In the material world, a bond joins two things together with an adhesive. That same idea extends to the digital world through eBonding—literally, electronic bonding.
The goal? Connect inherently different business applications through integration so they share matching data without anyone copying and pasting between screens.
This article covers how eBonding works, why organizations need it, real-world scenarios where it solves actual problems, how to evaluate the right tool for the job, and what pitfalls to watch out for.
Key Takeaways
- eBonding automates data synchronization between business applications, eliminating manual data entry and the errors that come with it.
- It originated in telecommunications but now spans ITSM, development, CRM, and project management workflows across industries.
- Cross-company eBonding introduces unique challenges around security, field mapping, and process alignment that intra-company integrations don’t face.
- Building an eBonding solution in-house rarely scales—maintenance costs, rigidity, and time-to-value make commercial tools the more practical path.
- When choosing an eBonding tool, prioritize flexibility, reliability, connector coverage, independent control over data flows, and security features.
- Exalate supports bidirectional sync across Jira, ServiceNow, Salesforce, Azure DevOps, Zendesk, Freshservice, Freshdesk, GitHub, Asana, and custom REST API connectors—with AI-assisted configuration to accelerate setup.

What is eBonding?
eBonding (also written as ebonding or e-bonding) is the use of automated connectors to synchronize information between different business applications so they always have matching data.
When something changes in one system, the change shows up in the other. Both sides deliver a continuous, end-to-end business process without manual intervention.
But it’s more than just syncing data in two directions. eBonding is a planned, structured methodology for integrating applications to automate workflows and deliver better service to customers. That’s why some people also call it a B2B software integration methodology.
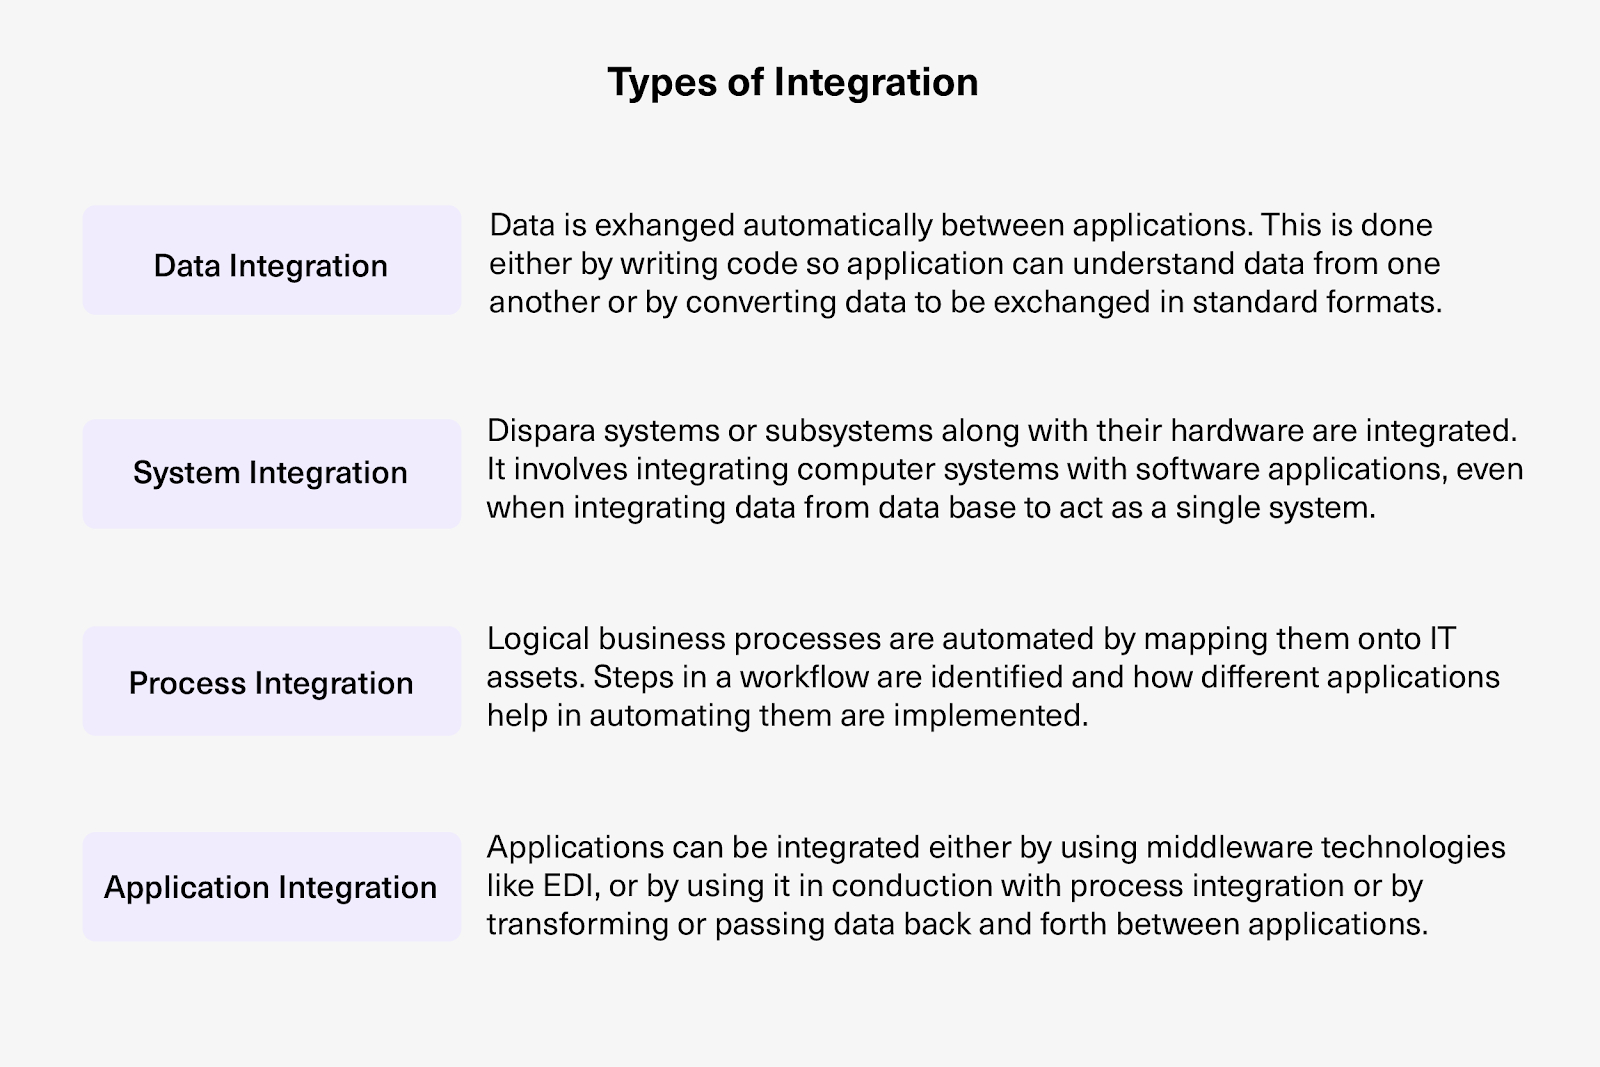
How eBonding Works
At a technical level, eBonding involves three layers:
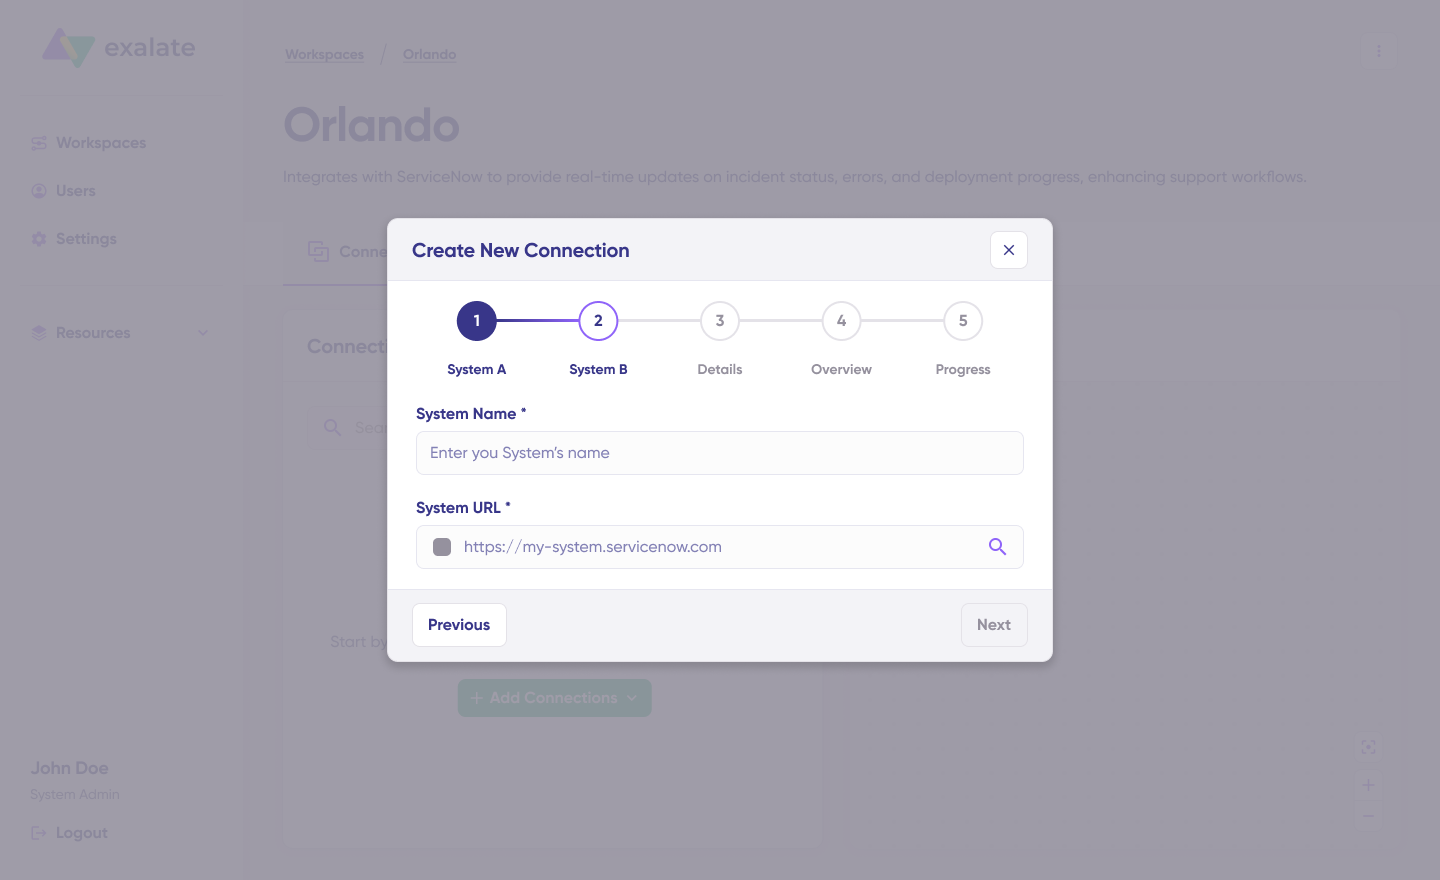
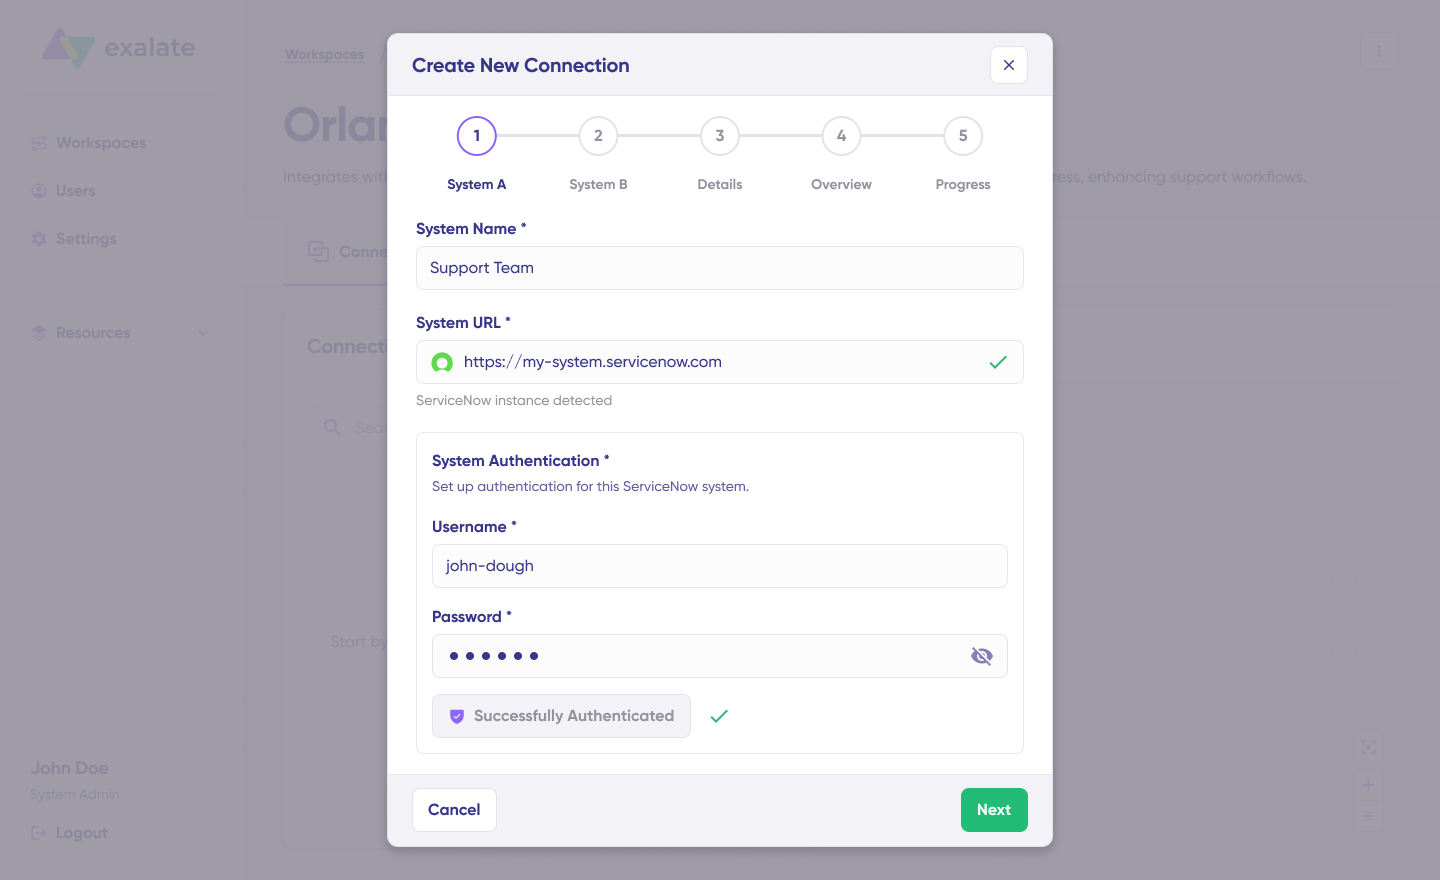
- Connection layer. Two applications are linked through a connector—either a native integration, an API-based connector, or a third-party platform. This layer handles authentication (typically using tokens like JWT), encrypted data transport (TLS 1.2/1.3), and endpoint configuration.
- Mapping layer. Fields in one application are mapped to equivalent fields in the other. This is where complexity lives—a “Summary” field in Jira might correspond to “Short description” in ServiceNow, and “Priority” in one tool might map to “Severity” in another. Handling these differences accurately is what separates good eBonding from broken eBonding.
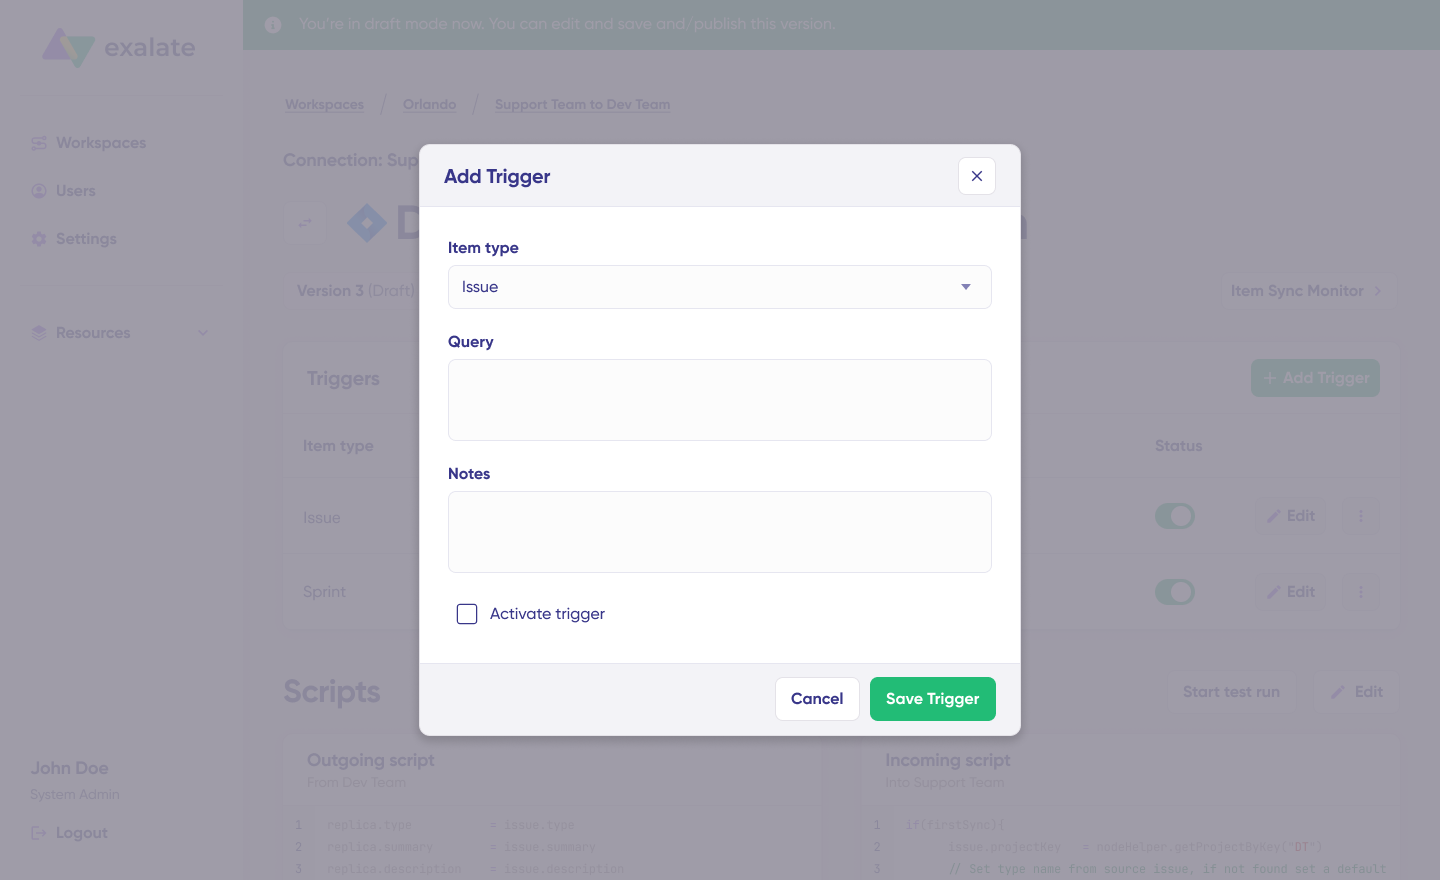
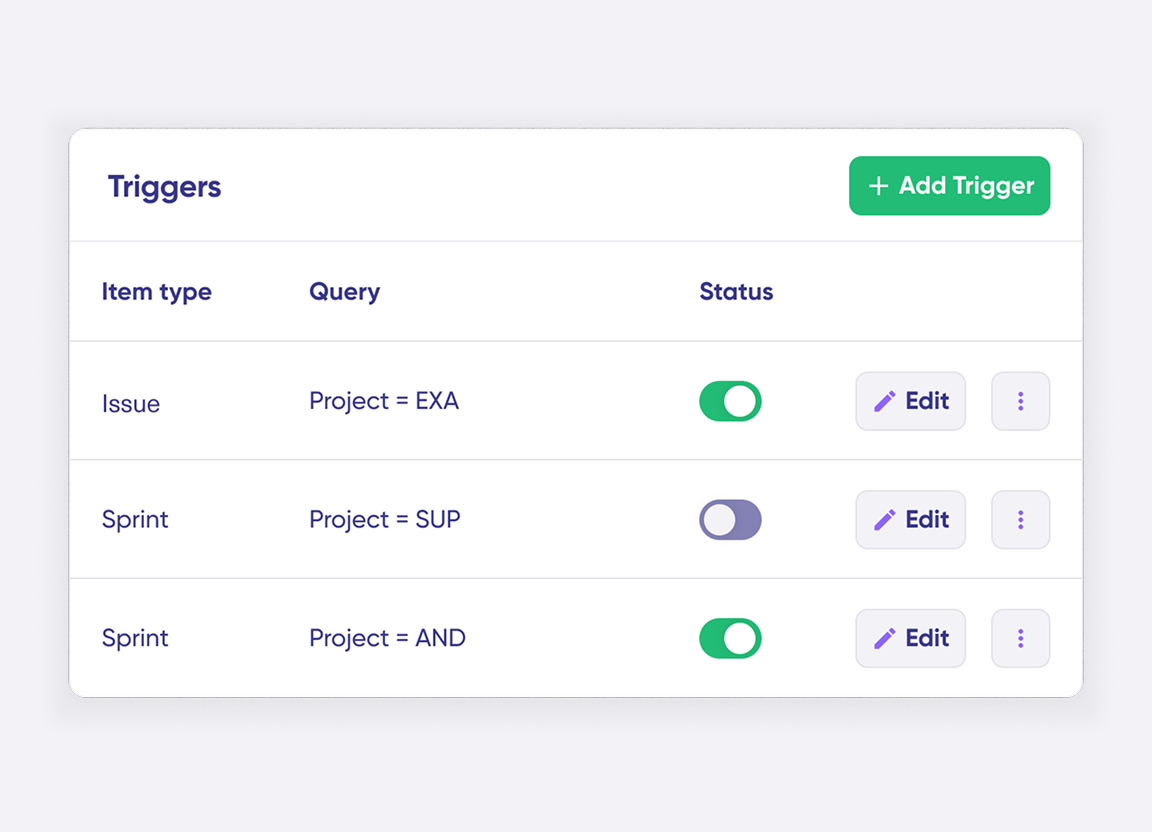
- Sync logic layer. Rules define what triggers a sync, what data flows in each direction, and how conflicts are resolved. Triggers can be condition-based (e.g., sync only when a work item reaches a specific status) or event-based (sync on every update). The best tools give each side independent control over what they send and receive—so you’re never forced to share data you don’t want shared.
Where Did It All Start?
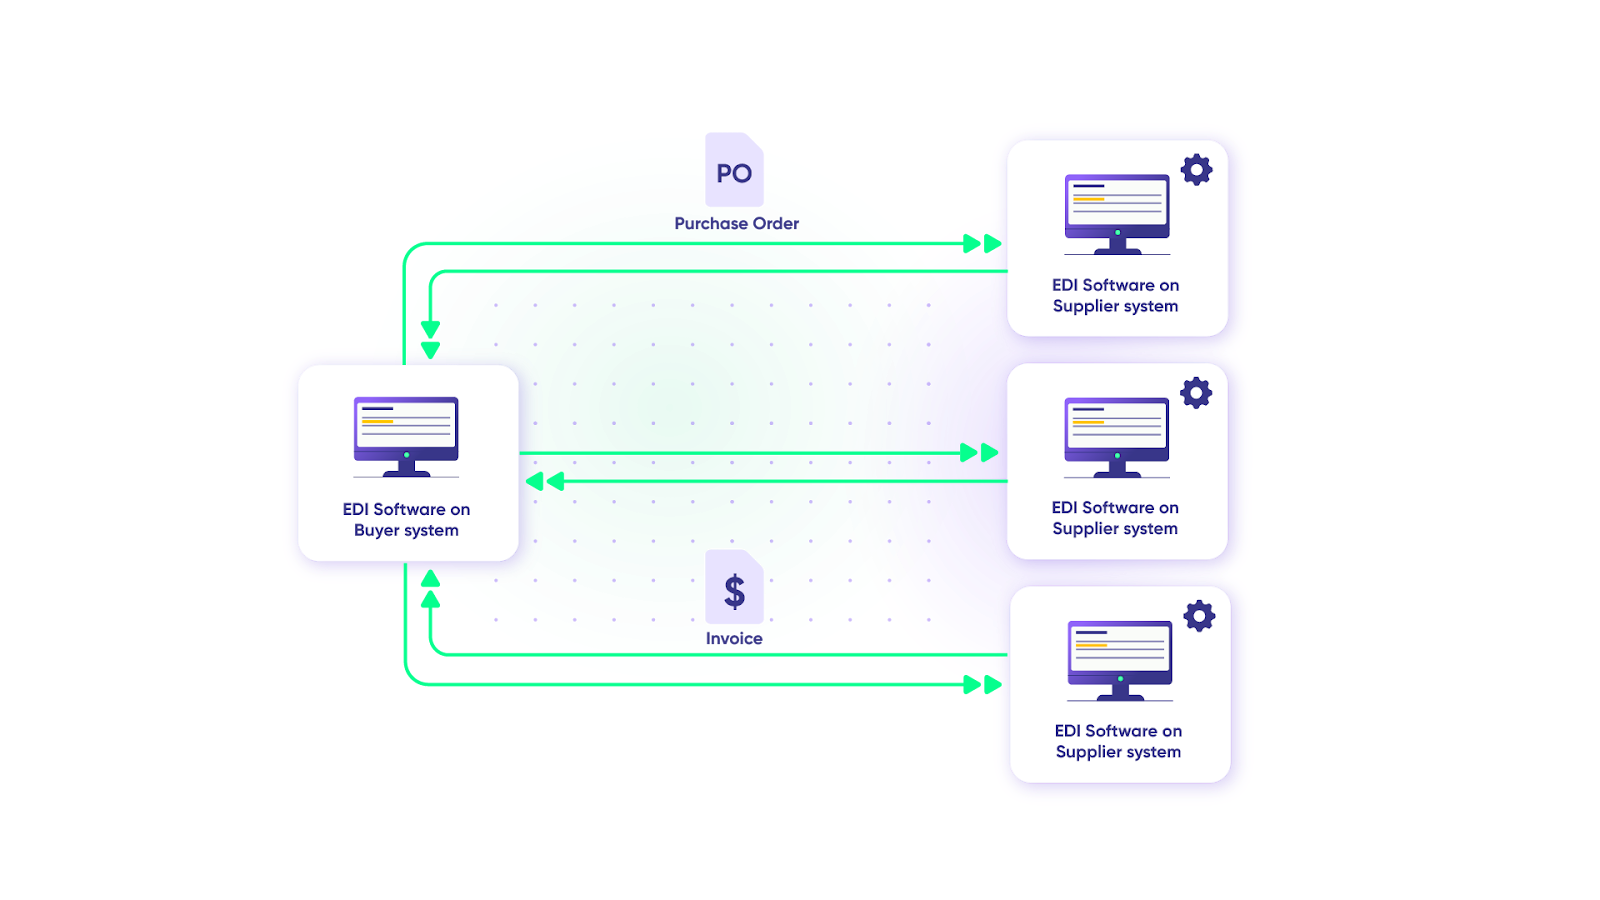
eBonding traces its origins to the telecommunications industry. Large telecom customers needed their ticketing systems to communicate automatically with one another instead of relying on email chains to pass information back and forth.
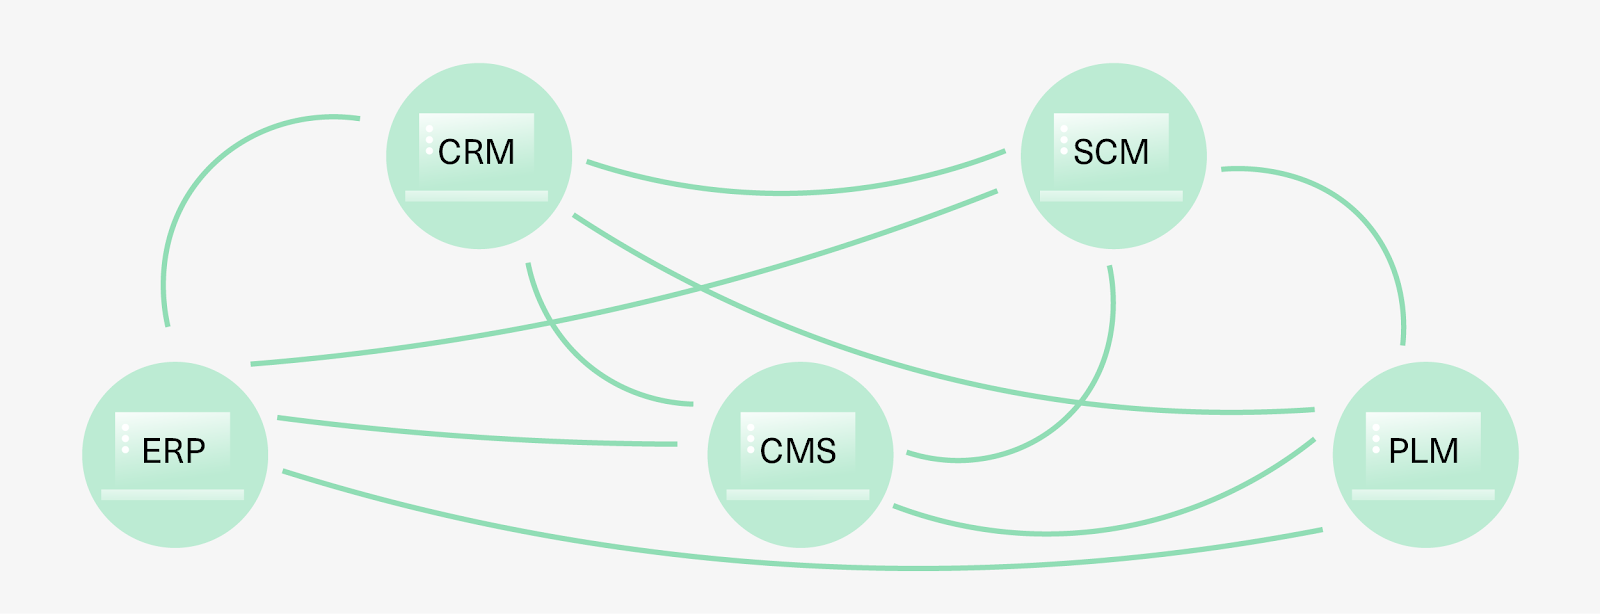
Other industries saw the value and adopted it. As managed services (MSPs) grew and outsourcing expanded, so did the number of applications teams used. With different workflows, schemas, and naming conventions across those apps, information couldn’t move between them without someone manually doing the work.
People dealt with it the only way they could—emails, phone calls, and switching between applications to find what they needed. This is what’s known as the “swivel chair approach.”
It was slow, frustrating, and error-prone. Manual handoffs led to duplicated data, wrong statuses, misplaced tickets, and growing friction between teams.
So organizations searched for automatic ways to synchronize information. eBonding was the answer.
Why Do You Need It?
- Eliminate manual data entry and its errors. eBonding syncs data automatically and in real-time. Nobody needs to learn someone else’s application or manually transfer information between screens. You work in your familiar tool, and the data stays consistent on both sides, without lifting a finger.
- Automate and simplify business processes. When information flows automatically between applications, the workflows connected to that information run faster. Teams stop spending time on data logistics and focus on work that actually matters. This is especially critical for organizations operating under tight SLAs where delayed handoffs directly impact response times and customer satisfaction.
- Enable digital transformation across your ecosystem. Implementing eBonding in the right way connects you with customers, vendors, partners, and suppliers in a secure, automated, and reliable manner. It’s the foundation for end-to-end process automation across your entire business network—whether that network spans two teams or twenty organizations.
- Improve SLA compliance and customer experience. When support teams can see engineering progress in real time and engineering teams have full context on customer-reported problems, resolution times drop. Organizations using automated eBonding typically see measurable improvements in mean time to resolution (MTTR) and SLA adherence because the information bottleneck disappears.
eBonding Scenarios
Here are the most common scenarios where eBonding delivers real value.
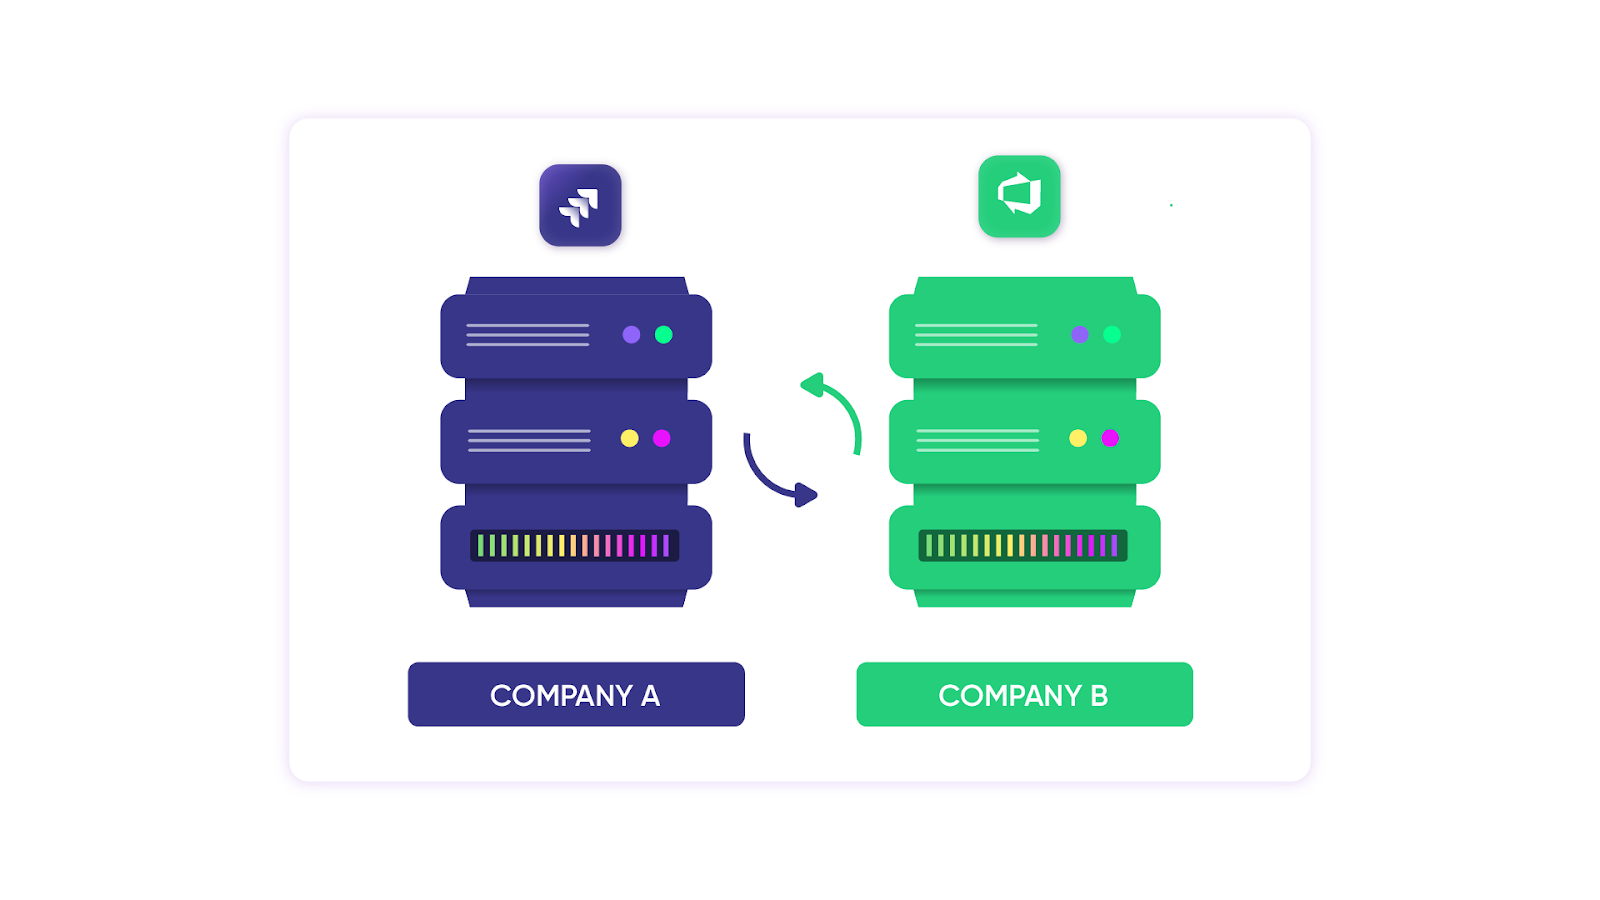
Intra-Company vs. Cross-Company
Outsourcing, multi-sourcing, and managed service providers are the norm now. They help deliver projects faster by leveraging the right expertise.
The scenarios below cover both intra-company eBonding (within one organization—different teams, departments, or projects) and cross-company eBonding (integrating with suppliers, vendors, customers, or partners).
This distinction matters because cross-company eBonding introduces unique challenges. When the bond extends outside your organization’s borders, you’re dealing with multiplied security, reliability, and scalability concerns. Each party has its own data governance policies, compliance requirements, and access controls, and those need to be respected on both sides.
Intra-Company: Development and QA Alignment
Case: A software company’s development team uses GitHub for code and development work items, while the QA team uses Jira to manage test cases, test plans, and execution tracking.
Every time a GitHub work item is completed, it needs to be passed to Jira for QA to pick up. When tests pass, someone sends an email or makes a call to the dev team. When bugs are found, the QA team manually notifies the relevant developer, who then works on it in GitHub. The back-and-forth continues until everything’s resolved.
Solution: Bidirectional eBonding between GitHub and Jira. When a development work item reaches “ready for QA,” it automatically creates a corresponding work item in Jira with all relevant context: description, acceptance criteria, and linked PRs. Test results flow back to GitHub automatically, and bug reports sync in real time.
Real-world application: A fintech company running sprint-based releases used this approach to eliminate the 2–3 day lag between code completion and QA pickup. Developers see test results in GitHub without switching tools, and QA engineers get full context in Jira without chasing developers for information.
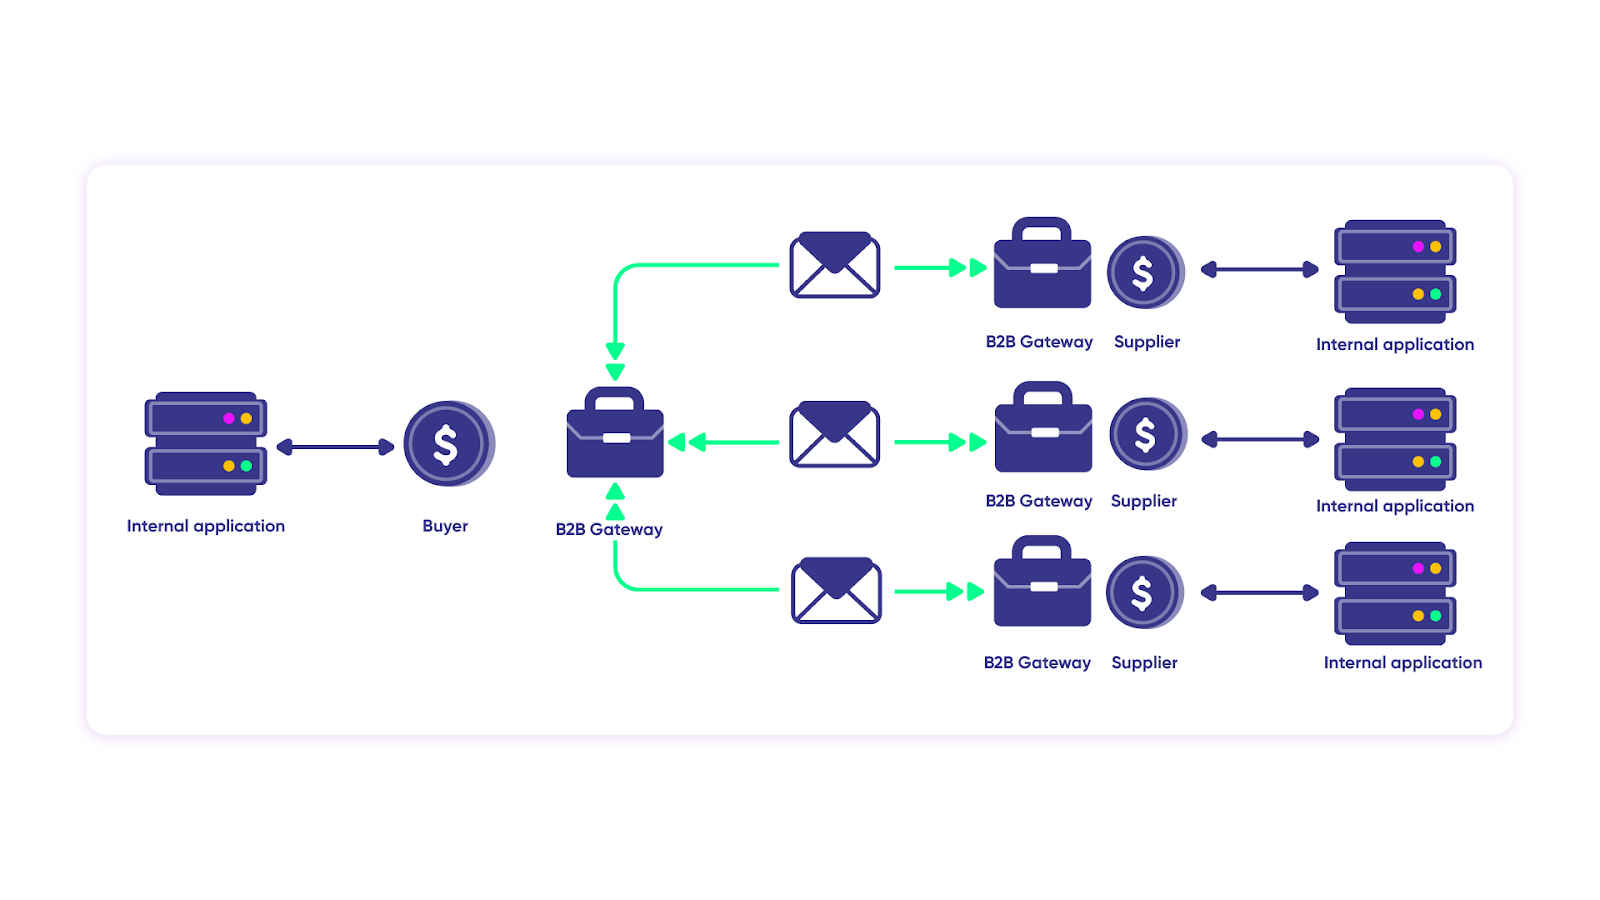
Cross-Company: Multi-Sourced Service Management
Case: An investment company (Alpha) uses Jira internally for project management. It outsources software development to Beta (also on Jira) and its customer ticketing system to Theta (on Zendesk).
To track development work items handled by Beta, Alpha sends endless emails and manually creates matching work items in its own Jira. It also needs visibility into tickets raised in Theta’s Zendesk.
Solution: eBonding between all three platforms. Alpha’s Jira syncs bidirectionally with Beta’s Jira for development work, and with Theta’s Zendesk for customer tickets. Each organization controls what data it shares and receives independently—so Beta doesn’t see Alpha’s customer tickets, and Theta doesn’t see Alpha’s development backlog.
Real-world application: An MSP managing clients across Jira, ServiceNow, Freshservice, and Zendesk uses eBonding to maintain a unified view of all client work without requiring access to every client’s system. Status updates, comments, and priority changes sync automatically while each party retains full control over their own data and processes.
ServiceNow eBonding
If you’ve searched for eBonding before, you’ve likely seen ServiceNow come up alongside it. That’s because eBonding has long been closely associated with ServiceNow’s ecosystem, including its eBonding spoke (more on that later).
ServiceNow to Jira: Support-to-Engineering Escalation
Case: A company uses ServiceNow to track customer incidents. Support agents analyze incoming incidents, provide workarounds, and escalate to engineering (using Jira) when technical expertise is needed.
The escalation happens manually—agents forward details to the dev team via email or internal messages. While the work item is being worked on in Jira, support agents have no visibility on its status and can’t tell the customer what’s happening. On a tight SLA schedule, this blind spot directly impacts resolution times and customer satisfaction.
Solution: Bidirectional eBonding between ServiceNow and Jira. When an incident meets escalation criteria, a Jira work item is created automatically with all incident context—description, priority, customer impact, and SLA deadlines. Status updates, comments, and resolution details sync back to ServiceNow in real time.
Real-world application: A B2B SaaS provider reduced escalation handoff time from hours to seconds by eBonding ServiceNow incidents with Jira work items. Support agents see engineering progress without leaving ServiceNow, and engineers get the full customer context without joining a service desk they don’t use daily.
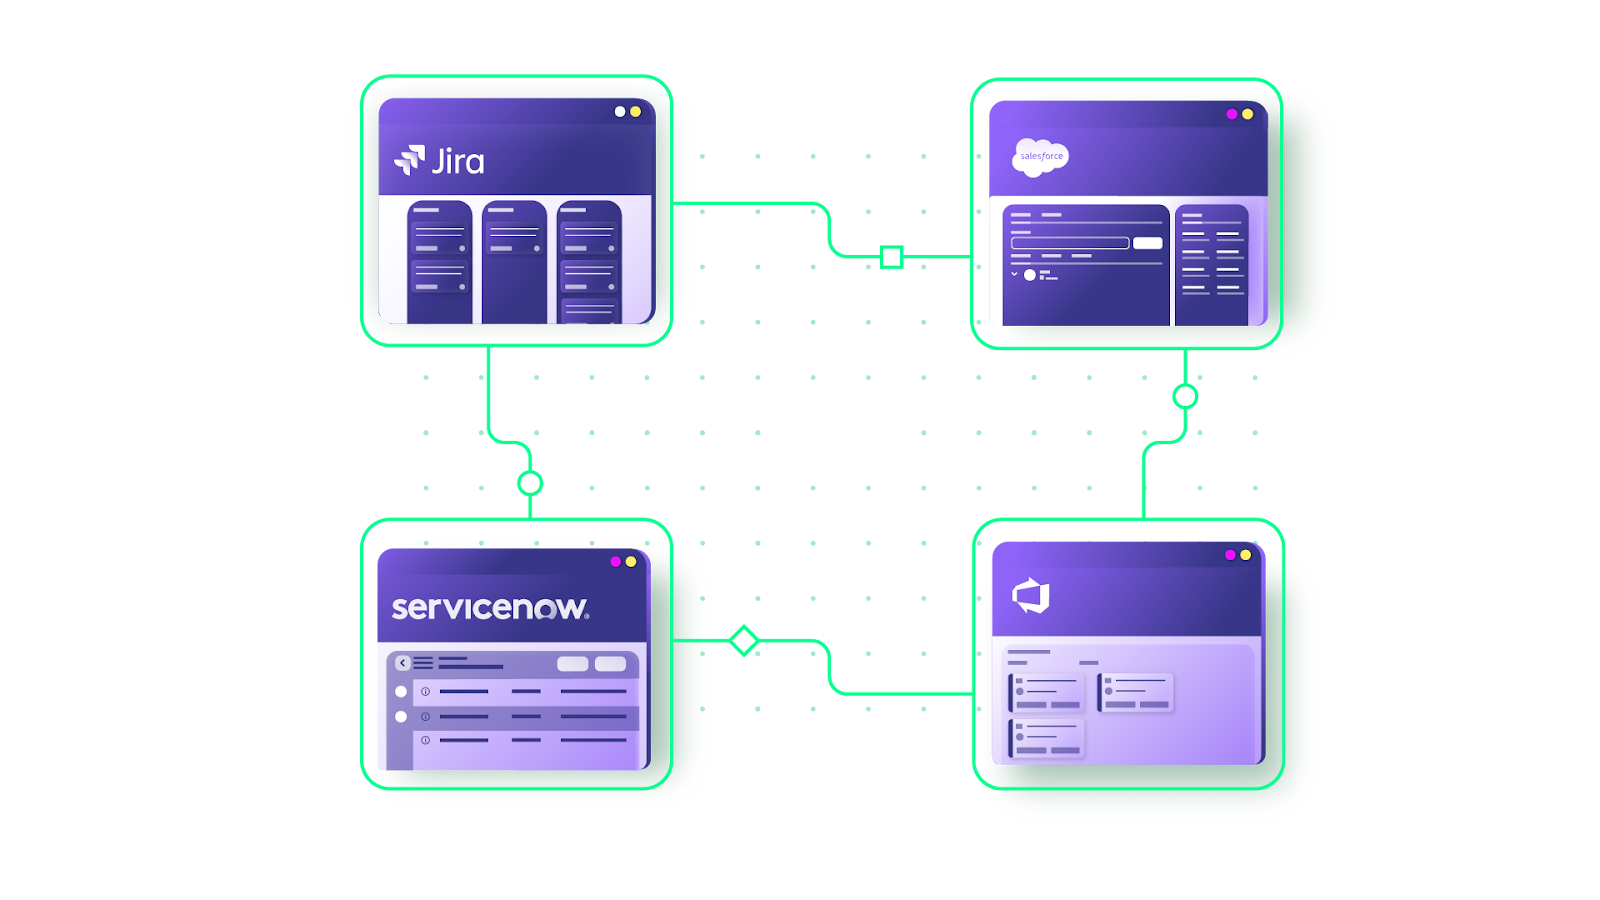
Multi-Platform eBonding
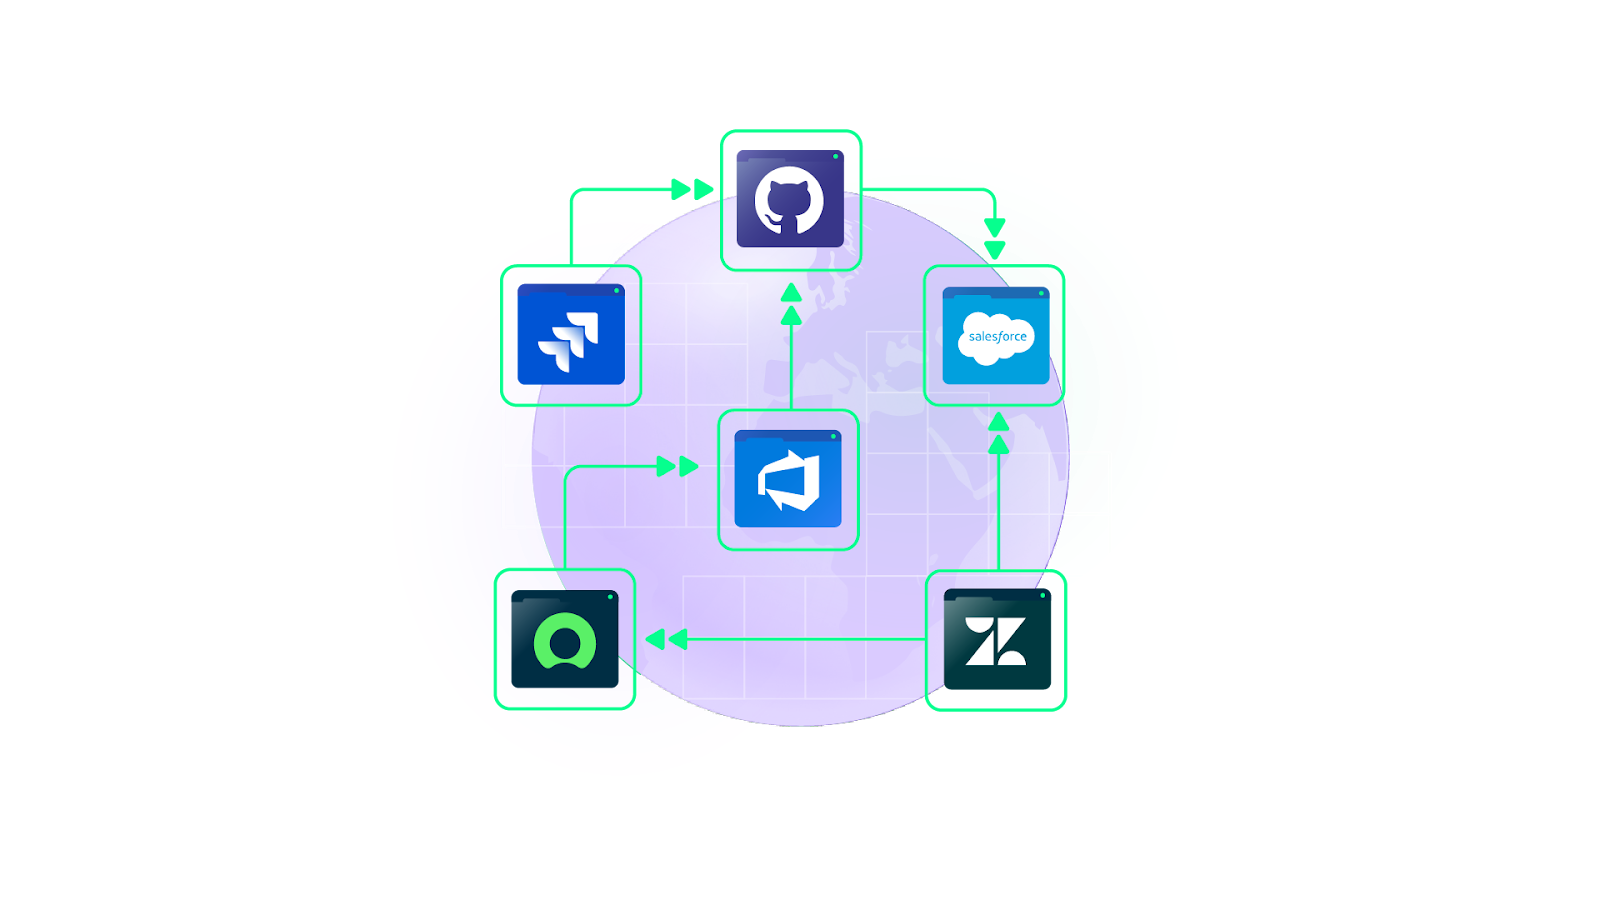
It’s common for organizations to run multiple work management systems—Jira, ServiceNow, Azure DevOps, Salesforce, GitHub, Zendesk, Freshservice, Freshdesk, Asana, and others. When teams within your organization use different tools, or when your eBonding partners do, you need integration between them.
Salesforce to Jira: Sales and Development Alignment
Case: Jira-Salesforce Modern teams are digital, global, and often not co-located. A sales team using Salesforce generates valuable customer feedback, feature requests, and bug reports as cases. That information needs to reach the development team working in Jira.
Without integration, someone manually copies case details from Salesforce into Jira work items, losing context and creating delays. By the time engineering sees a request, the customer has already been waiting.
Solution: Bidirectional eBonding between Salesforce and Jira. Customer-reported cases in Salesforce automatically create work items in Jira with full context. When engineering updates the work item status or adds comments, those changes sync back to Salesforce so the sales team can update the customer immediately.
Real-world application: A healthcare technology company eBonded Salesforce cases with Jira work items to close the feedback loop between customer-facing and engineering teams. Product managers gained real-time visibility into which customer requests were in development, and sales reps could provide accurate ETAs without pinging engineering for updates.
Multi-Vendor MSP Coordination
Case: A managed services provider handles IT operations for multiple clients, each using a different platform—one on ServiceNow, another on Freshservice, a third on Zendesk.
The MSP’s internal team uses Jira. Every client interaction requires manually copying ticket data between platforms, leading to inconsistent statuses, missed SLA deadlines, and frustrated clients who can’t get timely updates.
Solution: eBonding between Jira and each client’s platform (ServiceNow, Freshservice, Zendesk). Each connection maintains independent sync rules—so the MSP controls what data flows in and out per client without exposing one client’s information to another.
Real-world application: An MSP serving financial services clients reduced manual ticket handling by 60% after eBonding its Jira instance with client platforms. Client-specific SLAs were embedded into sync triggers, ensuring that high-priority tickets from premium clients were automatically escalated with the right urgency level.
Have you noticed the pattern in every scenario above? Information gets passed manually, errors multiply, teams lose visibility, and customer experience suffers. eBonding eliminates all of that by automating the data flow end-to-end.
But it’s not a plug-and-play exercise.
Challenges of eBonding
A lot can go wrong, and it usually starts with the details.
- Field mapping complexity. Every organization and application follows different processes, schemas, and naming conventions. Jira work items have “Summary” while ServiceNow has “Short description.” “Priority” in one tool might be “Severity” in another. Statuses like “In Progress,” “On Hold,” and “Resolved” can mean different things—or not exist at all—in the other system. Finding common ground for information exchange is manageable for one or two eBonded connections, but it becomes a tangled mess as integrations grow.
- Process alignment. Different teams handle workflows differently. What happens when an incident is put on hold? When it’s resolved? When it’s automatically closed after resolution? Some applications don’t allow modifications to closed tickets. Handling these edge cases means mapping out detailed process flows for every connection—and keeping them updated as processes evolve.
- Error detection and recovery. Integration errors are notoriously hard to find. Without proper monitoring, errors can get buried in general logs or go completely undetected until they become blockers. And by that point, downstream data may already be out of sync—requiring manual cleanup that defeats the purpose of automation in the first place.
- Security and compliance across boundaries. Cross-company eBonding means data is leaving your organization. That requires encrypted transport (TLS 1.2/1.3), token-based authentication (JWT), role-based access controls, and clear data governance policies about what gets shared. Look for eBonding tools that hold certifications like ISO 27001 and that publish their security posture transparently through resources like a public Trust Center.
- Scalability under growth. An eBonding solution that works for two connections doesn’t necessarily work for twenty. As you add partners, clients, and platforms, each new connection introduces its own field mappings, sync logic, and process considerations. The tool needs to handle this growth without requiring a rebuild every time.
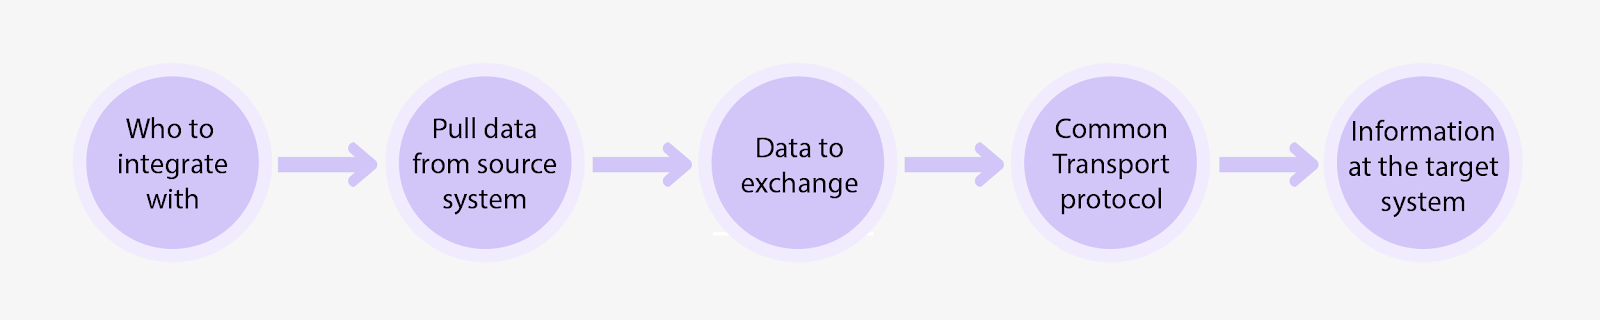
So before you start, spend time asking the right questions: What data needs to sync? In which direction? What triggers the sync? How are conflicts handled? Who owns the connection? What happens during downtime?
These are just starting points, but getting them right upfront saves enormous pain later.
Build vs. Buy: Getting Started with eBonding
Strategize, plan, assemble a team of developers, testers, project managers, and architects, build the solution, test it, and roll it out.
It sounds straightforward. It rarely is.
Why Building In-house Falls Short
The time, effort, and money you invest in a custom eBonding solution are almost never proportionate to future business requirements.
An in-house system works initially, but over time, it becomes a liability. Maintenance costs compound as the underlying platforms evolve: API changes, schema updates, and deprecations all require development work.
Scaling to new partners or platforms means building new connectors from scratch, every single time. And the rigidity of a custom-built solution means adapting to changing requirements often requires a near-complete rebuild rather than a configuration change.
Many companies push their teams to ship eBonding integrations as fast as possible, leaving no time to think about strategy, architecture, or long-term maintainability. The result is an inadequate, fragile solution that creates more problems than it solves.
Why Commercial eBonding Tools Make More Sense
Off-the-shelf eBonding platforms offer pre-built connectors, configurable sync logic, and managed infrastructure. They come in different flavors, deployment models, pricing structures, connector coverage, and code vs. no-code configuration options.
The advantages of building in-house are significant. Pre-built connectors mean you’re not writing API integrations from scratch. AI-assisted configuration reduces setup time and scripting errors.
Managed infrastructure means someone else handles uptime, retries, and queue management. And when a platform releases API changes, the vendor updates the connector—not your engineering team.
After a while, the math becomes clear: an eBonding tool saves man-hours and money while delivering faster time to value. But not all tools are equal, so knowing what to look for matters.
What to Look for in an eBonding Tool
Rather than listing evaluation criteria in one place, here are the capabilities that matter most—organized by the problems they solve.
Flexibility That Matches Your Reality
Businesses don’t want to abandon their existing application ecosystem to integrate. They need ways to connect and collaborate without leaving their own tools.
Integration requirements also change constantly. What you sync today might be obsolete tomorrow. A new partner might need completely different field mappings next week. Your eBonding tool needs to adapt rapidly to these shifts without requiring a development cycle for every change.
The most flexible tools support granular, condition-based sync rules that let you define exactly what data flows, when, and in which direction, with the ability to modify those rules independently on each side of the connection.
Reliability That Survives Downtime
All systems experience downtime. Your eBonding integration shouldn’t collapse because of it.
The right tool uses transactional sync queues that track changes in the order they occurred. When a connected system recovers, changes are applied in sequence from where they left off. Built-in retry mechanisms handle temporary failures automatically, so data isn’t lost during maintenance windows or unexpected outages.
The goal is that nobody should even notice an outage happened—the sync catches up on its own.
Scalability Across Partners and Platforms
eBonding always involves more than one connection. More partners, more applications, more integrations. A tool that handles two connections well but crumbles at twenty isn’t going to work.
Look for platforms that support a broad range of connectors—Jira, ServiceNow, Salesforce, Azure DevOps, Zendesk, Freshservice, Freshdesk, GitHub, Asana, and ideally custom connectors for proprietary systems.
The tool should make onboarding a new partner or application a configuration exercise, not a development project.
Independent Control Over Data Flows
In any eBonding relationship, especially cross-company, each side needs to independently control what data they send and receive. If making a change to your sync requires contacting the other party or updating a shared configuration, that’s a bottleneck that slows everything down and creates unnecessary dependencies.
Each side should be able to define its own sync rules, field mappings, and data filters without affecting the other. This is both a productivity feature and a security feature; it ensures that you never inadvertently share data you didn’t intend to.
Proper Error Handling Without Data Loss
Integration errors shouldn’t vanish into a generic log. The right tool provides visibility into sync status, pending changes, and failed operations, without requiring you to dig through system-wide logs. When errors occur, they should be surfaced clearly and resolved automatically where possible, or flagged for attention where they can’t be.
eBonding Tools: ServiceNow’s eBonding Spoke and Exalate
Two tools worth evaluating for eBonding are IntegrationHub’s eBonding spoke and Exalate. The first is a popular, ServiceNow-native solution. The second is gaining traction for its flexibility, broad connector coverage, and AI-assisted configuration.
IntegrationHub: eBonding Spoke
If you’re new to ServiceNow, it’s a leading IT service management platform, and IntegrationHub is ServiceNow’s automation and integration layer.
It includes pre-defined integration patterns for syncing data between ServiceNow instances and between ServiceNow and other platforms (Jira, Slack, Salesforce, GitHub, etc.) using spokes and the flow designer.
The eBonding spoke specifically enables bidirectional integration between two ServiceNow instances. It doesn’t require an IntegrationHub or Orchestration subscription—it’s available by default in your ServiceNow instance.
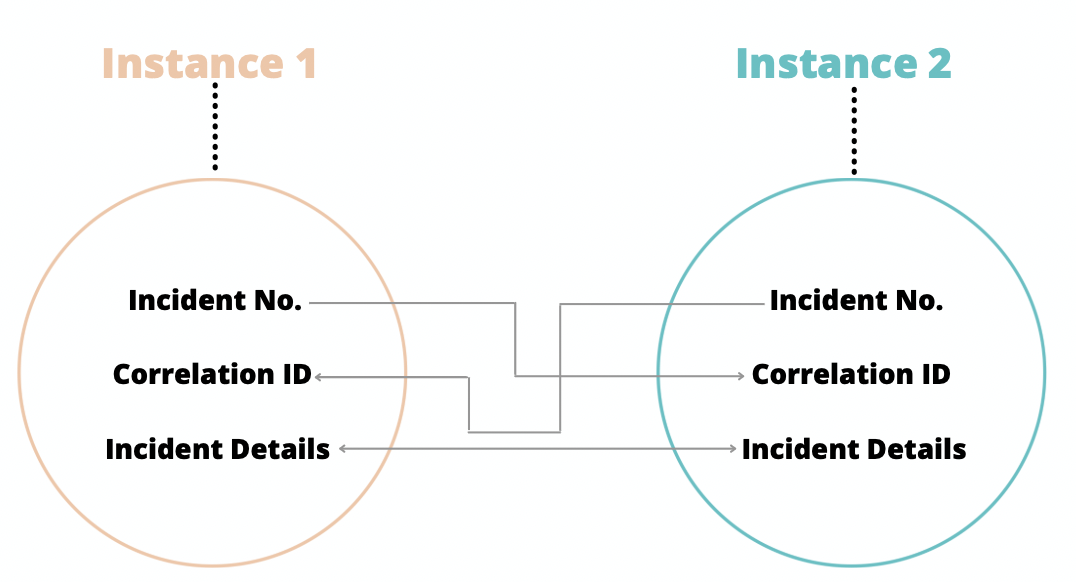
It works through three core actions:
- Create Remote Incident. Takes incident details from the source instance and creates a matching one on the target instance. Both sides get a Correlation ID containing the other’s incident number, establishing a persistent link between the two records.
- Lookup Remote Incident. Retrieves details of the remote incident—short description, summary, priority, and other relevant fields.
- Update Remote Incident. Pushes updates from the source instance to the remote one using the Correlation ID, keeping both records aligned.
The result: both ServiceNow instances always have matching incident data. Changes on one side are reflected on the other through these actions.
Where it works well: The eBonding spoke is a solid choice if both sides of your eBonding use ServiceNow. It’s straightforward to set up and doesn’t require deep technical expertise for basic scenarios.
Where it falls short: If you need integration between ServiceNow and non-ServiceNow applications, you need to add specific spokes (Jira spoke, GitHub spoke, etc.) through IntegrationHub—at an additional cost.
These are third-party API integrations with pre-built actions that cover common scenarios, but become rigid when you need advanced or custom sync logic. Requesting updates or new capabilities means waiting on the spoke creator.
For a deeper comparison, check out Exalate vs. IntegrationHub.
Exalate
Exalate is a cross-company (or B2B) integration platform that closes the gaps created by inconsistent, scattered information spread across applications, teams, and company borders.
It supports bidirectional sync across work management systems, including Jira Cloud, Azure DevOps (Cloud and Server), ServiceNow, Salesforce, GitHub, Zendesk, Freshservice, Freshdesk, Asana, and custom platforms through REST API connectors.

So whether you need Zendesk-Salesforce, GitHub-ServiceNow, ServiceNow-ServiceNow (just like eBonding spoke), or any cross-platform combination, Exalate can handle it.
What makes it practical for eBonding:
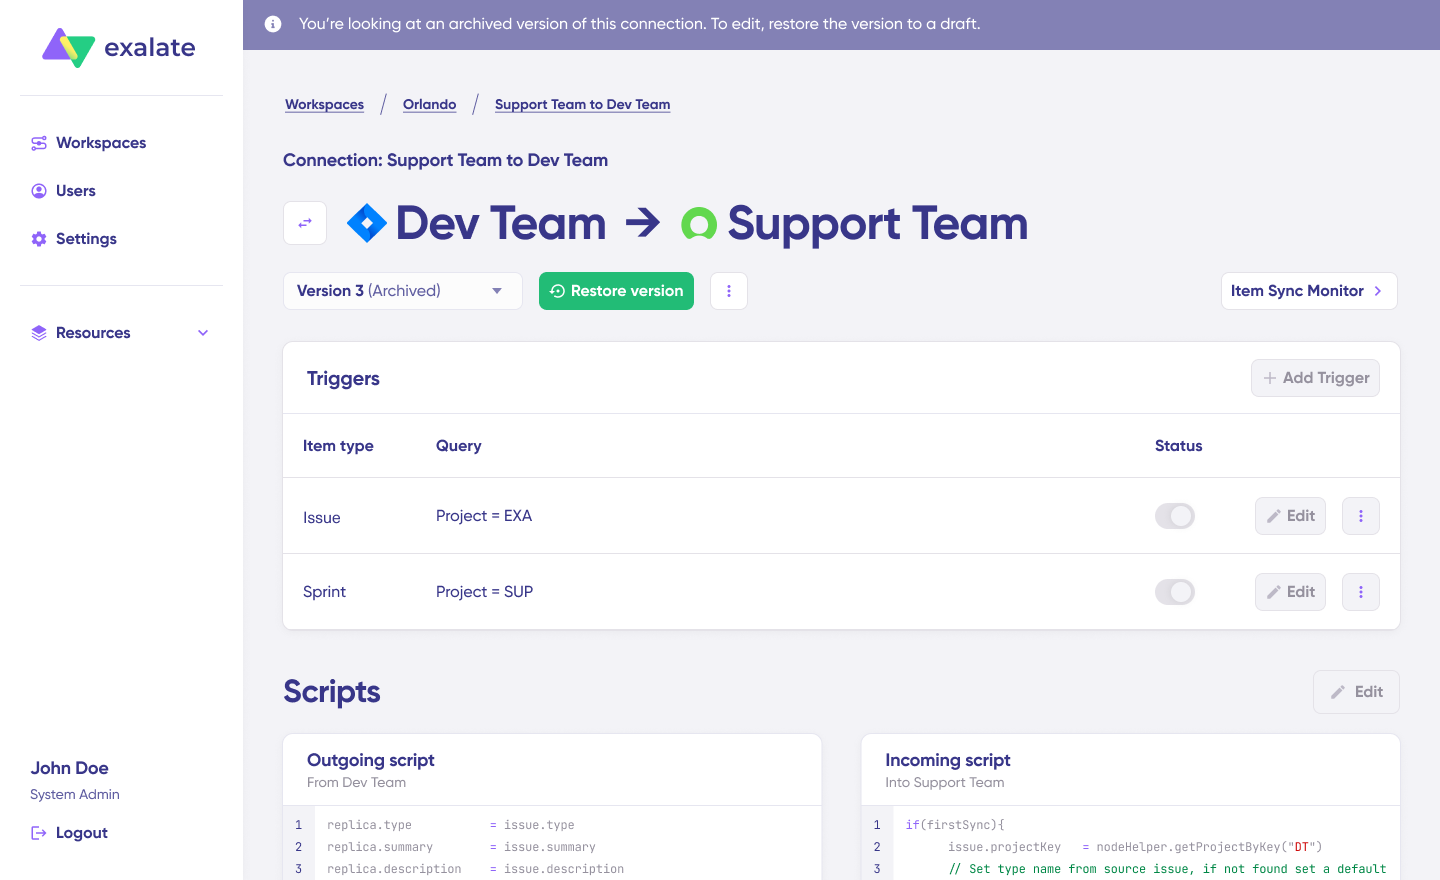
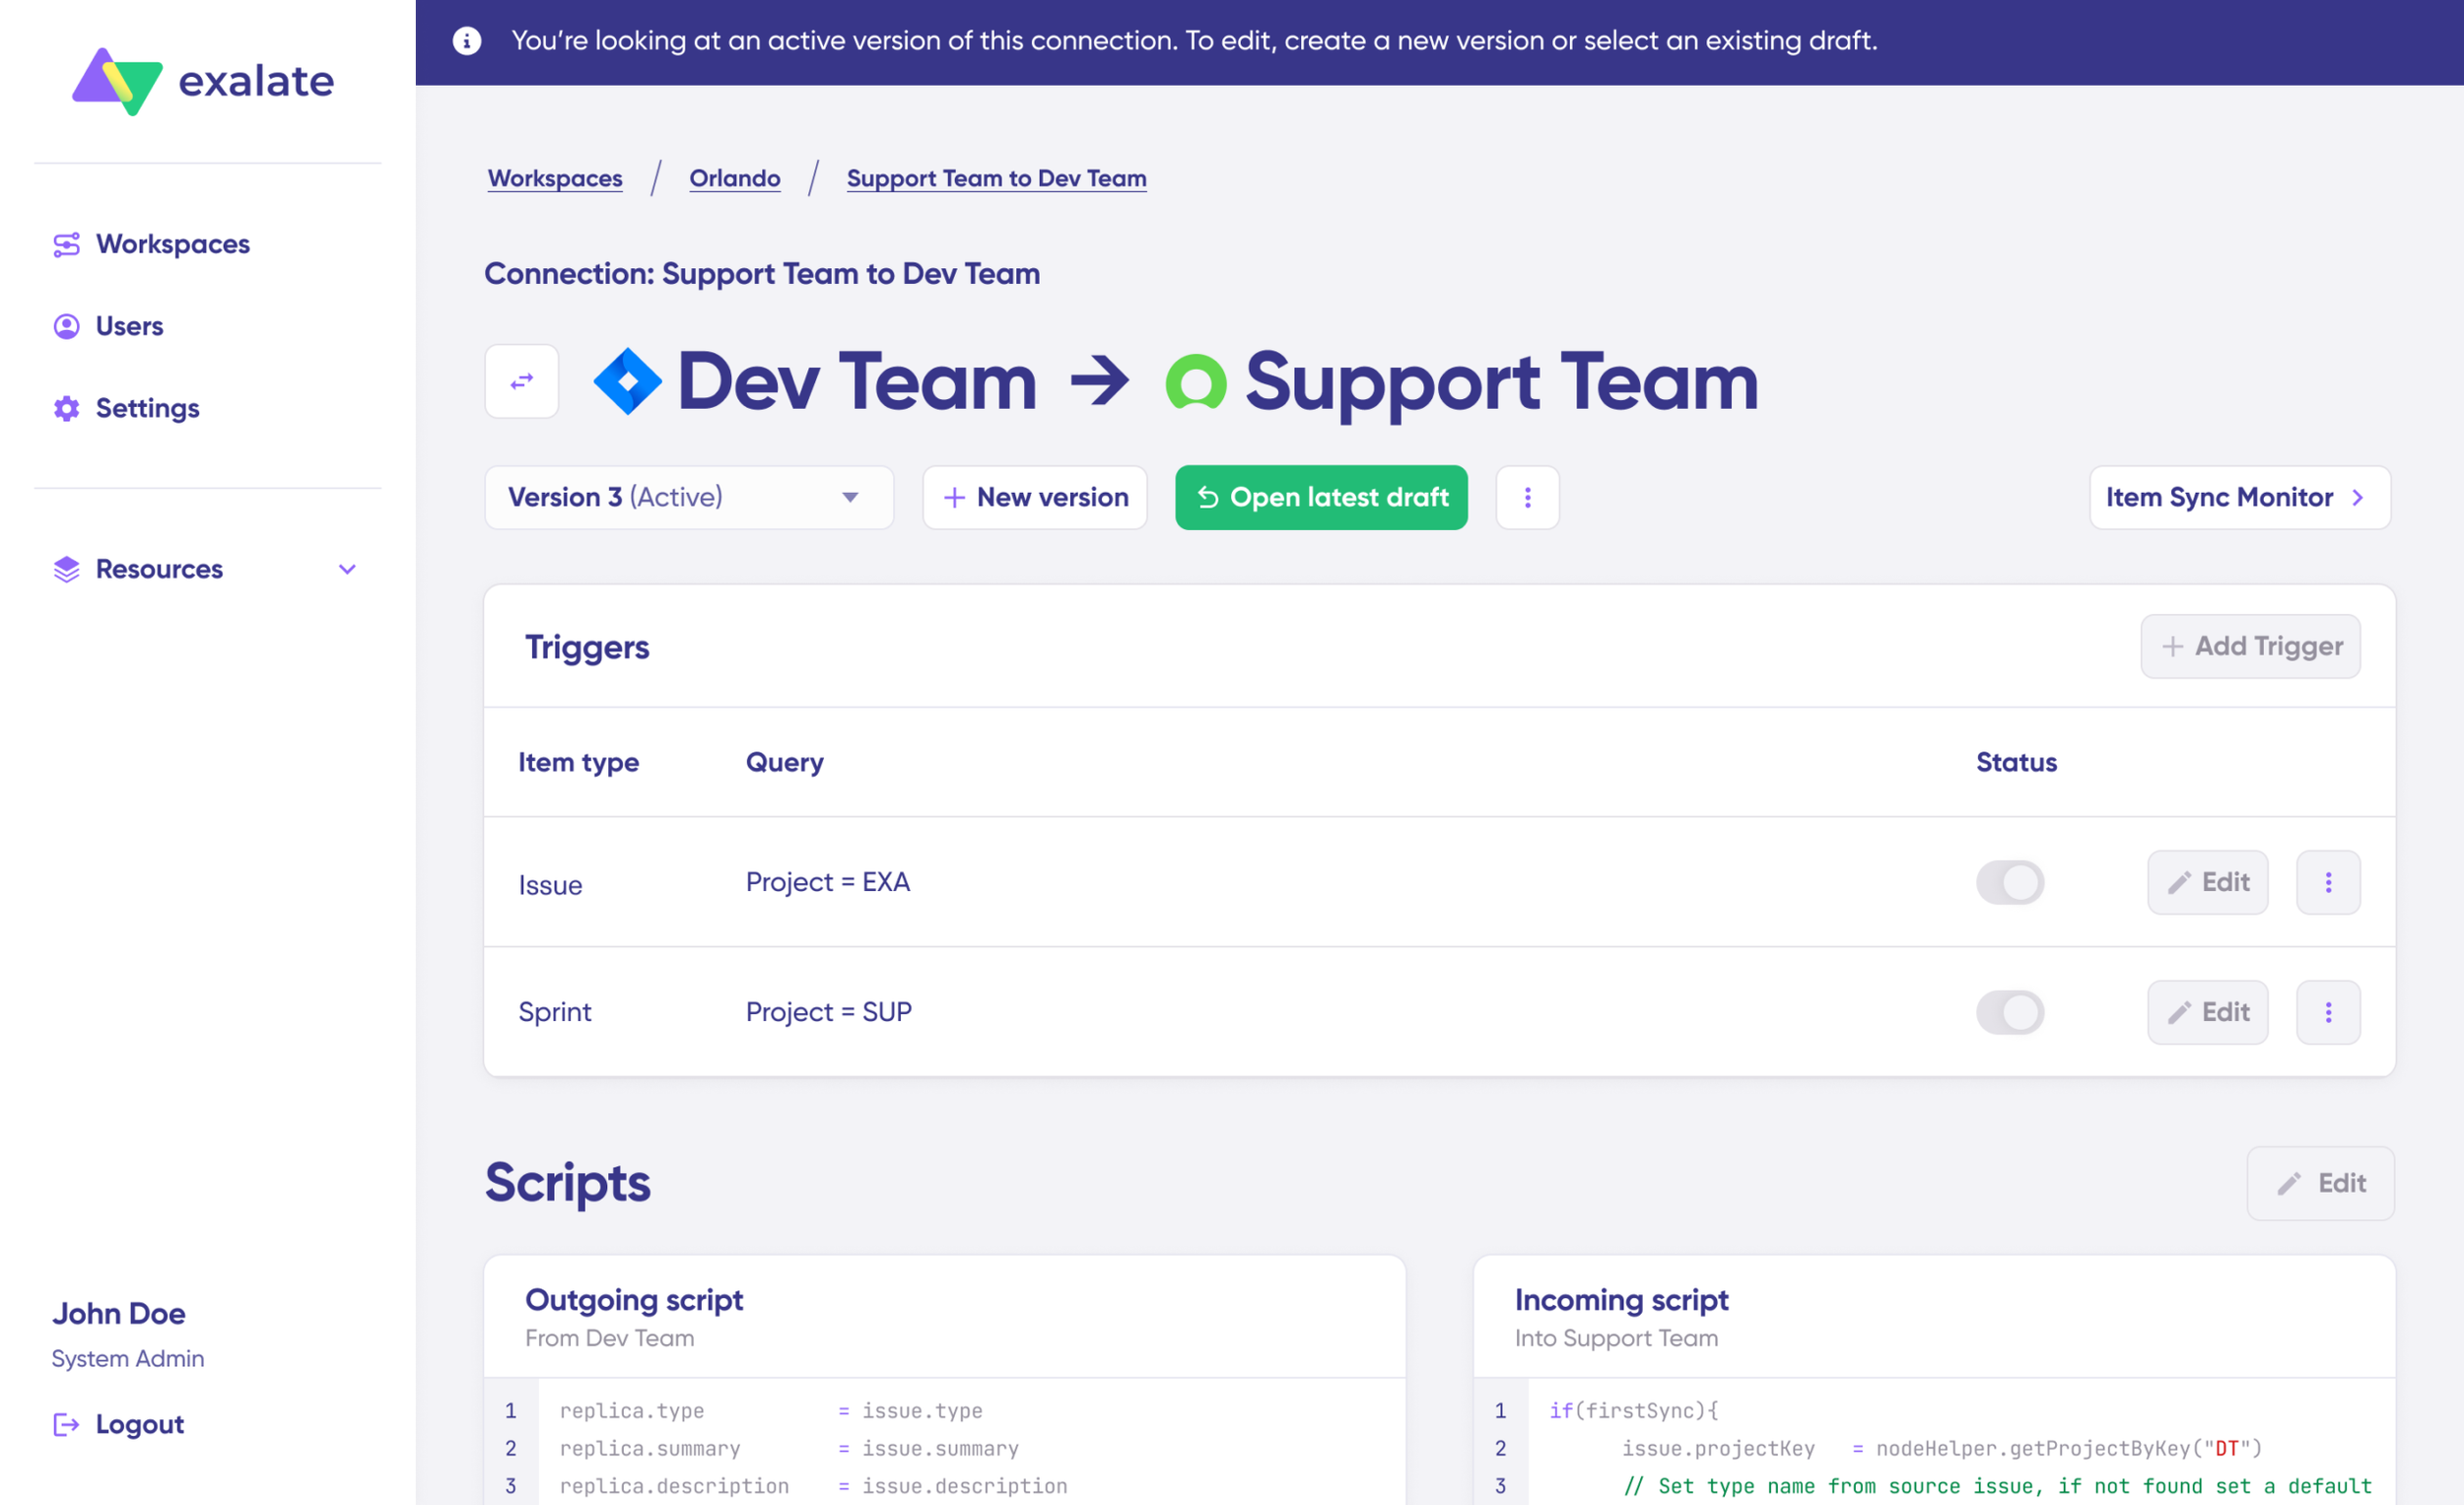
Independent control per side. Each party in an eBonding connection defines its own sync rules, without needing to coordinate changes with the other side. Outgoing sync rules on the Jira side determine what goes from Jira to Zendesk, and incoming sync rules determine what comes back. The same applies on the Zendesk side. Neither party can override the other’s configuration.
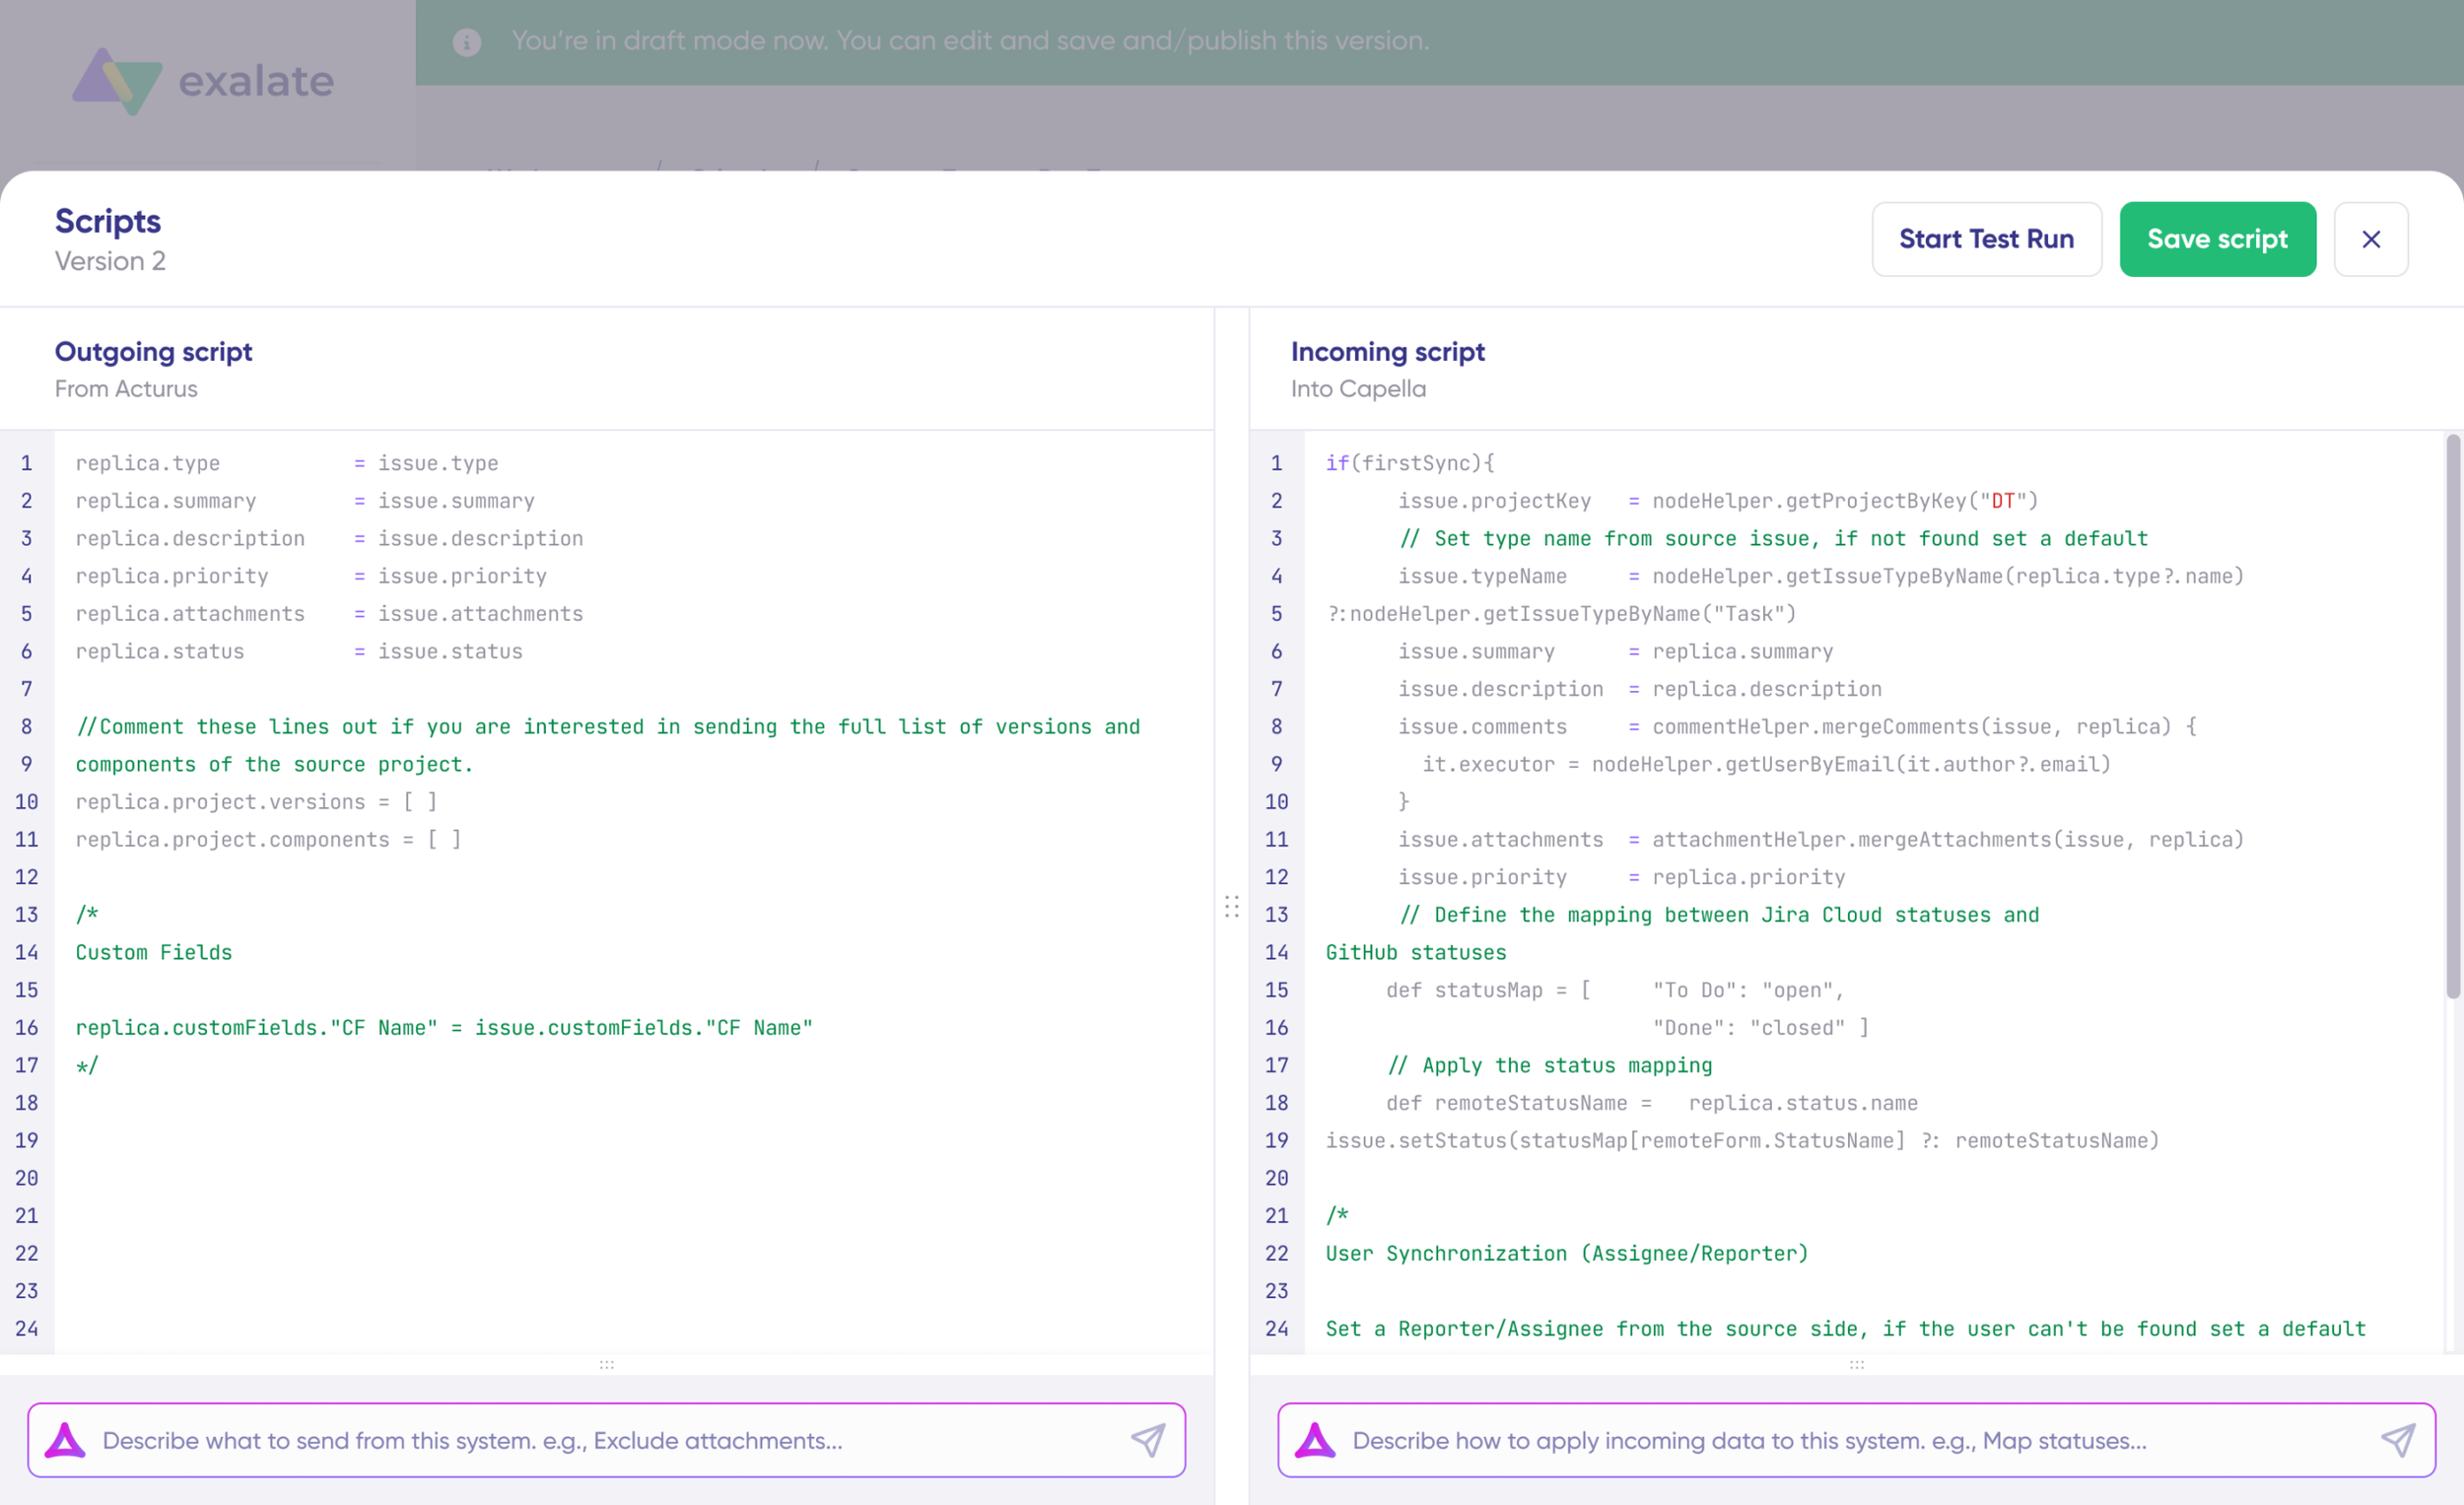
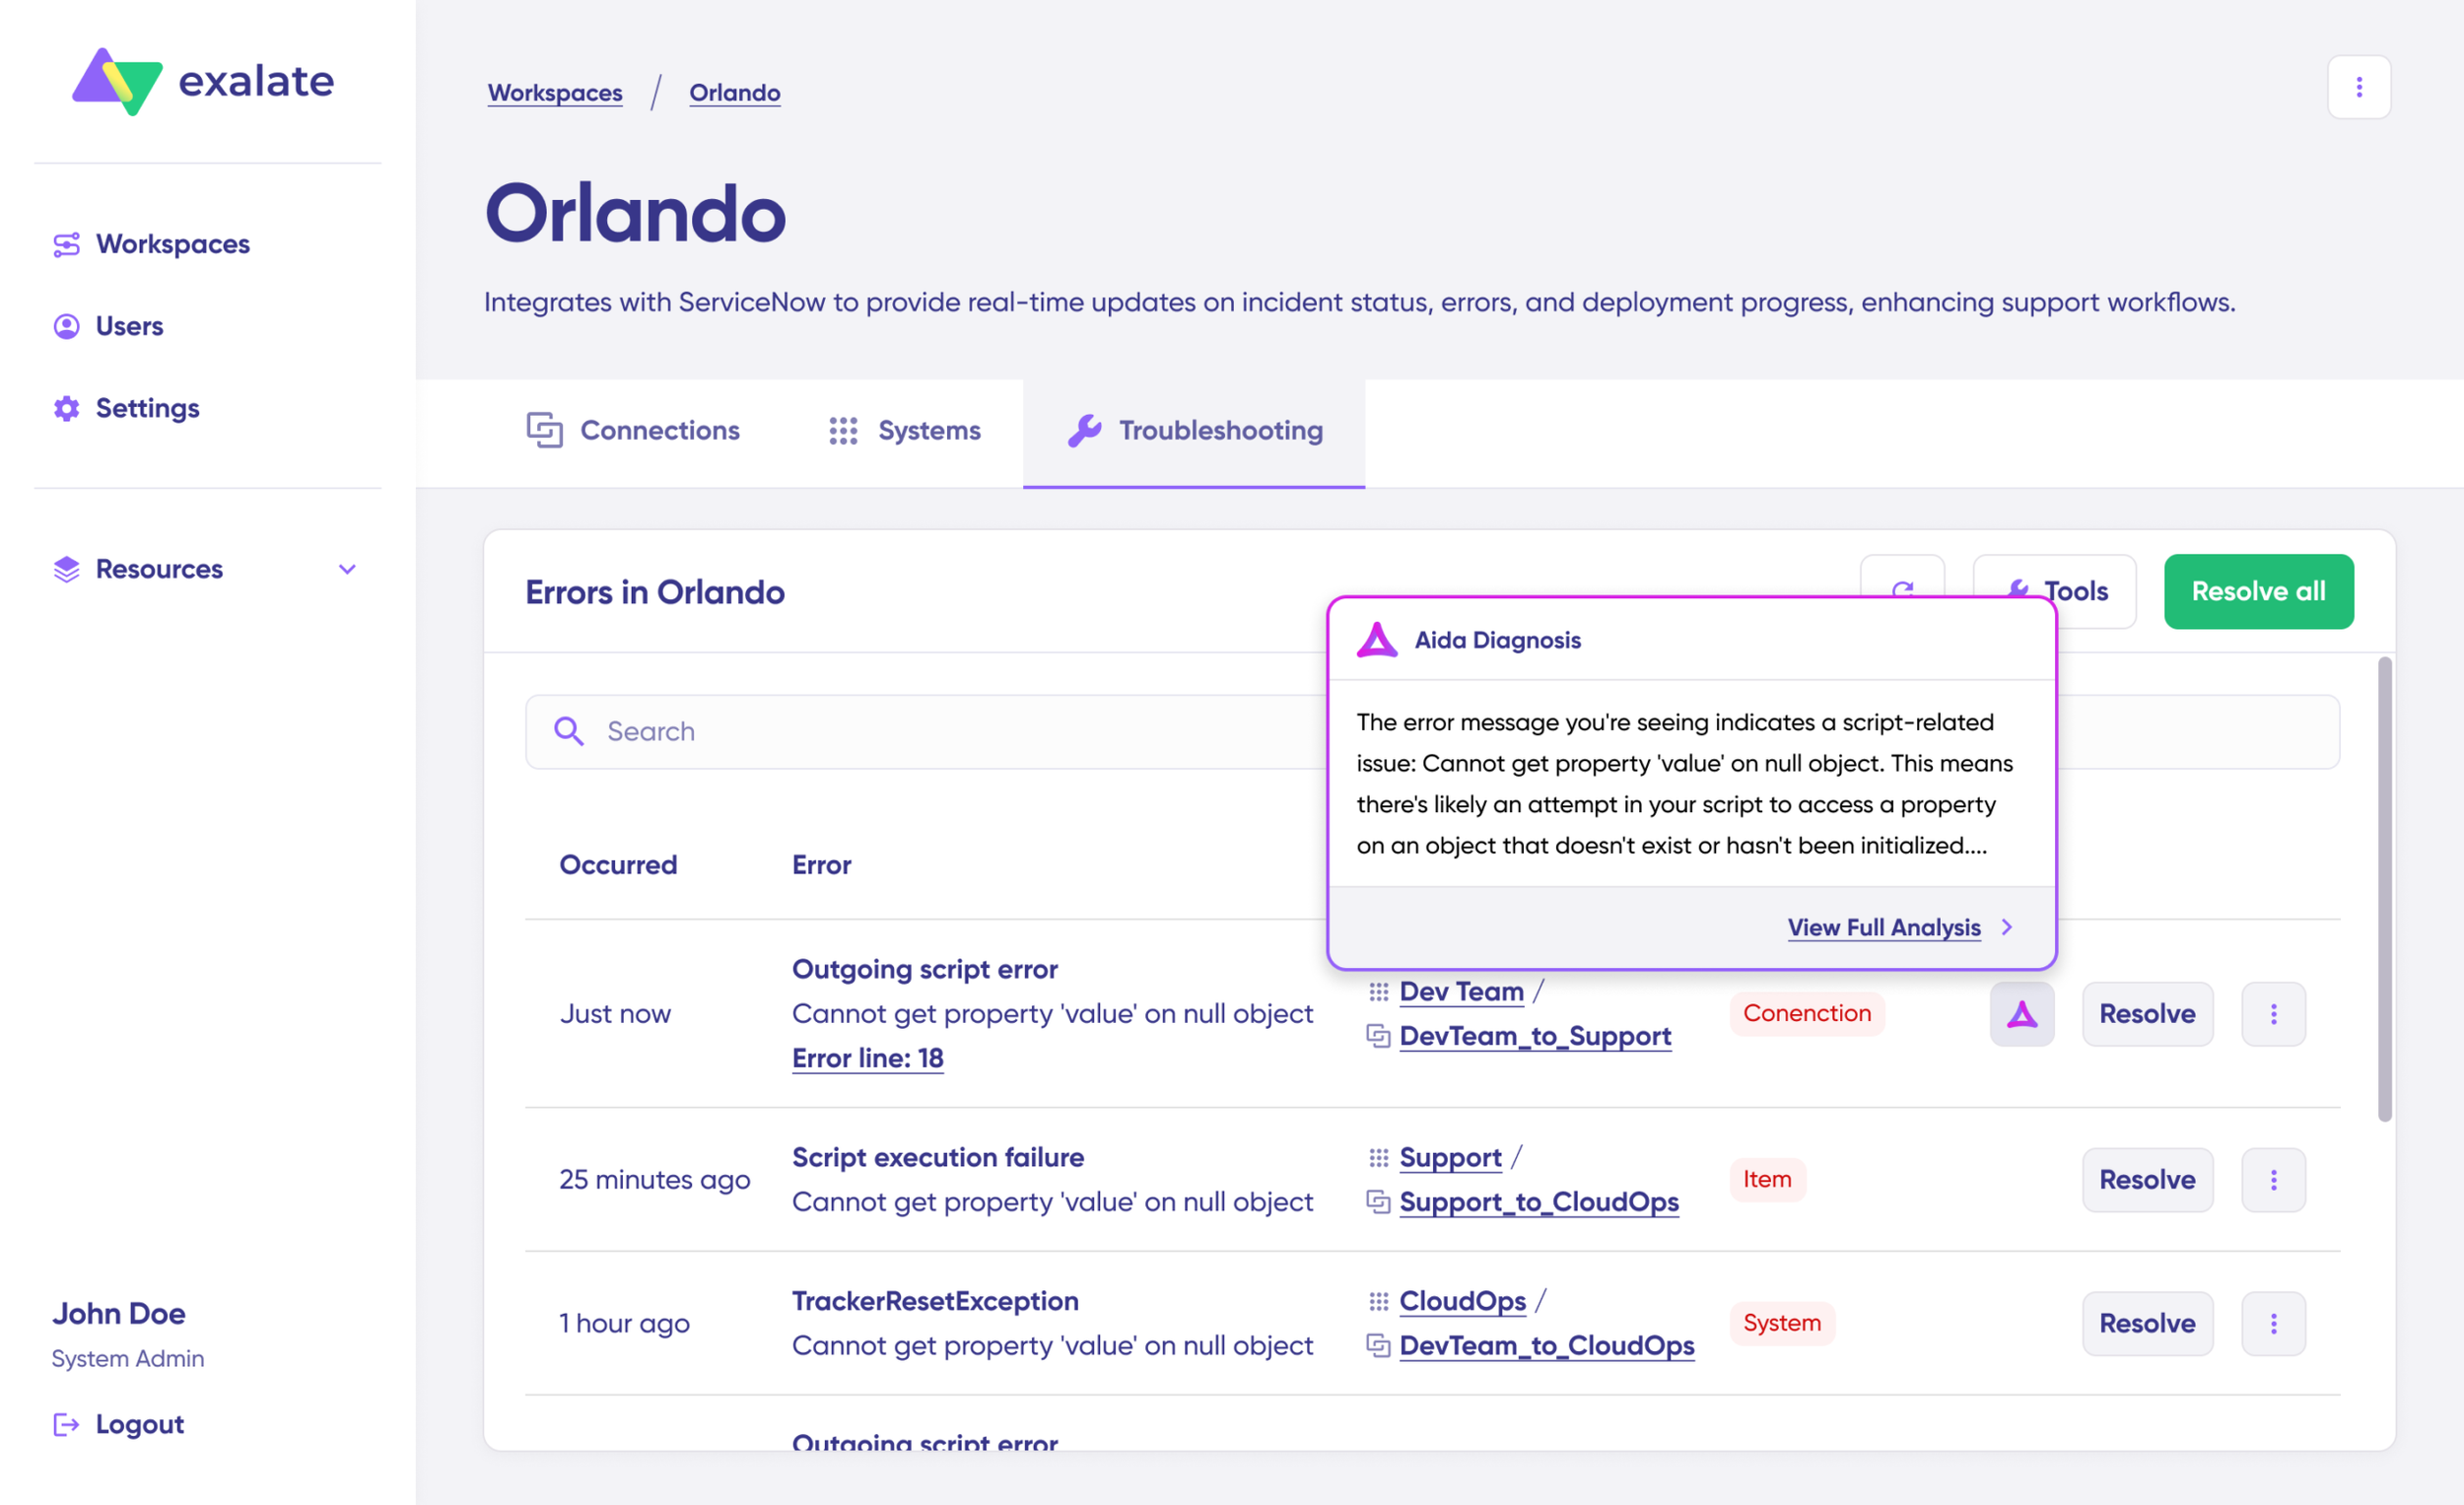
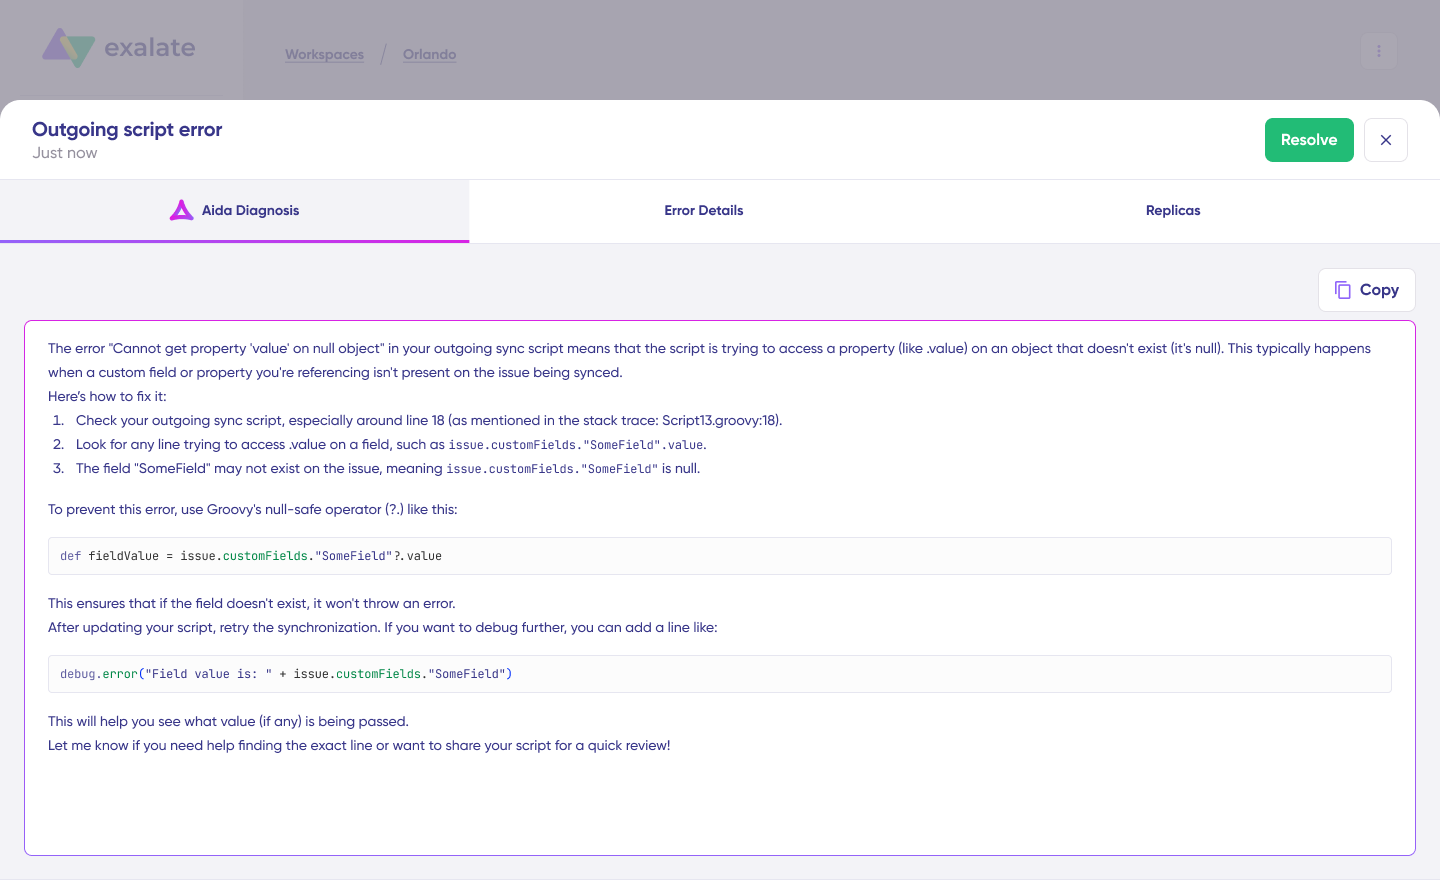
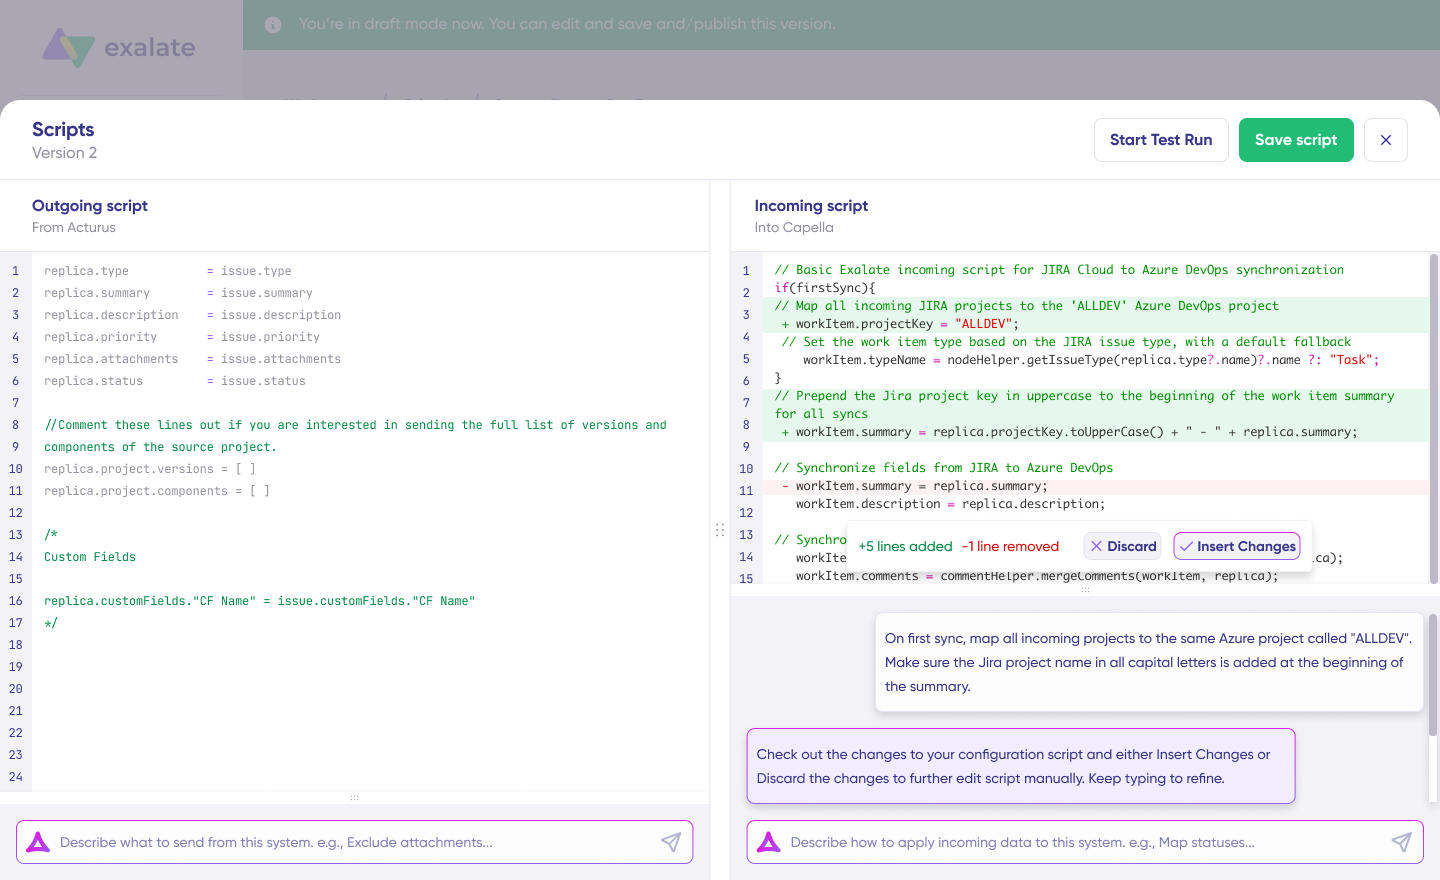
- AI-assisted configuration. Exalate includes Aida, an AI documentation assistant that helps teams scope integration requirements, navigate setup decisions, and troubleshoot configuration questions. AI-assisted integration generates sync configurations from natural language descriptions. This reduces the learning curve and gets integrations running faster.
- Security built in, not bolted on. Exalate holds ISO 27001:2022 certification. Data transport uses TLS 1.2/1.3 encryption, authentication relies on JWT tokens with automatic rotation, and role-based access controls govern who can configure and manage connections. For organizations with strict data residency requirements, Exalate offers cloud, on-premise, and Docker deployment options.
- Reliability through sync queues. Transactional sync queues track changes in sequence. If a connected system goes down, changes queue up and are applied in order once the system recovers. Built-in retry mechanisms handle temporary failures automatically without data loss.
- Broad connector coverage. Beyond the standard ITSM, development, and CRM platforms, Exalate supports custom connectors for proprietary systems with available REST APIs. This means your eBonding reach isn’t limited to the platforms on a pre-built connector list.

Calculate time and money savings from automated bidirectional sync.
eBonding Spoke vs. Exalate: Which One?
These aren’t direct competitors, but there are facts worth weighing.
The eBonding spoke is the natural choice if you’re a ServiceNow-to-ServiceNow shop and your use case is straightforward incident mirroring. It’s included in your ServiceNow instance, easy to configure, and covers the basics well.
For anything beyond ServiceNow-to-ServiceNow—or when you need advanced sync logic, cross-company controls, multi-platform coverage, or AI-assisted configuration—Exalate is the stronger option. It handles ServiceNow-to-ServiceNow just as well, plus every other platform combination your ecosystem requires.
You can also integrate ServiceNow with other applications through IntegrationHub, but the experience is less intuitive and more constrained. The Exalate vs. IntegrationHub comparison breaks down the specifics.
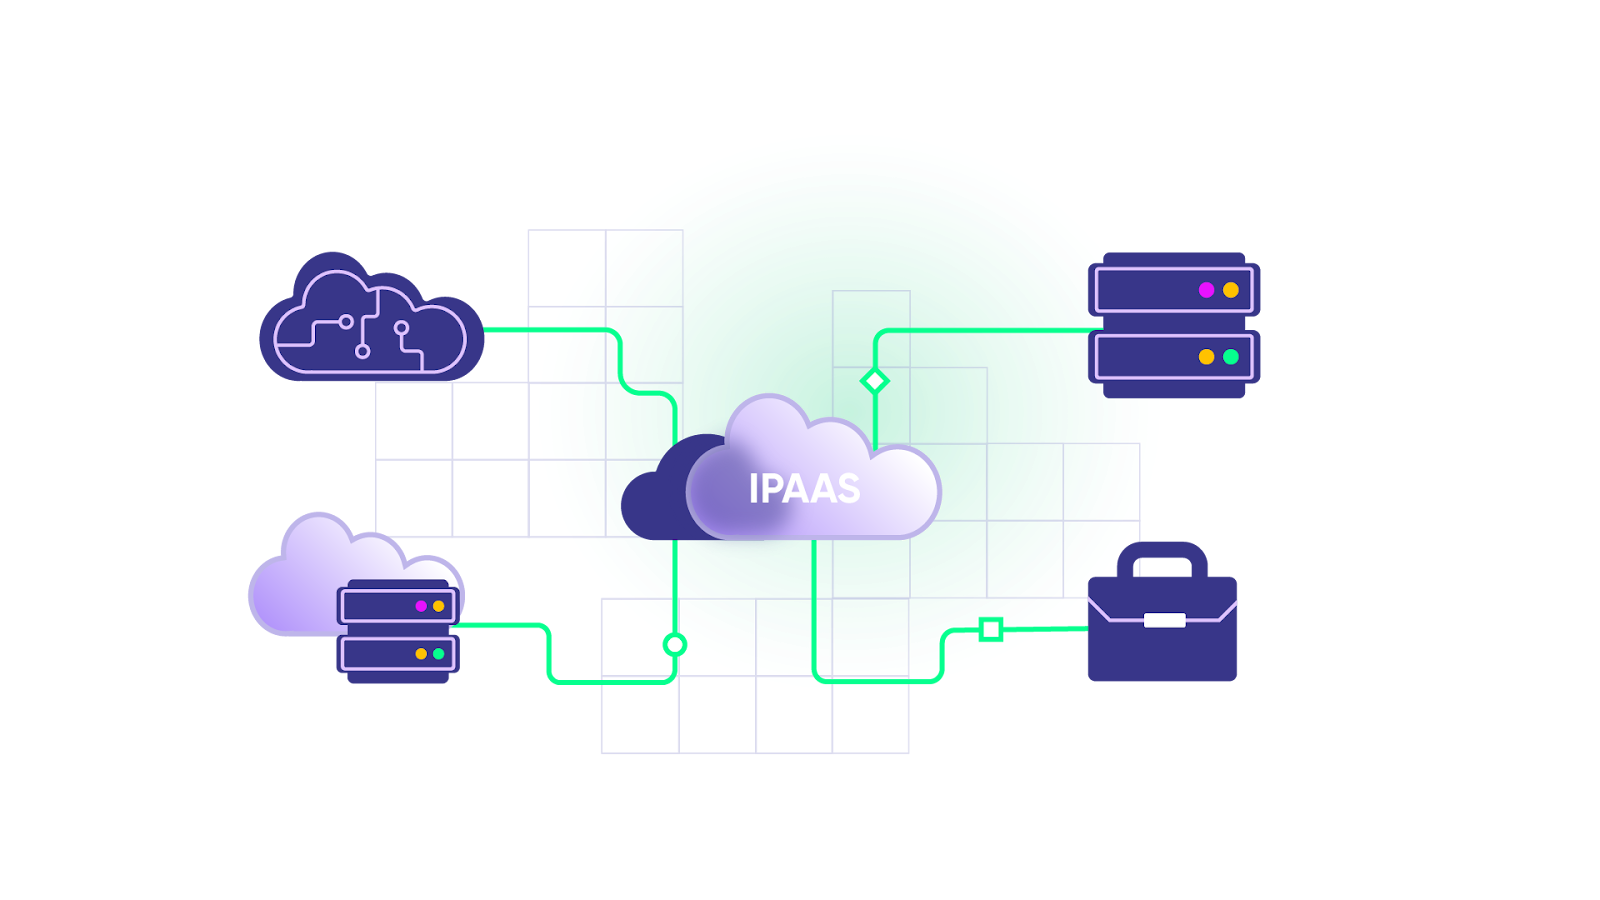
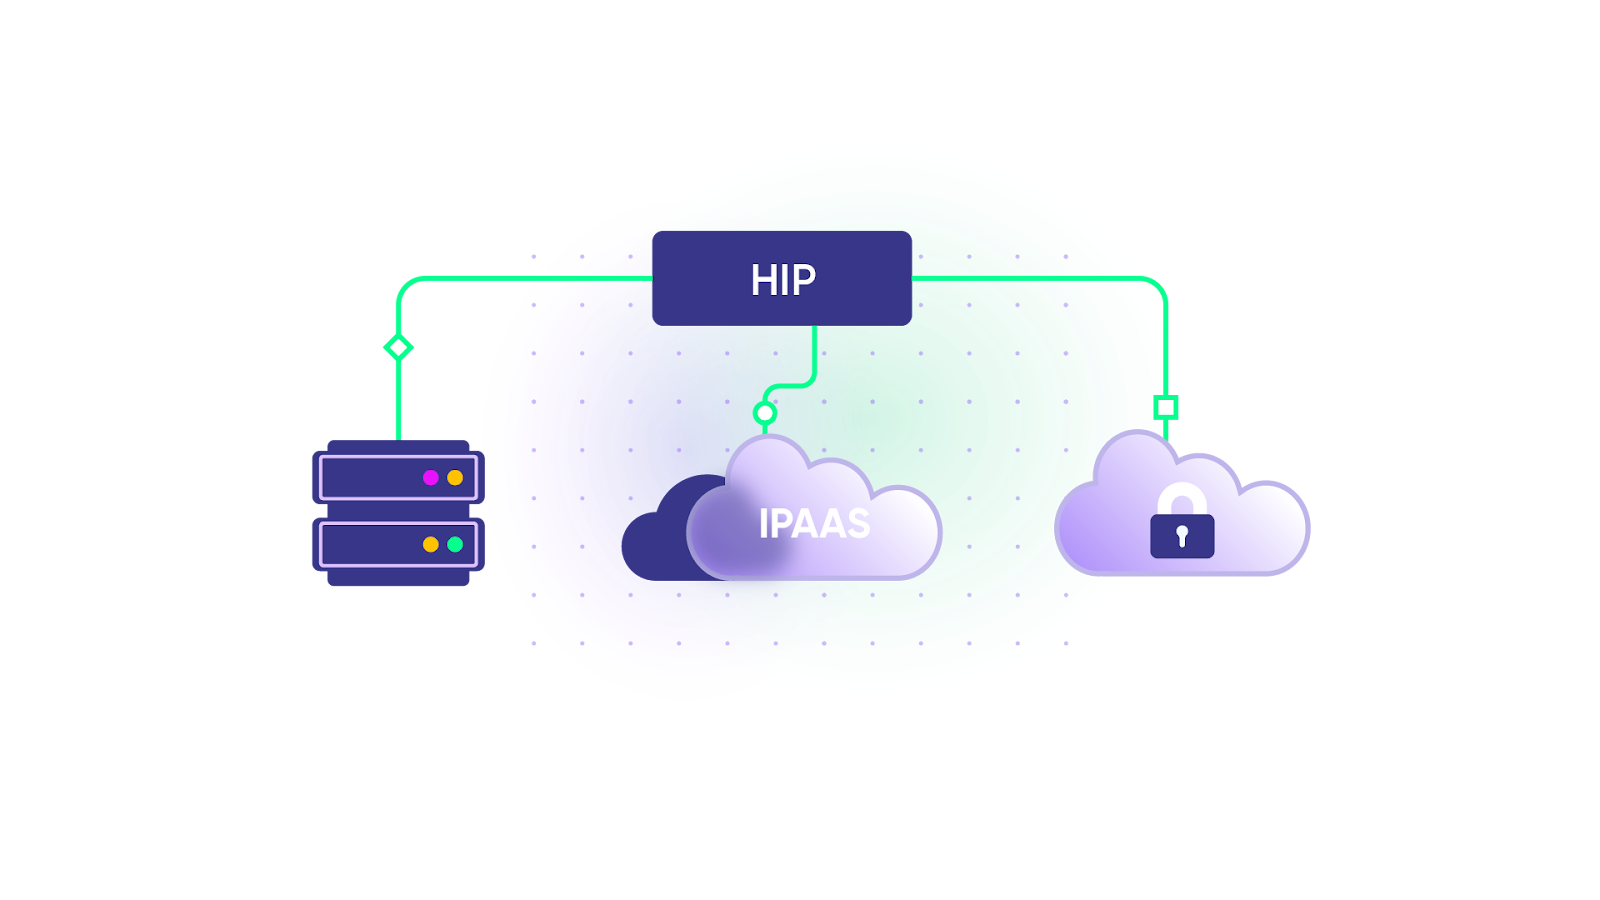
eBonding vs. iPaaS: What’s the Difference?
This is a question that comes up frequently, and the distinction matters.
eBonding is a methodology—a structured approach to synchronizing data between business applications so they maintain matching records and deliver end-to-end workflows. It’s focused specifically on keeping two or more systems in sync with bidirectional, real-time data exchange.
iPaaS (Integration Platform as a Service) is a broader category of cloud-based integration tools that connect applications, automate workflows, and move data between systems. iPaaS platforms handle many integration patterns—ETL, event-driven architectures, API management, workflow automation—of which eBonding-style synchronization is just one.
Think of it this way: eBonding is the what (synchronized, matching data across systems). iPaaS is one possible way (a cloud platform that can deliver eBonding among other integration patterns).
Some iPaaS platforms are good at simple data movement but struggle with the deep, bidirectional synchronization and field-level control that serious eBonding requires. Dedicated eBonding tools like Exalate are purpose-built for this specific pattern—which is why they handle complex cross-company sync scenarios more effectively than general-purpose iPaaS platforms.
eBonding Best Practices
Getting eBonding right isn’t just about choosing the right tool. It’s about approaching the implementation strategically.
- Start with a clear data map. Before touching any tool, document exactly what data needs to sync, in which direction, and under what conditions. Map fields between systems explicitly—don’t assume “Priority” means the same thing everywhere.
- Define ownership and escalation paths. Who owns each connection? Who gets notified when a sync fails? Who has the authority to change sync rules? These questions seem administrative, but leaving them unanswered causes real operational problems.
- Implement incrementally. Don’t try to eBond everything at once. Start with a single, well-defined connection, validate it thoroughly, and then expand. Each new connection builds on lessons learned from the previous one.
- Plan for change. Your eBonding requirements will evolve. New partners, new platforms, new data fields, new compliance requirements. Choose tools and architectures that treat change as normal rather than exceptional.
- Monitor continuously. Don’t wait for someone to report a problem. Set up monitoring that alerts you to sync failures, queue backlogs, and data mismatches proactively.
Conclusion
eBonding isn’t new, but it’s more relevant than ever. As organizations rely on more applications, more partners, and more distributed teams, the need for automated, reliable data synchronization only grows.
The core idea is simple: keep matching data in matching systems, automatically, so everyone works with the same information. The execution is where things get complex—field mapping, process alignment, security, scalability, and error handling all require careful planning.
Building in-house rarely scales. Commercial tools like ServiceNow’s eBonding spoke and Exalate offer faster time to value, lower maintenance costs, and broader flexibility. The right choice depends on your ecosystem—ServiceNow-only shops may find the eBonding spoke sufficient, while organizations managing diverse platforms and cross-company relationships will benefit from Exalate’s broader connector coverage, AI-assisted configuration, and independent control per side.
Whatever path you choose, start with strategy, implement incrementally, and pick tools that grow with your integration network.
Frequently Asked Questions
What is eBonding in ITSM?
eBonding in IT Service Management refers to the automated, bidirectional synchronization of service records—incidents, change requests, problems—between different ITSM platforms. For example, eBonding between ServiceNow and Jira ensures that when a support agent escalates an incident, engineering sees it instantly as a work item in their own tool, with all relevant context. Exalate supports eBonding across ITSM platforms, including ServiceNow, Jira, Freshservice, Freshdesk, and Zendesk.
How is eBonding different from a simple API integration?
A basic API integration typically moves data in one direction or handles simple CRUD operations. eBonding goes further; it maintains synchronized, matching records across systems with bidirectional updates, conflict resolution, field mapping, and conditional sync logic. It’s an ongoing, stateful relationship between records, not a one-time data push. Exalate handles the full eBonding lifecycle, including sync queues that maintain order and retry mechanisms that prevent data loss during outages.
Can eBonding work across company boundaries?
Yes, and this is one of its most valuable applications. Cross-company eBonding connects your systems with those of partners, vendors, MSPs, or customers. The key requirement is that each organization maintains independent control over what data they share and receive. Exalate is purpose-built for this. Each side configures their own sync rules without affecting the other party.
What platforms does Exalate support for eBonding?
Exalate connects Jira Cloud, ServiceNow, Zendesk, Salesforce, Azure DevOps (Cloud and Server), Freshservice, Freshdesk, GitHub, and Asana out of the box. For platforms not on that list, custom REST API connectors extend integration capabilities to proprietary systems and niche tools. This makes Exalate suitable for multi-platform eBonding environments where you need to connect diverse systems across multiple partners.
Is the ServiceNow eBonding spoke free?
The eBonding spoke is available by default in your ServiceNow instance without requiring an IntegrationHub subscription. However, it only supports ServiceNow-to-ServiceNow synchronization. If you need to eBond ServiceNow with non-ServiceNow platforms like Jira, Salesforce, or GitHub, you’ll need additional spokes through IntegrationHub, which come at extra cost.
How does AI-assisted configuration help with eBonding?
Exalate includes Aida, an AI assistant that guides teams through integration scoping, setup decisions, and troubleshooting. For complex sync scenarios, AI-assisted integration generates configurations from natural language descriptions—you explain what data should sync and under what conditions, and the platform produces the configuration. This significantly reduces implementation time and makes advanced eBonding accessible to teams without deep scripting expertise.
Can eBonding handle complex field mappings between different systems?
Yes, but the quality of field mapping depends heavily on the tool you choose. Different systems use different schemas, naming conventions, and data types—”Priority” in Jira might map to “Urgency” in ServiceNow, and status workflows are rarely identical. Exalate supports granular field-level mapping with conditional logic, allowing you to transform data as it moves between systems. AI-assisted configuration helps generate these mappings from natural language descriptions, reducing the manual effort involved.
What security certifications should an eBonding tool have?
At a minimum, look for ISO 27001. Your eBonding tool should also use TLS 1.2/1.3 for encrypted data transport, JWT tokens for authentication, and role-based access controls for configuration management. Exalate maintains these certifications and publishes its security posture transparently on its Trust Center.
Recommended Reads:
- ServiceNow eBonding: The Complete Guide
- B2B Integration: The Comprehensive Guide
- The Definitive Guide to Cross-Company Integrations for IT Professionals
- ServiceNow to ServiceNow Integration: The Step-by-Step Guide to Setting up a Two-Way Sync
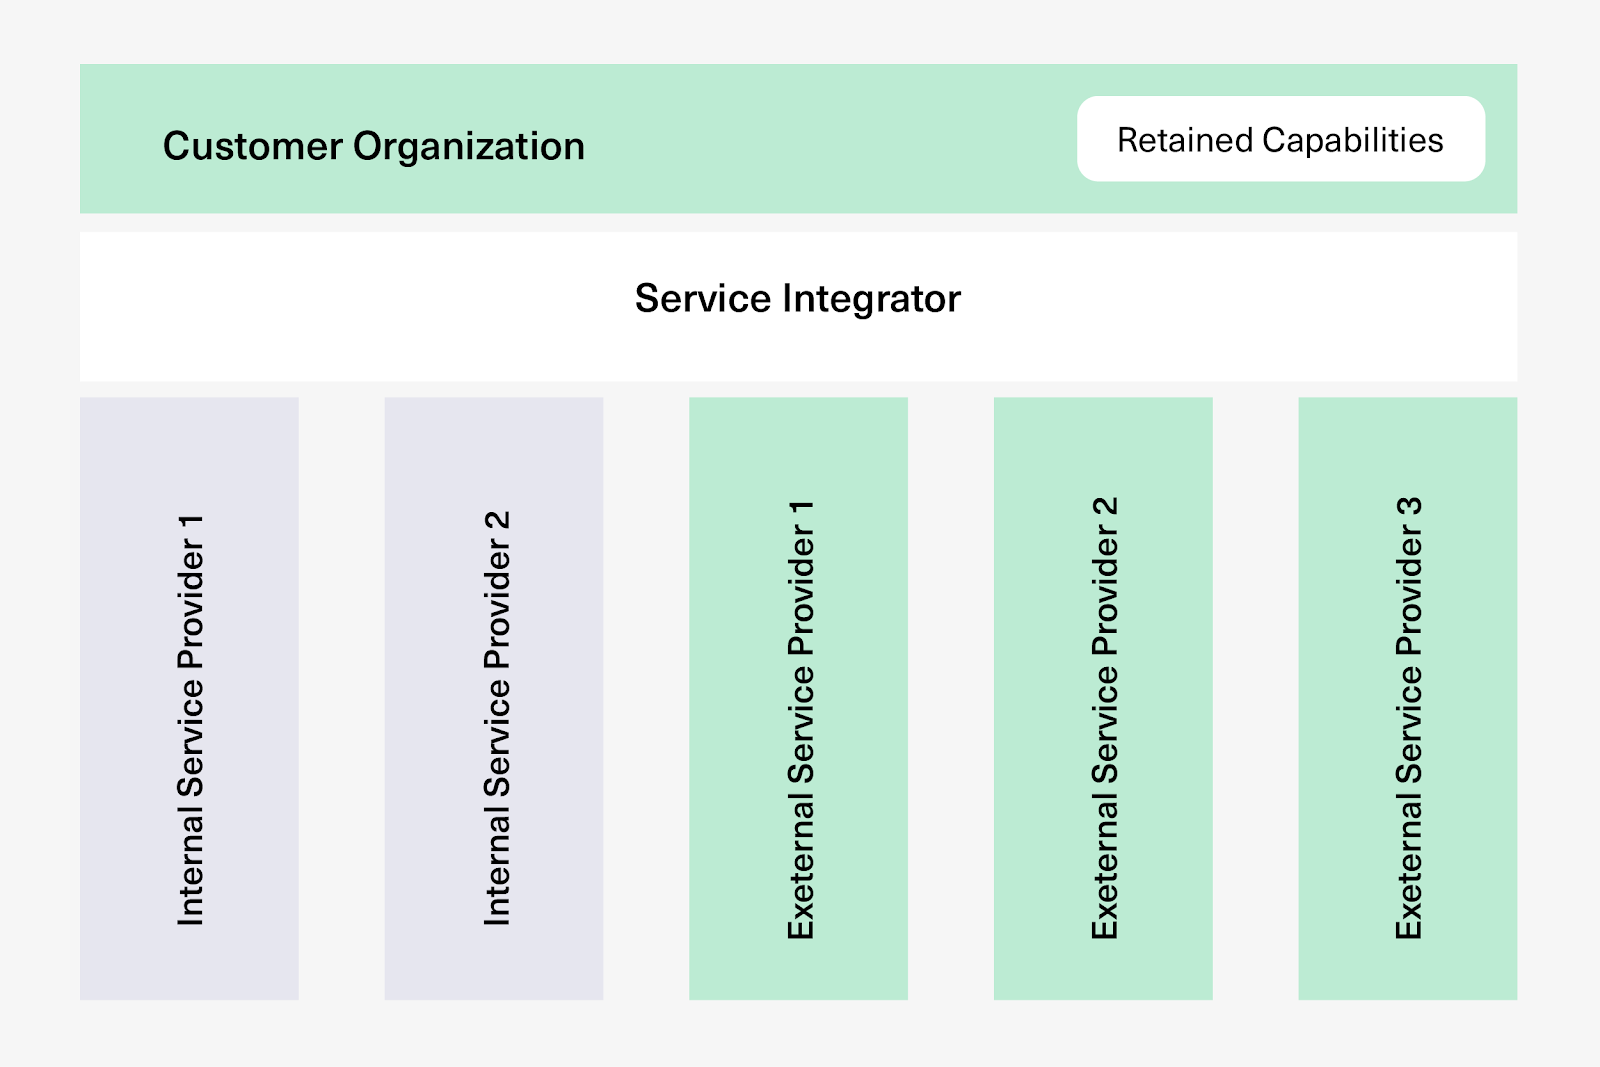
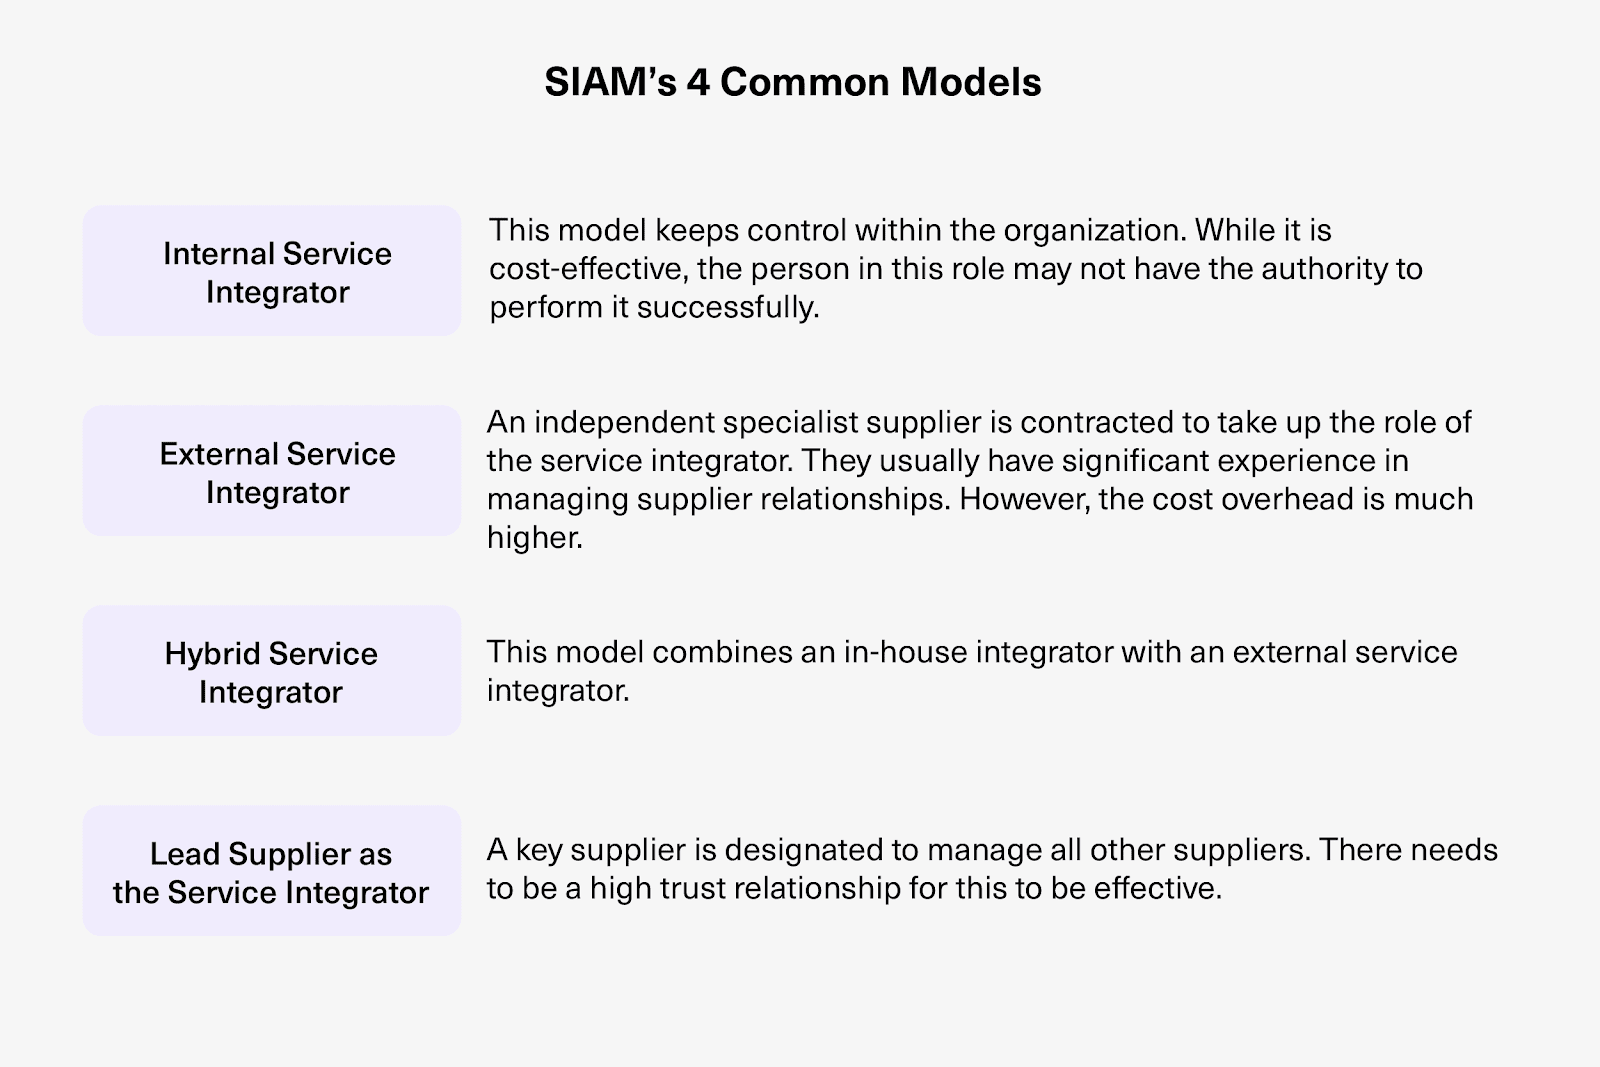
- Service Integration and Management (SIAM): The Complete Guide
- How to Build an Effective SIAM Operating Model