
Over the years, CRM and Salesforce have become inseparable and tightly bonded. That’s why companies looking to share CRM data are exploring Salesforce to Salesforce integration.
Such integration allows data sharing (for instance, Leads and Opportunities) and updates between different Salesforce instances. This helps achieve close collaboration with different partners or businesses, improving your customer experience.
In this article, I’ll use examples of Salesforce-to-Salesforce integration to highlight the benefits of connecting CRMs. I’ll then show you how to set up your own connection using robust Salesforce integration solutions.
Key Takeaways
- Successful integration requires defined user roles, proper access controls, strategic notification handling, and comprehensive testing
- Salesforce-to-Salesforce integration enables secure, real-time bidirectional data sharing between multiple Salesforce instances for improved collaboration.
- Common use cases include connecting sales and marketing teams, managing mergers and acquisitions, and streamlining MSP relationships.
- Native Salesforce functionality works for simple scenarios, while Exalate provides advanced customization with AI-assisted configuration and enterprise-grade security.

What is the Importance of Salesforce to Salesforce Integration?
Data is gold and, if mined correctly, can help teams share expertise and grow together steadily.
But when this information is passed manually between teams, it leads to discrepancies and errors.
Plus, you need to filter the exchanged data, as you don’t want to send all the information in compliance with security or data regulatory requirements.
When filtering is done manually, it can lead to friction between team members or collaborating partners in different organizations.
To avoid that, a two-way Salesforce CRM integration is the way out.
Salesforce-to-Salesforce integration provides:
- Secure information exchange – Role-based access controls and encryption protect sensitive data during synchronization
- Automatic data sharing – Eliminates manual data entry and reduces human error
- Filtered synchronization – Share only relevant information while keeping confidential data private
- Reliable data flow – Consistent synchronization ensures both parties have accurate information
- Real-time bidirectional updates – Changes in either instance are reflected immediately in the connected system.
This gives the other party the most accurate representation of the information it needs to see without exposing any confidential information.
Let’s look at scenarios where exchanging information between multiple Salesforce instances can help companies collaborate and communicate effectively.
What are Some Salesforce to Salesforce Integration Use Cases?
Case 1: Connecting Sales and Marketing Teams
Challenge: Sales and marketing teams work in separate Salesforce instances, creating data silos that prevent unified customer engagement strategies. Without real-time access to each other’s insights, campaigns lack sales context, and sales teams miss marketing intelligence that could accelerate deals.
Solution: Bi-directional Salesforce integration synchronizes Accounts, Opportunities, and Leads between marketing and sales instances. Teams can design campaigns around real-time sales pipeline data while sales teams access marketing engagement metrics instantly.
Real-World Application: Marketing teams track which campaigns generate the highest-quality Opportunities by accessing sales conversion data directly in their instance. Sales teams prioritize outreach based on marketing engagement scores and campaign interactions, creating a closed-loop process that improves both campaign ROI and sales efficiency.
Case 2: Improving the Efficiency of Sales and Customer Service Teams
Challenge: Customer service teams need access to sales context when handling cases, but information remains locked in separate Salesforce instances. This disconnection leads to repeated questions, longer resolution times, and frustrated customers who must explain their situation multiple times.
Solution: Point-to-point integration between sales and service Salesforce instances synchronizes Cases, Tasks, Opportunities, and related Account information. Service teams gain immediate visibility into purchase history, open deals, and previous interactions.
Real-World Application: When a customer contacts support, service representatives see the complete relationship history, including active Opportunities and past purchases. They can proactively address concerns about pending orders or upcoming renewals, transforming reactive support into relationship-building conversations.
Case 3: Growing and Diversifying Your Connections with Partners and Businesses
Challenge: Expanding partnerships requires sharing customer and project information across organizational boundaries, but manual data exchange creates bottlenecks and introduces errors. Different partners use their own Salesforce instances with unique configurations and data models.
Solution: Flexible integration between multiple Salesforce organizations allows each partner to maintain their own instance while selectively sharing relevant Accounts, Opportunities, and custom objects.
Real-World Application: A consulting firm partners with technology vendors and implementation specialists, each maintaining separate Salesforce instances. When pursuing enterprise deals, they automatically share Opportunity details, project timelines, and customer requirements. Each partner sees their role in the overall solution without accessing confidential information from other partners, enabling coordinated proposals that win more business.
Case 4: Navigating Mergers & Acquisitions Smoothly
Challenge: Mergers and acquisitions create immediate pressure to unify customer data, but migrating everything into a single Salesforce instance risks disrupting ongoing operations. Teams need access to combined customer information while maintaining their existing workflows during the transition.
Solution: Bi-directional integration between the Salesforce instances of the acquiring and acquired companies provides immediate unified visibility without forced migration. Both organizations share customer records, Accounts, Opportunities, Cases, and other critical information while maintaining operational independence during integration planning.
Real-World Application: A software company acquiring a complementary business immediately integrates both Salesforce instances to identify customer overlap and cross-selling opportunities. Sales teams from both organizations collaborate on unified Accounts, avoiding duplicate outreach while the technical teams plan the eventual consolidation. This approach maintains revenue momentum during transition periods that can stretch 12-18 months.
Case 5: Integrating Vendors & Suppliers
Challenge: Supply chain efficiency depends on real-time information exchange with vendors and suppliers, but email-based communication creates lag time and version control issues. Vendors need access to purchase orders, inventory requirements, and delivery schedules without compromising proprietary business information.
Solution: Controlled integration between the buyer and supplier Salesforce instances synchronizes purchase orders, inventory levels, delivery details, and custom supply chain objects. Each party maintains control over its data while ensuring partners have the information needed for timely execution.
Real-World Application: A manufacturing company integrates its Salesforce instance with key suppliers, automatically sharing production forecasts and purchase order details. Suppliers update delivery statuses and inventory availability in their own Salesforce, which flows back to the manufacturer’s planning systems. This transparency reduces supply chain disruptions and eliminates daily status check calls.
Case 6: Regional Operations Coordination
Challenge: Global companies operating regional Salesforce instances face delays in escalating customer issues and sharing best practices across regions. Data residency requirements prevent simple consolidation, but regional isolation creates blind spots for global accounts.
Solution: Selective synchronization of Cases, Accounts, and custom objects between regional instances enables global visibility while respecting data residency requirements. Escalation rules automatically share high-priority items across regions while routine operations remain localized.
Real-World Application: A multinational technology company synchronizes high-priority enterprise customer Cases across instances in EMEA, APAC, and the Americas. When a global customer reports an issue in one region, support teams worldwide gain visibility and can contribute expertise regardless of timezone. This coordinated approach reduced resolution time for global accounts by 40% while maintaining compliance with regional data protection regulations.
Features to Consider When Choosing a Salesforce Integration Solution
When evaluating Salesforce-to-Salesforce integration tools, prioritize these capabilities:
- Bidirectional Synchronization: Ensure the solution supports real-time, two-way data flow between instances, not just one-directional updates. This allows both systems to remain current regardless of where changes originate.
- Custom Object Support: Look for solutions that handle both standard and custom Salesforce objects, maintaining flexibility as your data model evolves.
- Granular Field Mapping: The ability to map fields at a detailed level prevents data conflicts and allows precise control over what information syncs between instances.
- Error Handling and Recovery: Robust solutions automatically resume operations after network interruptions or system downtime without manual intervention or data loss. Integration reliability directly impacts business continuity.
- Security and Compliance: ISO certification, role-based access control, and encryption (both in transit and at rest) are essential for enterprise deployments. Verify the vendor maintains a public Trust Center with compliance documentation and security architecture details.
- Scripting and Customization: Full operational control through scripting capabilities allows you to implement complex business logic beyond out-of-the-box functionality. Your unique workflows deserve unique solutions.
- AI-Assisted Configuration: Modern solutions leverage AI to accelerate setup, reduce configuration errors, and make integration accessible to teams without deep technical expertise. Configuration time directly impacts time-to-value.
- Scalability: Evaluate how the solution handles increasing data volumes and additional instances as your organization grows. Today’s simple integration becomes tomorrow’s complex integration ecosystem.
- Sync Panel: Exalate also comes with a Chrome extension called Sync Panel that lets users check sync status, spot errors, trigger manual syncs, and unlink sync pairs straight from the browser, without opening the console.
Exalate addresses all these requirements while providing enterprise-grade security and flexibility for both simple and complex integration scenarios.
Two Ways to Integrate Multiple Salesforce Instances
The Native Salesforce Functionality
The platform provides a native integration called “Salesforce to Salesforce,” which allows users to exchange records and stay updated.
But to use this feature, you must consider limitations, such as the ability to share a maximum of 100 tasks per related Salesforce record. Besides, the native functionality is scheduled for retirement in 2027.
If you have simple out-of-the-box use cases, this standard Salesforce to Salesforce REST API integration is the right option.
But if you need custom or advanced integration, then you can use Apex.
Apex is a powerful medium that allows you to extend the native capabilities of Salesforce to include custom and advanced business logic. Still, it boils down to implementing an integration, which is significant work.
Also, Apex isn’t designed for the complex integration processing that is expected from typical Salesforce integration tools; it is also subject to governor limits defined by Salesforce.
To account for this, AppExchange has ready-made apps that allow you to integrate multiple Salesforce instances easily.
A Third-Party Salesforce to Salesforce Integration
Exalate is a Salesforce integration software that allows you to bidirectionally sync information in real time between two (or more) Salesforce instances.
You can also use it to sync data between Salesforce and other applications. including Jira, ServiceNow, Azure DevOps (Cloud and Server), Freshservice, Freshdesk, Asana, GitHub, Zendesk, and more. Check out Exalate’s integrations page for more info.
Let’s see why Exalate is the right choice to handle a complex Salesforce to Salesforce integration:
- Enterprise-Grade Security: Exalate maintains ISO 27001 certification and implements role-based access control to ensure only authorized users can configure and manage integrations. You also maintain full scripting and operational control over your sync configuration, allowing you to define exactly what data flows between instances.
- AI-Assisted Configuration: Aida, Exalate’s AI-powered configuration assistant, streamlines integration setup by converting natural language descriptions into configuration scripts. This helps teams discover technical information quickly, reducing setup time and accelerating practical use case implementation without requiring deep technical expertise.
- Custom Object Support: Exalate syncs both standard and custom Salesforce objects between instances, maintaining flexibility as your data model evolves. You can sync any Salesforce records, including custom ones and their related records.
Exalate offers flexible subscription-based plans designed for teams of all sizes, from small businesses to enterprise deployments.
How to Set up a Salesforce to Salesforce Integration With Exalate
This tutorial demonstrates how to set up a Salesforce-to-Salesforce integration using Exalate.
Get Started with Exalate
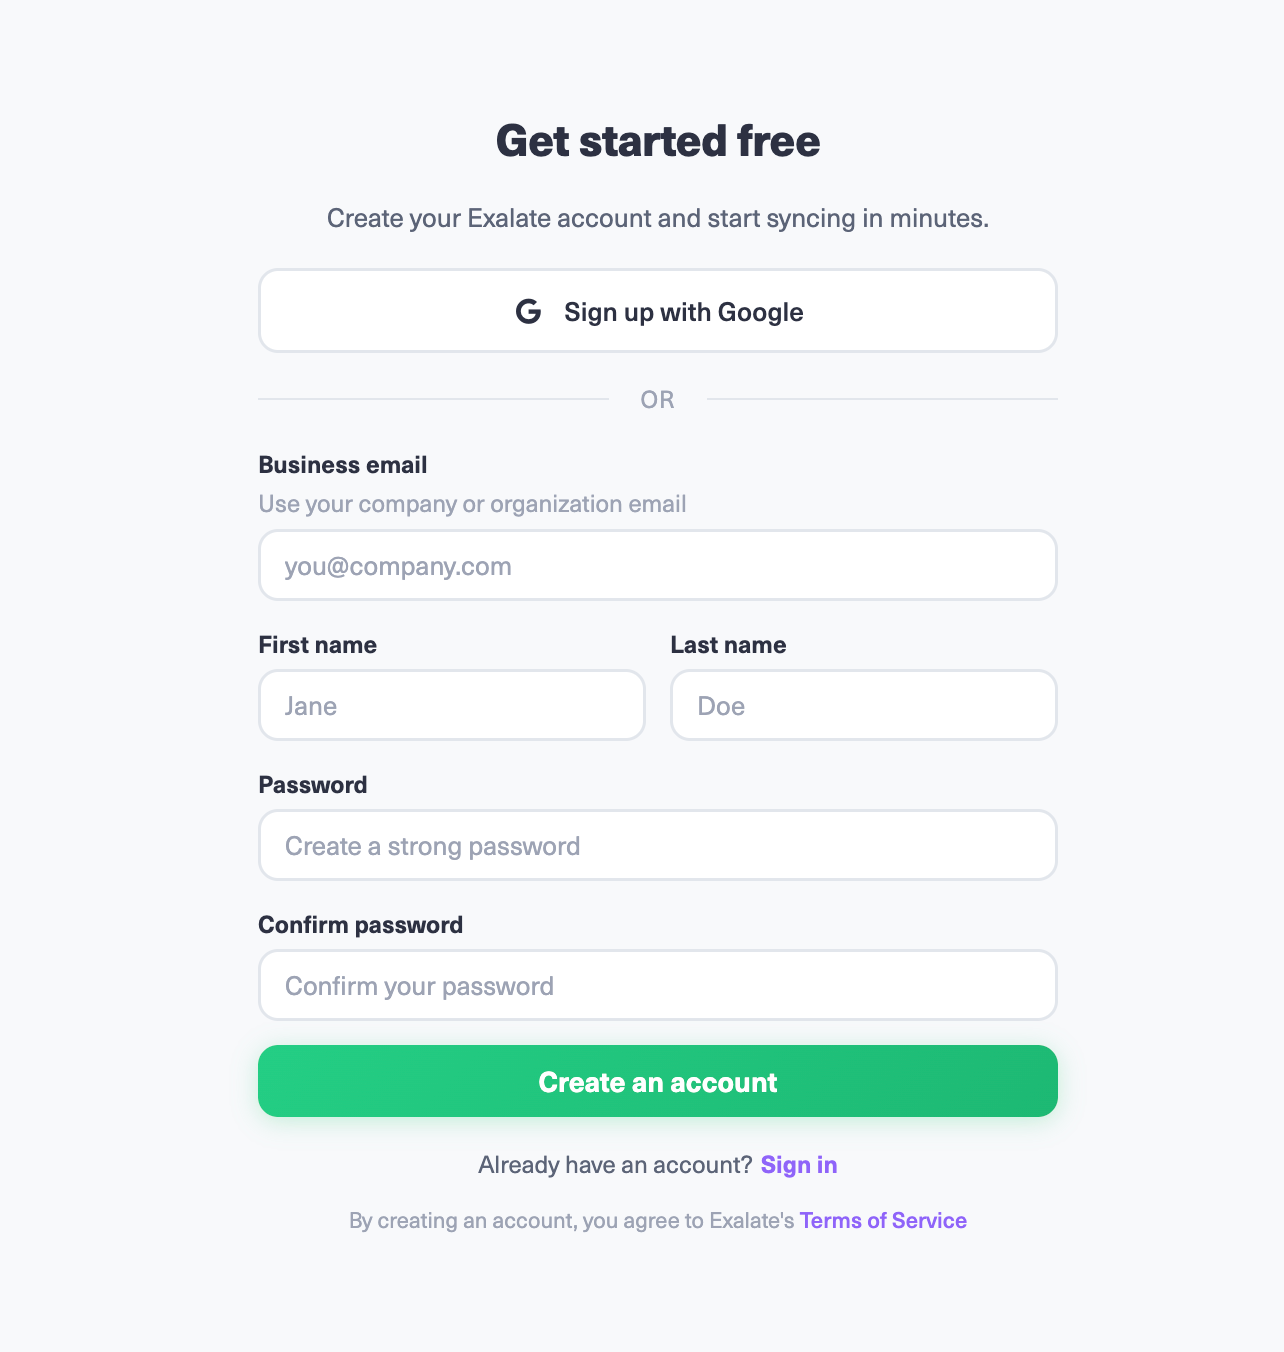
Navigate to Exalate and create your account. If you’re a returning user, simply log in. You can register manually with business email verification or use Google sign-in for faster access.
Initiate Your Salesforce-to-Salesforce Connection
If you’re working with an existing system, navigate to the “Connections” tab to view all your connections. From here, you can edit connections and access detailed connection information.
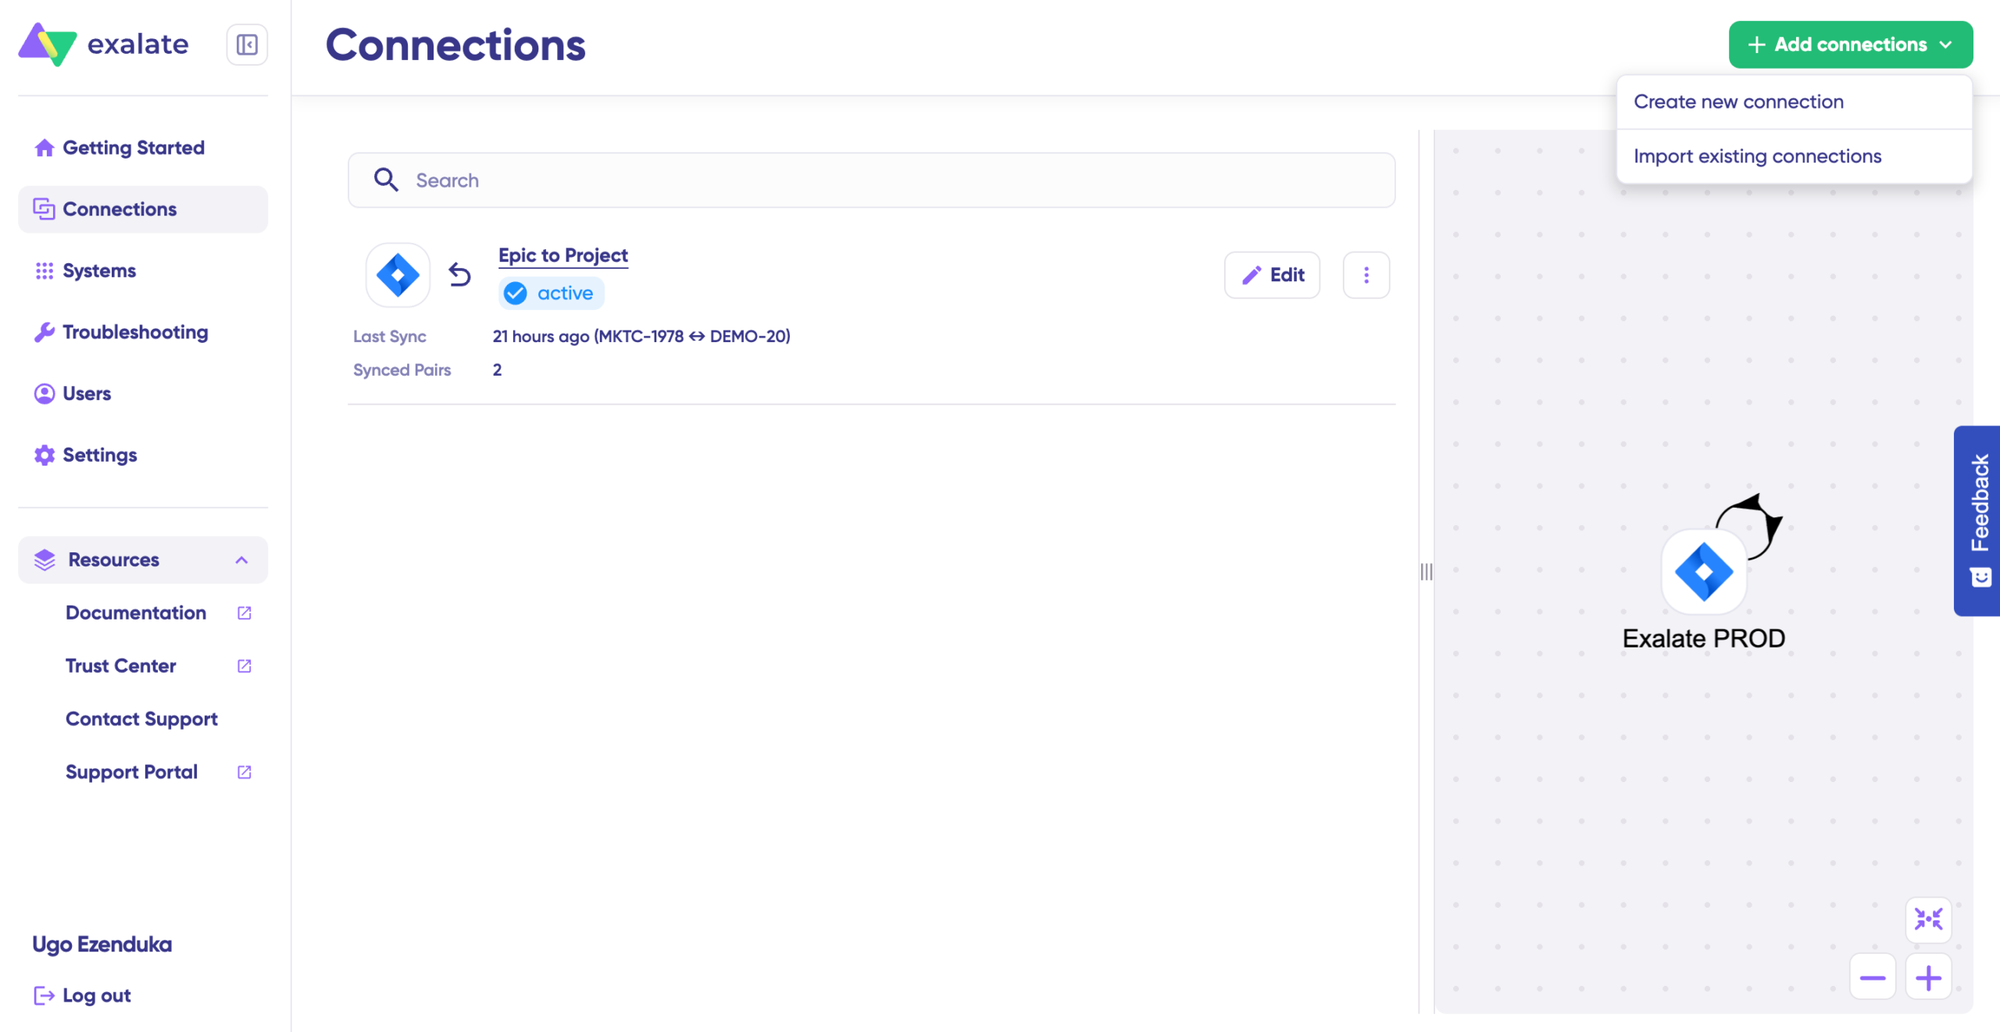
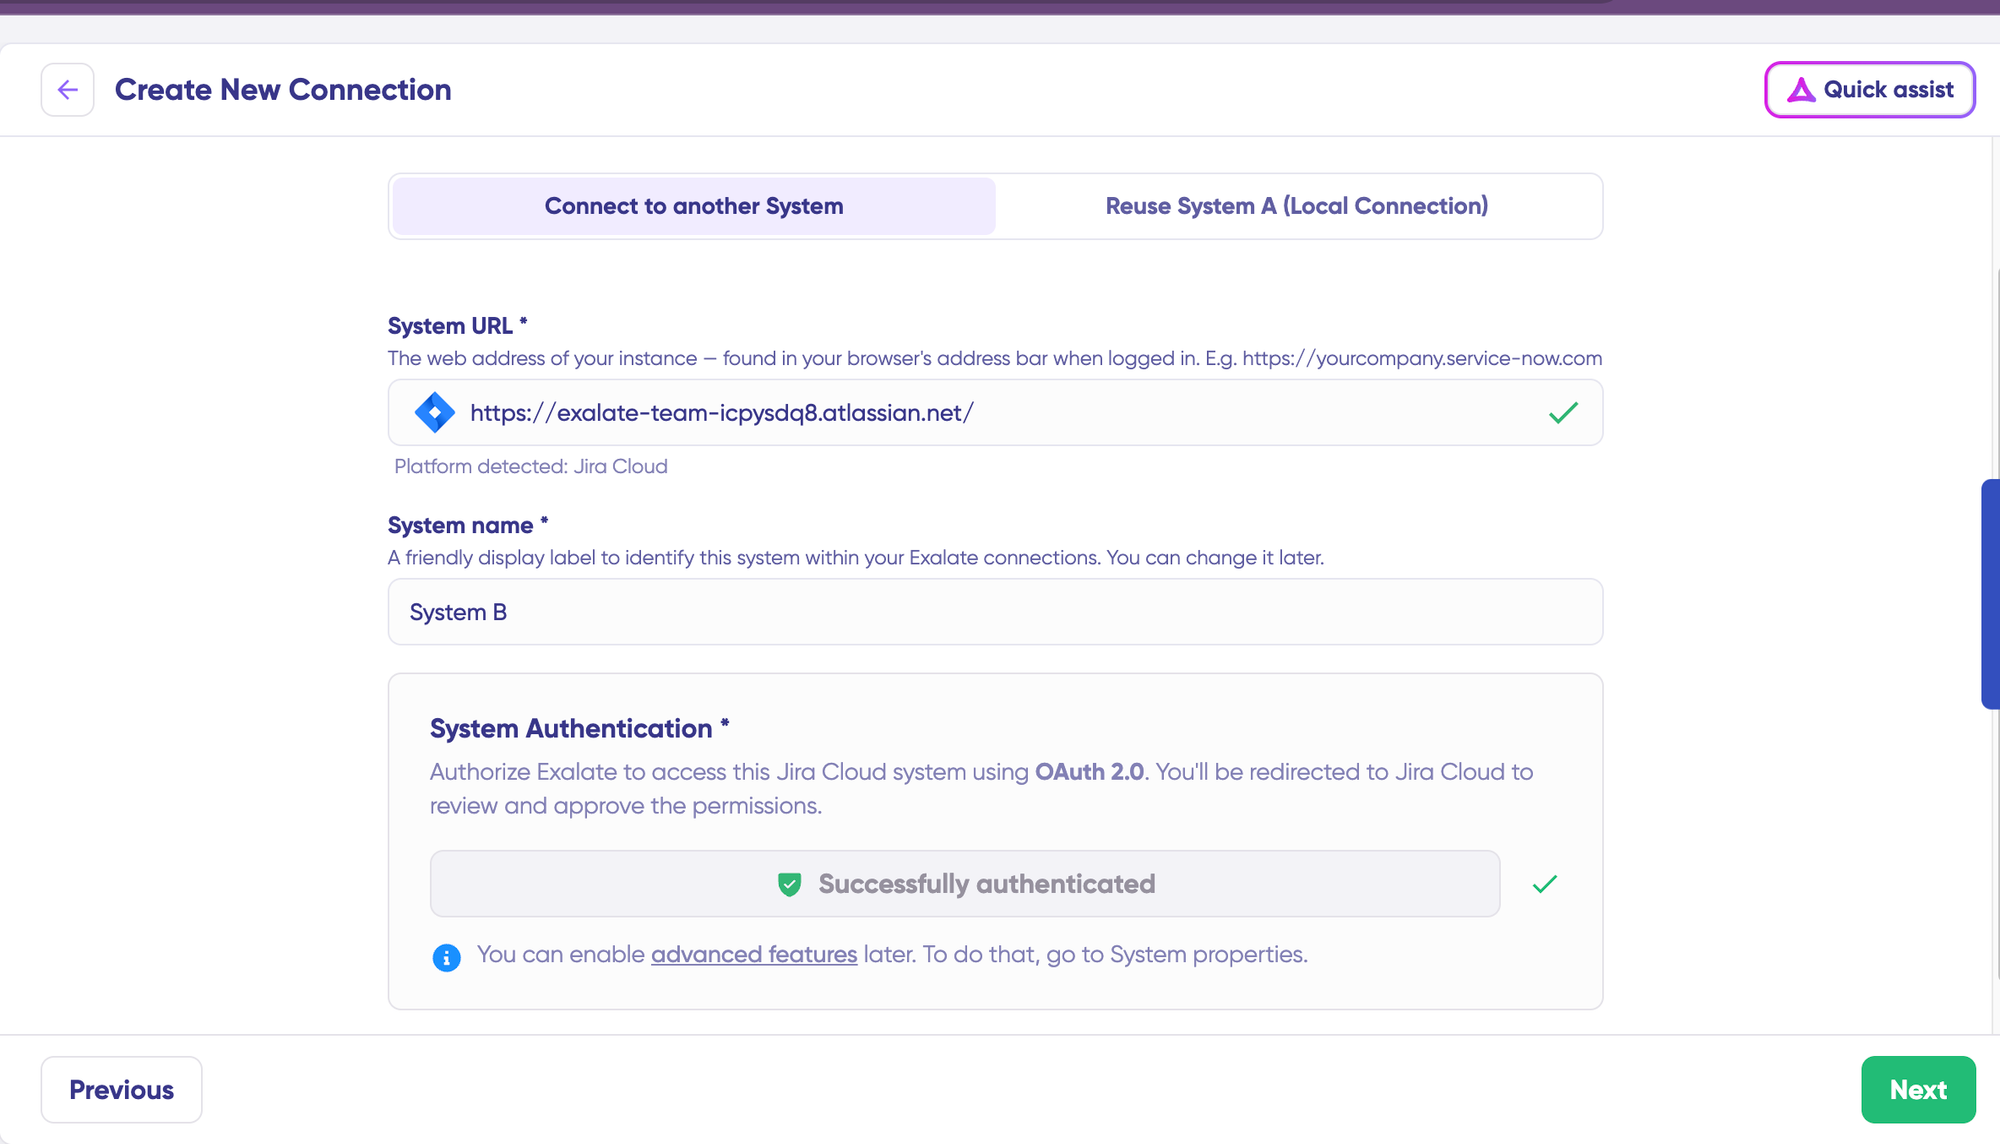
Click “+ Add connections” → “Create new connection“. Enter the name for your first Salesforce instance as System A. Then provide the URL of your first Salesforce org.
Note: Creating a connection requires an active Exalate account and authentication credentials for both Salesforce instances you want to connect.
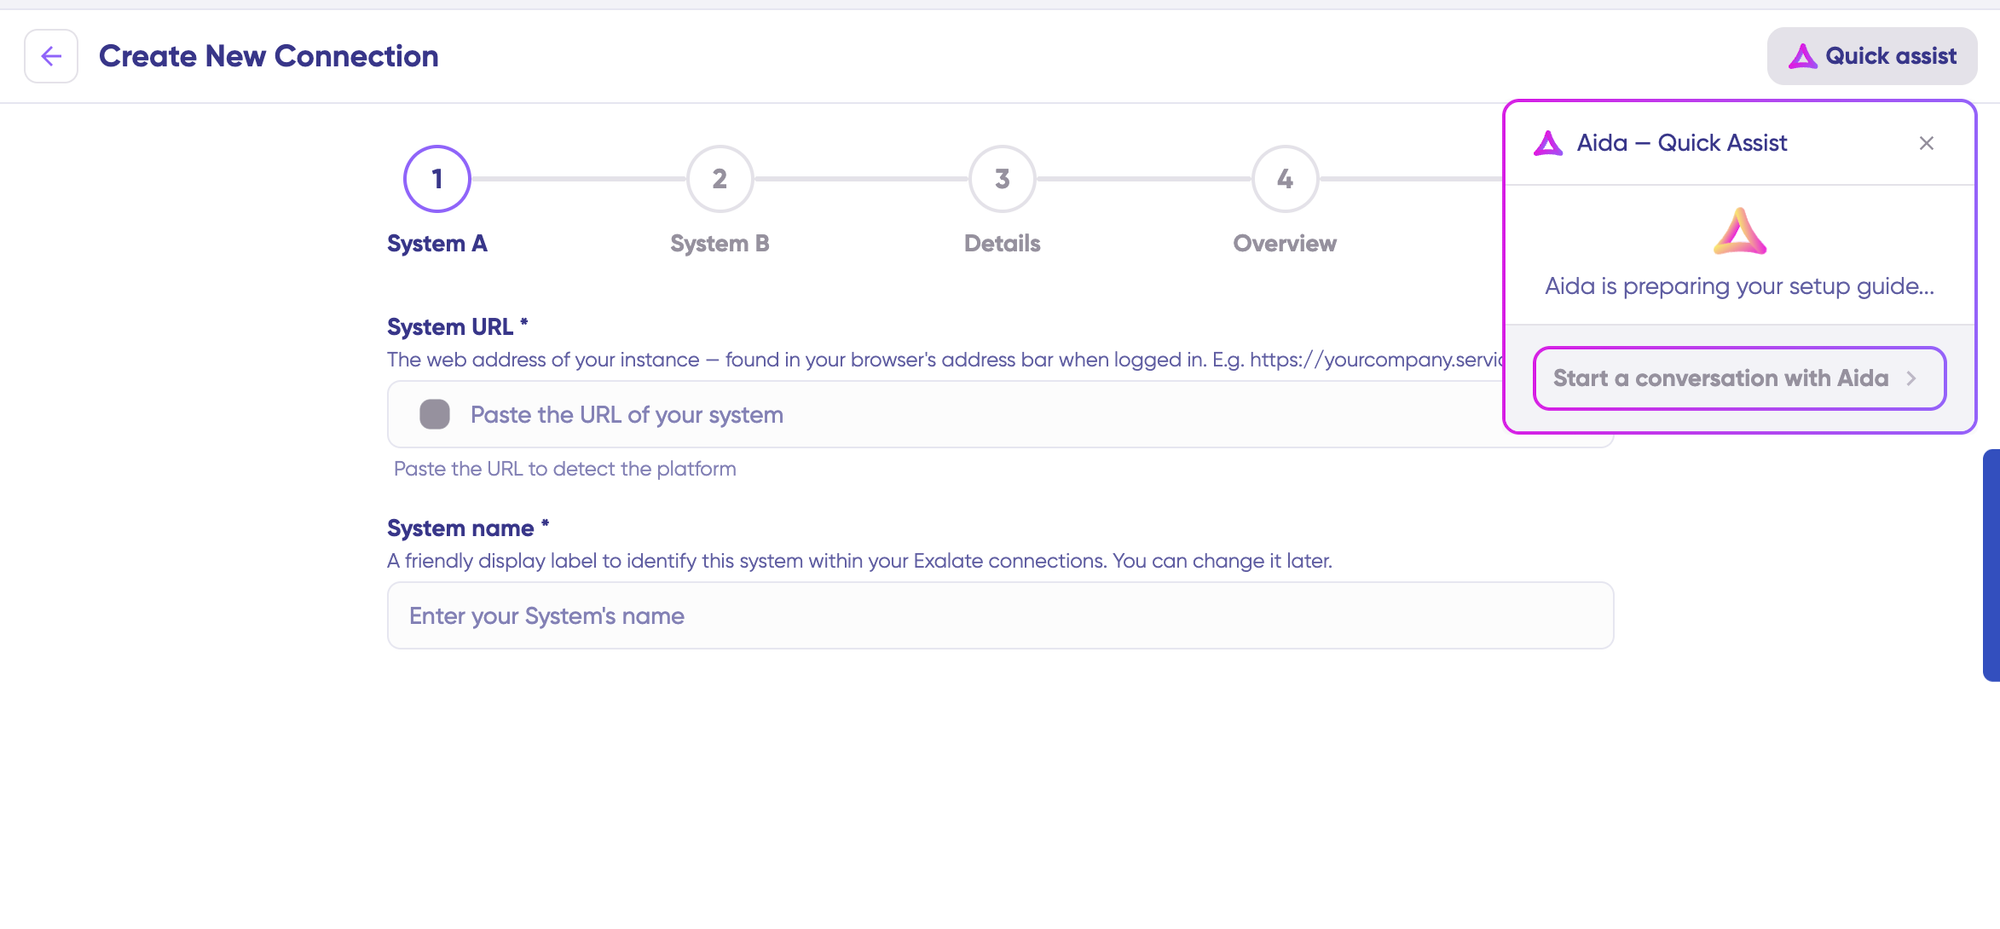
To speed up the setup, click on Quick Assist in the top-right corner to get insights from Aida.
Once you enter the URL, Exalate performs a validation check. If your Salesforce org is already registered, authentication happens automatically.
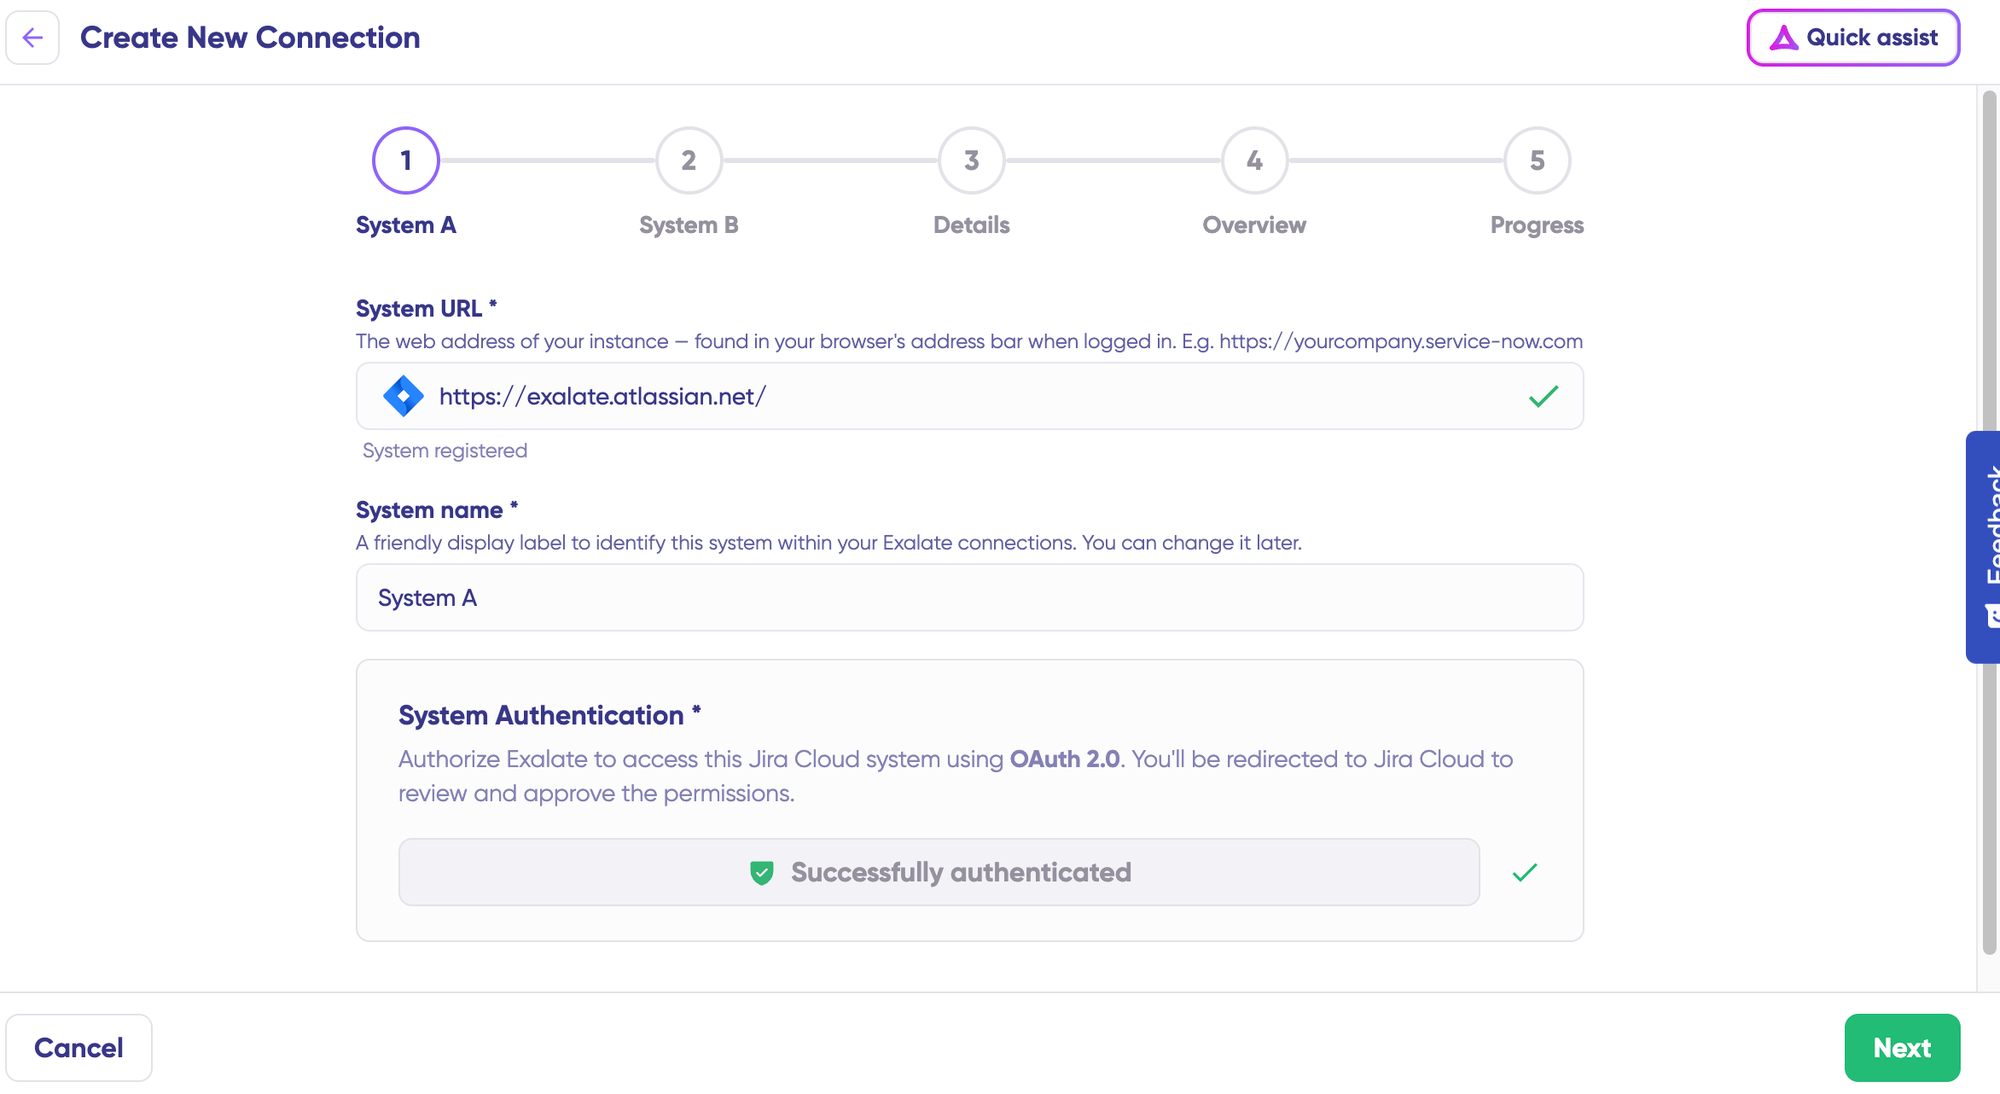
For a new Salesforce instance, you’ll need to enter your authentication credentials using Client ID and Client Secret.
Complete the same setup process for your second Salesforce instance (System B). The authentication rules remain identical since both systems are the same.
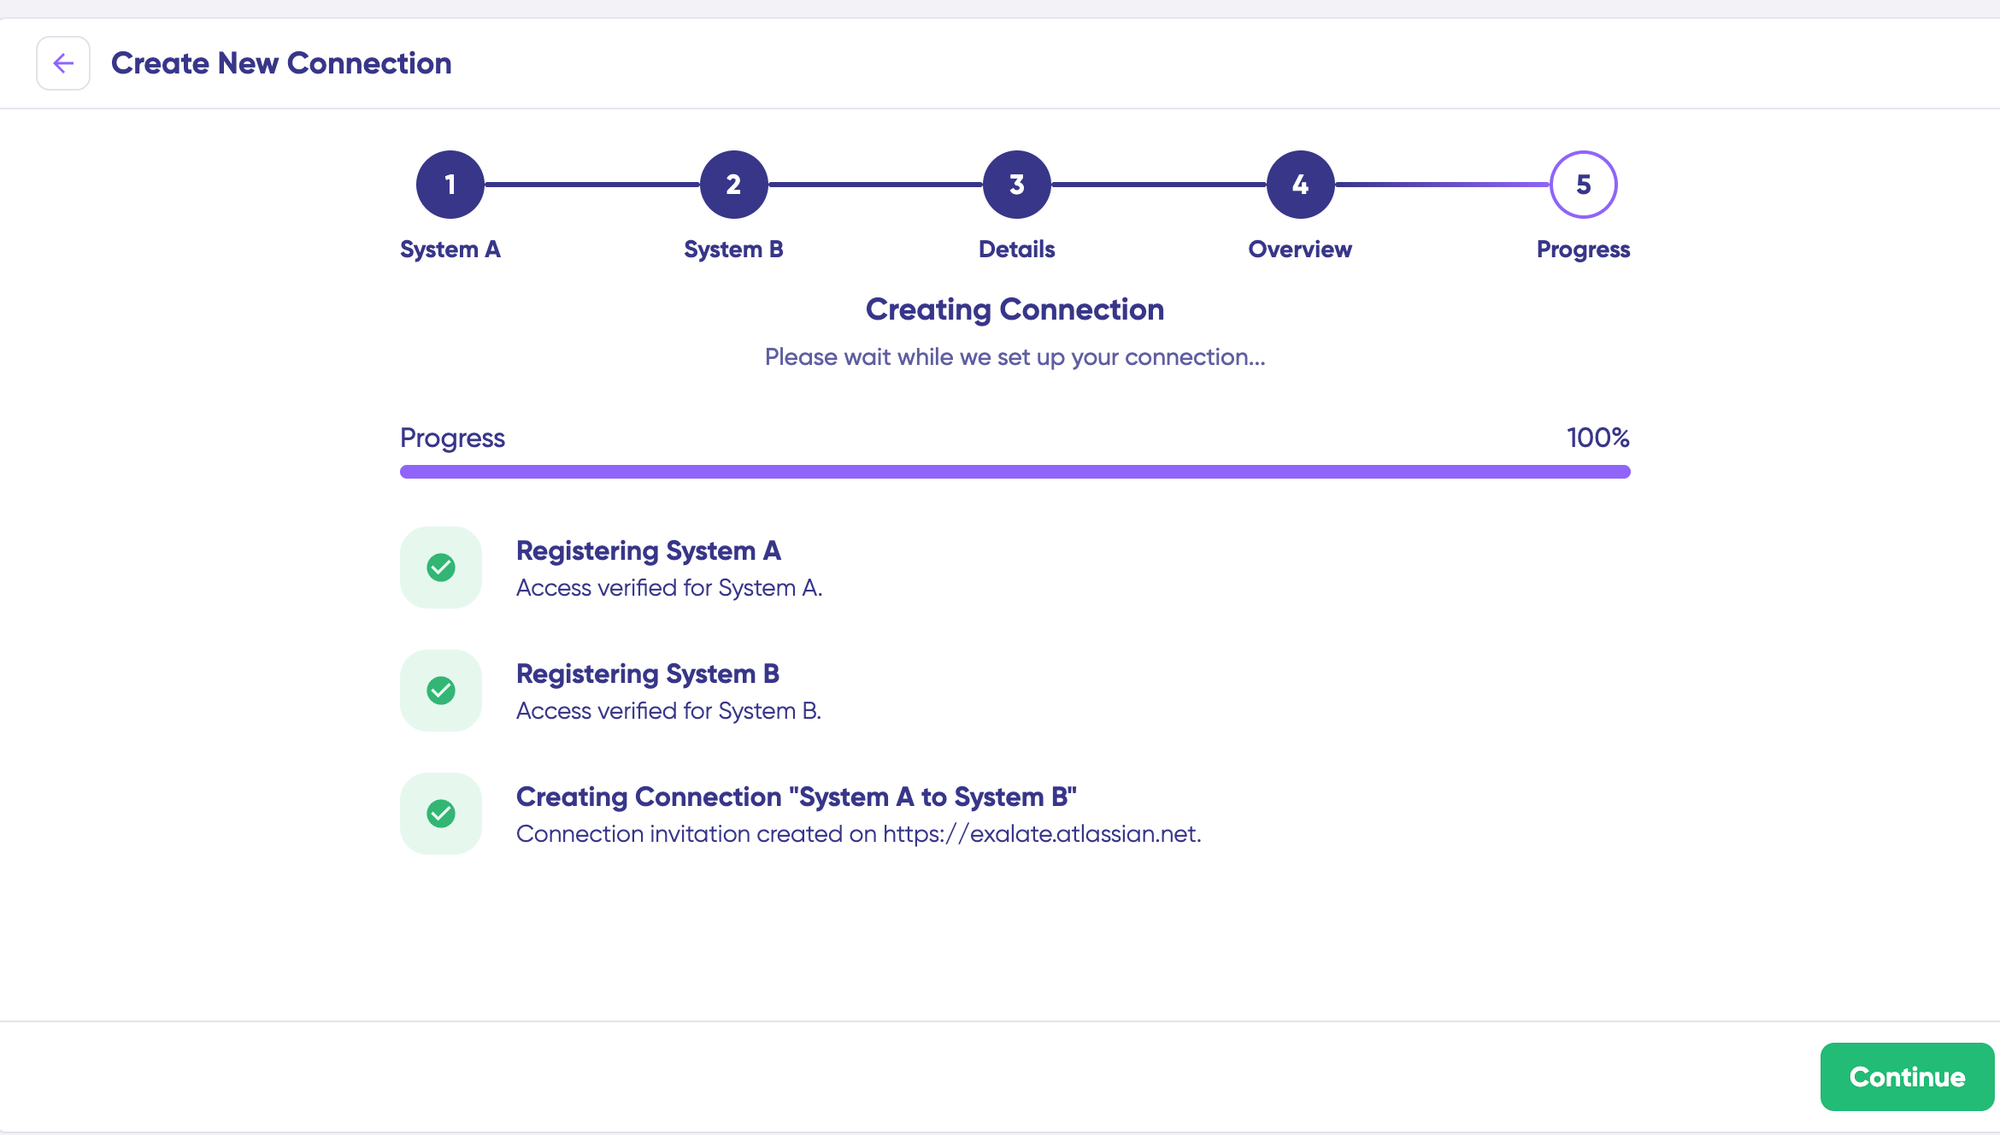
Assign a name and description for your connection, then click “Next“. Review the configuration details for accuracy and click “Create connection“.
When the process completes, click “Continue” then select “Continue to configuration“, and choose the Salesforce objects you want to synchronize (such as Accounts, Opportunities, Cases, or Leads).
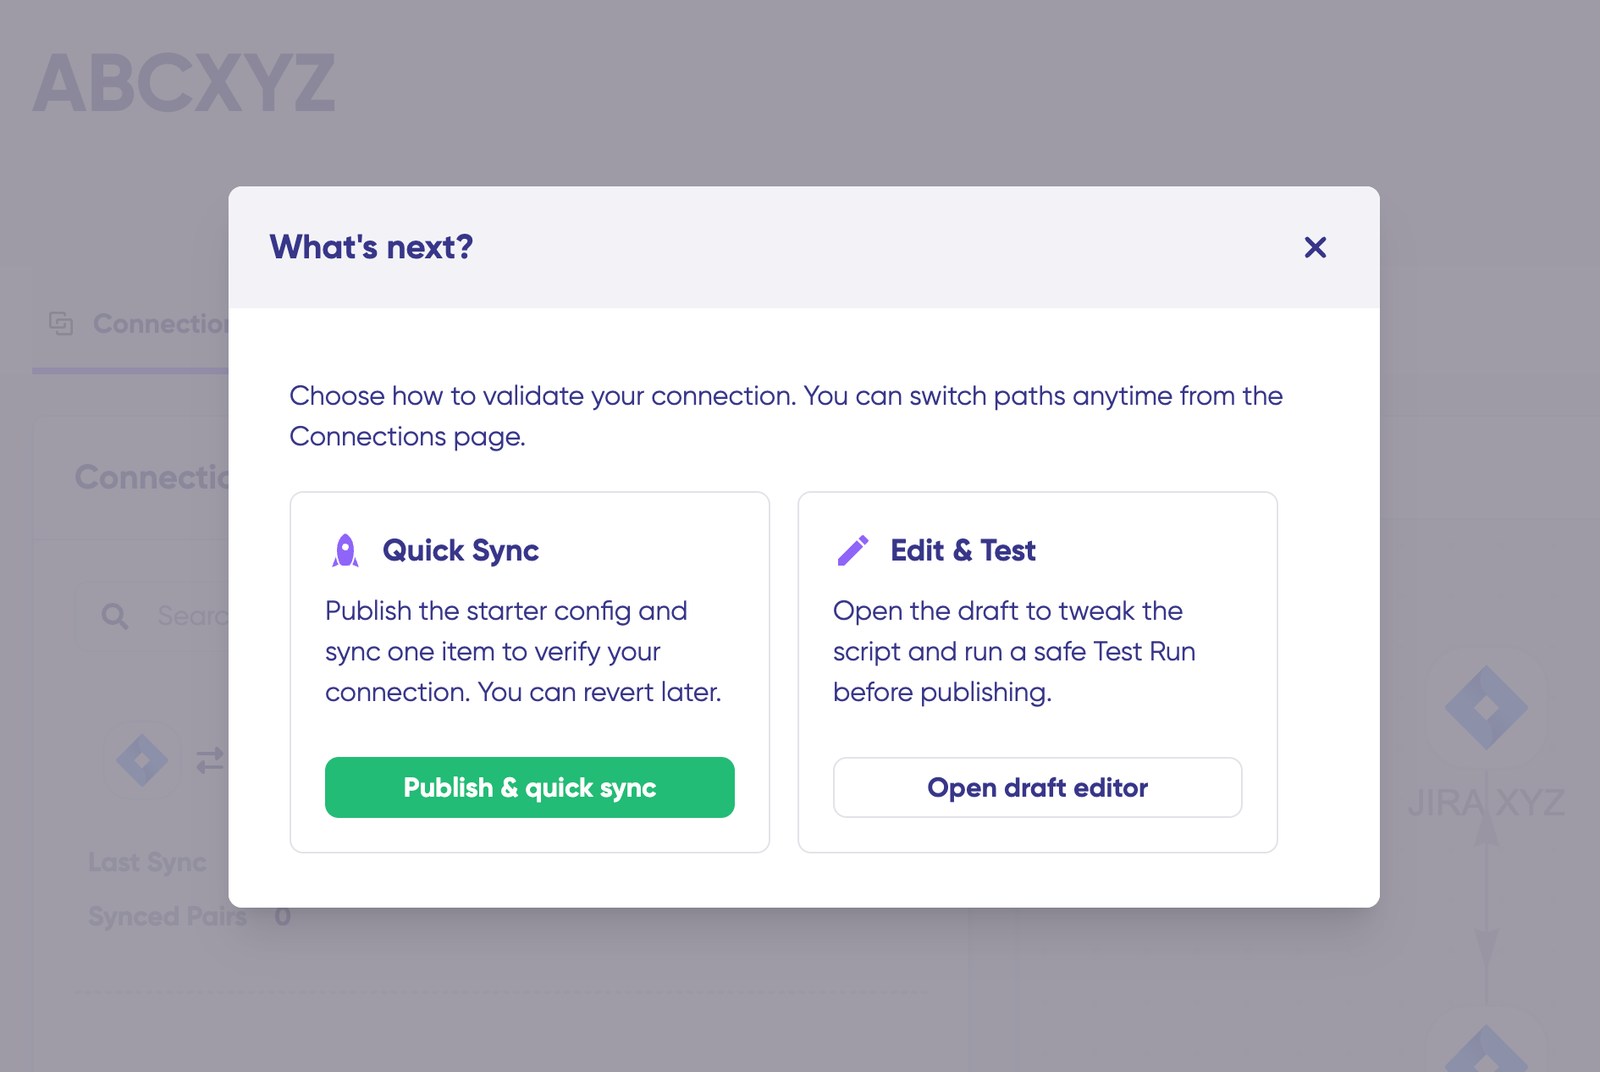
Then click “Build & continue“. You’ll now see two configuration options: “Quick sync” and “Edit & Test“. Let’s explore both approaches.
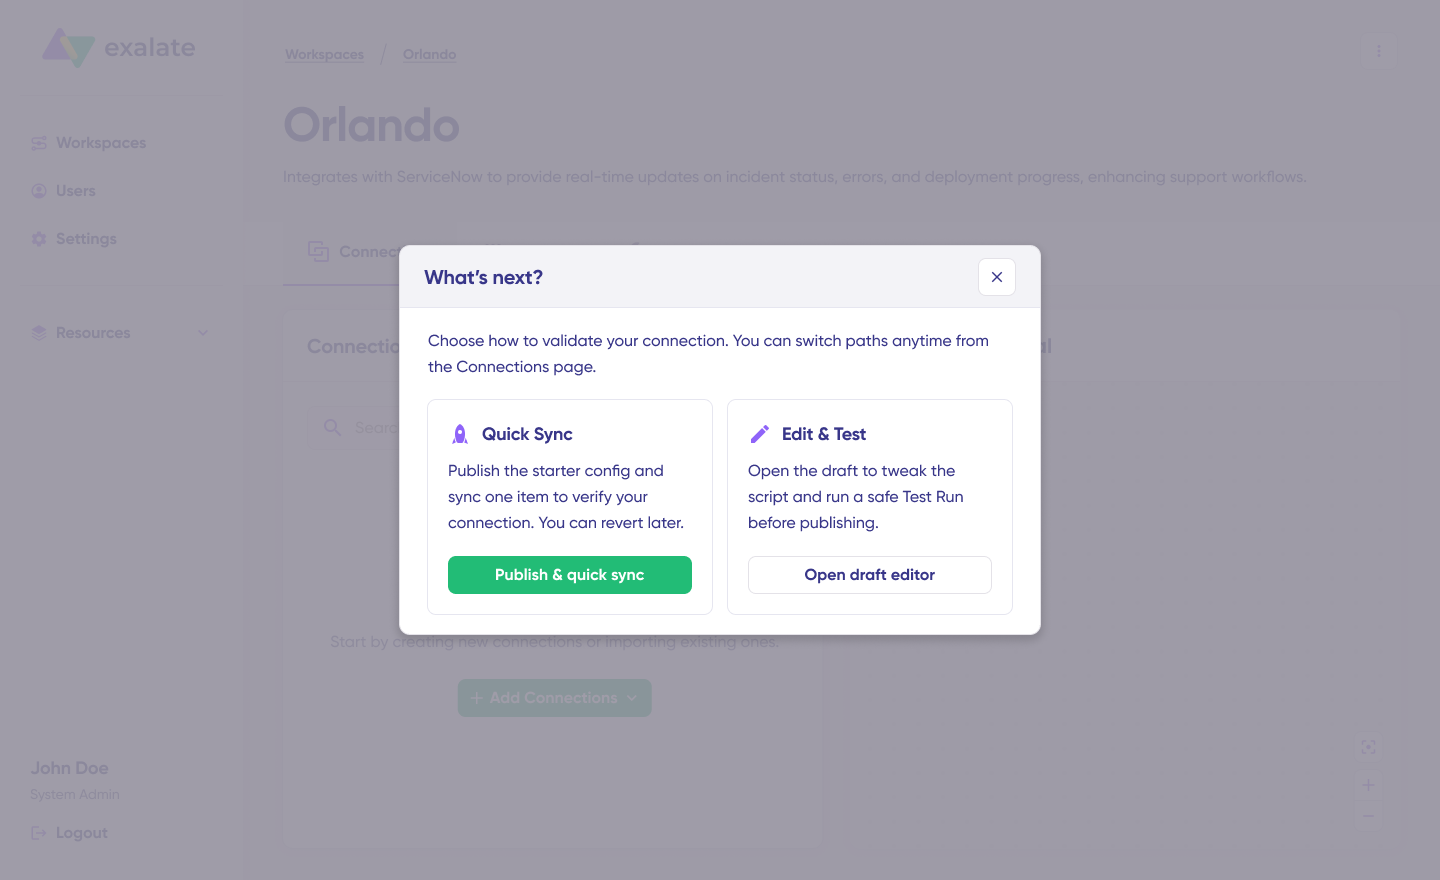
- Quick Sync: Test Your Connection Immediately
This option allows you to synchronize one record between your Salesforce instances to verify that the connection works correctly. This is an optional but recommended step.
Under the “Item sync monitor,” enter the Salesforce record ID from either instance—such as an Account ID, Opportunity ID, or Case Number.
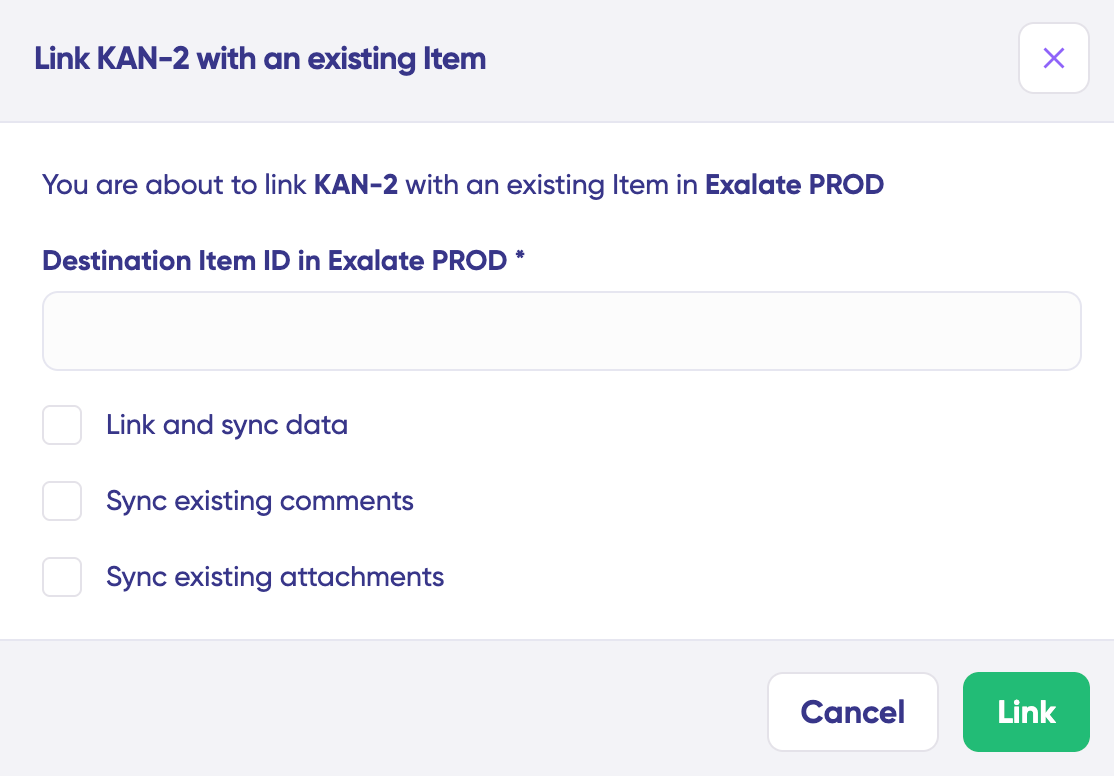
To synchronize the first record, click “Sync Now“. To link two existing records from both instances, select “Link with existing“. You’ll receive real-time status updates during synchronization.
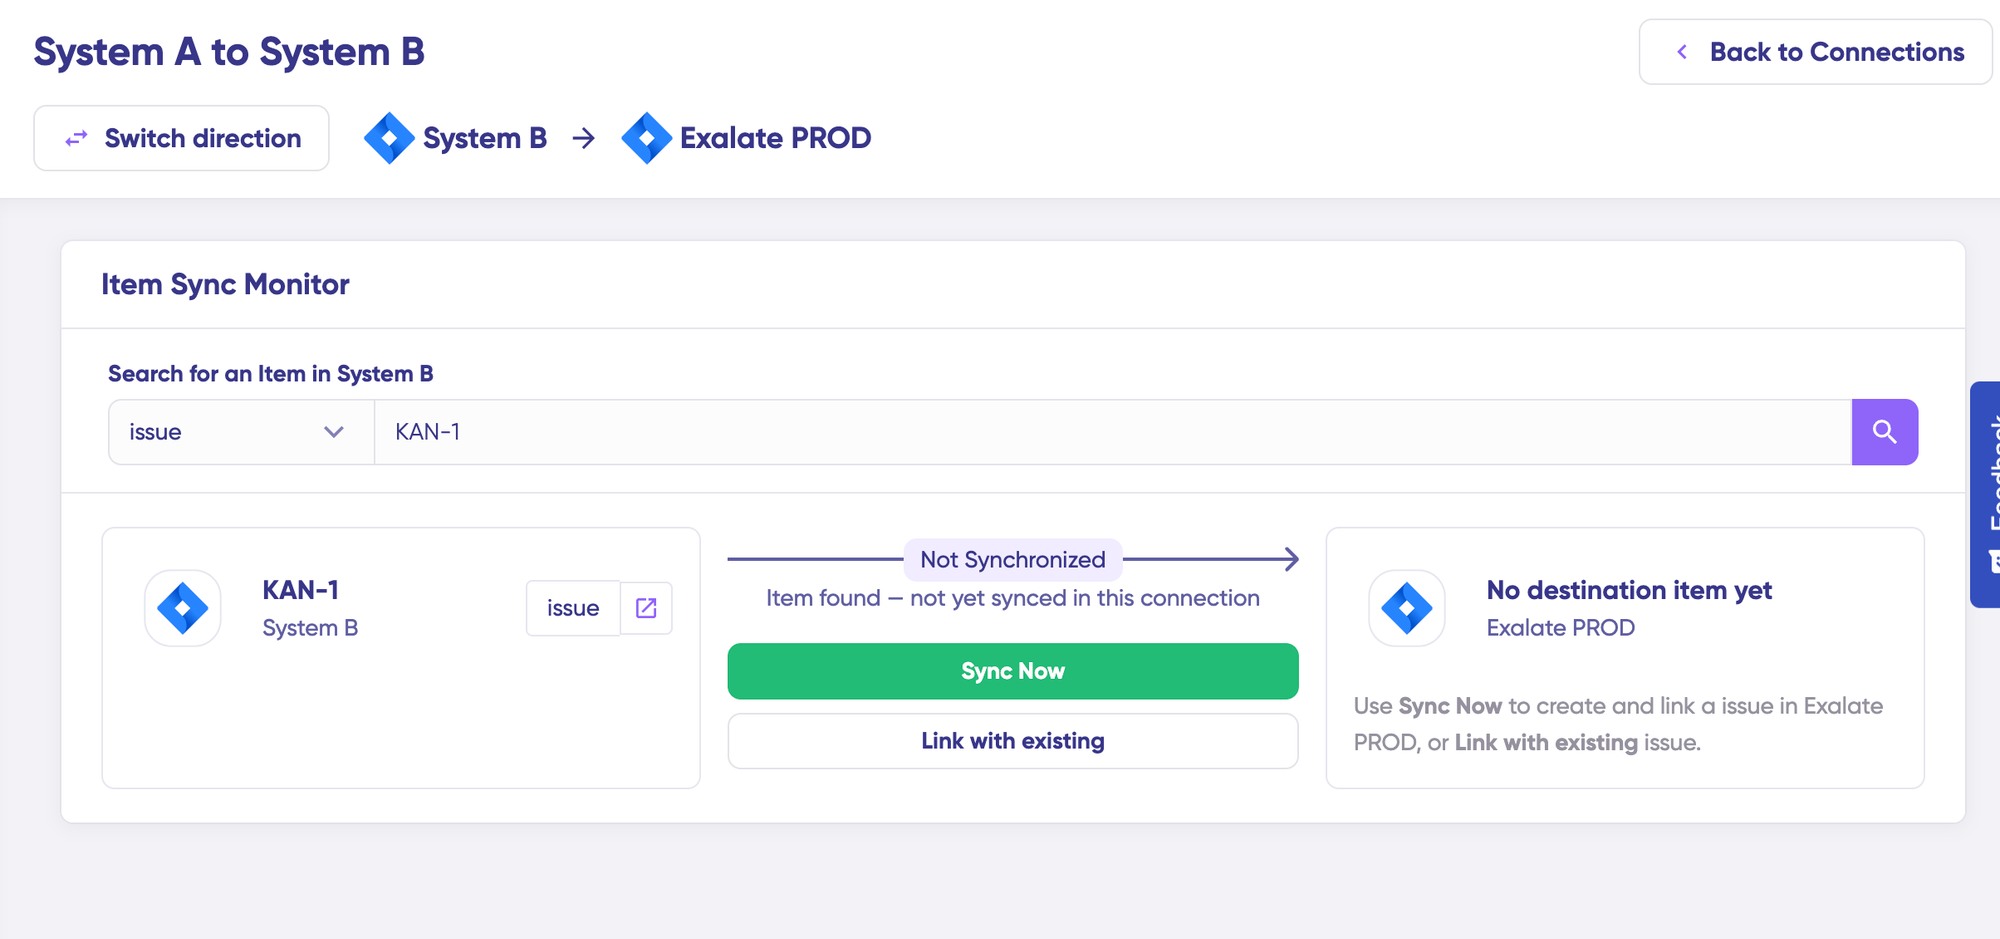
Once complete, view both synchronized records by opening them in separate windows. You can also compare how the synchronized records appear and preview how changes will be applied across both instances.
- Edit & Test: Configure Custom Sync Rules
To customize your synchronization behavior, click “Create a new version” or select “Open latest draft“. This prevents accidental modifications to your active configuration. All changes in draft mode are saved automatically.
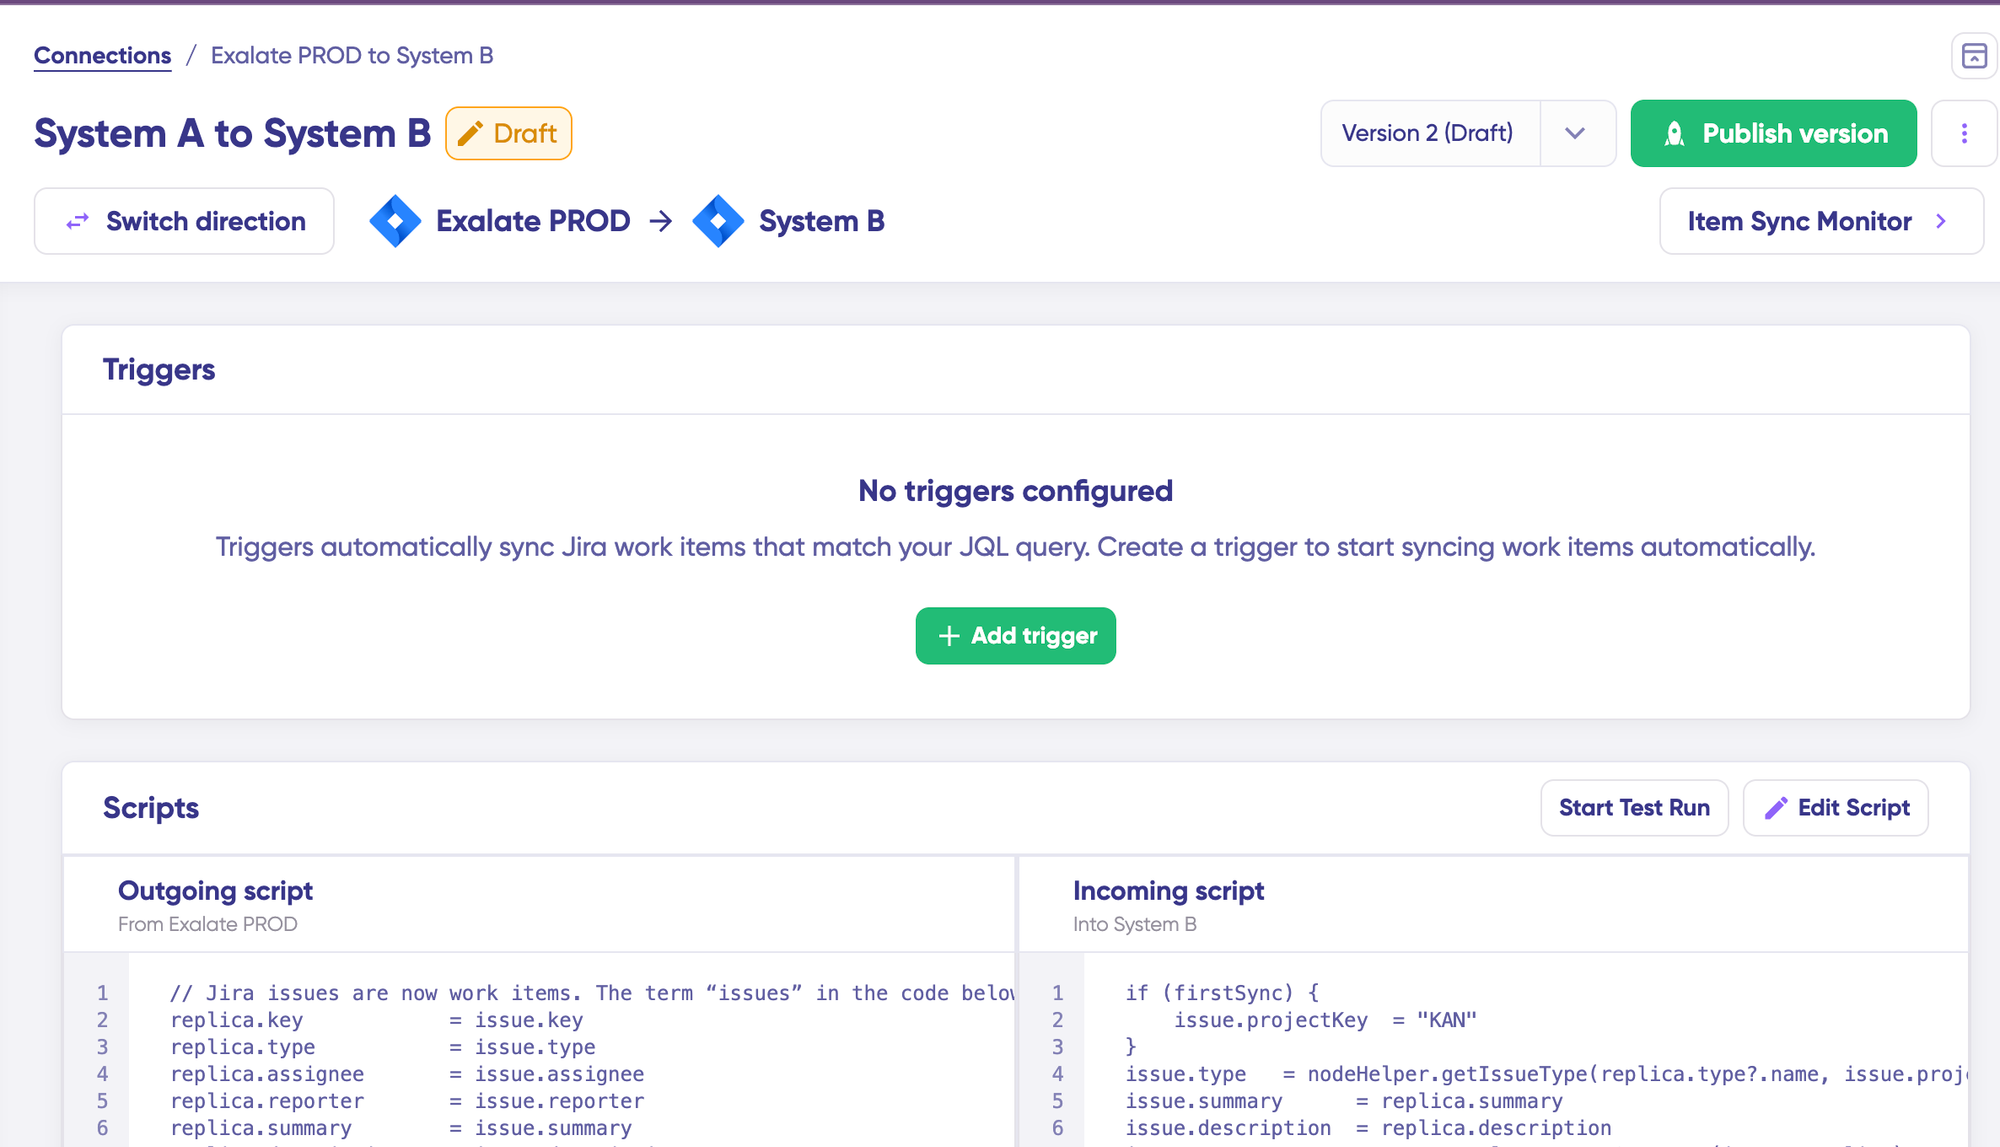
Click the “Edit Script” button to access the configuration editor and modify sync rules. Sync rules use Groovy-based scripting. These scripts enable custom data logic, field mapping, and conditional workflows, allowing you to handle complex business requirements and unique integration scenarios.
Change the synchronization direction by clicking the bidirectional arrows next to the connection name.
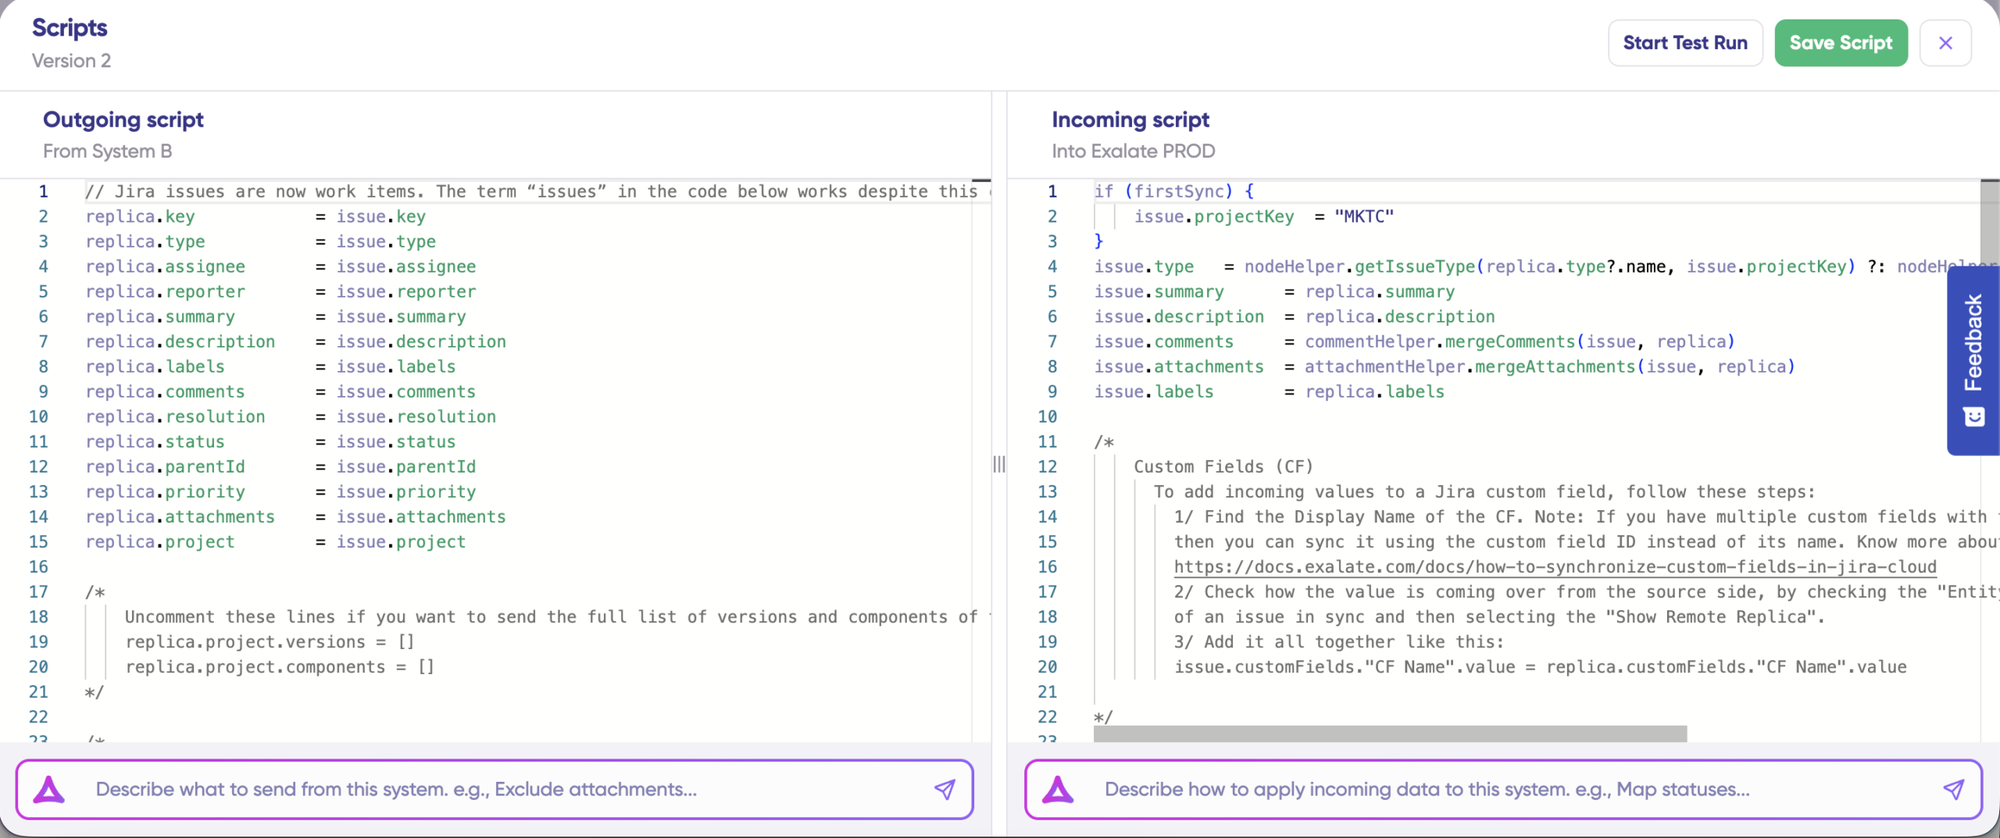
Scripts are organized into incoming and outgoing sections. If the sync direction flows from Salesforce A to Salesforce B, the outgoing script defines which values are sent from Org A to Org B, while the incoming script determines how those values are mapped in Org B. These scripts reverse when you change direction.
To synchronize new fields, add them to the sync script directly (if you’re comfortable with scripting). To prevent specific data from syncing, remove that script line from the outgoing script.
- Use Aida for AI-Assisted Configuration
If you want to save time and avoid scripting complexities (especially useful for business users), leverage Exalate’s AI-assisted configuration feature called Aida to generate your sync scripts.
Aida is available in both incoming and outgoing script sections, so select the appropriate side based on your needs. Outgoing and incoming scripts operate independently, as does Aida, so maintain separate context and direction for each prompt.
Aida assists you in two ways:
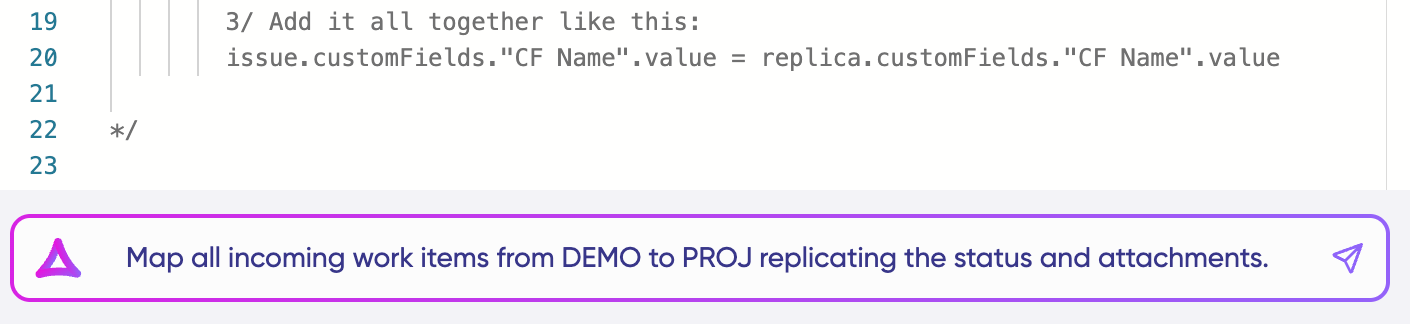
For Outgoing scripts: Describe what data should leave your Salesforce instance. For example, “Only sync Opportunities with Amount greater than $10,000.”
For Incoming scripts: Describe how incoming data should be applied to your Salesforce instance. For example, “Map Account Owner to the Contact Owner” or “Set a default Lead Status if the status doesn’t exist.“
Based on Exalate’s scripting API and your existing configuration, Aida generates functional Groovy scripts with proper field mappings.
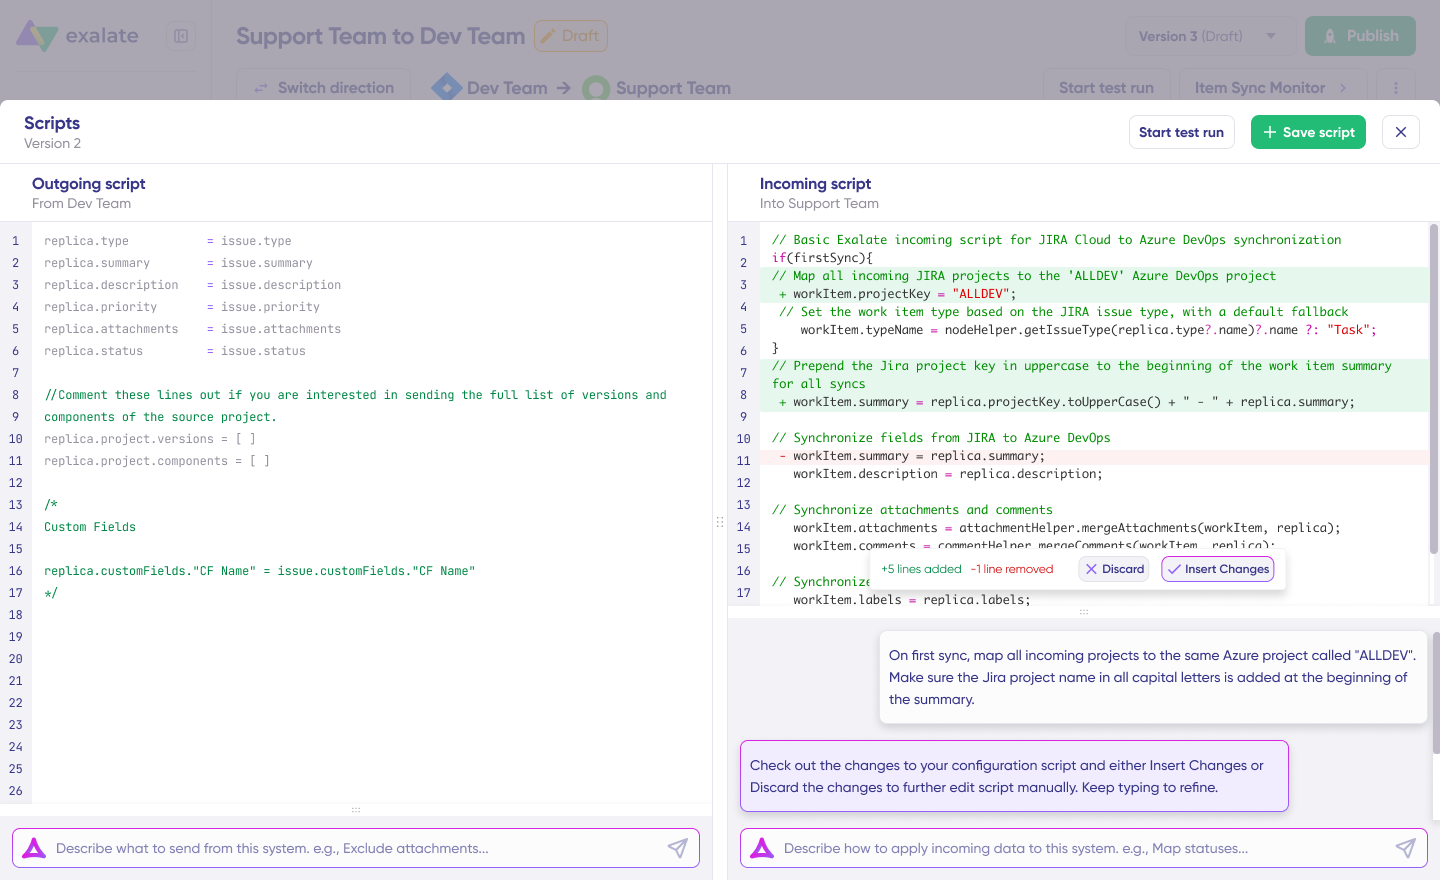
Once Aida completes your script, review the suggested changes. Green highlights indicate new lines to be added. Red highlights show lines to be removed. You can choose to “Insert” or “Discard” Aida’s suggestions.
Note: Aida is a powerful tool, but like any AI assistant, always review the generated code before applying it to production.
- TestRun: Validate Before Going Live
Once your sync scripts are ready, you can either “Save script” or validate them using the “Start Test Run” option.
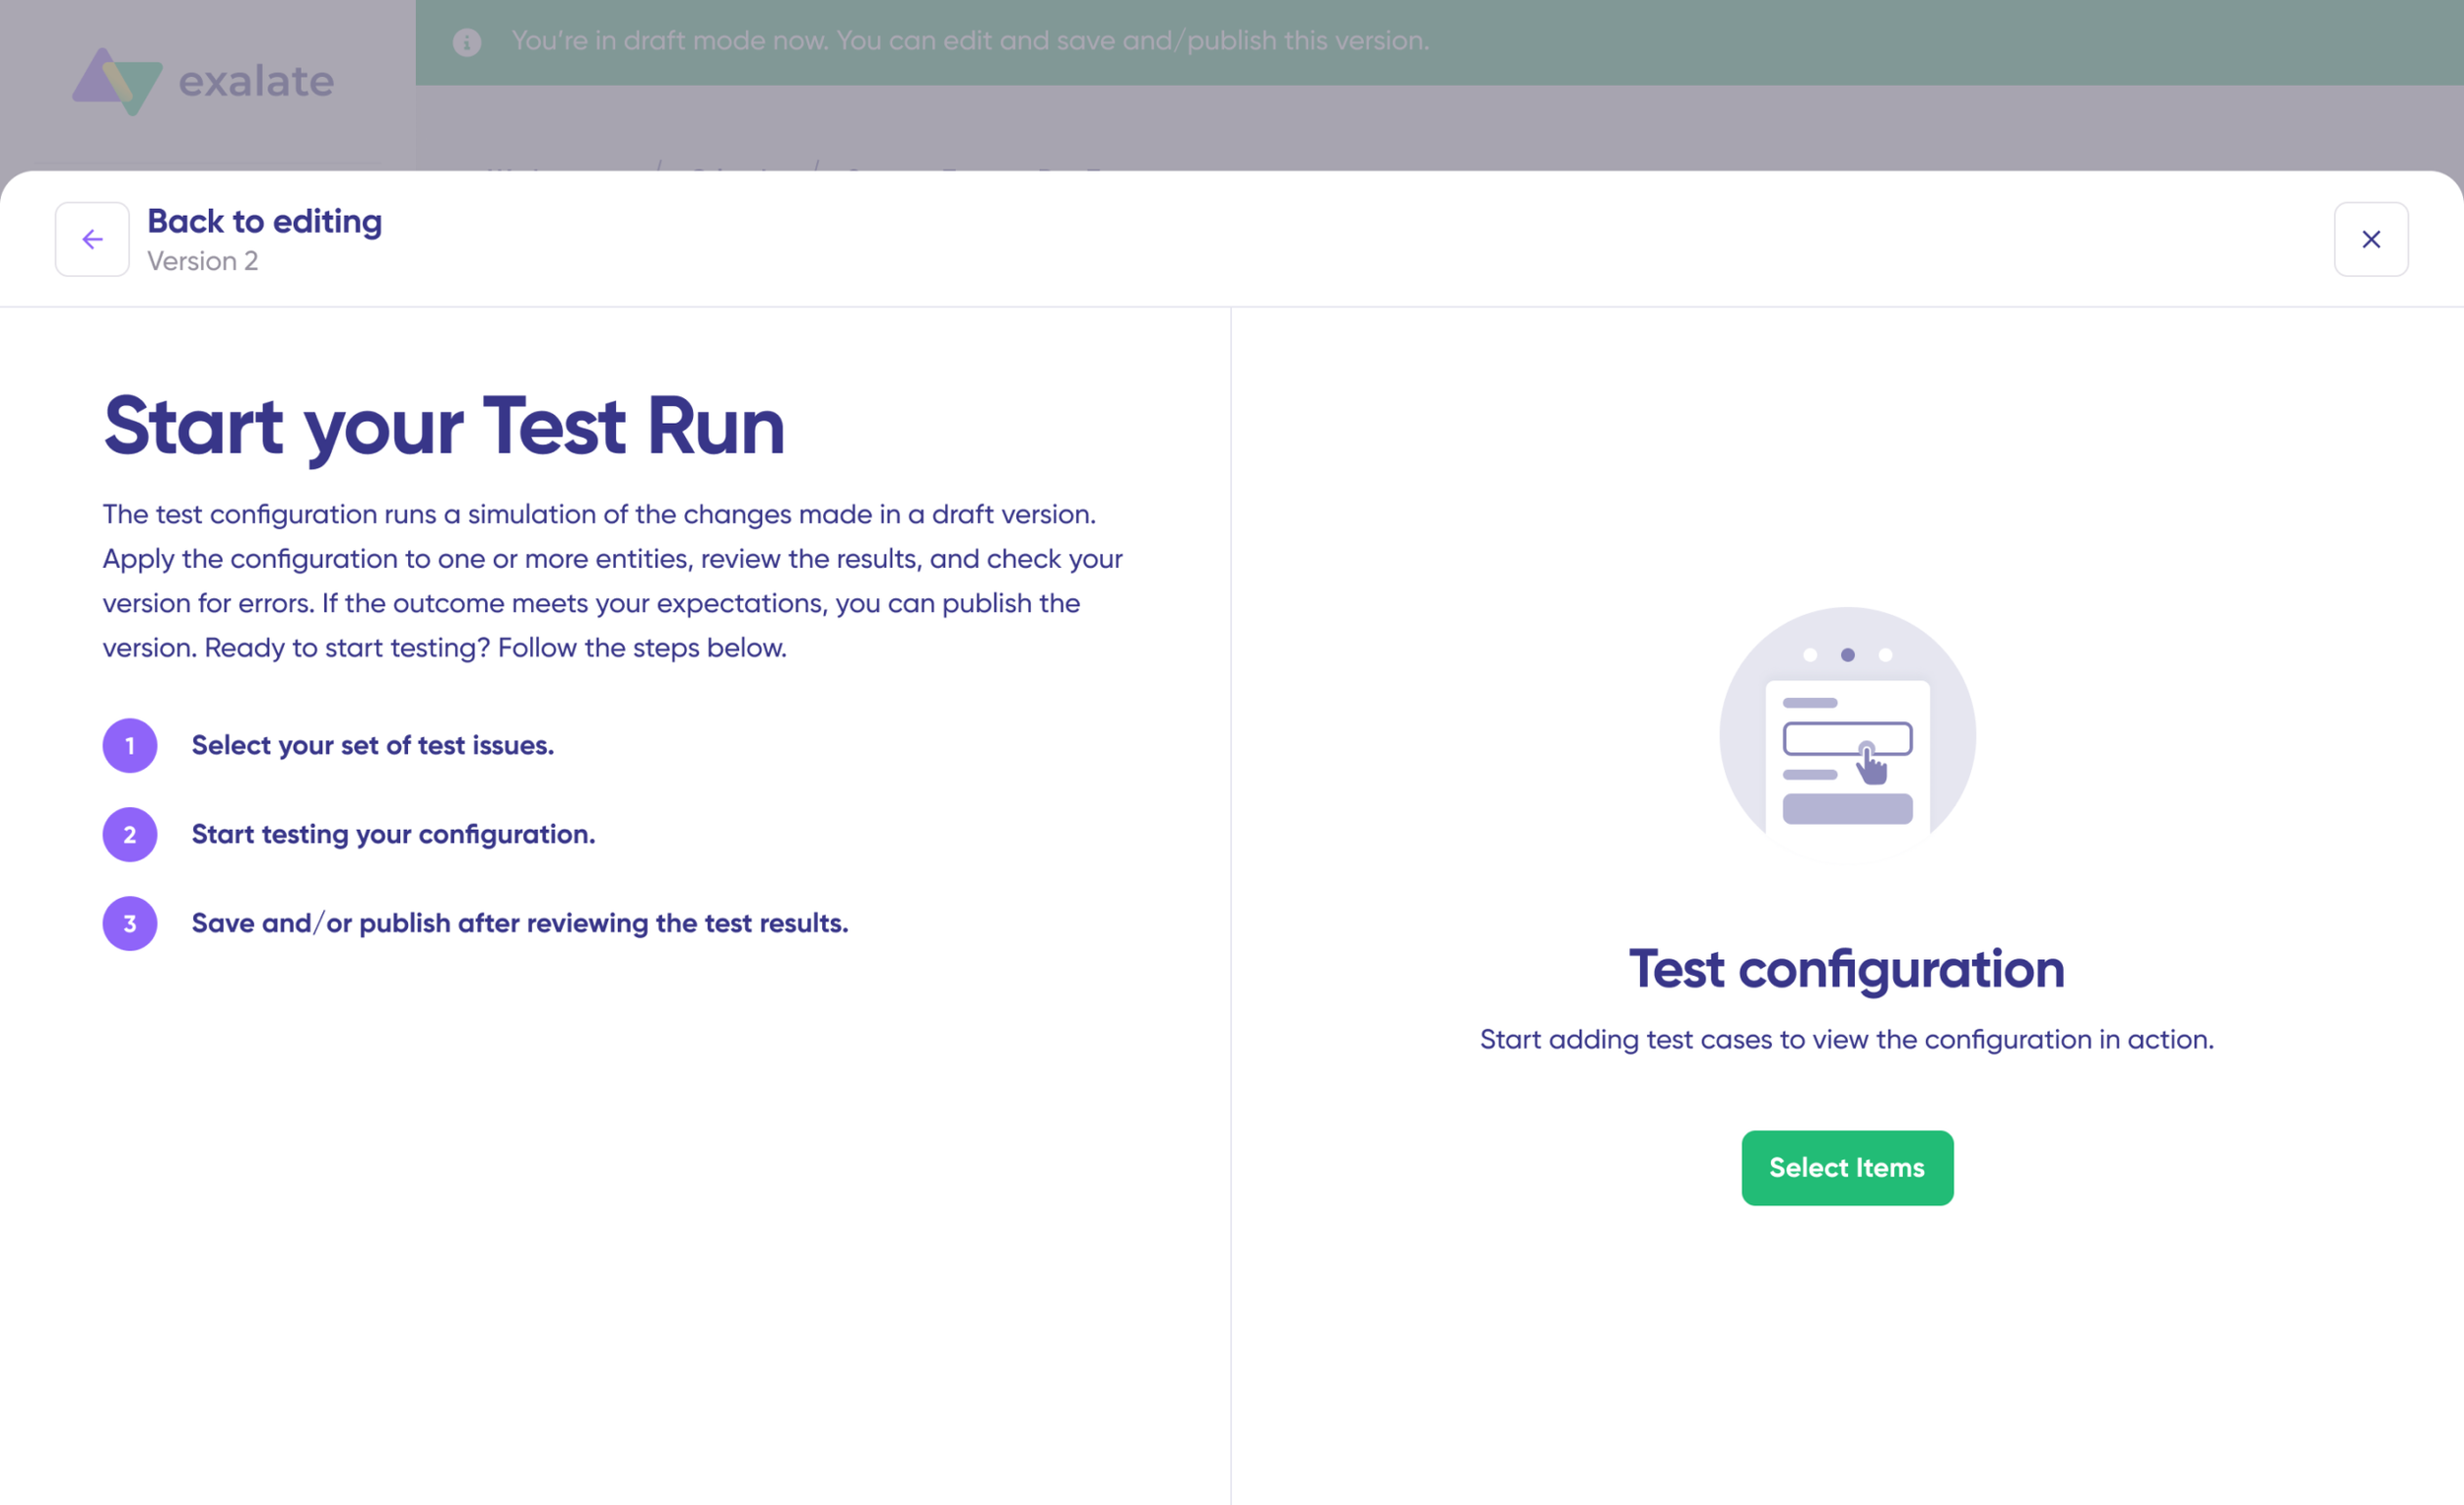
To test your configuration, “Select Items” you want to apply synchronization to. You can select multiple Salesforce records. After selection, click “Start Test Run”.
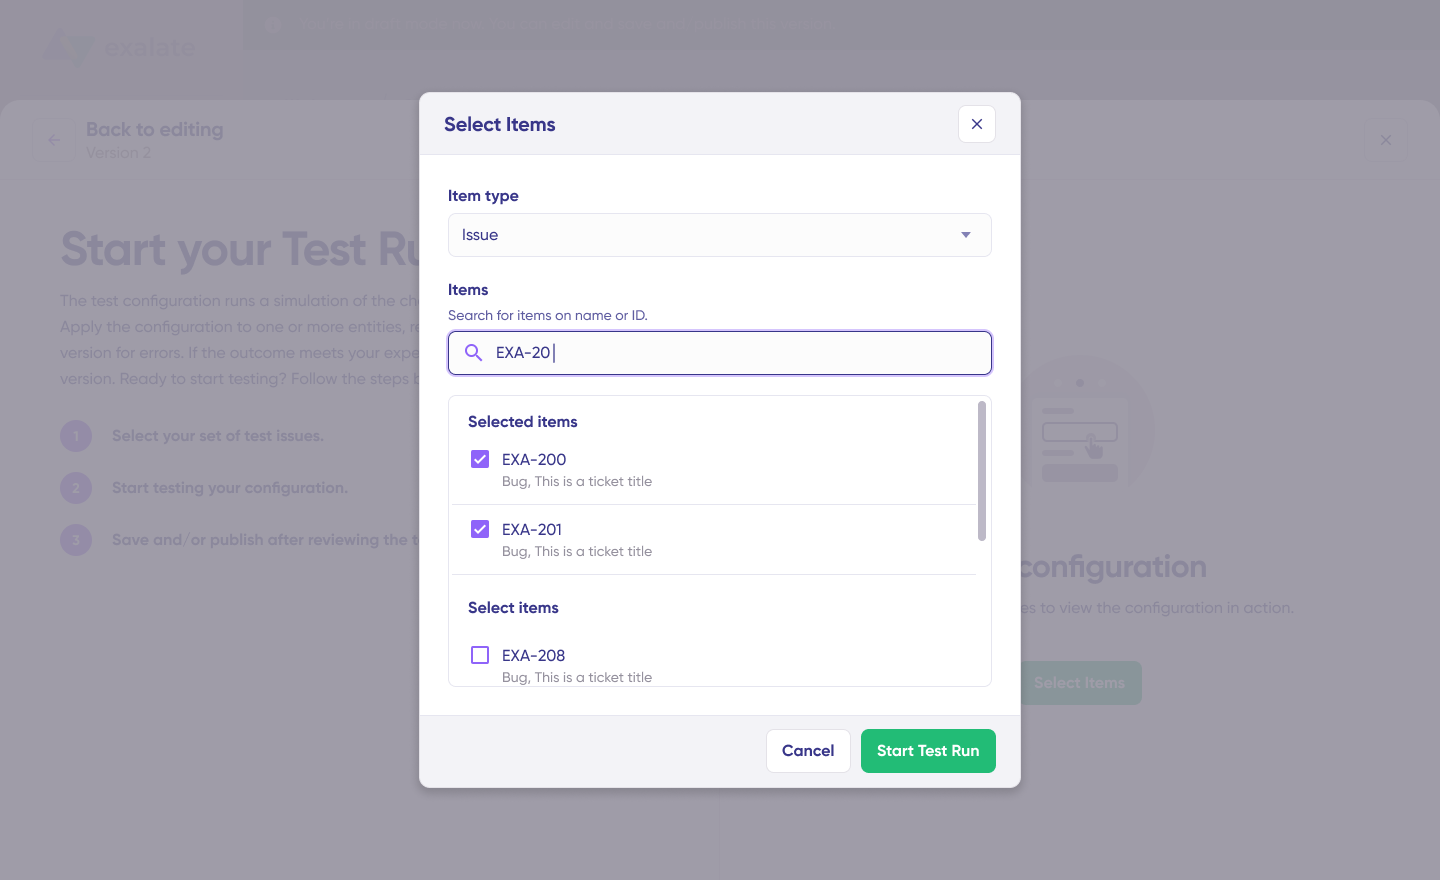
You’ll now see all incoming and outgoing replicas for each selected record. Review them in their respective tabs. Preview how the sync configuration will be applied to your records, examine the replica structure, and verify that field mappings appear correct.
If adjustments are needed, return to the editor, modify the scripts, and test again. Deploy only when you’re confident the configuration performs as expected. This validation step prevents errors from impacting production data.
- Publish Your Configuration
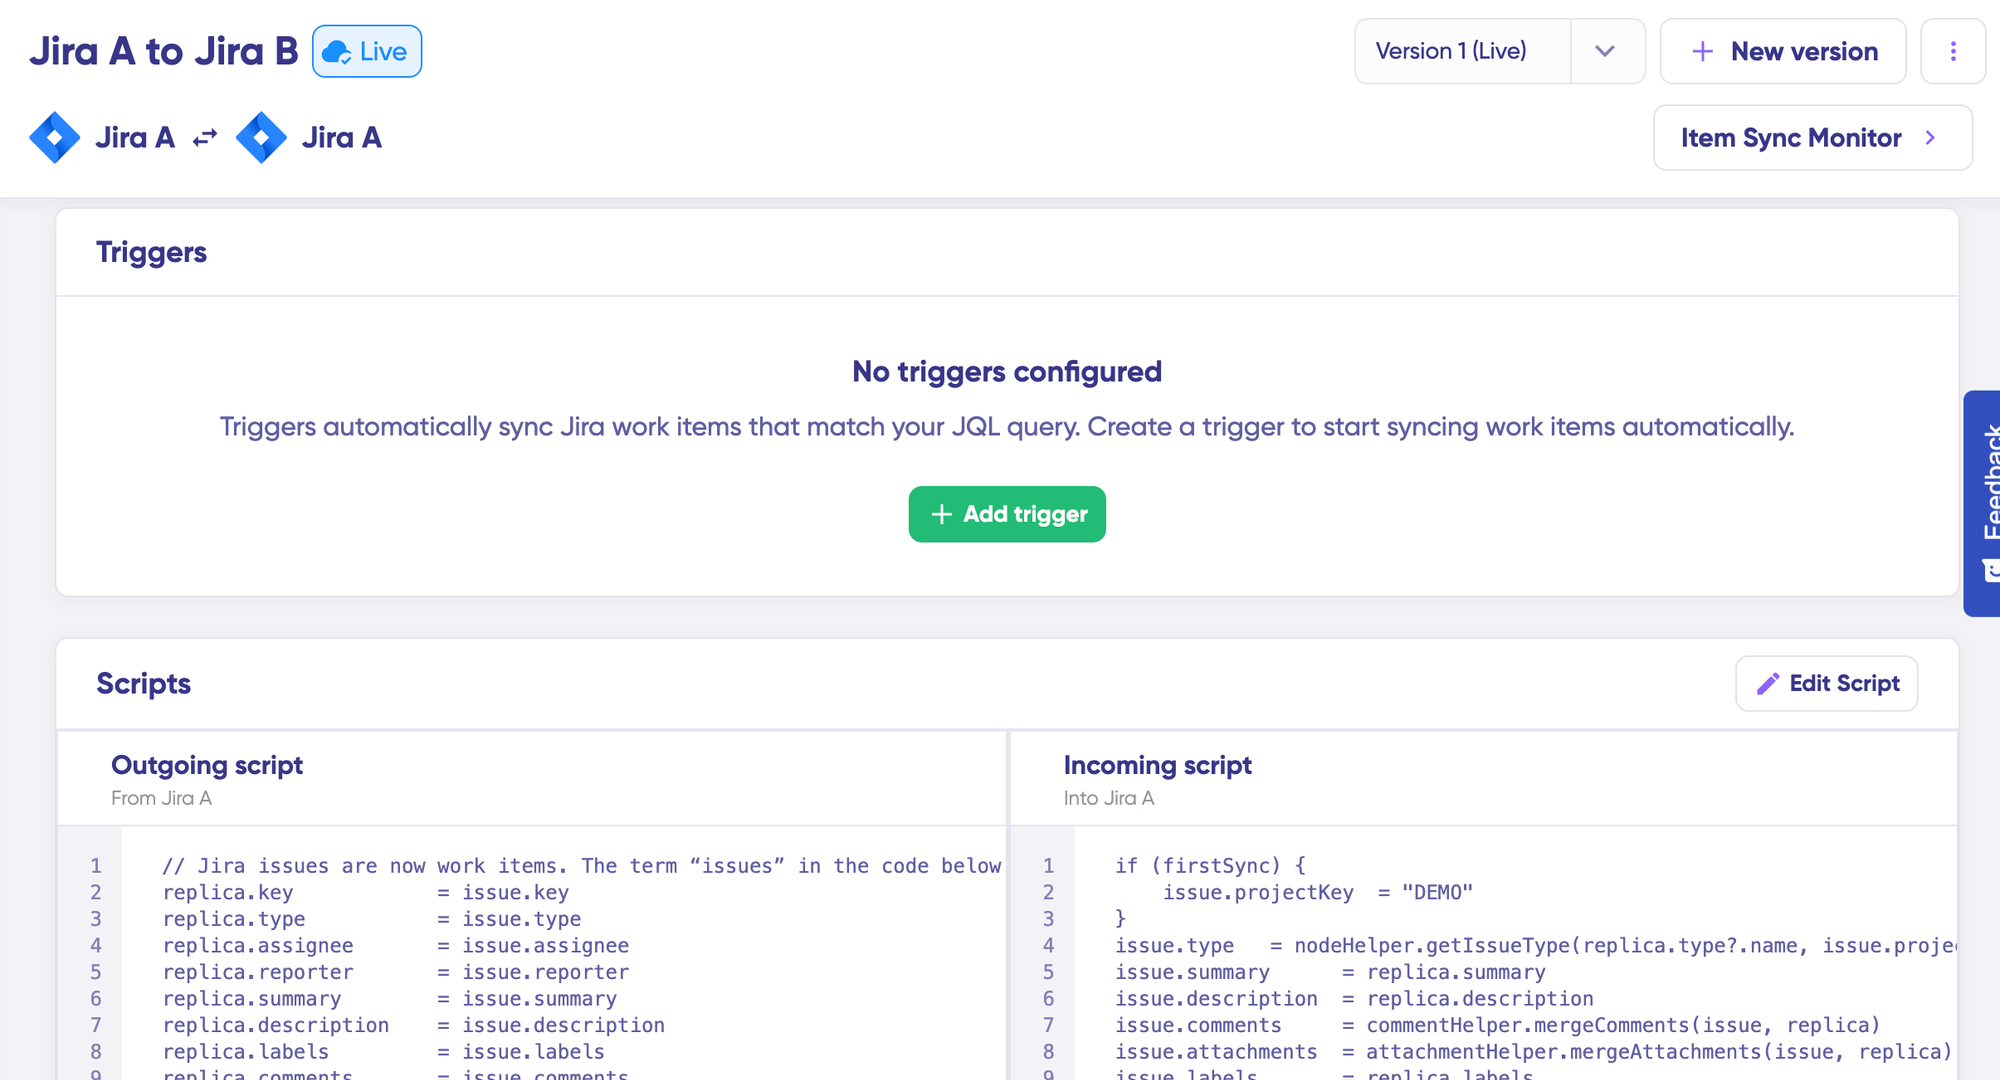
When everything meets your requirements, click “Publish Version” to apply your updated configuration to live synchronization. All versions for a connection are accessible in the “Version” dropdown.
- Configure Automatic Triggers
To enable automatic synchronization, configure “Triggers“—conditions or filters applied to specific records.
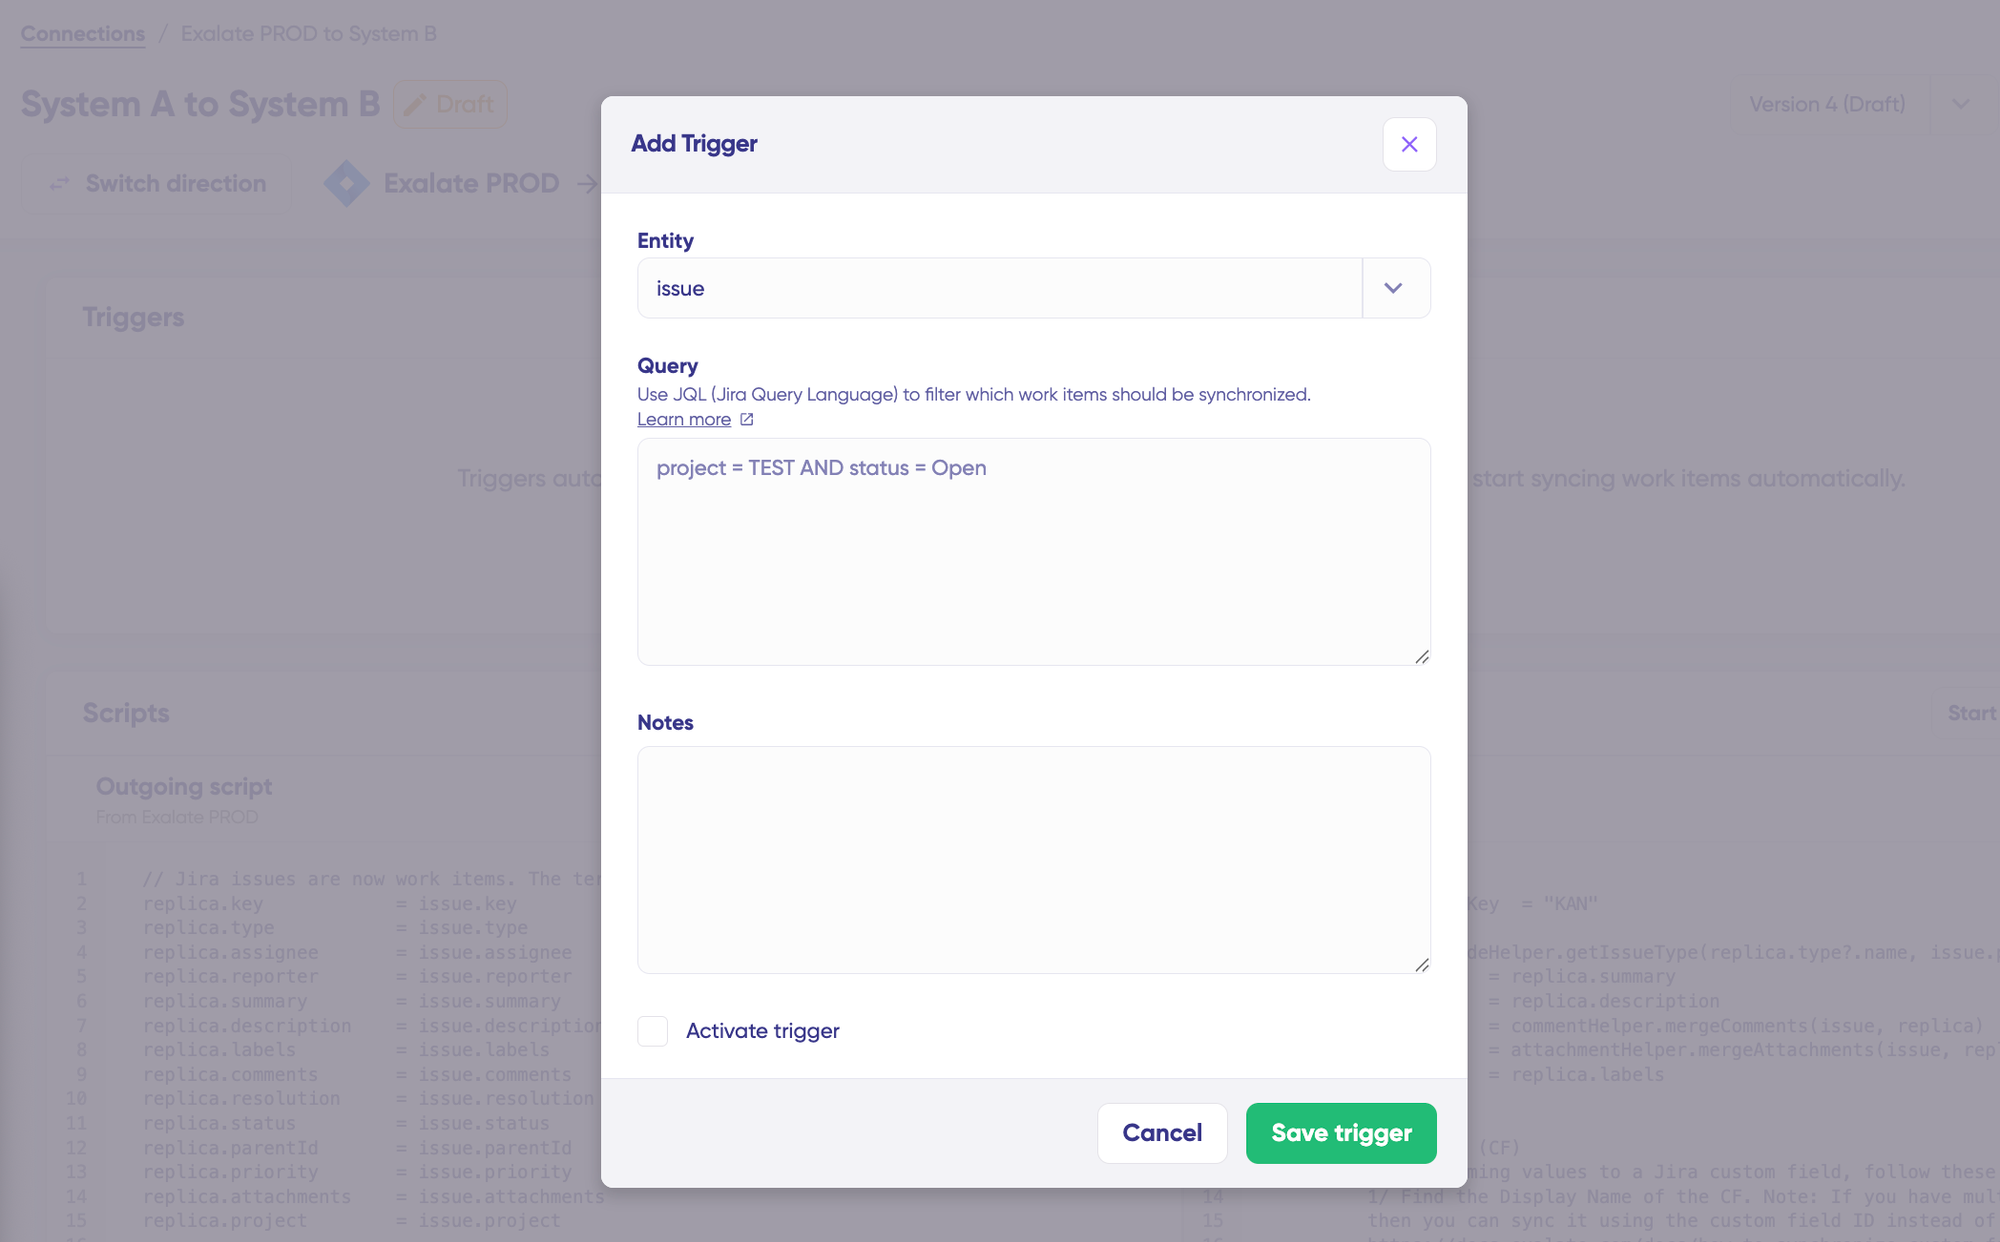
Click the “+Add trigger” button to create triggers. Exalate triggers are platform-specific. For Salesforce, you can use SOQL-style filters to specify conditions for Accounts, Opportunities, Cases, Leads, or custom objects.
StageName= 'Proposal'
This trigger will sync only Opportunities that have reached the proposal stage with your organization.
Save your changes by clicking on “Save Trigger“.
- Troubleshooting with Aida
Aida provides intelligent troubleshooting assistance to resolve errors faster. It offers clear, context-aware suggestions directly where errors appear.
When errors occur, navigate to the “Troubleshooting” tab. Hover over the error you want to diagnose and click the Aida icon that appears. An AI-generated suggestion will display in a modal window, including a concise explanation of the error and a proposed resolution.
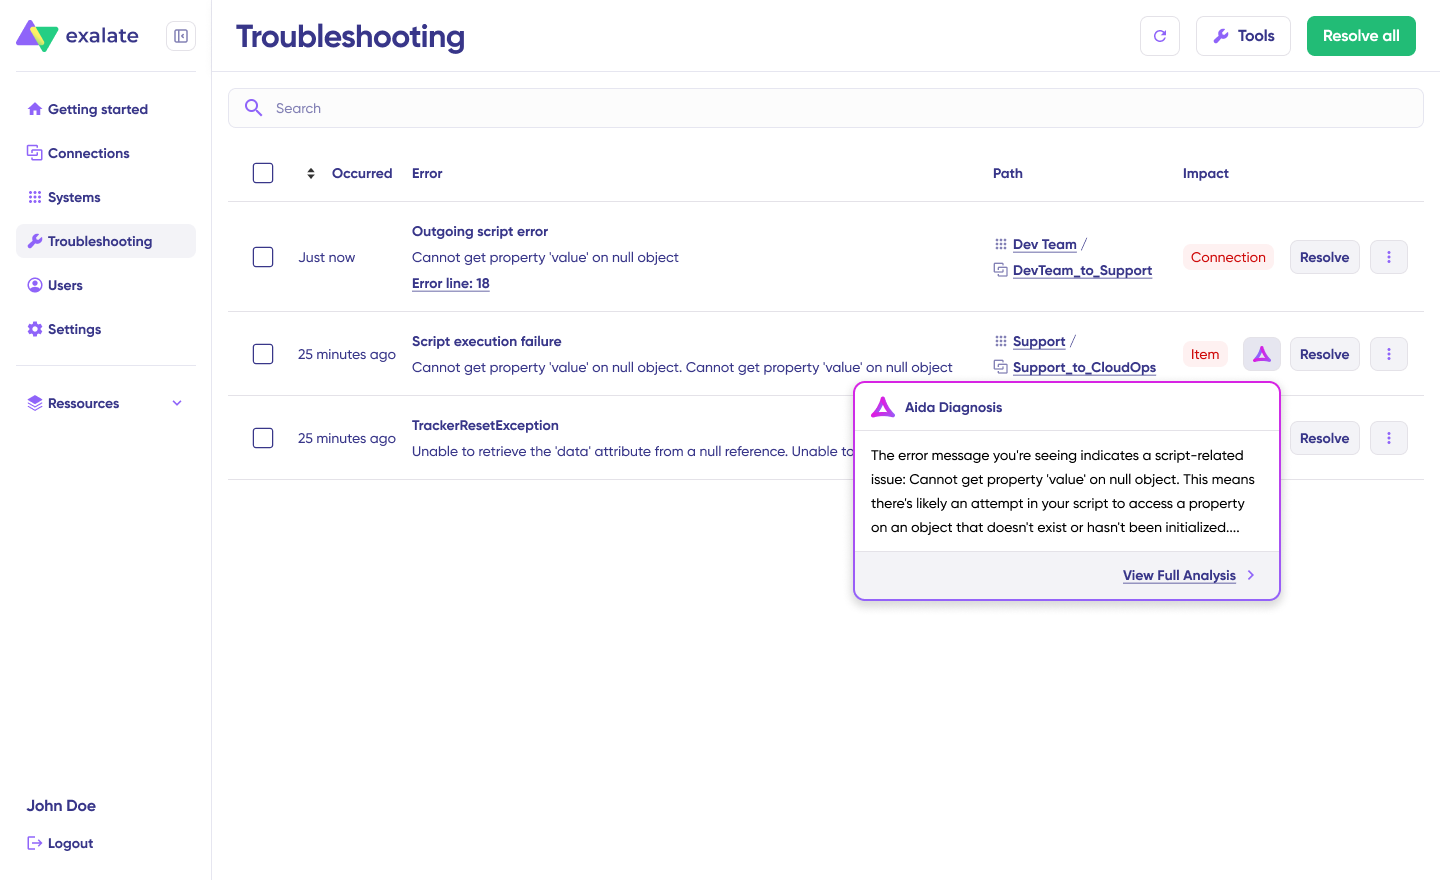
Select “View Full Analysis” for additional context. You can also access “Error details” to copy the stack trace and view “Replicas” in JSON format if needed.
Choose to “Resolve” and retry failed synchronizations.
What are the Common Salesforce to Salesforce Integration Mistakes?
Some mistakes to avoid during Salesforce integration across companies and teams include the following:
- Lack of comprehensive documentation: Organizations often prefer to wing it when it comes to configuring and setting up integrations between Salesforce orgs. Document every step of the integration to make it easier to revamp or reproduce configurations in the future.
- Not training your staff to use the integration solution: If your team doesn’t know how to set up simple connections or debug minor errors, then your administrators will spend disproportionate time and resources addressing individual issues that could be self-service.
- Ignoring data rate and API limits: Most platforms come with rate limits based on subscription or the number of users, which affects the volume of data you can access within a given period. These are critical considerations when choosing an integration solution and planning synchronization frequency.
- Not testing the endpoints before you start exchanging data: Before deploying an integration across the board, test it out in a sandbox environment to make sure the fields and entities are properly mapped.
- Not communicating with partners, vendors, MSPs: Organizations forget to keep integration partners involved in key decisions—say, they want to stop making comments public or change field mappings. This often leads to confusion and conflicts that could be avoided with basic communication protocols.
- Ignoring performance analytics instead of drawing insights from them: Companies connect their Salesforce org with their partners and forget about it. The reality is that if you don’t keep track of how the solution is performing, you’ll end up with more headaches than solutions.
- Over-synchronizing data: Not every field change needs immediate synchronization across instances. Excessive sync frequency can hit API limits and create unnecessary load. Define clear criteria for what triggers synchronization based on business impact.

Calculate time and money savings from automated bidirectional sync.
Conclusion
Data integration in Salesforce is a tricky subject that can lead to disaster. But if handled carefully and with proper planning, Salesforce data integration tools can make your life significantly easier.
We explored how this is true for Salesforce to Salesforce integration, where you can expand your business to include newer partners and enable your business teams to work towards common customer goals.
We covered the native Salesforce integration API and its limitations for complex scenarios. Then, we examined how to implement integration using a cross-company Salesforce integration partner called Exalate.
We detailed practical use cases from sales and marketing alignment to merger integration, showing how organizations apply these integrations to solve real business challenges. We also covered essential features to evaluate when selecting an integration solution and common mistakes to avoid during implementation.
Looking for Salesforce integration consulting? Book a demo with our Exalate engineers right away.
Frequently Asked Questions
Why integrate multiple Salesforce orgs?
By integrating multiple Salesforce orgs, your business teams can experience seamless and error-free data exchange across different departments. This eliminates manual data entry, reduces errors, and ensures all teams work with current information regardless of which instance they use daily.
How do I integrate Salesforce with Salesforce?
You can integrate multiple Salesforce instances using the “Salesforce to Salesforce” default functionality for simple use cases. For custom-made one-way or two-way automatic syncs with advanced business logic, use third-party integration solutions like Exalate that provide AI-assisted configuration and enterprise-grade security.
Can I set up a bi-directional integration between Salesforce and other tools?
Yes, you can set up uni or bi-directional sync between Salesforce and other applications, including ServiceNow, Jira, Azure DevOps, Freshservice, Freshdesk, and Asana. You can sync any Salesforce records (even custom ones) and their related records, and set up automatic sync triggers to start the information exchange.
What is an example of Salesforce to Salesforce integration?
If you have multiple sales teams working remotely, you can integrate their separate Salesforce instances to share customer data automatically. This provides useful insights about customer behavior across teams and helps you understand how different teams interact with customers, improving coordination and preventing duplicate outreach.
What security certifications does Exalate have for Salesforce integrations?
Exalate maintains ISO 27001 certification and implements enterprise-grade security, including role-based access control and encryption of data both in transit and at rest. You maintain full scripting and operational control over your synchronization processes. Full compliance documentation is available at the Trust Center.
Can Exalate sync custom Salesforce objects between instances?
Yes, Exalate syncs both standard and custom Salesforce objects between instances. You maintain full scripting control to define exactly which fields and related records synchronize, ensuring your unique data model is fully supported regardless of customizations.
What’s the difference between Salesforce’s native integration and Exalate?
Salesforce’s native integration functionality works for simple scenarios but has limitations, such as a maximum of 100 tasks per related record. Exalate provides unlimited customization, AI-assisted configuration, advanced error handling, and enterprise security features suitable for complex business requirements and high-volume data synchronization.
How does Aida help with Salesforce integration setup?
Aida, Exalate’s AI-assisted configuration tool, converts natural language prompts into configuration scripts, dramatically reducing setup time. The documentation assistant helps teams discover technical information quickly without extensive training, making integration accessible to teams without deep scripting expertise.
Recommended Reads:


