
In today’s software development workflows, keeping Jira and GitHub connected is essential. Your development teams work in GitHub, managing code, pull requests, and version control. Meanwhile, your project management, QA, and business teams operate in Jira, tracking work items and project progress.
Without integration, critical information gets siloed, pull request updates don’t reach Jira, work item status changes miss GitHub, and team members constantly switch between platforms to stay informed.
A Jira and GitHub integration bridges this gap, synchronizing work items, pull requests, comments, and statuses across both platforms in real time. Teams get unified visibility into development progress without abandoning their preferred tools.
Key Takeaways
- Real-time visibility reduces context switching: Teams stay informed about work progress without constantly jumping between Jira and GitHub.
- Flexible field mapping ensures autonomy: Each team controls what data they receive and how it appears in their workflow.
- Automated synchronization eliminates manual updates: Triggers ensure relevant work automatically syncs when specific conditions are met.
- Security remains intact across platforms: Role-based access control and encrypted connections keep sensitive data protected at both ends.
- Custom integrations support your specific tech stack: Beyond GitHub and Jira, Exalate supports Freshservice, Freshdesk, Asana, Azure DevOps, and other platforms in your environment.
- Error recovery happens automatically: Sync failures don’t break your integration—built-in retry mechanisms handle temporary outages gracefully.

Why Integrate Jira and GitHub?
Cross-functional visibility
GitHub and Jira serve different teams with different needs. Developers need GitHub’s pull request management and code review capabilities. Non-technical stakeholders need Jira’s roadmap views, release planning, and portfolio management. When you integrate them, each team sees the data that matters to them without drowning in irrelevant details.
For example, your QA team in Jira can automatically receive work items from GitHub that need testing, while your developers see the testing status and bug reports without leaving GitHub.
Reduced manual context switching
Without integration, team members spend time copying work details between systems. A developer creates a pull request in GitHub and manually updates the linked Jira work item. A tester finds a bug and recreates it in both systems.
These repetitive manual steps waste time and introduce errors: a work item status doesn’t match its actual progress because someone forgot to update it.
Integration eliminates this busywork. When a work item’s status changes in Jira, it updates automatically in GitHub pull requests. When a pull request is merged in GitHub, the linked work item status updates without anyone having to touch it.
Better traceability from requirement to production
For compliance, auditing, and post-mortems, you need a clear trail: which work item led to which code changes, which pull requests were merged to fix it, and when it went to production.
An integrated Jira-GitHub system provides this automatically. Every pull request links to its originating work item, every comment surfaces in both systems, and every status change is visible across platforms.
Understanding Your Integration Options
What an integration actually does
A Jira GitHub integration syncs specific data based on rules you define. When work items are created in Jira, the integration can create corresponding GitHub issues. When pull requests are merged in GitHub, it can update the Jira work item status. The key is that you control:
- What fields sync (summary, description, assignee, labels, status, custom fields)
- Which work items are included (triggered by specific conditions you set)
- How data transforms as it moves between platforms (rename statuses, reassign ownership, add context)
This flexibility means your developers in GitHub don’t see unnecessary Jira fields, and your project managers in Jira don’t get flooded with GitHub-specific technical data.
Synchronization scope: bidirectional vs. one-way
Most teams benefit from bidirectional sync: data flows in both directions. A work item created in Jira syncs to GitHub, and when developers update that GitHub issue, changes come back to Jira. This keeps both systems current without requiring teams to maintain separate systems of record.
Some scenarios call for one-way sync: your support team in Jira automatically creates GitHub issues for engineering, but engineering updates don’t flow back to support. You define this behavior based on your workflow.
How to Choose an Integration Solution
When evaluating tools for Jira-GitHub integration, consider these core features:
- Field mapping flexibility: Can you choose which fields sync and transform them as needed? If your GitHub labels don’t match Jira priority levels, can the integration translate “critical” on GitHub to “Highest” in Jira?
- Trigger-based automation: Can you set conditions that control when sync happens? “Only sync work items with the label ‘backend'” or “sync only when status changes to ‘In Progress'” prevents unnecessary data duplication and keeps your systems focused.
- Error handling and recovery: What happens when GitHub has an outage? Does the integration queue change and replay them when the connection recovers, or do you lose data? A robust integration maintains an ordered queue of changes and replays them in sequence when systems reconnect.
- Role-based access control: Can you restrict who can sync certain work items? A developer shouldn’t sync confidential roadmap items to GitHub, but they should sync their day-to-day work.
- Native support for your tech stack: Beyond Jira and GitHub, do you use Asana, Freshdesk, Azure DevOps, or other platforms? An integration platform that supports multiple connectors lets you build a unified view across your entire tech stack, not just Jira and GitHub.
- Security and compliance: Is the connection encrypted? Does it support OAuth for secure authentication? Is the vendor ISO-compliant? For regulated industries, these certifications matter.
How to Get Started With Jira to GitHub Integration Using Exalate
If you’re on Exalate Classic, then you can import your existing nodes and connections using the “Import connection” feature.
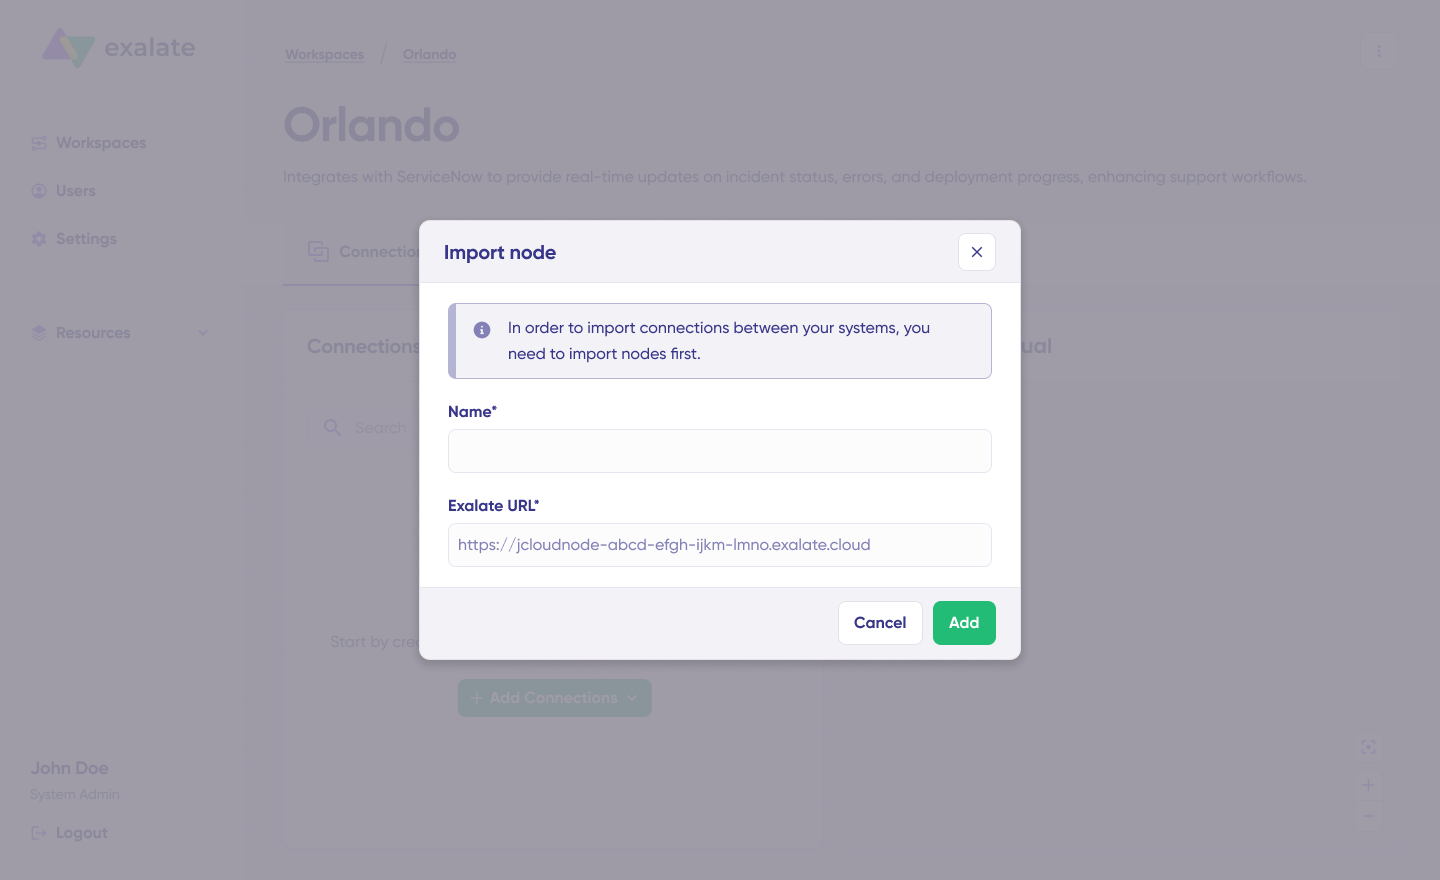
This will help you retain existing configurations and sync rules as you move to New Exalate.
Local connections in Jira also let you sync work items across different Jira projects (or spaces) that share the same instance.
Example: imagine your URL https://example.net/ hosting 2 Jira projects (or spaces). Project A has work item PROJA-11, project B has work item PROJB-12. Local connections in Exalate let you sync both.
To get started with Exalate for GitHub or discuss your use case and requirements, please contact sales.
Configuring synchronization rules
Once connected, you define what data flows between systems. Exalate uses a sync rules configuration where each line handles a specific field mapping. For incoming data from GitHub to Jira, you might have:
issue.summary = replica.summary
issue.description = replica.description
issue.assignee = replica.assignee
For outgoing data from Jira to GitHub, you might transform data:
issue.summary = replica.summary
issue.labels = ["jira-sync"]Code language: JavaScript (javascript)
You can also add conditional logic. If you want to sync only high-priority work items to GitHub, you could write:
if(issue.priority == "Highest") {
  replica.labels = "high-priority"
}Code language: JavaScript (javascript)
If you’re not comfortable writing code, Exalate’s AI-assisted configuration through Aida can generate these rules for you. You describe what you want (“Sync all open work items from Jira to GitHub with high priority marked as critical”), and Aida generates the configuration. You review it, adjust if needed, and publish.
Setting up synchronization triggers
Triggers determine when sync happens. Instead of syncing all work items constantly, you create specific conditions:
- “Sync work items with the label ‘engineering’ to GitHub”
- “Sync work items that change status to ‘In Progress’ within the next 5 minutes”
- “Sync pull requests from the ‘main’ repository when they’re marked as ‘ready for review'”
In Jira, triggers use JQL (Jira Query Language). In GitHub, they use GitHub’s advanced search syntax. You can combine multiple conditions with AND/OR logic.
For example, to sync bugs related to a specific project:
project = "MyProject" AND type = Bug AND status = "To Do"
When work items match these conditions, they automatically sync according to your mapping rules. If a work item no longer matches (status changes to “Done”), you can configure whether it should unlink, stay linked, or continue syncing.
Common Real-World Integration Scenarios
Scenario 1: Product development with distributed teams
The situation: Your engineering team in GitHub needs visibility into product requirements. Your product management team in Jira defines roadmaps and priorities. Without integration, developers either miss context or get flooded with product management details they don’t need.
The solution: Sync only the work items marked “engineering-ready” from Jira to GitHub. Include summary, description, and acceptance criteria. When developers update status or comment, those changes flow back to Jira. Product managers see real-time progress without developers seeing unfinished roadmap items.
Scenario 2: Support and engineering collaboration
The situation: Your support team in Jira receives customer bug reports. Engineers in GitHub need to address the critical ones quickly, but they shouldn’t be distracted by low-priority requests or feature requests.
The solution: Create a trigger that syncs only high-priority bugs (and above) from Jira to GitHub. When synced, add a “from-support” label so engineers know the source. When engineers resolve the GitHub issue, the status change flows back to Jira, and support can contact the customer immediately.
Scenario 3: Testing and development handoff
The situation: Your QA team in Jira finds bugs during testing. Engineers in GitHub need to prioritize their work. Without good handoff, bugs sit in backlog, or developers waste time context-switching between systems.
The solution: Sync only bugs found in the current sprint from Jira to GitHub. Include reproduction steps, environment, and any attachments. When engineers fix it and mark as resolved in GitHub, the status updates in Jira automatically. QA can immediately retest without waiting for manual updates.
Scenario 4: Multi-team ecosystem integration
The situation: You use Jira for project management, GitHub for code, Freshservice for support, and Asana for marketing campaigns. Each team works in their preferred tool, but they need to see how work across teams impacts their own.
The solution: A multi-platform integration connects all four systems. Marketing campaigns in Asana automatically create engineering work in GitHub when they need development support. Customer issues from Freshservice create bugs in Jira. Completed work in Jira updates project status in Asana.
Real-Time Sync vs. Scheduled Sync: What You Actually Need
Some integration tools only sync on a schedule (every hour, every 4 hours). Real-time sync means changes propagate within seconds. For development teams, real-time sync matters because a developer wants to know immediately when a status changes or a comment is added. A one-hour delay in sync can mean an hour of wasted work or repeated effort.
Exalate offers real-time event-based sync. When you change a work item in Jira, GitHub is updated within seconds. This keeps teams aligned without artificial delays that slow down collaboration.
Security Considerations for Jira-GitHub Integration
When data flows between Jira and GitHub, security must not be an afterthought. Here’s what matters:
- Encryption in transit: All data moving between Jira and GitHub should use TLS 1.2 or higher. This prevents man-in-the-middle attacks and keeps credentials safe.
- Role-based access control: The integration itself should respect your Jira and GitHub permission structures. A developer with read-only access to certain projects shouldn’t be able to sync work they can’t see.
- OAuth authentication: Instead of storing passwords or long-lived API keys, use OAuth, which grants temporary, revocable access tokens. This prevents credential compromise from exposing your entire system.
- Audit capabilities: You should be able to see which work items were synced, when, and by which integration. This isn’t audit trails for compliance; it’s operational visibility into what your integration is doing. Some platforms, like Exalat,e provide connection statistics and sync logs so you can debug issues.
- Vendor security credentials: Check whether your integration vendor is ISO-compliant and maintains a public Trust Center. Exalate meets these standards and publishes its security practices at the Trust Center.
For sensitive data or regulated environments (financial services, healthcare), ensure the integration supports your data residency requirements and encryption standards.
What’s Next?
The best time to integrate was when you first adopted both tools. The second-best time is now. Start small: pick one workflow (maybe syncing bugs from Jira to GitHub), set it up, and let it run for a week. See how it feels. Then expand to other workflows.
Don’t try to sync everything on day one. You’ll overwhelm your teams with noise. Sync strategically. Ask each team: “What information do you need from the other platform?” Build your integration around that.
And if you get stuck, the documentation and support for integration platforms like Exalate are usually solid. Most issues are configuration questions, not platform limitations.
Start a free trial with Exalate’s free tier and put together a working ServiceNow to Azure DevOps sync without a sales conversation. Connect both ends, configure rules with Aida or a Groovy engineer, and the records start syncing.
Prefer to see it run on your scenario first? Book a demo so the Exalate team can walk through the integration patterns on a live call.
Frequently Asked Questions
How can I connect Jira with GitHub?
You can connect Jira with GitHub using third-party integration tools like Exalate. Install the app on both sides (Jira Cloud and GitHub), create a connection between your instances, and configure which work items and fields sync based on your workflow needs. The setup takes minutes and doesn’t require code if you use AI-assisted configuration.
Why should I integrate Jira and GitHub instead of using native features?
GitHub’s native Jira integration is limited; it syncs basic information when you mention Jira work items in pull requests, but it doesn’t create bidirectional workflows or filter what data each team sees. A dedicated integration platform like Exalate gives you field mapping, role-based access, real-time sync, and automation triggers that the native feature lacks.
Can I sync comments and pull requests between Jira and GitHub?
Yes. You can sync comments between work items and GitHub issues, and pull request information (status, author, merged-by) can sync to Jira work items. This creates a complete audit trail from planning through code review to deployment, all visible in both systems.
What if I use GitHub Enterprise Cloud instead of GitHub.com?
The process is the same. Exalate supports both GitHub.com and GitHub Enterprise Cloud. The OAuth connection flows are identical, and the configuration is no different. If you’re using GitHub Enterprise Server (self-hosted), check with your integration vendor about support.
Can I use Exalate to connect multiple Jira and GitHub instances?
Yes, you can use Exalate to connect multiple Jira and GitHub instances. This integration solution helps to streamline collaboration between developers, salespersons, marketers, and support agents. Exalate also supports other ITSM tools like ServiceNow, Zendesk, Salesforce, and Azure DevOps. Check out our integrations for more information.
How often does sync happen, and can I control timing?
Exalate syncs in real time; changes propagate within seconds of being made. You control what syncs through field mapping and triggers, but not the timing. If you need batch sync on a schedule instead, other tools offer that, but real-time sync is faster for team collaboration.
What data should I sync and what should I leave out?
Sync the data your teams need to stay informed: summaries, descriptions, status, assignees, and comments. Leave out internal-only fields, confidential data, or fields that don’t make sense across platforms. Use role-based access control to ensure sensitive work stays visible only to authorized teams.
Is it safe to integrate GitHub and Jira? What about security?
Yes, if you choose a vendor that prioritizes security. Use tools with OAuth authentication (not passwords), TLS encryption, and ISO 27001 compliance. You can also restrict which work items sync based on user permissions.
What happens if the integration connection breaks or one system is down?
A robust integration queues changes while the connection is down and replays them in order when the connection recovers. This prevents data loss and inconsistency. You won’t lose information, and you won’t end up with duplicate data. Exalate handles this automatically.
Can I use the same integration tool for Jira-GitHub, and also connect to other platforms?
Yes. Exalate supports Freshservice, Freshdesk, Asana, Azure DevOps, and many other platforms. You can build a multi-platform ecosystem where Jira talks to GitHub, Freshservice, and Asana simultaneously. This is helpful if you manage work across support, engineering, product, and marketing teams.
How much does Jira-GitHub integration cost?
Exalate pricing factors in the cost of your time—if your team spends hours per week manually syncing data, integration quickly pays for itself. Check out our pricing page to see which plan works best for your use case.
Recommended Reading:
- Jira to Jira Integration: The Comprehensive Guide to Jira Sync
- Jira ServiceNow Integration: How to Set up an Integration in 6 Steps
- Jira Azure DevOps Integration
- How to Set up an Azure DevOps GitHub Integration
- How to Set up a Zendesk GitHub Integration
- Jira Integrations: Integrate Jira and Other Systems Bidirectionally


