
Tracking and storing information across customer service and development tools is essential for team productivity. The challenge is keeping Zendesk tickets and GitHub work synchronized without manual data copying.
When customer support tickets contain details that engineering needs to see (and vice versa) misaligned data creates delays, duplicated effort, and missed context. A reliable integration solution like Exalate connects these platforms so both teams stay on the same page with current information.
This guide walks you through the benefits of integrating Zendesk and GitHub, what to look for in an integration tool, and why Exalate is built to handle this specific need.
Key Takeaways
- Zendesk and GitHub store overlapping data that both teams need to see, making automatic synchronization critical for operational efficiency.
- Without integration, manual data transfer between customer support and engineering wastes time and introduces errors.
- An effective integration platform needs bidirectional sync, flexible field mapping, and the ability to work independently on both sides without breaking the connection.
- Exalate handles this through AI-assisted configuration, allowing you to map fields and sync rules without writing code.
- Integrating these platforms reduces response times, prevents duplicate work, and improves transparency between support and product teams.

Why Integrate Zendesk and GitHub
Zendesk handles customer support tickets while GitHub tracks code changes and development work. Though they serve different functions, the information they store often overlaps.
A customer report in Zendesk about a bug might relate directly to a GitHub issue or pull request. Without integration, someone has to manually copy that information between systems.
GitHub is the standard platform for code collaboration, issue tracking, and pull request management. When both are used by different teams in the same company, they need a way to exchange data seamlessly.
Consider a real scenario: Your support team receives a customer complaint about a feature in Zendesk. An engineer sees the same complaint in GitHub as a separate work item because someone had to manually copy it over.
Days later, both teams are working on solutions independently. With integration, that ticket appears in both places automatically, and updates from either platform sync back, keeping everyone aligned.
The Cost of Not Integrating
Manual data transfer is inconvenient and expensive. Teams spend hours copying information between platforms. Information gets lost or duplicated. Status updates miss one side entirely.
DPG Media, a large media organization, assigned a full-time employee just to copy Zendesk data to GitHub before they implemented Exalate. After integrating, they eliminated that task entirely and freed up that employee for higher-value work.
Beyond time savings, integrated platforms improve decision-making. When support teams have access to the development status of reported issues, they can give customers accurate timelines.
When engineers see the actual customer impact of a bug, they can prioritize better. When work items stay synchronized across platforms, duplicate effort disappears.

Calculate time and money savings from automated bidirectional sync.
Features to Consider When Choosing an Integration Tool
Not all integration platforms work the same way. When evaluating which tool is right for your Zendesk-GitHub setup, look for these key capabilities:
- Bidirectional Synchronization: Changes from either side should automatically sync to the other. If a GitHub issue gets closed, the related Zendesk ticket should close too. This prevents stale data and keeps both systems as the source of truth for their respective workflows.
- Flexible Field Mapping: Different platforms use different field names and structures. Zendesk has “tickets” while GitHub has “issues”. Your integration tool needs to let you map custom fields intelligently. Priority levels in Zendesk might need to become labels in GitHub. A tool that forces rigid mapping will frustrate both teams.
- AI-Assisted Configuration: Writing synchronization rules manually requires scripting knowledge. Exalate’s Aida feature helps generate mapping rules based on your requirements, speeding up configuration from days to hours. You describe what you want to sync and the AI helps build the rules.
- Sync Panel: Exalate also comes with a Chrome extension called Sync Panel that lets users check sync status, spot errors, trigger manual syncs, and unlink sync pairs straight from the browser, without opening the console.
- Trigger-Based Automation: You shouldn’t have to manually run syncs. Set rules that automatically synchronize work items when certain conditions are met (like when status changes to “open” or “in progress”. This ensures fresh data without human intervention.
- Role-Based Access Control: Your support team doesn’t need to see every GitHub field, and engineers don’t need every Zendesk field. A good integration lets you filter what information flows where based on user roles and team needs.
- Connector Coverage: Beyond Zendesk and GitHub, you likely have other tools (ServiceNow, Freshdesk, Freshservice, Asana, Azure DevOps Server, or custom APIs). Choose an integration that supports your full tech stack, so you can expand synchronization without changing tools later.
What Data Can Be Synchronized Between Zendesk and GitHub
When you integrate Zendesk and GitHub with Exalate, you can synchronize across a range of data types. The core fields include work item titles and descriptions, status updates, priority levels, assignees, and comments. Custom fields from either platform can also be included, so you’re not limited to standard fields.
Attachments and linked references transfer too, so if a GitHub pull request relates to a Zendesk ticket, that relationship can be visible in both places. This prevents silos where critical context lives in only one system.
The flexibility of field mapping means you decide what flows. Your support team might sync only certain ticket types to GitHub, while engineering syncs all work items back to Zendesk. Different teams have different needs, and a quality integration tool respects that autonomy.
How Exalate Handles Zendesk-GitHub Integration
Exalate connects Zendesk and GitHub through independent agents that sit between the two platforms. Each system maintains its own autonomy: Zendesk doesn’t need to know GitHub’s internal structure, and GitHub doesn’t need to conform to Zendesk’s format. Exalate translates between them.
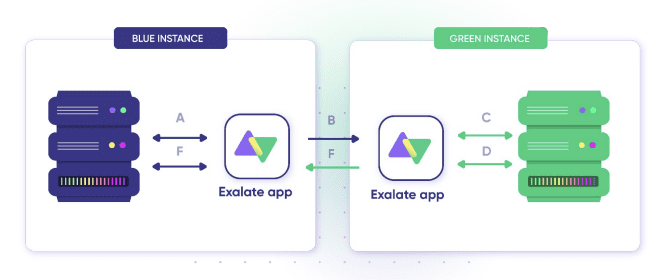
This matters because teams evolve. If your company switches from GitHub to Azure DevOps Server next year, Exalate’s agents can handle that transition without forcing changes to your Zendesk setup. Each platform can change independently while the integration keeps working.
The platform uses AI-assisted configuration to simplify setup. Instead of manually writing synchronization rules, you describe your requirements through Aida, and it generates the mapping logic. For example, you might say: “Sync all open Zendesk tickets to GitHub where the priority is high or critical.” Aida translates that into the necessary field mappings and filters.
Data security is built in. Exalate uses industry-standard encryption (TLS 1.2 and higher) for all data in transit. Authentication relies on OAuth tokens and API keys specific to each platform, so Exalate never stores your Zendesk or GitHub credentials directly.
The platform holds ISO 27001 certification and conducts regular security audits. For full details, review the Exalate Trust Center.
Integration Use Cases and Real-World Applications
Case 1: Rapid Support-to-Engineering Handoff
A customer reports a critical bug in your product through Zendesk. The support agent marks it as “urgent” in the ticket. Your engineering team in GitHub needs to see this immediately. Without integration, the ticket sits in Zendesk until someone manually creates a GitHub issue and copies over the details.
With Exalate, the ticket syncs to GitHub automatically, labeled as urgent based on your field mapping rules. Engineers see it in their regular workflow, and if they comment or change the status in GitHub, the update flows back to Zendesk instantly. The support team can tell the customer the current status without asking an engineer separately.
Case 2: Multi-Vendor Service Management (MSP Use Case)
Large IT service providers manage customer environments across multiple platforms: ServiceNow for incident management, Zendesk for customer-facing support, GitHub for internal tooling, and Freshservice for asset tracking.
Teams spend time re-entering the same incident data across three systems. Exalate consolidates this by syncing critical fields across ServiceNow, Zendesk, GitHub, and Freshservice.
When an incident is logged in ServiceNow, a corresponding ticket appears in Zendesk automatically, and the engineering team in GitHub can track related code fixes. Asset information from Freshservice enriches the context. No duplicate entries, no missing details.
Case 3: Cross-Company Partner Collaboration
Your company partners with agencies or vendors who use different tools. You run Zendesk internally; your partner manages work in GitHub. You want to sync specific project information without exposing internal tickets or allowing your partner to see all your support data.
Exalate lets you filter what syncs in a cross-company integration scenario. Only tickets tagged with the partner’s project name sync to their GitHub instance. Comments from internal support teams stay internal. The partner’s GitHub updates come back to you, but in a read-only view. Each organization stays independent while collaboration stays seamless.
Common Challenges When Integrating Zendesk and GitHub
Even with integration tools, certain challenges come up. Understanding these ahead of time helps you configure more effectively.
- Data Mapping Conflicts: Zendesk uses status values like “Open,” “Pending,” and “Closed.” GitHub uses “Open” and “Closed.” When you sync between them, you need rules for what “Pending” in Zendesk maps to in GitHub. Exalate’s field mapping features handle this, but you need to define the logic upfront. Aida helps by suggesting mappings based on your platforms.
- Sync Failures and Retries: If GitHub’s API is temporarily down when Exalate tries to sync, what happens? A robust platform queues the sync and retries automatically. Exalate does this, but you should monitor your connection’s health. Most sync failures are temporary and resolve on retry.
- Scope Creep: You start syncing just ticket titles and status. Then you add custom fields, comments, attachments, and linked work items. Each addition increases complexity and can introduce subtle bugs in your field mappings. Define your sync scope clearly upfront and expand incrementally. Test each addition before rolling it out.
- Performance and Scale: If you’re syncing thousands of work items, sync performance matters. An integration that works fine with 100 tickets might slow down with 10,000. Exalate is built for enterprise scale, but you should monitor sync times and adjust your configuration if needed. For example, instead of syncing all historical tickets, you might sync only new items going forward.
Security and Compliance in Your Zendesk-GitHub Integration
When data flows between systems, security and compliance become real concerns. Exalate is designed with security as a foundational layer, not an afterthought.
- Data Encryption: All data in transit between Zendesk, GitHub, and Exalate uses TLS 1.2 or higher. Data at rest is encrypted using industry-standard algorithms. Your customer information and code references stay protected during synchronization.
- Authentication and Authorization: Exalate uses OAuth tokens and platform-specific API credentials. Neither Zendesk nor GitHub credentials are shared with or stored by Exalate. Instead, each platform grants access through tokens that can be revoked anytime. Role-based access controls ensure that users see only the data their role permits.
- Compliance Certifications: Exalate holds ISO 27001 certification, demonstrating that information security management meets international standards. If you operate in regulated industries (finance, healthcare, government), these certifications help meet your own compliance requirements. For detailed security information, visit the Exalate Trust Center.
- Audit and Accountability: Every sync event is tracked. If you need to understand what data moved when, Exalate’s logging provides that visibility. While audit trails are logged, the focus is on understanding what was synchronized and whether it succeeded, not on creating excessive administrative overhead.
How to Set Up a Zendesk-GitHub Integration With Exalate
Connecting Zendesk and GitHub through Exalate follows the same overall flow as any other Exalate connector, with the key difference being that the authentication steps and field mappings are specific to these two systems.
Set Up Your Account
Go to the Exalate integrations page and sign up with your business email or Google Sign-In, or log in if you already have an account.
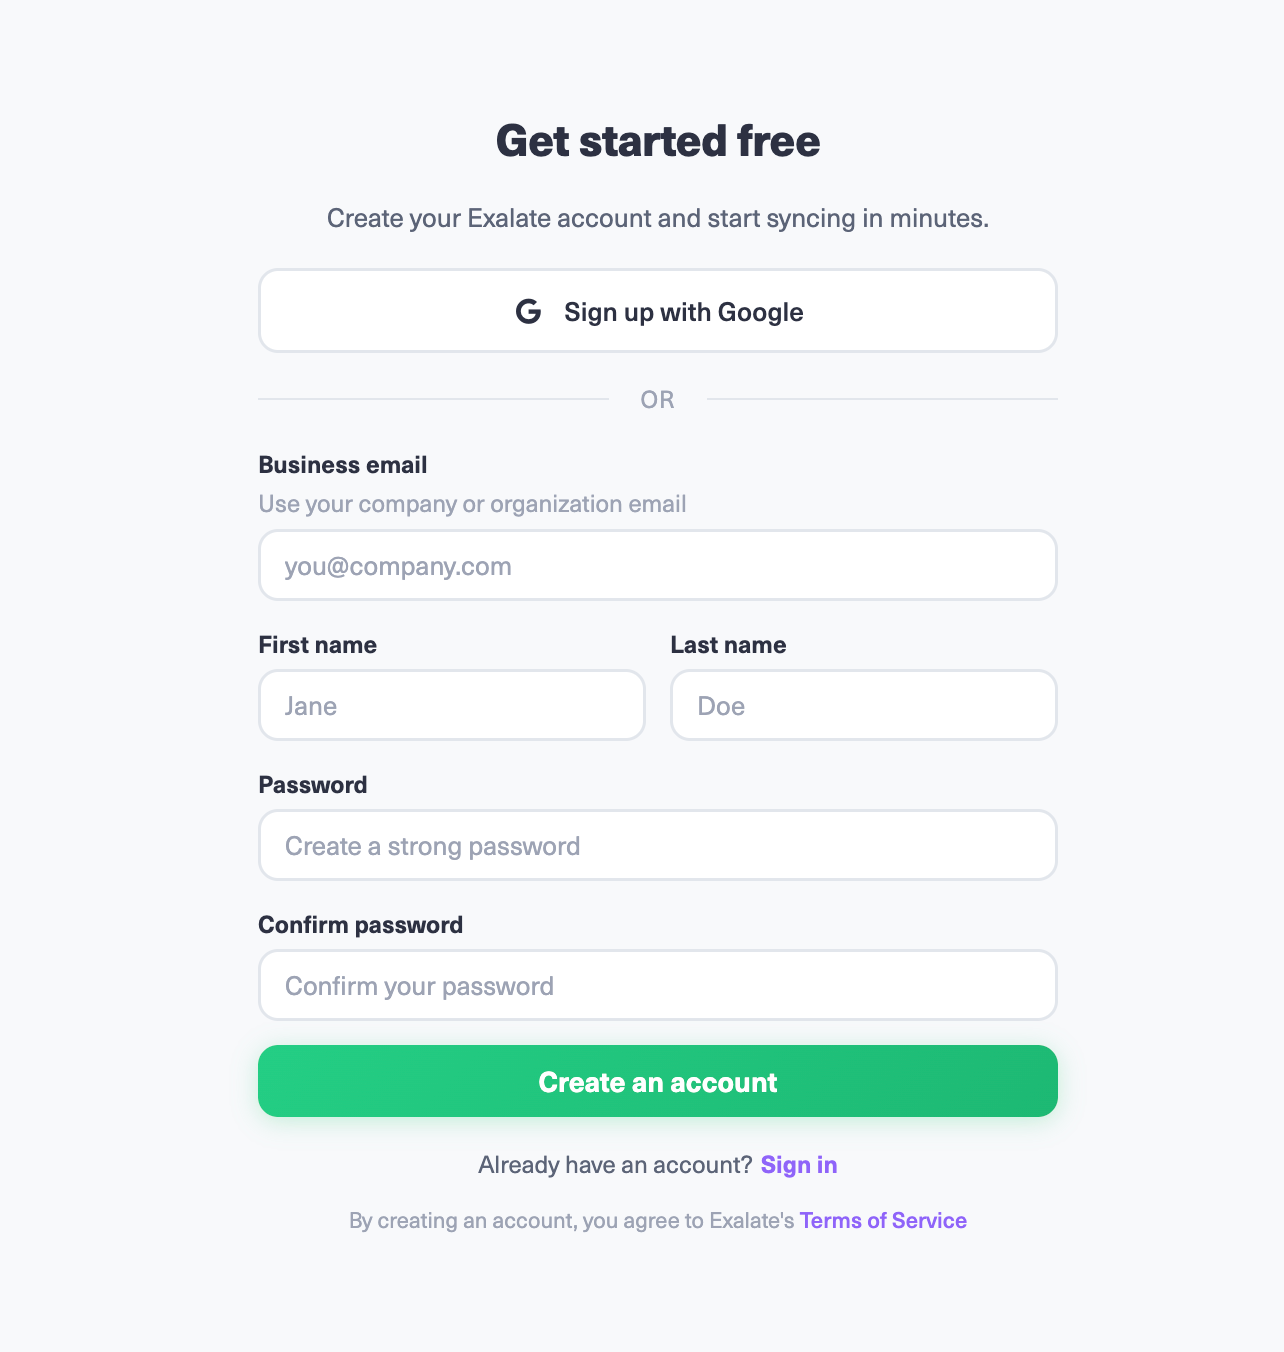
The same Exalate account can be used for all the connectors you configure. For example, if you already have Zendesk connected to another platform through Exalate, you can use your existing credentials for this integration as well.
After signing in, Exalate displays a Getting Started checklist to guide you through the initial configuration.
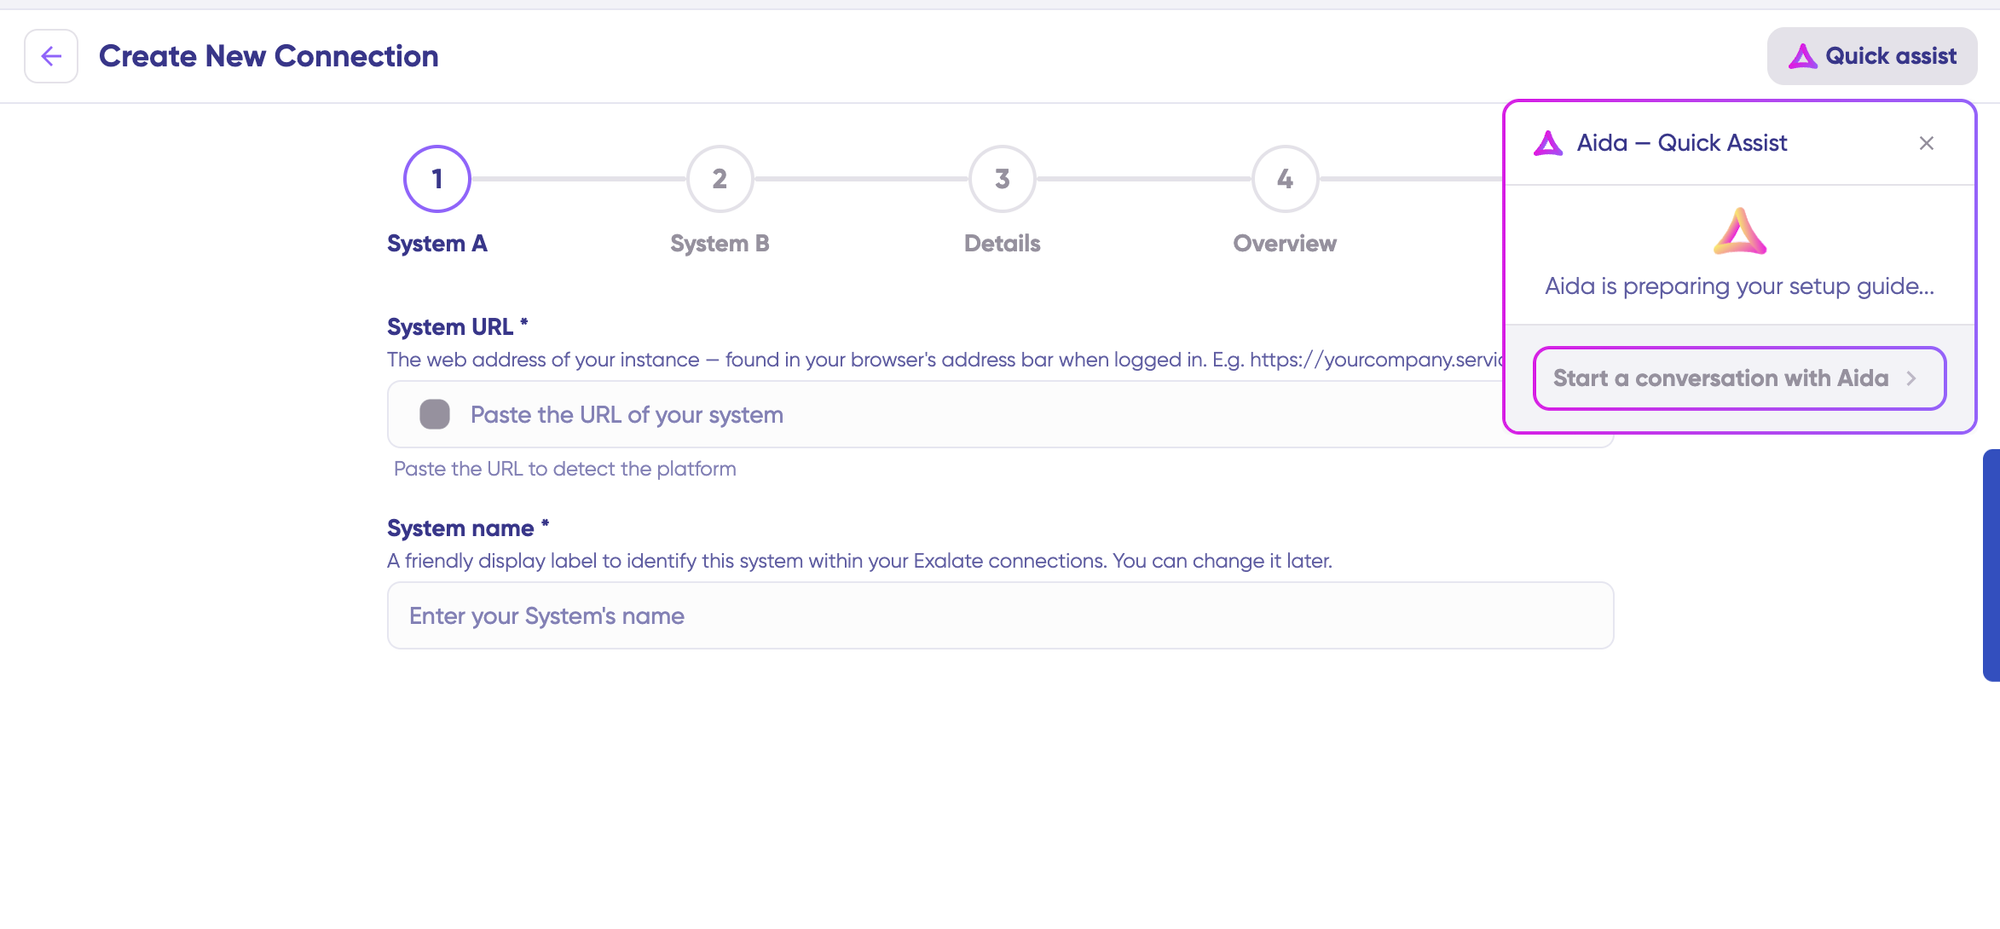
If you need help during the setup process, click Aida Quick Assist in the upper-right corner. It can provide guidance when you’re creating the connection or working through the initial configuration.
Connect and Authenticate Your Systems
From the Exalate console, select “+ Add connections”, followed by “Create new connection.” Then enter your Zendesk URL [example.zendesk.com]. Exalate will verify that the Zendesk instance is accessible and compatible before you proceed.
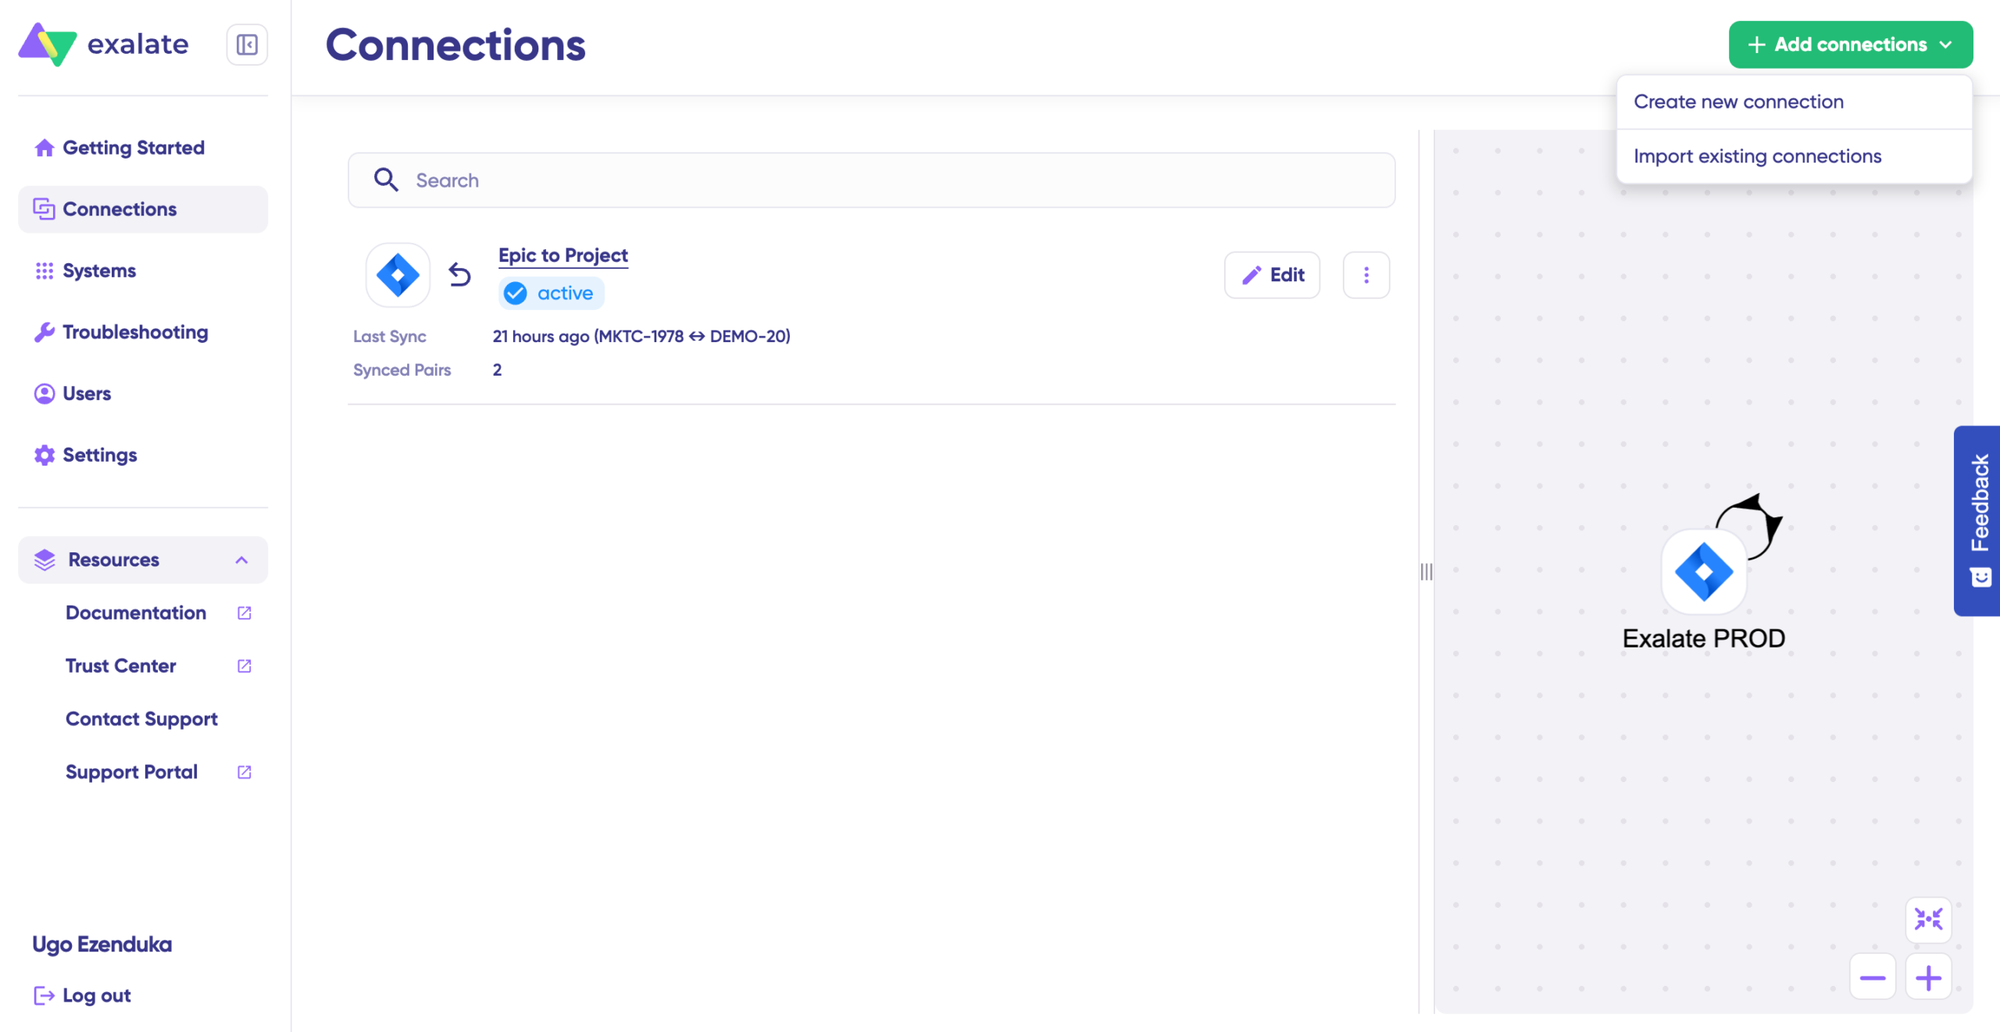
For Zendesk authentication, Exalate uses OAuth 2.0. Select “Connect with Zendesk”, sign in to your Zendesk account in the pop-up window, and click Allow. Once authentication is complete, the pop-up will close automatically. Read more about system authentication with Exalate.
For GitHub, first, install the Exalate for GitHub App. You must be the repository or organization owner to complete the installation. The app grants Exalate access to GitHub issues, pull requests, and metadata.
Enter your GitHub URL in the System URL field, then click Connect with GitHub. A pop-up window will open and guide you through the installation.
Make sure you install the app on the same organization or account specified in the System URL field. Otherwise, Exalate will not detect the installation.
Once the installation is complete, click Authorize to complete authentication.
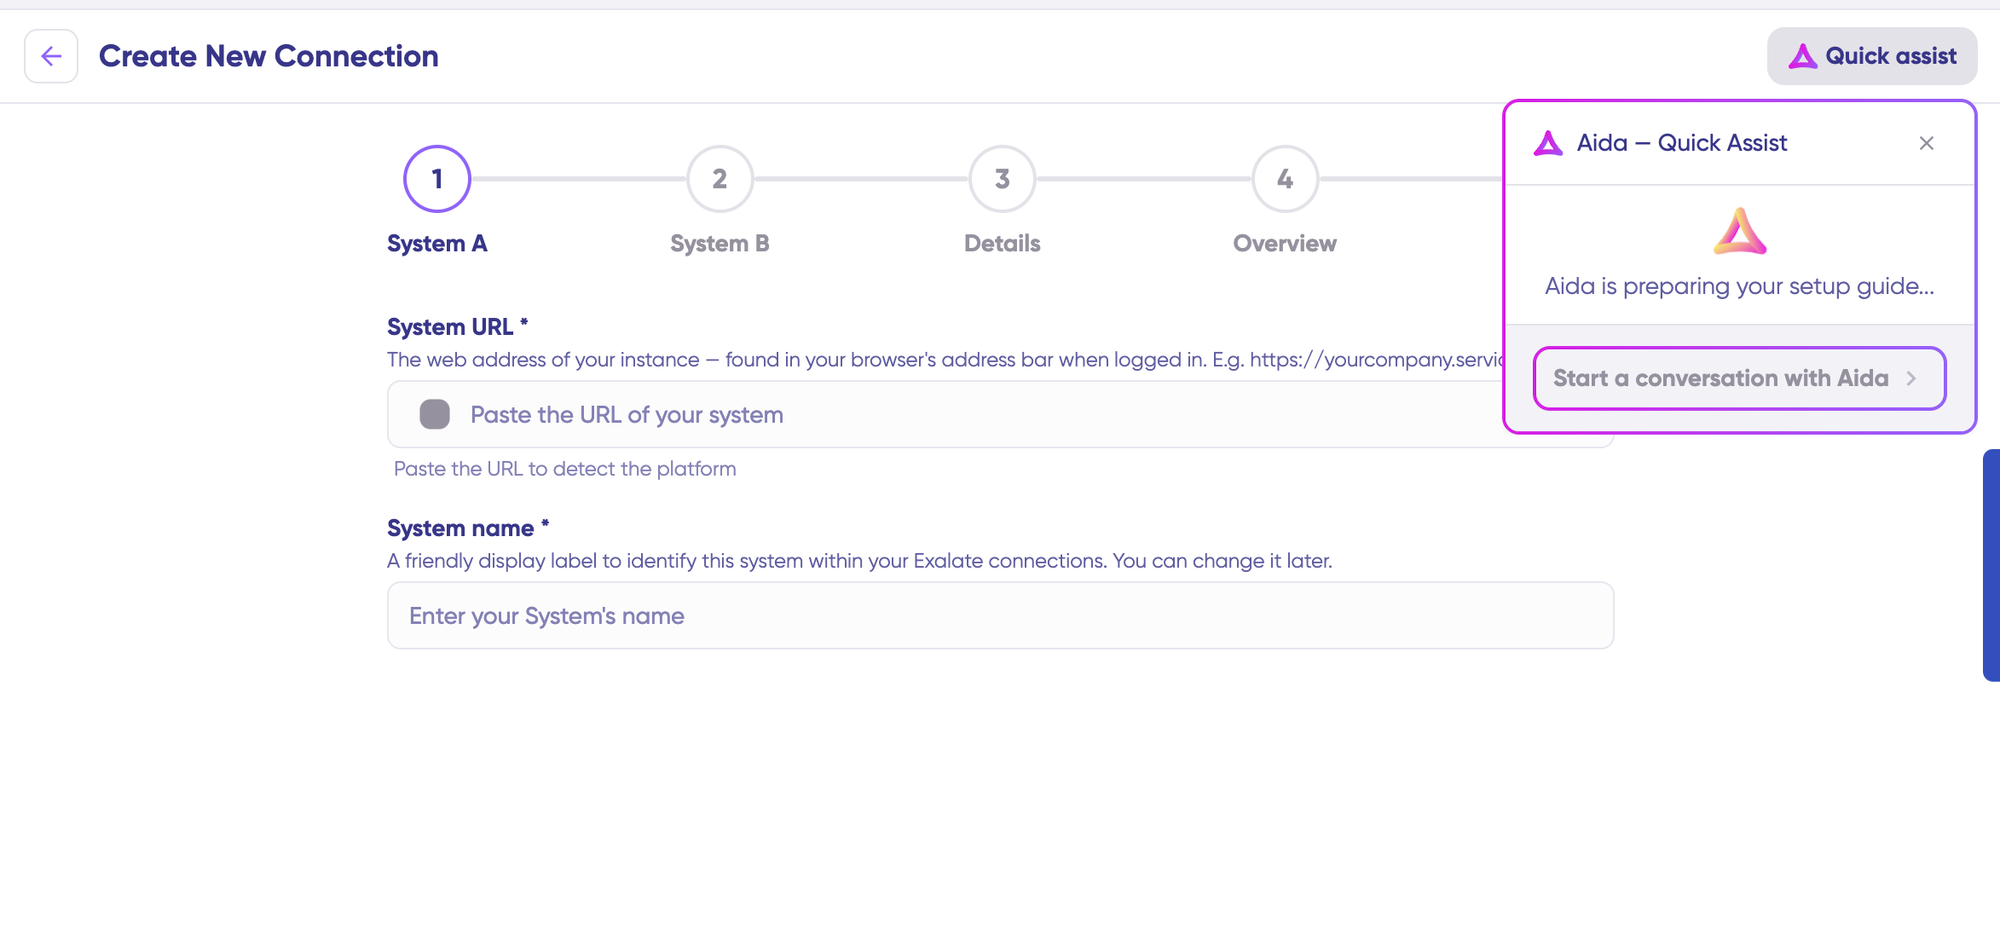
For more information, check out the GitHub authentication flow for Exalate.
Return to the Exalate console and click “Next”. Enter a name for the connection on the GitHub side and provide a useful description so that other administrators can quickly understand its purpose.
Click “Create Connection” and allow Exalate a few moments to complete the background configuration. Then click “Build and Continue“.
At this point, Exalate provides two configuration paths: “Quick sync” and “Edit & Test.”
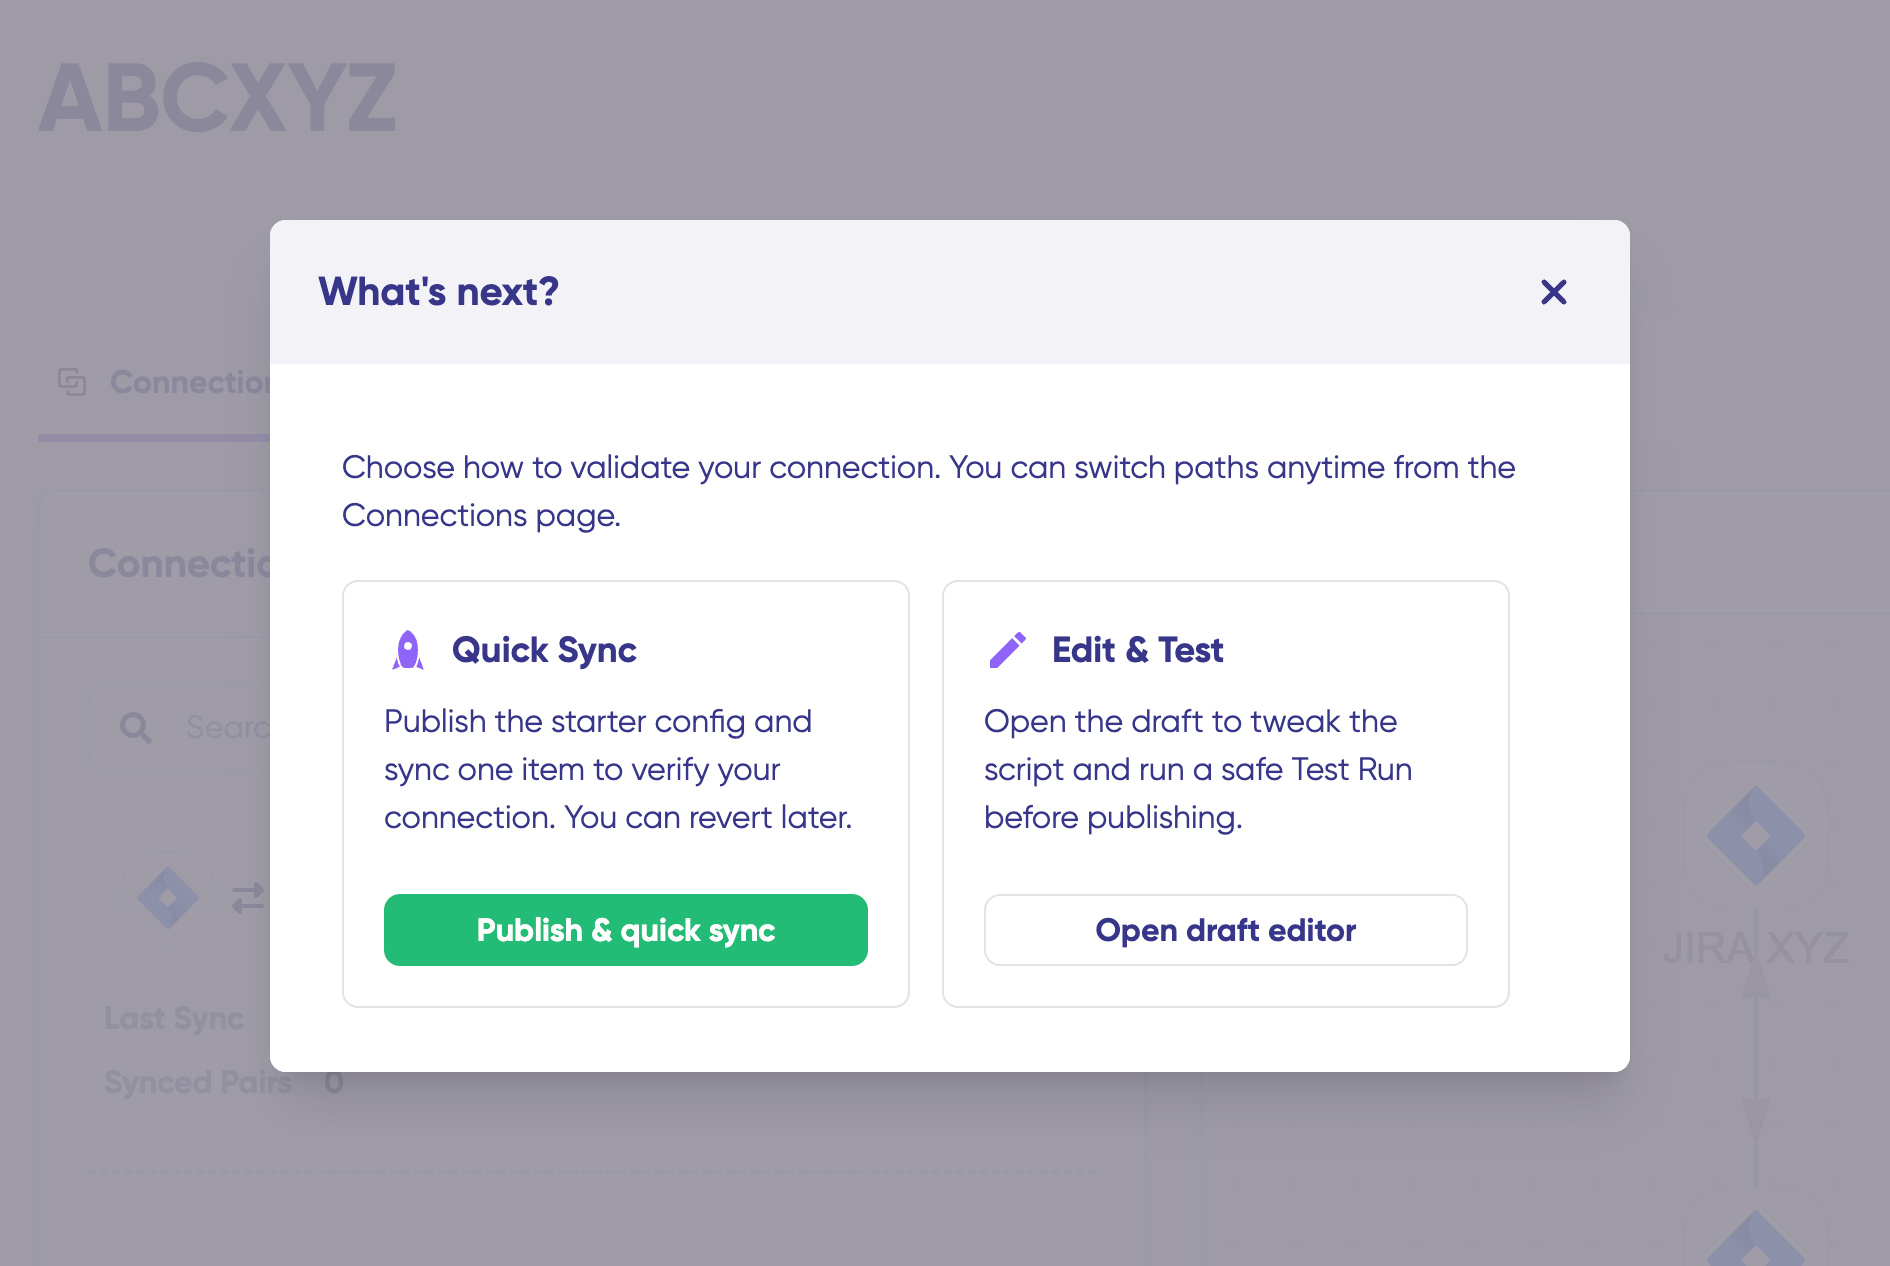
Quick Sync: Manual Sync Between Zendesk and GitHub
Quick Sync provides a simple way to verify the integration by synchronizing one ticket or issue between Zendesk and GitHub before configuring more advanced rules.
To start with Quick Sync, click on “Publish & quick sync” to proceed.
Under “Item sync monitor,” enter the ticket ID and run the search. When the ticket appears, click “Sync Now.”
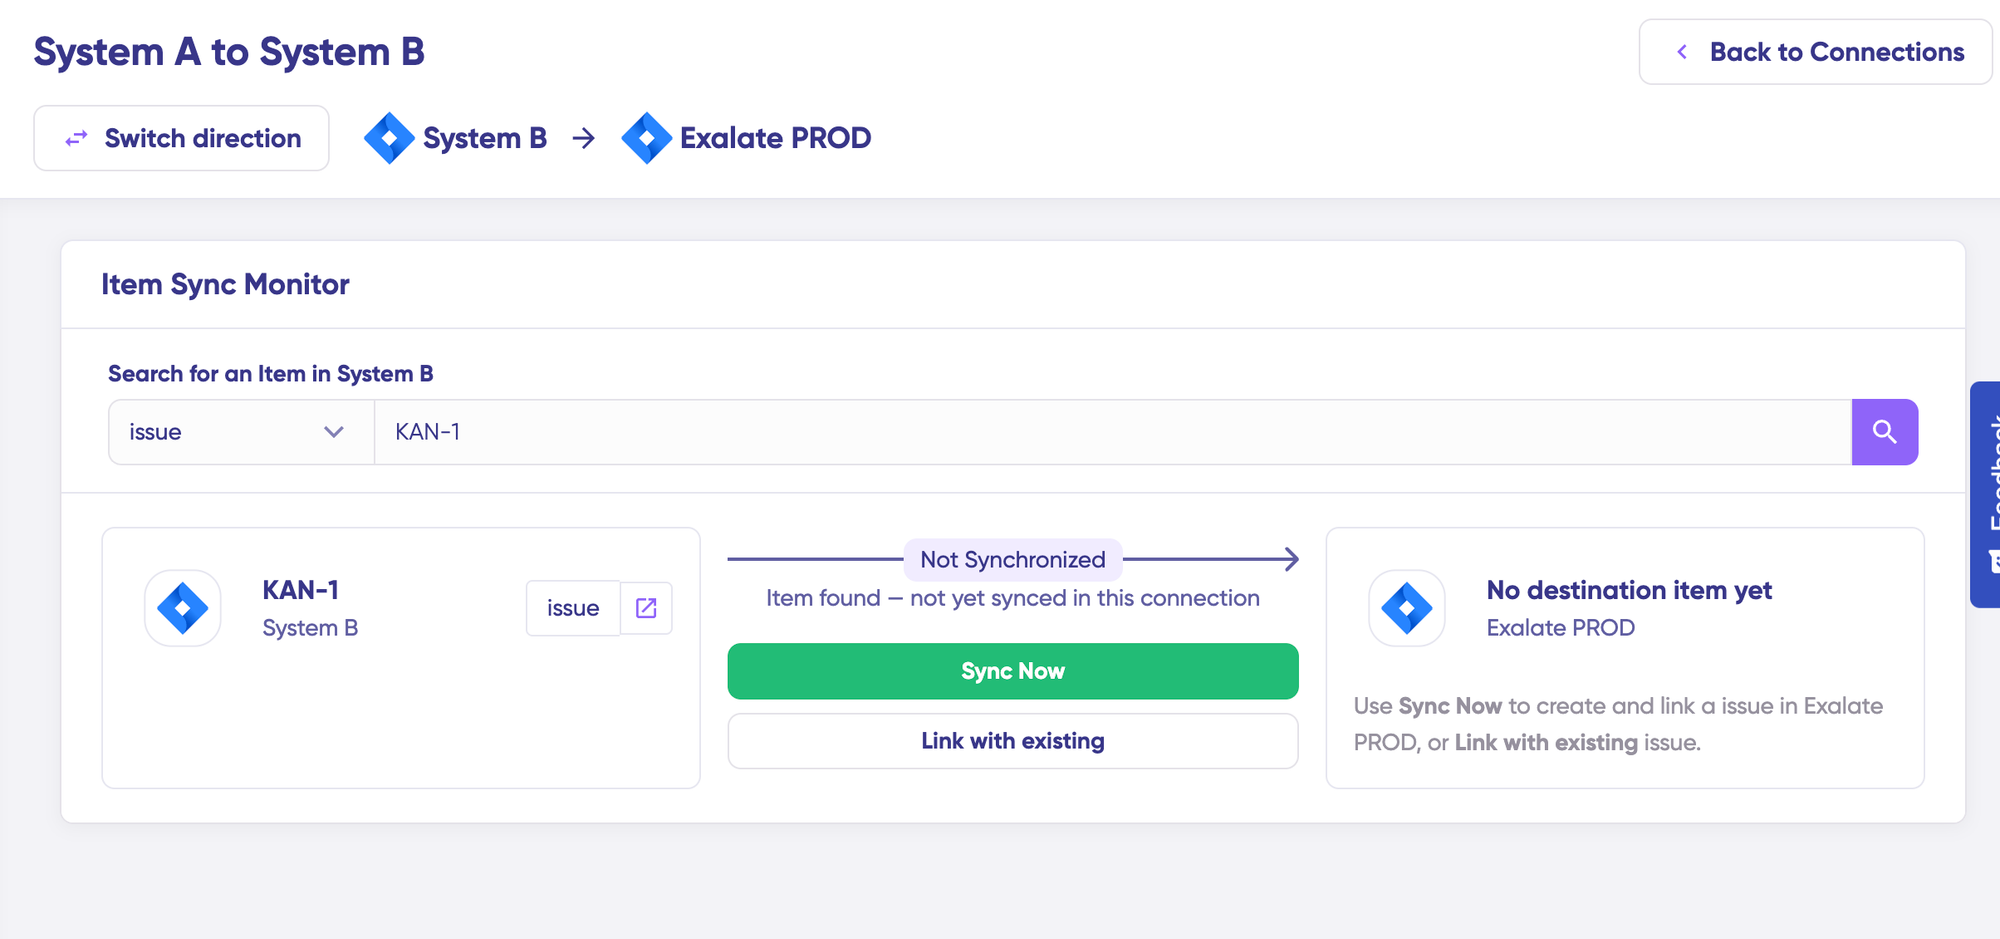
To link 2 existing items, click “Link with existing“. After the synchronization finishes, you can open the two linked items in a new window and compare the changes between them.
Edit & Test: Configuring the Sync Rules for a Zendesk GitHub Sync
When you need more control over the integration, choose “Edit & Test Sync.” This option allows you to customize the synchronization behavior using Exalate’s scripting capabilities.
Open draft editor: The draft editor lets you modify the configuration without immediately changing the active version. You can select “Create a new version” or “Open latest draft” to begin working on a draft.
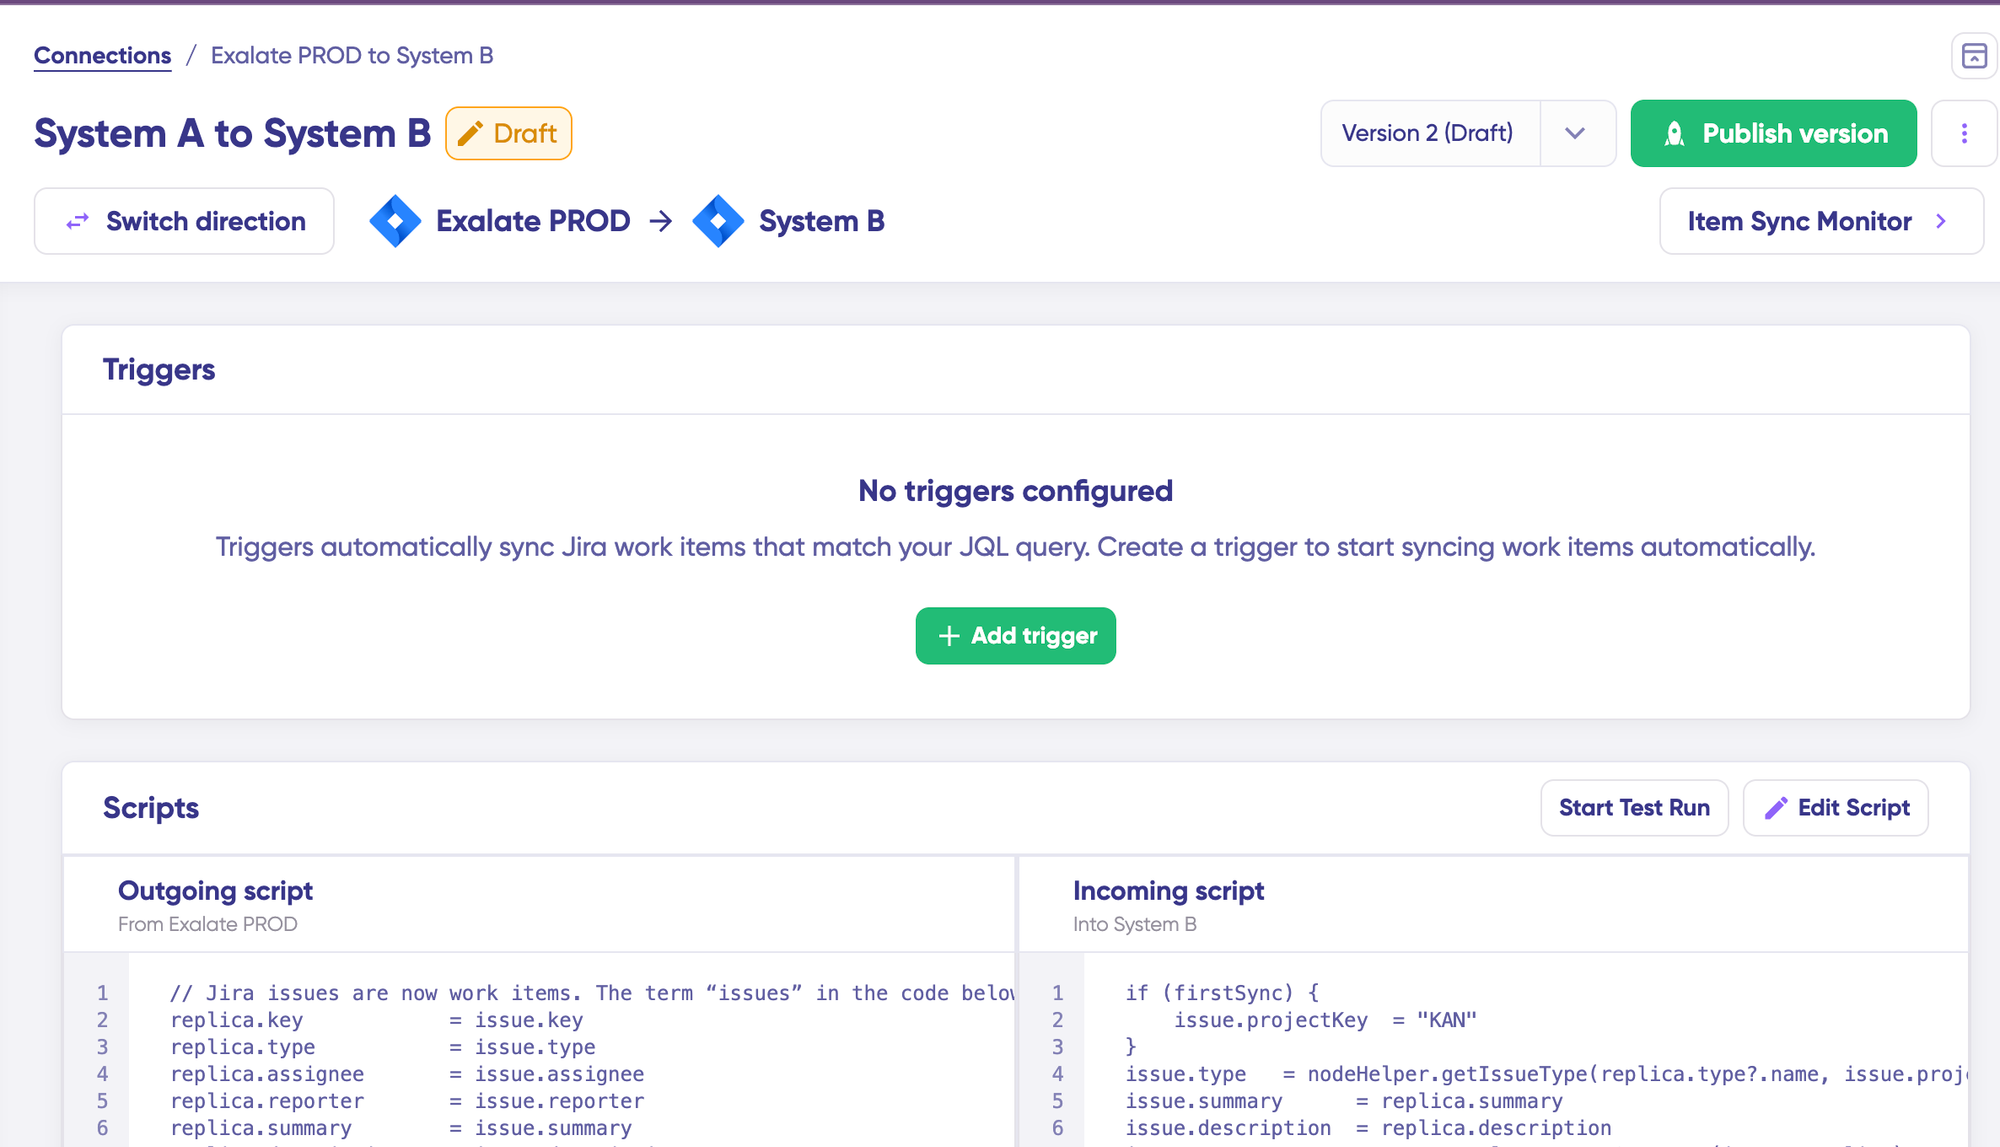
Once active, open the draft editor and click “Edit Script“. This takes you to the Groovy scripts that determine how information is transferred and mapped between Zendesk and GitHub.
The Outgoing script controls the information that leaves a system and how it is packaged. The Incoming script controls how the receiving system processes and stores that information.
So if you want to change the information sent from Zendesk to GitHub, modify the Outgoing script on the Zendesk side. If you want to control how information coming from GitHub is mapped into Zendesk, make the appropriate changes to the Incoming script.
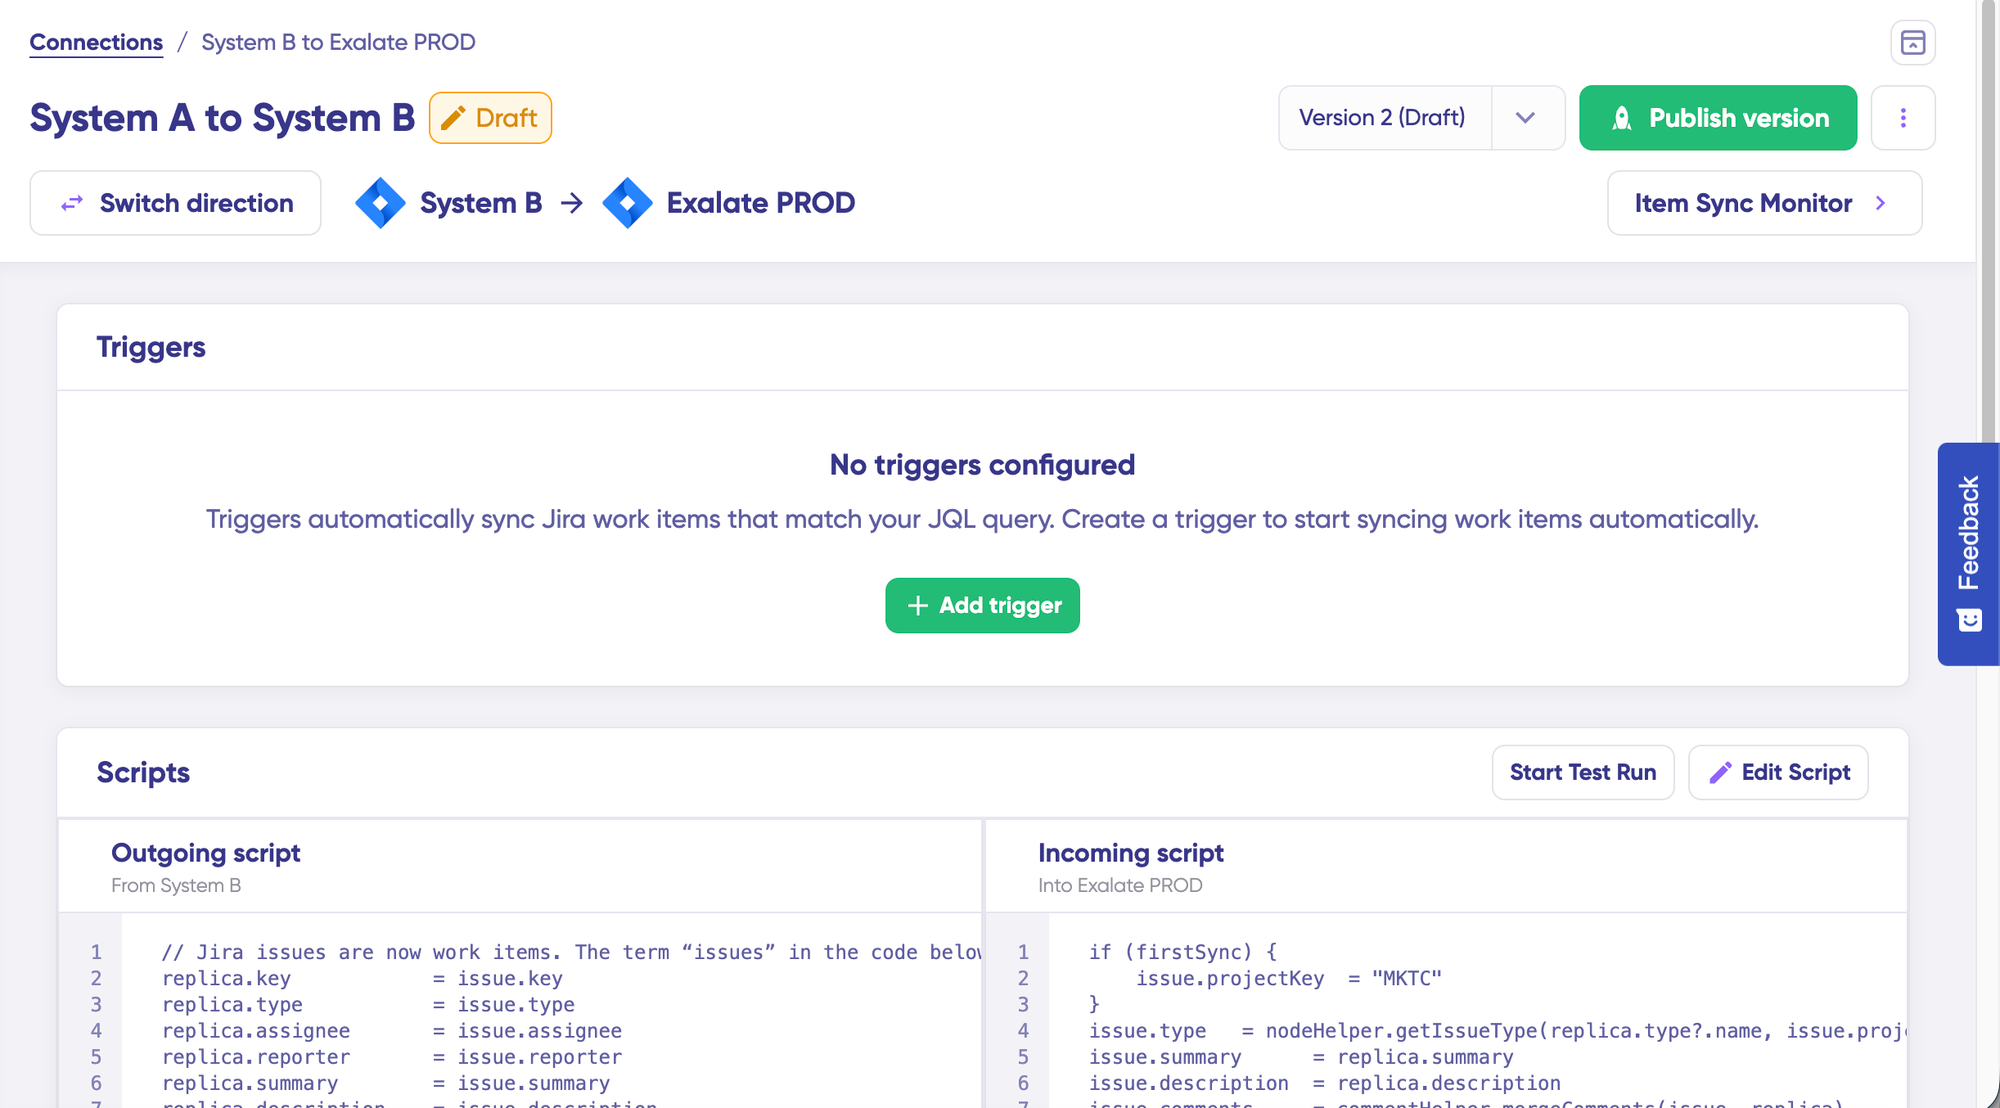
Click the “Switch direction” button whenever you need to reverse the synchronization direction and work with the corresponding Outgoing and Incoming scripts.
Exalate uses an object called the Replica to transfer information between the connected systems. The Replica is essentially a JSON payload containing the information shared from one side of the connection to the other.
So if you see replica.summary = ticket.summary in the Outgoing script on the Zendesk side, it means the ticket’s subject is saved into the summary field of the replica object. On GitHub’s incoming script, that maps as issue.summary = replica.summary, meaning the summary gets written into the GitHub issue’s title.
You don’t normally need to work with the Replica directly. However, understanding its role can make troubleshooting easier when a particular field doesn’t synchronize as expected.
Here are the fields and entities available for synchronization on GitHub.
Use Aida for Script Generation
If you’re new to the Groovy language, you can use Aida AI to describe the synchronization behavior you want in plain English.
For example, you could ask it to: “sync GitHub issues labeled bugs to Zendesk as new tickets, and send status updates back to GitHub.”
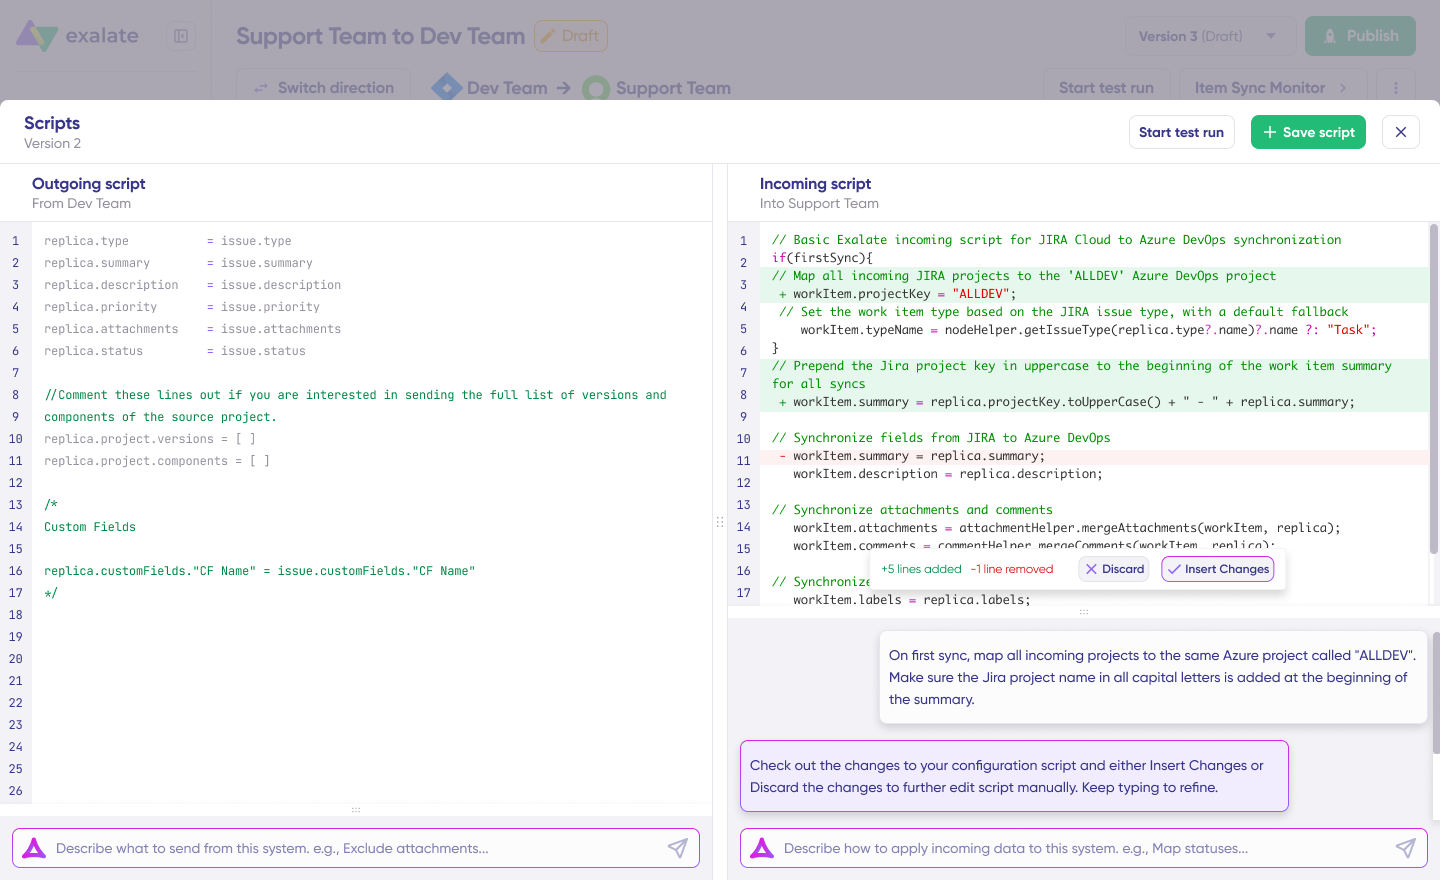
Aida uses Exalate’s scripting API, along with your existing configuration, to generate a script based on your instructions. Before publishing the generated code, review the proposed changes. Aida highlights newly added lines in green and proposed removals in red, allowing you to accept or reject the suggested modifications.
Note: As with any AI solution, review the generated code before applying it to avoid errors and hallucinations.
When the scripts are ready, you can select “Save script” or run them through a test before publishing.
Test Before You Publish
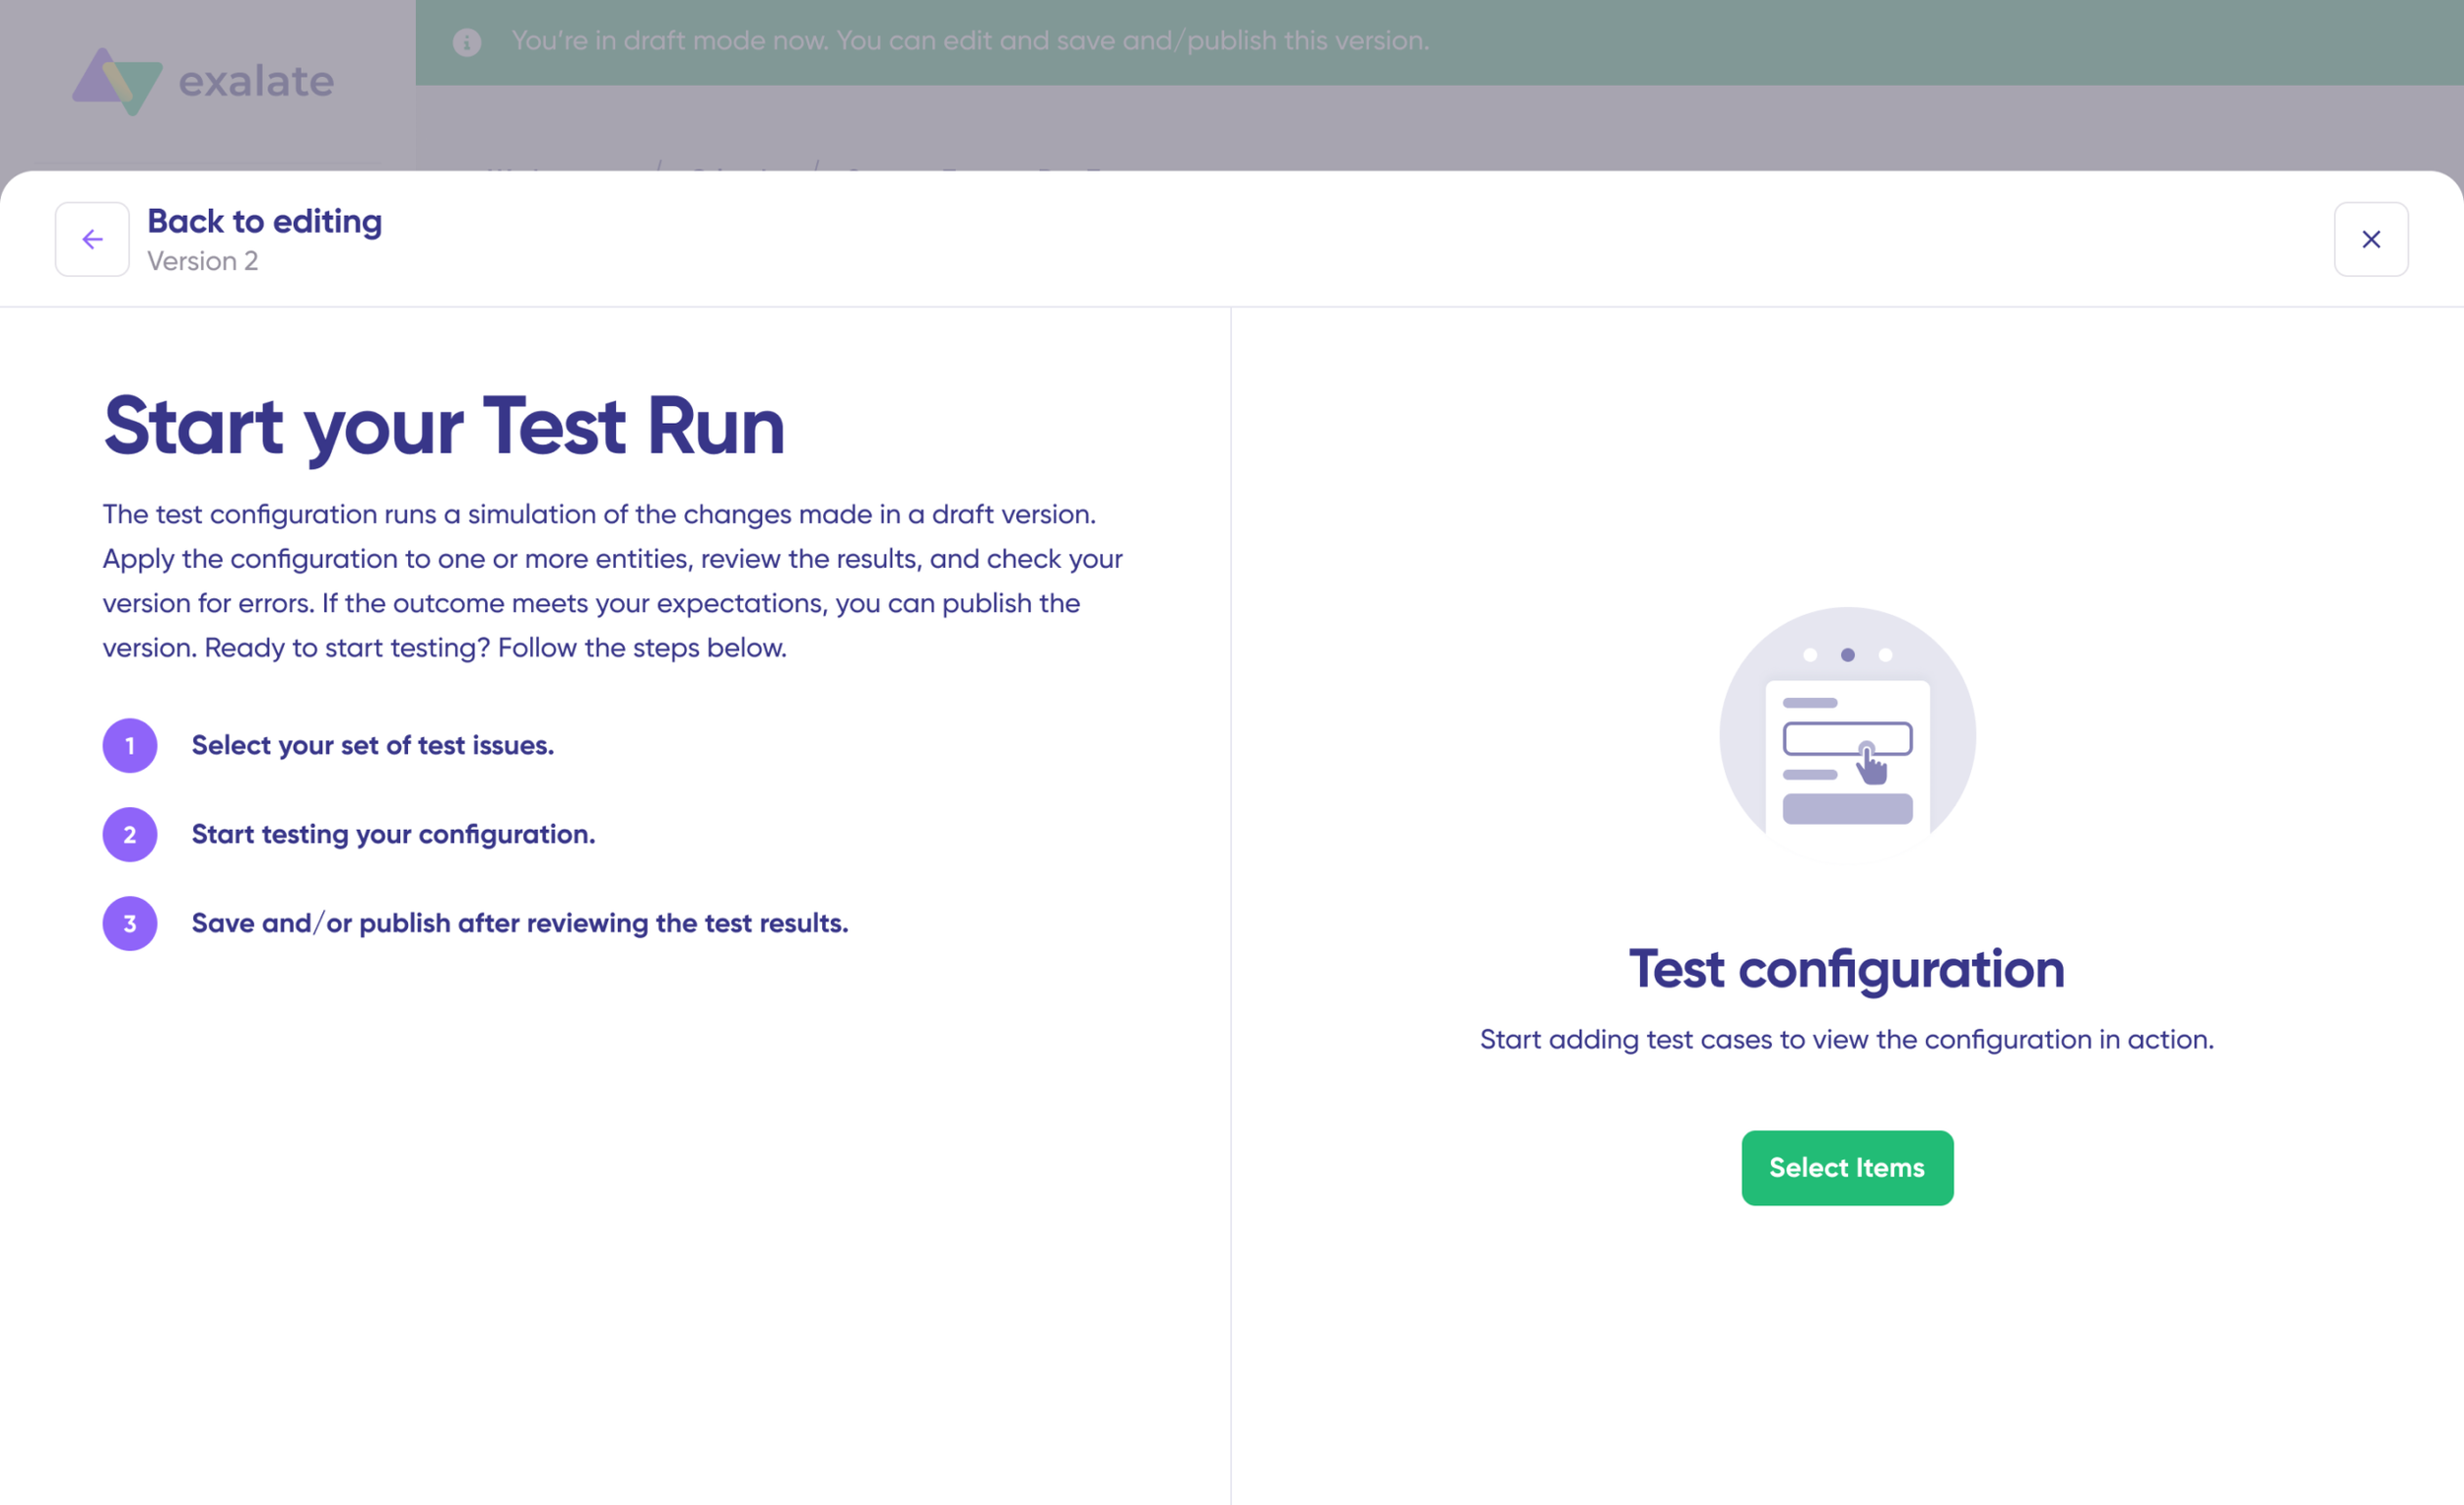
Click “Start Test Run” and “Select items” to test the connection you just set up. You can select multiple tickets or issues. After a short wait, you’ll see the detailed results of the fields synced and the payload shared between both systems. Review the results, and if everything is behaving as expected, select “Publish Version.”
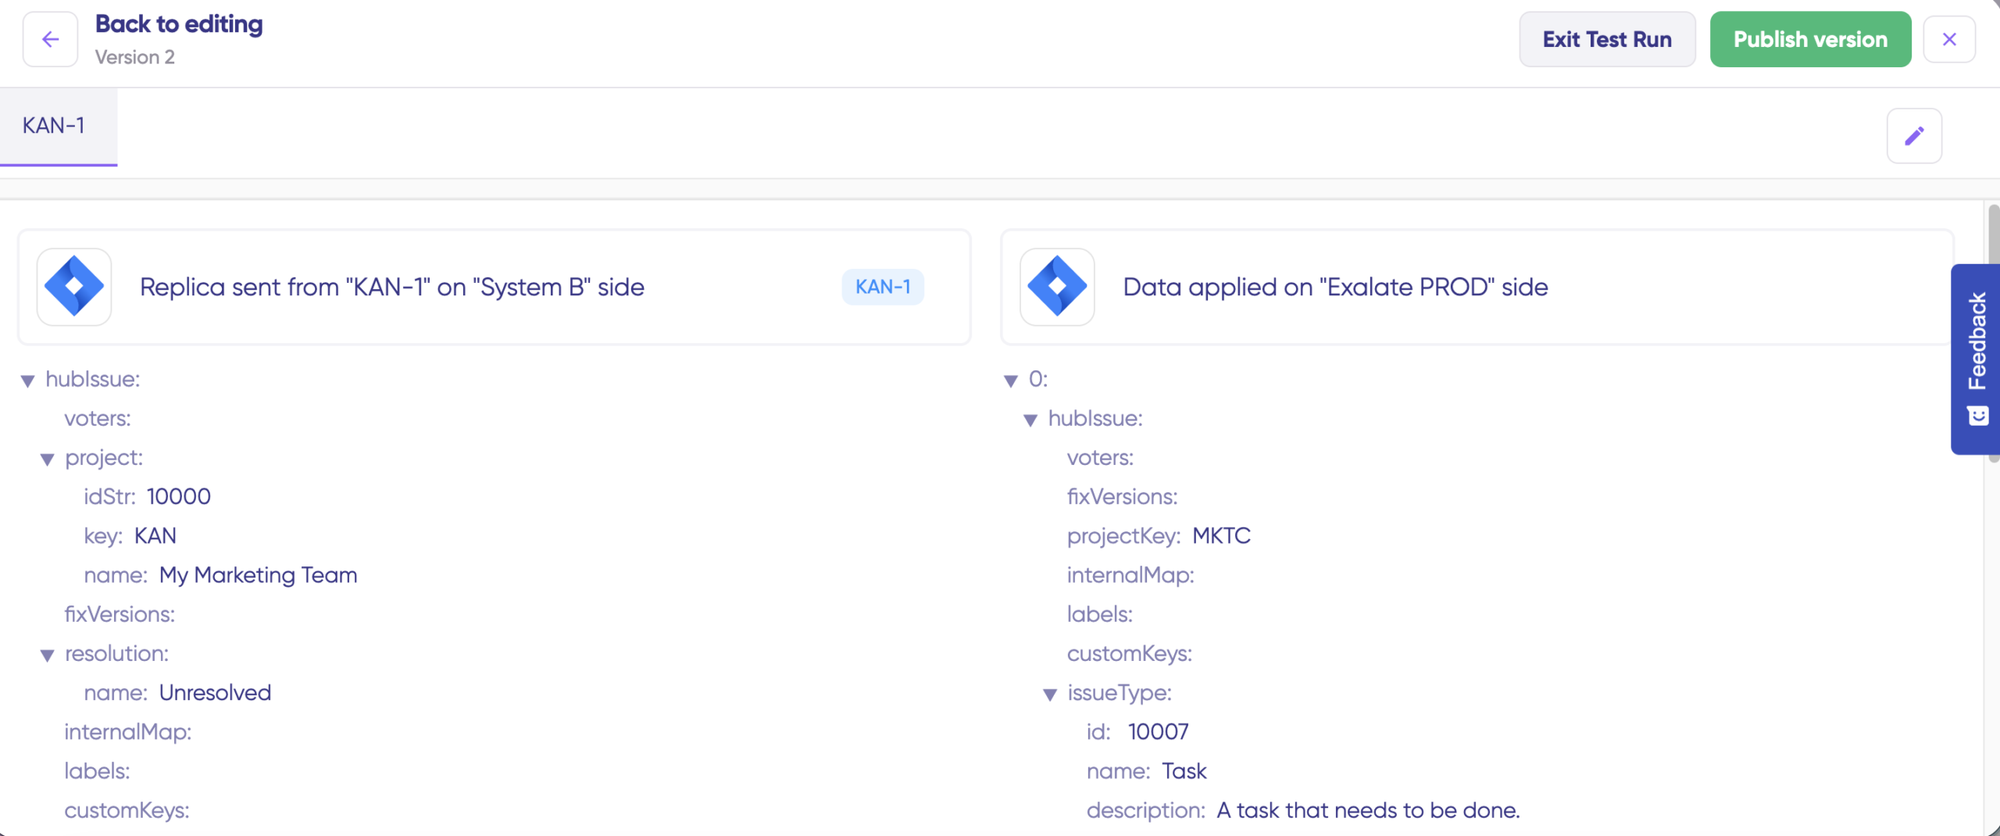
The point is to catch field mismatches or identity mapping gaps before the connection goes live for your whole team.
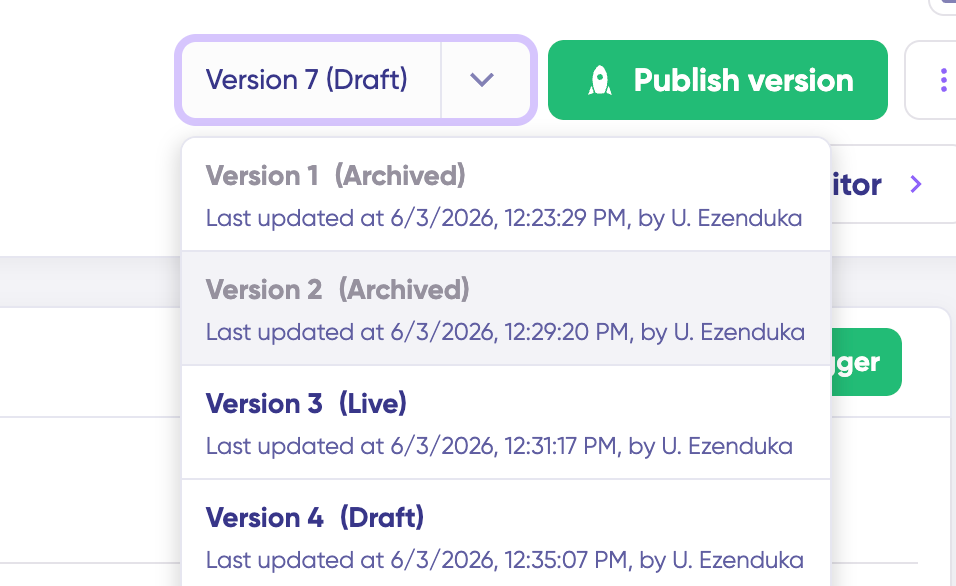
You can view all versions from the “Version” dropdown. Versions can be “Live“, in “Draft” (editable), or “Archived“.
Set Your Triggers
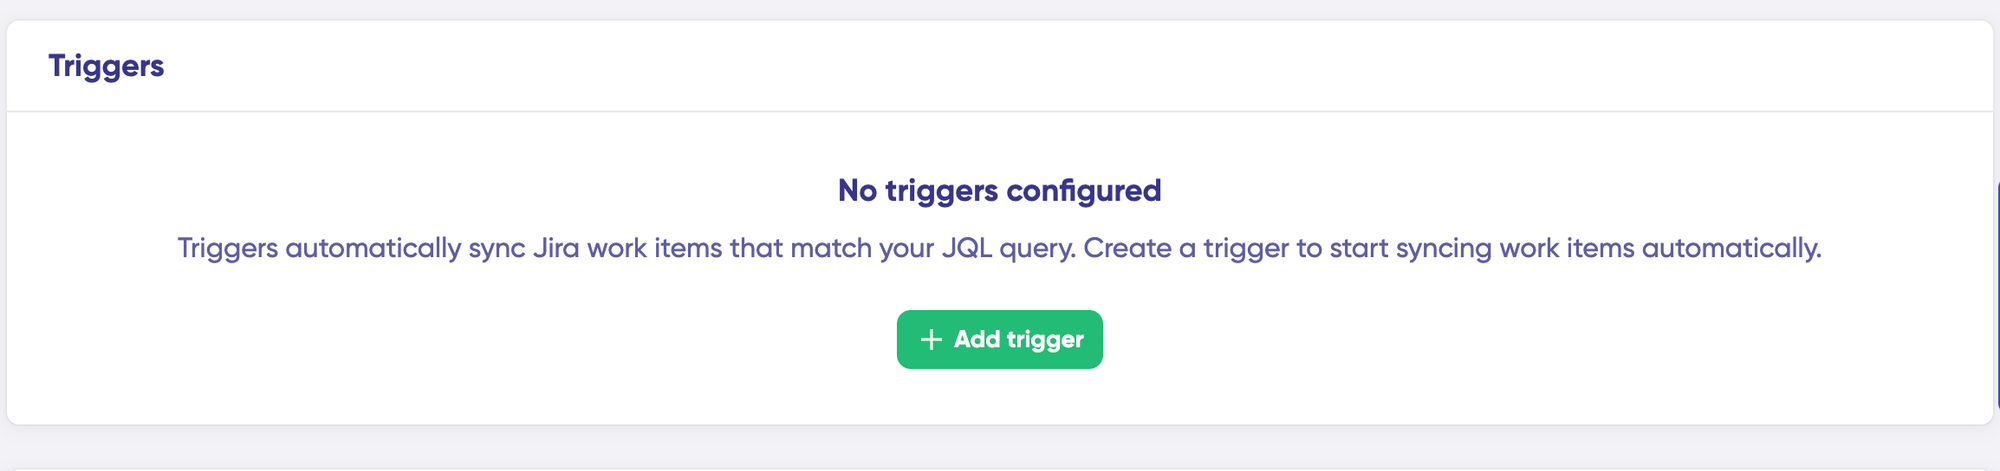
Triggers determine which tickets or issues should be synchronized. They allow you to define conditions so that only items matching specific criteria are included.
Click the “+Add trigger” button to start creating platform-specific triggers.
Choose the entity type (ticket for Zendesk). You also need a query language or search syntax to write the trigger condition.
- On the Zendesk side, that’s Zendesk’s own search syntax, something like “type:ticket status:open tags:github-bug.”
- On the GitHub side, it’s GitHub’s search syntax, like “label:bug is:open.”
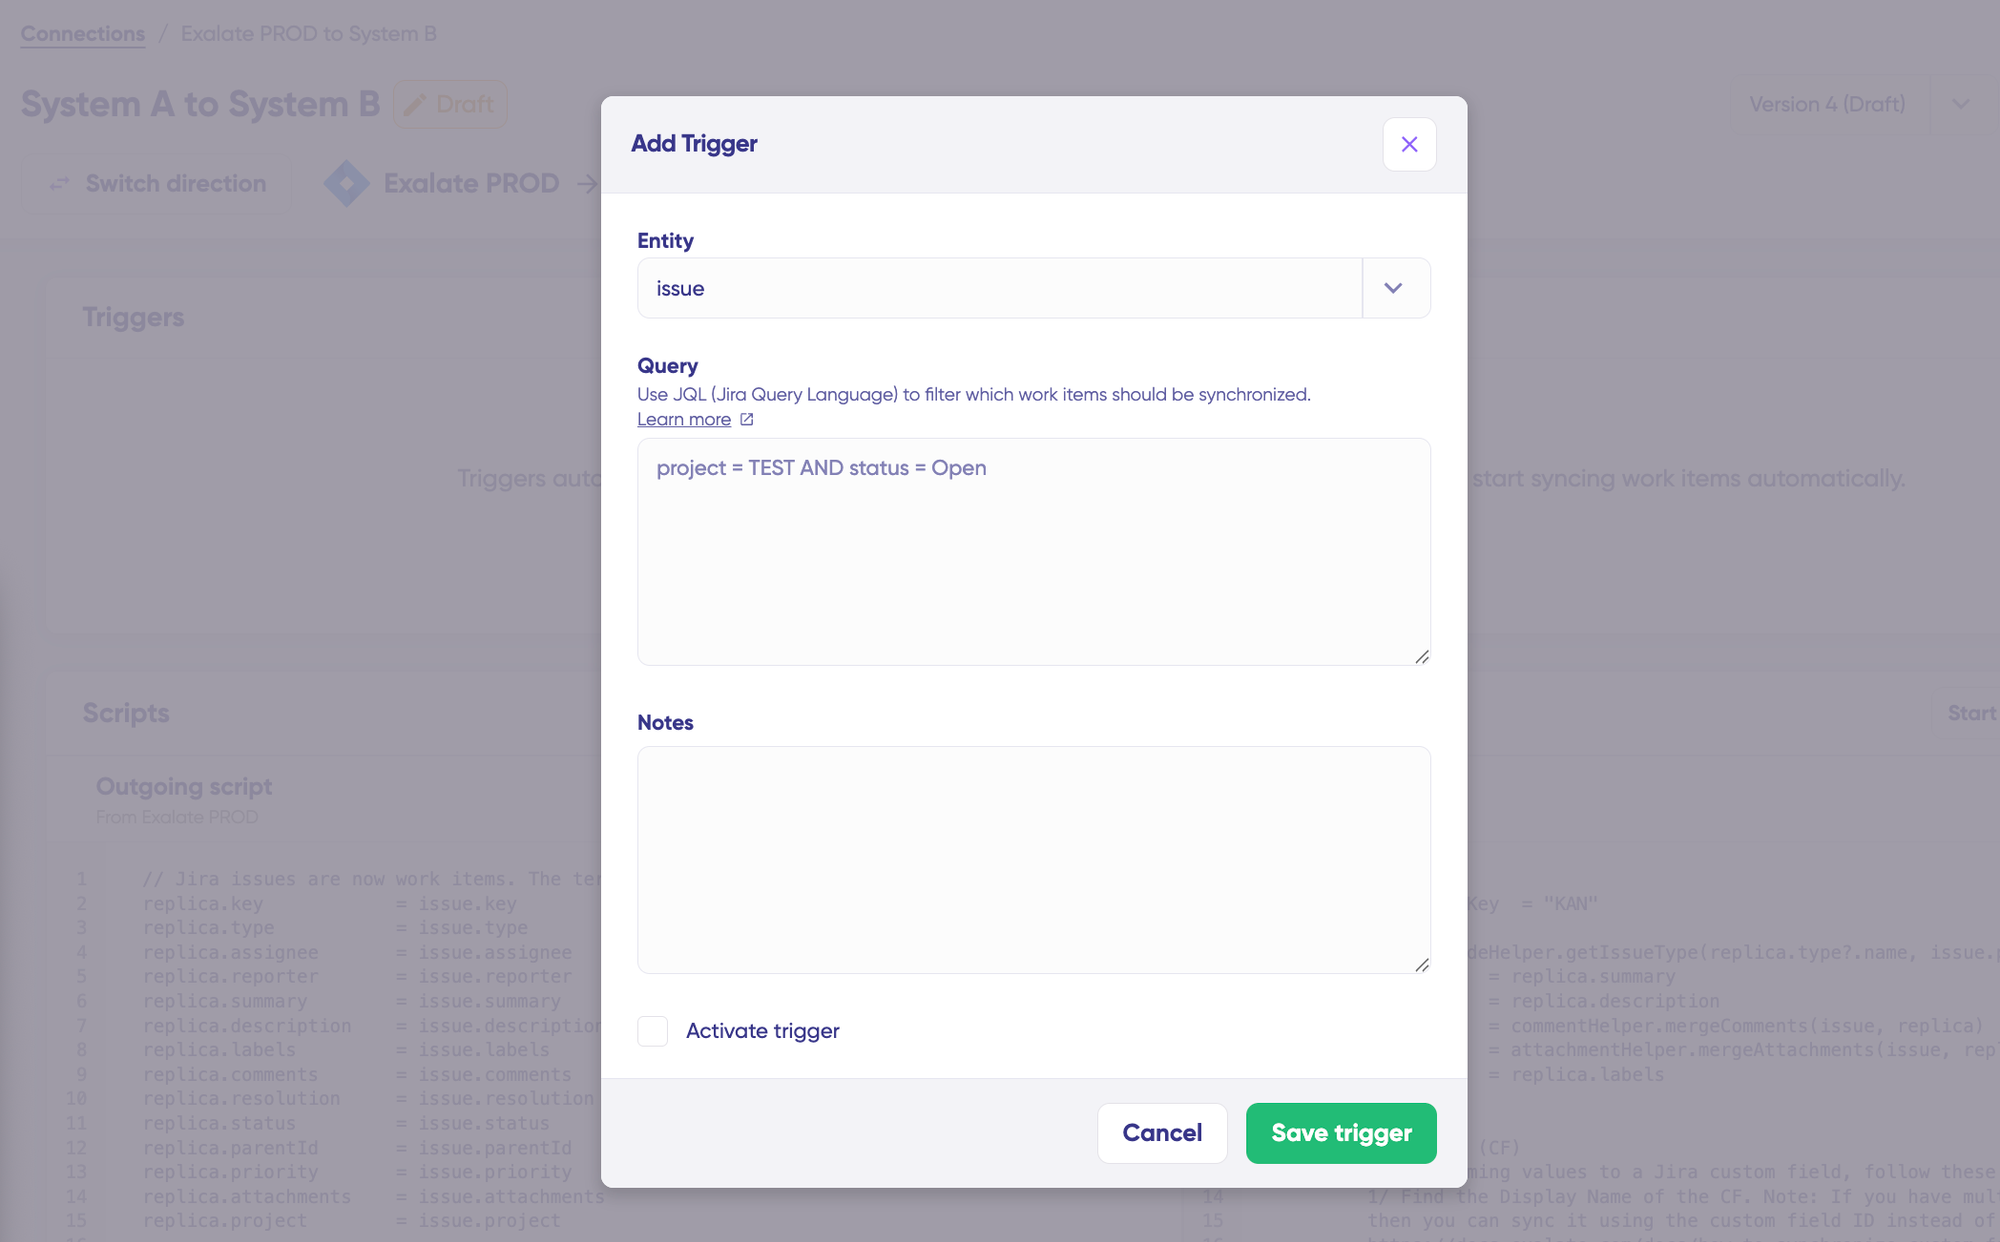
The trigger configuration is also where you determine the synchronization direction. For example, you could configure a one-way flow from GitHub to Zendesk for bug intake, or set up bidirectional synchronization when both teams need to see status updates from the other system.
After setting the trigger, click “Save Trigger” to activate it.
Troubleshoot Your Connection
If there is an error in your sync, the Troubleshooting tab shows affected items and connections on both sides.
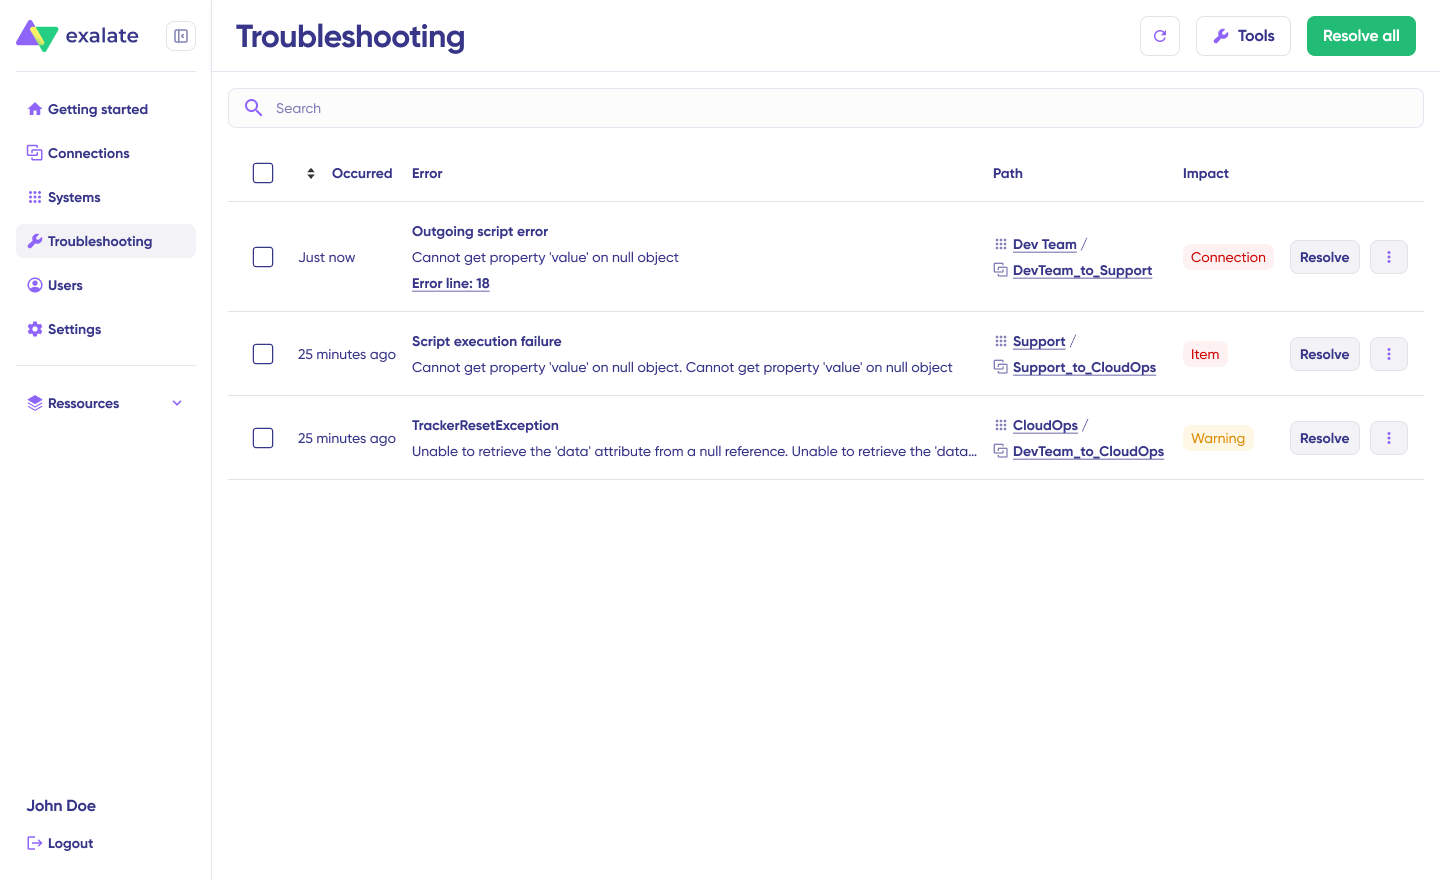
Hover over an error to have Aida provide a plain-language explanation and, where available, suggest a potential solution.
For more detail, click “Error Details“. You’ll see the impact level, stack trace, error type, and date of occurrence. You can also select “View Full Analysis” to see additional context. Once you’ve addressed the issue, click “Resolve.”
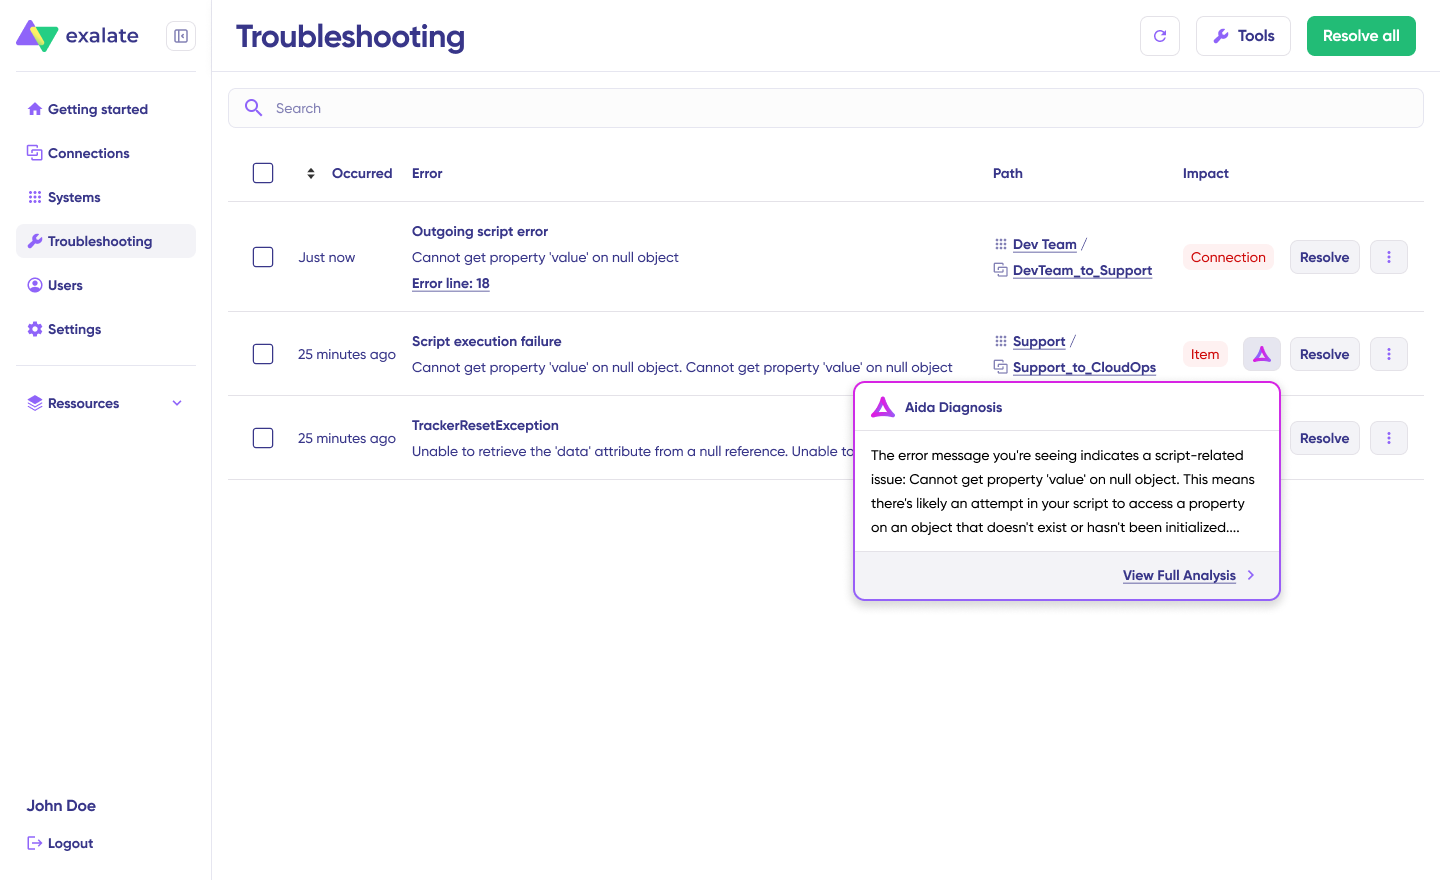
The information provided in the error details can help you determine whether the issue is related to permissions, a field mismatch, or something occurring on the GitHub side.
Monitor the Integration From the Dashboard
The Exalate Dashboard gives you an overview of synchronization activity over time. You can monitor all the connections available to you or focus on an individual integration or connection.
- Log in to the Exalate Console.
- Select Dashboard from the left menu.
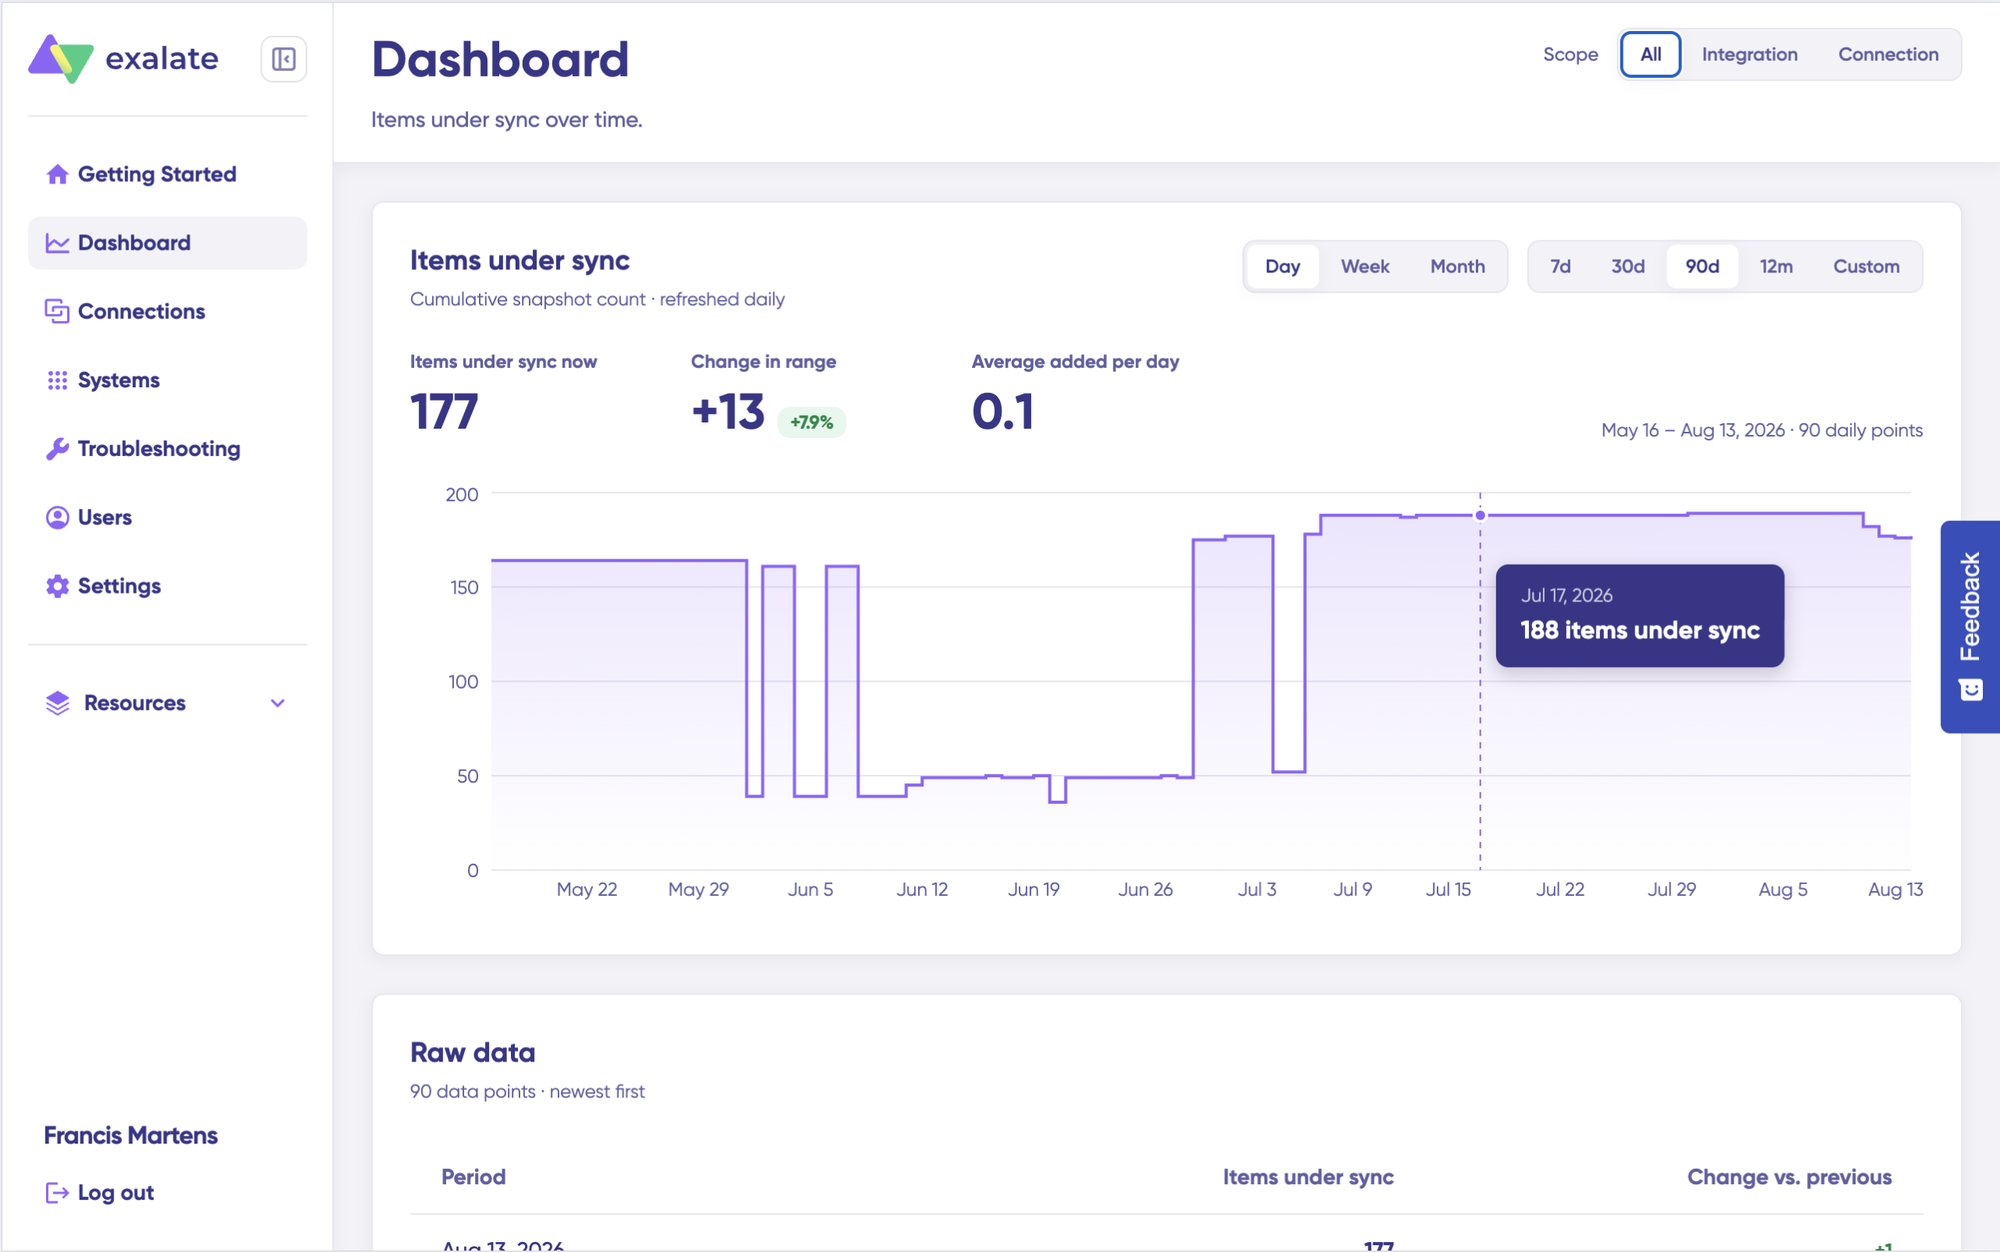
You can also open the Dashboard for a specific connection:
- Go to the Connections list.
- Open the Action Menu for the connection.
- Select View Dashboard.
Dashboard information is presented as cumulative snapshots and is updated daily. You can view the complete dataset or filter it by integration, connection, or a specific time period.
Check Sync Status with the Sync Panel
Exalate also includes a Sync Panel, which is available as a Chrome browser extension. It provides real-time synchronization information for a ticket without requiring you to open the Exalate console.
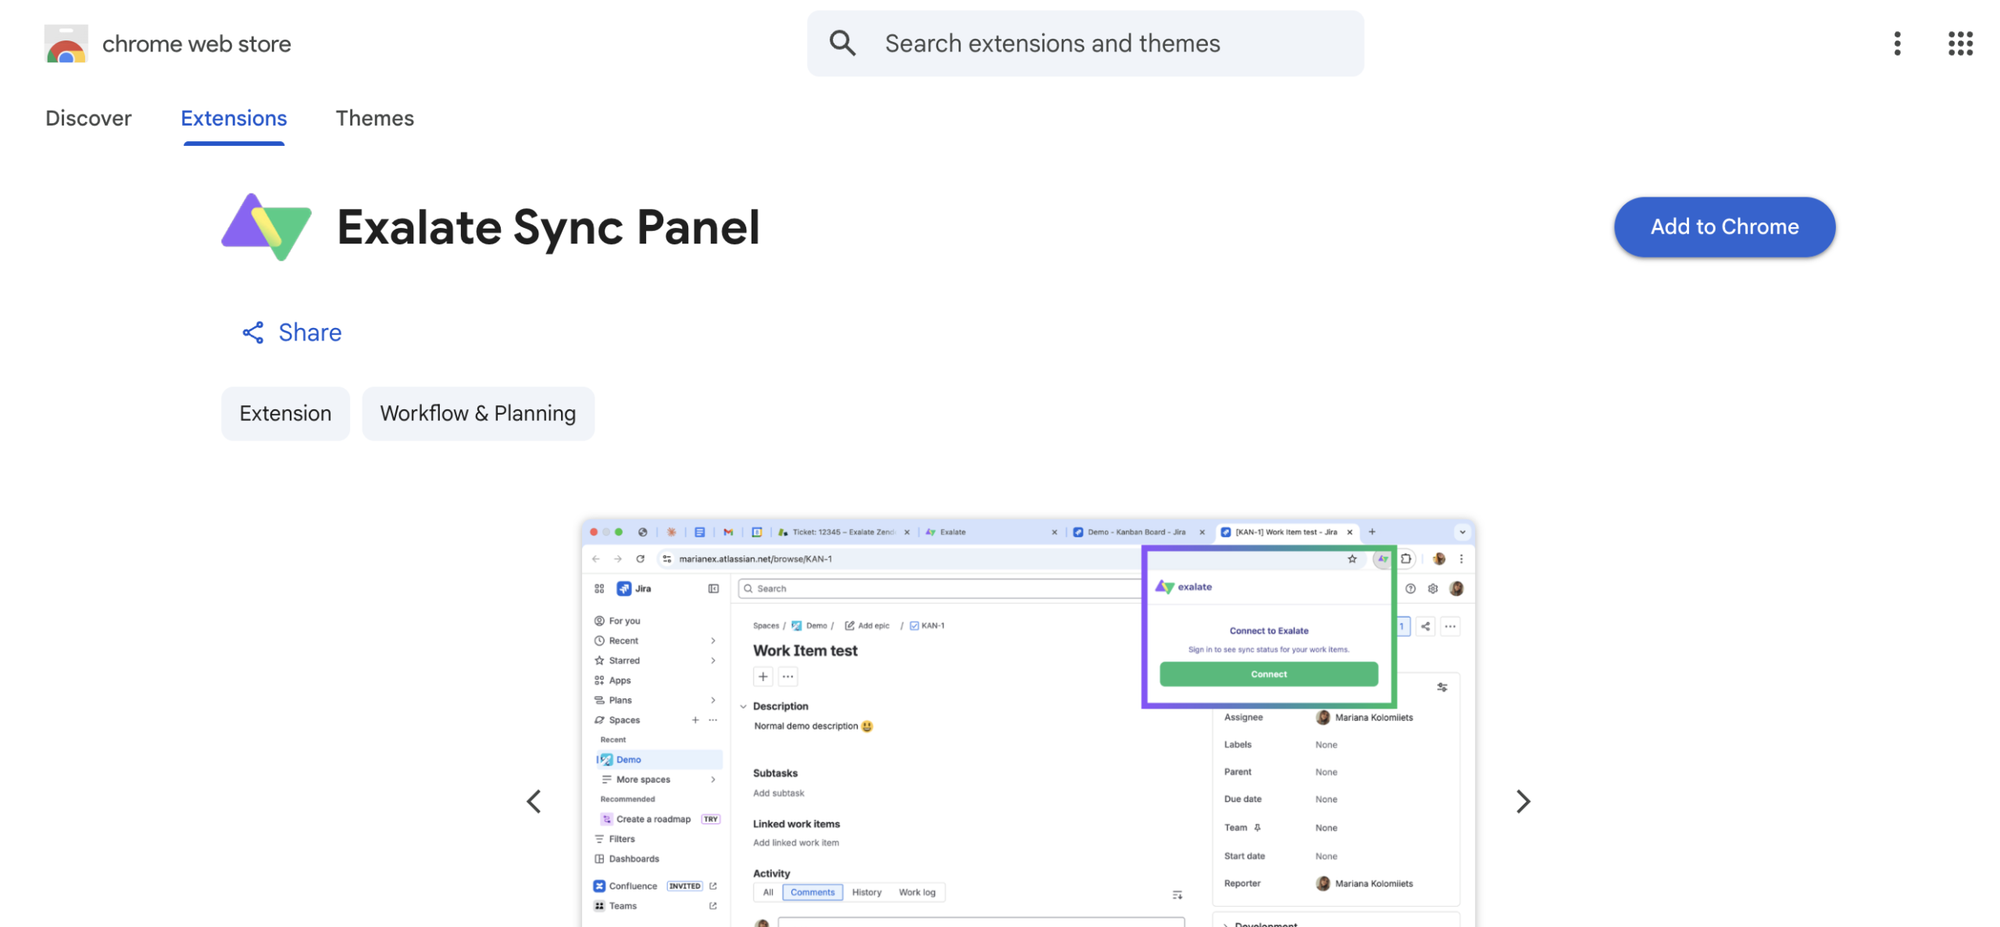
From the Sync Panel, you can manually start a synchronization, unlink items that no longer need to remain connected, and monitor the status of multiple connections from your browser.
Frequently Asked Questions
Does Zendesk integrate with GitHub?
Zendesk doesn’t have a built-in, native integration with GitHub. However, both platforms expose APIs and webhooks that third-party integration tools like Exalate can connect to. Exalate acts as the bridge, reading from one platform’s API and writing to the other’s, enabling true bidirectional synchronization.
What’s the difference between Exalate and GitHub’s native integrations?
GitHub’s app marketplace includes limited integrations, mostly focused on notifications. These don’t provide the work item synchronization that Exalate offers. Exalate specializes in bidirectional data synchronization with field mapping, so data stays consistent across systems. GitHub’s native tools usually handle one-way notifications.
Can I filter which Zendesk tickets sync to GitHub?
Yes. When you configure your Exalate connection, you define rules that determine which tickets sync. You might sync only tickets with a specific tag, assigned to certain teams, or above a certain priority level. Only matching tickets will be synchronized, keeping your GitHub instance focused on relevant work.
How long does it take to set up the integration?
Setup time depends on complexity. A basic bidirectional sync with standard fields takes a few hours. If you have custom fields, complex filtering rules, or need to coordinate with multiple teams, plan for a day or two. Aida accelerates the process by suggesting field mappings and sync rules based on your platform configurations.
What happens if the integration breaks or disconnects?
Exalate monitors connection health and alerts you if issues occur. Most disconnections are temporary (like API timeouts) and resolve automatically with retries. If there’s a persistent problem, you can pause the integration until it’s fixed. Work items that fail to sync are queued and will retry once the connection is restored.
Is there a free trial for Exalate?
Yes. Exalate offers a free 30-day trial. You can set up a full Zendesk-GitHub integration and test it with your actual data during the trial period. This lets you evaluate whether the tool fits your needs before committing to a paid plan.
How much does Zendesk GitHub integration cost?
Exalate pricing factors in the cost of your time. If your team spends hours per week manually syncing data, integration quickly pays for itself. Check out our pricing page to see which plan works best for your use case.
Can I sync with other platforms besides GitHub?
Exalate supports integrations with many enterprise platforms: Jira Cloud, ServiceNow, Freshdesk, Freshservice, Asana, Azure DevOps (Server and Service), Salesforce, and more. You can build a multi-platform synchronization setup with Exalate as the central orchestrator. For a full list of connectors, check the Exalate integrations page.
How is my data secured when syncing between systems?
All data in transit is encrypted using TLS 1.2+. Exalate uses OAuth tokens and API credentials specific to each platform and never stores your passwords. The platform is ISO 27001 certified and undergoes regular security audits. Sensitive data like passwords or API keys are handled securely and never logged. For details, visit the Exalate Trust Center.
Can I customize which fields sync between Zendesk and GitHub?
Absolutely. Exalate’s field mapping feature lets you specify exactly which fields sync in each direction. You control whether custom fields are included, how standard fields are translated between platforms, and which fields are read-only on each side. Aida can help generate mapping rules, or you can configure them manually.
Recommended Reading:
- Jira Zendesk Integration: The Comprehensive Step-by-Step Guide
- How to Set up a Jira GitHub Integration
- GitHub Salesforce Integration: How to Set up a Sync in 6 Steps
- Zendesk ServiceNow Integration: The Complete Guide
- How to Set up a ServiceNow GitHub Integration
- Salesforce Zendesk Integration: The Guide (Step-by-Step)
- Zendesk Integrations: Streamline Teams Working in Zendesk and Other Tools
- How to Set up a Zendesk Azure DevOps Integration
- How to Set up an Azure DevOps GitHub Integration