
If you use platforms like ServiceNow and GitHub to organize your teams, you’ll eventually need a ServiceNow GitHub integration that actually works.
Connecting these two platforms means easier and more accurate data sharing, especially with automated connectors that eliminate manual updates and reduce errors.
Managing incident tickets, pull requests, deployment tracking, and developer workflows across both platforms sounds overwhelming. The right integration solution makes it manageable.
This guide shows you how to set up a ServiceNow integration with GitHub, what features matter most, and how to optimize the connection for your team’s specific needs.
Key Takeaways
- ServiceNow GitHub integration enables automated bidirectional synchronization between ITSM workflows and development operations without manual data entry.
- Context-aware field mapping ensures ServiceNow incidents automatically populate GitHub issues with relevant technical details and vice versa.
- Enterprise integrations require security features and encrypted data transmission.

Why Integrate ServiceNow and GitHub
ServiceNow is a workflow platform that handles everything from service management to help desk support. With a focus on large teams and organizations, ServiceNow provides the right tools for tracking large amounts of information and handling complex business relationships.
GitHub is a code storage platform that enables developers to handle version control and code distribution easily. GitHub supports open-source projects and is a great way to build a community of coders working together to help improve products.
Since both platforms are vital to operations, integrating them helps teams share data and manage workflows collectively without jeopardizing either side’s autonomy or security.
Business Impact of ServiceNow GitHub Integration
- Faster incident resolution: Development teams see ServiceNow incidents directly in GitHub without switching contexts. Support teams track code fixes in real-time without asking for updates.
- Reduced manual work: Automated synchronization eliminates duplicate data entry. One update in ServiceNow or GitHub automatically reflects in the other platform.
- Better cross-team visibility: Product managers see development progress without accessing GitHub. Developers understand customer impact without digging through ServiceNow tickets.
- Improved compliance tracking: Every code change links to its originating ServiceNow incident. Audit trails connect customer issues to specific commits and pull requests.
Choosing the Right ServiceNow GitHub Integration
Your teams need a solution that handles outages without breaking synchronization, adapts to changing workflows, and allows granular control over what information gets shared.
- Reliability considerations: Look for platforms with automatic retry mechanisms, error handling, and connection health monitoring. System downtime on one platform shouldn’t stop all synchronization.
- Security requirements: Enterprise integrations need encryption at rest and in transit, role-based access controls, and compliance certifications. For detailed security practices, review the Exalate Trust Center, which includes ISO 27001:2022.
- Customization needs: Different teams require different field mappings. Some need summary and description only; others need assignee, priority, labels, attachments, and custom fields synchronized.
- Scalability factors: Integration platforms should handle growing ticket volumes without performance degradation. Consider platforms that support multiple ServiceNow instances and GitHub repositories simultaneously.
The tool we’ve chosen for this guide is Exalate because it meets these criteria and supports bidirectional synchronization of:
- Assignee
- Reporter
- Summary
- Description
- Labels
- Comments
- Attachments
- Priority
- ParentId
- Resolution
- Status
- Projects (versions and components)
Other considerations include privacy controls, compliance certifications, connection reliability, and AI-assisted configuration to simplify complex mapping scenarios without manual scripting.
Essential Features for ServiceNow GitHub Integration
Bidirectional Synchronization
One-way integrations create information silos. Bidirectional sync ensures both platforms stay updated regardless of where changes occur.
- ServiceNow to GitHub: When support creates an incident in ServiceNow, a corresponding GitHub issue appears automatically with all relevant context: customer details, priority level, and affected systems.
- GitHub to ServiceNow: When developers update an issue status, add comments, or link pull requests, those updates sync back to ServiceNow, so support teams see progress without asking.
Field Mapping Flexibility
Generic field mappings don’t work for most organizations. Teams need control over what data moves between platforms.
- Standard mappings: Summary, description, priority, and status typically map directly. An incident summary becomes an issue title; the incident description becomes the issue body.
- Custom mappings: ServiceNow custom fields can map to GitHub labels or custom issue fields. Priority levels in ServiceNow might map to GitHub priority labels or project board columns.
- Conditional logic: Advanced integrations support conditional mappings—only sync incidents with specific categories, or apply different mappings based on incident type.
Security and Compliance
Enterprise integrations handle sensitive customer data and require robust security measures.
- Data encryption: All data transmission should use TLS 1.2 or higher. Data at rest should be encrypted with industry-standard algorithms.
- Access controls: Integration platforms should respect existing permissions. Users shouldn’t see data they lack access to on either platform.
- Compliance certifications: Look for ISO and GDPR compliance.
Error Handling and Resilience
- Integrations fail when APIs change, networks drop, or platforms undergo maintenance. Good integration tools handle these scenarios gracefully.
- Automatic retry: Failed synchronizations should retry automatically with exponential backoff. Transient network issues resolve without manual intervention.
- Error notifications: Teams should receive alerts when synchronization fails repeatedly. Clear error messages help diagnose and fix configuration issues quickly.
AI-Assisted Configuration
Complex integrations traditionally required scripting knowledge. Modern platforms offer AI-assisted configuration that simplifies setup and ongoing maintenance.
- Natural language configuration: Describe what you want to sync in plain language: “When a P1 incident is created in ServiceNow, create a high-priority GitHub issue in the backend-services repository with the incident number in the title.”
- Smart field suggestions: AI analyzes both platforms and suggests logical field mappings based on field names, data types, and common integration patterns.
- Configuration validation: AI checks integration rules for common mistakes—circular sync loops, missing required fields, type mismatches—before they cause problems.
Exalate’s Aida provides AI-assisted integration setup, reducing configuration time and helping teams without scripting expertise build sophisticated integrations.
Sync Panel
Exalate also comes with a Chrome extension called Sync Panel that lets users check sync status, spot errors, trigger manual syncs, and unlink sync pairs straight from the browser, without opening the console.
It’s useful for two groups: admins who want to keep an eye on sync status without switching tabs and end users who want to confirm that the remote side received their update.
How to Set up a ServiceNow GitHub Integration in Six Steps
Exalate provides real-time bidirectional sync between ServiceNow and GitHub with AI-assisted configuration, flexible field mapping, and trigger-based control.
If you’re on Exalate Classic, then you can import your existing nodes and connections using the “Import connection” feature.
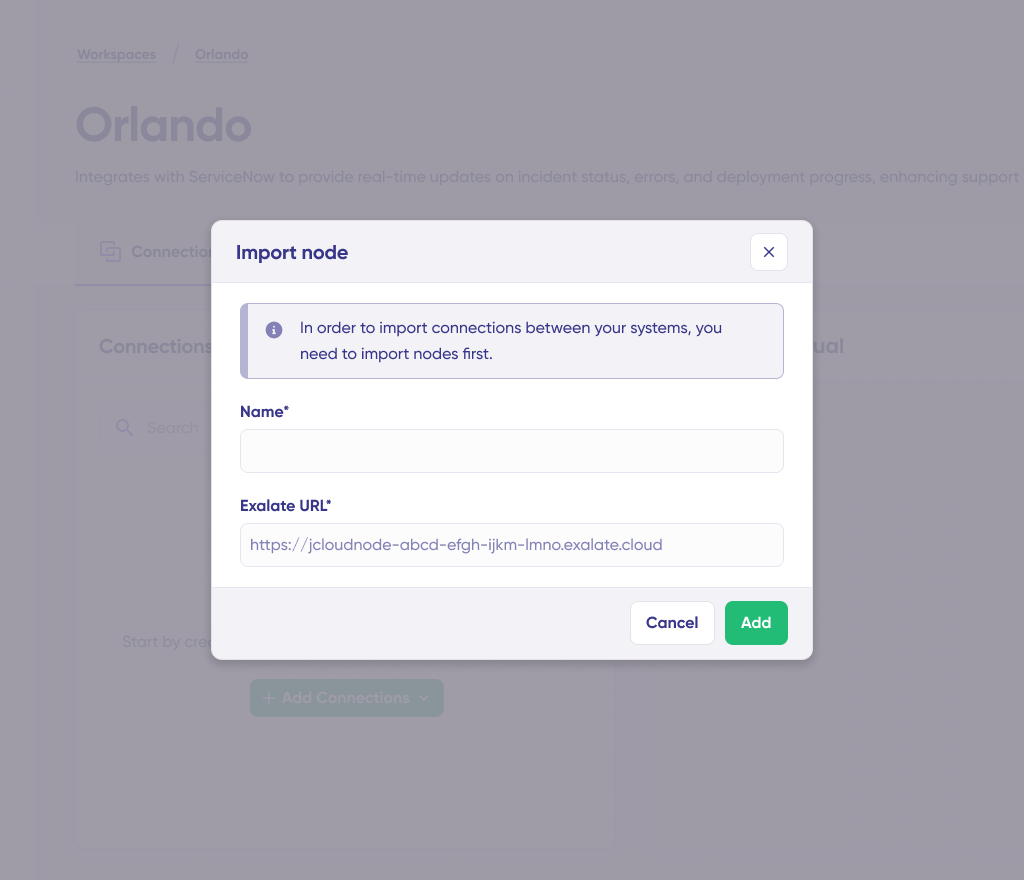
This will help you retain existing configurations and sync rules as you move to New Exalate.
To get started with Exalate for GitHub or discuss your use case and requirements, please contact sales.
Common Use Cases for ServiceNow GitHub Integration
Connecting Customer Support and Development Teams
Support teams work in ServiceNow; developers work in GitHub. Without integration, these teams communicate through email, chat, or manual ticket updates.
The challenge: Customer reports a checkout page error. Support creates a ServiceNow incident with customer details, error screenshots, and business impact. They then email developers asking for an investigation. Developers create a GitHub issue, duplicate the information, and start working. When they fix the bug, they update the GitHub issue but forget to update ServiceNow. Support has no visibility into progress.
The solution: Integration automatically creates a GitHub issue when support tags a ServiceNow incident for development. All incident details sync to the GitHub issue. As developers comment, link pull requests, or change status, updates flow back to ServiceNow in real-time.
Coordinating Product Development and Quality Assurance
QA teams track bugs in ServiceNow; developers manage fixes in GitHub. Without integration, QA manually checks GitHub for fix status or asks developers for updates.
The challenge: QA finds a critical bug during testing and creates a ServiceNow incident with reproduction steps, test environment details, and severity classification. Developers need to manually check ServiceNow, copy information to GitHub, and remember to update ServiceNow after fixing the bug.
The solution: Integration syncs QA-reported bugs from ServiceNow to GitHub automatically. Developers see full context, including reproduction steps and testing environment. When developers commit fixes and link pull requests, QA sees deployment status in ServiceNow without leaving their workflow.
Enabling Cross-Company Collaboration
Managed services providers (MSPs) work in their own GitHub repositories; clients track service requests in ServiceNow. Without integration, MSPs lack visibility into client priorities, and clients can’t see development progress.
The challenge: A client submits a feature request in ServiceNow. The MSP needs to manually check ServiceNow, create corresponding GitHub issues, and send status updates via email. The client has no visibility into actual development progress.
The solution: Integration creates GitHub issues in the MSP’s repository when clients submit specific ServiceNow request types. Client-facing fields sync automatically while keeping sensitive development details private. Status updates flow back to ServiceNow so clients see progress without MSP access.
Supporting DevOps and SRE Teams
Site reliability engineering teams use ServiceNow for incident management; DevOps teams track infrastructure changes in GitHub. Without integration, incident response requires manual coordination.
The challenge: Production outage triggers a ServiceNow incident. SRE identifies a configuration change as the root cause. DevOps needs to revert the change in GitHub while SRE coordinates customer communication in ServiceNow. Manual updates between platforms slow incident response.
The solution: Integration links ServiceNow incidents to GitHub commits, pull requests, and deployment records. SRE sees recent GitHub changes directly in ServiceNow. When DevOps reverts changes or deploys fixes, those actions automatically update the ServiceNow incident timeline.
Connecting with Other ITSM Platforms
Organizations using multiple ITSM platforms alongside ServiceNow can extend integration benefits beyond GitHub. ServiceNow integrations work alongside connections to platforms like Freshservice, Freshdesk, and Asana for unified workflow management.
The scenario: A company uses ServiceNow for internal IT, Freshdesk for customer support, and GitHub for development. Customer support tickets in Freshdesk need to reach developers in GitHub while IT tracks related infrastructure issues in ServiceNow.
The approach: Integration platforms that support multiple connectors enable sophisticated workflows—Freshdesk tickets create ServiceNow incidents when they require infrastructure changes, which then generate GitHub issues for developer action. Updates flow back through all platforms automatically.
The benefit: Organizations maintain platform preferences for different teams while ensuring everyone has the context they need without duplicate data entry or manual status updates.
Comparison: Integration Approaches for ServiceNow and GitHub
Native ServiceNow IntegrationHub
ServiceNow’s IntegrationHub provides built-in integration capabilities using Flow Designer and spoke connections.
Strengths: Native to ServiceNow, no additional platform costs for ServiceNow users, IT operations staff are often familiar with the Flow Designer interface.
Limitations: Requires ServiceNow instance access and permissions, configuration complexity increases with sophisticated mapping needs, limited error handling for complex bidirectional scenarios, and GitHub side requires additional development work.
Best for: Organizations heavily invested in ServiceNow who need simple one-way synchronization and have internal resources for custom development.
Third-Party Integration Platforms
Dedicated integration platforms like Exalate, Zapier, and Workato specialize in connecting different tools.
Strengths: Unified view across both platforms, sophisticated bidirectional synchronization, advanced error handling and retry logic, pre-built connectors reduce setup time, and AI-assisted configuration simplifies complex mappings.
Limitations: Additional platform cost beyond ServiceNow and GitHub licensing, introduces a third platform to manage and monitor.
Best for: Organizations needing sophisticated bidirectional synchronization, complex field mappings, or teams without extensive integration development resources.
Custom API Integration
Building custom integration using ServiceNow and GitHub REST APIs.
Strengths: Complete control over integration logic, no per-user or per-sync licensing costs beyond development time, and can implement highly specific business logic.
Limitations: Significant development and maintenance effort, requires ongoing updates as APIs change, custom error handling and monitoring needed, security implementation responsibility falls on the internal team.
Best for: Organizations with specialized requirements that off-the-shelf solutions can’t meet and dedicated development resources for ongoing maintenance.
No-Code Integration Tools
Platforms like Zapier and Make (formerly Integromat) offer no-code integration through visual workflow builders.
Strengths: Quick setup for simple scenarios, minimal technical knowledge required, pay-as-you-go pricing models.
Limitations: Limited support for complex conditional logic, less sophisticated error handling, can become expensive at scale, and field mapping complexity increases with custom fields.
Best for: Small teams or simple use cases with straightforward field mapping and low synchronization volumes.
Advanced Integration Scenarios
Multi-Repository GitHub Integration
Large organizations often use multiple GitHub repositories for different products, services, or teams. ServiceNow integration can route incidents to appropriate repositories based on incident properties.
Configuration approach: Map ServiceNow categories, assignment groups, or custom fields to specific GitHub repositories. An incident assigned to “Backend Services” creates an issue in the backend repository; “Frontend” incidents go to the frontend repository.
Team benefits: Developers see only relevant issues in their repositories. Support teams don’t need to know which repository handles each incident type. Routing logic is centralized in the integration configuration.
Scaling considerations: As repository count grows, consider repository naming conventions and categorization schemes that simplify routing rules rather than hard-coding specific repository names.
Status Workflow Synchronization
ServiceNow and GitHub use different status models. ServiceNow typically uses states like New, In Progress, On Hold, Resolved, and Closed. GitHub uses Open, Closed, and project board columns for granular status.
Simple mapping: Map ServiceNow “Resolved” and “Closed” to GitHub “Closed”; all other states to GitHub “Open”.
Advanced mapping: Use GitHub project boards for detailed status tracking. Map ServiceNow states to specific board columns: “New” to “Backlog”, “In Progress” to “In Development”, “Pending Deployment” to “In Review”, “Resolved” to “Done”.
Bidirectional considerations: Define clear rules for how GitHub status changes map back to ServiceNow. A closed GitHub issue might return to ServiceNow as “Resolved” rather than “Closed” to allow for verification.
Comment and Attachment Synchronization
Comments and attachments contain valuable context but require careful handling to avoid information overload.
Selective comment sync: Not all GitHub comments need to appear in ServiceNow. Consider filtering automated bot comments, code review details, or technical discussions. Sync only comments tagged for customer visibility.
Attachment handling: ServiceNow attachments (screenshots, logs, documents) should sync to GitHub when they provide development context. GitHub attachments (code snippets, technical diagrams) may not need to sync back to ServiceNow if they’re only relevant for developers.
Formatting preservation: ServiceNow and GitHub use different formatting (HTML vs Markdown). Integration should convert formatting appropriately or strip formatting to avoid display issues.
Integration with Azure DevOps Server
Organizations using both GitHub and Azure DevOps Server alongside ServiceNow can create sophisticated three-way synchronization workflows.
Scenario: Development teams are split between GitHub and Azure DevOps Server, and both need visibility into ServiceNow incidents while maintaining their preferred development platform.
Approach: The integration platform connects ServiceNow with both development tools simultaneously. An incident creates corresponding work items in both GitHub and Azure DevOps Server. Updates from either platform sync back to ServiceNow.
Conflict handling: Define clear precedence rules when the same incident receives updates from multiple sources simultaneously. Timestamp-based or platform-priority-based conflict resolution prevents data loss.
Measuring Integration Success
Key Performance Indicators
Track specific metrics to quantify integration value and identify improvement opportunities.
- Time saved per ticket: Measure time spent manually copying information, checking for updates, and sending status emails before and after integration. Multiply by ticket volume for total time savings.
- Incident resolution time: Track average time from incident creation to resolution before and after integration. Faster communication and visibility should reduce resolution time.
- Update frequency: Count how often teams manually checked for updates or sent status update emails before integration. Compare to the automatic sync frequency after integration.
- Error reduction: Track incidents where information was duplicated incorrectly or updates were missed before integration. Compare to synchronization errors after integration.
- User adoption: Monitor what percentage of eligible incidents use the integration. Low adoption may indicate configuration issues or user training needs.
Continuous Optimization
Integration isn’t set-and-forget. Regular optimization improves results over time.
- Review synchronization patterns: Which incident types benefit most from integration? Which creates unnecessary noise? Adjust trigger rules and field mappings accordingly.
- Gather user feedback: Support and development teams interact with integration daily. Their insights identify pain points and improvement opportunities.
- Monitor error rates: Recurring synchronization errors indicate configuration issues, API changes, or workflow mismatches that need addressing.
- Update field mappings: As ServiceNow and GitHub configurations evolve, field mappings may need adjustments to maintain synchronization accuracy.
Frequently Asked Questions
What security certifications does Exalate provide for ServiceNow GitHub integration?
Exalate maintains ISO 27001:2022 certification for enterprise security requirements. All data is transmitted using TLS 1.2+ encryption and is encrypted at rest using industry-standard algorithms. The Exalate Trust Center provides comprehensive security documentation, audit reports, and compliance certifications. Exalate respects existing access controls on both platforms, ensuring users only see data they’re authorized to access.
Can Exalate sync custom fields between ServiceNow and GitHub?
Yes, Exalate synchronizes custom ServiceNow fields to GitHub labels, custom issue fields, or project properties based on your configuration. The platform supports conditional field mappings—only sync specific fields when certain conditions are met—and data transformation to handle format differences between platforms. Exalate’s AI-assisted configuration analyzes both platforms and suggests logical field mappings based on field names and data types.
How does Exalate’s Aida help with ServiceNow GitHub integration setup?
Aida provides AI-assisted integration configuration through natural language prompts. Describe what you want to sync in plain language—”Create a high-priority GitHub issue when a P1 ServiceNow incident is assigned to the development team”—and Aida generates the appropriate configuration. Aida validates configurations for common mistakes like circular sync loops, missing required fields, and type mismatches before they cause synchronization problems.
Does Exalate support integrating GitHub with multiple ServiceNow instances?
Yes, Exalate supports multi-instance configurations where one GitHub organization connects to multiple ServiceNow instances or multiple GitHub repositories connect to a single ServiceNow instance. This enables organizations with multiple business units, geographic regions, or product lines to maintain separate ServiceNow instances while coordinating development work across shared GitHub repositories.
What happens to ServiceNow attachments when syncing to GitHub with Exalate?
Exalate synchronizes ServiceNow attachments to GitHub issues when configured. Screenshots, log files, and documents attached to ServiceNow incidents automatically appear in the corresponding GitHub issue. You can configure selective attachment sync—only attachments matching specific criteria (file type, size, or naming patterns) transmit to GitHub—to avoid unnecessary data transfer and storage costs.
Can Exalate integrate ServiceNow with other development platforms besides GitHub?
Yes, Exalate supports integrations between ServiceNow and multiple development platforms, including GitHub, Azure DevOps Server, Jira, and others. Organizations using different development tools across teams can maintain ServiceNow as their unified ITSM platform while connecting to each team’s preferred development environment. Exalate also connects ServiceNow with other ITSM platforms like Freshservice, Freshdesk, and Asana for comprehensive workflow integration.
How does Exalate pricing work for ServiceNow GitHub integration?
Exalate pricing is based on synchronized entities and connector usage rather than per-user licensing. Contact Exalate through the integrations page for specific pricing based on your ticket volume and integration requirements. Organizations can calculate potential ROI by quantifying time saved on manual updates, faster incident resolution, and improved cross-team collaboration before committing to implementation.
Recommended Reading:
- ServiceNow to ServiceNow Integration: Set up a Two-Way Sync
- Jira ServiceNow Integration: How to Set up an Integration in 6 Steps
- How to Set up an Azure DevOps GitHub Integration
- How to Set up a Zendesk GitHub Integration
- GitHub Salesforce Integration: How to Set up a Sync in 6 Steps
- How to Set up a Salesforce ServiceNow Integration
- ServiceNow Integrations: Integrate ServiceNow and Other Systems Bidirectionally


