The Reality of Business Process Integration in 2025

Business Process Integration

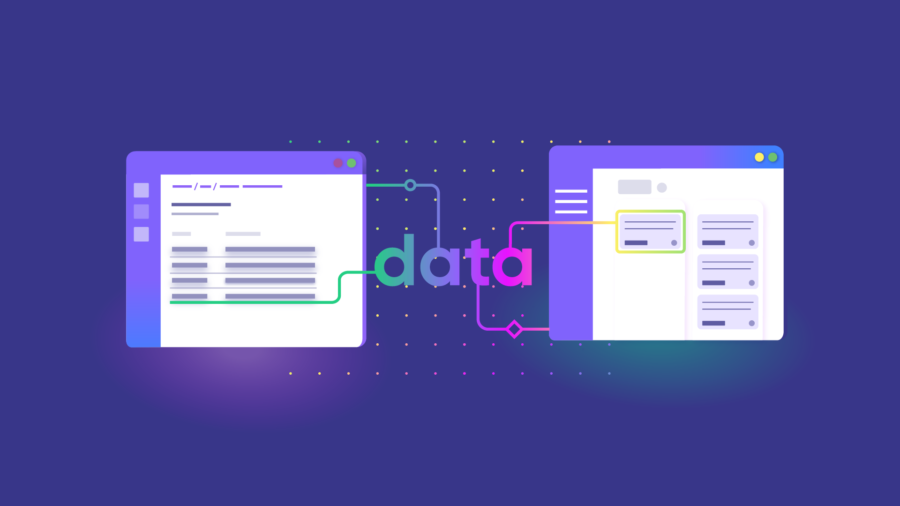
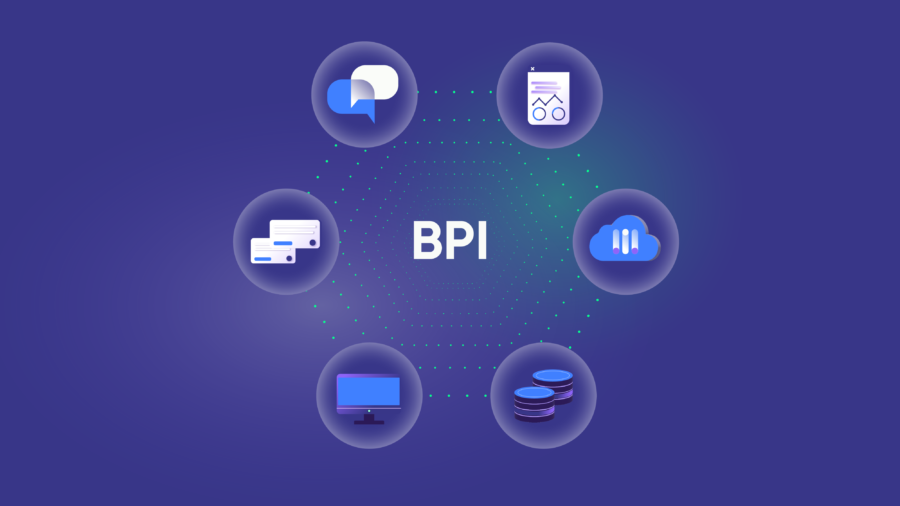
Business process integration (BPI) involves unifying and consolidating data, processes, applications, and systems in order to create one cohesive unit that is visible centrally within an organization.

Companies using multiple work management systems and platforms can integrate their business processes using native tools or third-party solutions.

Before going into detail about business process integration in the modern workplace, I’ll help you define the concept. 

You’ll also read examples and practical applications of BPI solutions. Then I’ll discuss business process integration advantages and disadvantages.

What is Business Process Integration?

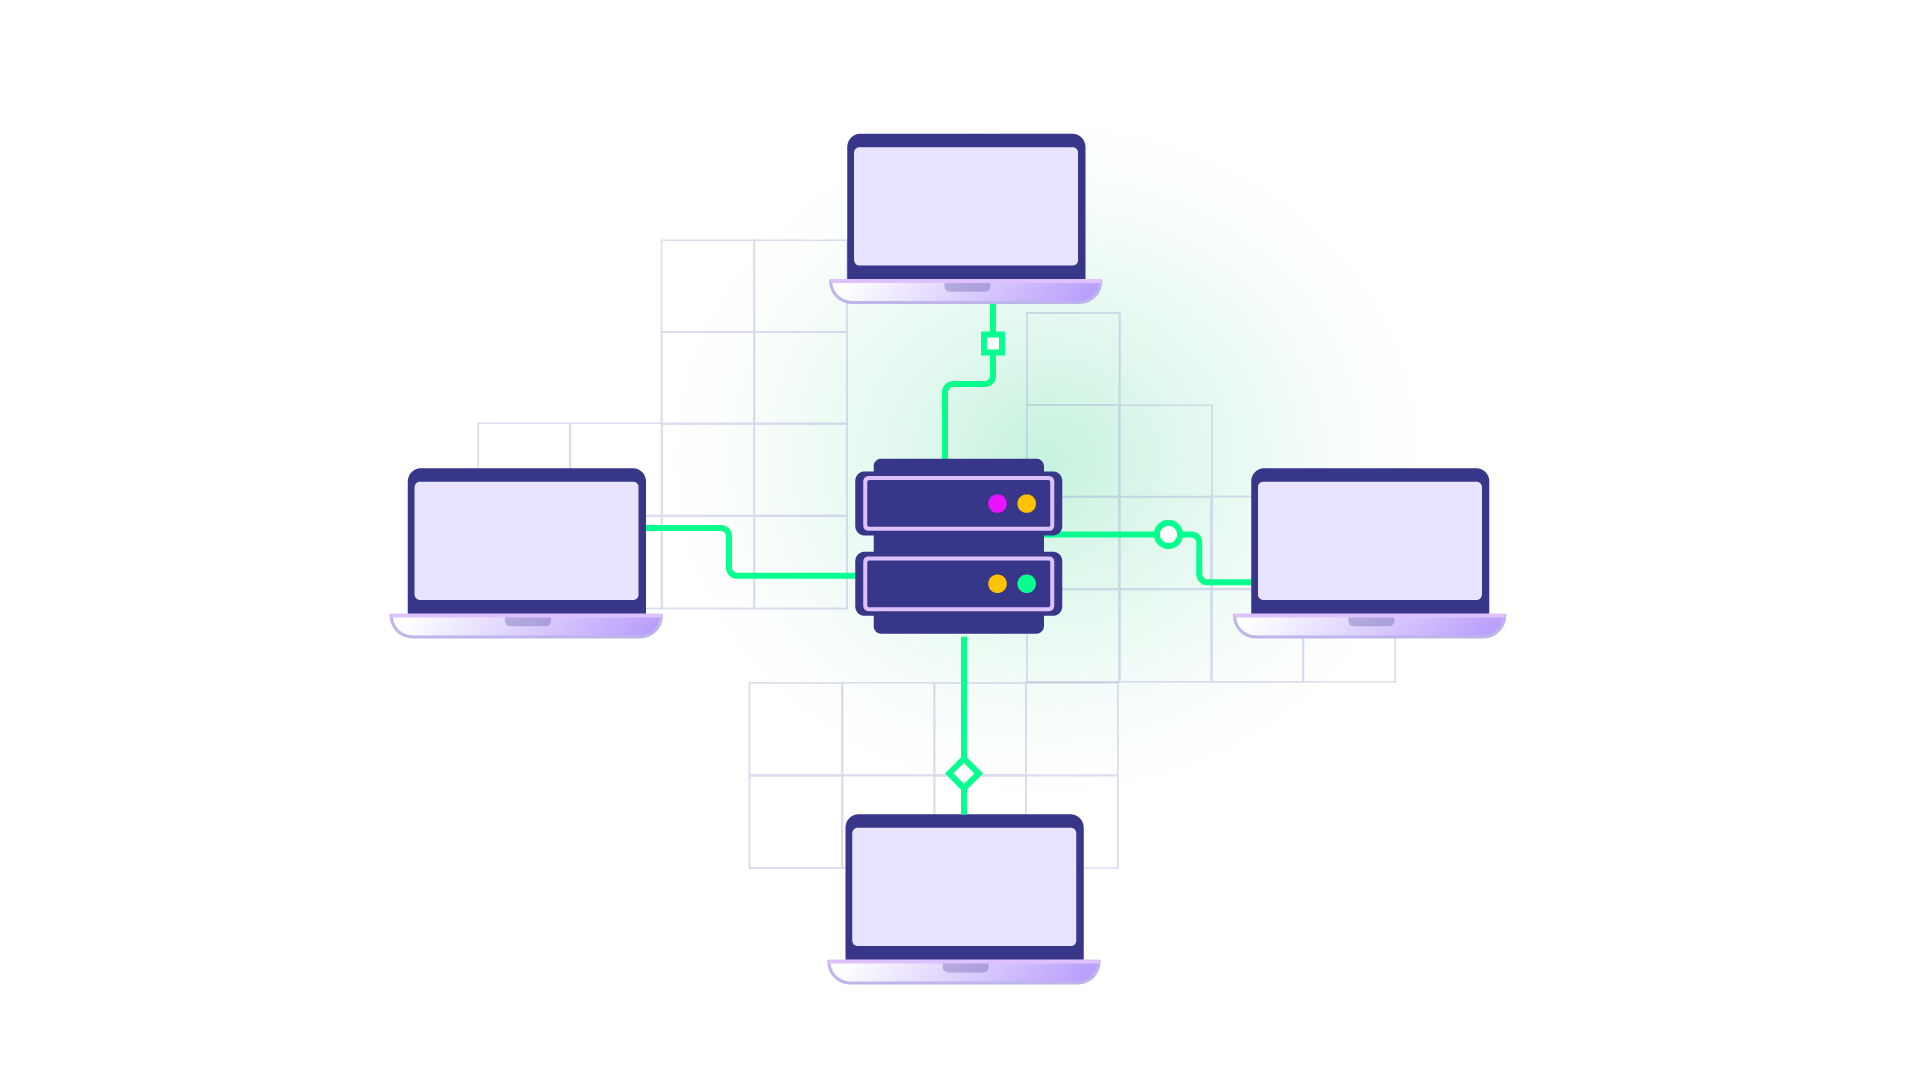
Business process integration is a concept that involves the interconnection of applications, systems, partners, databases, workflows, processes, and everything else related to business data. 

The main objective of this process is to establish a centralized repository where all stakeholders can access data. With the help of automation, integrating business processes can provide a single source of truth for your business.

exalate connectors

Here’s how it works.

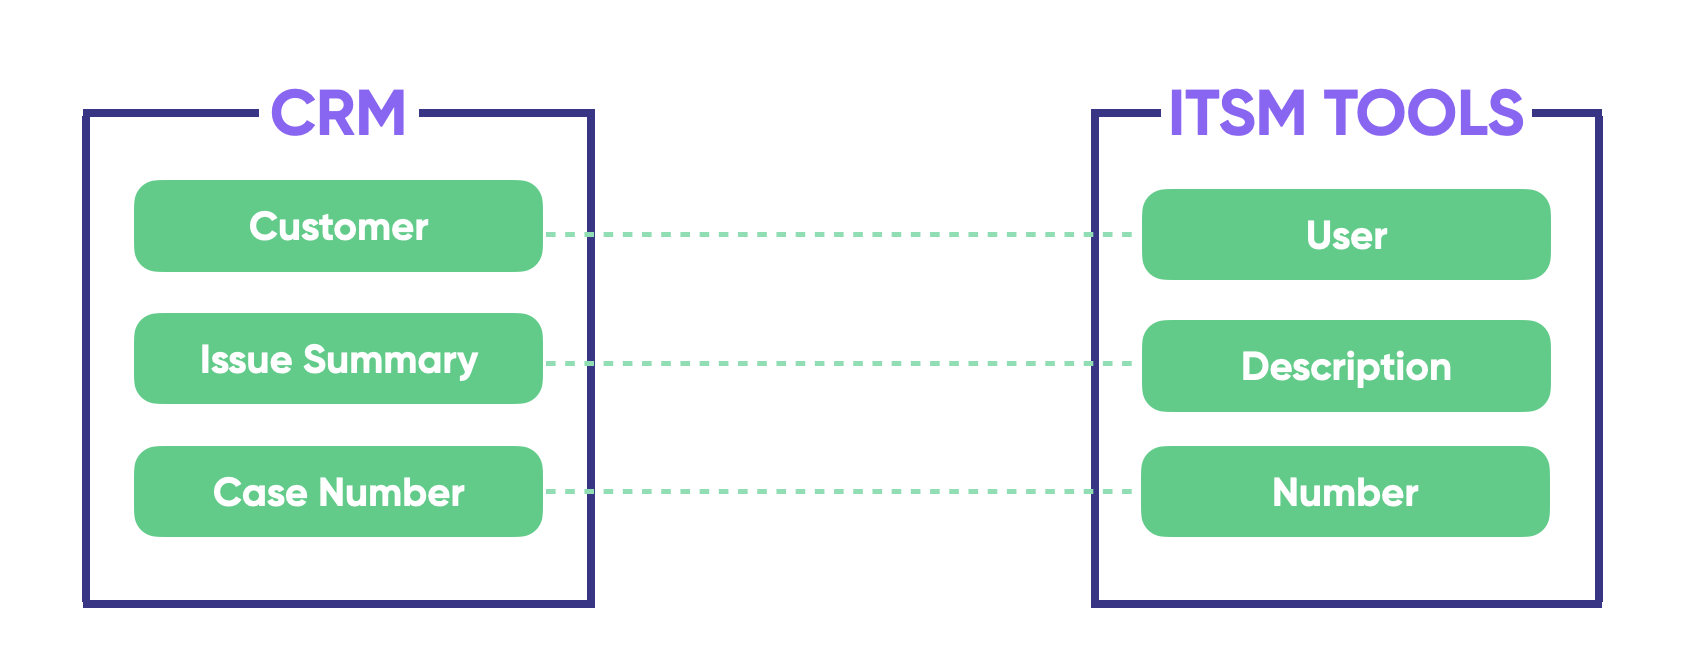
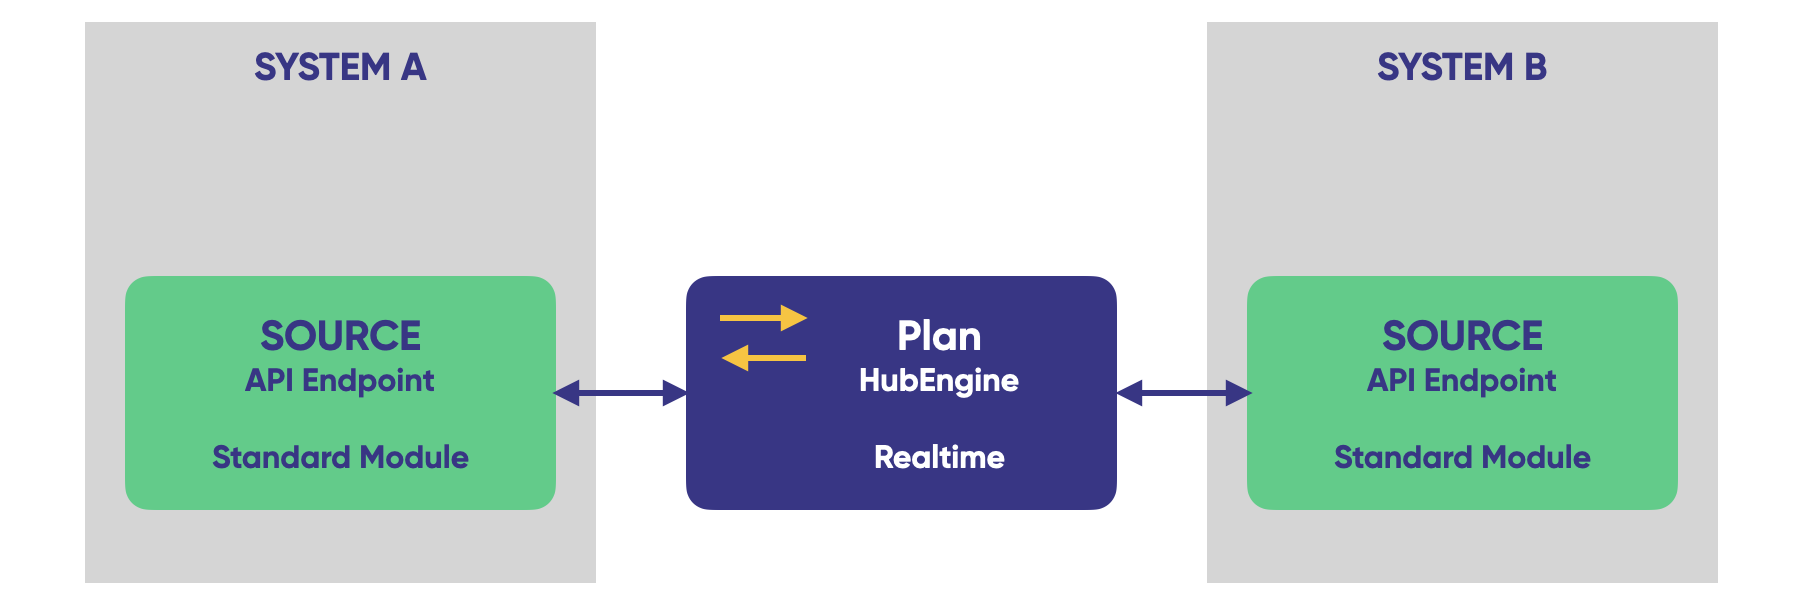
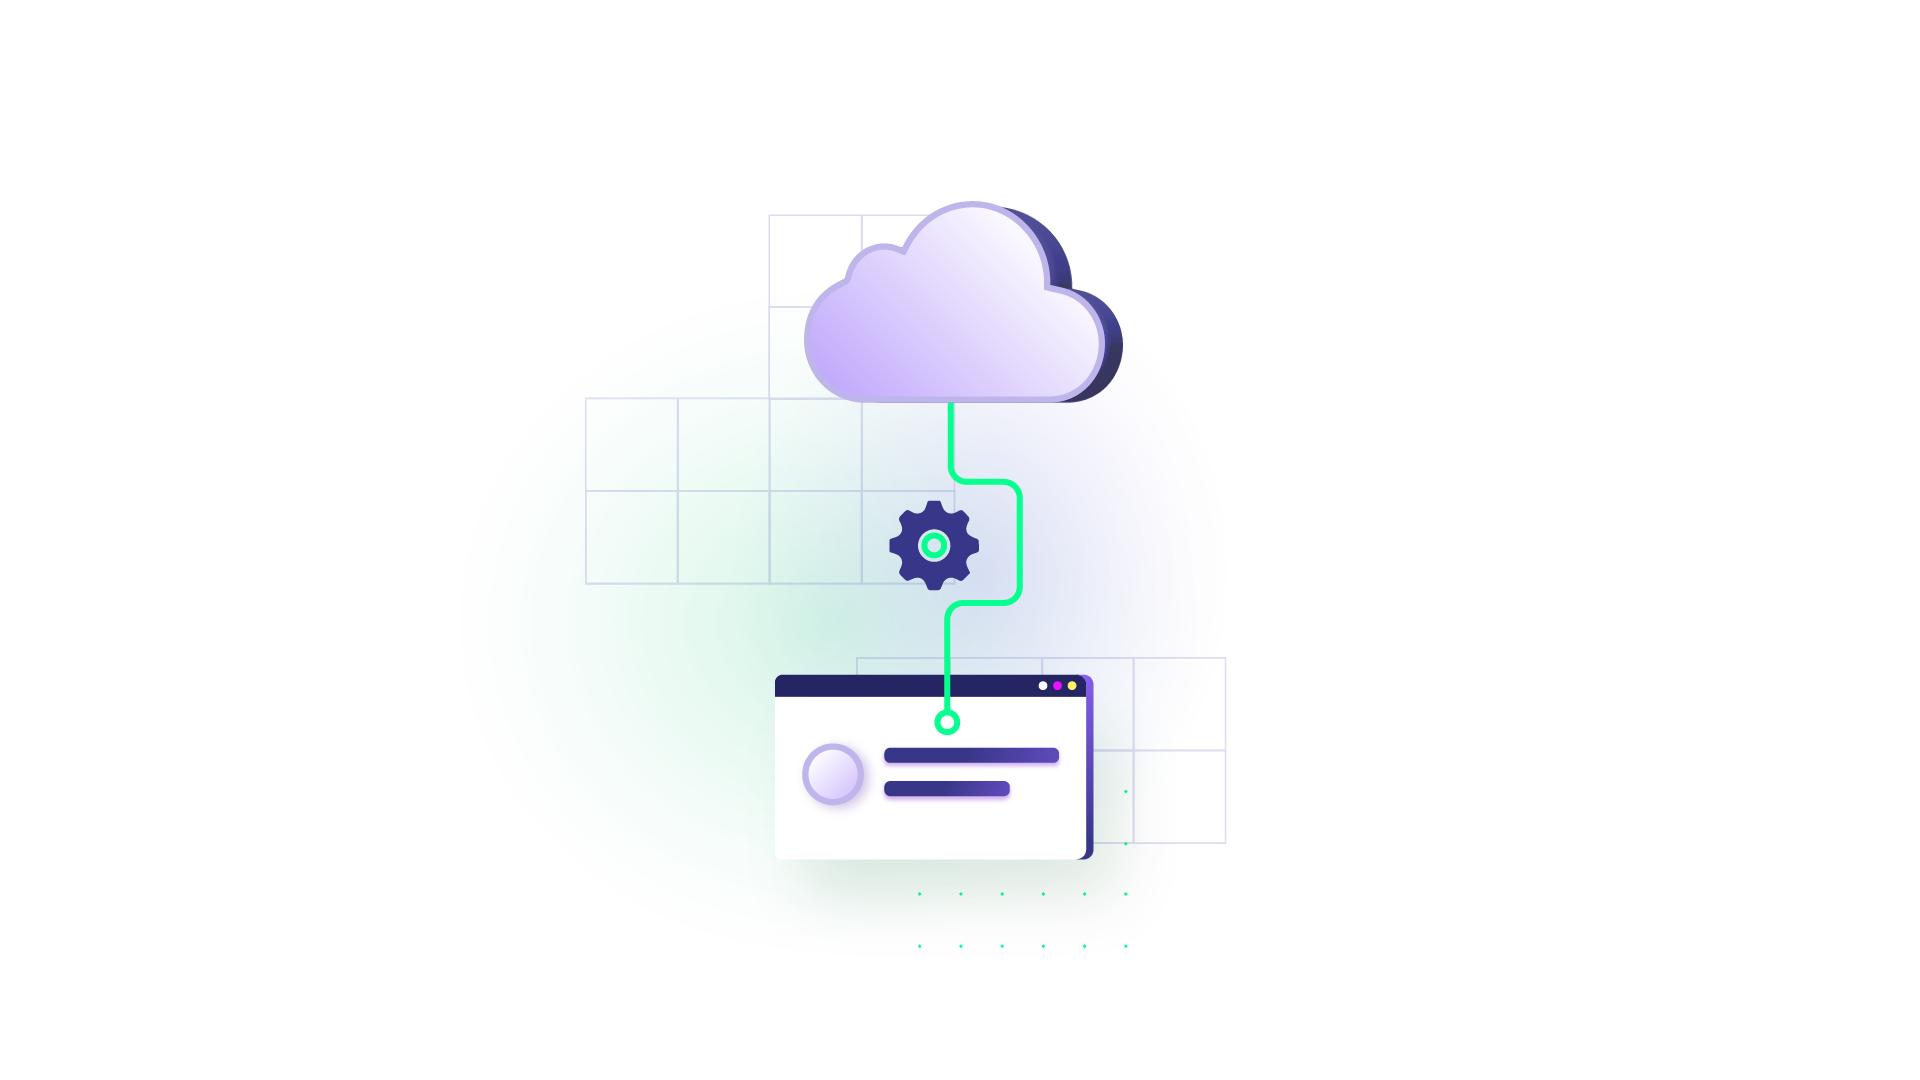
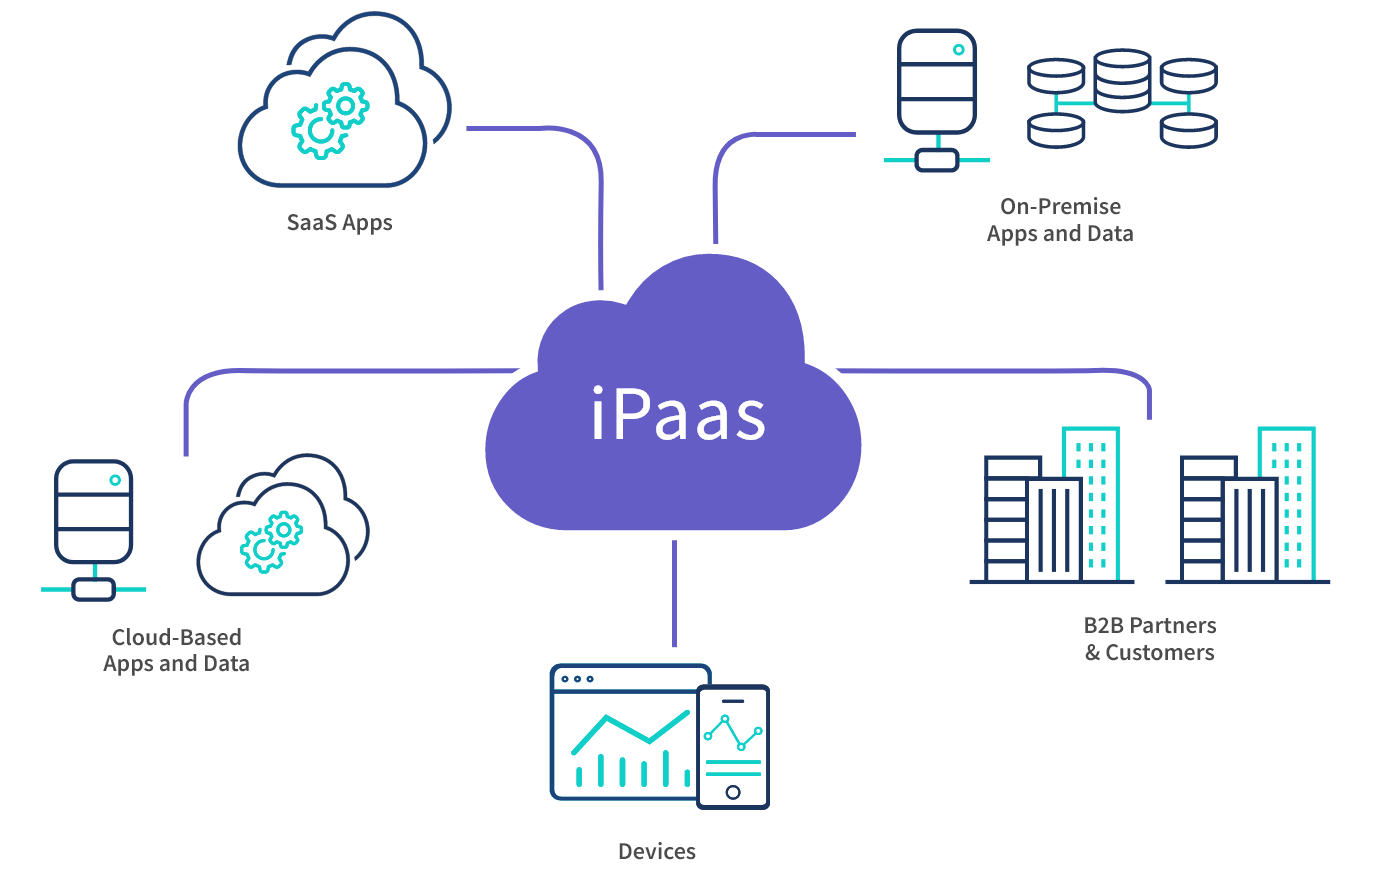
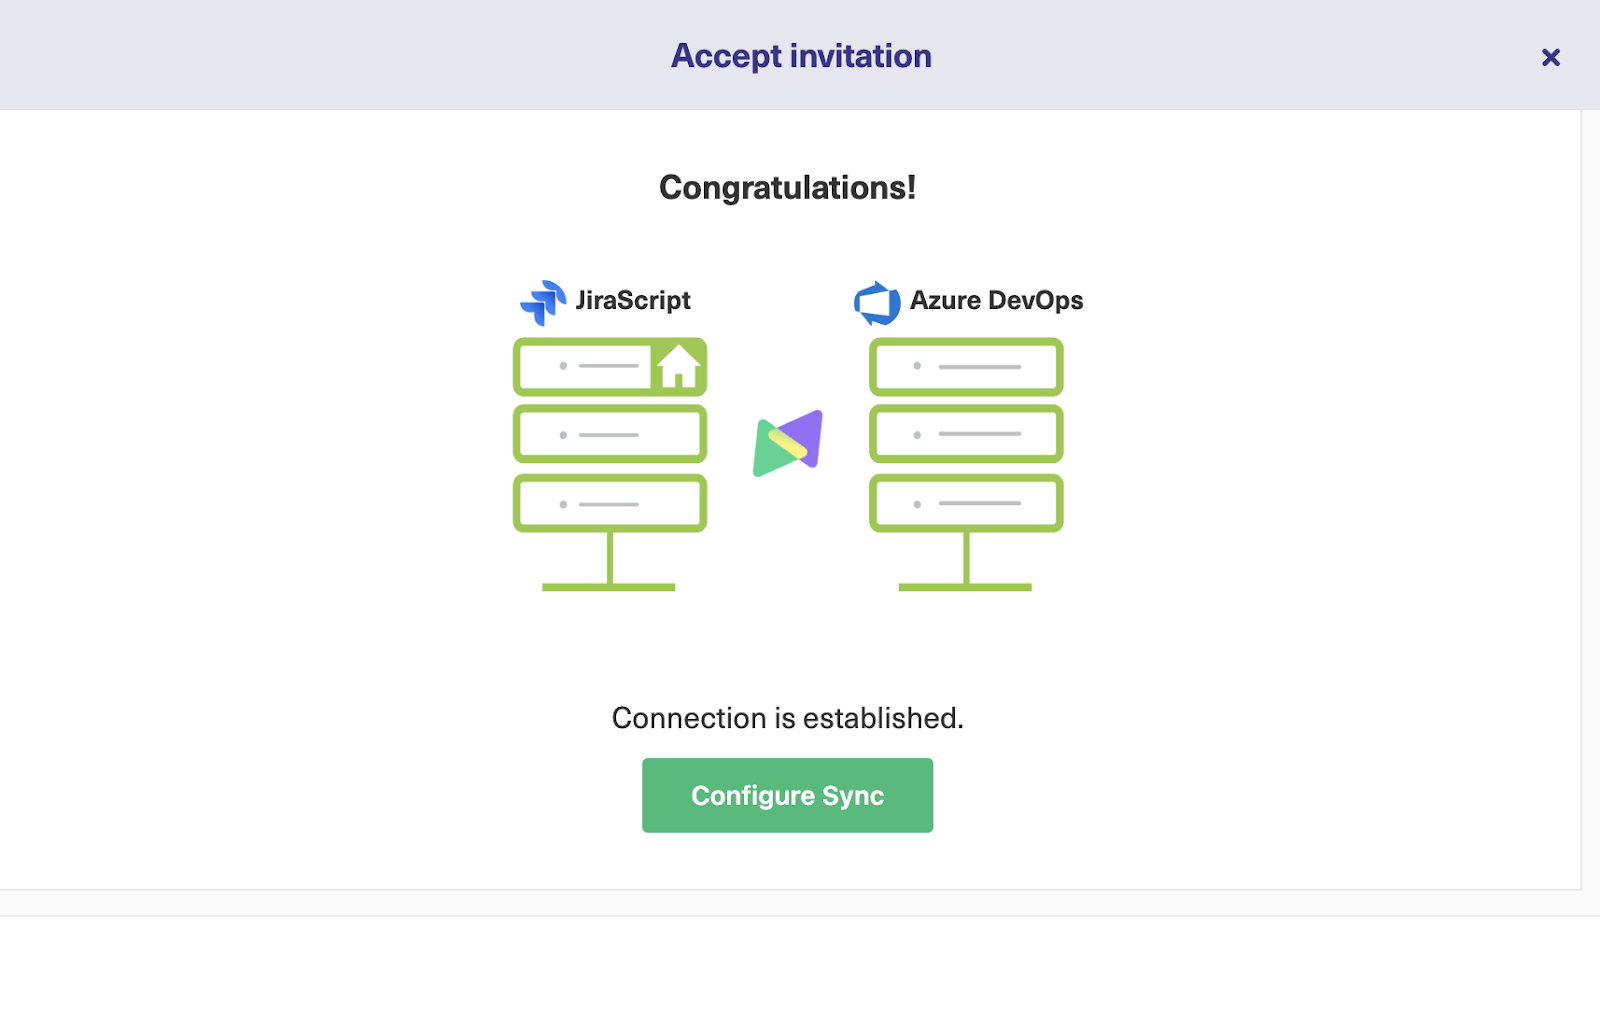
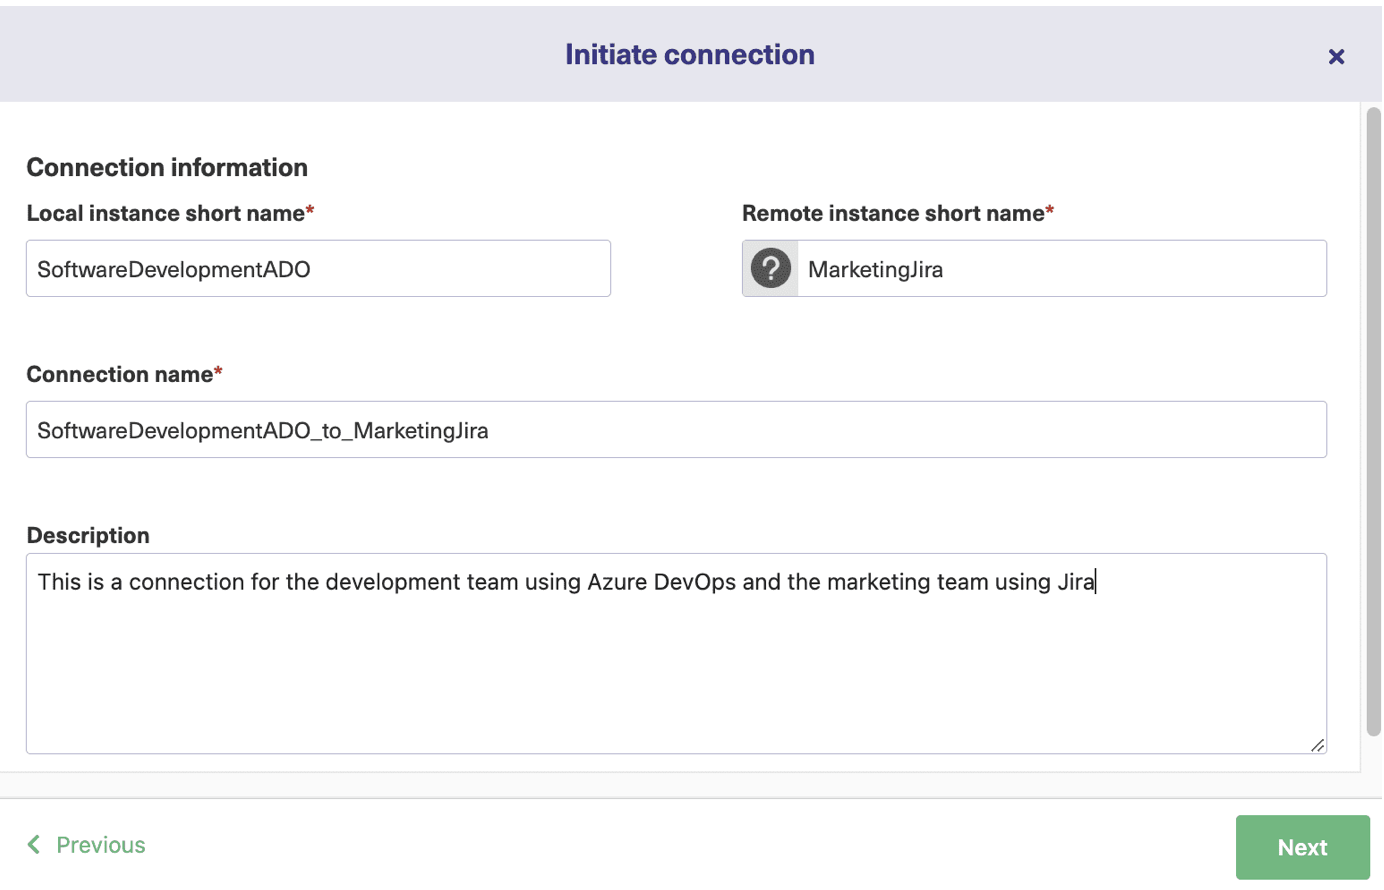
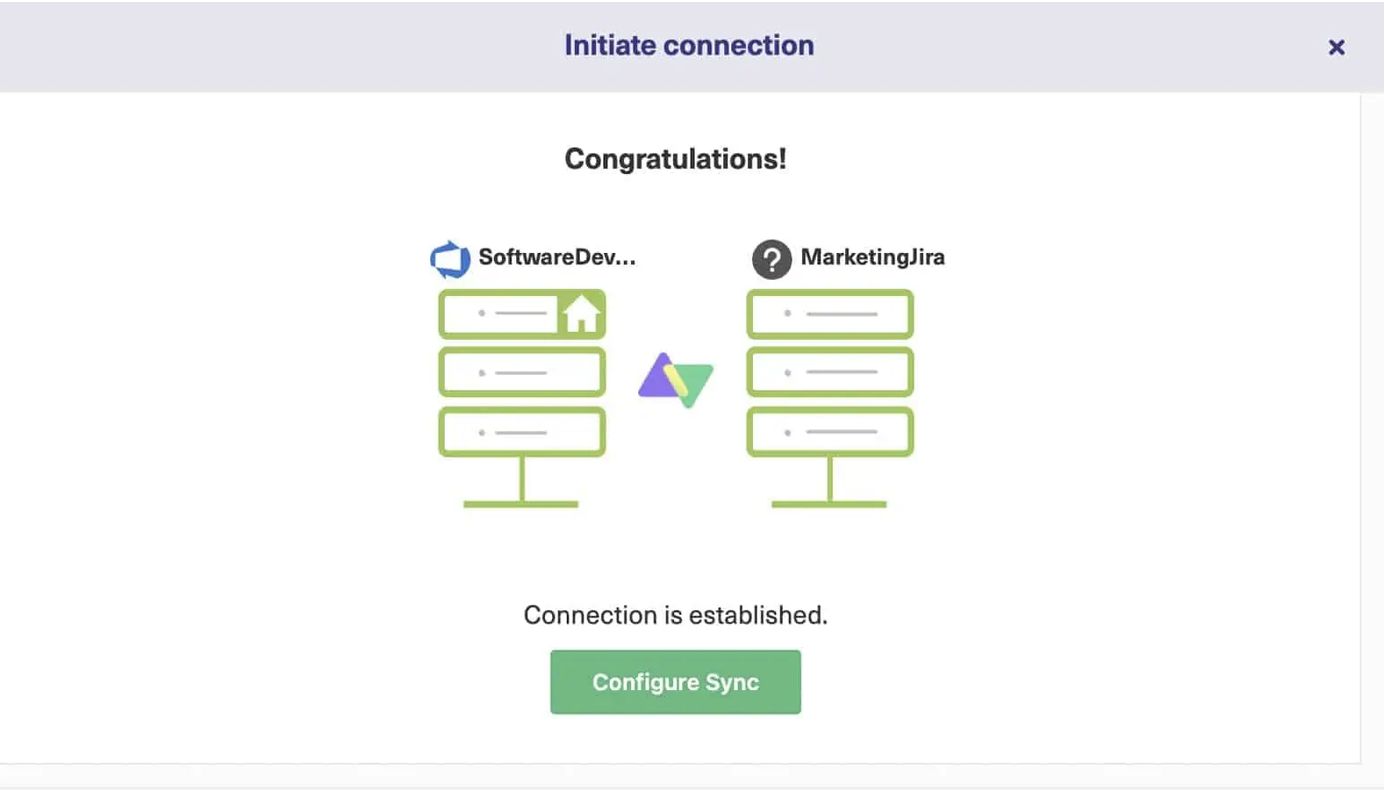
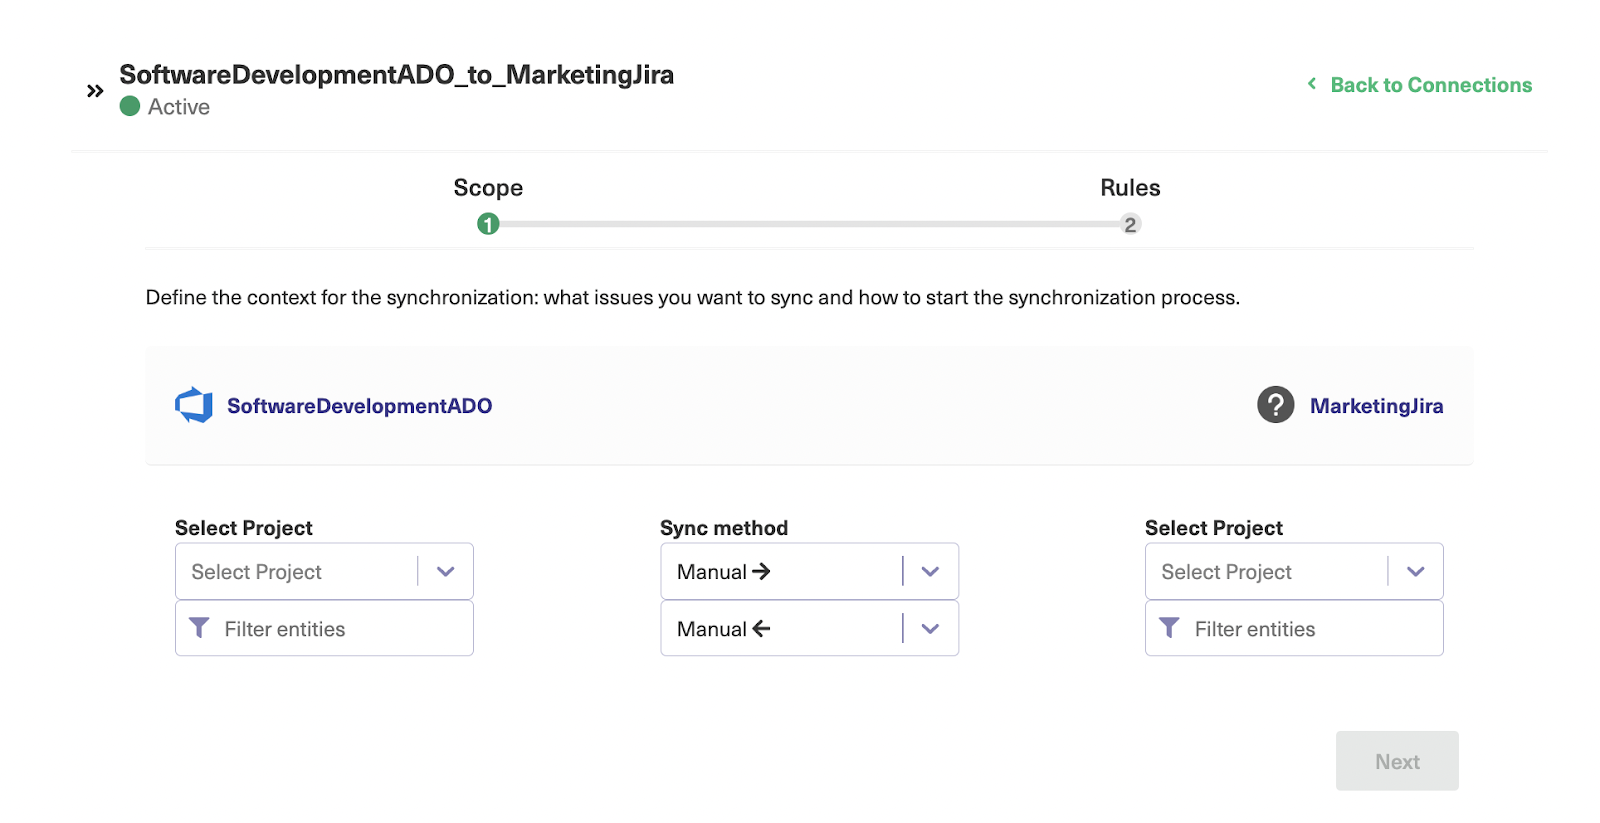
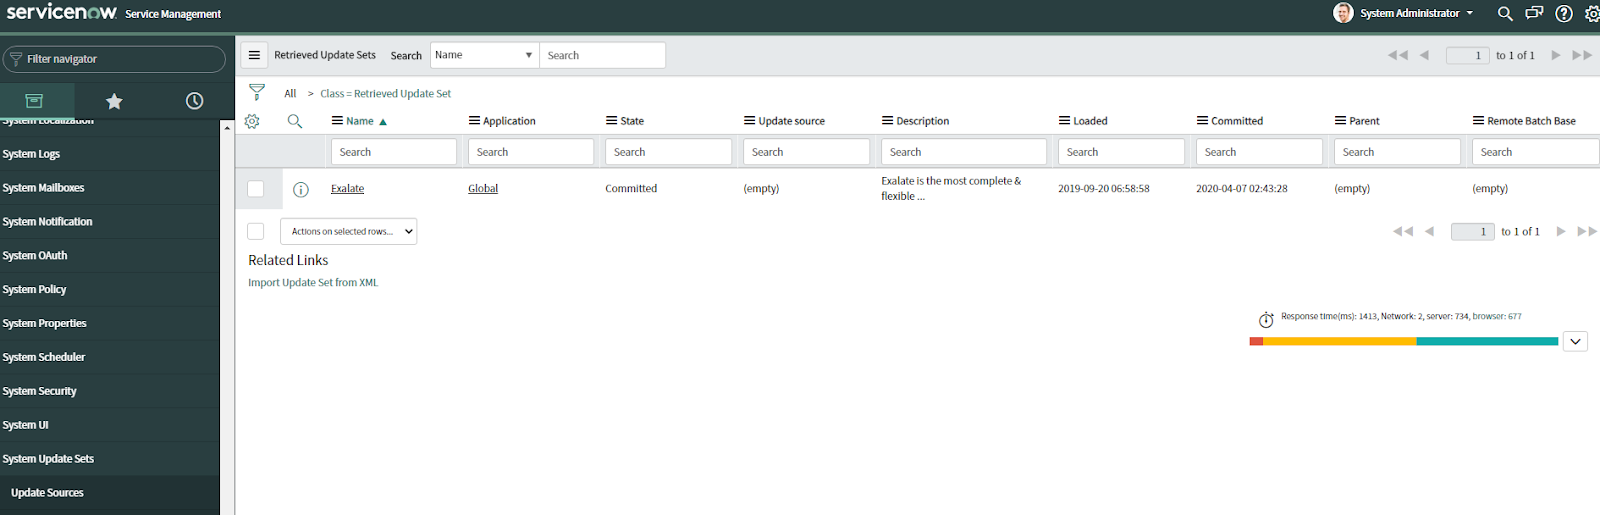
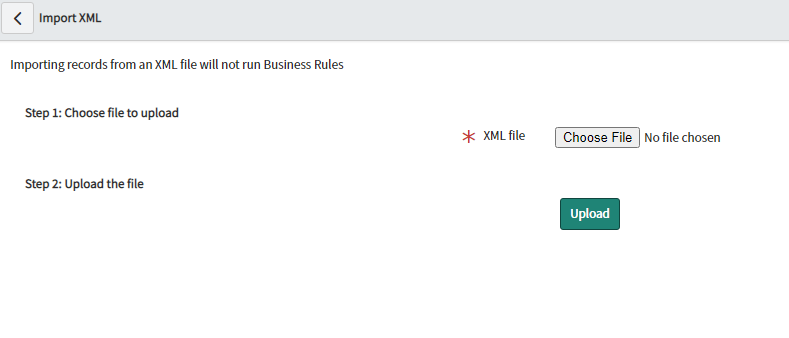
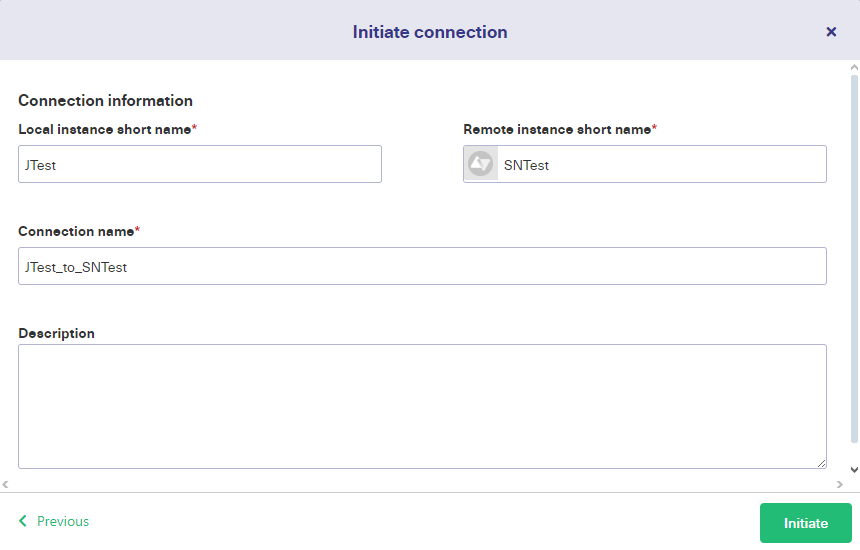
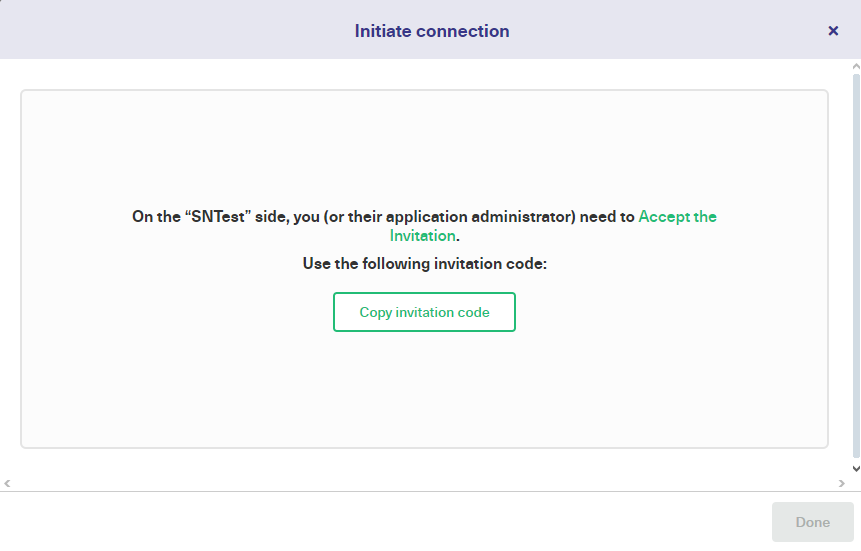
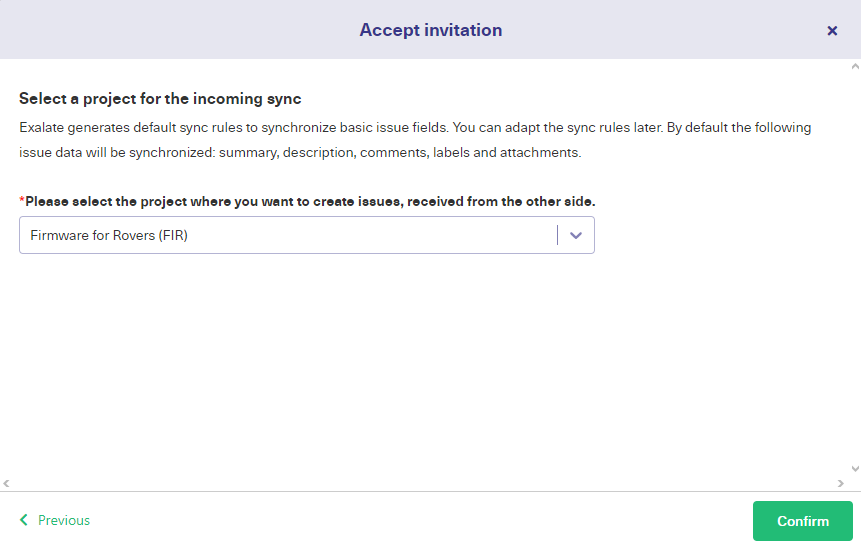
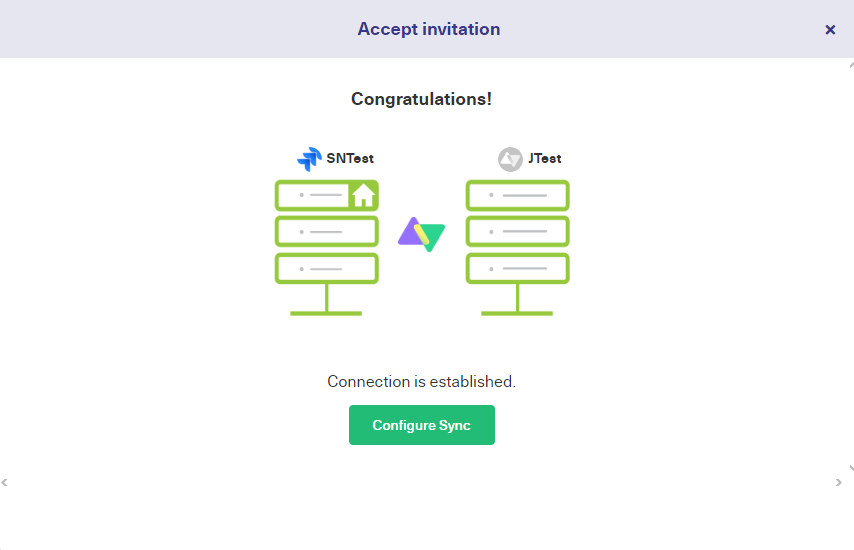
Let’s say you want to connect your team’s Jira with a partner’s ServiceNow instance. You’ll need a business integration platform — native application, third-party solution, custom API connector — to connect the APIs of both systems.

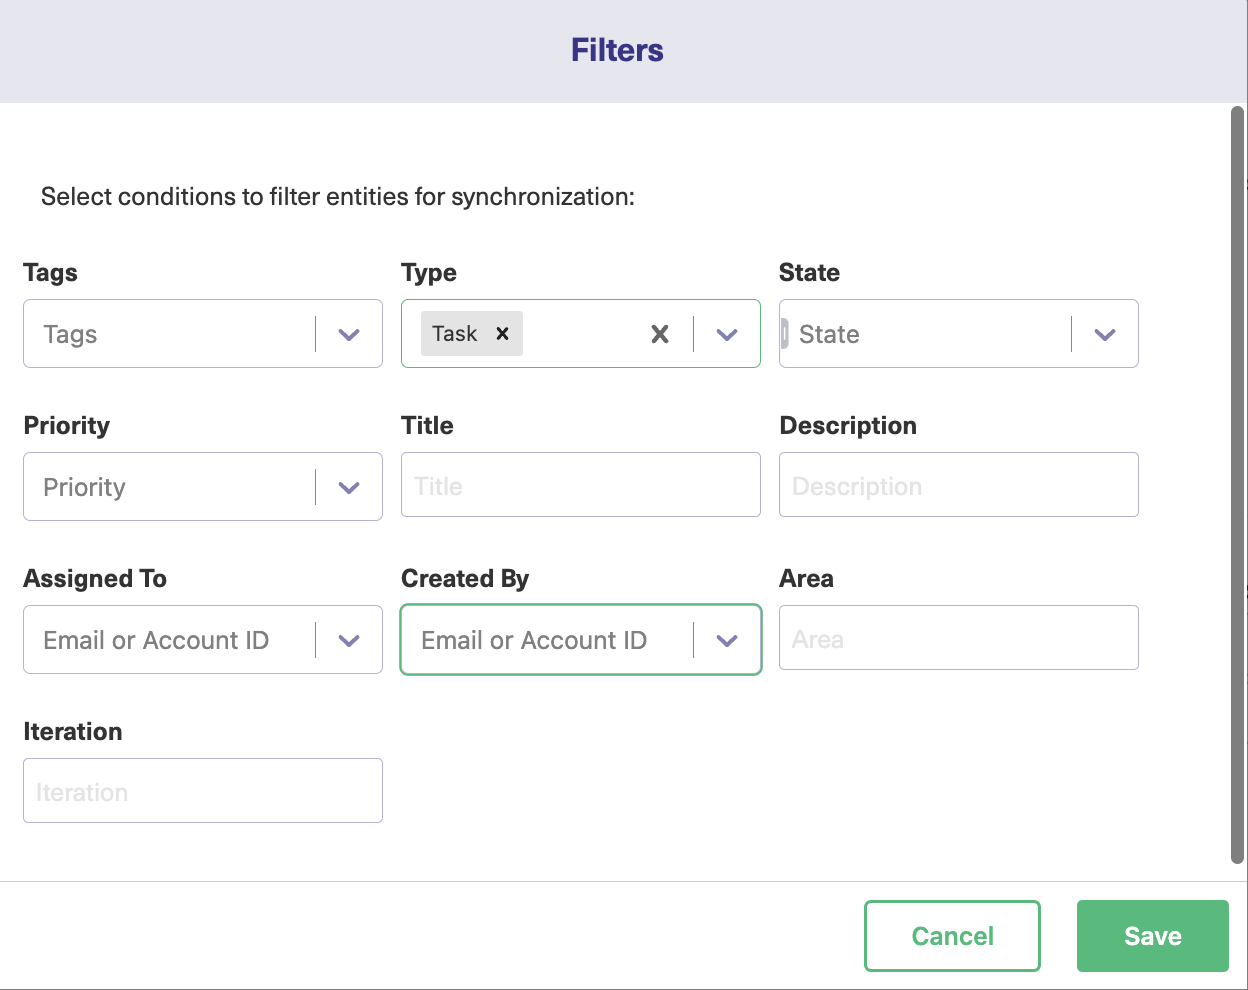
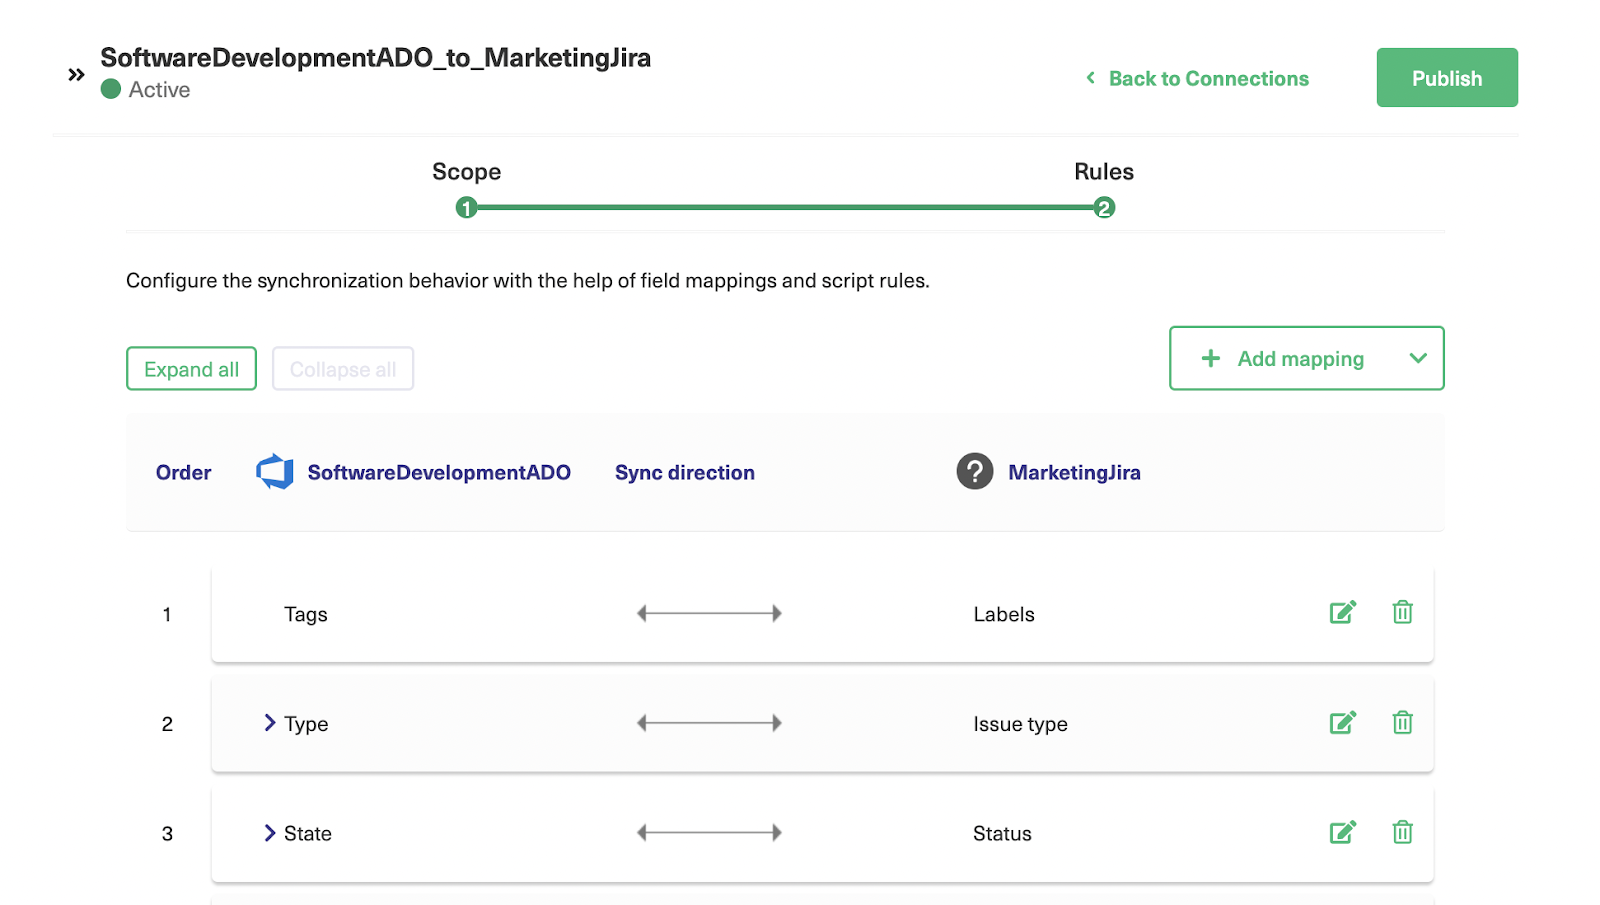
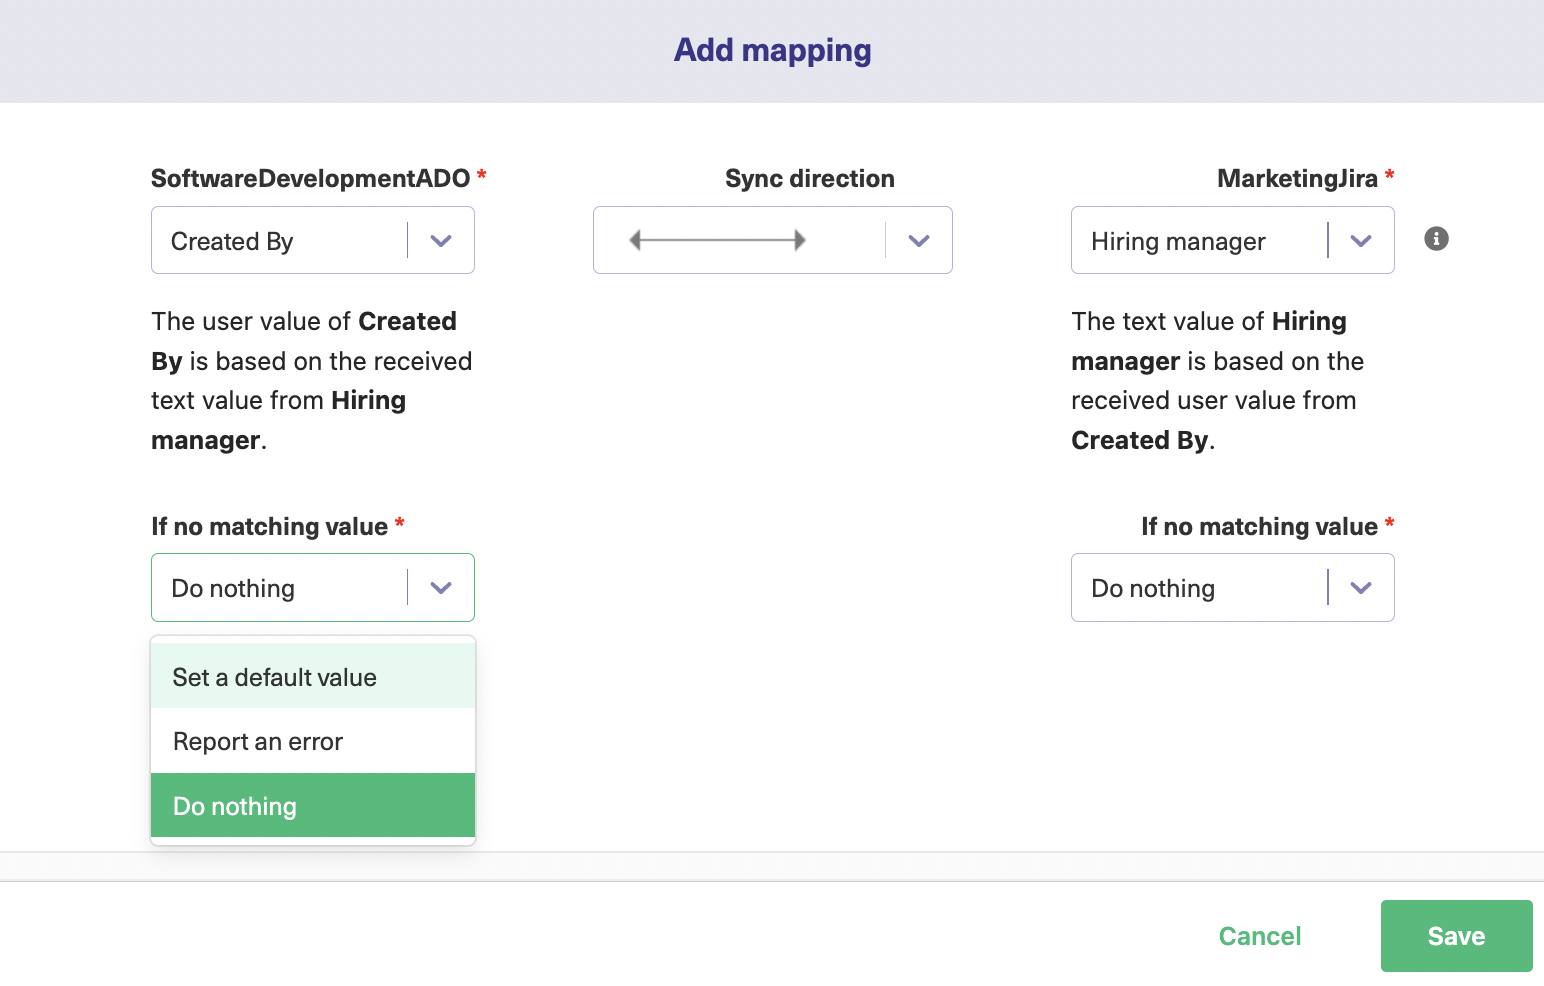
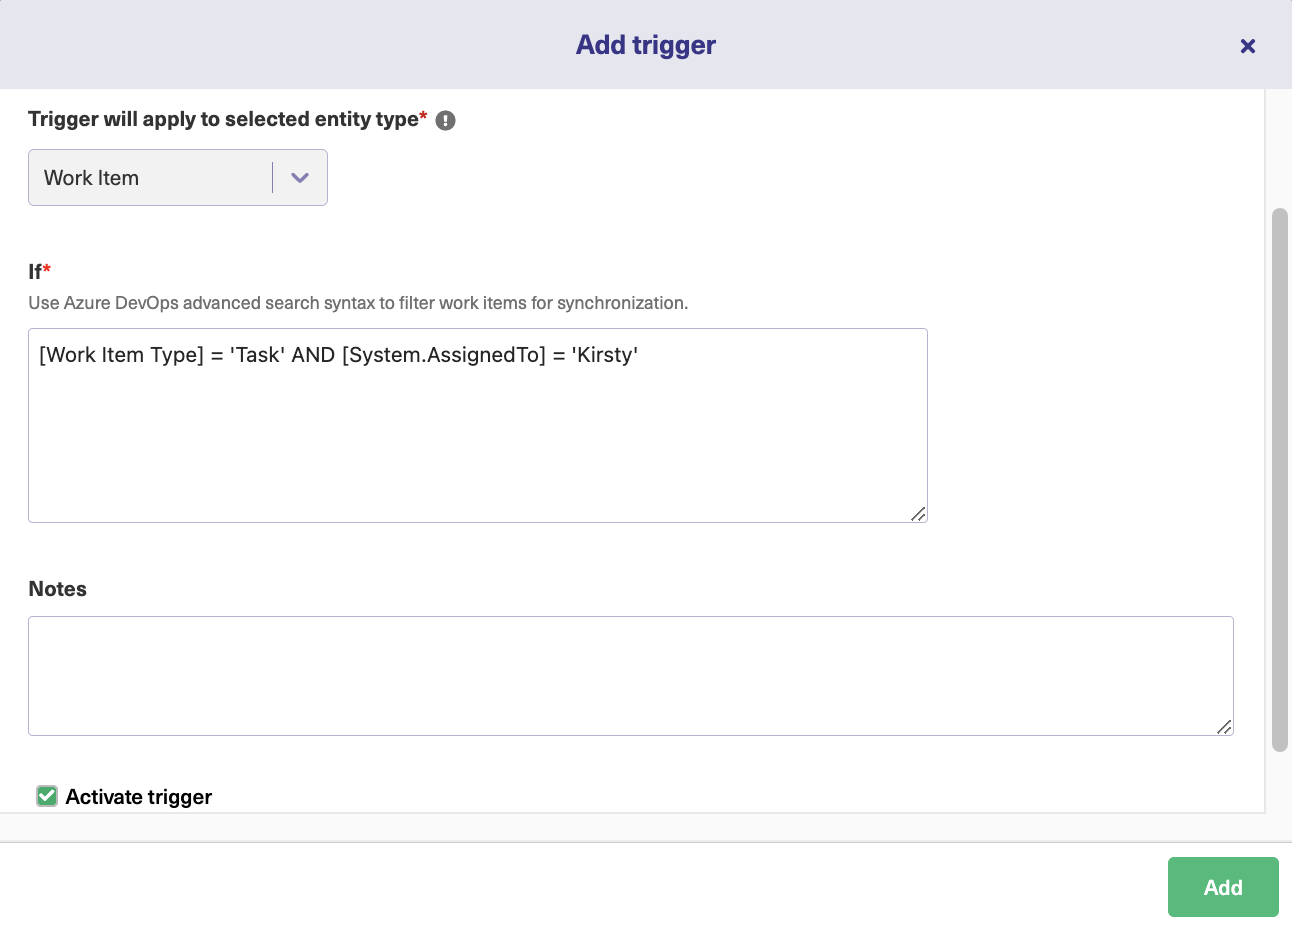
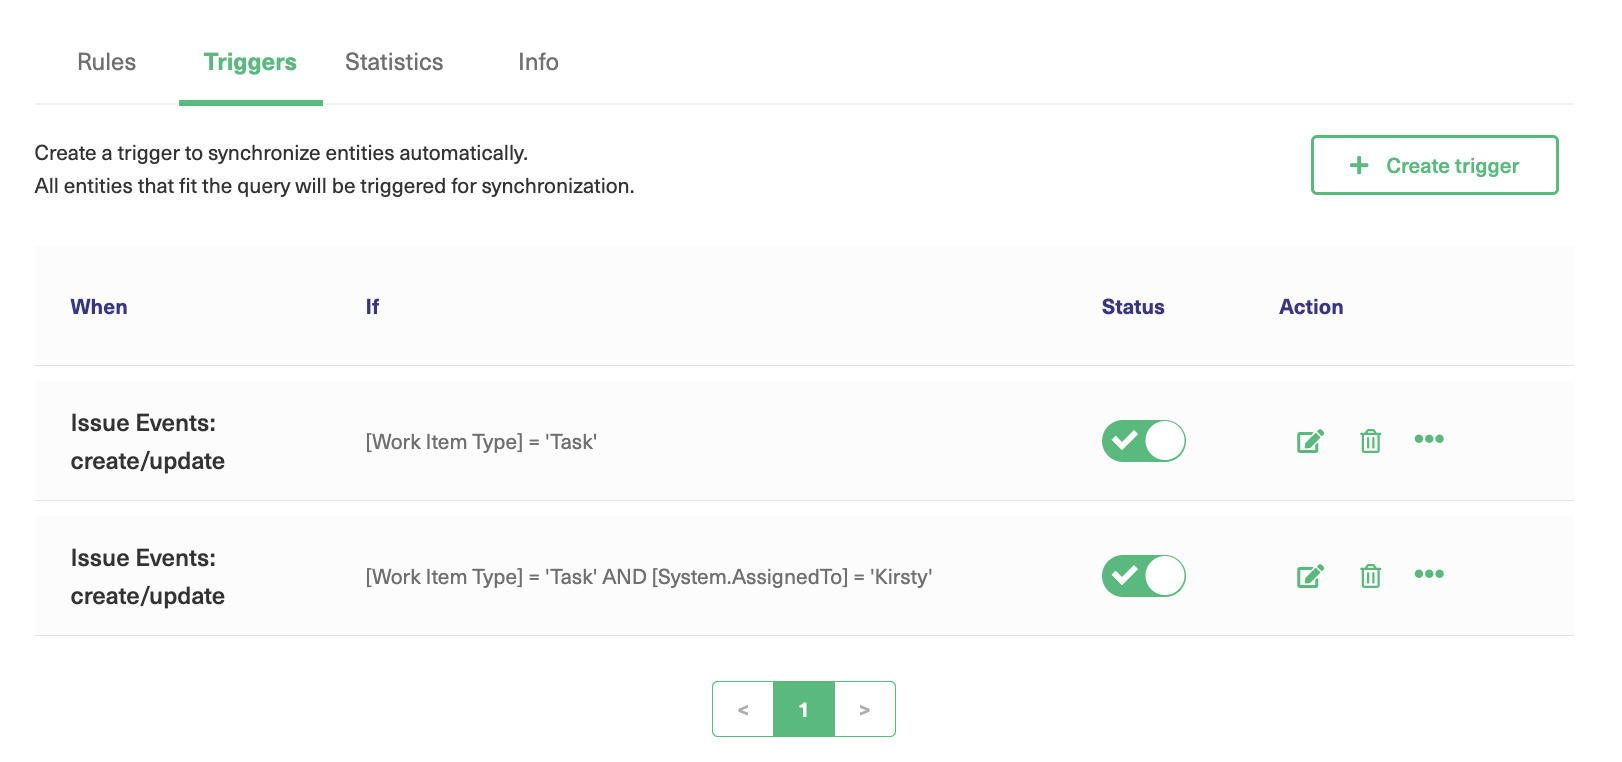
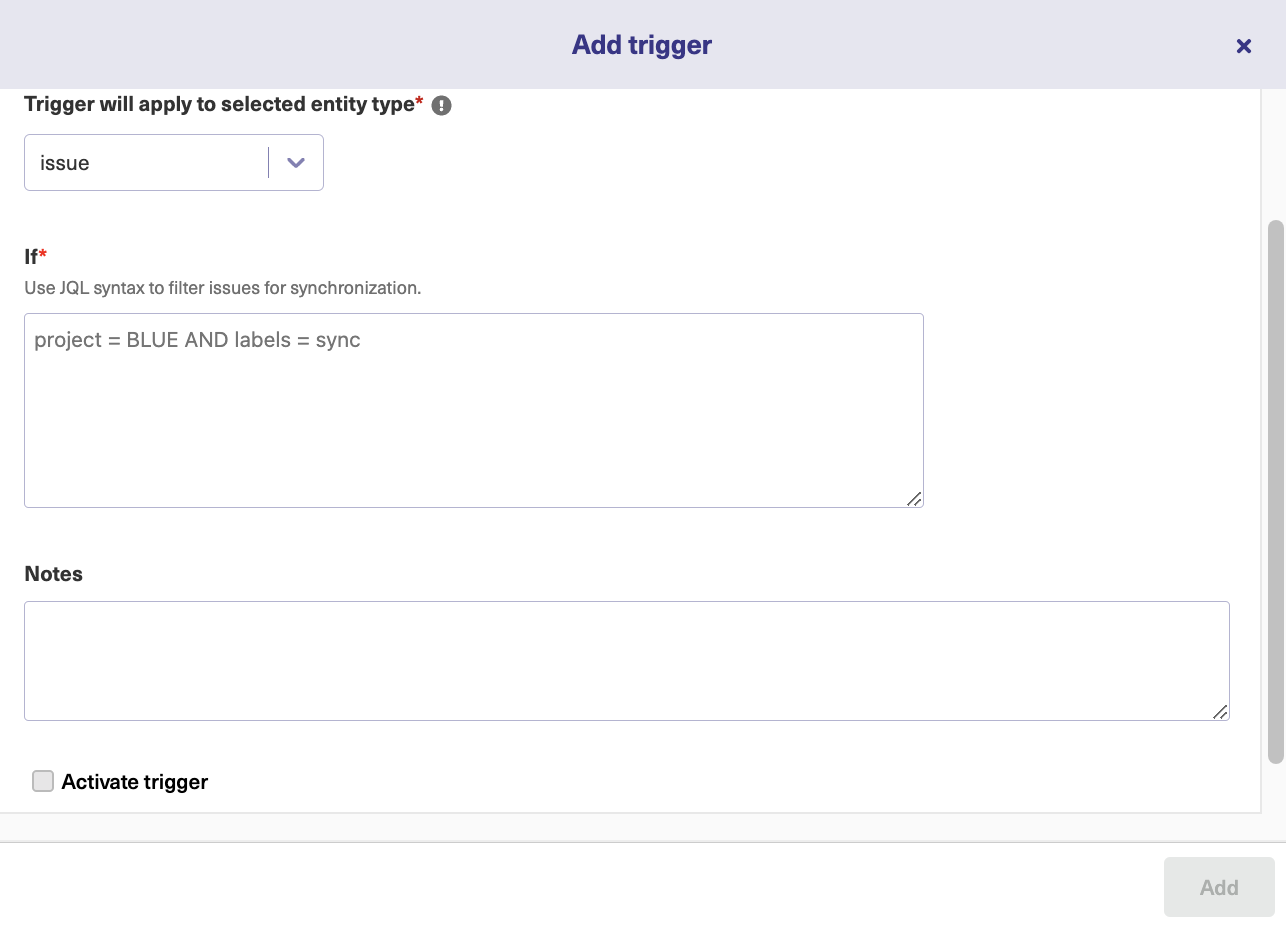
The integration solution for syncing business processes should contain a scripting engine or a visual editor for configuring the mappings of fields and entities. 

You can also set admin controls to limit who can make changes to the system.

Types of Business Process Integration

Organizations can integrate different processes or systems depending on their needs and technical expertise.

  1. Native integration — for connecting directly with another system’s API without needing third-party applications.
  2. Point-to-point integration — this involves connecting the endpoints (hardware, database, etc.) of two applications using custom code.
  3. UI integration — for streamlining navigation between applications at the user interface level.
  4. Robotic process automation — for improving the efficiency of handling repetitive, manual tasks such as data entry, invoicing, tracking, and similar administrative tasks. 
  5. Data integration — for timely data sharing, migration, and reporting across teams and between organizations.
  6. Business process reengineering (BPR) and business process management (BPM) integration — for restructuring existing internal processes to guarantee higher productivity.
  7. API integrations — for connecting two or more applications, for instance, integrating a payment solution with your sales management platform. 
  8. Third-party integrations — for extending the capabilities of existing systems using a non-native solution.

Real-World Applications of Business Process Integration

Startups, enterprises, managed service providers, and mid-sized enterprises can integrate business processes horizontally or vertically.

Horizontal integration involves connecting processes and sharing data with another organization. This example of business process integration manifests itself in cross-company collaborations. 

exalate horizontal integration

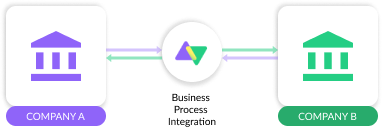
For instance, a B2B company could integrate horizontally with a managed security services provider (MSSP) to strengthen the security of its core architecture. 

Conversely, vertical integration involves syncing processes and systems between teams within an organization. 

exalate vertical integration

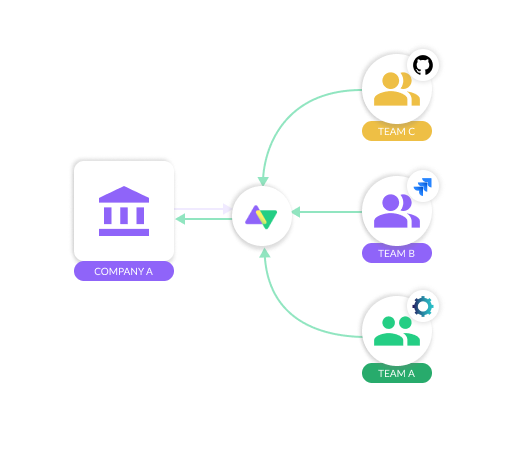
For example, the customer support team can integrate with the sales team to process customer feedback and channel it into product improvements. 

With a better understanding of horizontal and vertical integration, let’s explore real-world business process integration examples.

  • Automation: This can be used to streamline tasks such as payroll, quote generation, feedback processing, etc. Following the example of DPG Media, you can set up triggers in Jira to notify developers whenever the helpdesk opens a new incident in Zendesk.
  • Outsourcing: Working with outsourcing partners, vendors, or MSPs requires a coherent business integration process in order to make communication and collaboration smooth. NVISO used deep ticket integration to enhance collaboration with clients and partners.
  • CRM and ERP Integration: Businesses can integrate applications like Jira, Salesforce, and ServiceNow to consolidate data across these platforms. Examples of CRM are Salesforce, HubSpot, Kommo, and Pipedrive. The Gantner Group syncs data from different Jira instances between support and development teams to gain insights about releases and common pain points.
  • Supply chain management: Logistics and e-commerce companies that rely on interconnected supply chains can use supply chain business process integration to establish smooth delivery of goods from the warehouse to clients. Insurance company Türkiye Sigorta uses third-party integrations to connect with suppliers.

What are the Benefits of Business Process Integration?

Here are reasons why businesses should integrate all or most of their business processes

To Automate Tasks

Business process integration and enterprise systems introduce automation into the workflow, which eliminates manual administrative tasks. 

Automated integrations also save time and money by freeing up some real estate for more pressing business-oriented tasks.

To Make Better Decisions

Data consolidation is a byproduct of business process standardization and integration. This, in turn, provides decision-makers with actionable insights and eliminates guesswork.

 For instance, stakeholders and managers can look at the consolidated data, often prepared using ELT tools, to decide whether to pull a new feature entirely or continue making improvements to the product.

exalate puzzle

To Maintain a Steady Pace of Innovation

When stakeholders can make informed decisions about processes, personnel, and business infrastructure, the organization can innovate at a steady, sustained pace.

So the use of business process system integration opens up ample opportunities for organizations to tap into vast swathes of data in order to innovate and stay competitive.

To Increase Workflow Efficiency

Integrated business processes reduce the need to context-switch between different platforms to access or copy data. Everything you need is accessible from a central hub, and you don’t have to worry about human error and network interruptions.

exalate time

Slack estimates that 64% of employees spend up to 30 minutes per day shuffling between apps. This stacks up to several lost hours in a year.

To Break Down Data Silos

When multiple isolated systems exist in an organization, data silos form.  Although the information is available to some teams, it is isolated from the rest of the teams.

But when all business processes are integrated into a single source of truth, it breaks down these silos, allowing everyone to make decisions based on consolidated information. 

Drawbacks and Challenges of Business Process Integration

No business integration process is a cakewalk; you have to deal with several setbacks and look out for challenges. Some challenges to process integration in business include the following:

Poorly Defined Rules

The main challenge to business process management integration is establishing rules for what should be integrated and how it should be integrated. This includes specific fields, projects, and applications.

When the scope is unclear and the rules are non-existent, the integration process could turn into an administrative nightmare right from the start. Data could get lost, and sensitive information could fall into the wrong hands.

Lack of the Necessary Technology

You need the right technology when integrating businesses, whether it is a native integration, third-party app, custom-made API tool, webhook, or enterprise service bus (ESB).

Sometimes, business process integration platforms are not part of the company’s stack—or the available ones cannot handle specific integration scenarios.

Other times, the system admin or development team lacks the expertise to write mapping rules for integration with specific platforms.

Dynamic Business Environment

Business objectives change and this presents an issue when integrating processes internally or externally. That’s why you need a scalable business integration model.

Without a flexible and scalable action plan to accommodate changes such as increasing workloads and expanding vendor networks, you will struggle to integrate your business processes seamlessly.

Differences in Ideology 

For cross-company collaborations, your administrators need to align with the other side in terms of expected outcomes, milestones, scope, and other variables.

This will help both sides develop a universal process integration strategy that factors in the interests of both sides as well as potential risk factors.

But in most cases, organizations have red lines they are not willing to cross, which often wastes time and leads to broken business relationships.

Data Security

Integrating business processes adds potential points of failure in the system. If your integration partner’s security is lax, it could affect your system infrastructure.

data security

For instance, if you are working with a vendor that doesn’t use role-based access or multi-factor authentication, their system is susceptible to breaches. 

And since you are interconnected with them, the data in transit can fall into the wrong hands from their end.

System Maintenance 

Integration solutions break down from time to time due to human error, network interruptions, and other myriad issues. That’s why you need an IT team to maintain and troubleshoot all types of business process integration. 

In most cases, the integration solution supplier handles maintenance. However, for custom-made in-house solutions, maintenance could rack up costs and disrupt services indefinitely.

Best Practices for Business Process Integration

In my experience, here are some best practices for business process and integration configuration:

  • Model existing processes to help you understand the underlying architecture as well as the existing rules for external and internal integrations. Create a business process integration diagram mapping out all projects, entities, and systems that should be part of the connection.
  • Customize your processes to specific use cases instead of using a generic playbook for everything. For instance, your plan for internal business processes should differ from your MSP integration playbook.
  • Get the right business process integration tools. Consult with admins and developers to determine if a no-code or code-based solution is the right option for your business. You also need to balance cost and functionality to stay within your budget.
  • Map and document everything as part of business process integration in ERP. You need to document every mapping and connection in a publicly accessible platform. Consider using flowcharts and mapping tools to establish connections between endpoints. For companies with existing documentation, ensure that every extra step of the business process integration management is updated to show progress. 
  • Test rigorously before going all-in. For instance, you can start by migrating only a few Jira issues before integrating the entire project. This will help you figure out if the business process integration software works as expected or whether it needs adjustments.
  • Establish security risk management mechanisms. Prioritize integration security in the form of multi-factor authentication, firewall, access tokens, role-based admissions, and decentralization. Features like single tenancy can decentralize your infrastructure, giving you more control and autonomy over your connections.
  • Analyze and optimize. Use data visualization and analysis tools to monitor the performance of your BPI. This will help you make better decisions and track the performance and efficiency of internal and external connections.
  • Establish open, two-way communication channels between all sides of the business process integration. This will streamline your efforts, entrench trust, and break down information silos.

Integrate Business Processes with Exalate

Your organization’s survival in the age of information depends on how effectively you can consolidate and analyze data.

Process integration in business will help you automate repetitive tasks, increase productivity, and get rid of information silos. 

But this can only work if you establish a coherent integration plan and choose the right tool. Most of the time, third-party integrations can bridge the interoperability gap between platforms and applications.

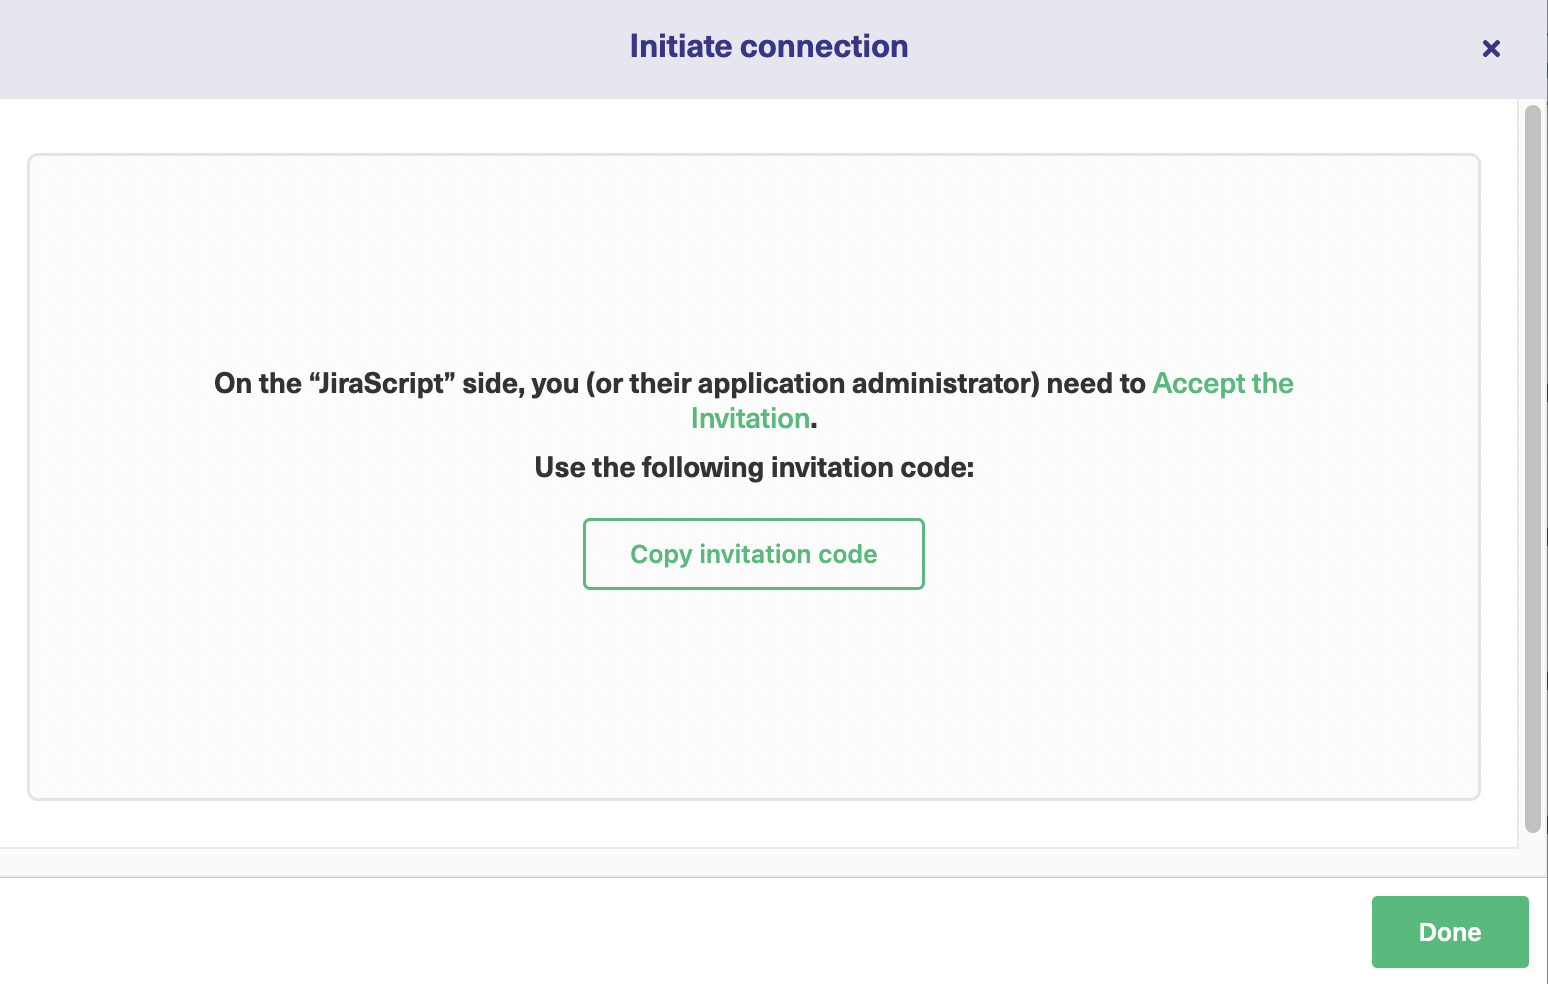
That’s where Exalate comes in.

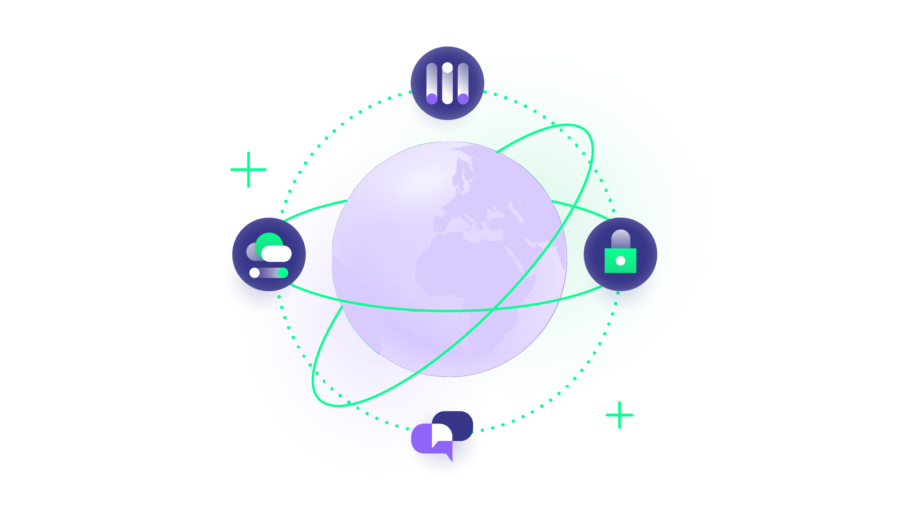
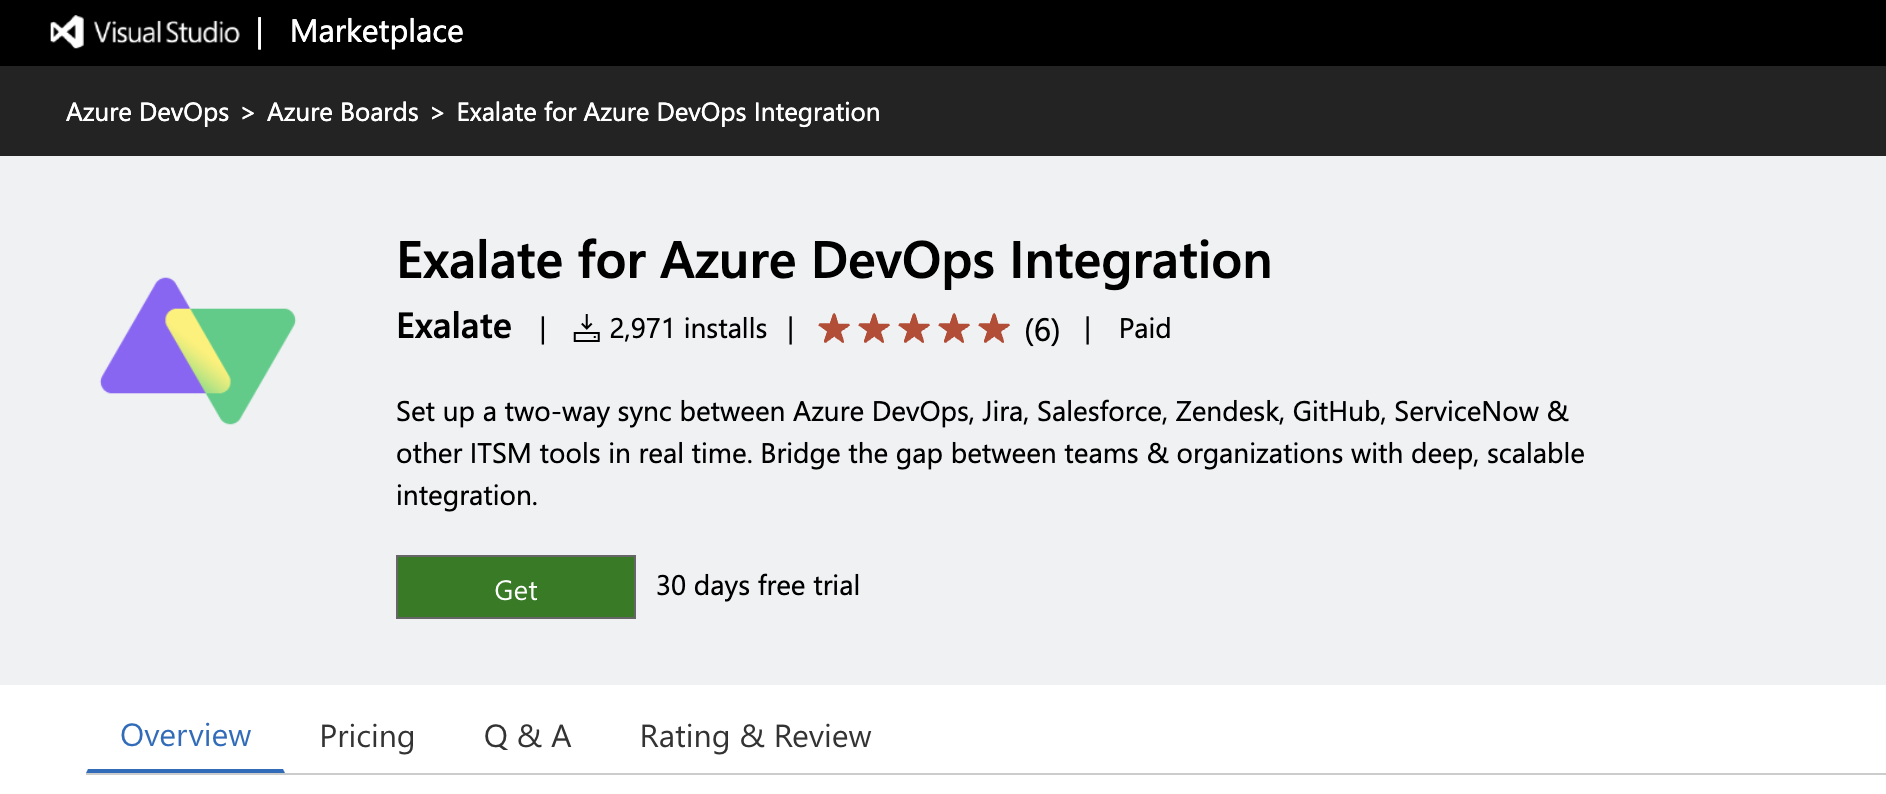
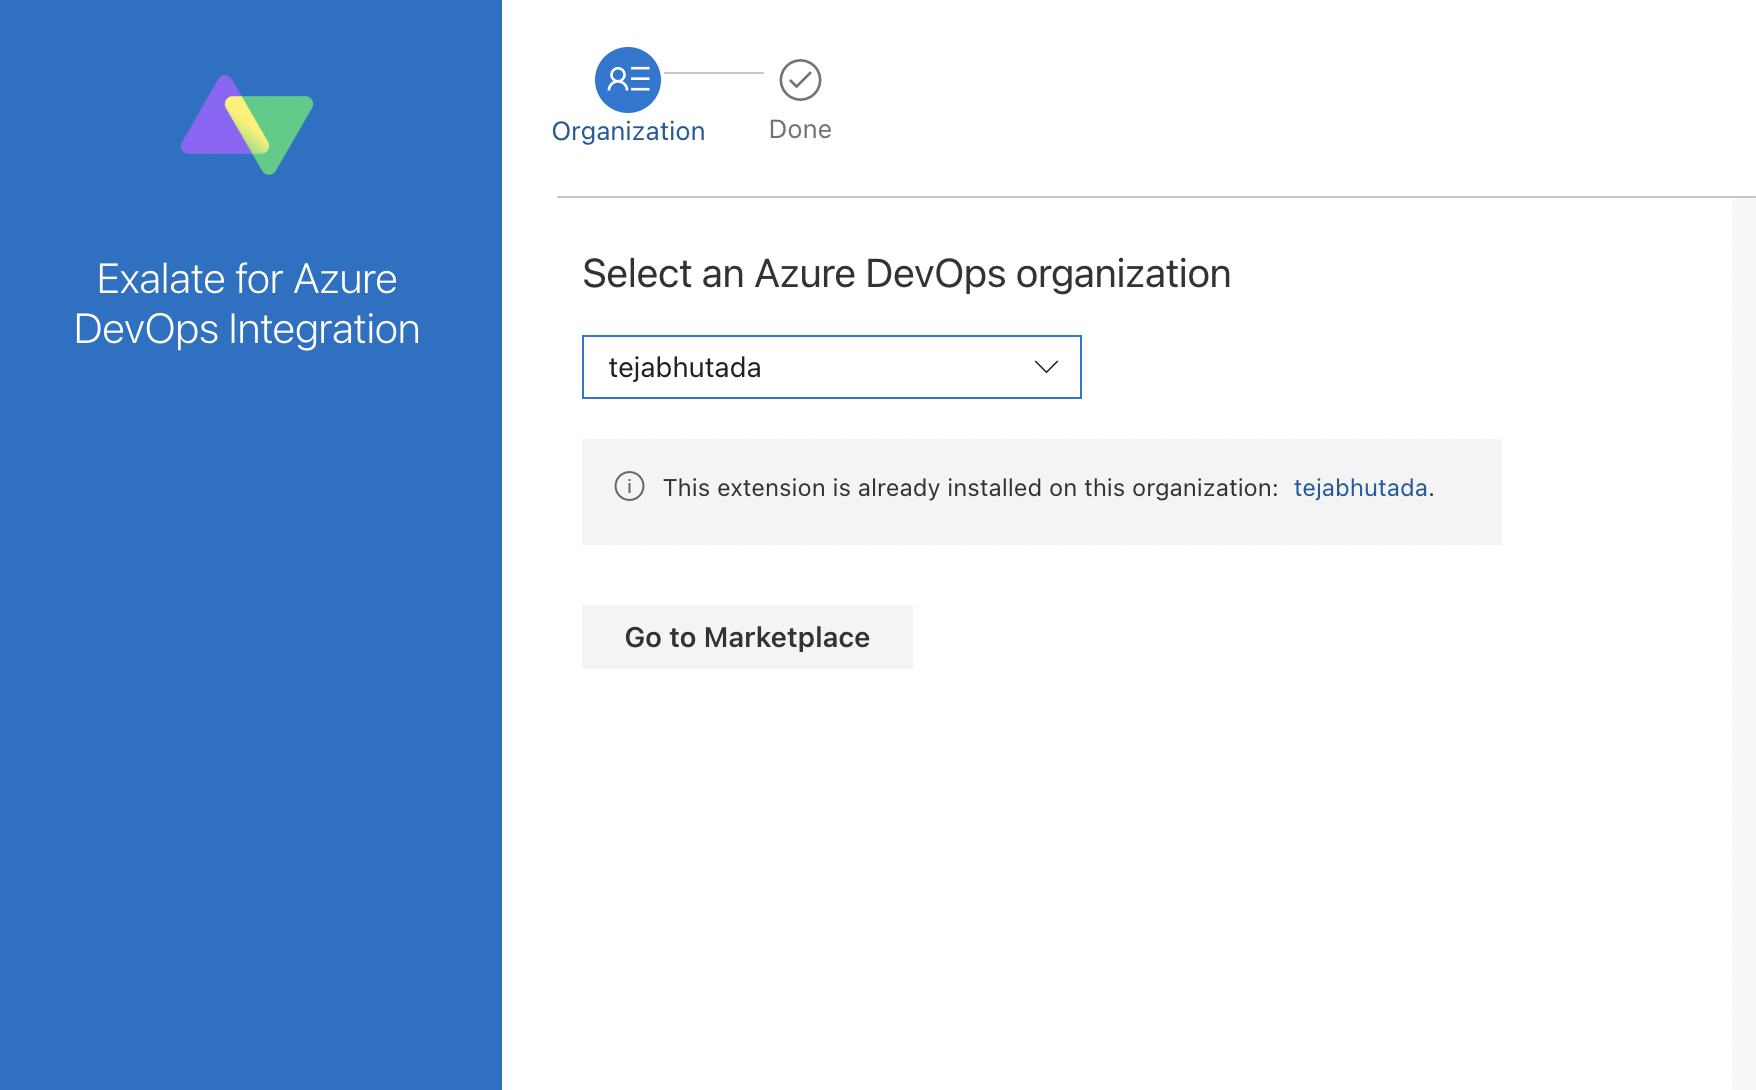
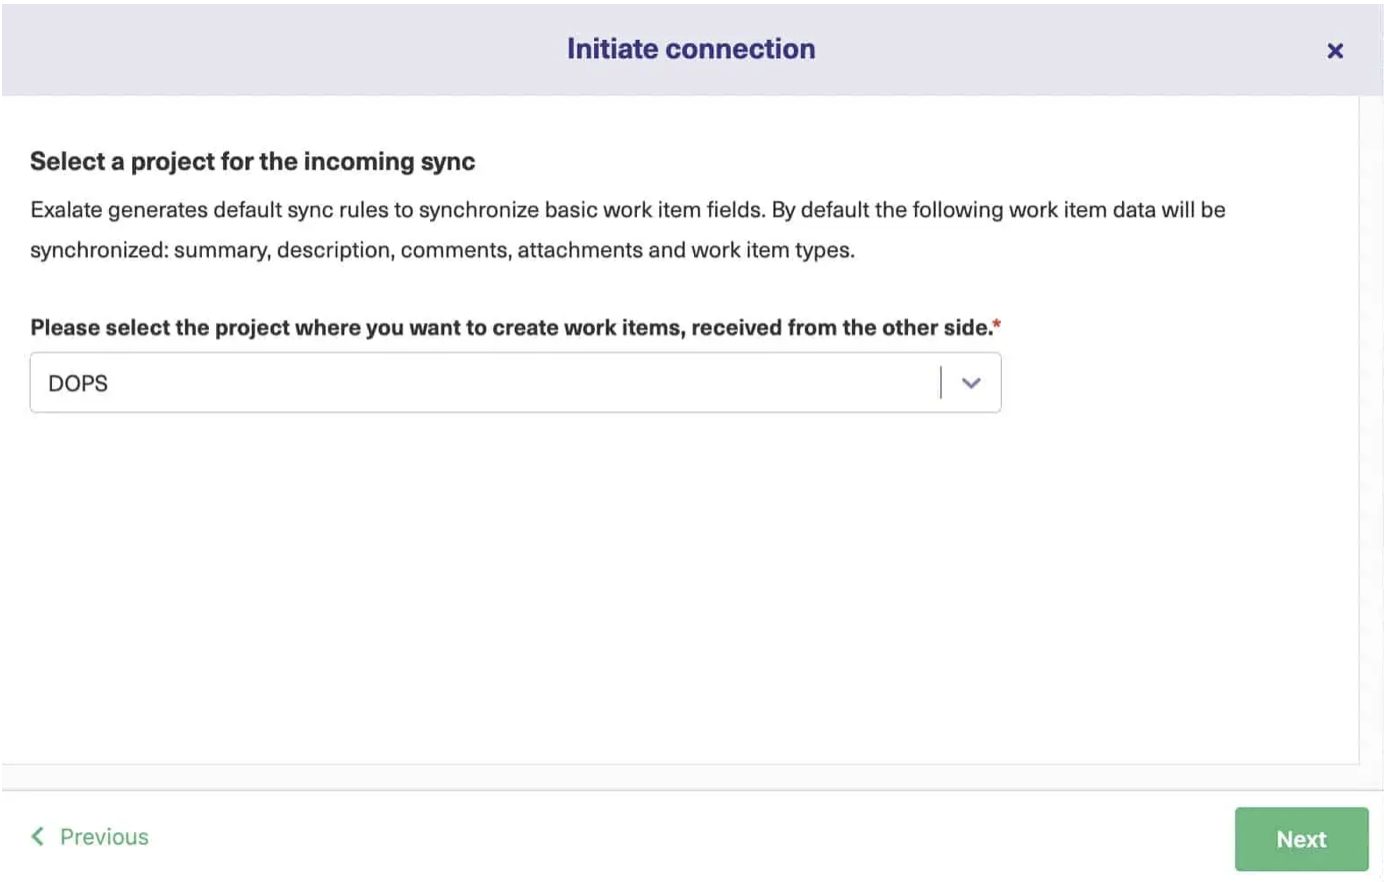
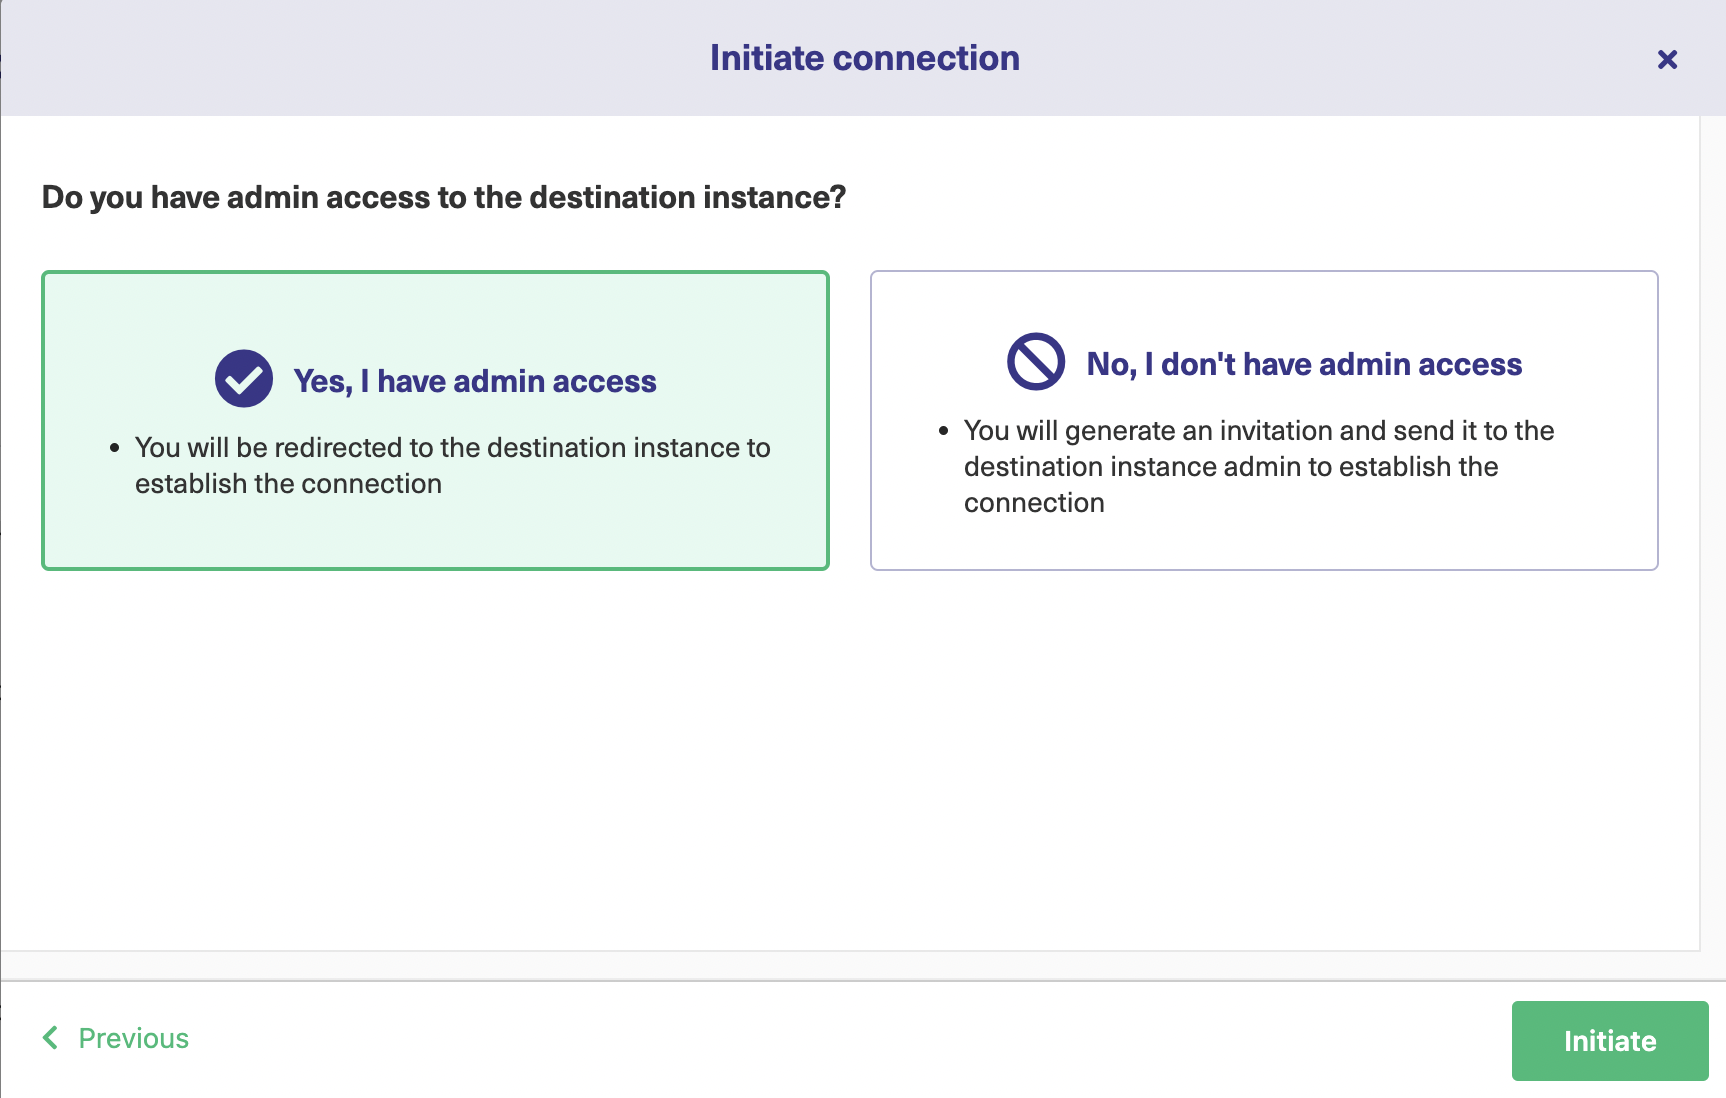
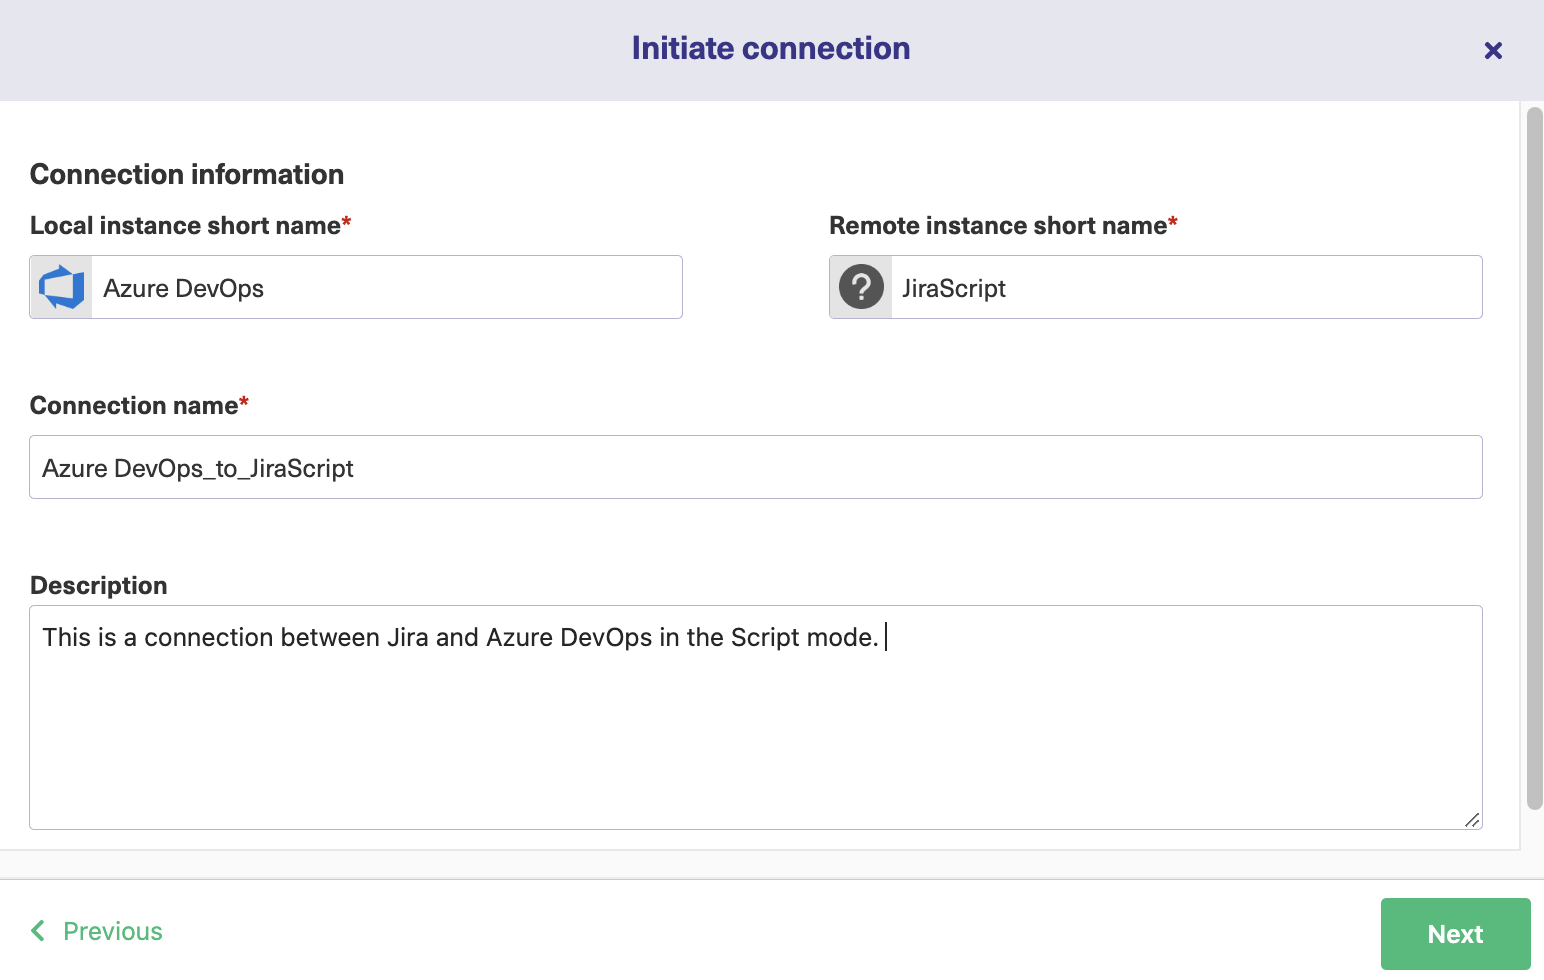
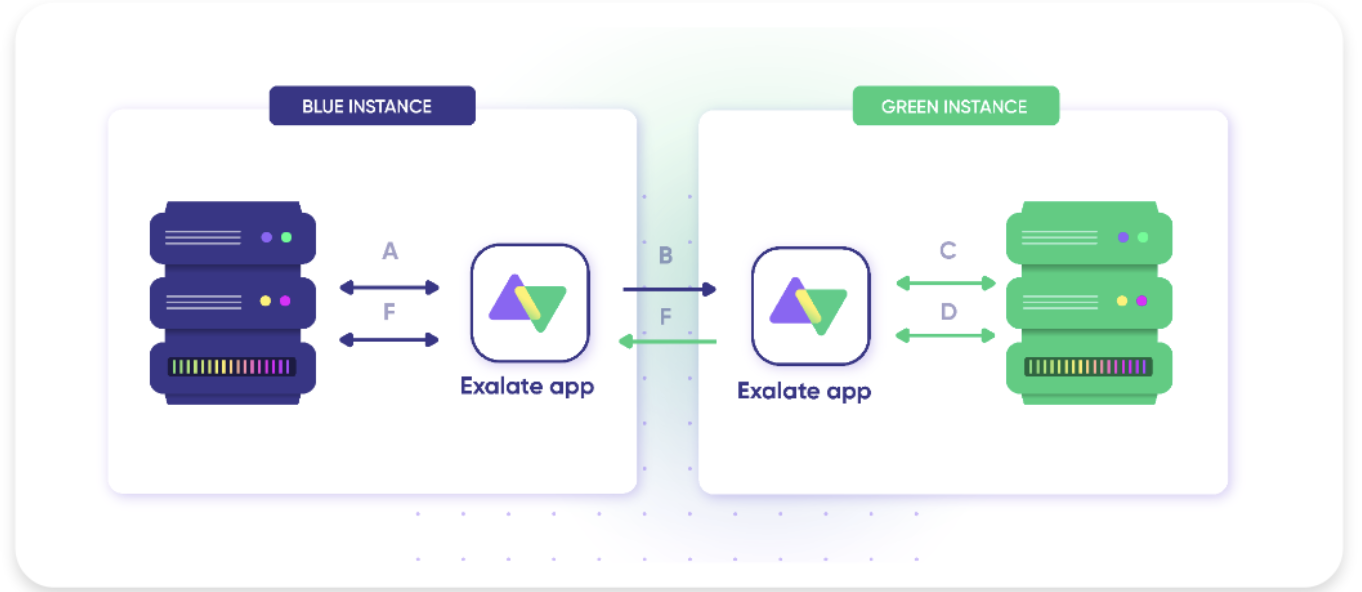
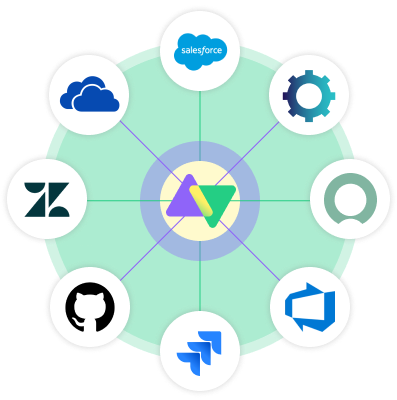
Exalate is an integration solution that supports bi-directional syncs between multiple platforms, like Jira (on-premise and cloud), Salesforce, Azure DevOps, ServiceNow, Zendesk, and GitHub.

Configuration modes in Exalate

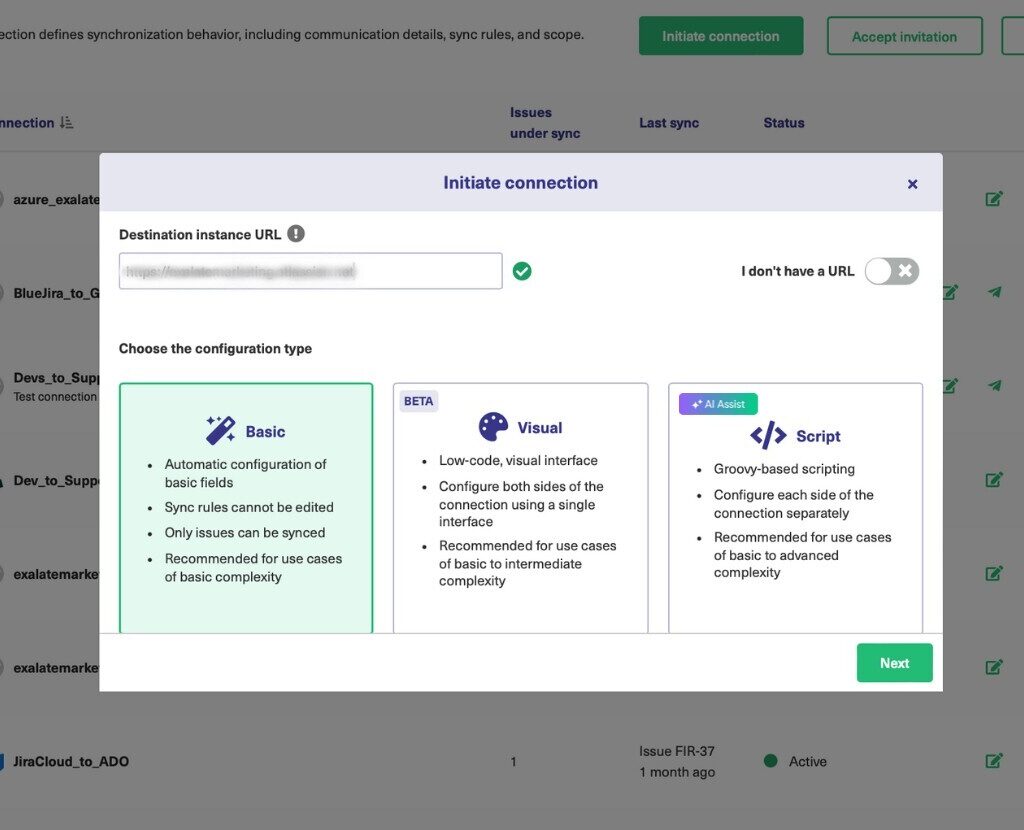
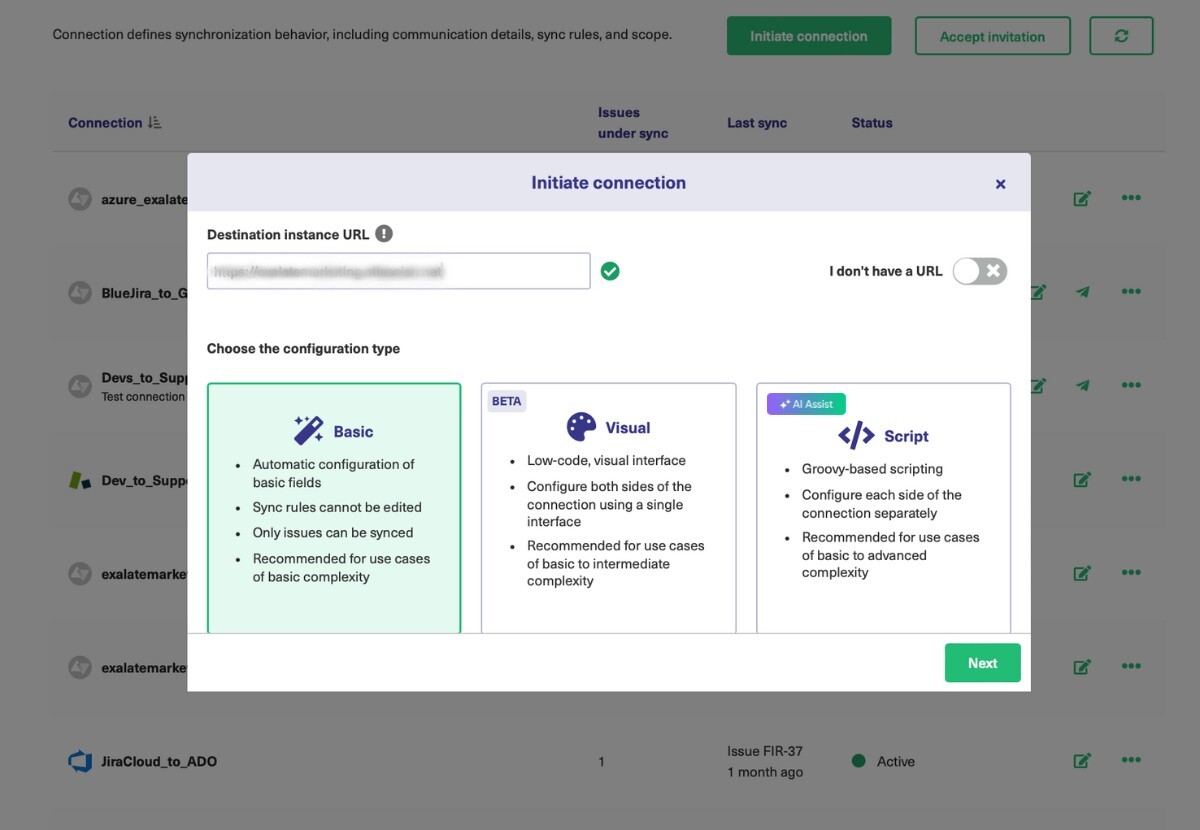
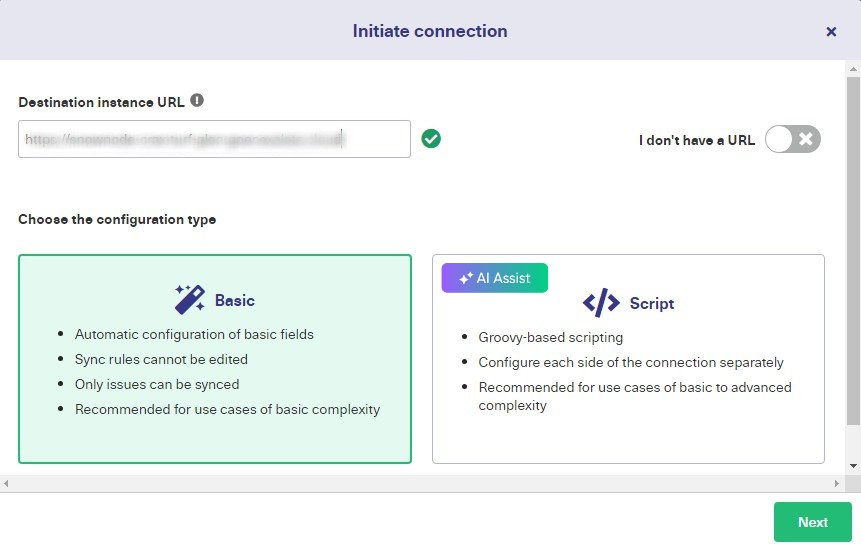
When you integrate your business with Exalate, you gain access to three configuration modes.

  • The Basic mode for pre-built mappings.
  • The Visual Mode with drag-and-drop mappings (Beta) 
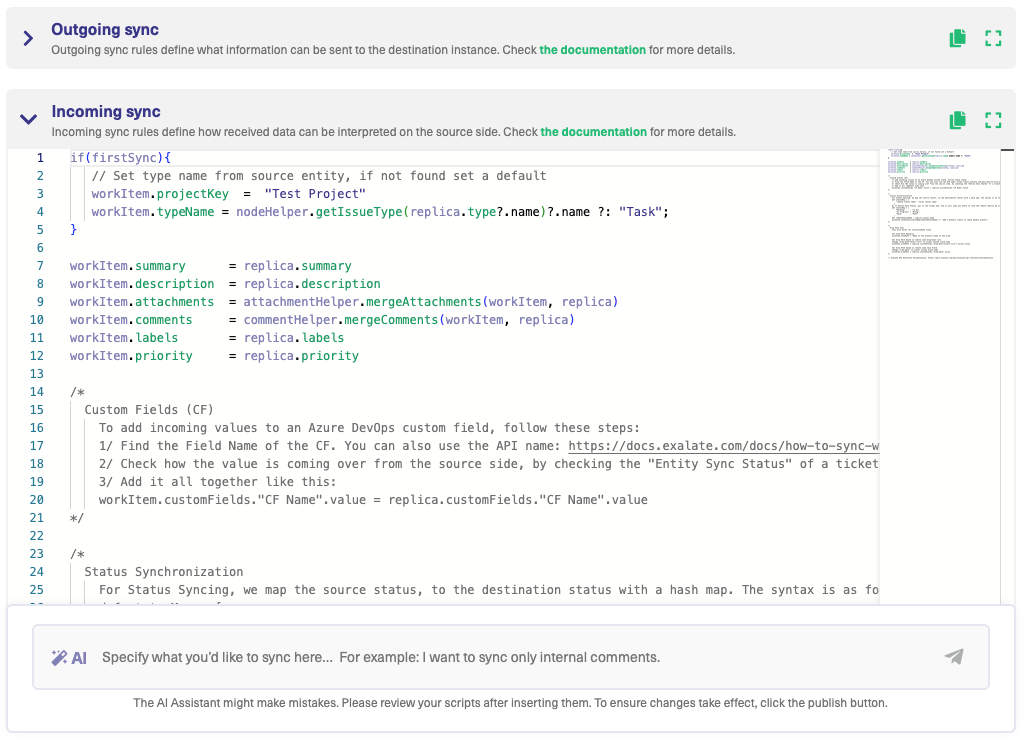
  • The Script Mode for advanced customizations using the Groovy programming language.

Exalate also provides advanced features that use the power of AI and machine learning to increase the productivity of custom configurations. The AI Assist chatbot allows users to generate various forms of Groovy code snippets and mappings for complex use cases.

You can start using Exalate for free before upgrading to the Premium or Enterprise plan.

You can also outsource your integration from concept to operations to Exalate, if you don’t wish to take care of the integration hassle yourself or do not have the resources to put on the project.

Integration as a Service

In terms of security, Exalate exists on a single-tenant architecture. Other security features include encryption, tokenization, role-based access, firewalls, etc. Read the security whitepaper to find out more.

Want to see how Exalate can be tailored to your business use case? Book a free session with an integration engineer.

Recommended Reading:

Help Desk Integration: Improve User Experience

Help Desk integration

Syncing information between internal teams and support staff will increase the resolution speed and enhance customer satisfaction.

With a customizable help desk integration, organizations and customer service teams can collect and collate data from multiple sources to improve predictions and decision-making.

So, how can you integrate help desk platforms without compromising security?

In this article, I’ll show you how. You’ll also learn the benefits and best practices of help desk integration.

What is Help Desk Integration?

Help desk integration is the process of connecting the APIs of two or more help desk software in order to extract, transit, and share information in any desired direction.

This process usually involves writing webhooks to interact with the API and track payloads back and forth. Essentially, you need to understand how the API of every system works in order to write the fitting script for it.

Since building an IT help desk integration requires painstaking coding and coffee-induced debugging, companies are now looking for third-party integration solutions to connect help desk systems seamlessly.

How Does a Service Desk Differ From a Help Desk?

Help desks and service desks are similar because they help service teams. But when you drill down to their core functionality, service desks differ from help desks.

In the traditional sense, help desks focus on consumer concerns. This is the first point of contact for end users seeking assistance with a product or service. 

Help desks offer lower-level support, self-service options, and direct communication channels. Conversely, service desks encompass everything offered by help desks while extending to the organization’s IT service management (ITSM) fabric.

Yes, the difference is subtle since most help desk platforms now provide service management as well.

Some help desk solutions that fit this bill include Zendesk, ServiceNow, FreshDesk, and Salesforce Service Cloud.

Why Do You Need To Integrate Help Desks?

Now, let’s discuss the intricate details of why every organization should integrate help desks internally and externally.

Integration outsourcing
  • Improve cross-team collaboration: Teams using different help desk software can work better together if they have access to all customer complaints and incidents. This will help them become more productive by avoiding double reporting, ticket replication, and extensive backlogs.
  • Break down information silos: Help desk integration provides a unified view of all information regarding any product or service. This helps dismantle information silos between teams working on the same issue. For cross-company collaborations, this ability to share information seamlessly will lead to transparency and trust. 
  • Satisfy customers better: When your help desk agents can see all the data regarding customer concerns, they’ll have a better understanding of how to fix them. This will lead to faster resolution times and accurate provisioning, which improves customer satisfaction.
  • Reduce expenses: Integrating help desk solutions bidirectionally allows your organization to enjoy the benefits of both platforms. For instance, you can collaborate with another MSP that uses ServiceNow without having to pay for the service. With their permission, you can extract data from the field you want.
  • Exchange information securely: Help desk integration solutions come with security tools that protect data in transit. Some of these safety measures include personal access tokens, role-based access, user permissions, and multi-factor authentication. As opposed to the exposure risk associated with manually transferring data, your admins can share sensitive business information with MSPs and other teams without worrying about information security.
  • Predict problems faster: Integration solutions for help desks usually come with analytical tools for measuring the performance of customer service efforts. With access to data from multiple sources, aided by the power of AI, your organization will be able to predict user concerns based on trends and historical data. 

Use Cases For Help Desk Integration

You can integrate help desks for different scenarios. Let’s go through some of them. 

  • Connect customer service agents in one company to their counterparts in another organization. One implementation scenario is in Zendesk ServiceNow integration.
  • Use Jira help desk integration to connect Jira teams and customer service agents. A cybersecurity MSP (NVISO) integrated their ITSM with clients using a tool called Exalate.
  • Create a deep-level help desk with ServiceNow integration. WirelessCar also uses Exalate to streamline collaborations with other automotive brands.
  • DPG Media implemented a help desk with Jira integration. This helped them migrate data from Zendesk customer care tickets to their in-house Jira issues. 
  • Sync the details of a service level agreement (SLA) from a Zendesk ticket to a Jira issue using data extracted from custom fields.
  • Merge contact information from Salesforce to the corresponding user in Zendesk in order to replicate account details across both instances.
  • Use a bidirectional help desk Jira integration to consolidate data from multiple Zendesk tickets to one Jira issue.

Best Practices For Successful Help Desk Integration

To ensure your help desk solutions are integrated properly, you need to follow certain tips and guidelines.

Track Key Metrics

With a better view of data coming in from all the help desks, you can use analytical tools to monitor performance metrics such as:

  • API limits
  • Uptime
  • Downtime
  • Ticket volume
  • Resolution speed
  • Response time
  • Open/Closed tickets 
  • First contact resolution
  • Backlogs and predicted backlogs
  • Customer satisfaction score
  • Agent performance
  • Transfer rate

You should also use more native analytical tools to gather insights in order to improve the resolution speed and overall customer experience.

Use Automat(ion)ed Responses

Several help desk incidents are often minor issues that end-users can solve on their own if given proper guidance. That’s why you need help desk live chat integration to incorporate automated responses as part of the self-service portal.

Use Secure and Compliant Solutions

Ensure the third-party integration solution you choose is compliant with regulations, whether GDPR, SOC II, PCI DSS, or other industry-specific compliance standards.

Always check for multiple security features, including API access tokens, personal access tokens, HTTPS, passwords, single tenancy, authentication protocols, and the very best integration security measures.

Choose a Scalable Solution

As your team expands, you want a help desk software integration that can handle the increasing workload without compromising performance. 

You need a solution that can handle ticket surges without breaking down and suffering multiple network outages. 

Prioritize Customization

Choose a help desk system integration that you can customize with scripts and automated triggers. This will give you plenty of autonomy and wiggle room to explore more integration use cases instead of shoehorning yourself into limited default connections.

Train your Team

Before implementing a help desk synchronization tool, make sure your team understands how it works. Consult your admins to determine if they can customize the scripts and debug faulty connections.

If not, you must train them to maintain and troubleshoot the integration without relying on external support staff.

Exalate: A Reliable Help Desk Integration

Exalate is a help desk integration solution that allows you to connect multiple portals in order to share information seamlessly and in possible real time. 

Companies of all stripes rely on Exalate to establish a seamless integration experience between internal teams and external clients. 

The main distinguishing factor is that Exalate allows single-tenancy, which means that only the admin in charge of your instance can control the outgoing and incoming data. This is pivotal for integration security.

Want to find out more about Exalate? Check out the online academy. To talk to an integration engineer, book a demo.

Recommended Reading:

How to Implement a Two-Way Integration Between Platforms

two-way integration

Companies use multiple work management systems to curate smooth workflows and obtain valuable insights. 

Here is a common scenario: The sales team is using Salesforce, the QA team tracks bugs in Jira, the service team uses Zendesk, and the development team uses GitHub.

You get the picture. However, the problem with different teams working on different systems is that they won’t be able to share data seamlessly without a two-way synchronization option.

Why? Because most of these ITSM tools are not interoperable, you need to establish a two-way integration to interact between their APIs and do all the fancy-schmancy transformations.

In this article, I’ll discuss how a two-way integration works. I’ll also explore why businesses need bidirectional integration solutions

What Is A Two-Way Integration?

Two-way integration (bi-directional integration) refers to the process of connecting two different systems so that they can share data between each other in both directions.

As the name suggests, two-way integrations allow you to track changes in one system and replicate them in the other system while maintaining data security and integrity.

If an integration synchronizes two systems without automatic triggers, it is a two-way synchronization. If it uses automated triggers without any need for manual intervention, it is a two-way automation.

Today, most integration solutions come with automated triggers by default to reduce the need for manually triggering information transfer. 

What Are the Differences Between Two-Way and One-Way Integration?

As the name suggests, one-way integration only supports information flow in one direction. This means that each end of the connection can do only one thing: receive or send information.

But with two-way integration, data flows both ways simultaneously.

Also, both parties in a two-way sync — both the local (source) and remote (destination) instances — can control what’s going out or coming into their systems.

However, only the admin of the source instance can send information, which gives them all the authority. This leaves the burden of configuration, debugging, and maintenance on one side.

How Does a Two-Way Integration Work?

Let’s say a support staff receives a ServiceNow incident reporting a bug. A two-sync solution can move the incident to the QA by converting it to a Bug or Task in Jira. 

Here’s how the magic happens using a tool called Exalate.

CRM and ITSM integration

First, the data from the field on the ServiceNow incident will be recorded as an object. Exalate will call the ServiceNow API to fetch the value in the field. Based on the user’s mapping, Exalate will now transform the ServiceNow value from HTML to Wiki — the native Jira format. 

And voila, the value from ServiceNow will appear on the corresponding field in the Jira entity. No manual copying, no needless stress.

source to plan to source

Still, sounds too abstract? Here is a real use case:

You can extract the data from the “caller ID” on ServiceNow and present all information attached to that user on your preferred field on Jira. This will help you extract several layers of data from one single object.

Why Do You Need Two-Way Integration?

As a company, two-way integration tools open a world of benefits and possibilities for inter-team and cross-company collaborations. You need a two-way integration solution for the following reasons.

Streamline Your Workflow

With a third-party integration facilitating a two-way sync between independent platforms, companies can streamline their internal workflow. This involves eliminating redundant tasks, manual “copy-paste,” and other bottlenecks involved in data exchange.

Exalate helped POSaBIT to establish a two-way sync between GitHub and Salesforce in order to optimize data extraction and communication.

Increase Productivity

The use of automated bidirectional triggers makes it possible to sync data in real time. This increases the efficiency of collaborations and project management by reducing the time it takes to access and process data.

Nevaris used Exalate to maximize workflow efficiency by decreasing the time it takes to handle issues and avoiding a single point of failure.

Unify The User Experience

Bidirectional integration also helps optimize the user experience by unifying all available data about the products and customer needs into one platform. 

Say the team is working on a user-reported bug. Sharing data between the devs and the customer support staff will help the customer get updates in near real-time. 

As a result, everyone involved in the process, including the customer, will get a clear view of the resolution’s progress.

Save Costs

Instead of paying for a new CRM just to copy one batch of customer data, a two-way integration tool like Exalate can save you money by extracting the data and replicating it in your own system. 

This is a massive benefit for companies working with managed services providers (MSPs) or clients. Your team can stay in touch without paying for additional software.

Netguru used Exalate’s two-way sync to eliminate licensing costs (per user) by only paying for one platform. This also helped them stay flexible and scalable through growth periods.

Improve Collaboration and Eliminate Data Silos

Two-way synchronization tools enhance collaborations by providing a platform for both sides to share data while regaining control. 

And since every involved party gets real-time updates, this makes the collaboration function smoothly without unnecessary conflict and endless back-and-forth. 

Also, sides sharing data bidirectionally will help dismantle data silos to ensure both sides have a unified view of all information related to a project.

For instance, Gantner uses Exalate to fine-tune internal collaborations, while WirelessCar uses the same tool to connect with other companies.

Secure Data Transfers

Most of the information you share during synchronization contains sensitive company or customer data. But with a reliable two-way integration tool, you can protect your data in transit.

How does this work? Well, it’s all about integration security.

For starters, a bidirectional solution used for sharing customer data must be GDPR-compliant. Depending on the information being shared, you might need a tool that meets other additional compliance requirements.

In addition, integration tools for two-way connections require authentication tokens in order to access the APIs. When combined with other security tokens and protocols, you get a foolproof system for securing your data at rest or in transit.

More so, a bi-directional sync tool resting on a single-tenant architecture gives every side of the connection granular control over incoming and outgoing data. You can “turn off the tap” at your end without disrupting the other side’s flow. 

Gather More Insights

Two-way synchronization gives you the best option and visibility across multiple platforms. This means you can obtain data from multiple sources simultaneously for deep-level synthesis and analysis.

For example, you can gather information about product performance from a Jira ticket and send it to Salesforce. This now gives you the freedom to run your data through multiple Salesforce analytical tools instead of sticking to only Jira features. 

Best Practices for Two-Way Integrations

Here are some best practices to guarantee that your two-way integration works as expected:

  • Add several authentication and authorization mechanisms to protect the system from unauthorized users. Consider adding API tokens, multi-factor authentication, robust passwords, rate limiting, and role-based access controls.
  • Establish a system for troubleshooting and handling errors within your bi-directional data sync. Most integration solutions provide a debugging console to help you figure out the source and cause of the error.
  • Create detailed documentation for every action you take within the bidirectional connection. You need to keep a log of all triggers, data schemes, and transactions.
  • Back up your data and create a recovery mechanism for when the system malfunctions or the data gets stuck in transit due to network outages.
  • Ensure your bidirectional integration solution meets all regulatory and compliance requirements. Consult your legal and compliance officer to determine the regulations you need to follow.
  • Continue monitoring the sync performance to figure out if changes are necessary. Tools like Statuspage can help you monitor uptimes, downtimes, and other critical performance metrics.
  • Choose a two-way sync solution that can share data between the platforms your teams are using. You also need to ensure that the solution is customizable and flexible enough to adapt to any use case.

Adopting these best practices will save you a lot of time and headaches while keeping your data flow smooth, consistent, and secure.

How Exalate Can Help You Set up Two-Way Syncs

Exalate is a bidirectional integration solution that allows you to sync data bidirectionally between work management systems, CRMs, ERPs, or version control platforms. 

Some platforms that support Exalate include GitHub, Salesforce, Zendesk, Jira, ServiceNow, AzureDevOps, and others. 

Thanks to Exalate’s Groovy scripting engine, you can configure every connection to sync data from any desired field, provided it is accessible to the API. All you need is a basic grasp of Groovy to start doing wonders.

It also has an AI Assist feature in the Script mode that allows you to generate sync scripts based on natural language prompts. Simply, type in your sync requirements in the chat window and AI will generate the scripts based on your inputs, your existing configuration, and Exalate’s scripting API.

With Exalate, you can also connect with other companies or MSPs in order to share data in real time. This is a valuable asset if you want to save costs and stay updated on project developments.

Want to find out more about Exalate? Go to the Exalate Academy. If you want some guidance, you can book a demo with our integration experts.

FAQs

What Is Bidirectional Data Integration?

Bidirectional data integration is the process of connecting two applications or systems so they can share data between themselves. This involves having an API or integration solution to act as an intermediary between both platforms in order to control incoming and outgoing data based on predetermined mappings.

What Is a Bidirectional API?

A bidirectional API (or two-way API) is an API that allows data to flow back and forth between two systems. This API allows both platforms to communicate, translate, and replicate data and requests from each other.

What Is Bi-Directional Integration Testing?

Bi-directional integration testing involves validating the entities moving between interconnected systems to make sure they are correctly mapped and accurate. Apart from making sure the right fields are mapped, bidirectional integration testing also evaluates performance to see what might be blocking or interfering with the transfer.

Why Do I Need a Two-Way Sync?

Two-way syncs allow you to share data between two systems in real time without having to copy the data manually. This process can streamline workflows and improve the efficiency of processes. Bidirectional syncs also improve collaboration and communication, which also enhances the user experience. Most importantly, it is valuable for consistent reporting and analysis.

Recommended Reading:

Adaptavist ScriptRunner Connect vs. Exalate: How Do They Compare?  

ScriptRunner Connect vs. Exalate

Jira users often want to share data with other team members, usually across two Jira platforms or with other third-party apps. To guarantee the smooth and safe transmission of data, you need a secure Jira integration solution.

If the option is between Adaptavist ScriptRunner Connect and Exalate, you need to compare their features to figure out which suits your use case best. 

In this guide, I’ll evaluate Adaptavist ScriptRunner Connect and Exalate to find out how they compare in terms of security and other factors.

What is Adaptavist ScriptRunner Connect?

Adaptavist ScriptRunner Connect is a code-first integration tool that allows you to integrate businesses across Atlassian and third-party apps.

This integration solution provides multiple connectors for different integration scenarios. 

What is Exalate?

Exalate is a bi-directional integration solution that enables you to sync data between Jira and other work management systems like ServiceNow, GitHub, Salesforce, and more.

Exalate is a decentralized integration tool that allows you to configure and automate syncs using custom scripts and triggers, without having to give up full control over your data. 

ScriptRunner Connect vs. Exalate: Comparing Key Features and Attributes

To determine how ScriptRunner Connect stacks up against Exalate, let’s answer the following questions.

Is it easy to configure?

ScriptRunner Connect comes with several templates containing ready-made scripts. You can find these custom and user-generated templates in the ScriptRunner Library. 

If you have development experience, you can configure the listeners using webhooks in order to detect issue creation and update changes.

Even though you don’t need to install ScriptRunner on your local instance, setting up two-way syncs for various fields is time-consuming and confusing because you need to set up listeners on both the source and destination. 

Exalate users can install their instance from the Jira Marketplace and complete the Basic Mode configuration in a few clicks. Developers and scripting enthusiasts can also explore Exalate’s Script Mode for advanced synchronization scenarios.

Setting up two-way syncs with Exalate is easy. You only need to initiate the connection from one end (the local instance), and the other side (the remote instance) has to accept the invitation.

How does it handle errors?

ScriptRunner Connect has an impressive IDE, but troubleshooting is difficult. Even though you can see error messages, the compiler doesn’t give you exact timestamps — which adds to the pain of debugging faulty connections. 

Apart from that, you can’t pause or deactivate a connection to limit the damage without having to delete the connection completely.

But one good thing about ScriptRunner for Jira is that you can switch environments between development and production in order to test the script. This “dry run” capability is a massive win because it helps you test-drive your sync before deploying it.

Exalate’s error-handling mechanism is more robust. It shows you the source of the error as well as the exact timestamp. This feature makes it possible to fix wrong expressions, class definitions, etc., before they can block the sync.

In addition, Exalate provides an option to deactivate connections. This feature allows users to stop and debug a malfunctioning sync without deleting it completely and losing the entire flow.

Is it fully customizable?

Exalate comes with a Groovy scripting engine that you can infinitely configure for several use cases and integration scenarios. You can write custom rules for syncing different entities and fields. For example, you can configure ScriptRunner listeners to control “Exalated” entities.

The ScriptRunner script editor uses a JavaScript/Typescript engine to control every aspect of your instance via the Java API and REST API. This makes it possible to configure connections using a ScriptRunner function in order to display custom messages and accept UI changes.

Although both solutions can sync custom fields, ScriptRunner only supports configurations using the custom field ID, not the name.

Can I automate syncs?

Adaptavist ScriptRunner Connect allows users to build multi-step automation flows with bespoke logic, loops, variables, and triggerScript functions. This makes it possible to archive issues, update and validate custom fields across projects, and remove repetitive tasks. 

Exalate handles automation using sync triggers, which outline the conditions for connections. These triggers use the Jira Query Language (JQL). 

You can create multiple triggers for handling entities and connections in bulk. The Bulk Exalate option automatically syncs and updates all un-synced entities with similar trigger search queries. The Bulk Connect option allows you to sync multiple entities in one click.

How does it handle security?

ScriptRunner Connect is Atlassian Cloud Fortified and compliant with GDPR guidelines. It also has ISO 20071 and SOC 2 Type 1 security certifications. 

Exalate secures data transmission using protocols such as HTTPS, 256-bit AES/CBC, TLS 1.3, TLS 1.2, SFTP, and FTPS. This solution also relies on security features such as JSON Web Tokens (JWT), personal access tokens, and OAuth authentication to verify users. It is ISO 27001 certified.

In addition, Exalate uses advanced endpoint detection and response (EDR) to respond to suspicious activity. And most importantly, Exalate rests on a single-tenant architecture, which means it is secure by design. 

How good is the documentation?

Exalate’s comprehensive documentation provides detailed information about setting up connections and script snippets for different platforms. 

New users can follow the Getting Started guide to start setting up Exalate with little or no expert help. You can also ask Aida, the AI-enabled documentation assistant any question about Exalate.

Visit the Exalate Academy to access a treasure trove of video tutorials and use cases. 

Exalate has an active community where you can connect with other users and technical engineers for user-generated solutions to common problems. 

The ScriptRunner Connect documentation page is fairly usable. With a bit of tweaking, navigating the documentation would become a lot easier. For now, finding information on the page feels like a massive chore.

But what Adaptavist ScriptRunner lacks in documentation, it makes up for with its library. The Adaptavist Library is stacked to the brim with scripts for different Jira platforms, products, and third-party apps.

How many integration scenarios does it support?

Adaptavist ScriptRunner Connect allows you to move data between tools within the Atlassian stack and other external apps, such as: 

  • Atlassian apps — Confluence, Bamboo, Bitbucket, Jira (Cloud, On-Premise, Service Management Cloud)
  • 3rd party solutions — Slack, Salesforce, Statuspage, ServiceNow, Microsoft Teams, Tempo Cloud, GitHub, Trello, and Zoom.

Exalate supports connections to multiple Jira instances at once. It also supports permutated connections between Jira, GitHub, Zendesk, ServiceNow, Azure DevOps, and Salesforce.

How good is the support?

As an Exalate customer, you get free support, which includes onboarding calls. The Enterprise plan gives you access to solution assistance, bi-weekly sync meetings, and other perks. You can get in touch with technical engineers by dropping a message in the support portal.

Adaptavist ScriptRunner support works around the clock, from Monday to Friday — no support on the weekends. You can contact them by submitting a support ticket.

How much does it cost?

ScriptRunner Connect is free to download and set up from the Atlassian Marketplace. To find out more about the ScriptRunner pricing, you need to contact the internal team and book a demo with them.:

Exalate’s Free plan gives you up to 1,000 new entity twin pairs per month. This package includes pre-built Basic Mode configurations for low-complexity use cases. 

Exalate’s Premium plan gives you access to unlimited custom two-way syncs. You can start with the 30-day free trial before opting for the Jira Premium Plan for a starting price of $6 per user/month. You can find out more about Exalate’s pricing here.

Does it include any AI features?

At the time of writing this blog, ScripRunner Connect does not have AI-assisted integration features.

Exalate’s Script mode, which is used for setting up advanced integration scenarios using Groovy-based scripts is now AI-enabled.

Exalate’s AI Assist is available as a chat window where you can just type your sync requirements, and AI Assist will generate the scripts for you—tailored to your input, existing configurations, and Exalate’s scripting API.

Remember, AI Assist, like any AI, isn’t perfect. So be as precise and detailed as possible with your prompts.

Exalate or Adaptavist ScriptRunner Connect: Making Your Final Pick

Adaptivist ScriptRunner Connect vs. Exalate

If you want to connect with Atlassian apps such as Confluence or BitBucket, then ScriptRunner Connect is the perfect solution. If you want to sync data with Jira, Salesforce, GitHub, Zendesk, ServiceNow, and Azure DevOps, Exalate is the go-to option.

Both solutions support advanced scripting and automation. But if you want granular control over your syncs, Exalate is the best bet because it supports JQL triggers. 

Both Exalate and Adaptavist ScriptRunner Connect have free plans, but you need to get Exalate Premium to have fun with advanced scripting. 

Want to connect your Jira with other ITSM tools and fully customize your sync using custom scripts? Book a free call with an integration engineer and bring your specific use case to the session.

Recommended Reading:

Comparing GitHub for Jira and Exalate: Who’s the Winner?

GitHub for Jira vs. Exalate

Teams working with Jira and GitHub depend on each other to share data and updates reliably and consistently. That’s why they need native or third-party solutions for syncing both platforms using pre-built mapping templates or scripts.

Before choosing any solution, you have to compare them with other offerings in the marketplace, to figure out which one will work best for you and your teams.

For this comparison, I’ll be focusing on Exalate and GitHub for Jira. Come along, let’s compare their main features, pricing, and licensing to determine which one performs better.

What is GitHub for Jira?

GitHub for Jira is an app that seamlessly integrates with Jira in order to view information branches, pull requests, builds, and much more on your organization’s repo.

This Jira GitHub integration app supports Github Cloud, GitHub Enterprise Cloud, and GitHub Enterprise Server. It also relies on smart commits to replicate GitHub actions in Jira.

What is Exalate?

Exalate is a bi-directional integration solution that enables you to sync data between different ITSM tools like Jira and GitHub, along with other work management platforms like Salesforce, ServiceNow, and more. 

This decentralized solution allows developers to share and receive updates from GitHub with other users on Jira. 

Exalate also supports no-code integration as well as script-based connections. You can even customize connections with automated triggers. 

GitHub for Jira vs. Exalate: Comparing Key Features and Attributes

It is important to note that GitHub for Jira only supports integration between GitHub and Jira, while Exalate supports other platforms as well. For the sake of fairness, I’ll be narrowing down the comparison to Jira and GitHub features as much as possible.

Security and Privacy

Both solutions are GDPR-compliant.

Exalate uses HTTPS to secure data transmissions. It also employs standard encryption protocols such as 256-bit AES/CBC, TLS 1.3, TLS 1.2, SFTP, and FTPS. It is ISO 27001-2002 certified.

Apart from standard encryption, Exalate also relies on JSON Web Tokens (JWT), personal access tokens, and OAuth authentication to verify users.

The Exalate engine rests on a single-tenant architecture and addresses incidents using advanced endpoint detection and response (EDR). Other security features available on Exalate include role-based access control and access tokens.

As an Atlassian product, GitHub for Jira relies on Atlassian’s security and privacy architecture, which is quite robust. It’s safe to say that your connection is in secure hands.

User-Friendliness and Customizability

GitHub for Jira has a read-only interface. Once you install the app on both sides, you only need to connect by adding a shortcode to your repo. 

Setting up Exalate is a bit trickier. First, you have to install the app and obtain your license. Then you can start setting up your connection using the code-free (Basic Mode) and code-based (Script Mode) versions. 

Starting with the Basic Mode is quite straightforward; it gives you access to templated mappings. But if you want customizable connections, you need to write some code in Groovy using the Script Mode.

Exalate supports bi-directional integration with pre-built connectors as well as custom Groovy-based integrations. 

Exalate also provides advanced features that use the power of AI and machine learning to increase the productivity of custom configurations. The AI Assist chatbot allows users to generate various forms of Groovy code snippets and mappings for complex use cases.

So GitHub for Jira is more user-friendly, even though it offers fewer options. However, Exalate provides AI-powered customization assistance for faster sync configurations.

Versatility (Supported Entities)

GitHub for Jira is a one-way synchronization tool that only supports data movement from GitHub to Jira. 

This is how it works: A developer makes changes to the organization’s repository. The integration solution picks up the change via webhooks and sends it to Jira. However, changes on the Jira side won’t reflect on GitHub.

In general, GitHub for Jira can track branches, PRs, commits, builds, and deployments. You can view these GitHub issue details right within the Jira issue. 

That’s where Exalate bosses GitHub for Jira. With Exalate, you can sync data from keys, types, assignees, reporters, summaries, descriptions, labels, comments, resolutions, priorities, statuses, attachments, projects, and many more. This bi-directional flow of information ensures better communication and collaboration between both sides.

Exalate now does one better by supporting connections to multiple GitHub repos at once. It also supports connections between Jira, GitHub, Zendesk, ServiceNow, Azure DevOps, and Salesforce; the permutations go on and on.

Bulk Operations

GitHub for Jira does not support bulk operations: you have to serially connect every issue or comment.

Exalate, on the other hand, supports bulk operations. With Bulk Exalate, you can sync and automatically update all un-synced entities with matching trigger search queries. You can also Bulk Unexalate them. The Bulk Connect option allows you to sync multiple entities in one click.

Automation

GitHub for Jira allows you to automate your issue’s workflows to transition issues when activity happens in your GitHub repos. The automation library comes with 3 pre-configured rules:

  • When a branch is created, move the issue to “In progress”
  • When a commit is made, move the issue to “In progress”
  • When a pull request is merged, move the issue to “Done”.

You can use smart commits and source code triggers to automate other parts of your Jira projects. 

Exalate automates syncs using triggers, which specify the conditions for controlling connections. Exalate triggers use native query languages for every platform:

  • Jira — Jira Query Language (JQL)
  • GitHub — GitHub advanced search syntax

Customer Support

All Exalate customers get free support. When you get the Premier Support option, you’ll become eligible for onboarding calls, solution assistance, bi-weekly sync meetings, and other perks. 

Atlassian handles support for GitHub for Jira. The service is available for 24 hours from Monday to Friday. So good luck if your sync stops working on a Saturday.

Pricing

GitHub for Jira is free.

Exalate’s free plan supports up to 1,000 new entity twin pairs per month. To get more syncs, you get the Premium plan. 

Exalate’s pricing depends on the platform you are working with. You can find out more about pricing here.

Error Handling

Exalate has an error handling mechanism that shows the source of errors: changed platform configurations or workflows, wrong expressions, wrong class definitions, and other potential human-made errors. 

This troubleshooting feature allows you to spot errors blocking the sync or making it malfunction.

If the data on the GitHub for Jira interface is not showing correctly, you’d have to debug it yourself and contact support.

Documentation and Community

Exalate has detailed documentation and a dedicated community. The comprehensive documentation page allows users and self-starters to learn more about the product and solve potential problems. You can also follow the Getting Started guide to start working with Exalate. 

The Exalate Academy has video tutorials that contain a treasure trove of information about Exalate’s key features. 

Exalate has a dedicated community with active users who love to discuss the best ways to make the solution work best for you. You can reach out to other technical engineers and fellow users for solutions to common issues. You can also read case studies and use cases for different synchronization scenarios.

GitHub for Jira also has detailed documentation for setting up the integration on different versions of Jira. The Atlassian community also has active users and technical experts addressing user questions and common concerns.

GitHub for Jira vs. Exalate: The Final Verdict

GitHub for Jira vs. Exalate

GitHub for Jira is easier to set up — and it is free. Besides, you are guaranteed to notch security and support since it is an Atlassian product.

But that’s as good as it gets.

Exalate blows it out of the integration water by offering multiple connection modes for customers with different technical skill levels. Exalate also uses single tenancy to isolate your system, which is important for decentralized cross-company collaborations. 

Besides, you can automate your syncs with Exalate using native triggers. You can also customize sync rules for any use case using the Groovy scripting engine.

And most importantly, you can use Exalate to share information between multiple work management systems.

Conclusion

Before choosing either GitHub for Jira or Exalate for your organization, consider why you need to synchronize both platforms. You must also factor in security, data privacy, pricing, support, performance, and ease of use.

If you only want to share updates with teammates using Jira, then GitHub for Jira has you covered. But if you want an iPaaS solution that connects with not just Jira and GitHub, but also bosses error handling, then Exalate is the perfect option for you.

Recommended Reading:

Integration Outsourcing is The Future: Here is Why You Need It

Integration outsourcing

Maintaining a successful organization requires integrating all operations, and creating a well-oiled digital machine. Some companies integrate data, while others integrate applications, systems, and APIs.

Whichever aspect of your business you want to integrate, you need to ensure a smooth flow of information and delivery of managed services.

That’s why integration outsourcing should be a key consideration for your business. 

Delegating integration services to trustworthy vendors will give you the freedom to focus on core business functions. At the same time, experts from managed service providers will build, maintain, and keep the system updated for you.

But it’s not that simple. Before dipping our toes into the unpredictable waters of integration outsourcing, let’s explore its benefits and other key considerations. 

What Does Integration Outsourcing Entail?

Integration outsourcing is the process of handing over the integration of systems, data, and business processes to an external entity. 

This means that a third-party service provider — also referred to as a managed services provider (MSP), or outsourcing partner — takes care of the integration infrastructure itself without gaining access to the core business ecosystem.

Companies can decide to outsource data integration to dedicated vendors in order to ensure leakproof information sharing. This is crucial for cross-company collaborations, mergers and acquisitions, or integration with other MSPs.

In some cases, the third-party service provider will help integrate your business with external systems or business processes. They will dedicate experts to help your internal team configure, troubleshoot, and maintain connections with applications, APIs, and other systems. 

node linking computers

Why Outsource Integration Services?

As mentioned earlier, companies outsource integration services for different reasons. Some to share data; others to keep all systems running like Swiss watches. Other reasons to outsource integration services include:

Hand It Over to the Experts

Integration outsourcing provides a great opportunity for companies to delegate their integration concerns to dedicated experts. This might involve giving up partial control by allowing the company to build the solution while your devs maintain it. 

Alternatively, you could outsource the entire integration solution lifecycle to the provider. With unlimited access to the latest technologies, they can cater to your exact needs. You also retain access and permissions to the turnkey solution they provide.

Speaking from experience, most companies start their integration journey in-house. The devs build APIs for connecting systems and data sharing. 

This might work in big companies with massive R&D departments dedicated to building out-of-the-box solutions. But for small businesses and startups, finding the experts to build cross-compatible, multi-system integration tools might be a far fetch.

Integration as a Service

Focus on Core Business

When you delegate integration to experts, this frees up some bandwidth and resources that you can channel into core business processes.

Say a third-party service is handling data integration across all your teams. Instead of hiring and managing developers to work on APIs, you can now focus your team on gathering, analyzing, and interpreting the data. This will increase productivity and overall performance.

Guarantee Stability and Service Availability

As part of focusing on core business functions, there won’t be any need to worry about the integration tool breaking down, because you are paying experts to keep it running.

Integration service providers stake their brand reputation and ultimate survival on ensuring maximum uptime for all their customers. So, they’ll go the extra nautical mile to guarantee service stability and availability.

This also extends to security. Reputable integration outsourcing companies use multi-layered security measures, firewalls, access controls, encryption, and authentication protocols to protect their customers’ data. 

Save Money

Exploring integration outsourcing reduces the company’s overall expenditure. 

Think about it; you no longer need to hire developers to build and maintain the integration platform. Other costs you can save by outsourcing include the following:

  • Licensing fees
  • Training
  • Office space and equipment
  • Technology stack

These extra expenses could go even higher as your business scales up. And if your in-house devs lack the experience to discern the tools they need, you might end up splurging on things you don’t need.

Drawbacks of Integration Outsourcing

When you delegate integration services to an external entity, you risk exposing your business to security breaches through yet another potential point of failure. As a result, your business and customers’ data could fall into the wrong hands in cases of massive breaches.

Also, outsourcing is tantamount to ceding control to a third party. While this might work for your organization early on, it might become an issue as your business grows. Since you are locked in with this vendor, ending any ongoing agreement might require a painful process of decoupling.

Sometimes, outsourcing integration to partners outside your trade zone (e.g., a company in the EU delegating to a MENA-based agency) can drag you into unforeseen legal trouble. If the data governance legislation changes in that area — say sanctions or trade embargoes due to military action — your business will feel the burn.

tech crystal ball

6 Factors To Consider Before Outsourcing Integration

Before outsourcing integration services, you must consider several factors to choose the perfect candidate. Here are the questions you should answer beforehand:

What are the Services They Offer?

Find out the company’s core competencies to ensure they align with your needs. This will help you tailor your search to specific providers.

For instance, if you want a solution that can integrate data between Salesforce and Zendesk, you need to find a service provider that supports Salesforce Zendesk integration.

In some cases, the integration provider might propose different cooperation models: dedicated team, turnkey solution, or pay-as-you-go. Choose the one that suits you best.

What is The MSP’s Track Record?

Now that you have multiple MSPs on your radar, start sorting them based on reputation. 

Consider reading independent reviews and word-of-mouth recommendations to find out what people are saying about the product or service they offer. 

You can find reviews in communities, forums, and social media. If the MSP has no track record, don’t take this ill-advised leap of faith. Protect your business by going with known entities.

What Technology Is Available?

You need to discover as much information as possible about the company’s technology stack. Pay attention to how they handle data in transit or at rest. 

Another technological consideration is the system architecture. You need to check if the outsourcing service provider uses a single or multi-tenant architecture. I’d lean towards single-tenant architecture because it isolates your system.

Apart from system architecture, check out security protocols like encryption, licensing, and firewalls. Trustworthy integration MSPs use multi-layered security measures, including access tokens, role-based permissions, and authentication, to guarantee privacy and data security.

What Does The SLA Contain?

The service level agreement (SLA) is a legally binding contract that contains the details of your agreement with the outsourcing partner. 

To avoid conflict, outline the details of the agreement vividly. Get your legal team to review and redline every stipulation in the contract; this will protect you if problems crop up in the future.

Where is The Company Located?

You are probably wondering what location has to do with outsourcing in the era of remote work and gigs.

As mentioned earlier, integration outsourcing means handing over partial or full control of your system to a third party. This means the service provider has access to your data, albeit to some extent.

And this raises the question of data governance and residency. In regions like the EU, data governance and privacy laws are stringent. This might affect your company’s ability to outsource data integration services to a non-EU MSP.

Other location-based considerations include time zone discrepancies and language barriers.

How Much Does It Cost?

Most businesses fall into the trap of going for the most expensive outsourcing partner. In the words of Logan Roy: “Congratulations for saying the biggest number!”

This same logic applies to choosing overly low-cost outsourcing services. If the price is too good to be true, you are probably getting subpar services.

The secret sauce is to strike a balance between your budget and the cost. However, the ultimate deciding factor should be the quality of services they provide according to the SLA.

cloud to desktop

Best Integration Outsourcing Practices 

Here are some best practices when outsourcing integration services to a third party.

  1. Outline your expectations in the service level agreement to indicate the expected deliverables, contingencies, roles, and concrete timelines.
  2. Establish a communication pathway between your organization and the managed service provider. Create an environment that fosters collaboration and teamwork.
  3. Abdicate responsibility but regain control. Make sure you have all the access roles and admin permissions to manage the data.
  4. Keep security, privacy, and compliance on top of the pile. You also need an external system for monitoring changes in compliance regulations.
  5. Outsource to companies within your geographical zone, if possible. This will save you a lot of headaches.
  6. Choose an outsourcing company with a proven track record of delivering quality services. You can also evaluate their tech task and interview the top brass before bringing them on board.
  7. Don’t splash money on the problem. Make sure the cost of outsourcing does not outweigh that of hiring in-house developers. And when you outsource, strike a balance between pricing and industry expertise.

How MSPs Can Outsource Integration

Managed services providers can outsource integration to vendors by buying out-of-the-box solutions. This cooperation model provides service providers with a solution that can integrate with their customer’s systems.

Exalate is an out-of-the-box solution that provides bidirectional integration solutions for MSPs. It uses a single-tenant architecture to host all its services. Exalate also comes with a scripting console and a team of engineers that can help you set things up and troubleshoot errors.

Nviso, a cybersecurity MSP, uses Exalate to automate its workflow and remove the redundancy of creating tickets between ITSM systems.

Alternatively, MSPs can hire a dedicated team from the outsourcing partner. The dedicated team will be a vestigial part of the organization without actually adopting its internal culture or data practices.

Build, Buy, or Outsource Integrations?

Companies often find themselves at a crossroads when deciding to build or buy integrations

Going with the build option requires having a team of developers on hand to develop everything from scratch. You’d also have to pay for licensing, maintenance, updates, and security. Then, you also need to provide support internally when the product malfunctions.

Alternatively, you could choose the buy option and outsource everything to a dedicated and trustworthy integration service provider. This will cost you less and reduce stress on your development team.

So, evaluate your business requirements and capabilities to see if your resources can shoulder the stress of building a product in-house. The choice is ultimately yours.

Summing Up

Integration outsourcing allows you to delegate integration services to trusted third-party MSPs with proven industry expertise. Whether integrating data or services, you need a partner that guarantees security and seamless integration. 

Instead of spending money for the services of the biggest outsourcing partner, you need to confirm if their services align with your organization’s needs. You should also factor in data governance and residency laws, as well as the scalability of their services.

Most importantly, always exert ultimate control over your data and service infrastructure when outsourcing integration services.

FAQs

Why Do I Need Integration Outsourcing?

You need integration outsourcing to relieve the pressure on your in-house team as regards building and maintaining a working integration solution. This will help you save money while focusing on core competencies.

What Type of Integration Can I Outsource?

You can outsource integration for applications and systems, as well as data, APIs, and business processes. You can also outsource integration between MSPs—or MSPs with customers.

What are the Challenges of Integration Outsourcing?

The challenges of integration outsourcing include communication and collaboration issues, security risks, data governance and residency, cultural fit, and cost. You also have to worry about getting an integration service provider with a stellar reputation.

Is Data Security a Concern with Integration Outsourcing?

Yes, data security is a concern when outsourcing integration. By connecting with a third-party service, you introduce a potential point of failure to your infrastructure. That’s why you need to choose a reputable provider with robust security measures for protecting sensitive information.

Recommended Reading:

ZigiOps vs. Exalate: A Side-by-Side Comparison

ZigiOps vs. Exalate

Organizations in different industries use work management systems to manage projects and track progress, as well as to gather and analyze data. 

Whether it is Jira, ServiceNow, or Salesforce, you need these work management tools to ensure independent teams are on the same page when it comes to collaborations.

However, the problem with having multiple work management tools is that you need to find a way to share data between them without compromising security or losing important data. That’s why you need integration solutions like ZigiOps and Exalate.

But before recommending one of these solutions, we need to see how they fare going head-to-head in a clash of integration titans. We’ll cover their main features, pricing, and licensing to find out which solution comes out victorious.

What is ZigiOps?

ZigiOps is a no-code integration platform that helps enterprises automate processes and enhance cross-team collaboration. This platform seamlessly connects your systems while extracting and transferring data between them in real-time. 

Founded by ZigiWave, ZigiOps supports local and cloud installation; you can download the application on your Windows or Linux device or on a private cloud for a limited fee. 

What is Exalate?

Exalate is a flexible integration solution that enables you to sync data between different work management platforms. This decentralized solution has a no-code builder for first-time users and a Groovy-based scripting engine for developers and those looking for additional customizability. 

When working with Exalate, you need to install the Exalate app on each side of the connection, meaning each system you want to integrate. This is for the cloud hosting option. You can also install Exalate locally on premise or via Docker. 

ZigiOps vs. Exalate: Comparing Key Features and Attributes

With a better understanding of both integration tools, it’s time for their features to go head to head.

Security

Both solutions value security, but their data protection approaches differ. 

ZigiOps uses encryption algorithms like 256-bit AES/CBC, TLS 1.3, TLS 1.2, SFTP, and FTPS to protect data from unauthorized interception. 

Also, the ZigiOps cloud version is only accessible via HTTPS. It uses OAuth to authenticate login credentials and relies on a Java Keystore (JKS) to hold a public certificate and private key.

Exalate safeguards every data transmission via HTTPS and other encryption algorithms that ZigiOps uses. In addition, Exalate also uses JWT tokens and OAuth to verify users’ login credentials. It is ISO 27001:2022 certified.

But the key difference is that Exalate’s single-tenant architecture relies on advanced endpoint detection and response (EDR) for addressing incidents and vulnerabilities. 

Verdict: Close round, but Exalate slightly edges this one because it uses advanced EDR.

Data Residency and Privacy

Since Exalate and ZigiOps value security, they both ensure your data doesn’t stay on their database longer than needed. 

Exalate Cloud uses the Google Cloud data center in Belgium and stores backups in Switzerland in the Rsync.net offline data center. So by extension, Exalate falls under the jurisdiction of Google’s strict privacy laws.

Similarly, ZigiOps does not store your information on a database, except for those used for troubleshooting. The user controls what data stays in storage. In addition, ZigiOps uses AWS, so it relies on the airtight security of Amazon’s data centers.

Verdict: This round is a draw. Both solutions place a lot of emphasis on data privacy.

Licensing and Certification

Companies that handle user data must get licenses and follow compliance standards. ZigiOps fulfills this requirement by acquiring ISO 27001 and FIPS 140-2 certifications.

Exalate also has ISO 27001 Certification. And since the company’s headquarters is in Belgium, their solution is GDPR-compliant.

Also, both products require licenses to work. So, you need to add a unique active license key to use Exalate or ZigiOps.

Verdict: This round is a tie.

User-friendliness

ZigiOps positions itself as a no-code platform. When using the solution, you’ll have several pre-built templates on the ZigiOps Web Console (compatible with only Chrome and Edge). 

Before installing ZigiOps, you must meet stringent software and hardware requirements. However, the installation process can be a headache, especially if your device runs on macOS. But once you complete the installation, it’s smooth sailing onwards.

Exalate is perfect for everyone, regardless of technical expertise, because it has pre-set (Basic mode), no-code (Visual mode), and code-based (Script Mode) versions. The interface is also easy to use and looks the same on every platform.

Verdict: ZigiOps pre-built templates are tough to beat, but Exalate’s three modes make it accessible for a wider range of users. So this round is a draw.

Speed and Performance

Since ZigiOps exists as a native application, its speed and performance depend on the application’s server. Similarly, Exalate supports instant, real-time synchronization between instances. Both solutions also use triggers to handle instant updates.

Verdict: This round is a stalemate since they have similar speeds.

Customizability

Exalate allows users to configure outgoing and incoming syncs using a Groovy-based scripting engine. You can also write mini-expressions to handle triggers. This script-based engine gives Exalate unlimited customizability, regardless of the use case and work management platform.

Exalate also provides advanced features that use the power of AI and machine learning to increase the productivity of custom configurations. The AI Assist chatbot allows users to generate various forms of Groovy code snippets and mappings for complex use cases.

AI Assist in Sync rules

Conversely, ZigiOps does not have a scripting engine, which significantly limits its customizability. Even with templates and triggers, it is no match for Exalate’s Groovy engine.

Verdict: Exalate wins by a landslide.

Connectivity

Both solutions support bi-directional syncs, which means you can transfer data in both directions, regardless of the platform.

Exalate is the perfect solution for cross-company integrations because each organization handles outgoings and incomings locally. And thanks to decentralized control, each organization retains independent control over its respective syncs.

But with ZigiOps, the admin (from ZigiOps) has access to your data, which might not be convenient for some organizations. 

Verdict: Another Exalate round.

Pricing

The ZigiOps pricing is not available to the public. But after extensive research, we discovered that ZigiOps doesn’t offer a free model. In any case, you can use two paid plans: Basic and Standard.

Under the Basic plan, you get one integration workflow for $11k annually. The Standard plan gives you access to unlimited workflows for $16k per year. You also have to pay extra for the Sandbox license, as well as around $7k for custom integrations. To find out more about ZigiOps’ available plans, you can book a pricing meeting with them.

Exalate’s free plan supports up to 1000 new entity twin pairs per month. This means that once you create a sync on the local instance, a replica will be created automatically on the remote side–and you have 1000 of these per month under the free plan. Alternatively, you can pay for the Premium plan after a one-month trial period. Exalate’s pricing depends on the platform you are working with. 

You can get the full pricing range here.

Verdict: Another round for Exalate, thanks to its publicly available and affordable pricing and free plan.

Customer Support

ZigiOps provides 20 free hours of customer support, which might be a massive inconvenience if you experience technical issues during the 4-hour window when their support is unavailable.

Conversely, Exalate offers 15 hours of support to all customers. But as part of the Premier Support service, you’ll get onboarding calls, solution assistance, bi-weekly syncs, and other perks, which are available 24/7. 

Verdict: Although both solution providers have a customer support portal, Exalate barely edges this round with 24/7 availability.

Versatility (Supported Platforms)

The compatibility of any iPaaS or IaaS solution is a massive selling point in a world where companies need hundreds of integration tools. So, having a tool that can connect with multiple platforms (without compatibility issues) is a welcome advantage.

ZigiOps supports the following platforms:

  • AppDynamics
  • Azure DevOps
  • Azure Monitor
  • BMC Helix
  • Cherwell
  • DataDog
  • Dynatrace
  • Foglight
  • Ivanti
  • Jira Cloud
  • Kubernetes
  • New Relic
  • Nutanix
  • MF OpsBridge
  • Prometheus
  • ServiceNow
  • Signl4

Exalate supports the following platforms:

  • Jira (Cloud, Server, Datacenter)
  • Docker (for multiple environments)
  • Zendesk
  • HP ALM
  • Salesforce
  • GitHub
  • ServiceNow
  • Azure DevOps
  • Upcoming (Asana, Trello, Azure DevOps on-prem, Gitlad, Monday)

Verdict: ZigiOps is the clear winner because it supports more platforms than Exalate.

Error Handling

When writing code with the Exalate scripting engine, you might run into some errors: wrong expressions, wrong class definitions, and other potential human-made errors. 

Luckily, the Exalate console will notify you about the error by pointing out the specific line in which it occurred. This feature makes it easier to debug your custom code to discover why the sync is malfunctioning.

However, the ZigiOps ticketing system and UI make troubleshooting much more difficult. You’d have to review the activity logs manually to determine what’s going wrong in any sync.

Verdict: As far as error handling goes, Exalate’s troubleshooting feature is more convenient than ZigiOps.

Documentation and Community

ZigiOps has an extensive repository of case studies, white papers, news, blog posts, videos, and FAQs. 

But even though the product has an accessible documentation repository, it only focuses on the solution’s core functionalities. This could pose a problem for self-starters and developers who want to explore the product further.

Unlike ZigiOps, Exalate has detailed documentation. You can solve almost any potential problem by reviewing the product’s documentation and following the integration flows in the Getting Started guide

And if you want to learn more about the product, you can consult the Exalate Academy for video tutorials. You could also read case studies and use cases for different synchronization scenarios.

In addition, Exalate has a dedicated community with fairly active users where you can find solutions to common issues. However, ZigiOps does not have any recognized community of users.

Verdict: Exalate wins the final round with its detailed documentation and interactive community.

ZigiOps vs. Exalate: The Final Scorecard

ZigiOps Vs. Exalate

For instance, ZigiOps can integrate with more platforms than Exalate. It is also easier to use because you only need to install it on your device once to connect multiple work management systems simultaneously.

But what makes Exalate unbeatable is its modes for customers with different technical skill levels, from basic to advanced. The secure IaaS solution also has the backing of a vibrant community, as well as detailed documentation that ties into the Exalate Academy. 

Ultimately, Exalate is the cheaper option considering the value you get for your money.

Conclusion

When choosing the integration solution for your organization, always consider your needs and how the solution you choose can solve them. Keep into account the work management systems your teams use to ensure the integration solution works seamlessly. You must also factor in security, data privacy, pricing, support, performance, and ease of use.

After comparing Exalate and ZigiOps, it is clear that Exalate is the better solution for both cross-company and internal synchronizations. 

Recommended Reading:

How SaaS Integration Can Improve Your Business Processes

SaaS integration

With the SaaSification of everything in full swing across industries, companies now use tons of SaaS products for different aspects of their business.

But this presents a problem: how can you connect all these systems (CRMs, ERPs, HRMs, cloud applications, and communication tools) in order to unify data and draw insights from a single source of truth?

The answer is SaaS integration.

Join me as I explore the definition and application of SaaS integration, as well as why every modern organization should explore it.

What is SaaS Integration?

SaaS integration is the process of connecting two or more SaaS applications in order to make them share data in real-time, near real-time, or in batches.

BMC estimates that over 90% of companies worldwide use at least one SaaS solution. Extrapolating from that, it is easy to assume that innovative companies have tens and hundreds of SaaS applications.

With that in mind, SaaS integration is the only way teams within these organizations can function together without the creation of information siloes.

Otherwise, they’d have to request, filter, and transfer data manually-–which is prone to human error and other risk factors.

How Does SaaS Integration Work?

You can implement SaaS integration using different connection models:

  • Point-to-point integration between multiple endpoints or nodes.
  • Hub-and-spoke integration involving a central hub and several ‘spokes’ or nodes.
  • Hybrid integration, which combines different models of interconnectivity.

In general, different SaaS integration models have a similar working principle: connect two systems to get them to exchange data.

Here is how it works.

Say you are working with Salesforce, and you want to integrate the data with AWS. You’d need to get the APIs of both systems to interact. 

To make this work, you need an integration solution acting as an intermediary between these disparate systems.

SaaS integration diagram

You could write custom code and conduct multiple tests to ensure you are calling the right endpoints. You could also use SaaS-native integration or automated third-party solutions to simplify the process and shun human error.

Other implementations of SaaS integrations include:

  • A native integration built in-house or by default as a standard feature;
  • Integration platform as a service (iPaaS), which is a variation of SaaS that delivers integration services as  a cloud application or service;
  • Robotic process automation (RPA) involves the use of AI-powered bots to collect information from business systems.

Once you connect the right endpoints, data will flow between them based on the established rules and mappings.

In the same process, the integration middleware will use transformers to convert the data on the local side from the native format in order to present it in a machine-readable format on the remote side.

Once properly set up, all the interconnected systems within the integration platform for SaaS will be able to share data.

Different Applications of SaaS Integration

Let’s check out common SaaS integration examples, use cases, and scenarios:

  • Implementing SaaS to SaaS integration for consolidating sensitive business data and product documentation into secure databases for industry-compliant cloud storage and centralized warehousing
  • Using SaaS application integration to streamline internal and external communication through messaging platforms such as Slack and Microsoft Teams
  • Using an integration platform for B2B SaaS to connect with suppliers, vendors, and managed services providers (MSPs) in order to share data in real time and maintain healthy data practices for B2B integrations
  • Bolstering the efforts of sales teams by integrating data between CRMs (HubSpot) and helpdesk applications (Zendesk, ServiceNow, etc.)
  • Combining e-commerce with marketing and design with the help of data obtained from platforms such as Canva, MailChimp, and Shopify
  • Increasing project management efficiency for companies using multiple work management systems such as Jira and Azure DevOps
  • Using SaaS integration services in cloud computing for connecting cloud services such as Azure, AWS, and others. Companies developing progressive web applications can use AWS SaaS integration to consolidate data from multiple cloud infrastructures
  • Enhancing the accuracy of data analysis using a vast array of analytical tools that may not be available on one system
  • Improving employee productivity and satisfaction by integrating management and performance analytics from HR management systems (HRMS)

Why is SaaS Integration Difficult?

SaaS integration can cause you headaches if you don’t have the right systems and procedures. Here are some SaaS integration challenges to contend with:

SaaS Sprawl

“SaaS sprawl” means that your organization has too many SaaS applications, and you are struggling to keep track of them. It is the natural consequence of having too many non-integrated systems.

The wider the SaaS sprawl, the more complex the SaaS integration strategy. Companies often forget they are paying for certain SaaS applications.

In some cases, changes to the API of one system might necessitate a reconfiguration of the SaaS integration solution.

Cost

SaaS software integration can be cost-effective for small businesses with few applications. But once your SaaS applications number in the hundreds, finding suitable, reliable SaaS application integration services becomes a challenge. You often end up having to pay extra for multiple integrations or custom configurations.

Technical Expertise

Speaking of custom configurations, you need IT professionals who can build a functional SaaS integration diagram that fits perfectly into your product ecosystem.

Yes, building SaaS integration products from scratch is a herculean task that involves nailing dynamic endpoints, taming non-interoperable systems, and crushing bugs.

If your team decides to build the integration in-house, this can lead to massive backlogs and customer dissatisfaction.  

In the end, you’ll end up outsourcing to SaaS integration companies.

Platform Support and Limitations

Let’s be real here: finding a universal platform that can integrate every SaaS application is impossible.

Some SaaS integration software supports only a handful of platforms. Suppose you want to integrate data from Salesforce, Jira, and MailChimp, but the integration supports only connections between Salesforce and Shopify. 

This is an understated bummer. You now have to build an integration in-house or find another solution that can address this deficit.

Even if you find SaaS data integration services that meet your integration needs, you still need to worry about API call limitations, product stability, usage rules, and compliance.

Another issue to contend with is vendor lock-in. Once you choose a SaaS app integration services provider, you have to adapt your systems and processes to their infrastructure.

Legacy Systems

Not all applications and services within your enterprise follow the SaaS model. The main culprit here is legacy systems.

Integrating legacy systems with modern SaaS solutions can be heavy lifting, if not impossible. 

Sometimes, the cost of modernizing legacy systems to level up with newer systems is so high that companies opt to abandon the process and leave the system outside the integration web.

Integration Security

Integrating multiple systems and applications into a centralized hub introduces a single point of failure. If the center breaks down, the rest of the system crumbles around it.

In a similar fashion, cross-company integrations with other organizations introduce an extra point of vulnerability. 

If your partner or vendor on the other end doesn’t follow proper SaaS integration security and data management procedures, your data will be exposed to external threats.

Why Your Company Needs SaaS Integration Software

Global trends and the rate of adoption indicate that SaaS integration products and platforms are the future. According to Statista, the market value for SaaS products is $644 billion.

SaaS integration revenue share

Whether you have two or 1001 applications, here are the potential SaaS application integration benefits for your business or organization. 

Increased Productivity

SaaS workflow integration removes the need to manually filter and share data between systems using automated triggers and scripts. This increases workflow efficiency by reducing the time and resources required to copy data back and forth.

Better Data Quality and Accuracy 

With the automation of data transfer and collection, SaaS service integration and management can eliminate human error and all associated risks. This improves the quality and accuracy of data required for making decisions within the organization.

Higher Flexibility and Scalability

Automated integration for SaaS platforms makes it possible to scale operations (up or down) according to business requirements. This helps companies expand their data ecosystem as more functions and applications enter the pipeline.

Better Analytics and Reporting

Access to a centralized data source makes it easy for managers to consolidate your company’s data for comprehensive analysis. 

SaaS data integration solutions also connect with third-party data management tools that can store, filter, and synthesize information from vast amounts of data.

Transparency and Trust

The single source of truth that SaaS integration tools provide is a catalyst for trust and transparency—especially for cross-company collaborations.

When both sides have the same view of process-relevant information, they can make decisions under a safe blanket of mutual trust.

For instance, an e-commerce company can use a SaaS Stripe integration along with invoicing software to handle payroll, invoicing, and billing when working with a marketing agency.

Both sides can also trust the market performance and penetration data if they have a full view of all the data. 

Enhanced Employee and Customer Satisfaction

For companies specializing in customer-facing products and services, integrating help desks and customer service portals will help them understand and address customer concerns better.

This trickles down to employees. When people from different departments and teams have access to all the information they need, they can make better decisions — which boosts employee morale.

How to Set Up a Successful SaaS Integration Strategy

Here are some tips and best practices for setting up SaaS integration strategies for your organization:

  • Map out the SaaS integration patterns for all the applications, services, and systems you want to integrate.
  • Micro-map the specific projects, entities, and even data fields you want to sync. E.g., what amount of code meets the minimum requirements for synchronization? 
  • Create and follow coherent SaaS application integration designs for every scenario.
  • Set the right expectations and outcomes across all teams.
  • Use SaaS integration testing for every endpoint, script, or mapping in order to ensure they are fit for purpose.
  • Adopt SaaS integration solutions with an intuitive interface in order to suit technical and non-technical users.
  • Train team members to manage, set up, and control SaaS integrations independently.
  • Communicate with the integration partner to determine points of cultural and procedural alignment.
  • Specify roles and restrictions to control access to the data.
  • Choose SaaS integration services with a proven record of delivering optimum performance, support, security, and maintenance.
  • Add multiple security protocols and encryptions to bolster security.
  • Use only industry-compliant SaaS integration platforms when handling sensitive business or consumer data.
  • Plan for the future by using only automated, scalable SaaS API integration tools.

Implementing SaaS Integration With Exalate

For successful bidirectional integration, you need an integration platform that can handle multiple use cases, scale with your organization, and guarantee the security of your data.

You also need to follow and document all SaaS integration best practices to establish comprehensive patterns for every scenario.

Exalate is the perfect SaaS integration solution that allows you to sync data between CRMs, code repositories, and work management systems. 

For companies relying on integration-as-a-service (IaaS) solutions, Exalate supports integrations at two levels of difficulty.

  • Basic Mode: Default no-code mappings for non-technical users and simple integration scenarios.
  • Script Mode: A low-code mode for setting up advanced connections.
Configuration modes in exalate

The Script mode gives users access to AI Assist, which is an AI-powered chatbot that helps to generate scripts for mapping different objects, fields, and entities. This speeds up the creation and optimization of connections significantly.

Supported platforms include Jira (on-premise and cloud), Salesforce, Azure DevOps, ServiceNow, Zendesk, and GitHub.

Exalate uses role-based access, tokenization, firewalls, etc., to protect sensitive information from unauthorized access. To learn more about Exalate’s robust security, read the security whitepaper.

You can watch the SaaS integration podcast to see how companies use Exalate. Want to learn more about Exalate? Contact our experts to get started.

Recommended Reading:

Jira Azure DevOps Integration: The Complete Step-by-Step 2025 Guide

Jira Azure DevOps integration

More teams are using work management platforms like Jira and Azure DevOps to organize their work and manage data. That’s where Jira Azure DevOps integration comes into the picture.

Integrating the software you use to store business information can make your life much easier and your collaborations way more efficient. But if your teams are well connected, then they can take advantage of everyone’s expertise and complement each other more effectively. 

So in this guide, you’ll learn how to set up a Jira Azure DevOps integration.

Get the Jira Azure DevOps Sync Guide

Learn how to integrate Jira and Azure DevOps, step-by-step.

What are the Benefits of Jira and Azure DevOps Integration? 

Here are some reasons to invest in Jira to Azure DevOps integration tools: 

  • Jira and Azure DevOps integration automatically sync data between both platforms in order to reduce the workload for both teams.
  • This integration scenario also prevents you from duplicating information and potentially working on the same problems. 
  • It allows you to take advantage of each other’s knowledge and research when working towards the same goals. 
  • Sharing issues but tailoring them to the needs of each team allows each team to work more efficiently. So you won’t be distracted by unnecessary information. 
  • Integrating both systems makes it possible to share data between custom and standard fields to fit a specific use case.
  • Azure DevOps to Jira integration protects data traveling between the two systems and ensures it appears in the appropriate format.

Also, teams can collaborate seamlessly and transparently when they have a unified dashboard for Azure DevOps integration with Jira.

How to Choose the Right Azure DevOps and Jira Integration

Working on diverse platforms can present challenges, but overcoming them can boost efficiency and productivity. So when selecting a tool for your Jira integration with Azure DevOps, consider the following key factors.

Decentralized Integration (Autonomy)

Although you are connecting your teams together, you need them to be able to act separately and retain control over their own data and what and how they share it. They may also have security or legal concerns, especially if they’re handling customers’ critical data.

It’s also nice to have this distributed architecture that Exalate supports so failure on one side can’t affect the other side.

David Müehlenhoff
DEVELOPMENT TEAM LEAD AT NEVARIS BUILD

An Azure DevOps Jira integration should give both sides of the connection the ability to see what is being sent out and passed into their systems and adjust what they need without consulting the other team. 

Reliability

Even in well-designed systems, things sometimes go wrong, so your solution needs to handle these problems gracefully. Any errors or changes should be detected, and the integration should be able to recover without manual intervention.

Downtime is another issue to consider when choosing integration platforms. The solution for Jira integration to Azure DevOps needs to be able to recover when one or both sides of the connection become unreachable.

Flexibility

Your teams’ needs will change over time as the data from customers broadens or shrinks in scope. 

Sometimes, this means adjusting your fields. Other times, this requires sharing entirely different things. When you make these changes, your Azure DevOps and Jira integration solution needs to handle them without fuss on either side.

Security

Considering the amount of sensitive information moving between systems internally and externally, you need robust security features and encryption protocols to keep things safe.

Most tools for Azure DevOps with Jira integration come with ISO certification, indicating their compliance with security standards.

Other considerations for integration security include access tokens, API keys, firewalls, single tenancy, role-based access controls (RBAC), TLS 1.2/1.3, etc.

Exalate was designed with these considerations in mind. It gives your team autonomy, enables them to work flexibly, and is reliable enough to handle errors. 

Now that we’ve chosen our solution, let’s get down to setting up the sync.

How to Set up a Jira Azure DevOps Integration in 6 Steps 

The first two steps are to install Exalate on both platforms. After that, you’ll connect the instances, and then you’ll see how information flowing between the instances can be controlled.

We’ll get to the step-by-step process of Jira integration with Azure DevOps, but if you prefer watching a tutorial, you can go ahead and watch this video instead.

Step 1 – Install Exalate on Jira

This guide is for Jira Cloud, though you can also read a Jira Cloud installation guide in Exalate’s documentation. Otherwise, please take a look at this guide for Jira Server and Data Center users. You can install Exalate on Jira directly from the marketplace or start from the integrations page.

Sign in to your Jira account and then look for the cog at the upper right of the screen.

Click it, and then click “Apps” in the menu. You may have to re-enter your login credentials as you’ve selected an admin function.

On the next screen, look at the left-hand menu. If it isn’t already selected, click “Find new apps” under the “Atlassian Marketplace” heading.

In the field that says “Search the Marketplace”, type in “Exalate” and press Enter.

Exalate for Jira integrations

Click the “Exalate Jira Issue Sync & more” app at the top. You will also see Exalate apps for other platforms, such as Azure DevOps, ServiceNow, and GitHub. So be sure to pick the correct one.

Click the “Try it free” button, and you’ll then be taken through a couple of screens.

Follow the process to start your trial, and you’ll be taken back to Jira, where you’ll see a confirmation message.

Step 2 – Install Exalate on Azure DevOps

You can either do it from the Atlassian Marketplace to connect Jira and Azure DevOps. Or you can go straight to Visual Studio.

Note: To install Exalate on Azure DevOps, you need to generate a Personal Access Token (PAT).

azure devops marketplace

To install it via Visual Studio marketplace, log in to Azure DevOps, then click the shopping bag icon at the top right of the screen.

Select “Browse Marketplace”. Type “Exalate” into the search field.

Click the “Exalate for Azure DevOps” app and then on the next screen, click the green “Get” button to activate the free trial.

You’ll be taken through an installation wizard. Select your organization from the dropdown box and click the “Install” button.

Click “Proceed to organization” on the next screen and Exalate is installed.

azure devops organization

Now you’ll need to get an evaluation license. To do this, look at Exalate’s left-hand menu. Click “License details”, then click on “30-day-trial”.

A pop-up will appear. Enter your email address. Wait a few minutes, then check your email for a message with your evaluation key. 

On the Exalate license details screen, click the green “License Key” button. Paste in the code you were sent in the email.

Click “Update” and you’re done.

After installing Exalate as shown above, proceed to verify it on Azure DevOps.

Note: You can check out the general documentation on Azure DevOps here. This guide focuses on marketplace installation, but you can also install it via Docker if you’re running your own server.

Step 3 –  Connect Your Jira and Azure DevOps Instances

You can initiate the connection from either platform. For this guide, I’ll start from the Azure DevOps side.

Navigate to Exalate by clicking on “Organization settings” in Azure DevOps.

In the Exalate menu, click “Connections”. You’ll see a list of any previously created connections.

Click the green “Initiate connection” button at the top right to get started.

Next, choose your destination URL. In this case, that’s the address of your Jira instance.

If you were doing this step in Jira, you would use your Azure DevOps instance address instead.

Configuration modes in Exalate

Now, a quick check is done to detect if Exalate is installed on the node you entered. If so, you are prompted to select one of the above 3 configuration modes: The Basic, Visual, or Script mode. 

I’ll take you through all of them one by one, but in case you want to skip and go to a certain configuration mode directly, please jump to the relevant section. 

Continue with the Basic Mode

After clicking “Next” on the screen above, you are redirected to another screen that prompts you to select the project you want to synchronize work items for.

initiate basic azure devops jira sync

Hit “Next” after selecting the project. 

You need to confirm if you have admin access to the Jira side. If not please click on “No, I don’t have admin access”. When you click this, you will be shown an invitation code, which you need to copy and paste on the Jira side by clicking on “Accept Invitation” in the “Connections” tab.

exalate basic mode admin access

After clicking “Initiate”, the same process is followed – selecting the project on the Jira side.

Click “Confirm” and your connection has been successfully established. Once that is done, you can immediately start to synchronize your first issue by entering the issue key and then “Exalate” the issue. You can even bulk exalate issues/work items or create triggers to synchronize them.

accept jira azure devops sync invitation

Wait for a short while, and then you’ll see your issue is synchronized.

successful jira azure devops sync

Continue with the Visual Mode

The Visual Mode allows users to sync work items/ issues without writing code. 

Click “Next” after selecting Visual Mode, then name your connection and enter a description.

initiate jira azure devops integration

After clicking “Next”, you are required to confirm the admin access to the Jira instance by clicking the “Initiate” button. You will be redirected to the Jira instance for verification.

Once the connection is successfully established, click “Configure Sync”.

azure devops jira sync initiate

Next, select projects on both the Azure DevOps and the Jira side between which you want the synchronization to happen. The “Sync Method” allows you to decide whether you want manual or automatic sync.

azure devops to jira sync scope

For both projects, you can further “Filter entities” and configure the way your synchronization works. 

You can filter work items or issues based on their Type, Priority, etc. Click “Save” to confirm the changes. You can “Cancel” them anytime.

jira azure devops integration filters

The “Rules” tab provides you with default mappings like “Type” in ADO being mapped to “Issue Type” in Jira.

 To add additional mappings, click the “Add Mapping” button.

jira to azure devops sync mapping

Here, you can add additional mappings you want between Azure DevOps and Jira.

add mapping to jira azure devops sync

Select the entities to be matched on both sides. Also, select the “Sync direction”. You can even specify what must happen if no matching value is found. You can either “Set a default value”, “Report an error”, or simply “Do nothing”. 

Click “Save” to confirm changes, else go back to the “Rules” tab by canceling the window. Once all this is done, don’t forget to “Publish” these changes. 

Also, you can edit the connection anytime by clicking on the edit connection icon to the right of the connection name in the “Connections” tab.

edit jira and azure devops connection

Continue with the Script Mode

Moving forward with the Script Mode, you name the connection just as discussed for the “Visual Mode”. Then click “Next” to continue.

azure devops to jira connection

Next, you need to pick a project on the Azure DevOps side that will be synchronized with the other platform. Choose one from the drop-down list, and then click the green “Initiate” button.

initiate exalate script connection

Exalate now generates an invitation code that you need to copy and paste from one side into the other. Click “Copy invitation code” to copy it to your clipboard. It is best to paste it somewhere safe at this point, such as a text file.

In Jira, click “Apps” in the top menu bar. Click “Connections” from the left-hand Exalate menu.

Click the “Accept invitation” button in the top right.

accept invitation exalate script

The “Accept invitation” screen has a large field for you to paste into the code you just generated in Azure DevOps. Do that, and click “Next”.

You’ll see a few options screens that look similar to the ones you saw when creating the connection. The first screen will ask you to select a project from the drop-down list to use for the synchronization on the Jira side. After selecting the project, click “Confirm”.

After clicking the “Confirm” button, you’re done setting up the connection.

Now you can move on to the next steps, where you’ll learn how to control exactly what your integration does.

Step 4 – Configure Your Connection to Determine What Gets Shared

Exalate lets you modify each connection to decide exactly what gets copied to and from each side.

It does that using scripting. If you are used to working with scripting or programming languages, you should find it very straightforward, but anyone can make changes with a little practice.

In the Visual Mode

We have already discussed how to edit the “Scope” and “Rules” for Visual Mode connection in the “Configure Sync” option in step 3. 

These scopes and rules can be modified once again by clicking the “Edit Connection” option shown next to the Connection name. 

In the Script Mode

The Sync rules use the Groovy scripting language. To start making changes, have a look for your connection in the list, move the mouse over it, and click the edit icon that appears. 

On the “Edit Connection” screen, there are 4 tabs: “Rules”, “Triggers”, “Statistics”, and “Info”.

Sync rules in Azure DevOps

Click on the “Rules” tab. At the top is a list of outgoing sync rules. These show how items in Azure DevOps are mapped to Jira. The incoming sync rules show how information from Jira is mapped to Azure DevOps items.
To edit the rules, click in either box, edit the text, and then click the green “Publish” button in the top right when you’ve finished. Check this article on sync rules to learn more.

Looking at the outgoing rules, you can see that there are many fields like replica.key = workItem.key. That means the key field can be retrieved by the other side of the connection using the same name.

If you don’t want to share any particular field, you can remove it, or replace it with something else. 

To remove it, simply delete the line. Or you can comment by adding ‘//’ in front of the particular line so it’s ignored for synchronization.

If you want to share a specific value, you could, for example, replace replica.status = workItem.status with replica.status = “from Azure DevOps”.

The Jira side will see incoming items with the status field set to “from Azure DevOps”.

In a similar way, you could give a specific value to items in the incoming sync that you get from Jira. Perhaps you could change workItem.description = replica.description to workItem.description = “from Jira”

If you want to assign items from Jira to a specific person, you can add a line to the incoming rules that says workItem.assignee = “Peter”.

Don’t forget to click “Publish” to save your changes.

AI-Assisted Script Mode

If writing sync rules from scratch is a hassle or if you don’t want to spend time searching for the relevant scripts, you can use AI along with the Script mode.

The AI Assist feature appears as a chat window in both the incoming and outgoing sync rules tabs. Simply type your sync requirements into the chat, and AI Assist will generate the necessary scripts for you.

The scripts are created based on your input, existing configurations, and Exalate’s scripting API.

However, keep in mind that AI Assist, like any AI, can make mistakes. So it’s important to be clear and detailed with your prompts.

Here’s an example of how to use AI Assist:

Let’s say you want to sync work item statuses from Azure DevOps with issue statuses in Jira. In the AI chat, you could type something like this.

AI Assist prompt in Azure DevOps

Give it a moment to generate the script.

The system will highlight changes: red lines indicate deletions, while green lines show new additions. You can accept or reject the suggestions, and refine your prompt if needed. Once satisfied with the result, don’t forget to publish your changes.

Step 5 – Set Up Automated Synchronization Triggers

Next, click on the “Triggers” tab. The triggers are written in the work item query language or WIQL for Azure DevOps and in JQL (Jira Query Language) for Jira.

Note: The “Triggers” tab for Visual Mode connections can be accessed by clicking the left submenu in the “Exalate” app.

Click the “+ Create trigger” button to create your new trigger. There are several fields on the screen. At the top, you can select the type of entity the trigger will deal with. In the large field with “If” at the top, you enter a WIQL query that selects the items you want.

Triggers in Azure DevOps

For example, [Work Item Type] = 'Task'will select items with the type “Task”. You can base the query on any of your items’ fields. You can also create multiple conditions for a trigger using logical operators. 

If you write, [Work Item Type] = 'Task' AND [System.AssignedTo] = 'Kirsty', you’ll sync items that meet both of those conditions.

Have a look at the documentation to get an idea of what you can do, and try modifying the rules to work with the fields you want.

Below that, there’s a notes field where you can write a description explaining what the trigger does. Then, tick the checkbox to turn the trigger on and off.

Triggers screen in Exalate

When you’re ready, click the “Add” button, and your new trigger will be created and added to the list.

You can add as many triggers as you like, giving you fine control over what kinds of items are shared. They can be activated or deactivated easily, and modified whenever needed.

Step 6 – Start Synchronizing Tasks

Now that your connection is ready and you know how to configure it, work items or issues will be shared between the platforms according to the rules you have defined. If you create new items that match your rules, they will be synced, as will existing rules that meet the same criteria.

Exalate will show you how many items have been synced on the connections screen. Synchronization doesn’t happen immediately, so please wait a few minutes if you don’t see the exchange take place. 

Common Use Cases for a Jira Azure DevOps Integration 

Let’s take a look at a few situations where a Jira Azure DevOps integration could be useful. 

Backend and Frontend Developers

You may have a team of backend developers handling your database and business logic in Azure DevOps, while frontend developers focus on the website, apps, and user experience in Azure DevOps.

These teams will sometimes have to handle common issues, and will both collect information on them. Sometimes a bug or issue might need to be diagnosed, and it may not be clear where it originates. Perhaps a new feature needs work done on the backend and the front end. In these cases, information on relevant issues can be synchronized.

You can copy the whole issue from one system to another, or copy particular fields. You can use labels or any other field to define which issues you need to share so that both teams are able to make information available to each other as needed.

Each team can decide what they send, and decide how incoming information is entered into their own system.

Customer Service and Engineering Teams

Your customer service team might be handling customer feedback or tickets in Jira Service Management. A lot of that will include problems and bugs that your engineers need to solve. The customers will want to know about any solutions or fixes that can be applied, so they will need some feedback. 

You don’t necessarily want the engineers talking to customers directly, so here the customer service team acts as a filter, handling most issues themselves, and passing on problems they can’t solve. They may modify feedback to make it more customer-friendly, and store it so they can handle the same problems again without needing to contact engineering.

An Azure DevOps integration with Jira can help make sure that each team gets the data presented in the way it needs and enables them to take advantage of the other team’s data when they need it. You can send the fields they need to be aware of and keep the information they don’t need out of their way.

Marketing and Design Teams

Your marketing team conducts research to find out what your customers want in Jira. Your design team will assess what they ask for and try to deliver it in your product. They might be using Azure DevOps. As with the previous situation, you are collecting data from customers and passing it on to a team that needs to use the information.

Here, the designers don’t need to provide customers with feedback on any issues they raise, but the marketing team might need to know what ideas the design team has to solve problems and conduct further research on how customers react to them. 

There may also be things customers want that aren’t possible for budget or technical reasons, and it is useful for marketing to know this, so they can focus their research on more useful areas.

Your Jira Azure DevOps integration can help handle the flow of information between these teams. The marketing team’s results get sent to the designers, and the designers can pass their findings back to the marketers. They can do this in the form of new issues or comments on the existing feedback.

How Exalate Handles Jira Azure DevOps Integration

Now, let’s delve deeper into Exalate technology. If you’re using it, you might have questions about its architectural design and security measures.

Architectural Independence

The diagram illustrates Exalate’s architecture.

Exalate architecture

The Blue end corresponds to Azure DevOps, and the Red end represents Jira. In between these services, Exalate agents facilitate the exchange of information.

The letters A-F illustrate the flow of information between the platforms. Both services utilize Exalate as an intermediary, preserving their autonomy.

Exalate agents govern the content sent and how information is matched between the two platforms. In addition to Azure DevOps and Jira (Cloud and on-premise), Exalate offers agents for GitHub, ServiceNow, Salesforce, HP ALM/QC, and Zendesk, with more services on the horizon. You can request custom integrations as well.

This distributed architecture sets Exalate apart as a unique integration solution that supports decentralized integration. It empowers each side to independently control information exchange without needing to coordinate with one another.

Security

Security is a critical aspect when sharing information between platforms, and Exalate prioritizes it. You can rely on Exalate for secure information synchronization. It employs HTTPS for most data transfers, utilizes reverse proxies for data termination, and implements JWT to verify trusted data sources. Exalate also safeguards your data through daily backups retained for two days and conducts monthly penetration tests to identify and resolve security vulnerabilities. For in-depth insights into Exalate’s data security practices, you can refer to the free Exalate Security and Architecture Whitepaper.

Conclusion

With a Jira Azure DevOps integration, your teams can share information effortlessly. With an effective integration tool, you can let teams get on with things without having to worry about downtime or problems. Your teams can both make changes and control what the integration does, making it evolve along with their needs.

As well as Jira and Azure DevOps, you can use Exalate to integrate other platforms, such as ServiceNow, GitHub, Zendesk, and more. The more connected your teams are, the easier it is to get them all pushing in the same direction.

You may also want to read this ebook on cross-company integration to learn more about sharing information between companies.

Frequently Asked Questions

Why integrate Jira and Azure DevOps? 

Integrating Jira and Azure DevOps will allow you to sync data automatically, reduce manual updates, ensure data consistency, and save time. It provides you with a unified view of project status, tasks, and progress, enabling teams to be on the same page and work towards a common goal. You can share and customize information exchange based on each team’s requirements. 

Can Jira integrate with Azure DevOps?

Yes, Jira can integrate with Azure DevOps to provide automatic information sharing and updates. Jira integrates with Azure DevOps through connectors and third-party plugins. Various integration options are available on their respective marketplaces. 

One such tool is Exalate, which offers flexible configuration options to set integrations up using a visual interface or a code-based UI.

What can I sync between Jira and Azure DevOps?

You can sync various entities between Jira and Azure DevOps, including work items, issues, tasks, epics, user stories, comments, attachments, statuses, etc. 

Also, you can sync and maintain issue links, relations, and sub-task mappings between Jira and Azure DevOps. Users can also migrate existing issues from Jira to Azure DevOps to ensure both platforms have consistent and accurate data. 

How do I integrate Jira with Azure DevOps for free?

No, you cannot integrate Jira and Azure DevOps for free. 

Jira and Azure DevOps are both powerful platforms. So you can build the integration yourself using public APIs, but it becomes unwieldy to manage over time and difficult to scale.

There are third-party apps that offer various capabilities for implementing simple to complex integration use cases or performing a migration. Exalate is one such app. It comes with a Free plan to sync 1000 entities per month. It has various modes targeted towards different users and integration scenarios. 

How can I migrate from Jira to Azure DevOps?

There are a few steps you need to follow for a migration. First, evaluate your requirements and understand the scope of your migration. Next, plan the migration. Identify Jira projects, automation, customizations, and data to be migrated. Then export the data using third-party tools that can help convert it into a compatible format for Azure DevOps. Test the migration and validate if it meets your expectations. Specific tools and needs can vary depending on your unique requirements. Consult experts when in doubt.

Recommended Reads: 

Jira ServiceNow Integration: How to Connect Jira and ServiceNow in 5 Steps

Jira ServiceNow integration

Then, you can also choose to build a Jira ServiceNow integration with custom code. Again, it has its pros and cons.

Teams within your organization usually use different platforms (let’s say Jira and ServiceNow) to handle business-critical or user-centered information. You might also want to share some data with other companies you do business with. To this end, you’ll need a Jira ServiceNow integration to connect internal and external teams.

With the integration in place, you’ll be able to boost your productivity and save yourself time if you understand how to set up a Jira ServiceNow integration with the least fuss possible.

So in this step-by-step guide, you’ll learn how to integrate Jira with ServiceNow.

Jira ServiceNow integration ebook

ServiceNow Jira Integration Guide

Learn how to achieve a seamless Jira ServiceNow integration step-by-step.

What are the Benefits of a ServiceNow Jira Integration?

ServiceNow is often the primary choice for CIOs and heads of IT departments. Why so?

You can track user requests related to all your support incidents in one place using ServiceNow, allowing the customer support teams to remain up-to-date. While incidents form the basis of ServiceNow, it’s also designed around workflows and is particularly useful for services, operations, and business management.

When we talk about Jira, Agile instantly springs to our mind. Atlassian’s Jira is excellent for managing issues and projects for software development teams. It can be hosted either on the cloud or on-premise.

Teams using Jira and ServiceNow can benefit by collecting, organizing, and exchanging data between these platforms.

Let’s discuss a Jira Service Management (JSM) integration with ServiceNow use case:

  1. A customer logs an incident in Jira Service Management (e.g., “System Outage”) with fields like Summary, Description, Priority, and Attachments.
  2. These fields flow into ServiceNow as Short Description, Work Notes, Urgency, and Attachments, with correct transformations applied (e.g., JSM’s “High” Priority maps to ServiceNow’s “Critical” Urgency, and so on).
  3. Any updates—such as a status change in JSM to “In Progress”—sync to ServiceNow as “Work in Progress.” Similarly, updates in ServiceNow sync back to JSM with proper field mappings.
  4. Comments sync bidirectionally, but visibility rules ensure customer-facing comments in JSM remain internal notes in ServiceNow.
  5. If the incident is marked “Critical,” additional fields like Service Owner and Resolution SLA synchronize in real time.
  6. Once the incident is resolved in JSM, resolution code, and resolution notes are automatically assigned to the incident based on the selection the agent makes.
  7. This triggers the status change in the ServiceNow instance. The resolution code and resolution notes for the incident are automatically filled. The incident is now ‘Resolved’.

This use case is just the tip of the iceberg. You can implement any kind of advanced workflow orchestration by connecting Jira and ServiceNow.

As you might have noticed, setting up a ServiceNow Jira integration allows you to share data automatically based on specific events and control how that data is exchanged. You don’t need to use manual means to pass information between these platforms.

Let’s see how we can actually implement such an integration.

But before that, let’s see a few practical use cases. If you don’t find what you’re looking for here you can always set up a call with our integration engineers to discuss further.

Jira ServiceNow Integration: Practical Use Cases

Incident Management (IT Teams)

You can streamline the incident management process by automating it for the customer support agents. We just saw an example of this. Having these systems connected will reduce the need for manual updates and all teams will have real-time information within the tools they use. Also, alerts set up during integration would notify the right people and escalate unresolved issues automatically.

Cross-team Collaboration (Vendors/ Clients)

For Managed Service Providers (MSPs) it’s not uncommon that their clients or vendors use different tools like ServiceNow, Jira, etc. A Jira ServiceNow integration will ensure all the daily tasks are synced between different teams using these systems, increasing transparency and trust. It will also simplify reporting by keeping both teams aligned.

The moment the ticket enters the help desk in ServiceNow, Exalate routes it to my team working in Jira. My team then provides feedback, which is immediately reflected in ServiceNow.

Ms. TEO
TEAM LEAD, LF LOGISTICS

Customer Support to Development Escalation

Often customer support agents perform the root cause analysis of tickets and conclude that the ticket needs to be passed to the development guys.

When such a ticket originates in ServiceNow, it can then be mapped and synced to Jira with the correct SLA information so the dev guys are updated on the timelines.

While the ticket is being worked on in Jira, the customer support agents would have visibility over its status, improving the overall customer experience and resolving tickets in a timely manner.

Kickstarting Your Jira ServiceNow Integration

Before you jump right into the integration it’s important to understand what are the ways in which you can integrate Jira and ServiceNow.

Native Jira ServiceNow Integration Methods

ServiceNow provides a native method called IntegrationHub to integrate Jira and ServiceNow. However, it’s not the best option if you want to set up a fully functional bidirectional integration because it is limited in scope. It’s also costly to implement as it comes with an additional package.

We have a detailed guide to help you understand why IntegrationHub is not the most feasible choice.

Then, you can also choose to build a Jira ServiceNow integration with custom code. Again, it has its pros and cons.

Build an Integration vs. Buy Third-Party Integration Solutions

I have often observed that ServiceNow users prefer to build their integration from scratch. Honestly, ServiceNow APIs do make the task easy but this option isn’t always cost-effective. It also leads to significant maintenance costs and difficulty scaling your integration requirements.

We have an elaborate guide explaining the A-Z of building vs. buying an integration. Check it out to get the necessary answers.

From my experience, I have observed that companies try to build their own solution initially but then eventually switch to a third-party solution.

Also, when it comes to third-party solutions, you will see a lot of no-code, template-based tools to integrate Jira with ServiceNow. They may work for simple use cases but cannot be used to implement advanced integration scenarios.

Demonstrative image

So, how do you start integrating Jira with ServiceNow? What things should you take into account?

Consider your Jira ServiceNow integration as a project in itself.

  1. Define your integration goals by identifying their purpose: issue tracking, incident management, or workflow automation, or something else.
  2. Define the scope of your Jira ServiceNow integration, i.e what data you want to sync. Issues, comments, custom fields, work notes? Plus, mention the sync direction: unidirectional or bidirectional.
  3. Choose an integration method. There are many ways you can implement a ServiceNow to Jira integration. Evaluate various options available in the market, consider PoCs, and ensure you have a robust and scalable integration.
  4. Prepare both platforms for the integration. Set up the required admin accesses to both instances and identify modules and fields to be integrated (e.g. incident, problem, change requests, etc.)
  5. Set up the integration tool: install the plugin, connect the instances, configure the endpoints, etc.
  6. Configure the sync rules in the tool of your choice. Define the field mappings, like map Jira summary, description, and custom field called SNOW ID to ServiceNow incident’s short-description, description, and correlation ID.
  7. Test the integration. Validate field mappings, data flow, and conflict handling. Verify if everything works according to your needs.
  8. GO LIVE!
  9. Monitor and optimize the integration. Periodically review integration rules to ensure they align with evolving workflows.

There are a lot of third-party Jira ServiceNow integration solutions available in the market with flexible license plans, various deployment models, extensive documentation, and other custom-made features. With such solutions, you can get your integration project up and running in no time.

However, it’s a good practice to consider some factors while choosing the solution.

How to Choose the Right Tool for Setting up Your ServiceNow Jira Integration

To get the best out of your integration, think carefully about various factors like ease of use, security, etc.

Sharing data between your teams sounds simple, but there are many ways to do it, and getting the details right will make sure the right information is shared and presented to those who need it.

  • Flexibility: Many companies look for integration solutions that can support complex or advanced use cases. Using predefined integration templates doesn’t always work. Look for solutions that offer support for complex integration use scenarios with minimum hassle. Adding conditional logic, advanced data mappings should be included as a default.
    The solution must also support historical data exchange or legacy system integration.
  • Security and Decentralized Integration Architecture: When each integrating platform has independent and complete control over information exchange, there is less chance of unauthorized information getting accidentally sent over. This kind of setup can be achieved with a distributed integration architecture. It inherently increases the security of your integration. Additionally, the solution must implement various security measures like RBAC, encryption, etc. It helps if it’s ISO certified too.
  • Reliability: Downtimes are hard-hitting. It’s important to consider solutions that offer an integrated retry mechanism that doesn’t need manual intervention. Also, the two-way synchronization must resume from the point of interruption without having to worry about data being lost during system failures.
Team collaborations

While considering a Jira ServiceNow integration solution, ServiceNow’s native offering, IntegrationHub often comes to the forefront. Using its Jira Spoke, you can connect ServiceNow with Jira. However, it might not always be a feasible option. It has a longer onboarding journey, is costly, and is ideal for simple integration use cases.

Also, setting up a fully functional ongoing bidirectional Jira Salesforce sync is difficult with IntegrationHub. Additionally, ServiceNow is in the driving seat of such an integration.

Let’s consider another tool called Exalate and study the step-by-step process of setting up a ServiceNow Jira sync.

Note: You can also have a look at the complete comparison between IntegrationHub and Exalate if you prefer.

How to Set up a Jira ServiceNow Integration in 5 Steps

In order for Exalate to work, you need to install it as an app on both sides. It doesn’t matter which side you start from. I will start from the ServiceNow side in this guide. 

If you prefer watching videos, you can also view our tutorial.

Step 1: Install Exalate on ServiceNow

Request a trial for ServiceNow Jira integration by visiting the Exalate integrations page.

The Exalate team will reach out to you with your Exalate node.   

Once you get your ServiceNow node URL, you can follow the following steps to access your Exalate node.

Download the XML file from the documentation page that contains the information ServiceNow needs to access your Exalate node.

Now, log in to your ServiceNow account. In the left-hand menu, look for “System Update Sets”. You can search for it by typing it into the “Filter navigator” search field.

Click the “System Update Sets” entry to expand it, and then click “Retrieved Update Sets”.

exalate for servicenow

On this screen, look under the “Related Links” heading and click the text that says, “Import Update Set from XML”.

upload the xml file to servicenow

On the next screen, click the “Choose File” button and then navigate to the XML file you downloaded earlier.

After selecting it, click the “Upload” button.

Once the XML file uploads, you’ll see it listed. Click on it, followed by the “Preview Update Set”.

You might need to do an update, so if asked to do so, click “Accept remote update”.

Next, click “Commit Update Set” to finish the ServiceNow installation. Exalate is now ready on ServiceNow. From here, you can set up a connection between the platforms.

Note: You can also install Exalate on your ServiceNow instance via the Atlassian Marketplace to connect Jira and ServiceNow.

Note: Find the step-by-step instructions for the Exalate agent installation for ServiceNow on the Exalate documentation. If you prefer video tutorials, you can watch this instead: how to install Exalate on ServiceNow

Step 2: Install the Exalate App on Jira

Installing the Exalate app on Jira is a straightforward process, like installing any other Jira app.

If you’re on Jira Cloud, you can also install the app through the Jira Administration menu. Click “Add-ons” and go to the “Find new apps” section.

Search for Exalate and click “Exalate Connector for Jira, Issue Sync & Two-way Integration“.

Note: To install Exalate on Jira on-premise, follow this documentation

You can also request a trial for ServiceNow Jira integration from the integrations page.

Step 3: Connect Jira and ServiceNow

To connect Jira and ServiceNow, start creating a connection. One side initiates the connection and the other side accepts the connection invitation. I’ll start from ServiceNow.

Click the “Initiate connection” button in the “Connections” panel.

initiate connection Exalate console

All of your connections will be listed here. However, it will be empty if it’s your first connection.

Enter the destination instance URL, Jira in our case.

Configuration modes in Exalate

After a quick check, you’ll be prompted to choose between two configuration modes: the Basic mode and the Script mode.

The Basic mode is used for simple synchronization use cases and consists of predefined sync rules. Using this mode, you can sync only incidents and issues.

The Script mode allows you to use Exalate’s full functionality. You can add advanced mappings, set conditional logic, and do much more using Groovy-based scripts. This mode is also AI-assisted. We will study more about it in the coming section.

We’ll have a look at both these modes.

The Basic Mode

Once you select “Basic” on the screen above and click “Next”, you need to verify admin access to the remote instance. Select “Yes, I have admin access” if you have the access already and hit “Initiate”

Verification for Jira ServiceNow basic integration

After a successful verification, you’ll be redirected to the Jira remote instance. Select a Jira project you want the incidents coming from ServiceNow to be synced. Then click “Confirm”.

Select the project for Jira ServiceNow sync

Enter the issue key or the incident number to start your sync by clicking the “Exalate” button.

jira issue key in Exalate

It’ll take a few seconds for the sync to be successful.

Jira ServiceNow integration

There are direct links to the synced entities that you can click to go to the right issue or incident.

In the Basic mode, you can even create triggers or sync issues or incidents in bulk using the “Bulk Connect” option.

Moving on to the Script mode.

Continue with the Script Mode

You can create a connection in the Script mode using an invitation code generated by one side, which is copy pasted at the remote end.

Select the “Script” mode on the modal that prompts you to choose the modes and click “Next”.

Configuration modes in Exalate

On the Connection details screen give a name to the Jira and the ServiceNow instances. A Connection name is automatically generated but you can modify it if you want.

Add a description to understand how you plan to use the connection and click “Initiate”.

sync Jira and ServiceNow

Copy the generated invitation code, click “Done” and go to the Jira instance.

Invitation code for integration

Take that code you just generated and use it to accept the invitation on the other side. Head over to your Jira instance, navigate to ‘Connections’ in the Exalate console, and click ‘Accept Invitation’.

Then, paste the code in the designated field.

Exalate invitation code

The code will be validated automatically when you click ‘Next’. Exalate will determine your connection type based on the invitation. Select the project on the Jira side, as you did in Basic mode, and then click ‘Confirm’ to proceed.

Select integration project

You can configure the sync rules for each side independently from the other side. This is intentional, allowing each side to maintain its autonomy.

successful Jira ServiceNow sync

You can configure it right away by clicking ‘Configure Sync,’ or you can do it later in Step 4.

Once you’ve accepted the invitation and the connection is established, we can proceed to configure the connection.

Step 4: Configure your Sync Rules

Once you connect Jira to ServiceNow, it’s time to decide what information you want to exchange between the platforms. Start doing that by clicking on the ‘Configure Sync’ button.

This information exchange is divided into two categories of sync rules in Exalate. The ‘Outgoing sync’ decides what information is sent from Jira to ServiceNow. The ‘Incoming sync’ rules decide how the information coming from ServiceNow is interpreted in Jira.

These rules exist on both sides with their roles reversed.

The ‘Outgoing sync’ in Jira looks like this:

Sync rules in Jira
  • replica.<attributes> is the actual message payload.
  • entity.<attribute> represents the local fields on the underlying instance.

You can edit these mappings the way you want. Refer to the Exalate Script Helpers if required.

Exalate provides a number of script helpers to reduce the effort of scripting yourself.

Note: The Incoming sync on the Jira side represents how to interpret information received from the ServiceNow side. 

Just like with outgoing sync rules, you can script more complex mappings.

Configure Scripts Using AI Assist

You can also use Exalate’s Script mode with AI. It’s called AI Assist and it appears as a chat window in both your incoming and outgoing sync rules tabs. Just type your sync requirements into the chat and let AI Assist generate the scripts for you. 

The scripts are based on your input, existing configurations, and Exalate’s scripting API.

Note that AI Assist, just like any other AI, can make mistakes. So try to be as precise and detailed as you can with your prompts. 

Here’s an example of how to use AI Assist:

Let’s say you want to map and sync statuses between Jira and ServiceNow. You can enter something like this into the AI chat:

For incoming sync (Jira): “Create a status mapping that sets New to Open, Working to In Progress, and Closed to Done in the Jira incoming configuration.”

Give it a moment to generate the script.

AI assisted Jira ServiceNow integration

Red script rules indicate lines that will be deleted from the existing scripts, while green ones show new lines to be added. You can accept or reject the AI’s suggestions. If needed, refine your prompt. Once everything looks right, be sure to publish your changes.

This video gives you a hands-on view of how to use AI Assist to map and sync custom fields between Jira and ServiceNow.

Note: You can also refer to the Getting Started guide on Exalate documentation for a step-by-step process of setting up a ServiceNow Jira integration.

Step 5: Configure Triggers to Set Up an Automated Sync

Now it’s time to create automated sync triggers. You can create triggers for specific conditions you want the information exchange to occur. For instance, when an incident belonging to a particular assignment group is created in ServiceNow, a new issue in Jira is created. Triggers will filter all the issues or incidents that satisfy the trigger condition and sync according to the rules you’ve set up in Step 4. Triggers are present on both the Jira and the ServiceNow side.

To create triggers, click the “Triggers” tab. If there are any existing triggers, they will be listed here, but the first time you use them, they will be blank.

To create a new trigger, click the “Create trigger” button. The “Add trigger” pop-up is where you create all your triggers.

First, select the entity to which you want to apply the trigger. For instance, you can choose between the numerous ServiceNow entities, like incidents, problems, change requests, etc. On the Jira side, you will be prompted to select issues or sprints.

Then in the “If” section, write the actual trigger condition in the platform-specific search language. Use JQL for Jira and ServiceNow search syntax for ServiceNow to create these triggers.

Click the checkbox to “Activate the trigger”.

Triggers in Exalate

Note: Incidents, Problems, Change Requests, RITMs, Cases, and Catalog Tasks are the most commonly synced ServiceNow entities with Exalate. However, you can sync any entity in ServiceNow using Exalate’s intuitive scripting engine.

Exalate: a Deep Dive

Let’s deep dive into Exalate and understand its features.

Decentralized integration in Exalate

Decentralized Integration

Exalate must be installed on both integrating platforms since it’s based on a distributed architecture. `

Let’s assume you have it installed on the ServiceNow (Purple) instance and the Jira (Green) Cloud or on-premise instance. You can also install it on docker.

As shown in the picture, both the Purple and the Green instances will have a separate dedicated Exalate agent. The letters A-F depict the information flow. So, information going out of ServiceNow is controlled by its Exalate agent that interacts directly with the Exalate agent on the Jira side which then transfers it to the Green Jira instance. The flow back from Jira to ServiceNow follows the D,E,F pattern.

This decentralized setup ensures you have the autonomy of what information you want to send and how you want to map information coming from the other side.

Security

Exalate has in place all the required security mechanisms like encryption, RBAC, HTTPs, etc. It’s also based on a single-tenant architecture allowing your Exalate node to be more secure. It’s ISO 27001 certified.

Note: You can find our entire security landscape and architecture in this free whitepaper.

Deployment Models

Exalate supports various deployment models, so you can install it either on the cloud, on-premise, or via docker.

The image shown below will give you an idea.

Deployment models in Exalate

Advanced Jira ServiceNow Integration Use Cases using Exalate

Exalate gives you the flexibility to adapt and adjust your synchronization to handle different kinds of Jira ServiceNow integration use cases. We’ll discuss a few integration scenarios that are quite popularly implemented using Exalate.

  • To ensure critical incidents are always handled with priority and within their SLAs, you can sync the SLA records and maintain state updates between Jira and ServiceNow. Imagine, a priority 1 incident is raised and the customer support agent identifies it as a dev issue to be passed to the dev team working in Jira. Alongwith the SLA and time-related information, if the incident status is also synced, the agents would always have visibility over it at all times and the dev team would know the SLAs and time constraints they must adhere to beforehand. So, when the issue is marked resolved in Jira then the corresponding state is updated in ServiceNow with specific comments left as resolution notes.
  • Sometimes, internal teams working on specific problems or incidents must pass important information from ServiceNow to Jira, for instance, leaving notes for the dev team to help them with the issue. In such a case, private comments must be kept private and synced between the two systems. It’s possible to do that with simple code. Share only ServiceNow work notes to Jira such that the dev team has all the required information handy.
  • You can also sync different entity or issue types between Jira and ServiceNow for better visibility and streamlined business operations. For instance, sync ServiceNow customer case to a Jira epic. You can also sync incidents, CMDB, change requests, problems, custom fields, and almost any field available via REST APIs.

Conclusion

Jira and ServiceNow are both excellent platforms that offer different features to their users. A flexible Jira ServiceNow integration can help teams work together more efficiently, and using the right tool can make the integration as effective as possible.

As you’ve seen, there are challenges to overcome when synchronizing environments. So by using the most reliable solution, you can guarantee that the integration delivers the results you require.

With the technology doing the work, your teams are free to concentrate on other things, whether that is looking after customers or designing your latest product. Everyone can focus on what they do best.

Frequently Asked Questions

Why integrate Jira and ServiceNow?

Integrating Jira and ServiceNow can help teams reduce information silos. It reduces manual errors like misplaced statuses, wrong escalations, etc. You can ensure data is exchanged automatically and is accessible to the right stakeholders when they need it. You can also control exactly how much data to share.

How do I connect Jira with ServiceNow?

There are native and non-native ways to connect Jira and ServiceNow. 

ServiceNow offers integrations in the form of IntegrationHub (Jira Spoke). But it’s costly and not meant for ongoing bi-directional synchronizations. ServiceNow developers also prefer developing their own integration solution in-house. However, doing so hinders the scalability and maintainability of the integration as requirements change over time. 

Third-party integration solutions like Exalate can be an excellent alternative for the hassles of an in-house solution or limited scope of integration use cases offered by the native approach. 

What can I sync between Jira and ServiceNow?

In ServiceNow, you can sync Incidents, Problems, Change Requests, RITM (RequestItems), Catalog Tasks, etc. In Jira, you can sync any issue information like summary, description, status, labels, comments, attachments, priority, user-defined fields, etc. You can even sync epics, story points while maintaining the parent-child relationship. 

If the fields you want to sync do not exist, you can use the httpClient method to do so.

Can I integrate Jira and ServiceNow for free?

No, you cannot integrate Jira and ServiceNow for free. Integrating these platforms typically requires some level of configuration and development work and might not be available for free. You might also require interacting with their respective APIs and creating custom scripts or middleware to allow communication between them. It’s always better to check for the options available on their respective marketplaces and compare prices, features, and functionalities to make an informed decision.

Recommended Reading: