Egg-citing Adventure: Join Exalate’s Easter Hunt with Aida!

exalate easter egg

This Easter, we’re inviting you to join an egg-stravagant journey filled with hidden surprises.

Aida, our AI-powered sidekick, has been busy hiding Easter eggs just for you! Starting March 25th, dive into the world of Exalate and let the fun begin! 

Here’s the lowdown:

Duration: The hunt kicks off on March 25th, leading up to Easter Sunday.

Where: Primarily on LinkedIn, but the fun doesn’t stop there! Keep an eye out for surprises across our other channels, too.

Prizes: It’s not just about the hunt—it’s about the rewards! Top egg hunters could snag some egg-stra special treats.

How to Join the Hunt:

1. Engage with Aida: Ask questions, strike up conversations, and be on the lookout for Aida’s hints.

2.  Uncover Hidden Treasures: Pay attention to Aida’s responses—there could be an egg hiding in plain sight! And don’t worry; Aida will drop hints on LinkedIn regularly.

3.  Share the Joy: Found an egg? Don’t keep it to yourself! Share your discovery, mention Exalate, and use the hashtag #ExaEgg to spread the word and join the community of egg hunters.

Stay tuned to our socials and website for more updates, hints, and egg-citing surprises! 

Ready to crack the code and uncover the hidden Easter Eggs together?

Let the egg hunt begin!

Choosing the Best Tasktop Alternatives For Business Process Integration

Tasktop Alternatives

Tasktop is a tool that provides integration solutions for connecting apps in order to share data seamlessly. In this article, we’re going to discuss Tasktop alternatives for business.

Recently acquired by Planview, Tasktop provides an integration hub that uses pre-built integration models to sync information and monitor usage data and ROI.

But Tasktop is not the answer to all integration problems. Your business might want a tool with more security features, custom connectors, or cheaper pricing. 

We’ll briefly review all Tasktop competitors to see which one offers the best substitution for your organization. 

What is Tasktop?

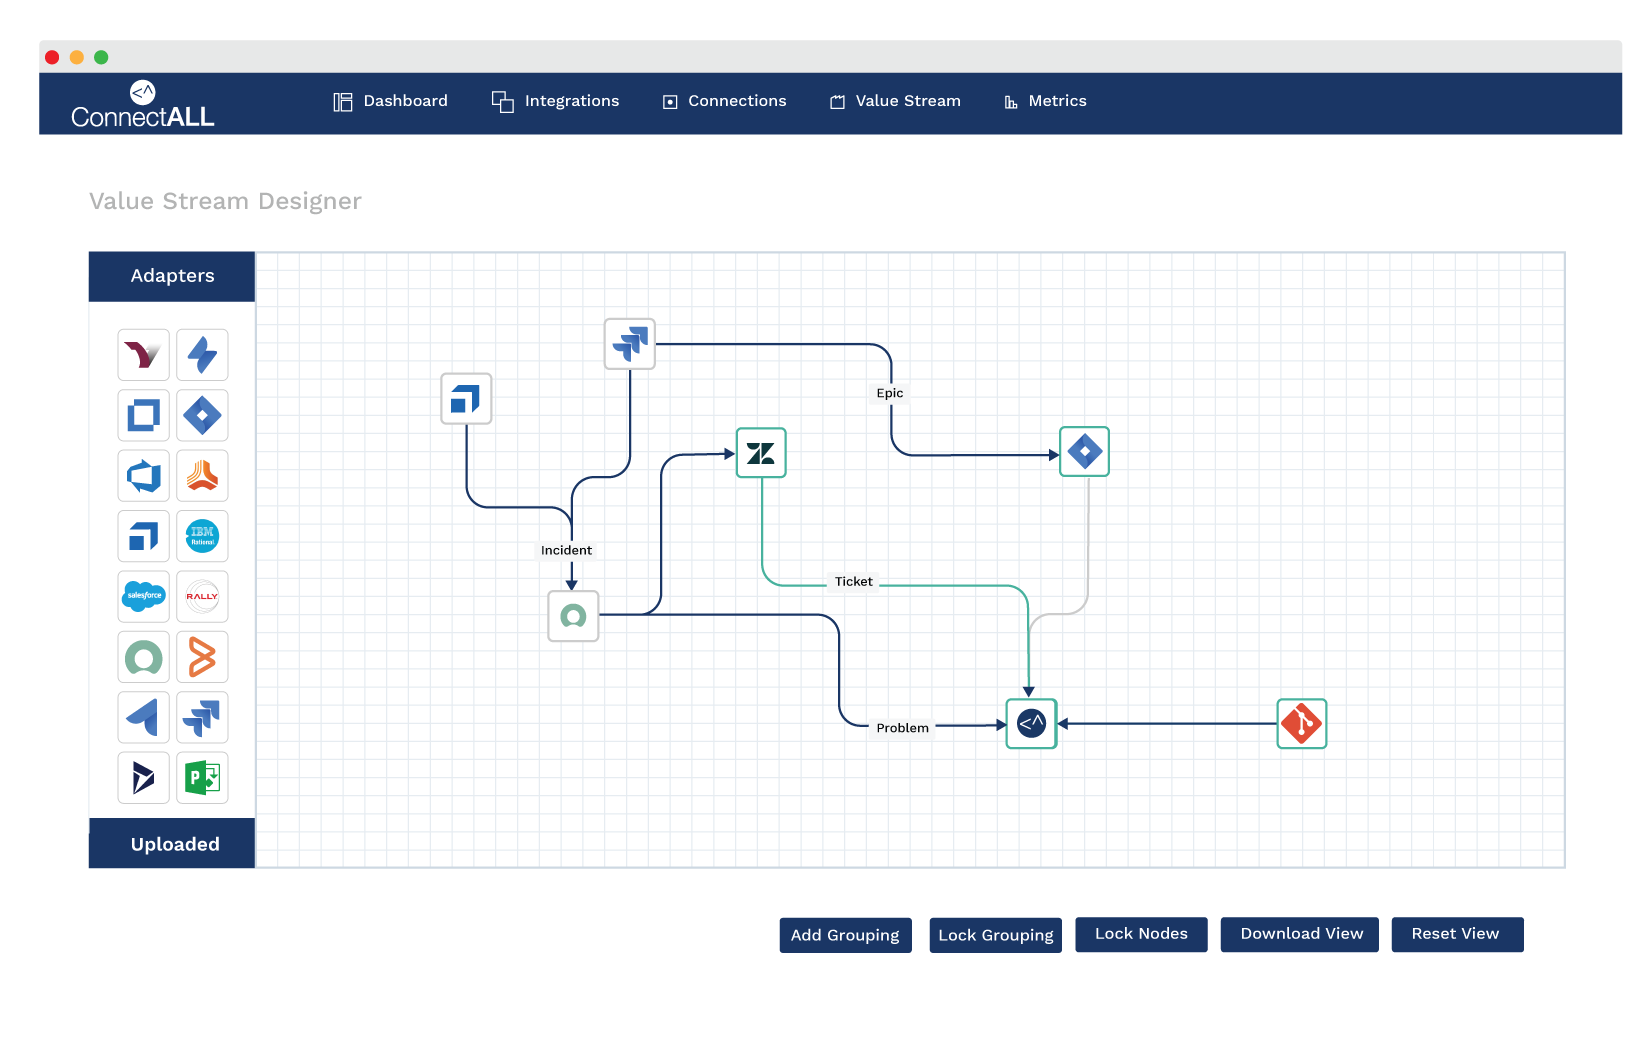
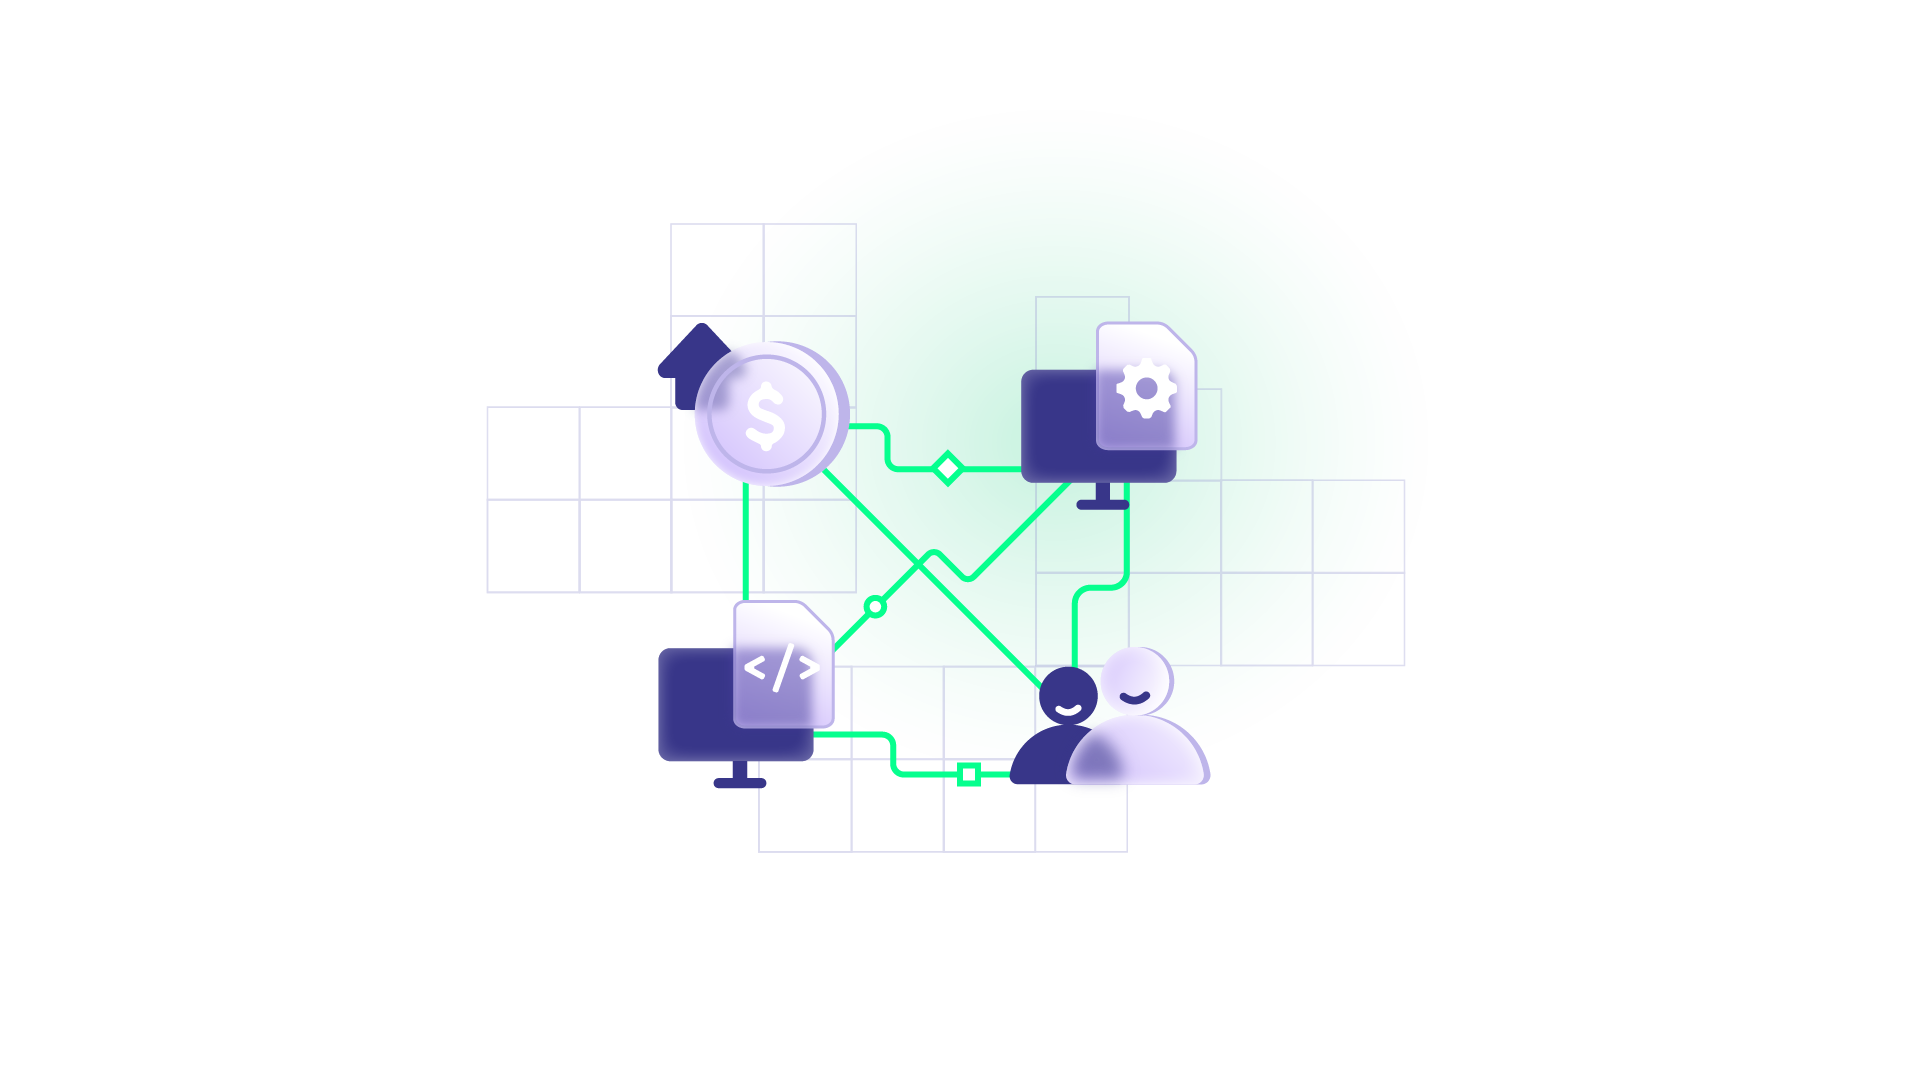
Tasktop (also known as Planview) is a value stream management solution that allows organizations to visualize and connect multiple tools within their ecosystem.

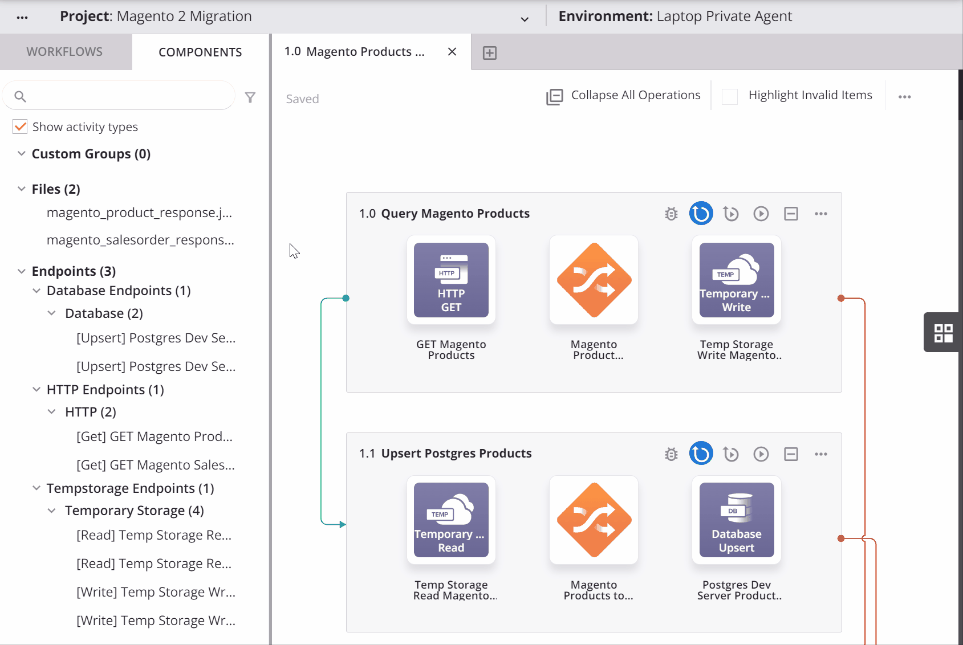
When it comes to connecting systems, Planview Tasktop provides a software toolchain integration solution known as Planview Hub (also Tasktop Hub and Planview Tasktop Hub).

With Tasktop Hub, users can set up connections between systems using a point-and-click no-code interface. Non-tech users can also use Tasktop connectors to sync their applications.

Some Tasktop technologies and features that can benefit your business or non-profit include:

  • Product management and development
  • Comprehensive dashboard reporting
  • Variable data integration models
  • Test management and coverage
  • Event-driven artifact creation 
  • Out-of-the-box connectors
  • IT service management 
  • Intuitive field mapping
  • Revenue calculators
  • Regulatory support 

Users can also improve their workflows with several Tasktop integrations for ITSM, agile management, ALM, test management, and others. Supported platforms include Jira, ServiceNow, Azure DevOps, Micro Focus ALM, Asana, Broadcom, etc.

Most available Tasktop reviews are positive (4.2 out of 5 on G2), which indicates that the customer perception is fairly good.

Tasktop Limitations

Tasktop only provides pre-built connectors, which makes customization difficult for users looking to explore advanced use cases.

Besides, finding the location of the Tasktop documentation felt like a mini treasure hunt. But when I finally found it, I was impressed by the extensive explanations and content structure.

To get the current Tasktop pricing, you’d have to reach out to the sales team. You can also get in touch with them via the Tasktop support portal.

Now that you understand what Tasktop has to offer, it’s time to look at alternatives.

Zapier

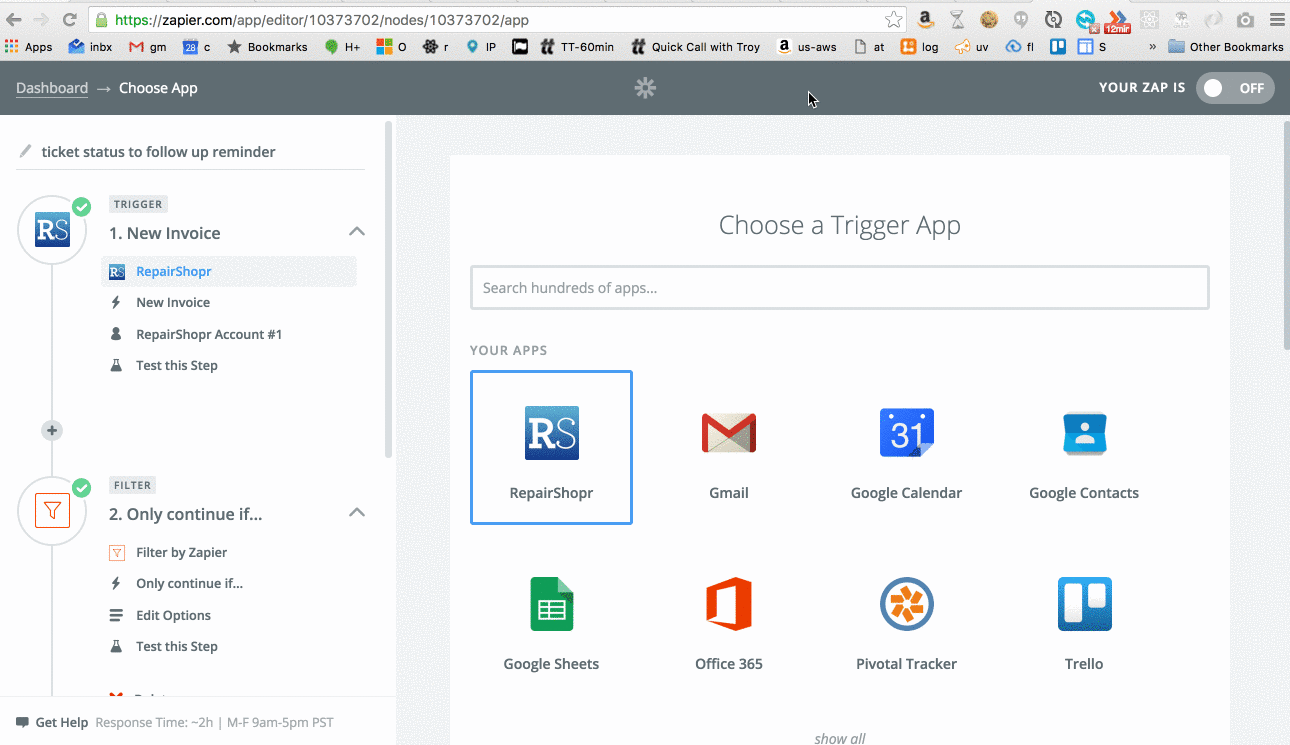
Zapier is a workflow automation software for business and non-commercial use. Every Zap you create starts with a trigger that controls the automation over a drag-and-drop interface. 

Zapier users can also set up connections using webhooks, paths, filters, and an AI-powered data formatter. Teams in sales, HR, development, customer service, and IT can use Zapier to improve productivity.

zapier interface

As one of the best no-code integration and automation solutions, Zapier is home to over 6000 default connectors, Zaps, and tables. 

Here is the Zapier pricing table:

  • Free
  • Starter starts from $29.99 per month ($19.99 per month paid annually)
  • Professional starts from $73.50 per month ($49 per month paid annually)
  • Team starts from $103.50 per month ($69 per month paid annually)
  • Company (available on-demand)

Zapier vs Tasktop

Companies and startups in different sectors prefer Zapier to Tasktop Planview because it has way more standard connectors.

Exalate

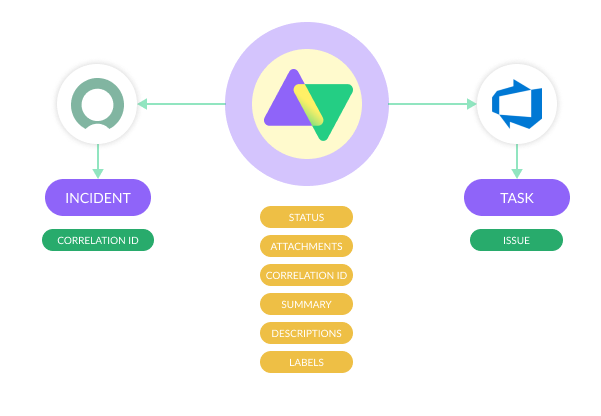
Exalate is a low-code integration solution that supports data synchronization between teams—and externally with partners, vendors, and MSPs.

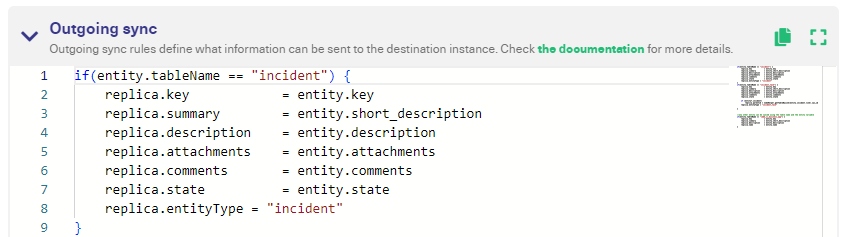
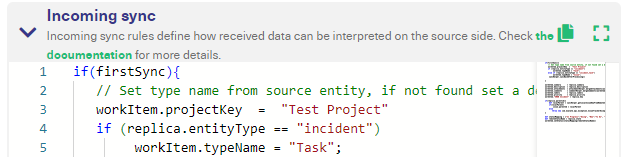
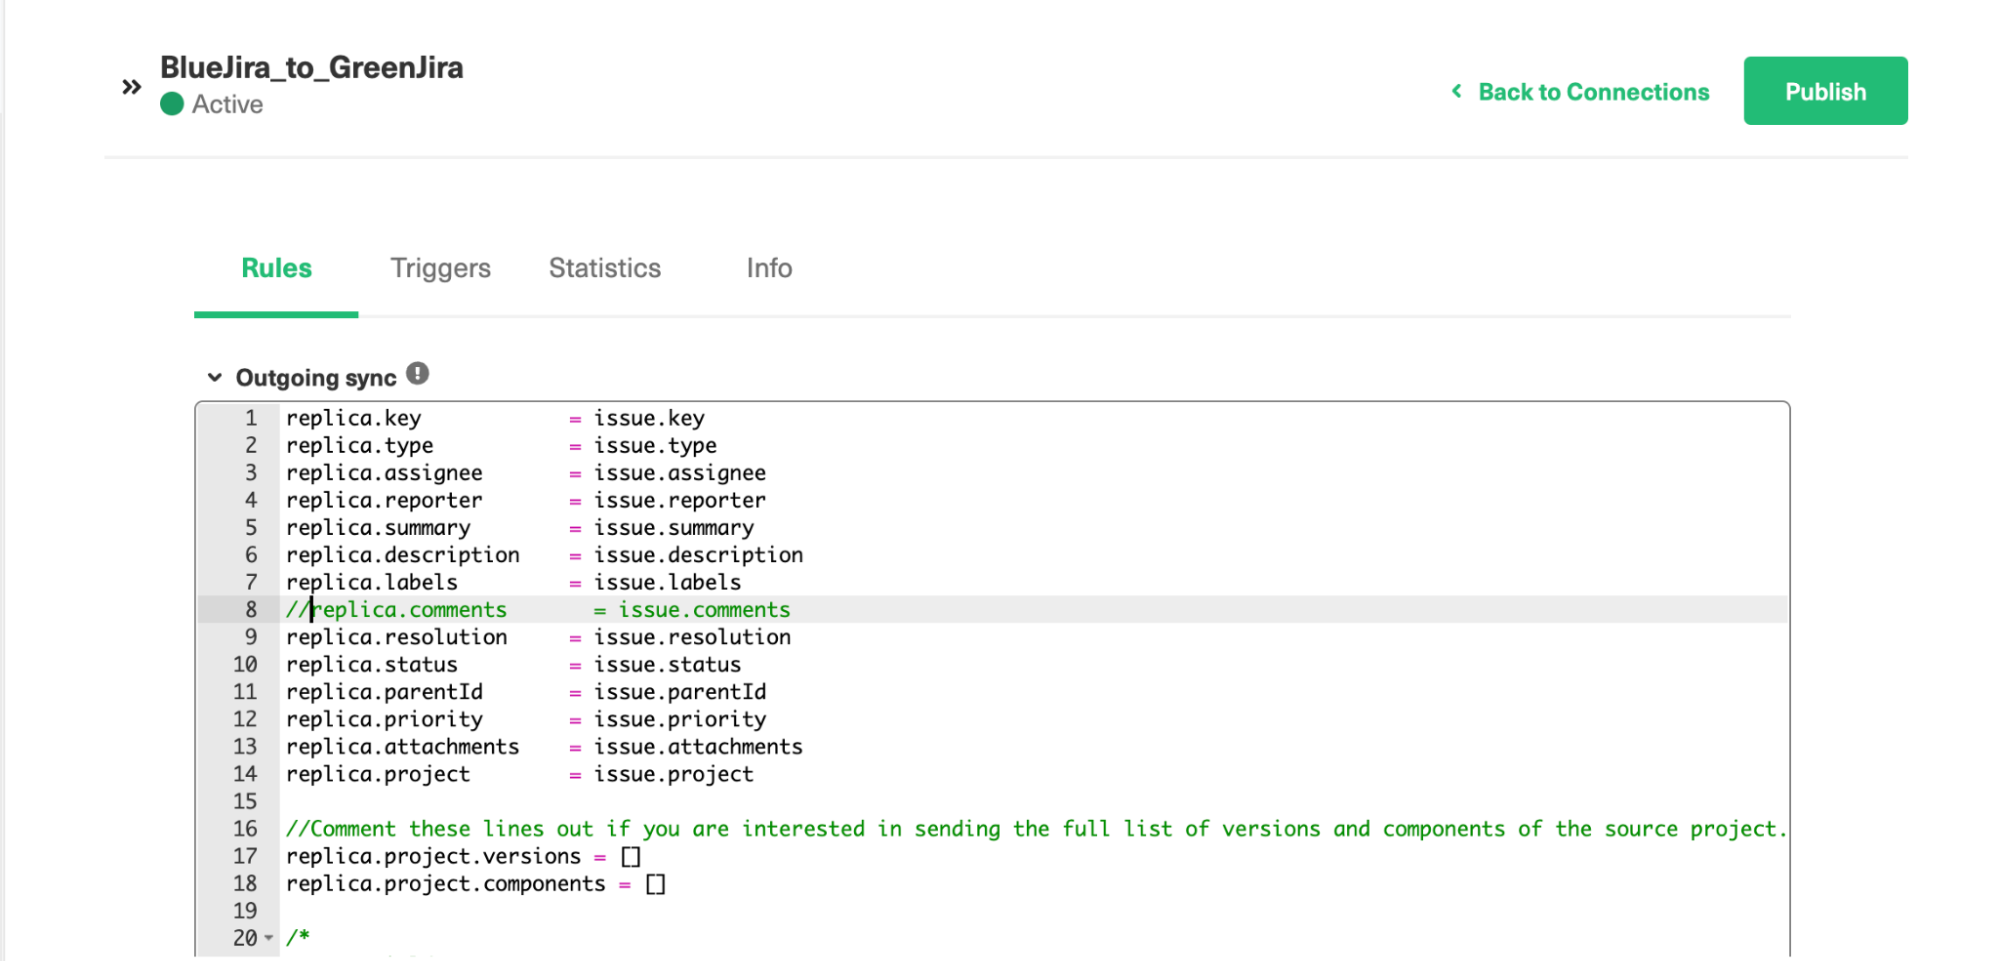
Users with no technical experience can start with Exalate’s Basic mode before upgrading to the low-code Script mode.

Using the Groovy-based Script mode users can implement any advanced integration scenarios. This mode is also AI-enabled meaning you can generate sync scripts using AI based on human prompts. Just type your sync requirements in the chat window and AI Assist will generate scripts based on current configurations, your input, and Exalate’s scripting API.

exalate interface

Companies can also explore the Exalate IaaS option when connecting internal and external processes. And you can automate all connections using custom triggers.

Exalate has three plans: Free, Premium, and Enterprise. To find out how much it will cost for your use case, reach out to the sales team.

Exalate vs. Tasktop

Businesses choose Exalate over Tasktop because it comes with a Groovy scripting engine for configuring advanced use cases if the pre-built options don’t cover your needs.

Boomi

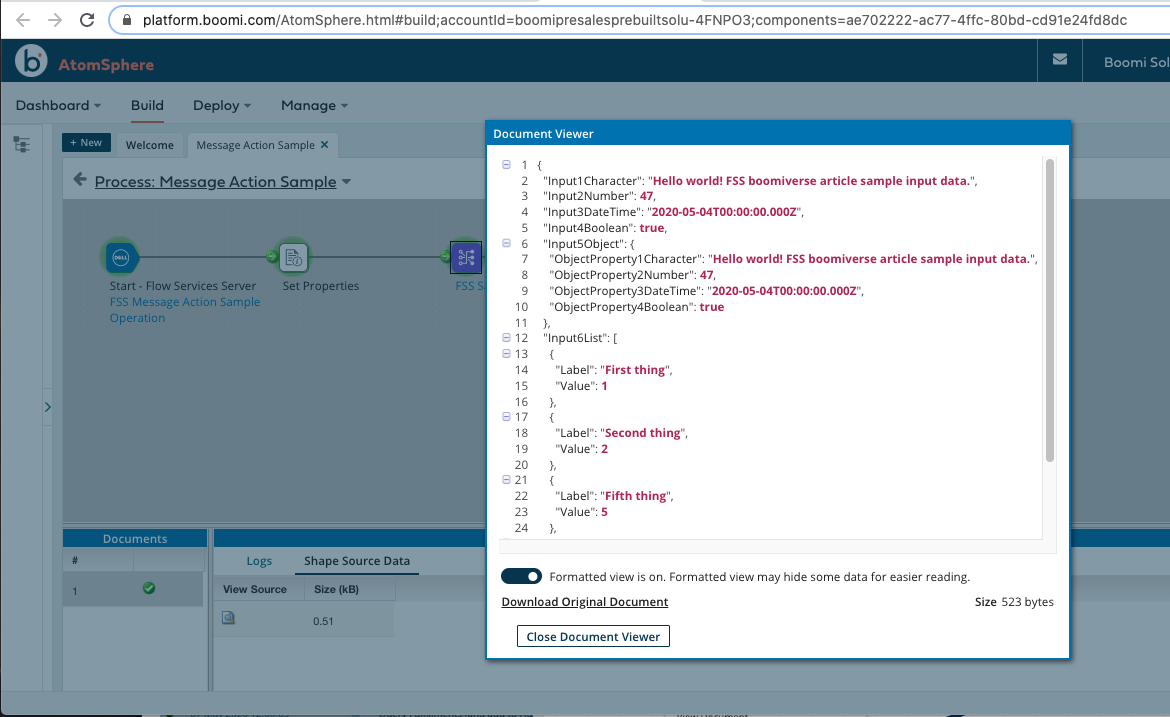
Boomi is a multi-cloud integration platform that supports application integration as well as API management.

With Boomi’s Master Data Hub, you get a 360 view of your company’s data, which you can plug into Event Streams. 

boomi interface

You can host Boomi in the cloud or on-premise in order to access over 300,000 endpoints and pre-built connectors.

After the free trial, you can upgrade to any of these paid plans:

  • Professional
  • Pro Plus
  • Enterprise
  • Enterprise Plus

To get the exact cost of implementing your integration use case, reach out to the sales team.

Boomi vs Tasktop

Tasktop is no match for Boomi when it comes to endpoints. Boomi supports a broader array of connectors, including Salesforce, Oracle Netsuite, SAP, AWS, and Workday.

Jitterbit Harmony

Jitterbit Harmony is a low-code integration platform that allows businesses to connect systems and build applications. You can use the web-based Harmony Portal to access all applications, statistics, and training documentation.

jitterbit harmony interface

Features available to Harmony users include Cloud Studio, API Manager, Vinyl LCAP, Management Console, Marketplace, and pre-built integrations.

Jitterbit offers three plans: Standard, Professional, and Enterprise.

Jitterbit Harmony vs Tasktop

Although the system requirements vary by the feature you want to use, Jitterbit Harmony still offers more value for money than Planview Hub.

SnapLogic

SnapLogic uses Snaps (prebuilt integrations) to automate workflows and integrate data between organizations and systems.

Your organization can use SnapLogic to integrate data and applications, as well as to manage APIs. You can also access other AI and LLM options, including SnapLogic AI and SnapGPT, to speed up integrations.

Information from the SnapLogic blog shows that you can get Premium Snaps or Core Snaps. 

Core Snaps are free with CRUD capabilities. 

Premium Snaps have two tiers with a starting price of $9995.00 per year:

  • Tier One (+$45k)
  • Tier Two (+$15k)

*You need to confirm price changes from the sales team.

SnapLogic vs Tasktop

Apart from API management, SnapLogic outperforms Tasktop Hub thanks to generative AI and language learning models.

IFTTT

IFTTT is an automation solution for business and home use. It allows you to connect AI tools, productivity and lifestyle apps, social media platforms, lead management platforms, and customer communication tools.

ifttt interface

IFTTT has a no-code platform that puts your integrations in your palms through mobile apps (Android and iPhone).

Here are the available IFTTT plans:

  • IFTTT Free 
  • IFTTT Pro — $34.99 billed annually ($3.46/month)
  • IFTTT Pro+ — $149.99 billed annually ($14.99/month)

IFTTT vs. Tasktop

IFTTT is a viable Tasktop alternative if you are looking for an integration tool with a mobile-friendly option.
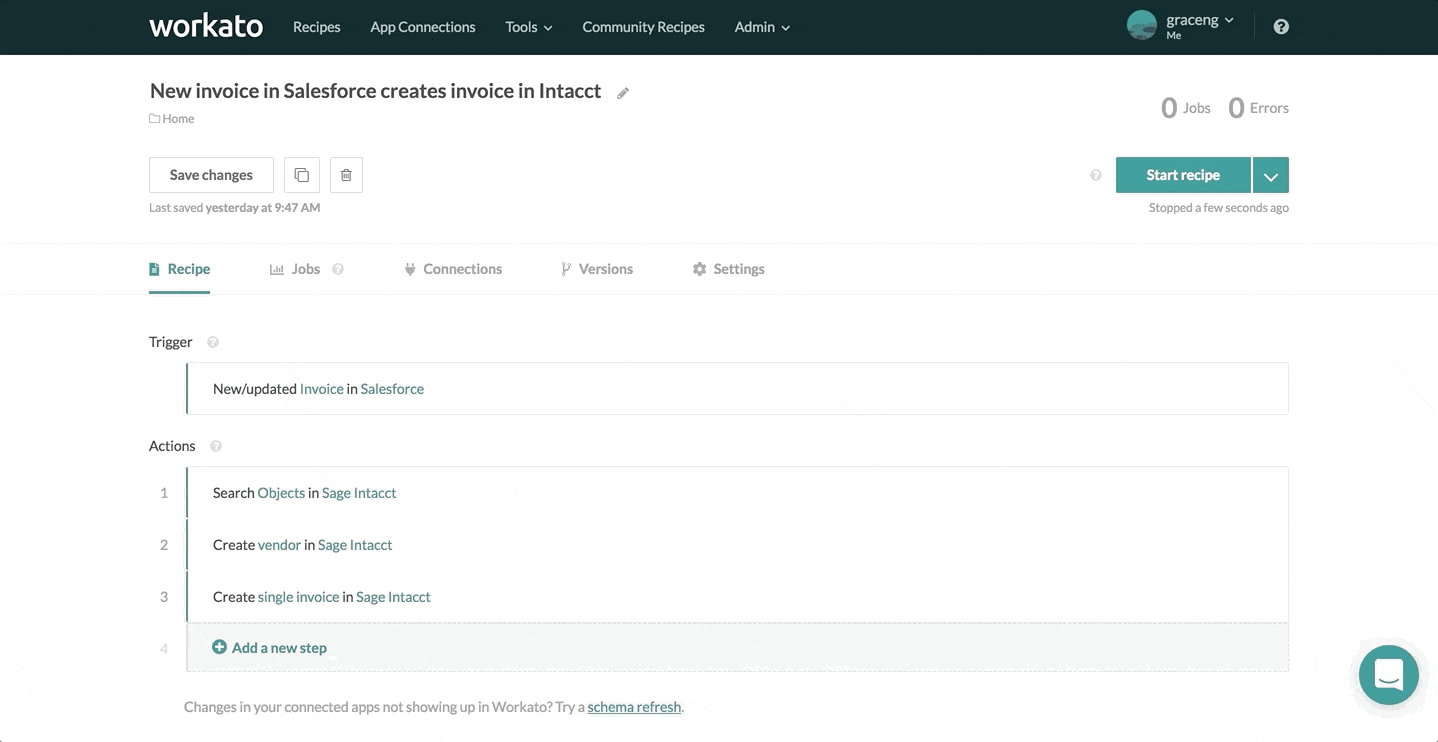
Workato

Workato is an IPaaS solution that provides intelligent automation for connecting systems and platforms. 

Workato uses a set of instructions called “recipes” to control and automate complex workflows. These recipes interact with the REST endpoints of connected applications.

workato interface

Recipes are divided into two:

  • Triggers (conditions that prompt an action)
  • Actions (a set of available actions for every connector).

Workato’s connector library is also home to hundreds of DevOps, productivity, collaboration, HR, and customer service tools. You can also access custom integration recipes.

To find out how much Workato costs, you need to contact the sales team for a detailed breakdown of their pay-per-use model.

Workato vs. Tasktop

Workato provides a broader library of endpoints and integration recipes compared to the options available for Tasktop.

Informatica

Informatica is a cloud-based data management platform that uses the ETL process to automate workflows and business processes.

As a data integration solution, Informatica offers features such as MDM & 360 applications, as well as Customer 360. It also supports intelligent automation and API and application integration.

informatica interface

Businesses can also use the CLAIRE AI engine to automate data management tasks in order to improve productivity and data democratization. You can obtain a quote for Informatica pricing on demand.

Informatica vs. Tasktop

Informatica is a good Planview Tasktop alternative for companies looking for generative AI integration as well as cloud computing.

Oracle Integration Cloud (OIC)

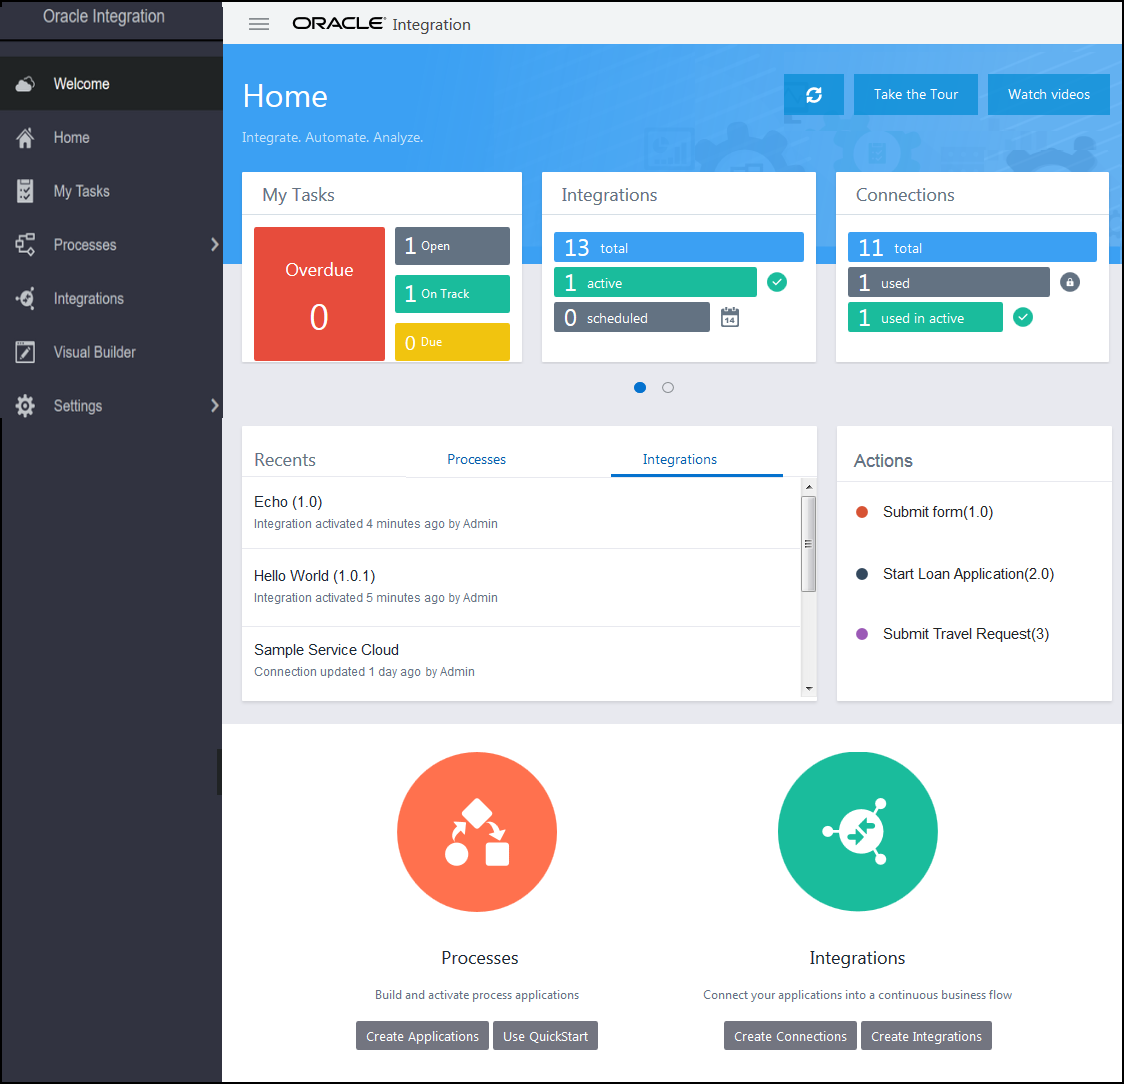
Oracle offers cloud infrastructure integration services for companies looking to connect work management systems, databases, applications, and other data sources. 

The integration cloud contains a suite of prebuilt adapters complemented by low-code customization options for advanced use cases.

oracle interface

Connecting to the Integration Cloud gives you access to API full lifecycle management, Kafka-compatible event streaming, and Oracle GoldenGate for real-time integration and analytics.

You can use the cost estimator to find out how much you need to pay for every service option you require.

OCI vs. Tasktop

OCI is better than Tasktop Planview because it offers you several data management tools under the Oracle banner. You can even use the solution to migrate data.
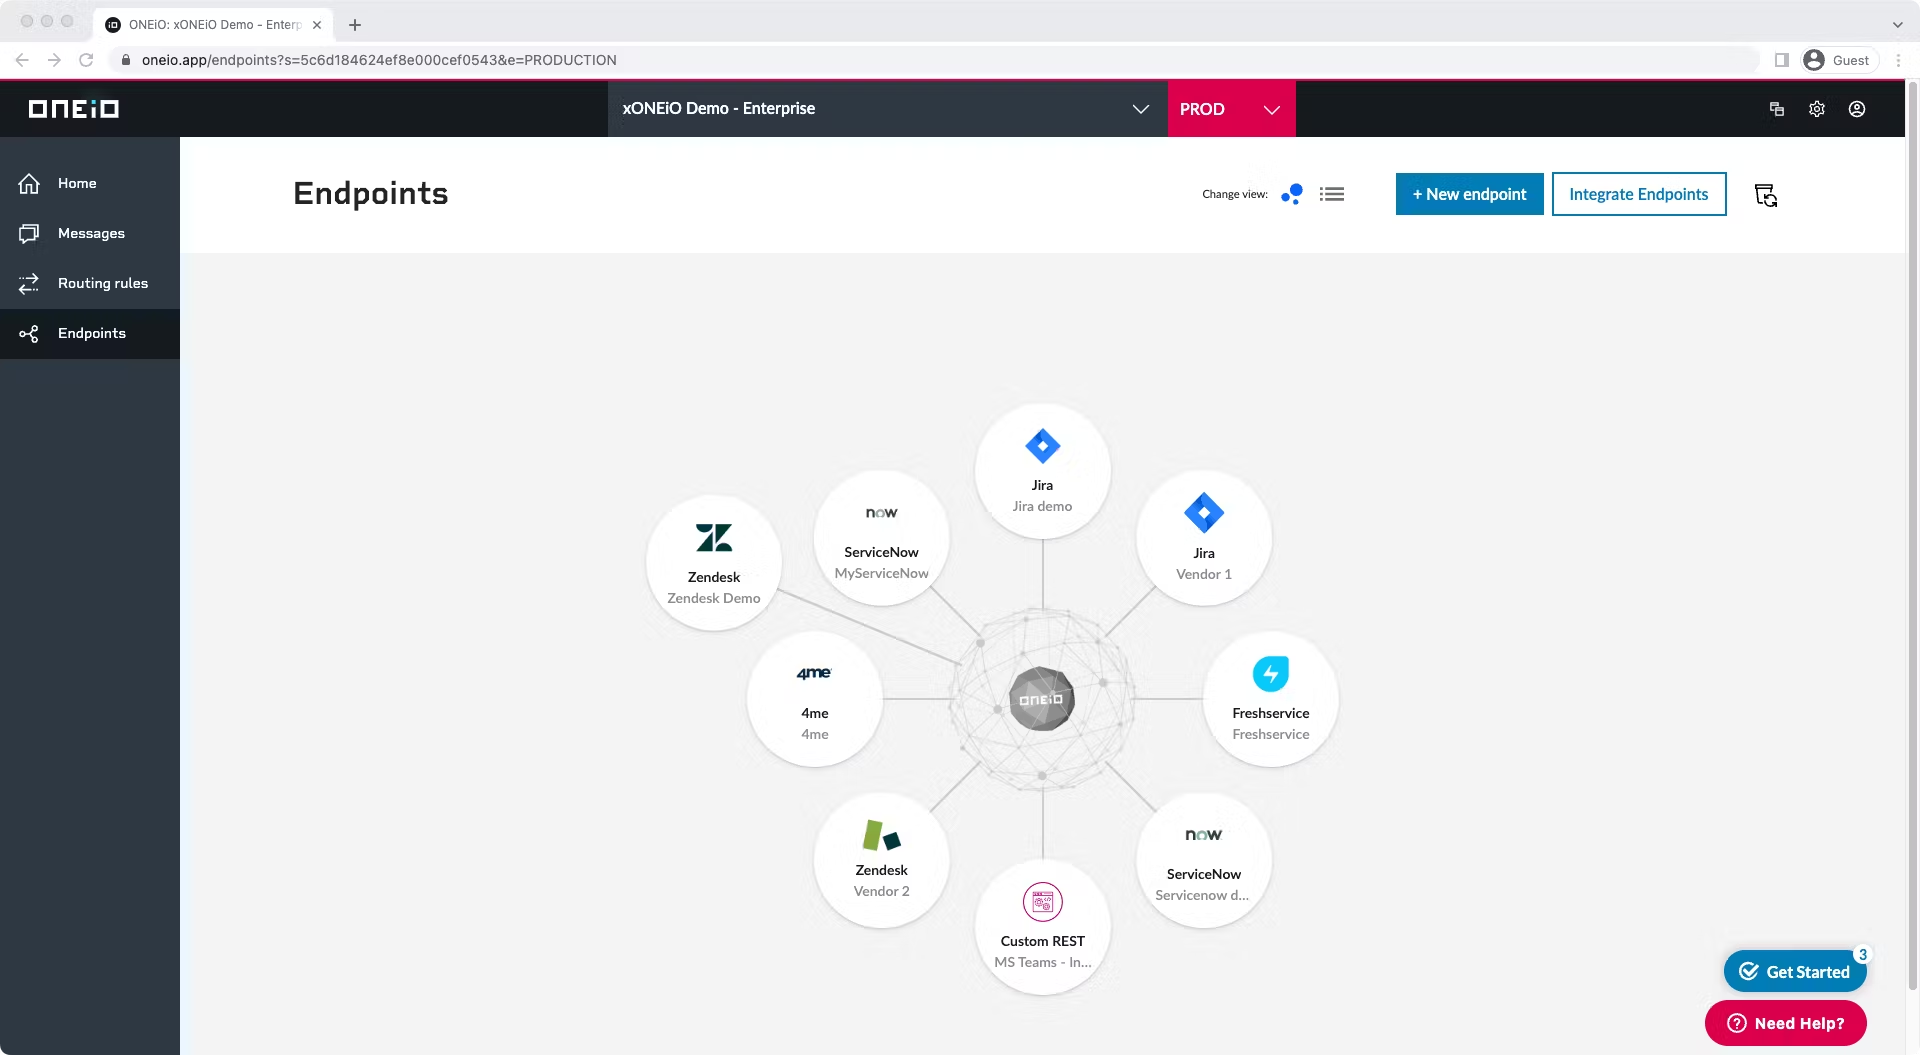
ONEiO

ONEiO is a cloud-native integration solution that enables seamless synchronization with systems, applications, and service providers.

oneio interface

Supported connectors include Okta, HubSpot, TOPdesk, Slack, Netvisor, Trello, and others.

ONEiO also comes with a custom scripting engine that allows you to connect to different endpoint types in order to retrieve the relevant data.

You can start a free trial, or you can contact the ONEiO sales team for a detailed price quote.

ONEiO supports multiple connectors, including communication apps, work management systems, and DevOps tools. 

ONEiO vs. Tasktop

ONEiO one-ups Tasktop, thanks to its AI-powered scripting engine. However, Tasktop supports more integration endpoints than ONEiO.

Exalate: The Best Tasktop Alternative

If you are looking for a Tasktop alternative with an AI-enabled scripting engine, Exalate is the must-have option. 

With Exalate’s IaaS option, you can explore several possibilities, from Jira service desk integrations to custom Salesforce ServiceNow integration. MSPs can also use Exalate to improve collaboration with clients.

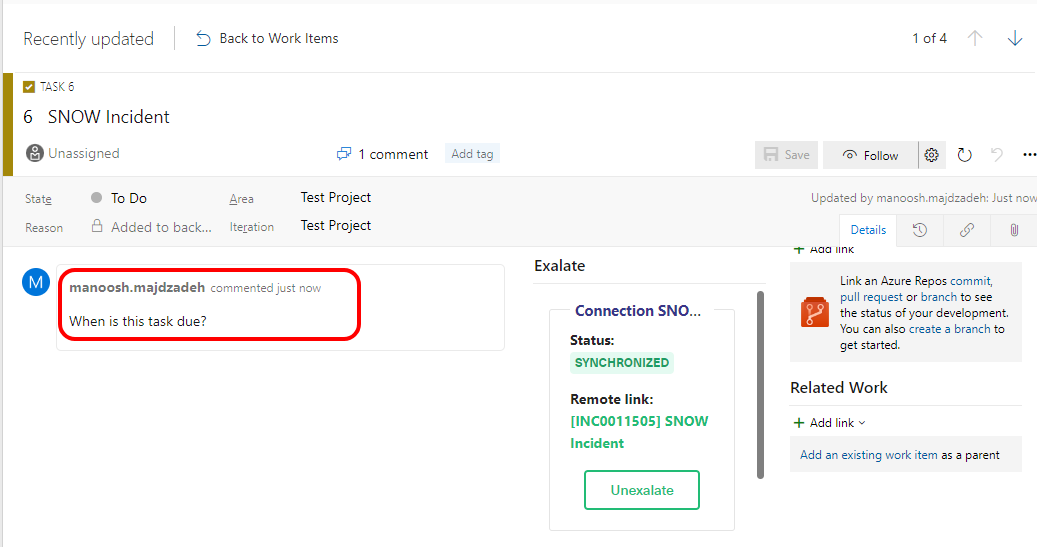
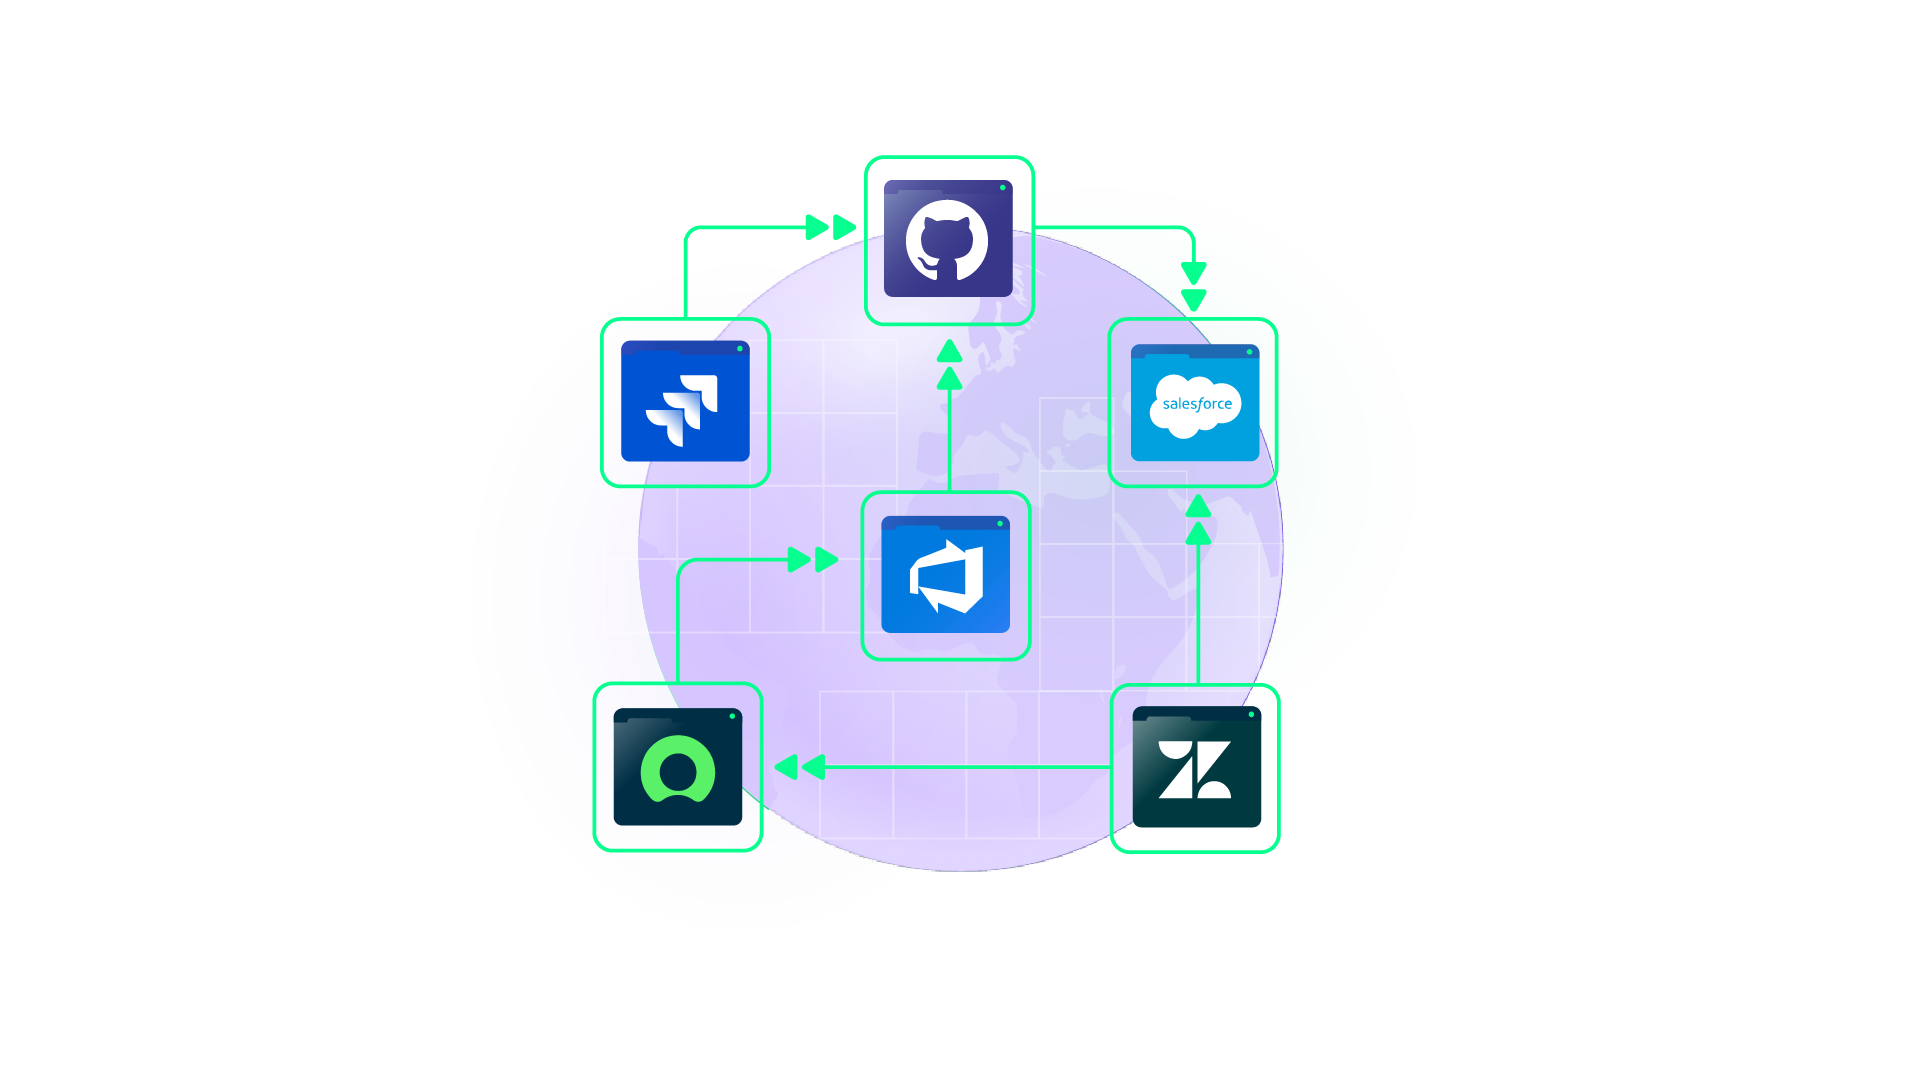
Exalate also supports bidirectional integration between platforms such as Jira, Salesforce, ServiceNow, Zendesk, Azure DevOps, GitHub, and many others.
To find out more about Exalate’s robust integration tool, book a demo with our engineers right away.

Recommended Reading:

The Best ConnectALL Alternatives For Business Integration

connectall alternatives

ConnectALL is a value stream management solution that companies can use when integrating data between applications. 

Owned by Broadcom, this integration solution contains visualization and analytics features that businesses can use to fine-tune operations and processes.

But what if ConnectALL doesn’t have what you need in an integration?

Then you need to look for ConnectALL alternatives that offer similar or better integration services. 

I’ve gathered information about the best alternatives to ConnectALL. Let’s go through them to see what makes them special.

What Makes ConnectALL Good?

ConnectALL enables seamless bidirectional integration and data exchange between platforms. It supports synchronization with legacy systems as well as modern solutions. 

connectall interface

According to ConnectALL reviews, adding the platform to your workflow can help:

  • Focus more on data.
  • Outperform the competition.
  • Visualize your organization’s value stream.
  • Increase productivity and workflow efficiency.
  • Improve the quality and consistency of product delivery.

The biggest advantage to using ConnectALL.org is that its adapters can connect multiple testing, code management, deployment, monitoring, and release management tools.

Some of them include: 

  • Universal adapters for connecting to DevOps tools.
  • Insights adapters for gathering data from multiple sources.
  • Database adapters for syncing records from any application’s database.
  • Vendor adapters for connecting common applications in your software delivery pipeline.

ConnectALL is downloadable as a single virtual appliance, or you can deploy it on-premise or as a cloud solution.

If you want to use ConnectALL Jira, Salesforce, or MongoDB adapters, you can start with a free trial. But you’d have to pay annually for the core engine and the adapter— the cost varies for specific adapters. 

For more information about ConnectALL pricing, you’d have to reach out to their engineers.

The Best ConnectALL Alternatives

#1 – Workato 

Workato is a cloud-based integration solution that uses workflow automation to improve the efficiency of processes.

Workato recipes refer to instructions that automate workflows. These recipes contain triggers and actions.

workato interface

Developers can use Workato to build and govern APIs with unbridled access to real-time performance and usage data.

A Workato trigger is a set of conditions that prompts an action that should occur in real time or batches. The action could be to create a work item in Azure DevOps or to update a Jira issue.

With Workato, you can integrate with sales, collaboration, development, operations, and AI solutions.

Workato Pricing

Workato uses a pay-per-use pricing model. You can embed Workato in your business workspace or just one product. To find out the exact costs, contact the sales team.

Workato vs. ConnectALL

Workato provides better customer service than ConnectALL. It also makes it easier to configure and map integrations. 

ConnectALL focuses on value stream management, while Workato focuses on workflow automation.

#2 – Zapier

Zapier is an automated integration platform that allows you to connect different applications, processes, and workflows.

zapier interface

Here are the products available on Zapier:

  • Tables – workflow databases for storing data.
  • Canvas – drawing tool for sketching and mapping automations.
  • Zaps – customizable workflow automation for connecting services.
  • Chatbots – AI-powered virtual assistants trained on your company’s data.
  • Interfaces – custom workflow pages for building websites and applications.

Zapier also supports 6000+ integrations for databases, instant messengers, Google Apps, and CRMs.

Zapier Pricing

Zapier uses a pay-per-use pricing model. Your monthly or annual bill depends on the number of tasks you have.

Here is the pricing range for:

  • Free
  • Starter starts from $29.99 per month ($19.99 per month paid annually)
  • Professional starts from $73.50 per month ($49 per month paid annually)
  • Team starts from $103.50 per month ($69 per month paid annually)
  • Company (available on-demand)

Zapier vs. ConnectALL

Zapier contains way more connectors than ConnectALL. Although both are no-code platforms, Zapier is easier to set up and use.

#3 – Exalate

Exalate is a bidirectional integration platform that allows users to sync data between work management systems or CRMs. 

Businesses and startups can use Exalate to connect with service providers in order to enjoy streamlined cross-company collaboration and project management. It is ISO 27001 certified.

exalate interface

Exalate also provides an IaaS (integration as a service) option for connecting with multiple platforms internally or externally.

Whichever option you choose, you can start with Exalate’s Basic mode before upgrading to the Script mode — a code-based version that gives you access to the Groovy scripting engine for sync customization.

And if you are a self-starter, Exalate’s virtual assistant AIDA, can assist you with common integration scenarios.

Aida isn’t Exalate’s first AI endeavor. It has introduced AI Assist in Script mode that allows you to set up simple or complex integration scripts, increasing efficiency and accuracy. This is an attempt to make the integration process more productive by reducing the time spent on writing sync scripts from scratch or searching for the relevant ones.

Exalate Pricing

Exalate has three plans: Free, Premium, and Enterprise. To find out how much it will cost for your use case, reach out to the sales team.

Exalate vs. ConnectALL

ConnectALL has more pre-built connectors than Exalate. However, Exalate comes with a custom Groovy scripting engine that extends its scalability and applicability.

#4 – Cleo Integration Cloud

Cleo Integration Cloud is an integration solution for B2B businesses and their partners in logistics, transportation, manufacturing, and related industries. 

cleo interface

This tool is used for supply chain integration with the help of automation, a digital hub, and a blended approach between self-service and managed services.

Your company can use API integrations and pre-built EDI (electronic data interchange) under the Cleo Network.

Cleo Integration Cloud Pricing

The pricing is not publicly available. You need to contact the sales team for a quote.

Cleo vs. ConnectALL

Cleo Integration Cloud contains more features for integration and API management than is available in the ConnectALL library.

#5 – SnapLogic Intelligent Integration Platform (IIP)

SnapLogic is an IPaaS solution that uses ‘Snaps’ to integrate enterprise data and automate workflows.

snaplogic interface

Here are some of its prominent features:

  • GenAI Builder for creating LLM-powered applications.
  • SnapGPT for translating intent into real-life integrations.
  • API Management (APIM) for designing and managing APIs.
  • Snaps (prebuilt intelligent connectors) for no-code integration.

SnapLogic Pricing

According to the SnapLogic blog, you can get Premium Snaps or Core Snaps. 

Premium Snaps have two tiers with a starting price of $9995.00 per year:

  • Tier One (+$45k)
  • Tier Two (+$15k)

Core Snaps are free with CRUD capabilities. 

SnapLogic vs. ConnectALL

SnapLogic provides AI-powered Snaps that can facilitate accurate data exchange and better API management. However, ConnectALL is the cheaper option.

#6 – Boomi

Boomi is an iPaaS solution for connecting applications, functions, industries, and initiatives in order to exchange data freely.

boomi interface

Here are the Boomi services that can help your business:

  • API management
  • B2B/EDI management 
  • Master Data Hub for a 360-view of your data
  • Event Streams for scalable, high-performance use cases.

Boomi supports over 300,000 endpoints for cloud solutions, payment portals, databases, applications, CRMs, ERPs, etc.

Boomi Pricing

Boomi comes with a free trial. Here is the pricing tier:

  • Professional
  • Pro Plus
  • Enterprise
  • Enterprise Plus

The exact cost for your integration use case is available upon request.

Boomi vs. ConnectALL

Both platforms support cross-company integrations as well as value stream management, but ConnectALL slightly edges out Boomi in terms of analytics and insights. On the other hand, Boomi has more endpoints than ConnectALL, and it’s not even close.

#7 – Informatica

Informatica is a cloud data management platform used by enterprises to automate business processes, improve results, and outclass competitors.

informatica interface

The core Informatica features include:

  • Customer 360
  • Intelligent automation
  • API and app integration
  • MDM & 360 applications
  • Data integration and engineering
  • Intelligent data management cloud

The standout feature is CLAIRE, an AI co-pilot that uses unified metadata intelligence to reduce complexity, streamline data delivery, and increase integration scalability. 

Informatica Pricing

The pricing is not openly available, but you can get a quote for your Informatica Processing Unit on demand.

Informatica vs. ConnectALL

Informatica’s AI capabilities exceed whatever ConnectALL has to offer in this regard.

#8 – PowerAutomate

Power Automate is a no-code AI-powered cloud automation platform that allows organizations to discover, orchestrate, and extend the capabilities of applications.

power automate interface

Some key Power Automate functionality includes:

  • Digital process automation for Microsoft Project integration in the cloud.
  • Robotic process automation (RPA) for legacy systems using pre-built or custom actions.
  • AI Copilot for authoring, processing, and generating automation using vast data and language models.

Power Automate Pricing

Power Automate uses the pay-as-you-go pricing model for human users and bots. 

  • Free (for 30 days)
  • Premium ($15 per user per month)
  • Process ($150 per bot per month)

Power Automate vs. ConnectALL

Since Power Automate is a Microsoft product, it is the better option for Azure DevOps integrations. It is also more secure and reliable than ConnectALL.

#9 – Jitterbit Harmony

Jitterbit Harmony is a low-code integration platform that allows businesses to connect systems, automate workflows, and build new applications.

jitterbit harmony interface

The main Harmony features include:

  • Vinyl LCAP for creating enterprise apps
  • EDI for managing partners and workflows
  • Cloud Studio for creating easy-to-use workflows
  • API Manager for creating, publishing, and managing APIs
  • Marketplace for accessing pre-built templates and recipes
  • Management Console for controlling and monitoring integrations
  • Message Queue for handling system workloads and connectivity

Jitterbit Pricing

Jitterbit offers custom pricing options tied to your enterprise license agreement (ELA). The options are Standard, Professional, and Enterprise.

Jitterbit vs. ConnectALL

Jitterbit offers a more flexible pricing option. But ConnectALL is easier to use since admins only need to write limited code and automation scripts.

#10 – Mulesoft Anypoint Platform

Mulesoft Anypoint Platform is an integration solution that allows organizations to speed up application delivery and development. You can use it to build APIs from scratch as well as to maintain CI/CD pipelines.

mulesoft interface

Some features available on the Anypoint Platform include:

  • Anypoint Flex Gateway
  • Anypoint API Manager
  • Anypoint API Experience Hub
  • Anypoint Studio
  • Anypoint Connectors
  • Anypoint Partner Manager 
  • Anypoint Code Builder
  • Anypoint DataGraph

And since Mulesoft is a Salesforce product, your organization can use it for Salesforce and ServiceNow integration, as well as other platforms and service desks.

Mulesoft Anypoint Platform Pricing

Here are the pricing options: Gold, Platinum, and Titanium. The costs for your project are available upon request.

Mulesoft Anypoint Platform vs. ConnectALL

Mulesoft Anypoint Platform is more expensive than ConnectALL. However, you can access more connectors and a wider array of data management services under the Salesforce umbrella.

What is The Best ConnectALL Alternative?

Seeing all the features ConnectALL provides, you can now tailor your search for alternatives.  If you want thousands of integration endpoints — which you might end up not using — Zapier and Boomi are excellent options for you.

If you are looking to explore a hybrid integration strategy using a no-code ConnectALL alternative, Workato, and Jitterbit Harmony can address your needs.

But if you need an AI-enabled scripting engine that can help you automate and customize connections, Exalate is the must-have option. 

Whether you need standard Jira service desk integrations or a custom Salesforce ServiceNow integration, Exalate has the answer for you.

To find out more about Exalate’s robust integration tool, book a demo with our engineers right away.

Recommended Reading:

How To Map and Sync Statuses and Correlation Details Between Azure DevOps and ServiceNow

ServiceNow Azure DevOps integration

In this blog, we are going to discuss a commonly asked Azure DevOps ServiceNow integration use case.

The primary objective of this use case is to sync statuses and exchange correlation details between Azure DevOps and ServiceNow using a third-party integration tool. For this integration, I have used a tool called Exalate.

Here are the requirements and challenges:

The Use Case Requirements

When a user opens an incident on ServiceNow, the description, attachment, and status should be automatically synced over to the corresponding work item in Azure DevOps.

In addition to these primary requirements, we want to sync the following:

  • Map statuses bi-directionally between Azure DevOps and ServiceNow. For instance, “Active” is mapped to “In Progress”.
  • Sync these statuses bi-directionally between Azure DevOps and ServiceNow.
  • When a status is marked as “Closed” in Azure DevOps, a corresponding close code and close note is added in the ServiceNow instance and the status is changed to “Resolved”.
  • Display the Azure DevOps work item ID in the Correlation ID field in ServiceNow.
exalate connector

Potential Challenges

  • Avoiding errors when writing sync rules for the incoming and outgoing data. 
  • Setting up the right triggers to update the fields on both sides automatically.
  • Mapping the correct fields and entities.
  • Fetching the correct work item ID and populating the ServiceNow Correlation ID field.
  • Handling possible network timeouts.

Solution to the Problem: Exalate

Exalate is a bi-directional integration solution that works with Zendesk, Azure DevOps, ServiceNow, Jira, Salesforce, etc. 

It has a Groovy engine that allows developers and scripting enthusiasts to write sync rules for each connection.

How to Implement Exalate for Automatic Data Syncs

First, you need to install Exalate on both Azure DevOps and ServiceNow. 

Next, establish a connection between them using the Script Mode—which enables the advanced integration that this use case demands. 

Then, open the Exalate console in your ServiceNow dashboard. Go to the connection you want to edit, and click the “Edit connection” icon. 

You have two options: 

  • Outgoing sync (on the ServiceNow side) refers to the data to be sent over to the Azure DevOps side. 
  • Incoming sync (on the Azure DevOps side) refers to the data to be received from the incident on ServiceNow.

Under the “Rules” tab, enter the following code snippet into the “Outgoing sync” text area. 

exalate outgoing sync
if(entity.tableName == "incident") {
    replica.key            = entity.key
    replica.summary        = entity.short_description
    replica.description    = entity.description
    replica.attachments    = entity.attachments
    replica.comments       = entity.comments
    replica.state          = entity.state
    replica.entityType = "incident"
}}

Note: The expression above establishes the mappings for every ServiceNow entity type. For this use case, we sync an “incident” within the ServiceNow environment. You can add additional ServiceNow entities in the Outgoing sync. You can see that the sync rules in the console allow you to sync statuses, comments, attachments, descriptions, keys, and short descriptions. 

Scroll down to the incoming sync and enter the following code:

if(firstSync){
    if (replica.type.name == "Task")
        entity.tableName = "incident"
    syncHelper.syncBackAfterProcessing()
}

if(entity.tableName == "incident") { 
    entity.short_description = replica.summary
    entity.description = replica.description
    entity.attachments += replica.addedAttachments
    entity.comments += replica.addedComments
    
    def statusMapping = ["Active":"In Progress", "Closed":"Resolved"]
    def remoteStatusName = replica.status.name
    if (remoteStatusName == "Closed"){
        entity.close_code = "Known Error"
        entity.close_notes = "Closed by Azure DevOps"
    }
    entity.state = statusMapping[remoteStatusName] ?: remoteStatusName
    entity.correlation_id = replica.key
}

if(entity.tableName == "cmdb_ci_business_app") { 
    entity.short_description = replica.summary
    entity.description = replica.description
}

Note: The code snippet above establishes the status mappings and the Correlation ID details. You can also display the remote entity URL in the Correlation Display field. 

In ServiceNow, close notes and close code notes are mandatory fields. So you need to add them when the work item status on Azure DevOps is closed.

Once done, click “Publish” to save the changes.

On the Azure DevOps side, enter the code in the “Incoming sync” text area.

exalate incoming sync
if(firstSync){
   // Set type name from source entity, if not found set a default
   workItem.projectKey  =  "Test Project"
   if (replica.entityType == "incident")
        workItem.typeName = "Task";
    syncHelper.syncBackAfterProcessing()
    
}

workItem.summary      = replica.summary
workItem.description  = replica.description
workItem.attachments  = attachmentHelper.mergeAttachments(workItem, replica)
workItem.comments     = commentHelper.mergeComments(workItem, replica)
workItem.labels       = replica.labels
workItem.priority     = replica.priority


def statusMapping = ["In Progress":"Doing", "New":"To Do", "Resolved":"Done"]
def remoteStatusName = replica.state
workItem.setStatus(statusMapping[remoteStatusName])

The code snippet defines the mapping rules for states and statuses. So if the incident is “In Progress,” it will appear as “Doing” in the corresponding work item. “New” becomes “To Do,” and “Resolved” becomes “Done”.

Scroll down to the outgoing sync field and enter the following code:

replica.key            = workItem.key
replica.assignee       = workItem.assignee 
replica.summary        = workItem.summary
replica.description    = nodeHelper.stripHtml(workItem.description)
replica.type           = workItem.type
replica.status         = workItem.status
replica.labels         = workItem.labels
replica.priority       = workItem.priority
replica.comments       = nodeHelper.stripHtmlFromComments(workItem.comments)
replica.attachments    = workItem.attachments
replica.project        = workItem.project
replica.areaPath       = workItem.areaPath
replica.iterationPath  = workItem.iterationPath

Note: The code snippet above sends work item related information (summary, assignee, etc.) to the other side (ServiceNow). 

Once done, click “Publish” to save the changes.

Congratulations! You have now set rules for syncing data between Azure DevOps and ServiceNow. 

Subsequently, you can adjust the rules according to the demands of specific projects and issues.

So, let’s see how it works in practice.

exalate rules adjustment

When you sync an incident and a work item, the work item ID gets reflected in the Correlation ID field in ServiceNow. 

Enter the description and add a comment to the incident.

exalate sync incident

Go over to the Azure DevOps side. You’ll see that the same comment has come over, as well as the description. Also, since the incident’s state is “New”, the task status will reflect ”To Do” as well.

exalate azure devops

Next, upload an attachment and respond to the comment. Then change the incident state to “In Progress” and then to “Resolved”. 

exalate resolved issue

Back on Azure DevOps, you can review the task history to see all the changes that have taken place on the incident.

exalate task history

And that’s all you need to get this use case working!

Conclusion

Exalate allows you to sync data between ServiceNow incidents and Azure DevOps work items. You can specify the rules according to each use case. 

If you still have questions or want to see how Exalate is tailored to your specific use case, book a demo with one of our experts immediately.

Recommended Reading:

Exalate is Part of The One Million Club

exalate one million club

We’re proud to be recognized by Trends Magazine and Scaleup Vlaanderen‘s One Million Club among the selected group of founders from Flemish scale-ups with a million euros in funding or annual turnover.

A Glimpse into Exalate’s Journey

In 2015, Francis Martens and Hilde Van Brempt embarked on a transformative venture, establishing iDalko and later pioneering the integration software Exalate. Fast forward to 2022, we strategically sold our consultancy branch to fuel Exalate’s expansion. Our integration software ensures seamless collaboration between different systems, teams, and companies, keeping all data secure, up to date and in sync.

Empowering Collaboration

When it comes to software integration, security and autonomy are the pillars of successful collaboration, and Exalate is the solution that seamlessly makes it happen. It’s bridging the gaps between systems, ensuring that each interaction is secure, empowering teams and companies to collaborate smoothly without compromising data integrity.

Global Impact

Presently, our dynamic team of over 90, including 25 talents in Belgium, is making a global impact. With 40% of our turnover coming from the United States, an additional 40% from the EMA, and the remaining 20% from Asia-Pacific, we’re gearing up for even greater focus on the U.S. market, potentially opening an office there soon.

Our Visionaries

A special acknowledgement goes to our founders, Hilde Van Brempt and Francis Martens for their visionary leadership and commitment to excellence. The Exalate journey continues, and we’re excited about what lies ahead! 

Get the news here (in Dutch)

Exalate Breaks Into Main Software 50 Benelux 2023, Celebrates Industry Recognition

exalate benelux 50

In an exciting win for Exalate, the company has secured a spot in the Main Software 50 Benelux 2023 ranking. This achievement highlights Exalate’s growth, innovation, and the trust clients place in its solution.

Key Highlights

The 12th edition of the Main Software 50 Benelux ranking highlights the broad adoption of SaaS models and underscores the resilience within the sector. Exalate’s entry is a significant accomplishment, considering the competition and industry challenges. The Top-50 software companies in the Benelux region are marking solid 24% average revenue growth, showcasing the industry’s strength amid economic uncertainties. 

Path to Success

The selection criteria for this ranking looked at revenue growth, sales growth, sales quality, Cloud/SaaS revenue, EBITDA, international returns, partner channel revenue, innovation, and overall impact. Exalate’s performance on these fronts has earned it a well-deserved spot among the top players in the Benelux software scene.

Team Recognition

Exalate’s VP of Operations, Stefaan Quackels, and VP of Sales, Ruben Bru, had the pleasure of representing Exalate at the awards ceremony on November 16, 2023, where they received the recognition on behalf of the entire team.

Exalate expresses gratitude to its team for their hard work and commitment, as well as to its co-founders Francis Martens and Hilde Van Brempt for their visionary leadership.

Exalate’s achievement in the Main Software 50 Benelux 2023 not only elevates the company’s profile but also signifies a commitment to excellence and innovation that resonates throughout the industry.

Empowering Women in Tech: Co-Founder Hilde Van Brempt Leads the Way

hilde van brempt

Join us in celebrating the achievements of our very own co-founder Hilde Van Brempt. Beyond being one of the sparks that started our integration journey, Hilde is a recipient of the InspiringFifty Women in Tech Belgium award, and has just recently been invited to join the board of EFFEX. 

Hilde has fostered a uniquely inclusive environment at Exalate, ensuring women in the workplace, and everyone on our team, can and do reach their full potential in an incredibly competitive and male-dominated world. Today, women hold half of the senior management positions at Exalate. 

In May 2023, EFFEX, an organization revolutionizing the Design of Experiments, invited Hilde Van Brempt to join their management board. EFFEX performs research on cost-efficient experimental plans and multi-criteria selection. 

Their CEO, Dewi Van De Vyver, had this to say about Hilde’s selection to the board: 

“I’m grateful that Hilde has agreed to join our board and spare some of her precious time facing her own challenges at Exalate. I know we can learn a lot from her past and present experience as a company, but more importantly for me personally, having someone on board who understands my journey as a woman in tech.”

Hilde’s aims go far beyond what she’s already achieved. She’s encouraging women everywhere, regardless of age or background, that growth and advancement in tech aren’t just possible, but necessary and achievable. 

In her own words, “The Exalate team and I are committed to breaking the biases within tech by fostering an environment that highly values inclusivity and diversity, where women from varied backgrounds and experiences are not only appreciated but encouraged to achieve their full potential.”

Diversity and inclusion are the pillars of our culture at Exalate, and Hilde has been championing this way of working and being since the very beginning. 

“Our drive to celebrate women in the technology field is a tribute to their role in challenging industry norms and driving impactful change, transcending gender and cultural stereotypes.”

How to Sync Tempo Worklogs Between Two Jira Cloud Instances

Sync Tempo Worklogs

This article was originally published on the Atlassian Community.

In today’s interconnected business environments, teams are distributed across different departments or organizations. Hence, maintaining accurate and synchronized work logs becomes essential to ensure transparency, optimize resource allocation, and enable effective decision-making. 

This use case explores the process of syncing Tempo Worklogs between two Jira Cloud instances. By implementing this synchronization, teams can bridge the gap between disparate Jira instances, harmonize work data, and unlock the full potential of their collaborative efforts.

The Use Case

To set the context, let’s envision a situation involving two Jira Cloud instances: Instance A (JCA) and Instance B (JCB). When a ticket is escalated from JCA to JCB, it appears within the latter, allowing users to engage with it. 

However, a crucial aspect of maintaining work log consistency arises when a user records time for the ticket in JCB. It becomes essential for this time entry to be accurately mirrored in JCA, ensuring uniformity.

Conversely, if a user changes a work log in JCA, the same change should be synchronized to JCB. This way, everyone involved will always have the latest information across both instances.

The advanced nature of the use case warrants an integration solution that can handle it effortlessly. 

Exalate is a customizable integration solution that supports basic to advanced use cases. 

Exalate: An Integration Solution 

Exalate connects your everyday tools to set up a flexible, bidirectional sync. It supports Jira, GitHub, Salesforce, Zendesk, Azure DevOps, ServiceNow, etc. 

In addition to a drag-and-drop interface for simple use cases, it offers a customizable Script mode that helps set up advanced use cases with ease. 

Exalate’s Script mode has Groovy-based scripts present on both integrating sides. The outgoing script controls what information leaves the platform, and the incoming script controls how to interpret information coming from the destination instance. You can control these scripts independently at both ends, as they are decentralized in nature. 

Before we discuss how to implement this use case with the help of Exalate, let’s quickly understand how Exalate handles Tempo work logs.

How Exalate Interacts with Tempo

If you have installed Tempo already, you can access it under “Apps” in your Jira Cloud instance. 

Exalate uses Tempo Cloud REST API to get access to the Tempo worklogs.

The use of the Tempo Cloud REST API enables Exalate to retrieve worklogs from the source instance and transfer them to the target instance. Furthermore, it also allows for the ongoing synchronization of worklog updates, ensuring any modifications made in one instance are accurately reflected in the other. 

Grant Exalate Access to Tempo

Exalate requires access to Tempo. To do so securely, you need to create a user access token. This access token is based on the current permissions of the Jira cloud user. 

You can generate the Access Token under the “Tempo settings > API integration” tab.

The required set of permissions for the user who generates the access token are:

Jira Permissions:
  • Create worklogs
  • View all worklogs
  • Log work for others
  • Work on issues
Tempo Permissions: 
  • View team worklogs
  • Manage team worklogs

With this groundwork, it’s time to implement the synchronization. 

How to Sync Tempo Worklogs Between Two Jira Cloud Instances

To start implementing the use case with Exalate, you must first install it on both the Jira Cloud instances. Then establish a connection in Script mode between them. 

Next, you need to configure the connection. You can do that by clicking the “Configure sync” button after establishing the connection or editing it under the “Connections” tab in the Exalate console. 

You can see the “Rules” tab here. This tab is where the Groovy-based scripts we talked about earlier reside. The “Outgoing sync” contains scripts that control what you want to send to the other Jira. The “Incoming sync” contains scripts that decide how you want to interpret the information coming from the destination Jira. 

Exalate syncing tempo worklogs between two Jira instances

Since we want a bidirectional Tempo worklogs sync between the Jira instances, we must modify both scripts at both ends. 

Outgoing Sync 

The incoming and outgoing sync scripts will remain the same on JCA and JCB. Only the token must be replaced with the actual token that you’ve generated. 

Outgoing script
TempoWorkLogSync.send(
"92mXBTLkvf7pQWHns4yJGz1Cr6d8Ao-eu", // replace the "token" with the //previously generated access token
replica,
issue,
httpClient,
nodeHelper
)

Incoming Sync

For the incoming sync, ensure the following: 

  • Add the imports at the beginning of the code.
  • Add the functions at the end of the code.
Incoming script
TempoWorkLogSync.receive(
"7a9KJZPwtV5gQMLxr3dTYq8Ns1w6Co-us", // replace the "token" with the previously generated access token
replica,
issue,
httpClient,
traces,
nodeHelper
)

Conclusion

By synchronizing Tempo worklogs between distinct Jira cloud instances using Exalate, organizations can facilitate real-time updates of Tempo worklogs. This bidirectional synchronization not only ensures consistency and accuracy of worklog data but also fosters efficient cross-instance communication, promotes transparency across teams, and elevates the overall success of their projects.

Recommended Reading:

Exploring the Build vs. Buy Integration Debate

build vs buy in integration

Integrations can be pretty complex. Technical challenges, diverse organizational structures, people with varying skill sets and agendas, distinct processes, and separate applications are all factors adding to this complexity. 

We will focus on one portion of the process, examining whether to build a custom integration using existing company resources or buy one of the commercially available software applications that provide this service. We will also focus on how the build vs. buy debate pans out in cross-company integrations.

But before we do that, let’s look at the different steps in an integration project. 

Phases of the Integration Project

Gather Requirements and Plan

  • Start working out the pain points. Identify what’s going to be the most difficult part of your integration. Is it assigning new users to platforms? Or copying data between applications, or sharing information via email and chats to keep track of statuses? Is going back and forth between different workflows becoming confusing for everyone? 
  • What does the communication path look like?  What sort of deployment models do you and the other environments you are integrating with use? What sort of security, authorization, information, and authentication issues are likely to arise during the integration? 
  • Plan both the internal and external resources: Work out not just the budget, but the amount of work and effort required. Make sure the right people are involved from the start.

Design the Integration

  • Work out your common data model. Carefully map data exchanges and transformations between systems. A three-space text field won’t t map to a two-digit text field, and no amount of wishing will make it so. 
  • Figure out redundancies. Identify what potential failure paths and proper notification protocols will be. You also need to have a formal rollback system in place in case of inevitable system crashes. After all, no system is perfect. 
  • Account for data tracking: Make sure you’re logging all data transfers so you can conduct regular audits and be sure of system reliability.
  • Design the integration scope: Look at all the data you’ve gathered and determine what your unique information flow requirements are. Do you want one or two-way integration? Which fields do you and don’t you want to sync? These are important questions to figure out before you begin. 

Implement the Integration

Your developers can now start to code in or buy, an integration solution with the required functionality. This might seem pretty simple, but the hard part comes in figuring out how to handle errors and exceptions without causing the applications to terminate.

Validate Your Integration Solution

It can be hard to figure out the validation process for the functionality of your integration. To make sure everything is running smoothly, you need to subject the process to testing for performance and functionalities, as well as future pain points. Testing to ensure there are no unexpected errors is of paramount importance: a system crash can lead to irretrievable loss of data.

Manage Your Production Release

So you’ve got your integration solution ready to roll and validated, and now you want to release it to the production systems. Sometimes, the release can also involve deployments across company borders(aka cross-company integrations).


It also needs to be delivered to your end users in a way that’s transparent and easy to understand for everyone. Disruptions cost, and you need to take that into account not just for your business, but any businesses you’re integrating with.
You also need rollback plans, so if unforeseen failures or consequences occur you’re covered.

Maintain the Integration 

Ask anyone in software and engineering circles, you’ll get the same answer: maintenance costs. Not just money either: time too. In fact, maintenance is going to set you back a lot more than the initial setup. Make sure you’ve got a maintenance plan in place, you’ll thank yourself later.

Customize the Integration

Here’s the thing about integration: once you’ve started, that’s not the end. You’re going to start getting requests to make it better. Stuff like new workflows, permissions, data fields, and different insights into existing workflows. Take these inevitable customization requests into account. 

But we’re here to solve the classic integration problem: build vs. buy software. Before that, let’s understand the thought process companies usually have when it comes to an integration project. 

How do Companies Approach an Integration Project?

Companies choose to integrate the applications they use on a daily basis to overcome certain pain points. For instance, when teams using these applications exchange data manually it leads to inaccuracies, delays, missed deadlines, and poor business outcomes. Moreover, for a smoother collaboration with other companies using different applications altogether, they start feeling the need for integration. With such an integration, they expect automatic, real-time data exchange based on their requirements. 

And the thing with integration requirements is that they vary in complexity and are volatile. They can range from simple data mapping between entities to creating complex multi-level dependencies between the same entities. 

So, they usually start looking for automation solutions to see if their integration requirements can be fulfilled. This approach works for basic one-on-one unidirectional mappings but might be a hindrance for complex, ever-evolving requirements. 

They might hit a limit in their decision-making process, losing hope of finding a solution that can accommodate advanced integration use cases. The only feasible option they now consider is to build the integration themselves. 

But, we are here to present our side of the story for this dilemma. 

This blog is for companies who are faced with a similar situation and are contemplating between: 

  • Building the integration in-house: Building a custom integration application in-house using existing company resources. This usually involves accessing the application’s open APIs and writing code to enable automatic information sharing between them. 
  • Buying a COTS (Commercial-off-the-shelf) integration solution: Purchasing one of the commercially available software applications that provide integration-as-a-service. And here, we mean a solution that offers the kind of automation and customization they desire. 

Weigh the Options: Building Vs. Buying an Integration Solution

To solve the build vs. buy software issue, you need to take into account a range of key factors. 

Let’s deconstruct the two approaches and analyze their key advantages and potential drawbacks. 

Why do Companies Choose to Build a Custom Integration Solution? 

Usually, MSPs (Managed Service Providers) or MSSPs (Managed Security Service Providers) opt for building a custom integration solution in-house. They do so because of various reasons: availability of resources, security considerations, etc. 

There are some scenarios where building your own integration might work:

  • You need bespoke integrations. 
  • You have a team of engineers, developers, system architects, and product managers ready at your fingertips to develop and maintain the integration. More so, the team should be entirely dedicated to the integration project because of its demanding nature (as we saw). 
  • You have an integration request critical to your business process, so you choose to build in-house. Or maybe the integration is basic and easy to implement, connecting you to a single customer application. In such cases, the code will be less complex to develop and maintain. 
  • You have stringent security requirements. 
  • You want complete ownership of your integration – the code, support, maintenance, etc. 

However, it’s necessary to take note of the pitfalls of building an integration. 

Drawbacks of Building a Custom Integration Solution

You may encounter the following issues:

  • Scaling in-house solutions can be hard. Be it adding a new application to your technology stack or wanting to collaborate with a completely new customer. You might well end up developing the same solution over and over again. This ultimately hinders the agility of your integration. 
  • Business environments are dynamic. The flexible nature of business means things change, and your integration needs to change with them. This adds complexity to in-house integrations. Your dev team has to take into account these changes in workflows, as well as other customizations. This takes up valuable time and can be frustrating for everyone.
  • Let’s be honest: your dev team has other work to do. Depending on the severity of your and other issues, you might not be at the top of their list, which is just how things are in a fast-paced environment. Your requests are going to have to compete with other projects, and that causes delays. 
  • Maintenance costs on an in-house integration solution are high. When you start wanting upgrades (trust us, you will – for many reasons like security, etc.), you have to modify existing apps that were developed for the original system, or in some cases replace them altogether. This also leads to retesting the configuration, which needs to be factored into the cost of ownership.
  • It isn’t just the original app that needs to stay up to date. The documentation has to be changed too. That adds time. More than that, your original dev and maintenance staff might leave, and with them valuable and unique knowledge about the technology stack.  This can create a whirlwind of issues means you’re spending more time, money, and effort just to make an already difficult-to-maintain system function properly. 

When integration, especially one across company borders, becomes an essential part of optimizing your workflows and systems, you must face the decision to build the integration application in-house or buy an integration software available commercially.

So you’re still deciding, right? The initial costs of building your own enterprise integration software are less than the costs of using a third-party solution. And your development staff are on standby and ready to roll out your in-house integration? 

Hold on just a minute. Building this type of integration is a massive job, and initial costs can seem cheaper, but as we’ve already seen, maintenance is what costs more time and money in the long run. And you do have to think about the long run: a successful business is a marathon, not a sprint. 

A lot of these difficulties can be avoided by using the correct commercial integration software for your project. While the acquisition costs are higher, they start to even out when you take into account customization and maintenance.  

We’re going to understand the specifics of the above in the coming sections and also consider a time and cost-saving analysis.

cost of different integration approaches

Benefits of Buying a Third-Party Integration Solution

Some key advantages of buying commercially available integration solutions:

  • They are agile and scalable. It’s easy to add just another application or customer to your integration.
  • They leave your developers the time and space to work on meaningful tasks rather than spending time and effort on unnecessary integration overheads and maintenance.
  • They expedite your integration since they already have the necessary arsenal to set you up. 
  • They can significantly reduce difficulties and delays caused by system and process changes. 
  • They allow your teams to define what information gets sent out externally and how incoming messages are processed internally. Changes in your internal company processes will not affect your cross-company integration efforts.
  • They can help you significantly reduce costs. They also have multiple pricing plans that offer support at all phases of your integration project. 
  • They have teams responsible for maintaining the software documentation and providing needed training. They even work with you to troubleshoot specific issues and provide you with the required support along the way. 
  • They are built with changes to underlying systems in mind and can operate independently of those changes.
  • They help you maintain integration transparency, where your focus is on optimizing your business, not getting distracted by potentially messy in-house integration projects.  Acquiring one of the best-in-class integration software packages allows you to do just that.

Challenges of Buying a Third-Party Integration Solution

As we saw, buying software is a must to fulfill modern integration requirements

But there are some challenges you must address: 

  • Often commercial integration software has a range of specific integration templates. So if you have an advanced use case with detailed data mappings and dependencies, you might not be able to fully leverage the solution and be constrained by the UI it provides. 
  • With so many options available in the market today, it’s difficult to choose the right one.

Thankfully, you’ve come to the right place! We’ll address both these challenges right here, right now. 

One of our customers asked: “But can’t we build our integration ourselves?” 
And we replied: “Yeah, you can do everything via the REST API. That’s fine. But then you also need to think about bidirectional information exchange. With REST API you can push and get stuff. But you need to develop all of this yourself. So you’re basically rebuilding Exalate.”

Factors To Consider When Buying an Integration Solution

When it comes to a cross-company integration solution, the following features become the most prominent ones to take into consideration:

Cost

Cost is the primary reason we’ve started the build-vs-buy debate in the first place. Factor in the systems you want to integrate, how many such systems, the pricing models of the solution you want to buy, and last but not least, one that shouldn’t burn a hole in your pocket.

Security 

How do you ensure the information you share with other companies or teams is not privy to being exposed? How do ensure the data exchanged is encrypted and free from cyber-attacks? 

integration security

Having a solution that is inherently secure by design helps solve these issues. 

Reliability

Systems go down – that’s a fact. You can imagine that your partner is upgrading their Jira.  How do you ensure that all the changes are synced in the same order as they happened? Having a solution support an integrated retry mechanism is important. 

Scalability

Adding a new integration partner or buying a new application that needs to be integrated is necessary for evolving business environments. A solution that can scale with minimal effort should be your top choice. 

Customizability

You often need to make customizations to accommodate changing integration requirements. In such a scenario, pre-defined integration templates don’t always work. 


For instance, say you have an incident to issue mapping where you have 150 projects on the Jira end, and new projects are added on the fly on the Jira side.  How do you implement an efficient dispatching capability that is easy to maintain?

A tool like Exalate provides you with an AI-powered scripting engine, which you can use to generate scripts and establish granular control over your integrations.

Decentralization

Integrations evolve, just like everything else. The question is, how do you deal with changing workflows in your specific use case when it evolves? Decentralized integration ensures that you get independent and granular control over your side of the integration. This can happen even without consulting the other side. 

Exalate: A Fully Customizable Integration Solution

Exalate meets all the above criteria and solves the most complex cross-company integration use cases, flexibly and adaptively. It is perfect for MSPs wanting to connect with their customers. 

It allows you to focus on optimizing processes within your company while seamlessly integrating with your external partners exactly where and when you need to integrate. It offers integrations between applications like Jira, Salesforce, ServiceNow, Zendesk, GitHub, etc. 

Exalate allows you to use the AI Assist feature available in the Script Mode to set up advanced integrations. This feature is integrated right into both your incoming and outgoing sync rules tabs as a chat window. The scripts are crafted based on your input, existing configurations, and Exalate’s scripting API.

Decentralized integration is an important feature, and currently, Exalate is the only integration software providing this functionality. You can learn how a distributed architecture helps scale your integration and makes it more secure in this whitepaper.

It has a Groovy-based Script mode along with a drag-and-drop visual interface to facilitate both business and technical users. It also provides a single-tenant architecture for utmost security. 

Let’s look at the time and cost savings with Exalate. 

A Time and Cost-Saving Analysis of Building a Custom Integration Vs. Using Exalate as a Third-party Integration Solution

Assuming a conservative estimate of 10% time savings for each employee working with integrated systems, and an average salary of $60,000 per employee, the potential cost savings for a team of 20 people could be calculated as follows:

Time savings per employee per year: 10% x 2,080 hours = 208 hours
Total time savings for the team: 208 hours x 20 employees = 4,160 hours
Cost savings from reduced labor hours: 4,160 hours x $30 per hour (assuming a fully loaded cost of labor) = $124,800 per year. 

Exalate can help reduce licensing fees for tools that are no longer needed due to integration. 

Assuming an average licensing fee of $50 per month per user, and a reduction of 10 licenses across different tools, the potential cost savings could be calculated as follows:

Licensing fees saved per year: 10 licenses x $50 per month x 12 months = $6,000 per year Combining the potential cost savings from time savings and reduced licensing fees, the total potential cost savings could be $130,800 per year.

Therefore, if the cost of purchasing an Exalate license is $3,100 per year, the ROI could be calculated as follows:


ROI = (Total Cost Savings – Cost of Exalate) / Cost of Exalate x 100%
ROI = ($130,800 – $3,100) / $3,100 x 100% = 4,118%

This means that for every $1 spent on Exalate, your company could potentially receive a return of $41.18 in cost savings and increased efficiency.

The Final Verdict: Build or Buy an Integration Solution? 

We’re almost at the end of our dilemma. I hope this blog has steered you in the right direction. If not, read on. 

Modern integration requirements are evolving and demanding. So we ask a few questions and choose the correct answer: Build or Buy software?

Integration QuestionsBuildBuy
Are you interested in rolling out the integration within a shorter time frame? ✔️
Do you have in-house resources ready to prioritize the development, maintenance, and customization of the integration? ✔️
Is your integration scope broad and complex spanning multiple departments, teams, and companies? For instance, orchestrating complex workflows across 3 different companies with inter-dependent fields and data mappings. ✔️
Are you an MSP or MSSP encountering higher integration requests from your partners or customers? ✔️
Do you want a cost-effective integration in the long run?✔️
Do you want your business to drive the integration and not the other way around? ✔️
Build vs. Buy Integration PDF

Recommended Reading:

Exploring the Working Principles of Service Desk Integration

service desk integration featured image

Technical support managers at companies and organizations use service desks to deliver IT support to customers. In some circumstances, an organization might have more than one service desk application, which means they need to find a way to integrate all of them.

That’s where service desk integration comes in. You need a system connecting multiple service desks to create a unified, coherent ecosystem for managing and monitoring all support services. 

In this article, I’ll discuss the bolts and nuts of service desk integration. Continue reading to learn the best tips and tools for integrating service desks.

ITSM vs. Service Desk: What’s the Difference?

A common misconception is that ITSM (IT service management) and service desk are interchangeable concepts. But the truth is that despite their similarities, some key factors differentiate both—I’ll show you how.

ITSM is a framework of practices and procedures governing the entire spectrum of IT services. It covers everything from detection to delivery, ensuring that the business requirements stay front of mind.

So how does ITSM differ from the service desk? A service desk is only one aspect of ITSM, which focuses on handling technical issues for customers. It serves as a portal where users file service requests and get timely assistance. 

That being said, the service desk has a smaller catchment area compared to the ITSM framework—a service desk is a sub-category of ITSM. While a service desk handles support services, ITSM focuses on managing the entire scope of service delivery.

What is Service Desk Integration?

Service desk integration is the process of unifying and consolidating data from two or more service desks in order to establish a seamless, coherent service ecosystem.

Here is a typical service desk integration scenario: 

The support team uses Zendesk to gather information about incidents reported by users, while the IT team uses Jira to raise tickets and analyze the efficiency of the support services they provide. 

In this scenario, the manager or admin has to integrate both Zendesk and Jira in order to streamline the efforts of both teams and ensure smooth collaboration.

The Different Types of Service Desk Integration

Every team can integrate a service desk to meet specific business requirements. Similar to ITSM integration, service desk integration occurs in various forms:

  • Data integration: Customer success managers can gather data from multiple service desks and put it into a central hub. This makes it easier for agents to find tickets, push them to resolution faster, and conduct accurate root-cause analyses.
  • Self-service portal integration: Integrating a self-service portal with your service desk increases the user’s autonomy to solve issues faster without having to wait for a service agent. 
  • System integration: Technical support managers can combine service desk systems internally or externally (with other organizations and MSPs) in order to streamline processes and improve the experience for employees and customers.
Integration as a Service

Benefits of Integrating Service Desks

There are many reasons why businesses choose to integrate their service desks. Here are just a few of the advantages:

To Centralize Support Services 

In companies where independent teams provide assistance to customers, integrating service desks will help centralize their efforts into a single hub in order to establish a central view. This makes it easier for agents to stay on the same page when assisting customers and tracking incidents.

To Improve Operational Efficiency 

Service desk integration lets companies automate processes such as ticket prioritization and routing through a central platform. This decreases the time needed for sorting and responding to incidents, which also improves the average response time.

To Foster Collaboration

As mentioned earlier, service desk integration gives agents and admins a central view. This makes collaboration easier since everybody has access to the same data sets and dashboards. As a result, managers and support agents from different teams can share information seamlessly, fostering a collaborative work environment.

To Improve the User Experience

Integrating service desks provides a better user experience for customers (end users) and employees alike. In the scenario mentioned earlier, employees will enjoy better access to real-time information, which will help them address incidents and change requests better.

Similarly, the improved employee experience trickles down to the end users. And how does this happen? When the agent has a better understanding of the incident as well as up-to-date information, they will be able to provide better, detailed assistance to the customer.

To Improve Data-Oriented Services

When it comes to analysis and reporting, integrating multiple service desks is the best approach. 

Centralizing your data makes it possible to unify everything into one portal, from which you can obtain updates, generate reports, and analyze performance. This will give you the insights needed to optimize operations in order to improve efficiency and customer satisfaction. 

One example where a service desk integration can improve data-related support is self-service. With a better consolidation of similar incidents and user requests, you can generate guidelines for implementing self-service portals. 

Service Desk Integration: Best Practices

For any service desk integration effort to succeed, there are some best practices you need to follow. Here are some tips to consider when integrating service desks internally or externally.

Always Work With a Plan

Before implementing service desk integration, the first port of call is to establish a strategy that aligns with your needs and prospects. You need a clear understanding of what you want to achieve with the integration and how it ties into your organizational requirements.

In addition, your integration plan must account for timelines, deliverables, milestones, responsibilities, and expectations. You also have to factor in the tools needed for gathering data and sharing updates.

Don’t Shy Away From Automation

Dread it, run from it, but automation is here to stay. You just have to embrace it as part of the service desk integration reality. 

Consider using automated integration solutions to reduce the bottlenecks in manual integrations. By thoroughly assessing your existing service desk processes, tools, and data, you can spot potential areas for improvement and project-relevant automation, such as chatbots and virtual assistants. You should also look for tools with AI-powered assistants and chatbots. 

One potential implementation of automation in the service desk integration landscape is in Exalate’s AI Assist. This feature relies on human prompts and AI-generated output to synchronize tickets and foster real-time interaction between the two independent systems.

Track Progress and Key Metrics

After integrating data from different service desks, you need to monitor key metrics to know when to make changes. This will determine whether the integration solution is the perfect fit for you.

Imagine integrating Zendesk with Jira Service Management using a third-party integration solution like Exalate or Zapier. 

You can use accurate reporting tools to monitor the progress and quality of the responses to incident requests. This will help boost the customer satisfaction (CSAT) score, reduce the resolution time, and clear your backlogs. 

Use Secure Integration Tools

I’ve already hinted at using integration tools to automate processes and improve reporting. But you should always prioritize security when choosing a service desk integration solution.

integration security

Why? Well, because you want to keep your customer data safe from unauthorized access. Besides, when integrating data with that of another company, you have to ensure that the tool you’re using grants you complete control from your end. This is possible when the service desk integration platform supports single tenancy.

Service Desk Integration Tools

When you want to integrate two or more service desks without compromising security and process efficiency, here are some tools to consider:

Zapier

Zapier is a workflow automation platform that allows users to connect multiple service desks, CRMs, ERPs, and applications in order to share data using Zaps. 

Zapier interface gif

When you create Zaps between two service desks, you can configure triggers to control what gets sent and when it leaves.

Workato

Workato is an enterprise automation solution that allows users to connect enterprise applications. You can configure connections using Workato recipes—a set of instructions that controls the automation of complex workflows.

Workato interface gif

With Workato, users can integrate service desks in order to get access to both simple and complex features—from detecting the tone of the ticket to creating bots using AI and machine learning.

Exalate

Exalate is an iPaaS solution that is perfect for bi-directionally syncing two service desk platforms. Supported platforms include Jira (Service Management), Zendesk, and ServiceNow. Other supported services include Salesforce, Azure DevOps, GitHub, and more.

Exalate for Service Desk integration

Exalate supports Basic and Script mode connections. The Basic mode supports simple configurations and field mappings. The Script mode comes with the AI Assist feature, which helps users generate custom scripts for advanced integration scenarios.

In terms of security, Exalate is a safe bet, thanks to its single-tenant architecture that gives every side of the integration independent control over their own instance. This means that only your admins can make changes to your side of the connection.

Exalate also syncs service desks between other systems and ServiceNow. You can also use it to connect Salesforce, GitHub, Azure DevOps, and several other platforms. 

Jitterbit

Jitterbit is an iPaaS solution that allows users to connect systems and build applications effortlessly. It works well for advanced IT teams looking to work with custom systems.

If you are looking for a low-code integration solution, Jitterbit Harmony is the answer. This platform allows you to automate workflows and streamline business processes across enterprise applications, legacy systems, and cloud services.

Microsoft Power Automate

Microsoft Power Automate is an integration solution that enables users to integrate service desks in order to share data and analyze incidents in real time. Thanks to its vast database of Actions and Flows, Power Automate allows users to automate workflows and improve service experience.

With Power Automate, you can access a vast library of pre-built connectors for connecting apps, service desks, CRM platforms, and ERPs. The AI Builder allows users to create intelligent automation and find insights using tailored AI models.

Key Takeaways

Service desk integration enables support agents to improve the quality of service they offer to customers. This, in turn, boosts customer and employee satisfaction. Integrating service desks also helps automate processes, gather actionable insights, and improve collaboration.

To get the best out of any service integration solution, you need to work with a coherent plan. You also need to consider security and AI-powered automation, as well as the reporting and analytical tools present.

If you’re considering service desk integration and have any questions or concerns, book a session to discuss them with an integration engineer.

FAQs

What is the purpose of a service desk?

A service desk allows companies to provide centralized support services to customers and employees. It can be used to manage and report incidents, improve self-service portals, enforce SLAs, and communicate with different parties involved in the service pipeline.

How do you implement a service desk?

To implement a service desk, you need a plan that covers everything from planning to reporting. Here are the steps to follow in order to implement a functional service desk.

  • Analyzing requirements
  • Design processes
  • Create a knowledge base
  • Choose a service desk software
  • Train service agents
  • Establish clear communication channels
  • Test within a limited group
  • Adopt the service desk
  • Monitor and optimize performance

What is service desk management?

Service desk management is the process of managing the core activities of a service desk. The management process usually involves creating plans, designing processes, training staff, allocating resources, monitoring performance, and reporting results.

What are the benefits of service desk integration?

Service desk integration allows managers to improve operational efficiency when working with multiplier service desk platforms. It also improves collaboration between support teams, especially for cross-company collaborations.

In addition, integrated service desks make it possible for companies to centralize and streamline all support processes. And most importantly, integrating service desks guarantees a better user and employee experience.

Recommended Reading: