This article was originally published on the Atlassian and Zendesk Communities
You can orchestrate workflows by using a third-party integration solution to sync multiple Zendesk tickets to a single work item in Jira.
Interdependent teams use these integrations to connect their workflows. For instance, your Support team can sync tickets with the Development team to account for a bug that affects multiple customers.
To find out how this will work in practice, we will create a sample use case using Exalate.

Connecting Multiple Tickets to 1 Work Item: Zendesk Jira Use Case
Every ticket the Support team receives in Zendesk automatically appears as a bug on the Jira side. Other tickets opened subsequently will also map automatically to the same Jira work item, and they will appear on the “On-Hold” queue while the development team works on earlier tickets.
Once the development team marks the corresponding Jira work item as “Done”, the Zendesk tickets will receive an automatic update and start appearing as “Open” for support agents to address.
Here are the primary requirements and potential challenges of this process:
Main Integration Requirements
When a support agent opens a ticket for a bug on the Zendesk side, it will appear on the Jira side as a work item.
When they open another ticket for the same bug with the same key, the ticket will be added to the already open Jira work item instead of opening a separate one.

To put this into effect, we will need to create synchronization rules to control the incoming and outgoing data that should be transferred on both sides.
You will also need to create rules to ensure the tickets are getting mapped correctly under the same work item, and ensure that changing the Jira status affects the ticket status on the Zendesk side.
Potential Challenges
The common problems you could encounter while working on this synchronization include:
- Network interruptions during the sync
- Triggers created with errors
- Groovy script errors, which might lead to incorrect mapping of fields
Why Use Exalate for Zendesk Jira Integration
Exalate is an integration solution that lets you synchronize workflows on independent platforms. This bidirectional synchronization tool works on Zendesk, ServiceNow, Jira, Jira Service Management, Salesforce, Azure DevOps Cloud, Azure DevOps Server, GitHub, Freshservice, Freshdesk, Asana, and other workflow management systems.
Benefits of Using Exalate
- Exalate comes with a Groovy scripting engine that allows you to write custom integration rules for any workflow.
- You can set up multiple triggers to automate the sync based on platform-native filters.
- You can connect interdependent teams (like Support and Development) to streamline their efforts toward solving user experience issues.
- Exalate improves workflow synchronization by reducing the time and effort required to configure syncs and handle tickets individually.
- You can set up multiple syncs simultaneously using the Bulk Operations feature.
- Aida, the AI-assisted configuration feature, helps generate and troubleshoot sync scripts using natural language prompts.
- Test Run functionality lets you test your sync scripts against real data before production deployment.
- Script versioning provides a full audit trail of changes with rollback capability.
How to Connect Multiple Zendesk Tickets to a Single Jira Work Item
Start by going to exalate.app and logging in or creating an account.
For this specific use case, you need to configure your connection using Script Mode. It requires some coding but allows you to customize your sync using the Groovy engine.
Step 1: Set Up the Connection
- Log in to exalate.app and navigate to your workspace (or create a new one).
- Click “+ Add Connections” and select “Create new connection”.
- Enter your Zendesk URL as System A. The validation check will occur automatically.
- Authenticate Zendesk using your API token.
- Enter your Jira URL as System B.
- Authenticate Jira using OAuth.
- Give your connection a name and description, then click “Next”.
- Review the details and click “Create connection”.
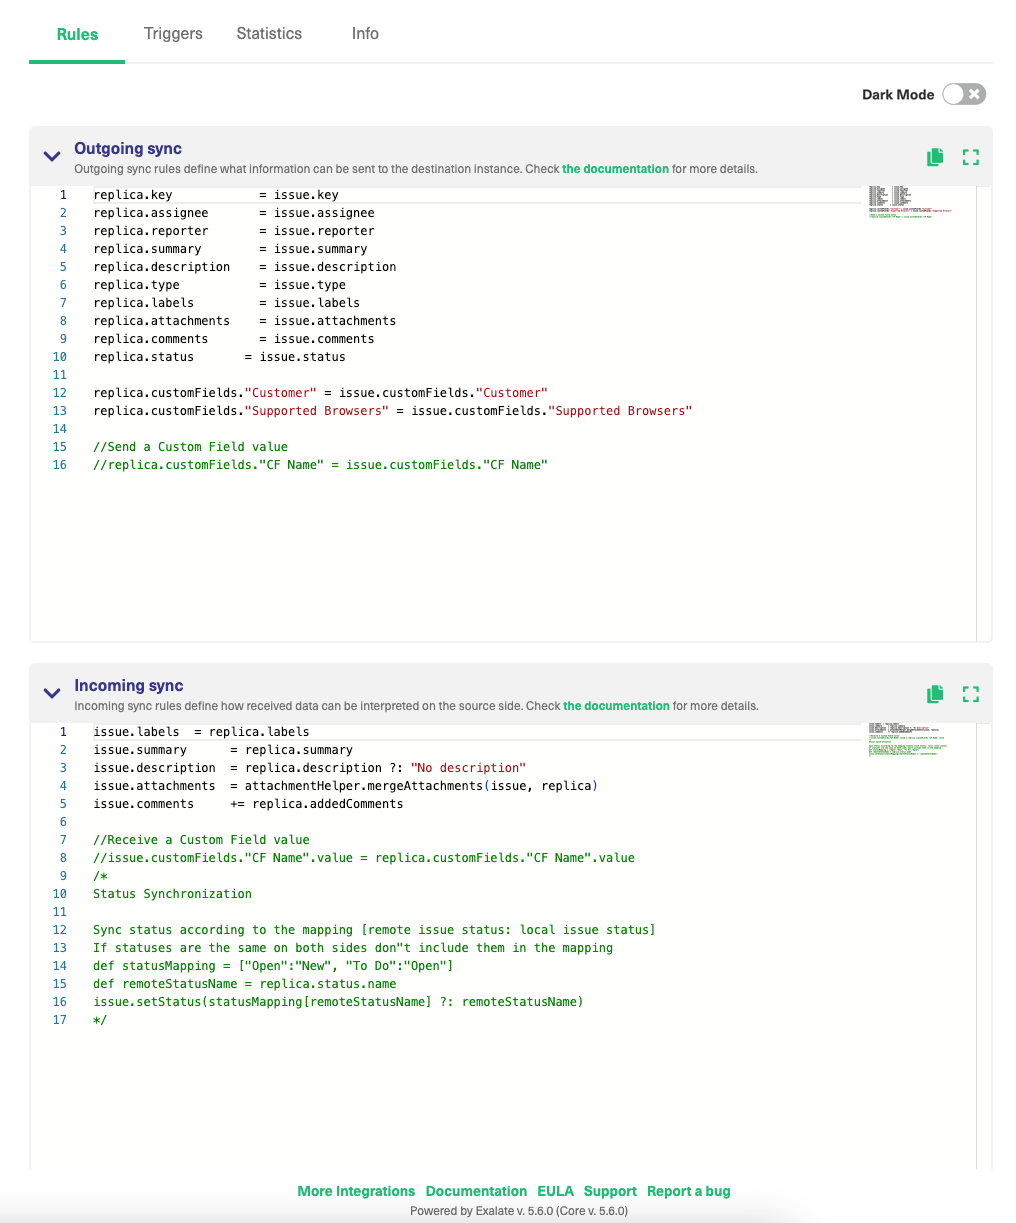
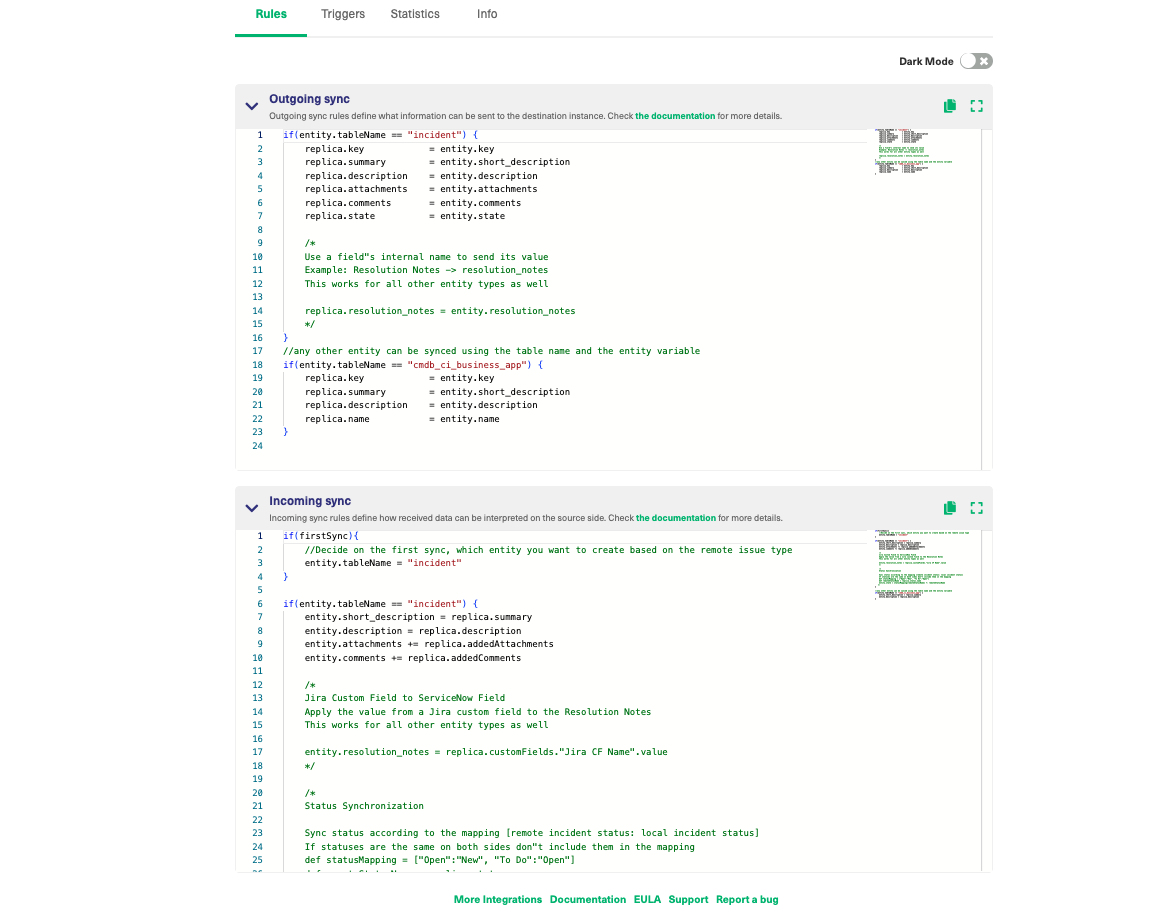
Step 2: Configure the Sync Rules
After setting up the connection, go to the editor to configure the settings. Pay attention to the following:
- Outgoing sync (on the Zendesk side) refers to the data to be sent to the Jira work item.
- Incoming sync (on the Jira side) refers to the data to be received from Zendesk tickets.
Go to the “Rules” on the Zendesk side and enter this line of code in the “Outgoing Sync” text area:
replica.customFields."Key" = issue.customFields."Key"
Note: The issue.customFields method is a field containing the unique key for the Zendesk ticket. The replica.customFields method contains the key value you want to pass to the Jira side.
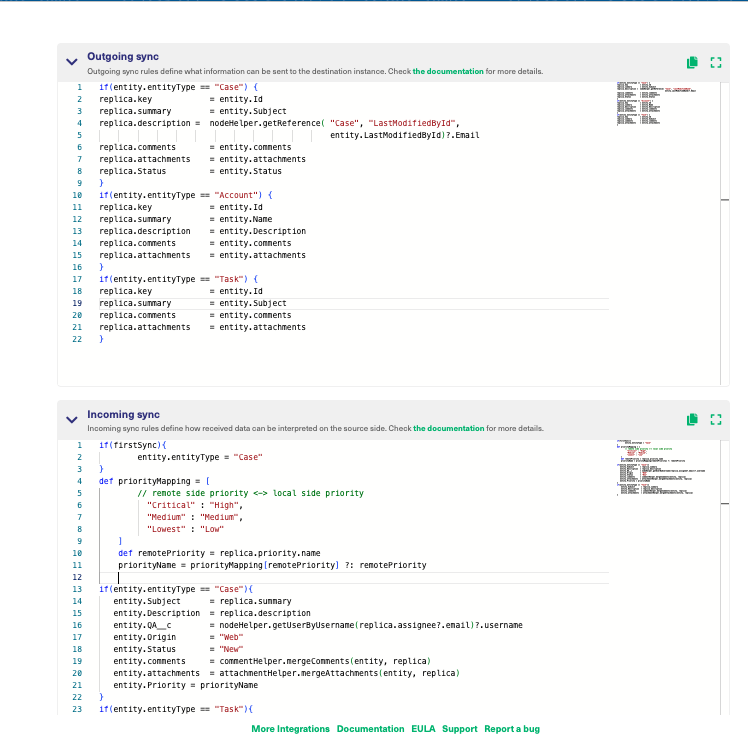
On the Jira side, you need to enter the following code into the “Incoming Sync” text area:
import com.atlassian.jira.component.ComponentAccessor

if(firstSync){

   issue.projectKey   = "SYEDR"

   issue.typeName     = "Bug"

   def remoteIssueUrn = replica.customFields."Key"?.value

   if (remoteIssueUrn){

        def issueManager = ComponentAccessor.issueManager

        def mainIssue = issueManager.getIssueByCurrentKey(remoteIssueUrn)

        issue.id = mainIssue.id

   }

    else{

        issue.summary = replica.summary

        issue.description  = replica.description

        syncHelper.syncBackAfterProcessing()

    }

}Code language: JavaScript (javascript)
The above code snippet reads the value of the given field (Key and typeName) on the Jira side and uses the ComponentAccessor to search for the local work item with a corresponding key.
Step 3: Test and Publish
Before publishing, use the Test Run feature to validate your sync scripts against real data without affecting production. This ensures your configuration works as expected before going live.
Click on “Publish” to validate the code and establish the connection.
Testing the Integration
Your connection is set. You can now start syncing multiple Zendesk tickets to 1 Jira work item.
Go to the Zendesk dashboard and click “Add Item” to start. Select “Ticket” from the dropdown menu.
Enter a subject and public reply. You can also change the brand, requester, assignee, tags, and form. Then click “Submit as New” to save the ticket.
Scroll to the bottom of the ticket and click on “Apply Macro”. Select “Exalate” from the dropdown menu. You will see an internal note showing that the ticket has been synced.
The work item key will also reflect automatically in the “Key” input field. Copy this key to your clipboard.
 Open
Open
Open a new ticket and paste the copied key into the “Key” input field. Click “Submit as On-Hold” to complete the process and save the ticket.
Repeat this process two more times to create a total of three tickets.
Now, go over to the Jira side and open the work item. Or you can click on the remote link from the Exalate tab on the Zendesk side.
New comments (“We are closing this soon”) added on the Zendesk side will reflect there, but not on the Jira side. However, comments added on the Jira side will appear on the Zendesk side instantly.
Why is the setting this way? Because the support team needs to share updates on the ticket, and the developers do not need to follow this communication.
But when a developer drops a comment on the Jira work item, the support staff needs to see the latest update in order to coordinate their response.
After that, go to the Jira work item and click “Selected for Development”. From the “Workflow” dropdown menu, select “Done” to mark the work item as completed.
On the Zendesk side, this message will appear as “IMPORTANT: The bug SYEDR-252 has been resolved”. The ticket status will also change from “On-Hold” to “Open”.
Click on “Submit as Open” to complete the process and save changes.
Common Use Cases for Multiple Tickets to Single Work Item Sync
This workflow pattern is useful for several scenarios:
- Bug Consolidation: When multiple customers report the same bug, all their tickets can link to a single Jira work item. The development team works on one fix while support tracks all affected customers.
- Feature Requests: Multiple tickets requesting the same feature can map to a single story or epic in Jira, giving product teams a clear picture of demand.
- Incident Management: During outages, multiple support tickets can connect to one incident work item, enabling coordinated response across teams.
Conclusion
With Exalate, you get access to a customizable third-party solution for syncing multiple Zendesk tickets to 1 Jira work item. You can also use Exalate’s Groovy scripting engine to edit the rules and set triggers for advanced customization options.
Features like Aida for AI-assisted scripting, Test Run for safe validation, and script versioning for audit trails make it easier to build and maintain complex integrations. If you still have questions or want to see how Exalate works for your specific use case, book a demo with one of our experts.
Recommended Reading:
- How to Sync Comment Threads and User Mentions in Comments between Jira and Salesforce
- How to Use Exalate to Synchronize Insight Objects
- Advanced Integration Use Cases
- How to Synchronize a ServiceNow Customer Case to a Jira Epic
- How to Sync Tempo Worklogs Between Two Jira Cloud Instances
- How to Sync Custom List Fields Bi-Directionally Between Jira and Zendesk


