The success of any help desk relies on its ability to connect with other systems to process customer concerns, including work items, incidents, and bugs.
When teams use both Freshdesk and Jira, consolidating data keeps every stakeholder informed. Whether through third-party tools, in-house solutions, or native connectors, a Freshdesk Jira integration becomes essential.
This article explores Jira Freshdesk integration using real-world use cases and practical implementation guidance. Is this the right integration for your organization? Keep reading.
Note: Jira now refers to issues as work items throughout this guide. You’ll see us use “work items” when referring to individual items and “work” when referring to all items collectively.

Key Takeaways
- Freshdesk Jira integration eliminates manual data transfer, keeps teams aligned, and improves customer satisfaction.
- Organizations choose automated integration to solve real problems like delayed bug fixes, lost feature requests, siloed teams, and frustrated customers.
- Exalate provides the flexibility, security, and control organizations need for sophisticated Freshdesk Jira integration scenarios, from simple template-based setups with Aida to advanced script-based customization while maintaining complete operational control.
- Security features such as encryption, role-based access control, and ISO certification protect sensitive data throughout the integration with cross-company scenarios, working without sharing credentials.
- Exalate scales to meet your requirements, whether you’re a small team connecting two systems or a large enterprise orchestrating integrations across dozens of platforms.
What Are Freshdesk and Jira?
Jira is a work management platform used in most IT companies to track bugs, work items, and projects. Jira helps teams manage development workflows, sprint planning, and bug tracking. Jira also includes Jira Service Management (JSM), a dedicated solution for tracking support tickets and managing IT service operations.
Freshdesk is a service desk (help desk) solution and ticketing system used by support teams to handle customer feedback, requests, and concerns. Freshdesk’s omnichannel support and advanced analytics dashboards are standout features that help teams deliver exceptional customer service.
Why Teams Use Both
Teams in different organizations might prefer one platform over the other because of internal culture or personal preferences. This is common in cross-company collaborations. Teams in the same organization might use different platforms because each has specific functionality they need—omnichannel support in Freshdesk versus agile project management in Jira.
Whether dealing with cross-company or intra-company collaborations, admins and managers must find a way to integrate Freshdesk with Jira.
Why Integrate Freshdesk with Jira?
Integrating Jira and Freshdesk delivers tangible benefits across support and development operations:
- Connecting both systems gives dependent teams a unified view of ongoing operations, open work, and trending customer concerns. Support teams see exactly what developers are working on, while engineering teams understand which customer issues are most critical.
- Help desk integration increases transparency, operational efficiency, ticket resolution metrics, and the speed of decision-making. Eliminating manual data entry frees teams to focus on solving problems instead of copying information between systems.
- Integration improves customer satisfaction scores by addressing actual pain points faster and predicting consumer trends more accurately. Customers receive timely updates as their tickets progress through different teams.
- Integrating Jira and Freshdesk breaks down silos by establishing clear communication channels between teams. Developers and support staff collaborate seamlessly without switching between disconnected tools.
- It reduces money spent on adopting new technologies by maximizing value from existing platforms. Integration platforms enhance security through advanced encryption, role-based access controls, and secure data transmission protocols.
- Track Freshdesk ticket progress across L1, L2, and L3 support tiers within your tool. Seamlessly connect internal Jira with outsourced support teams using Freshdesk.
- Transform customer tickets into actionable Jira work items automatically. Automate syncs to remove manual data transfer and improve efficiency.
- Link multiple related Freshdesk tickets to a single Jira work item for streamlined resolution. Generate reports on key metrics from resolution times to customer satisfaction.
Features to Consider When Choosing an Integration Solution
When evaluating Freshdesk Jira integration solutions, certain capabilities separate basic connectors from enterprise-grade tools:
- Real-time synchronization keeps teams instantly informed of changes, while scheduled sync works for less time-sensitive workflows.
- Bidirectional sync ensures updates flow both ways—when a developer updates a work item in Jira, support agents see the change in Freshdesk immediately.
- Selective synchronization lets you sync all tickets or just specific subsets based on conditions like only high-priority or specific labels.
- Standard and custom field mapping lets you map any field from Freshdesk to Jira and vice versa. Text formatting preservation maintains bold, italic, lists, links, and text colors across platforms.
- Attachment, inline image, and comment synchronization keep all context, not just basic data, with screenshots, logs, and documentation syncing automatically.
- Data encryption protects data both in transit and at rest, preventing unauthorized access even if network traffic is intercepted. Role-based access control grants permissions based on user roles, ensuring that not everyone has access to all synchronized data.
- Script-based customization uses scripting languages like Groovy for complex transformation logic. Platform-native filtering controls what syncs using each platform’s native capabilities.
- AI-assisted configuration generates sync rules through conversational prompts—describe your use case in plain language. Pre-configured templates start with common scenarios like “bug escalation” or “feature request tracking,” then customize to match your workflow.
What are the Freshdesk Jira integration Options?
You can go native, custom, or third-party when choosing integrations. But before choosing, learn what each option entails.
Native Integrations
Freshdesk comes with an out-of-the-box native integration for different apps: e-commerce integrations for Stripe and Shopify, integrations for messengers such as WhatsApp and Slack, as well as integrations for management apps such as Teams, Salesforce, and Zendesk.
The one for Jira is called Atlassian Jira Plus. This integration allows users to connect multiple Jira accounts to a Freshdesk account or multiple Jira work items to a Freshdesk ticket.
The integration also lets you assign roles and put restrictions in place to control the information going back and forth between both platforms.
You can map Freshdesk fields such as source, group, ticket number, email address, and custom fields.
Sounds like an excellent option. But there is one issue with native solutions.
Just like Atlassian Jira Plus, native solutions restrict you to template connections, which could be a dream scenario for simple use cases or a nightmare for complex use cases.
You don’t get the flexibility of scripting your own connection that works beyond the default settings.
Third-party Applications
Unlike native integrations, third-party apps allow bidirectional data exchange between CRMs, ERPs, and cloud solutions.
The biggest advantage of third-party integrations is that they can support connections with multiple platforms simultaneously. The solution can also scale with your system and adapt to increasing workloads.
And most importantly, it gives you the autonomy to set up your own scripts; this is a dream scenario for most organizations.
One third-party solution that supports bidirectional Jira Freshdesk integration is Exalate.
Exalate is an AI-powered integration tool that supports one-way and two-way custom connections between Jira and service desk platforms such as Freshdesk, Zendesk, and ServiceNow.
It also supports integrations with work management and sales platforms such as Salesforce, Azure DevOps, and GitHub.
Let’s look at the standout reasons why enterprises choose Exalate:
- It supports Groovy-based scripting mode for advanced integration scenarios. This feature improves the flexibility of the integration by allowing your engineers to explore intricate mapping possibilities.
It also comes with an AI chatbot called Aida to automate the process of generating scripts. - Exalate supports point-to-point integration as well as many-to-one and one-to-many connections, which is a valuable asset for companies connecting with multiple partners, vendors, MSPs, customers, or suppliers. This ensures your integration is never left behind as your business grows.
- It uses a single-tenant architecture to isolate your system (and data) from other companies. The system also uses JWT-based authentication, role-based access controls, and secure data encryption protocols.
- Exalate uses automated triggers to streamline the replication of tickets and other desired actions on either side of the connection.
- The IaaS option allows you to offload the integration and configuration hassle to experienced engineers.
- Exalate also scales according to the ticket volume or the number of work items without needing additional maintenance or upgrades.

Calculate time and money savings from automated bidirectional sync.
How to Implement Freshdesk Jira Integration Using Exalate
Getting Started with Exalate
Navigate to the Exalate integrations page to begin. Set up a new account by providing your email address and completing verification, or use your Google account for quick signup.
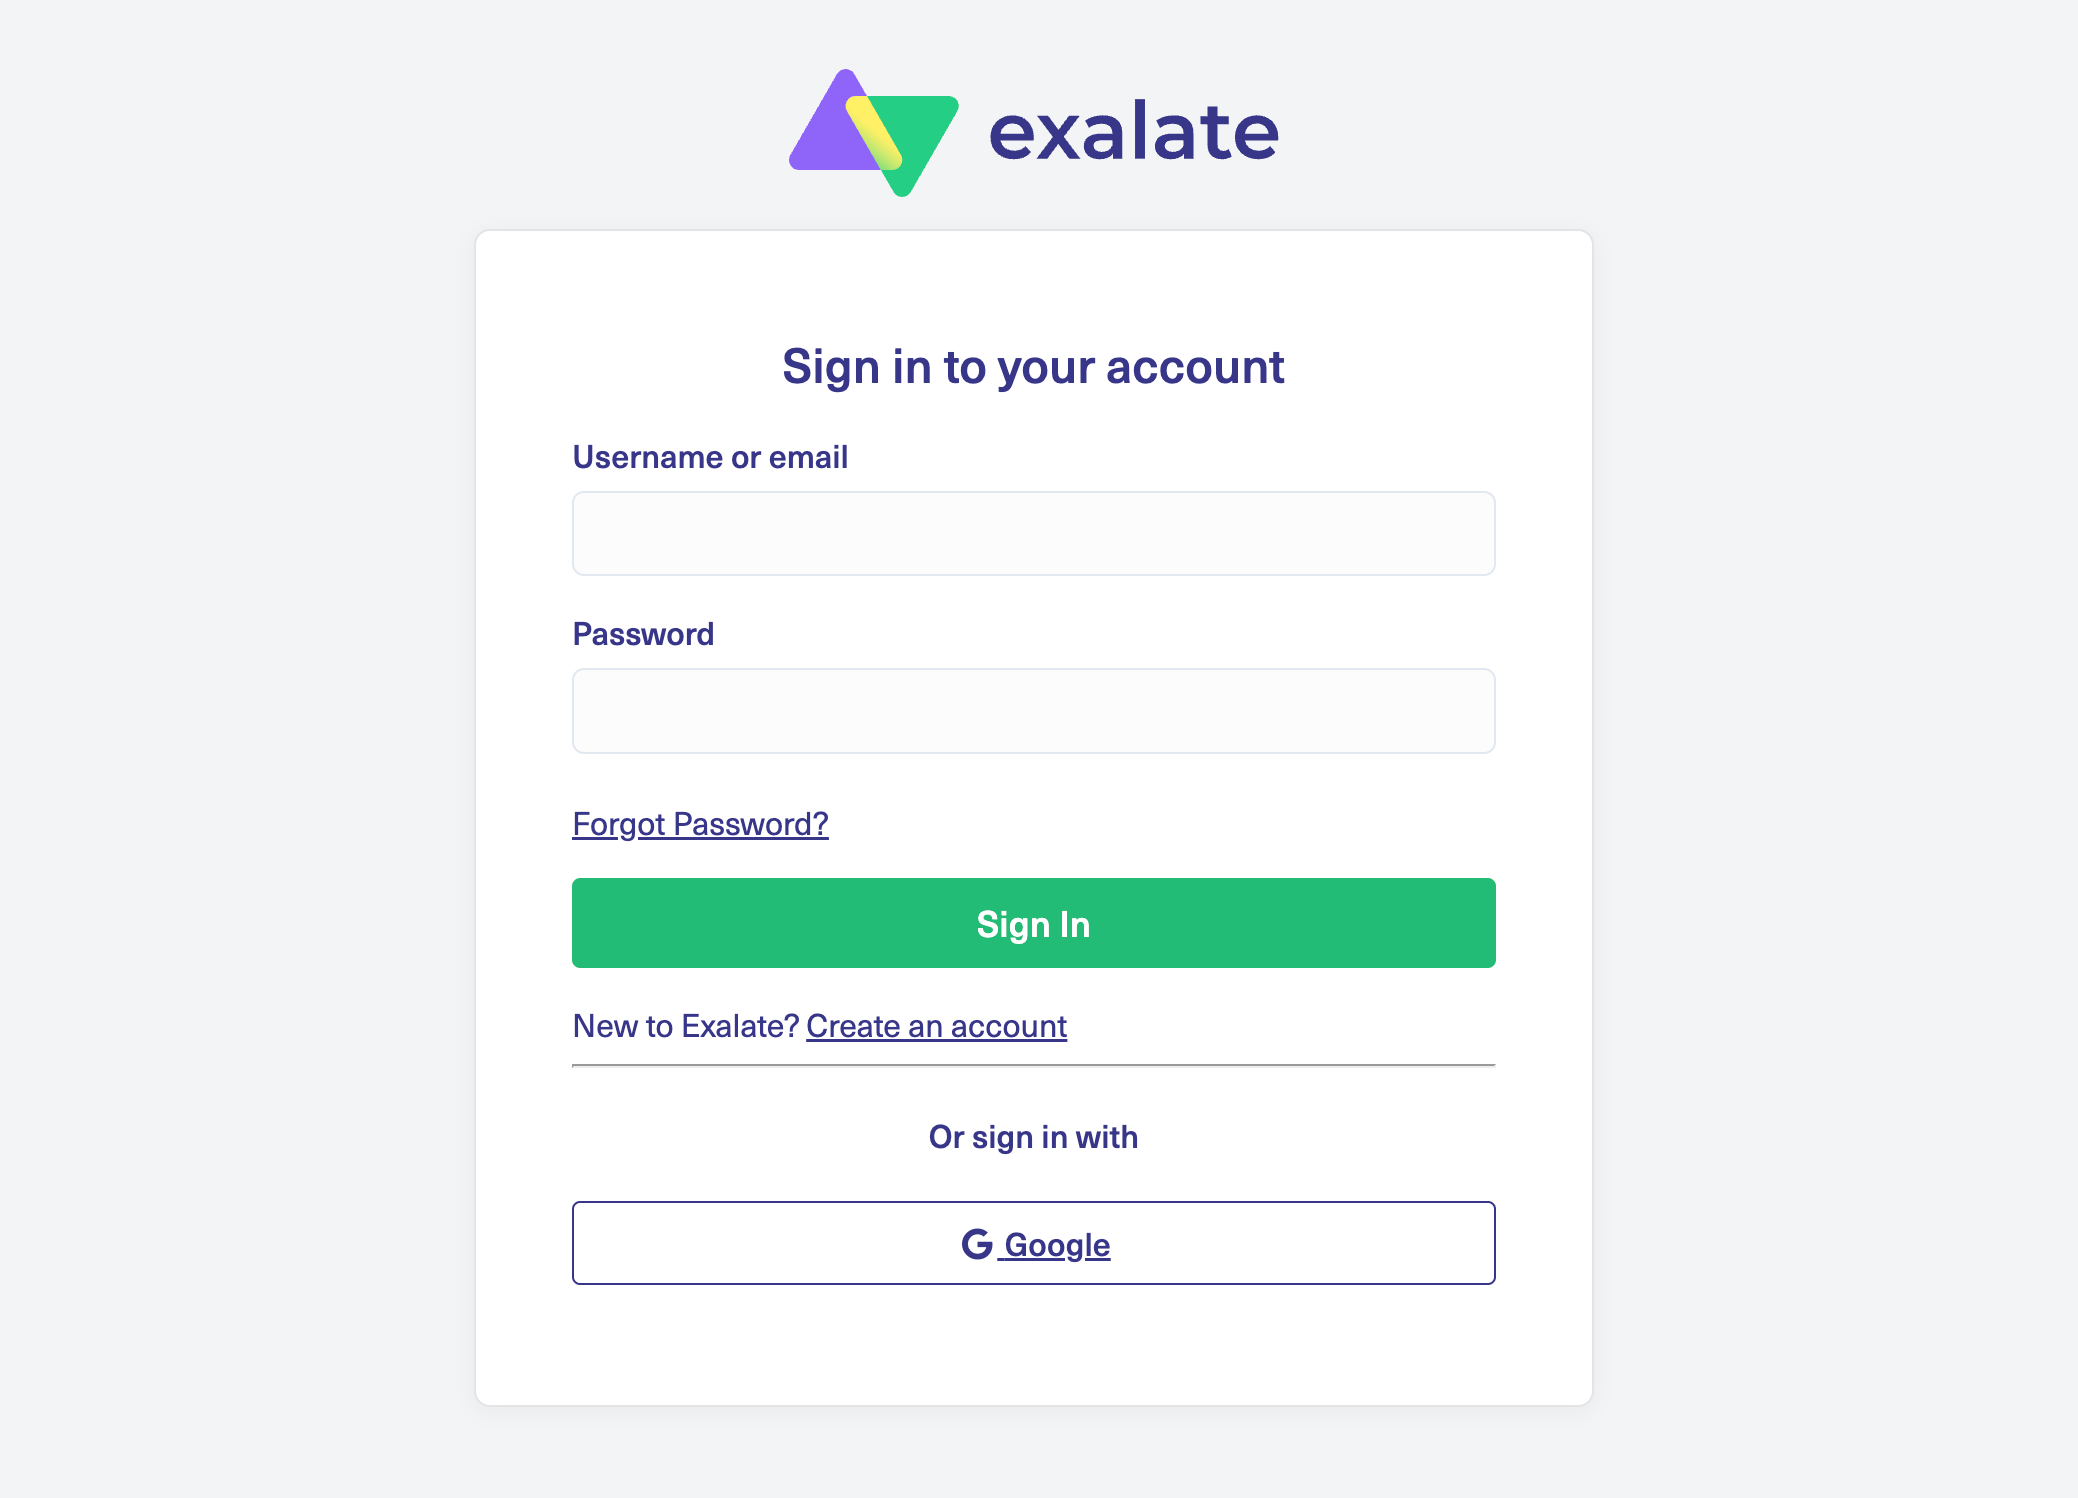
Already registered? Simply log in to reach your dashboard.
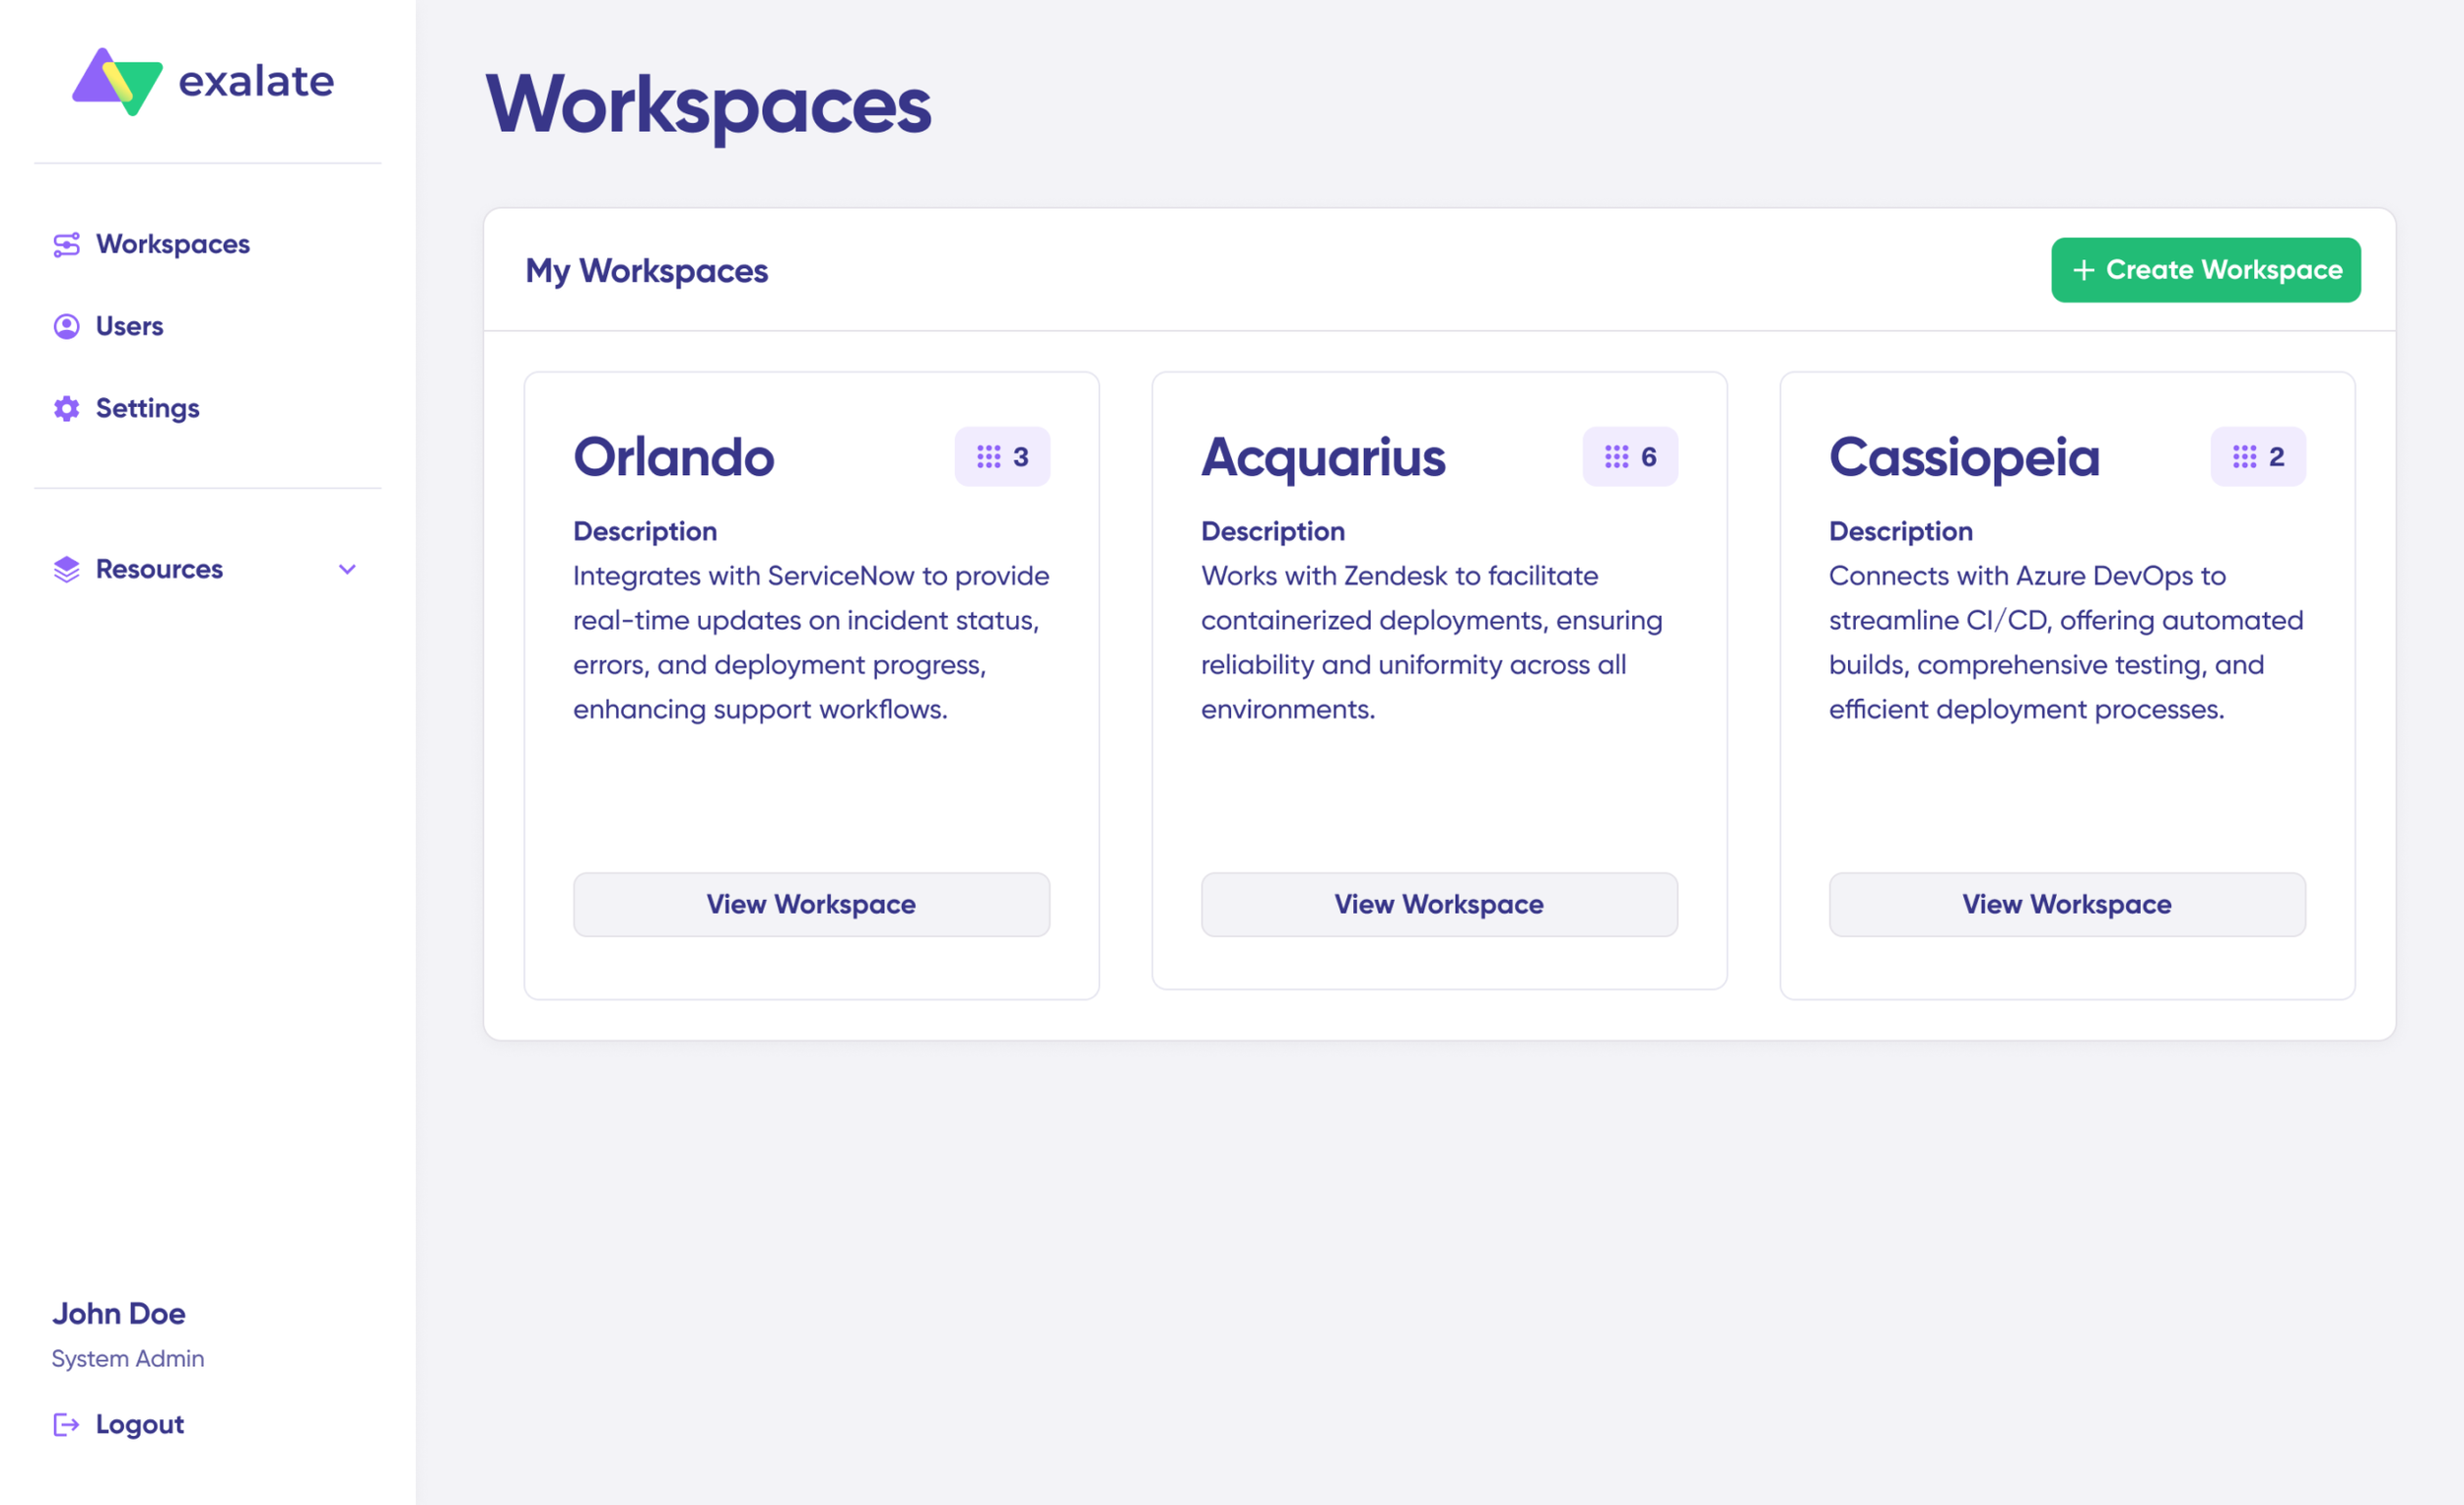
Setting Up Your Workspace
Your workspace serves as the central hub for managing integrations and connections. Access all existing workspaces through the “Workspaces” tab.
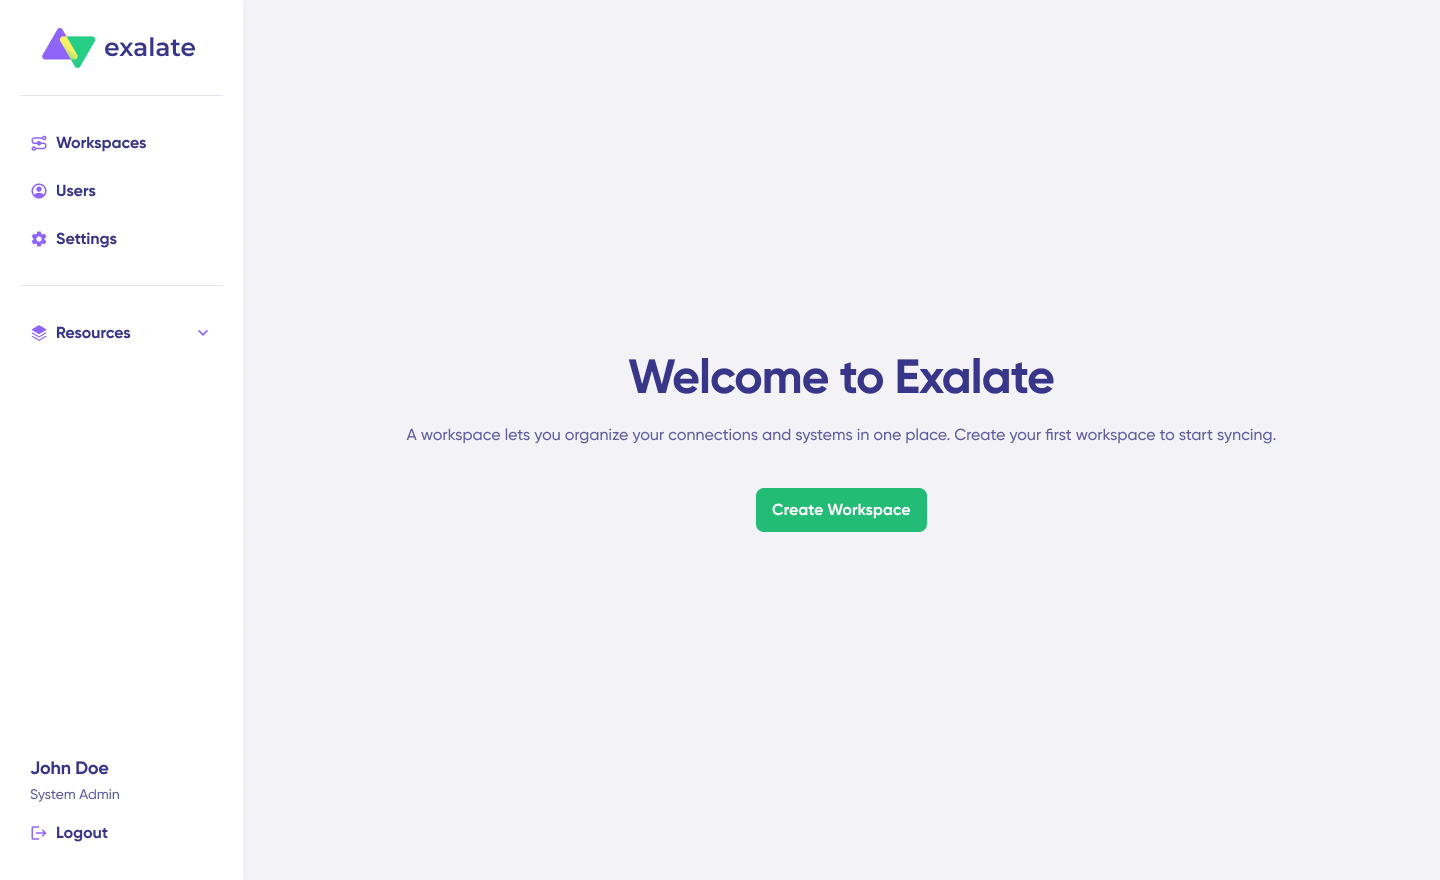
To establish a new workspace, select the “+ Create Workspace” button. Provide a workspace name and description, then click “Create workspace.”
Establishing Your Connection
Before creating a connection, ensure you have an active Exalate account with at least one workspace and login credentials for both systems you’re connecting (System A [Jira] and System B [Freshdesk]).
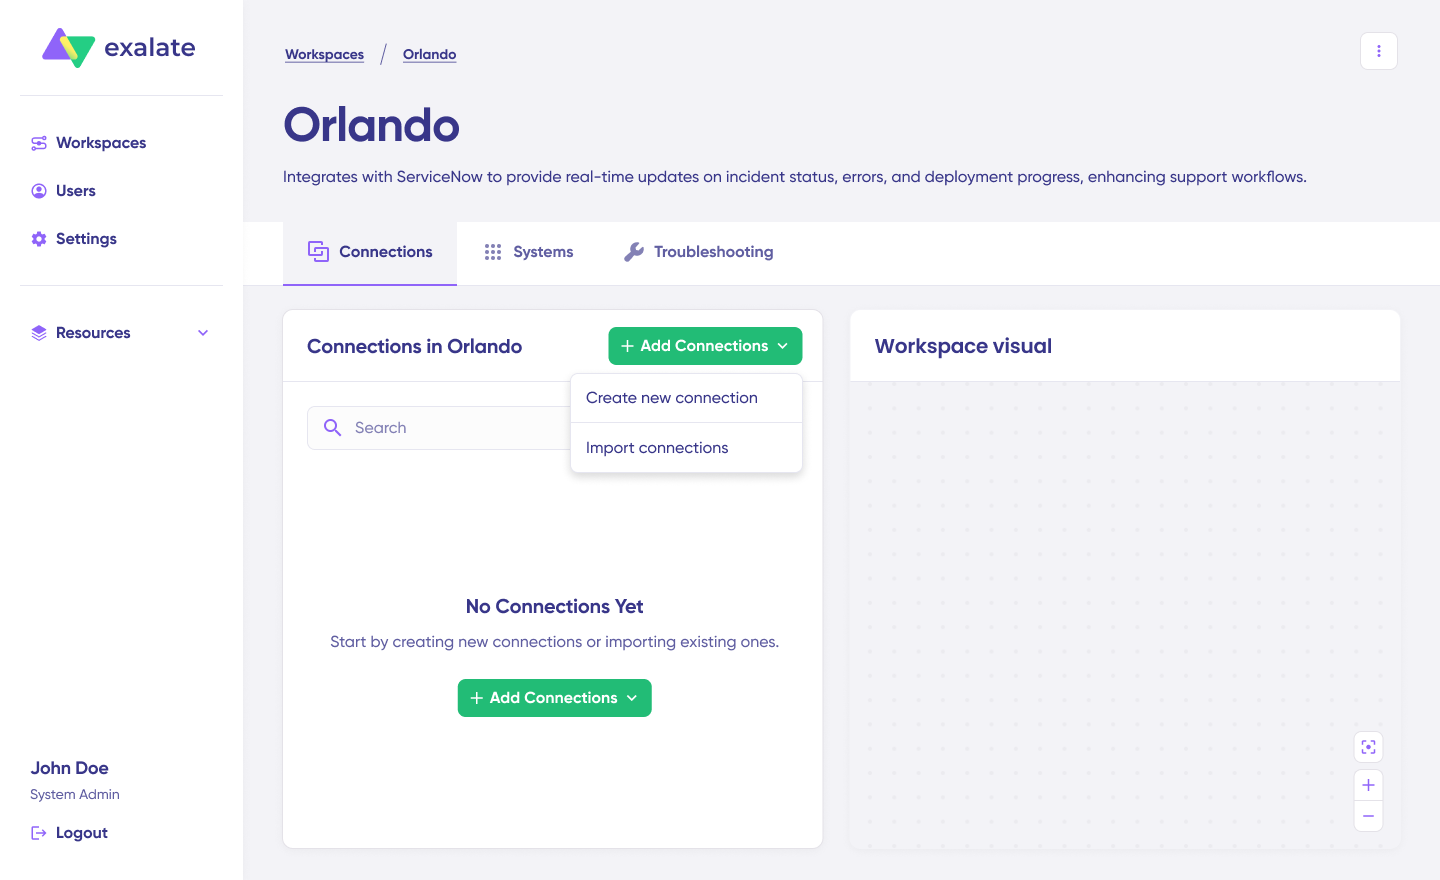
Select “+ Add connections” > “Create new connection“. Provide a name for your first system and input its URL (Jira instance).
The system automatically performs authentication checks and verification. Systems from different workspaces will be registered for your current workspace.
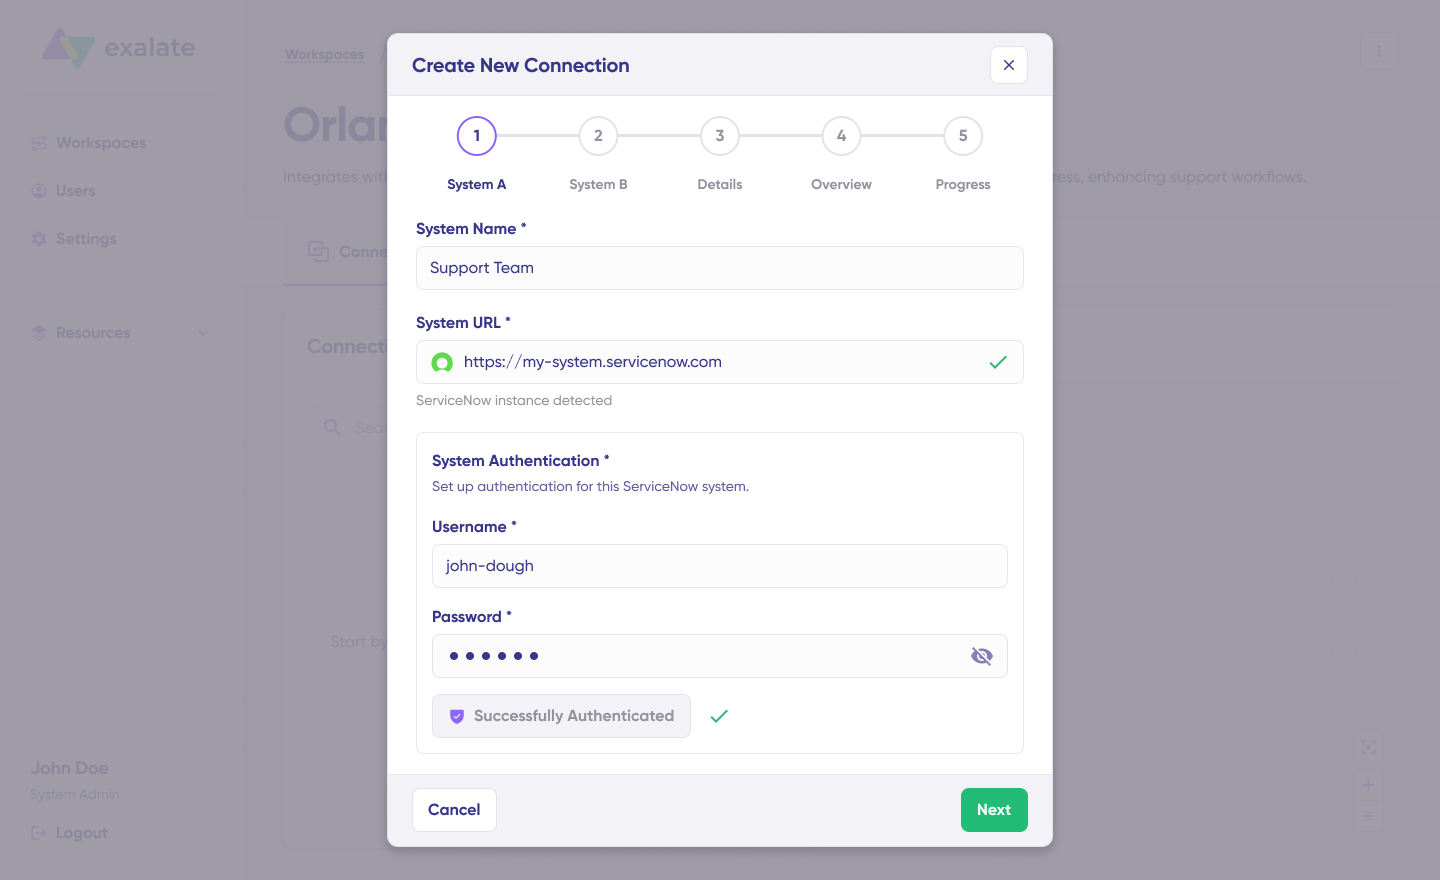
Enter your authentication details—for Jira, this includes your username and API key or Basic Auth. Click “Check Authentication” to verify the connection.
Click Next to set up System B (Freshdesk). Repeat the authentication process for your second Jira instance.
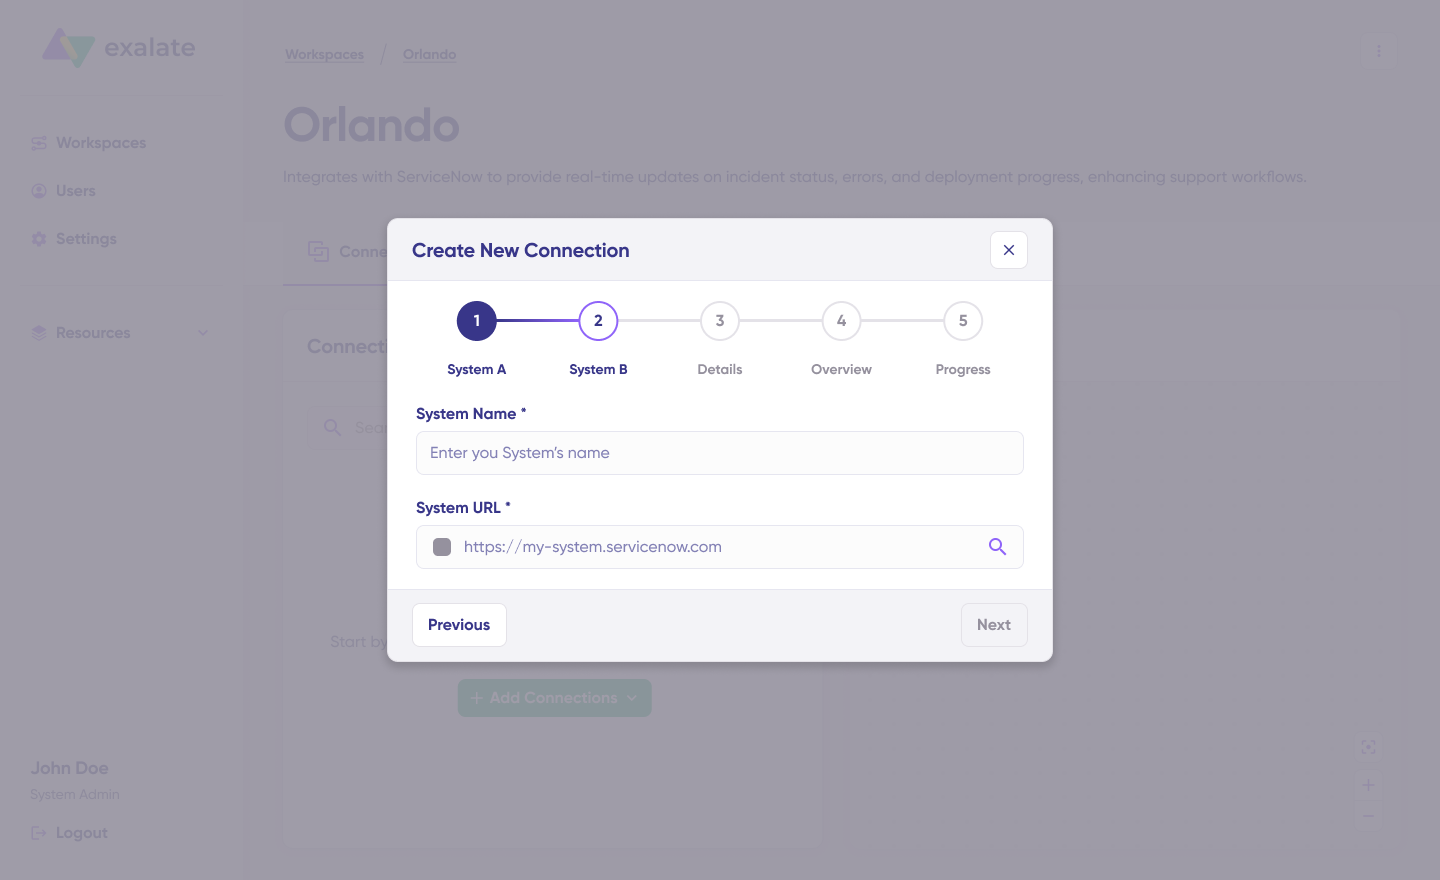
Verify the Connection Name and add an optional description. Review your connection configuration and click “Create Connection“. Allow a few minutes for background configuration and checks to complete.
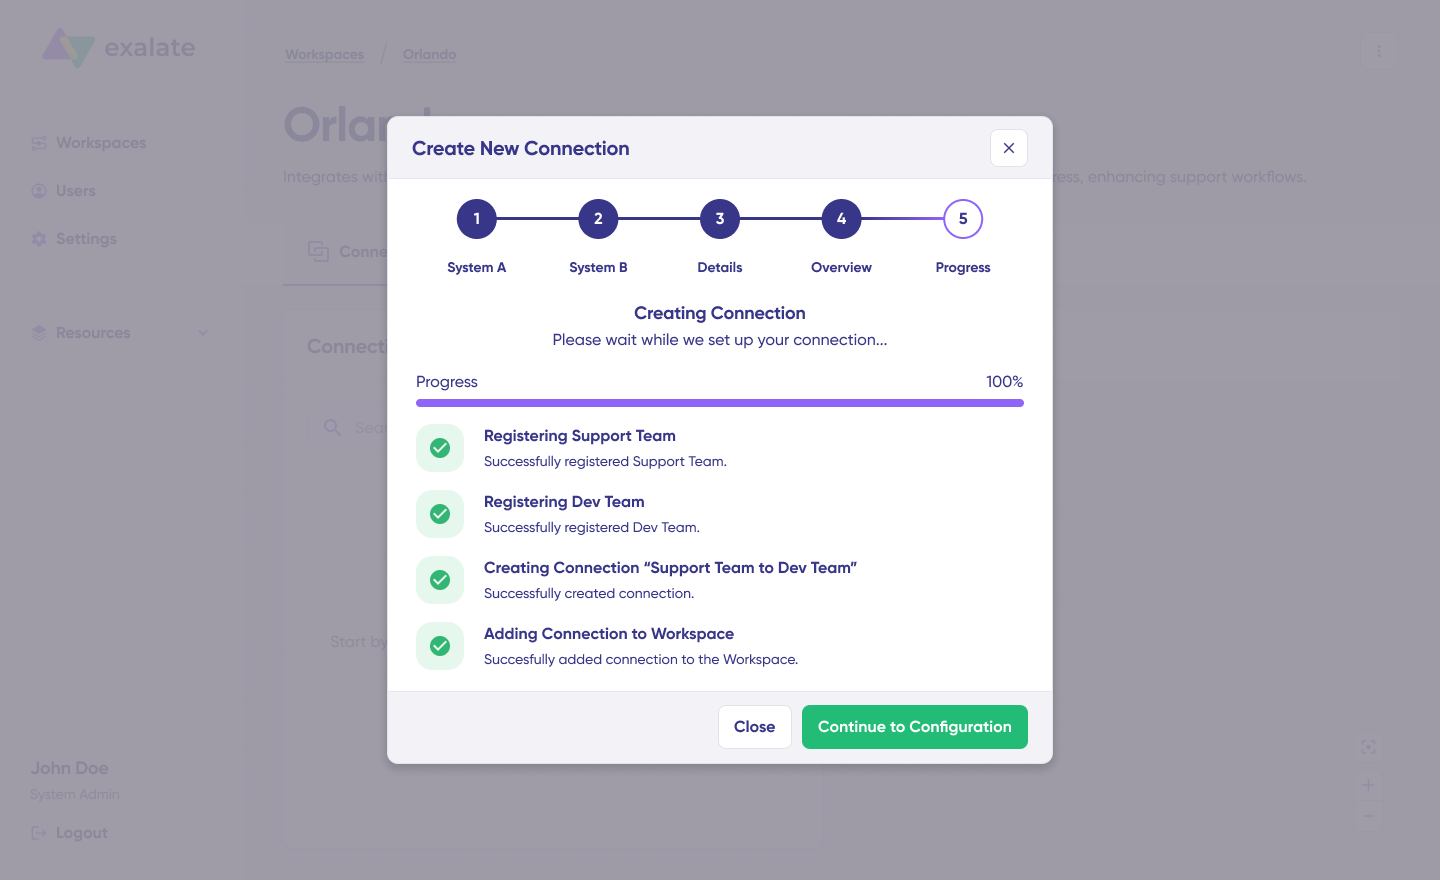
When finished, click “Continue to Configuration“. Your first connection is now successfully established in your workspace.
Configuring Your Sync
Select the project you want to synchronize from the dropdown menu on both sides. Click “Build and Continue“.
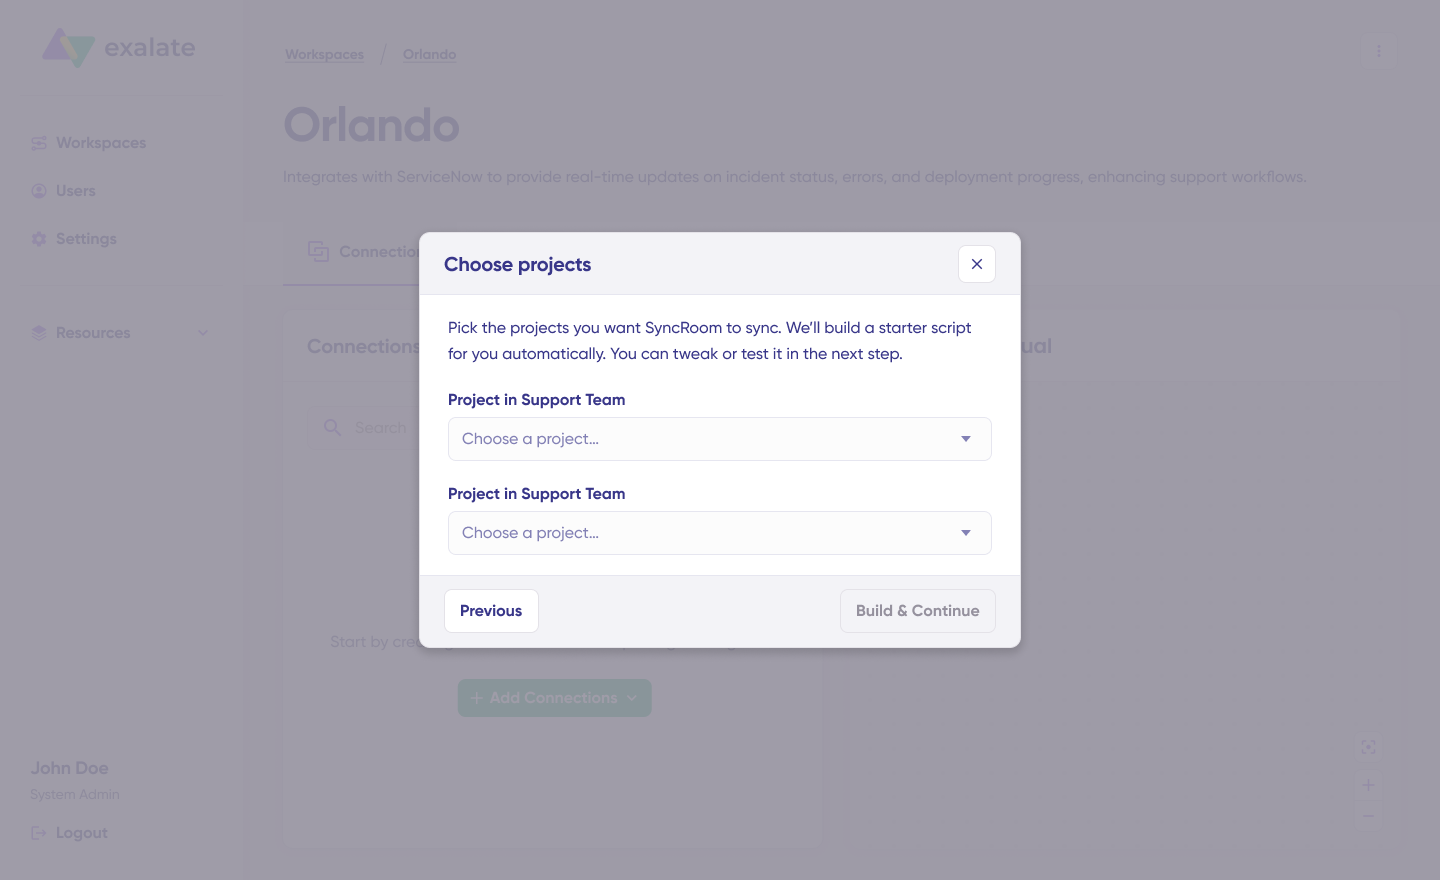
You’ll see two configuration options: “Quick sync” and “Edit & Test“. Here’s how each works:
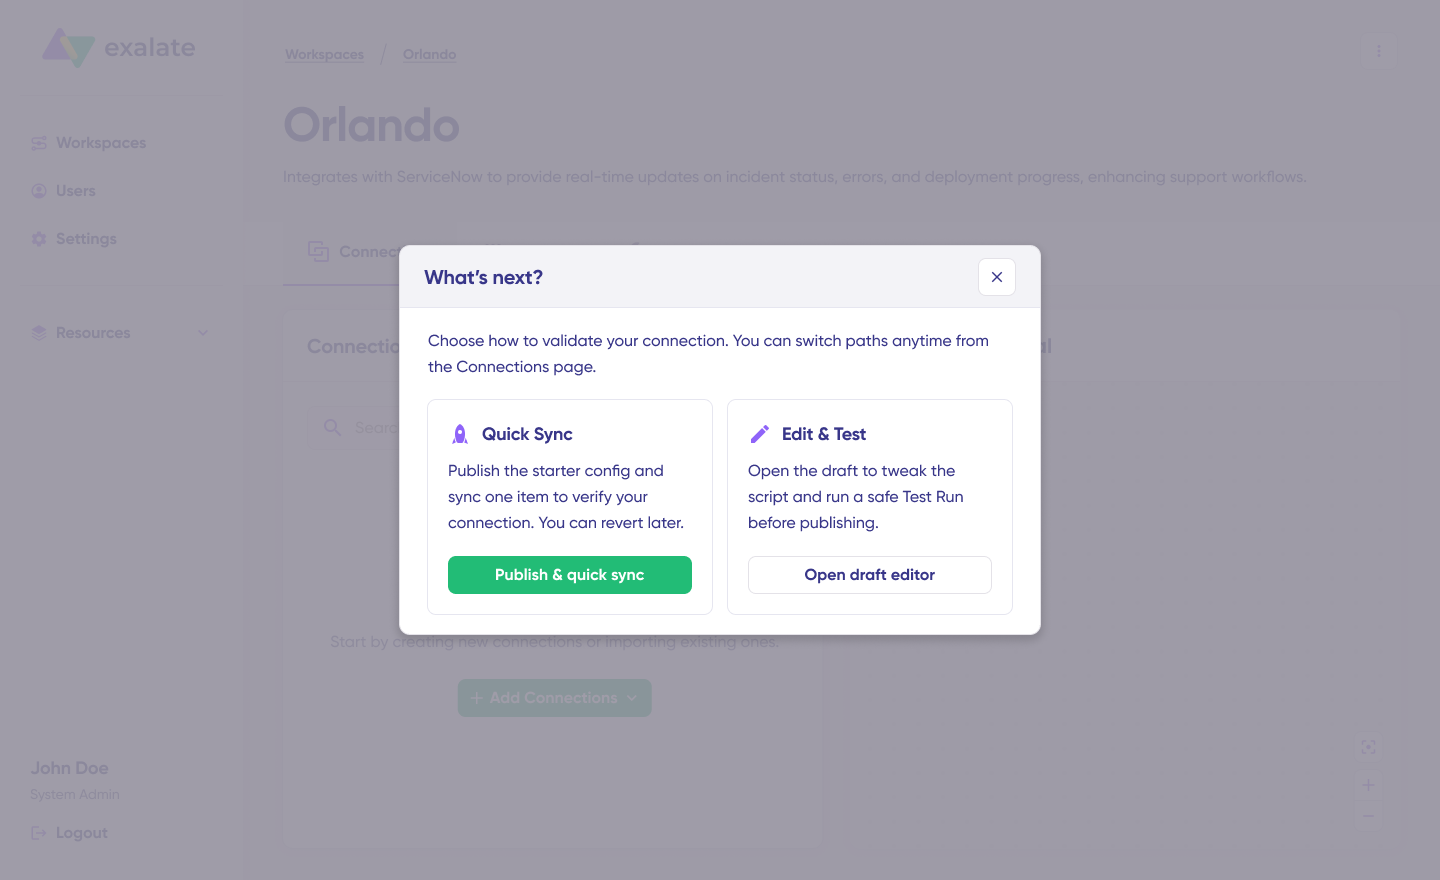
Quick Sync Option
This feature enables you to sync a single item between Jira instances. In the “Item sync monitor,” input the work item key and click “Sync Now“.
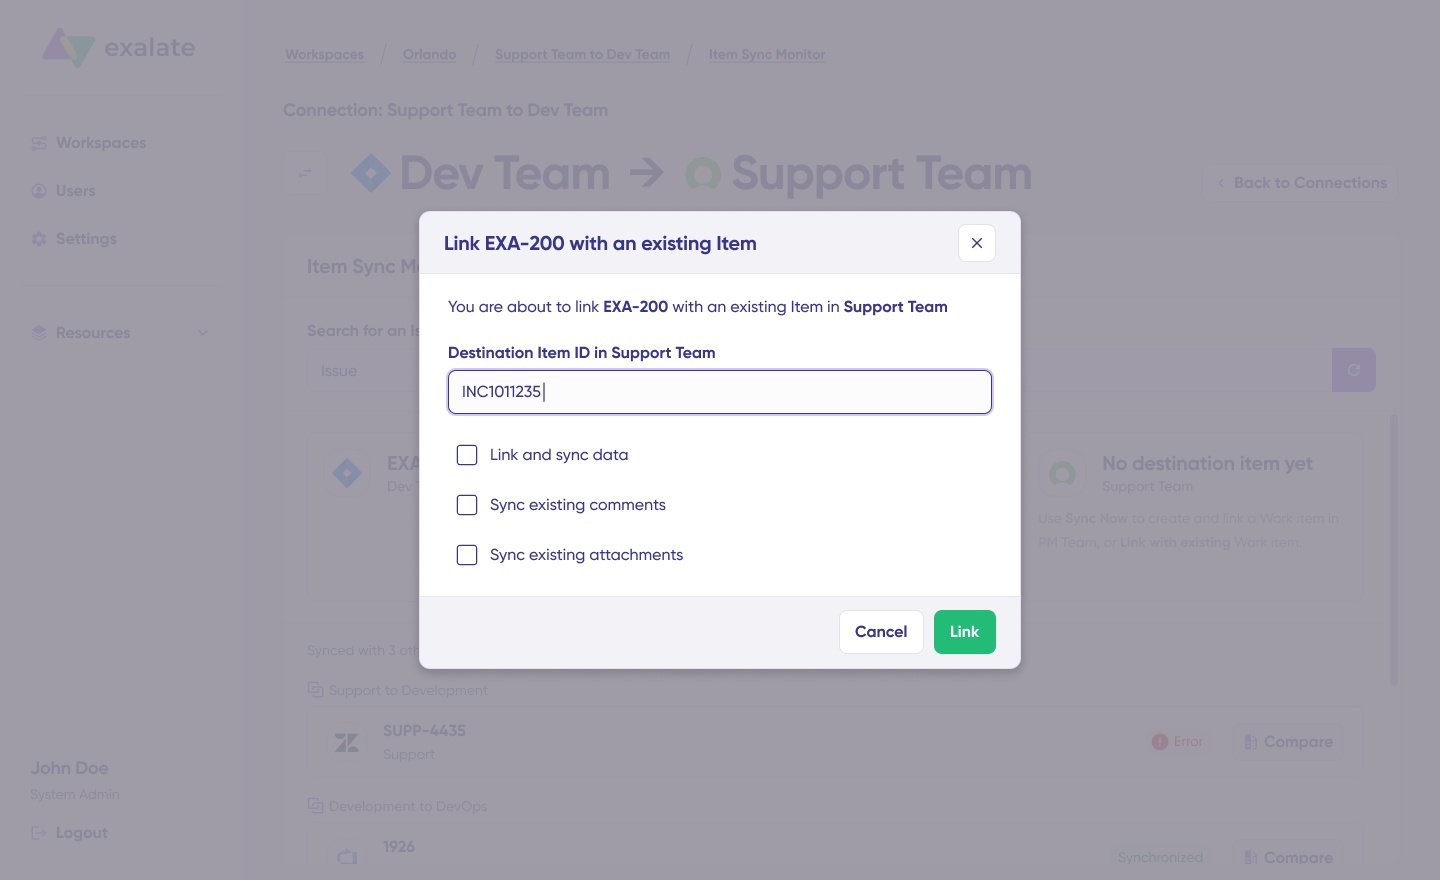
To connect two existing items, click “Link with existing“. After synchronization completes, view both the ticket and work item in a new window and compare the changes if needed.
Edit & Test Option
Access the draft editor by clicking “Create a new version” or selecting “Open latest draft”. This prevents accidental modifications to your live configuration.

Once active, click the “Edit” button to access the editor and modify sync rules using Groovy-based scripts. These scripts allow you to implement custom data logic and field mapping for advanced workflows and complex use cases.
Switch sync direction by clicking the two arrows beside the connection name.
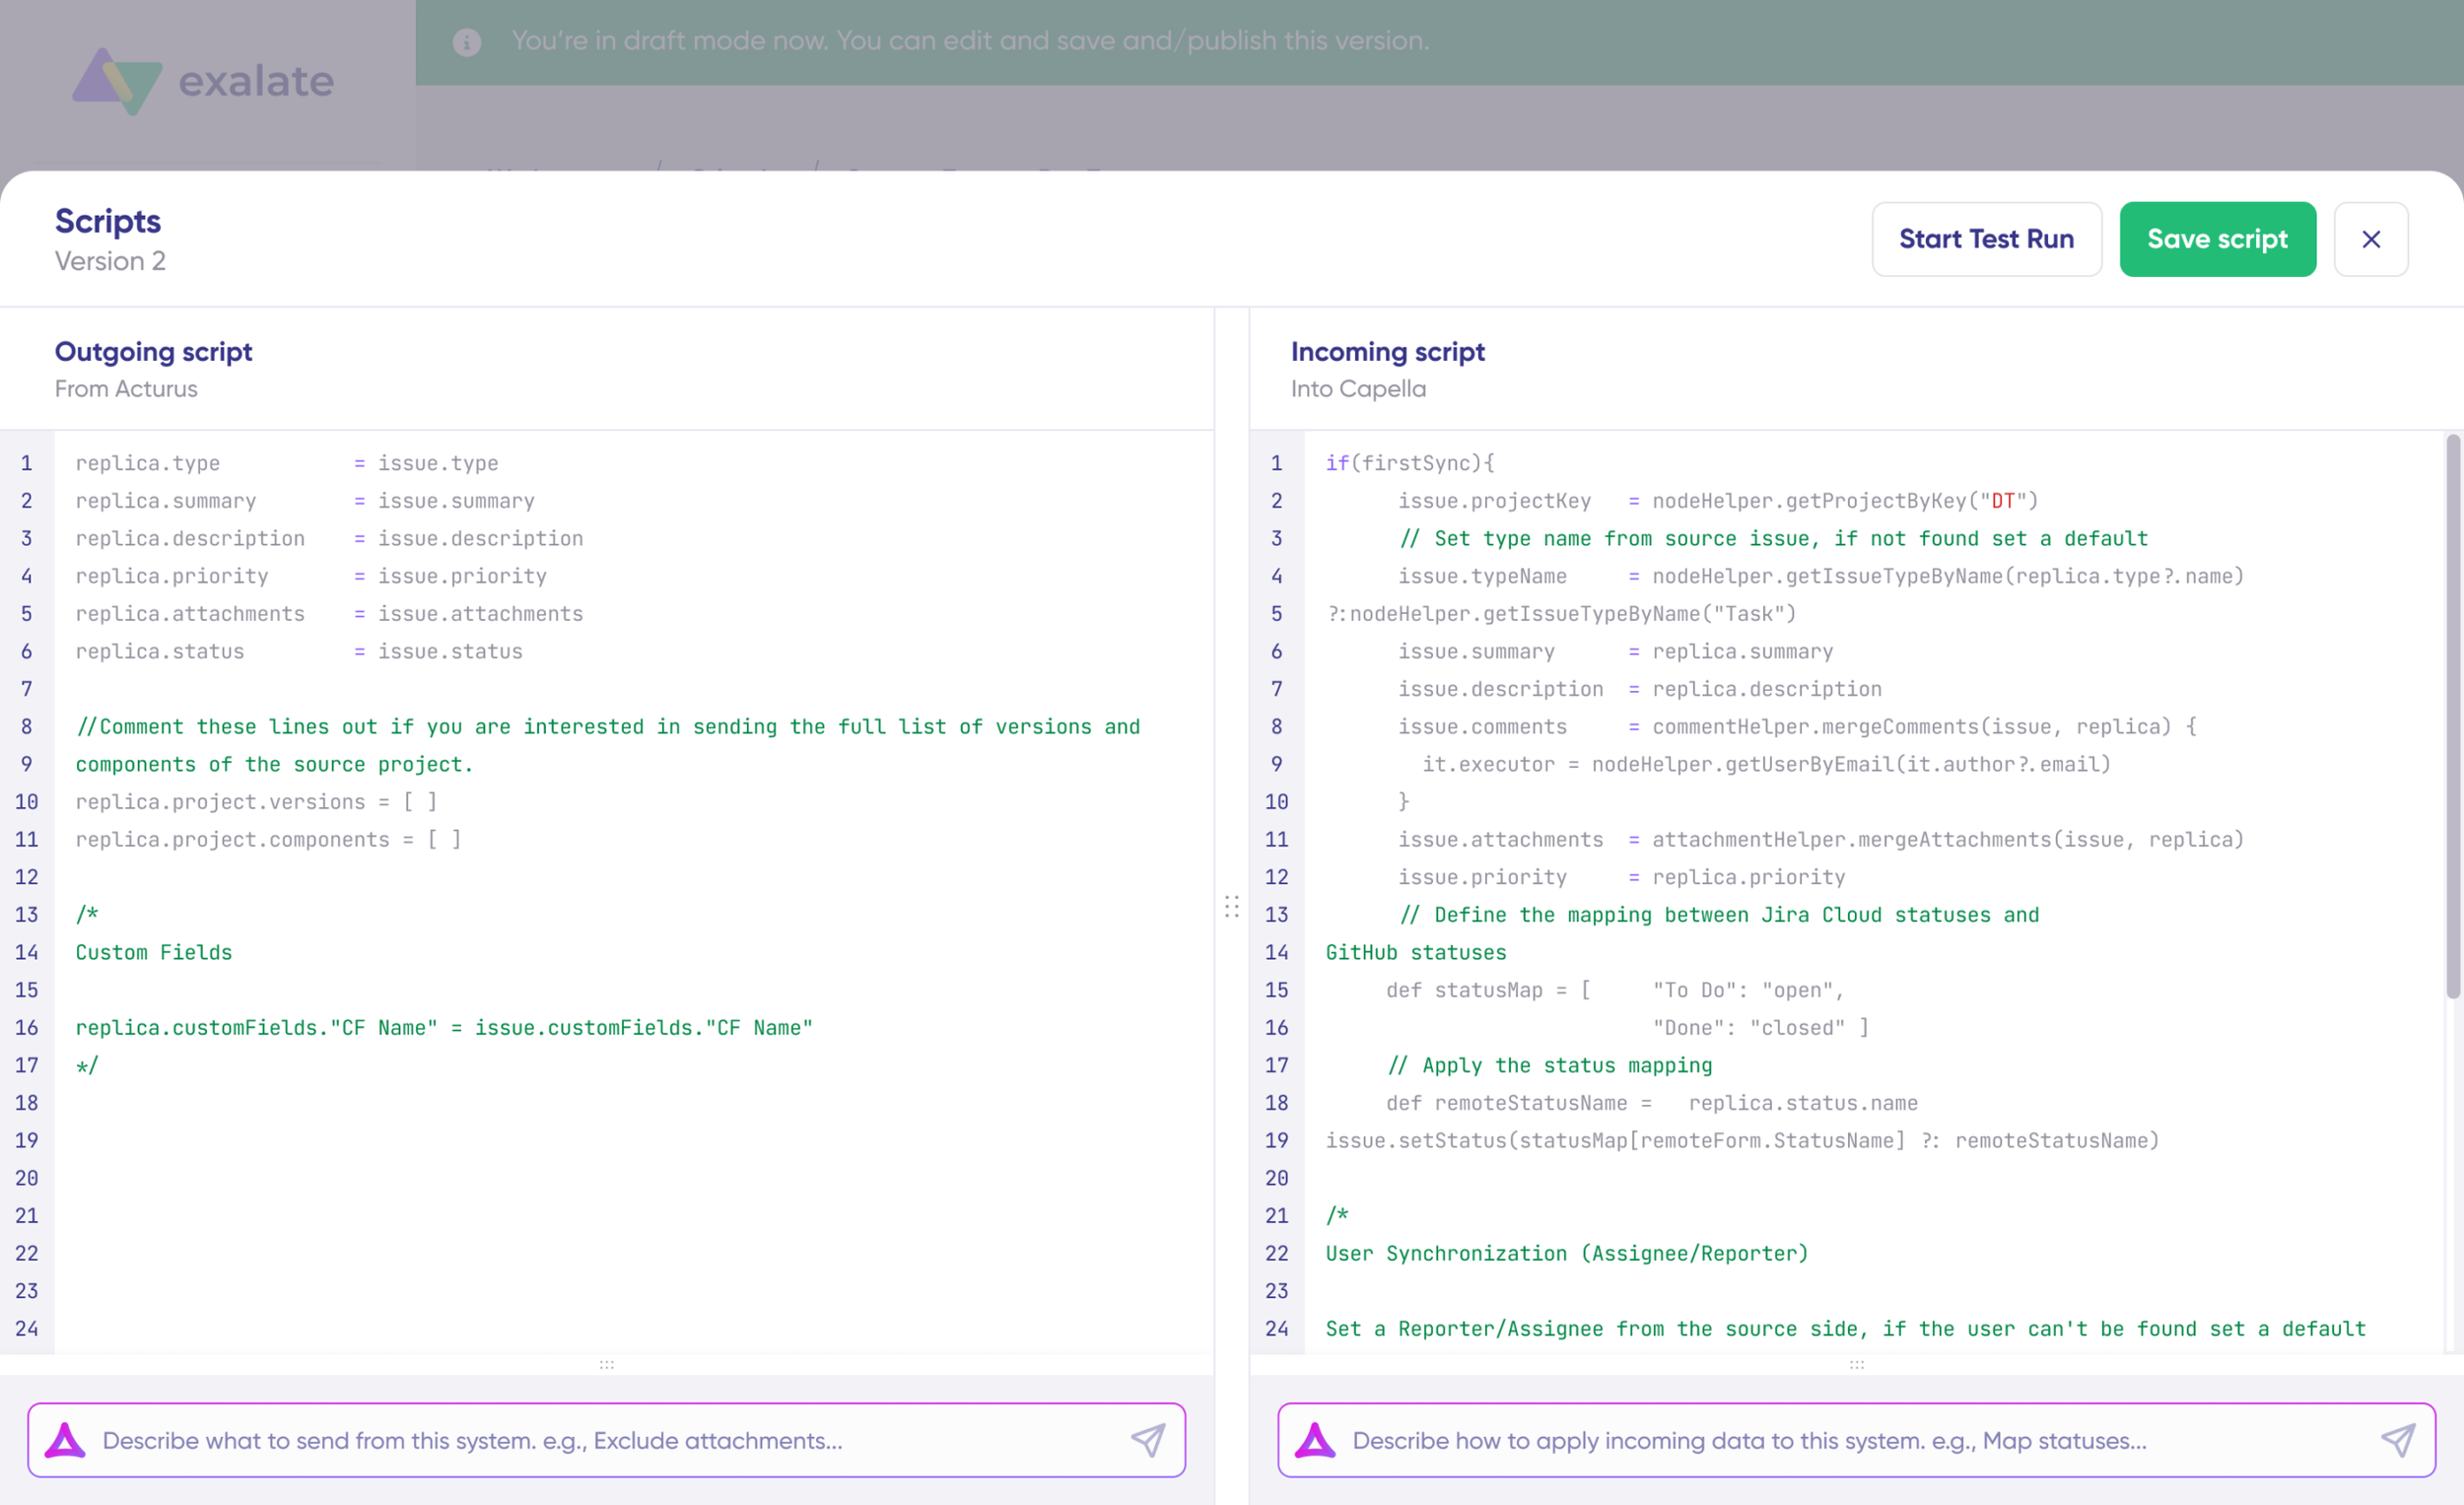
The outgoing script defines values passing from Jira to Freshdesk, while the incoming sync determines how values from Freshdesk map to Jira.
The Replica is a JSON file containing the payload with data shared between entities on both Jira instances. You can modify sync scripts if you’re familiar with Groovy, or leverage Aida, our integrated AI assistant.
Using Aida for Script Generation
Aida generates sync scripts and appears in both incoming and outgoing script sections—select the appropriate side for your needs.
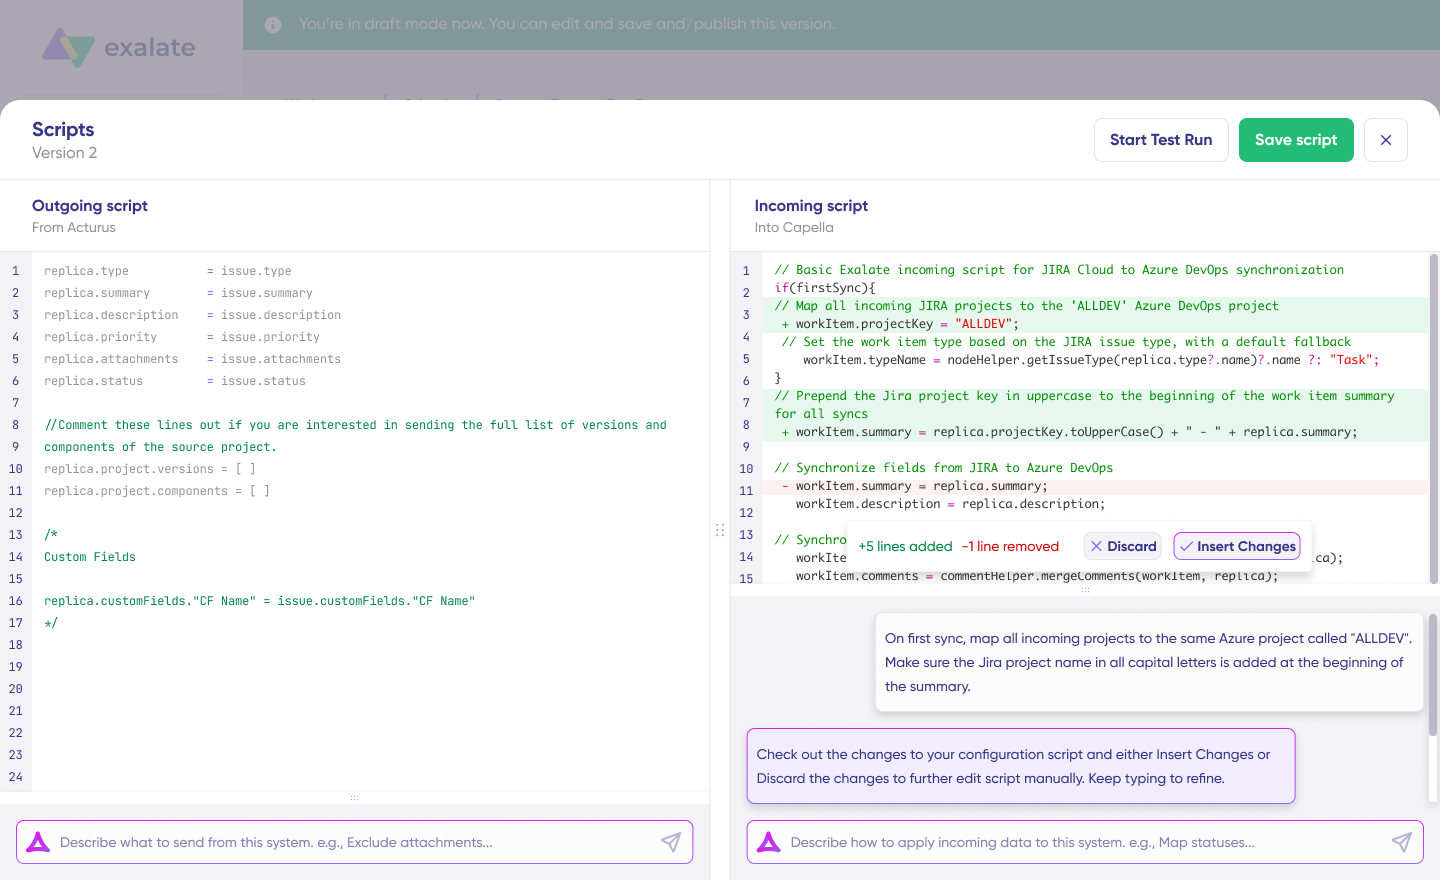
For Outgoing scripts: Specify what data should exit your system, such as “Only sync custom fields.“
For Incoming scripts: Define how incoming data applies to your system, like “Map priorities between tickets and tasks.“
Aida generates scripts based on Exalate’s scripting API and your current scripts.
Review the generated output to validate suggested modifications. New additions appear in green highlighting, while recommended deletions are shown in red. Choose to “Insert” or “Discard” each suggestion.
Note: As with any AI tool, always review generated code before implementation.
Testing and Publishing
Once your sync scripts are ready, you can “Save script” or perform a dry run before publishing.

Click “Start Test Run” and “Select items” to sync. You can choose multiple work items. After a brief wait, view detailed results showing synced fields and the payload exchanged between instances or systems. If results meet your expectations, click “Publish Version“.
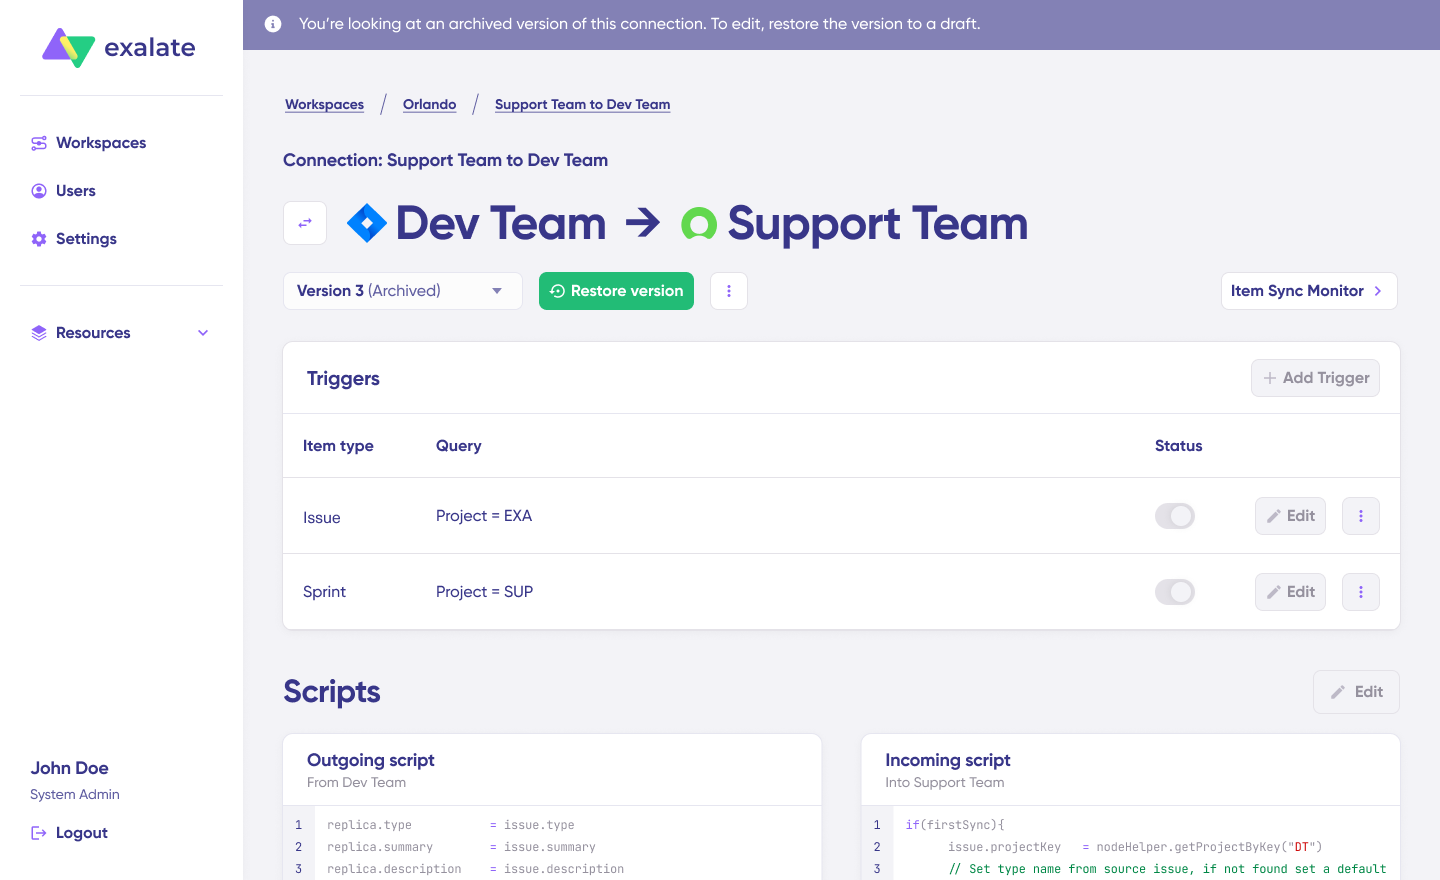
Access all versions through the “Version” dropdown. Versions exist in three states: “Active“, “Draft” (editable), or “Archived“.
Automating with Triggers
Configure triggers to automate your synchronization. Triggers are conditions or filters applied to specific items. For example, sync all Jira work items where “label = dev“.
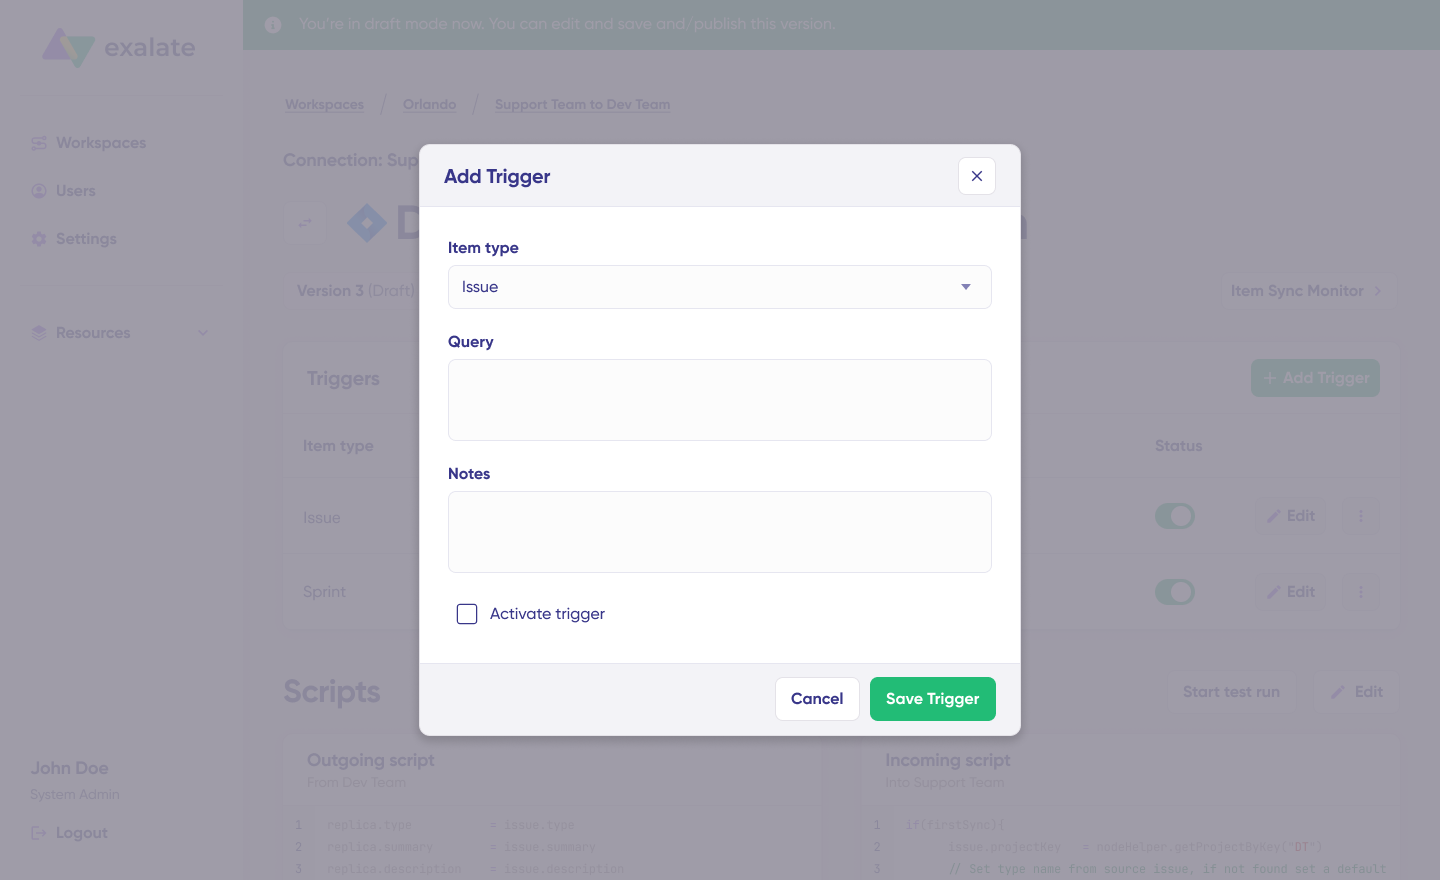
Click “+Add trigger” to create platform-specific triggers.
Select the entity type (issue or sprint).
For Jira, use Jira Query Language (JQL) to define conditions for work items or sprints. For instance, “Project = EXA” ensures synchronization only occurs for items in the EXA project. Save your trigger when complete.
For Freshdesk, use the advanced search syntax to write the trigger conditions. For example, “filter = new_and_my_open” will only filter out new and open tickets.
Troubleshooting with Aida
Diagnose connection issues using Aida. When errors occur, navigate to the “Troubleshooting” tab in your workspace. Hover over the error requiring diagnosis and click the Aida icon that appears beside it.

You’ll see all affected systems, connections, and items along with Aida’s brief error analysis.
For additional information, click Error Details to view the impact level, stack trace, error type, and occurrence date. Select “View Full Analysis” for comprehensive context.
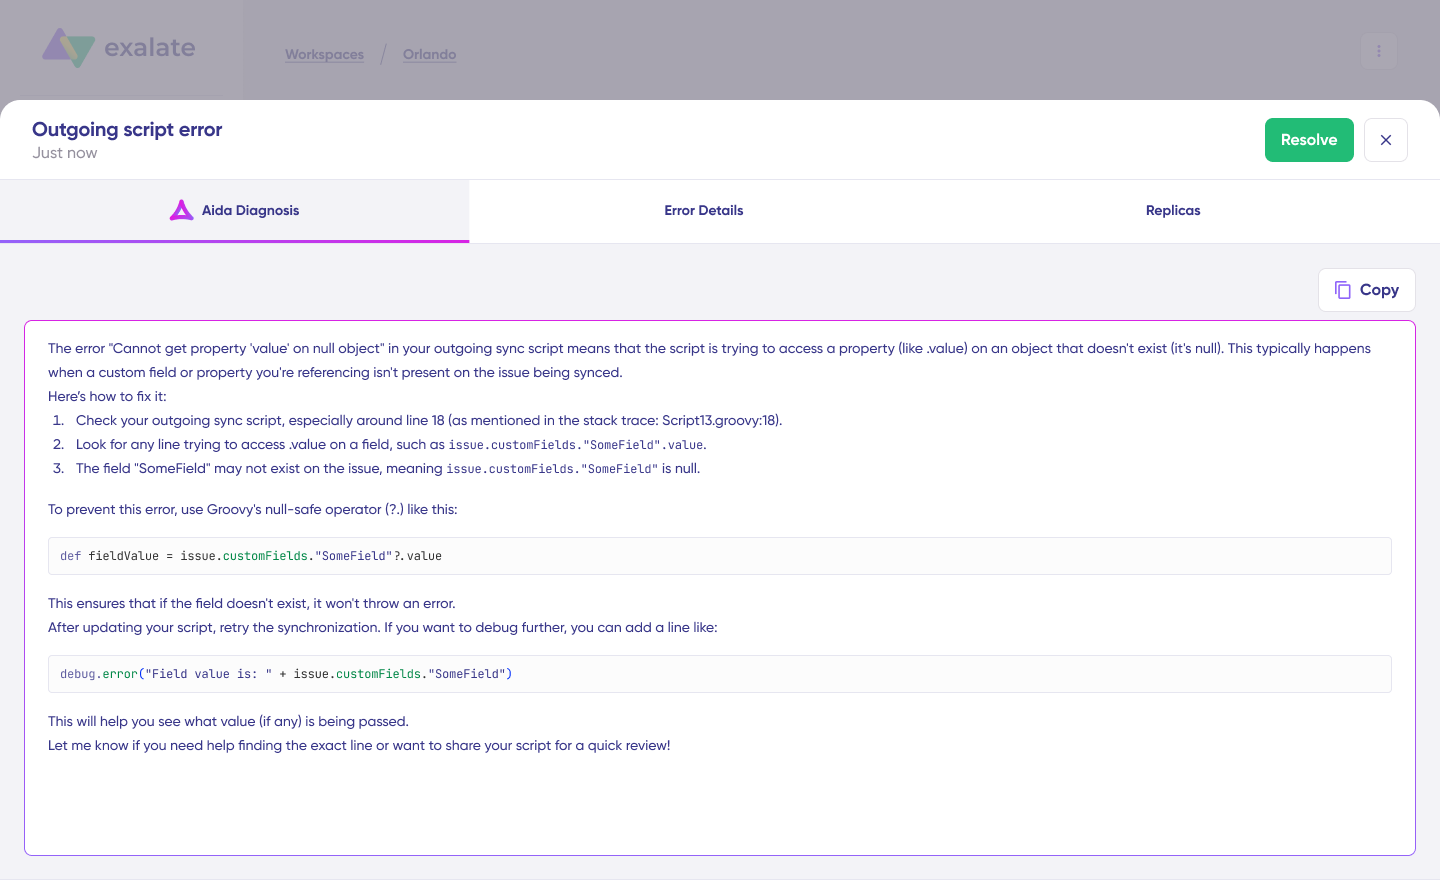
Resolve the error and click “Resolve“.
Your first synchronization will launch automatically based on the sync rules and triggers you’ve configured. Happy syncing!
What are Some Practical Freshdesk Jira Integration Use Cases?
Use Case 1: Escalating Bug Reports from Support to Development
Challenge: Support teams receive customer bug reports in Freshdesk daily. Developers work entirely in Jira and need detailed information to reproduce and fix issues. Manual copying creates delays, information gets lost in translation, and customers wait longer for resolutions. Screenshots don’t get attached properly. Reproduction steps are incomplete. Priority doesn’t translate accurately between systems.
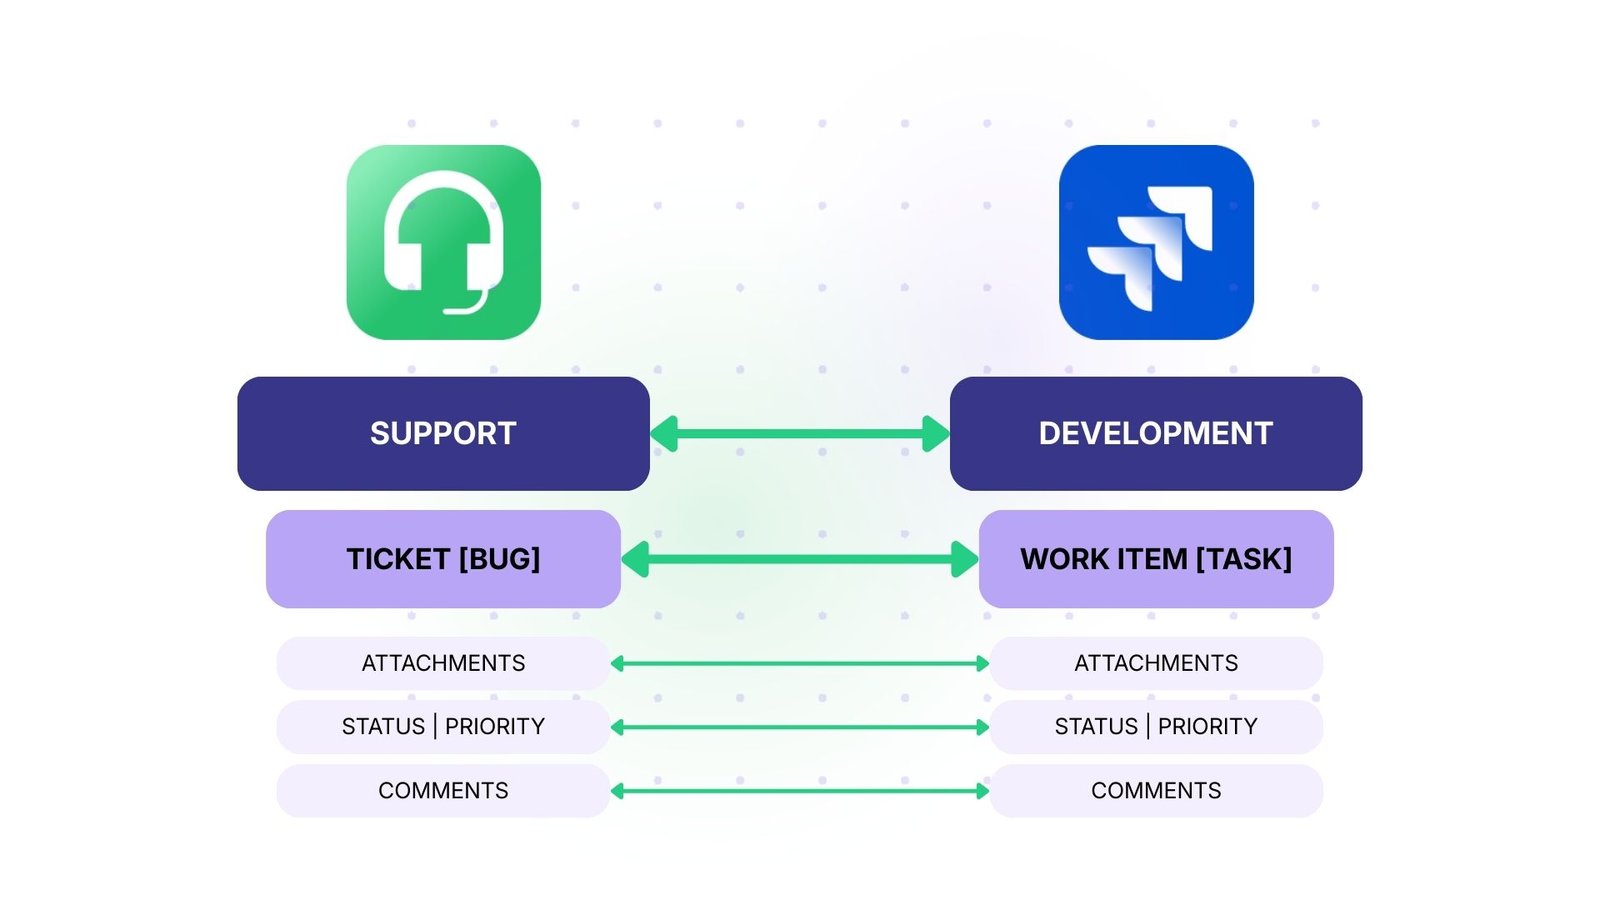
Solution: Automatically create Jira work items when Freshdesk tickets are tagged as “bug.” Map priority levels so critical bugs land in the development sprint immediately. Sync attachments, screenshots, and reproduction steps without manual intervention. Status updates flow bidirectionally—when developers mark a bug as “Fixed,” support agents see the update in Freshdesk without leaving their system. Custom fields like “customer impact” and “affected version” sync automatically to give developers full context.
Real-World Application: A SaaS company reduced average bug resolution time by 40% after implementing automated escalation. Critical bugs now reach developers within minutes instead of hours. The development team receives complete reproduction information on the first try, eliminating back-and-forth clarification. Support agents receive automatic notifications when fixes are deployed, allowing them to update customers proactively. The company tracks resolution metrics across both systems without manual reporting.
Use Case 2: Managing Feature Requests Across Teams
Challenge: Product teams need consolidated visibility into feature requests coming from multiple support channels. Requests are scattered across Freshdesk tickets, making it difficult to identify patterns and prioritize development work. When 50 different customers request similar features, product managers can’t easily see the aggregate demand. Revenue impact data lives in separate systems. Strategic accounts’ requests get lost among general customer feedback.
Solution: Use conditional routing to automatically send feature request tickets to a dedicated Jira product backlog project. Link multiple related Freshdesk tickets to a single Jira work item to demonstrate demand volume. Custom fields sync automatically, providing product managers with customer segment data, urgency indicators, and revenue impact. Tags and labels aggregate similar requests even when phrased differently. Voting mechanisms in Jira reflect the number of linked Freshdesk tickets.
Real-World Application: An enterprise software company tracks customer demand for specific features by automatically aggregating similar requests. When 15+ customers request the same feature, it automatically escalates to executive review for roadmap consideration. Product managers see which features impact their largest accounts without manual reporting. Sales teams reference the Jira backlog during customer conversations to show requested features already in planning.
Use Case 3: MSP Multi-Client Management
Challenge: Managed Service Providers (MSPs) handle dozens of clients, each requiring isolated Jira projects for security and organization. Support teams use a unified Freshdesk instance but need client data to remain completely separate. Routing tickets to the wrong client’s Jira project exposes sensitive data. Each client also has unique SLA requirements, priority mappings, and workflow rules.
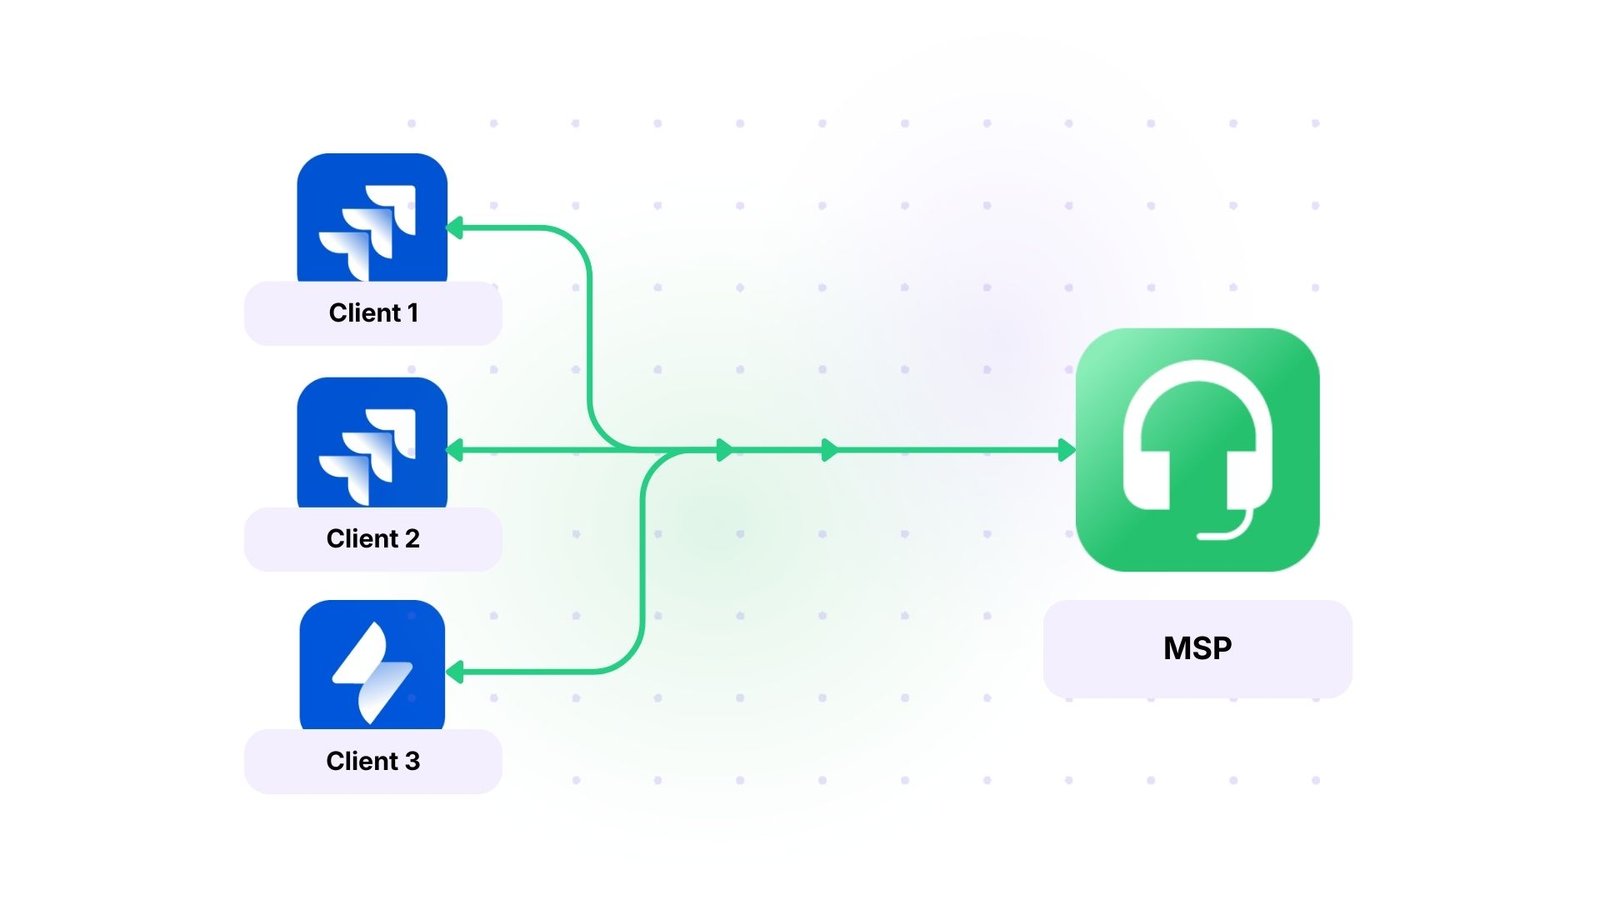
Solution: Set up multiple connections with custom field mapping that automatically routes each client’s tickets to their dedicated Jira project. Each connection has independent sync rules while support operations remain centralized in Freshdesk. Client-specific SLA rules, priority mappings, and custom workflows work independently. A “Client ID” custom field determines routing automatically. Support agents work in a single Freshdesk instance without worrying about which client project to update.
Real-World Application: An MSP supporting 50+ clients eliminated manual ticket routing errors that previously caused data to land in the wrong client projects. Each client’s tickets automatically sync to their dedicated Jira project based on a custom “Client ID” field. The MSP maintains unified support operations while ensuring complete data isolation between clients. Different clients have completely different field mappings—some sync custom SLA fields, others sync specific compliance tags. The MSP adds new client connections in minutes without disrupting existing integrations.
Use Case 4: ITSM Integration with Jira Service Management
Challenge: Organizations using Jira Service Management for IT operations need seamless incident and service request handling. IT teams work in Jira Service Management while customer-facing support operates in Freshdesk. Disconnected systems lead to delayed incident resolution and poor visibility. When a customer reports an outage in Freshdesk, IT operations teams in JSM don’t see it immediately. Status updates don’t flow back to support agents, leading to duplicate customer inquiries.
Solution: Integrate Freshdesk with Jira Service Management for unified ITSM control. Automatically convert high-priority incidents to JSM alerts with complete escalation procedures. Sync on-call schedules, alert acknowledgments, and resolution notes. Service request workflows span both platforms while maintaining proper routing and assignment rules. Critical incidents trigger automatic JSM escalations with SLA timers. Resolution notes from JSM engineers sync back to Freshdesk, so support agents can update customers immediately.
Real-World Application: A financial services firm manages customer-facing support in Freshdesk while handling backend IT operations in Jira Service Management. Critical incidents automatically trigger JSM alerts, notify on-call engineers, and escalate based on SLA thresholds. Support agents see real-time status updates as IT resolves backend issues without asking for updates. The integration reduced mean time to resolution (MTTR) by 35% by eliminating handover delays. Incident post-mortems in JSM automatically link to all related customer tickets in Freshdesk for complete context.
Use Case 5: Multi-Tier Customer Support
Challenge: Multi-tier support structures need visibility into which team currently owns each ticket. As tickets escalate from L1 support to L2/L3 engineering teams, status gets lost. Customers receive conflicting information from different support tiers. Teams duplicate work because they don’t see that someone else already started the investigation. L1 agents can’t provide accurate ETAs because they don’t know what stage of investigation they have reached.
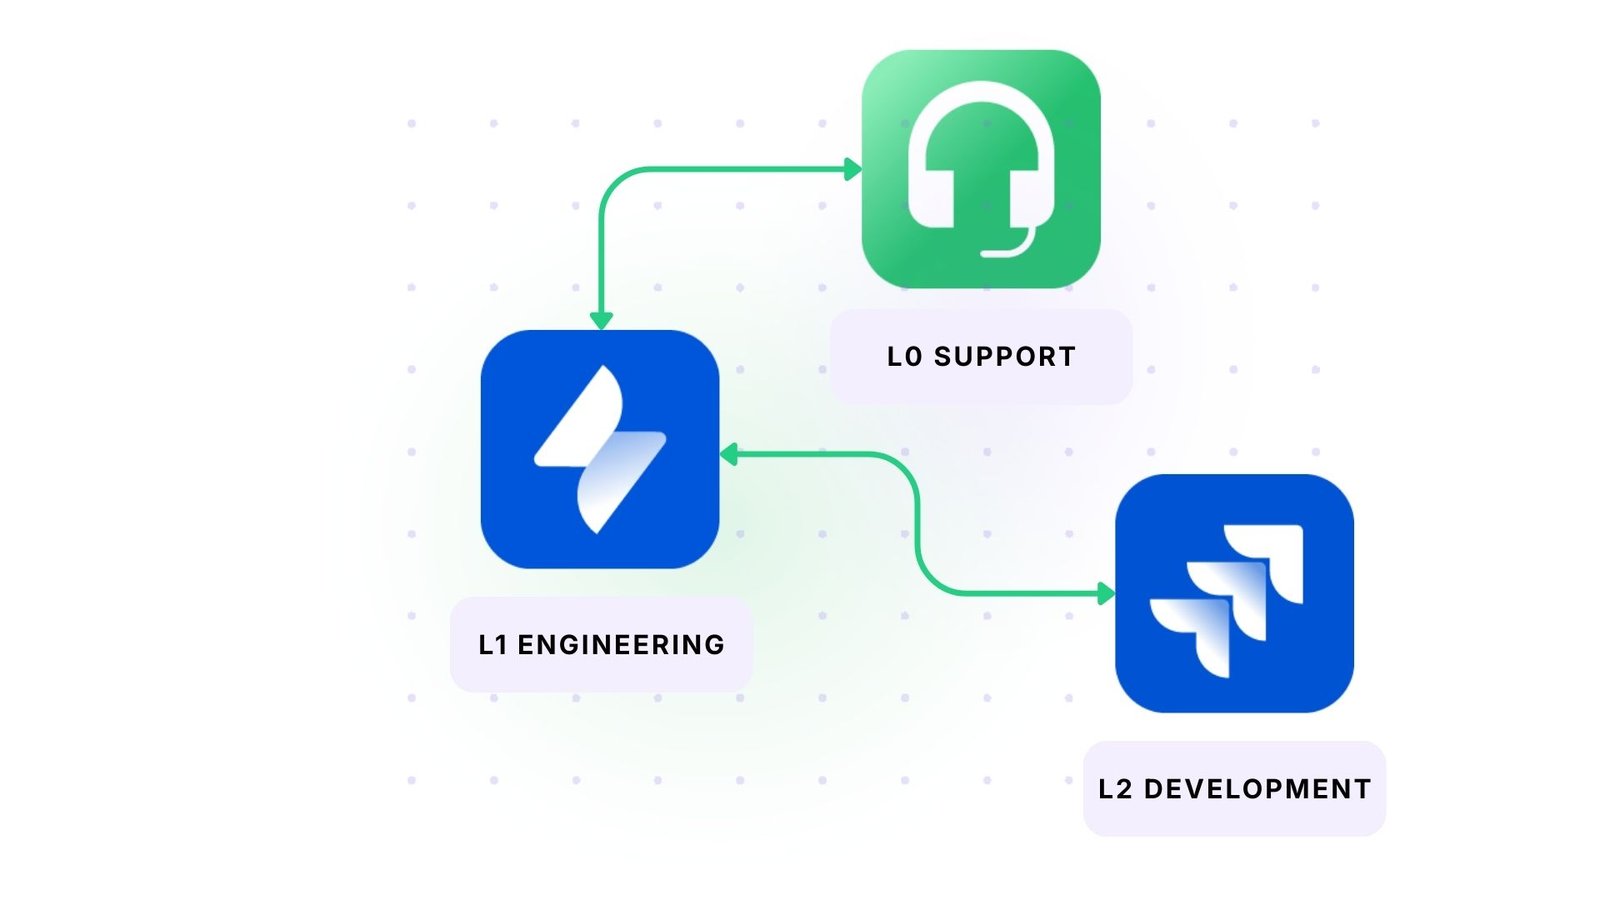
Solution: Sync ticket assignments and status changes between Freshdesk and Jira automatically. As tickets escalate from L1 support to L2/L3 engineering teams in Jira, Freshdesk reflects current ownership and status. Custom workflows trigger automatic reassignment based on ticket age or complexity. Status mappings translate between support terminology (“Pending Customer,” “Pending Engineering”) and development terminology (“In Progress,” “Code Review”). L1 agents see exactly which engineer is working on each escalated ticket without asking.
Real-World Application: A telecommunications company tracks 10,000+ monthly tickets across support tiers. Automatic escalation rules trigger Jira work item creation when tickets exceed resolution SLAs at L1. L1 agents see exactly which L2/L3 engineer is working on escalated tickets and receive automatic updates when engineers add notes or change status. The company uses custom fields to track “time in L1,” “time in L2,” and “time in L3” for detailed operational analysis. Customers receive proactive updates at each escalation point automatically generated from Jira status changes.
Use Case 6: Cross-Company Collaboration
Challenge: Organizations working with external partners, contractors, or vendors need to share ticket information without compromising security. Granting full system access creates audit concerns and exposes proprietary information. Partners need to see customer issues affecting their deliverables, but shouldn’t access internal sprint planning, resource allocation, or strategic roadmap data.
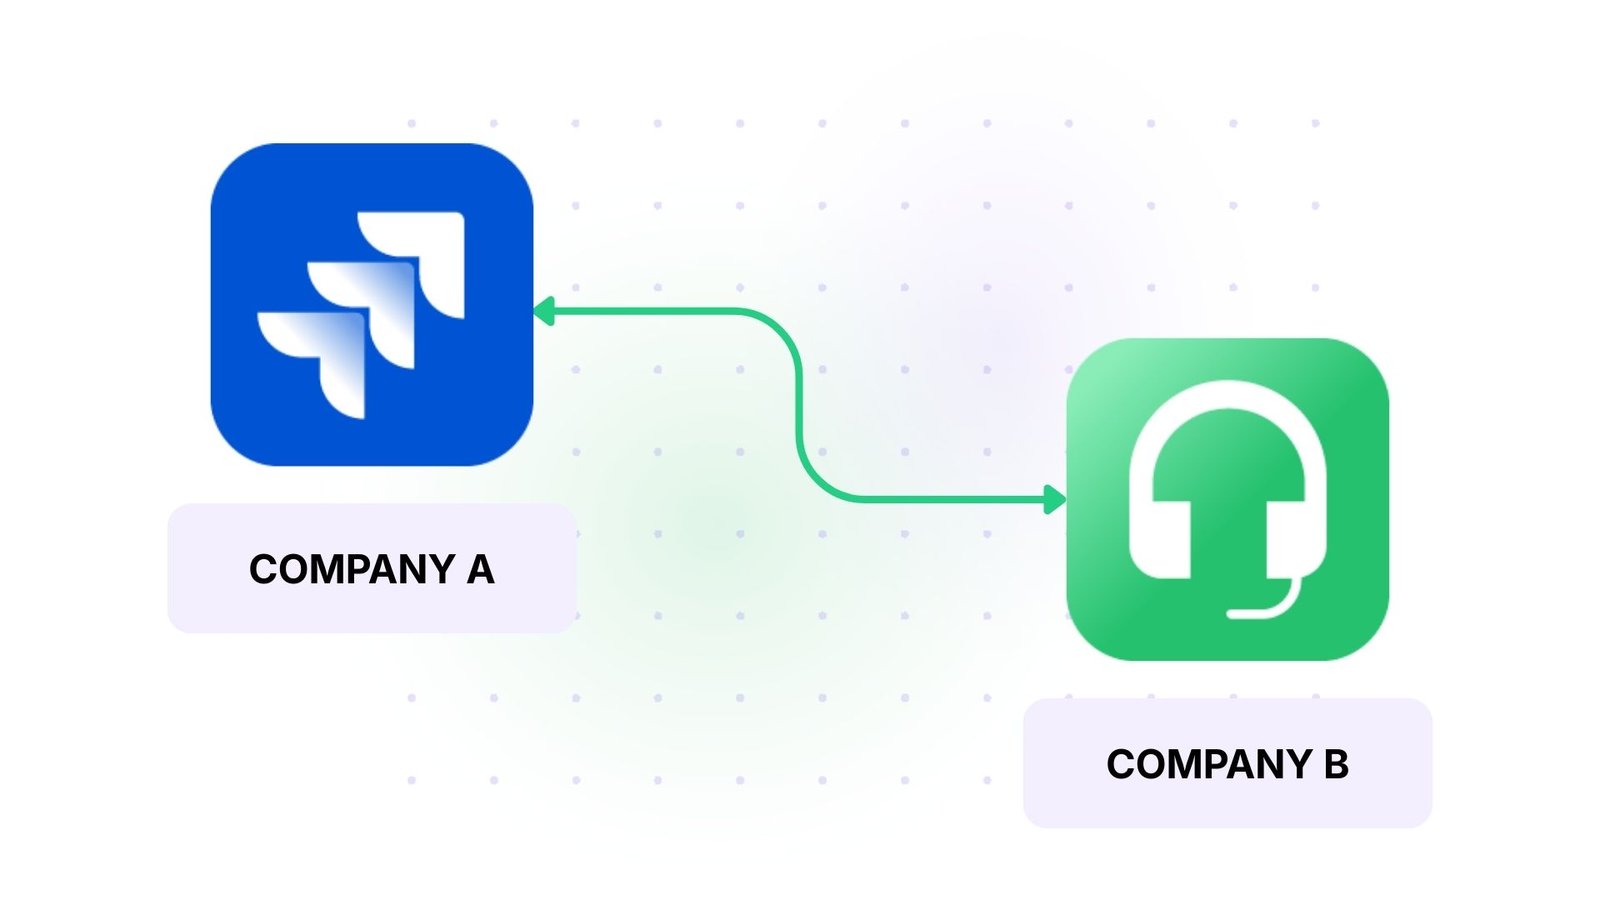
Solution: Connect your internal Jira with partner Freshdesk instances without sharing credentials or admin privileges. Each side maintains complete control over what data syncs and can modify sync rules independently. Selective field syncing ensures sensitive data stays protected while relevant information flows freely. Partners see ticket summary, priority, and customer impact but not internal cost estimates or resource assignments.
Real-World Application: A software vendor collaborating with implementation partners shares only relevant work item details while protecting proprietary development information. Partners see customer issues that impact implementations, but don’t access internal sprint planning, resource allocation, or strategic roadmap data. When a partner closes a ticket in their Freshdesk, it automatically updates the vendor’s Jira, but internal engineering notes remain private.
Security Considerations When Integrating Freshdesk with Jira
Customer tickets contain sensitive information, and work items include proprietary development details, so the integration platform must protect data at every stage.
- Compliance with international data protection regulations ensures your organization meets regulatory requirements. Exalate maintains ISO certification and undergoes regular third-party security audits.
- Role-based access control (RBAC) grants permissions based on user roles. Administrators have full configuration access while users have appropriate visibility based on their job function.
- No requirement to share admin credentials with external parties. Cross-company integrations work without exposing system passwords or API keys. Each organization authenticates to its own systems only.
- Selective field syncing excludes sensitive information from synchronization. Even within a connection, you control which fields sync. Customer payment details, internal cost estimates, or proprietary notes can be excluded while other fields flow freely.
- Connect with partners, vendors, or contractors without exposing internal systems. Your Jira instance doesn’t grant access to partner users. Their Freshdesk instance doesn’t require your team to have accounts.
For comprehensive security documentation, architecture diagrams, and compliance certifications, visit the Exalate Trust Center.
Best Practices for Successful Integration
Following proven best practices ensures your Freshdesk Jira integration delivers maximum value:
- Before implementing integration, discuss which projects, fields, and work items should sync and which should be excluded. This protects sensitive information, especially for cross-company integrations.
- Create a data governance document covering which Freshdesk ticket types sync to Jira, which Jira projects receive tickets, which fields contain sensitive data that shouldn’t sync, and who has the authority to modify sync rules.
- Document how statuses, priorities, and custom fields transform between systems. Include field mapping tables showing Freshdesk fields mapped to Jira fields, status transformation rules, priority conversion logic, conditional routing rules, and exception handling.
- Ensure admins understand security best practices and can manage syncs independently. Train administrators on how to modify field mappings, troubleshoot common issues, and handle security for cross-company sync.
- Combine platform-native workflows with integration triggers for powerful automation. Freshdesk automation rules can tag tickets based on keywords, Exalate syncs only tickets with specific tags, Jira automation rules assign work items based on project, and Exalate syncs status changes back to Freshdesk.
- Set up real-time or near-real-time updates between teams. Bidirectional sync keeps everyone informed without manual status checks. Status updates sync immediately, comment notifications flow to both systems, and assignment changes are visible in real-time.
- Begin with a few test tickets before the company-wide rollout. Validate field mappings, status transformations, and routing logic with limited scope. Test with 5-10 sample tickets, validate field mappings work correctly, roll out to additional teams, and scale to full production.
How Exalate Enables Freshdesk Jira Integration
Exalate provides bidirectional sync between Freshdesk and Jira with complete customization control. Unlike native or template-based integrations, Exalate uses script-based configuration for complex scenarios that simple connectors can’t handle.
- When a support agent updates a ticket in Freshdesk, developers see it in real time in Jira. When engineers change work item status, support agents see updates without refreshing.
- Synchronizes core fields like summary, description, labels, status, and priority. Connects collaboration data like attachments, inline images, notes, and comments.
- Synchronizes custom data like custom fields and custom keys specific to your workflow. Supports rich text formatting, including bold, italic, underline, text color, links, lists, and dividers.
- Groovy-based scripting provides complete control for advanced scenarios. Apply conditional logic like “If ticket source is email AND priority is high, create a work item in the customer escalation project with priority critical.”
- You can use the AI scripting assistant Aida to generate sync rules through conversational prompts instead of writing scripts from scratch. Describe your use case in plain language, and Aida builds the initial configuration.
- Connect multiple Freshdesk or Jira instances with independent configurations. Different ticket types go to different Jira projects automatically.
Want to learn more about Exalate? Find out how it works. To discuss your use case and see if Exalate is the right choice, book a demo with our integration engineer.
Frequently Asked Questions
What is Exalate’s Freshdesk Jira integration?
Exalate is a bidirectional sync solution that connects Freshdesk tickets with Jira issues in real-time. You can sync tickets, comments, attachments, custom fields, and status updates between the two platforms while maintaining complete control over what data flows and how it transforms.
The integration allows both systems to communicate directly without routing data through third-party servers, which keeps your information secure and gives you more control over the sync process.
How does Exalate differ from native Freshdesk-Jira connectors?
Unlike built-in connectors or template-based solutions, Exalate gives you script-based control over your integration. You’re not limited to predefined field mappings—you can transform data, apply conditional logic, and handle complex scenarios that templates can’t accommodate.
While native connectors might let you map “field A to field B,” Exalate lets you decide what happens when field A contains specific values, needs transformation, or should trigger different behaviors based on context. This flexibility makes it possible to match your exact workflow rather than adapting your workflow to fit the connector’s limitations.
Can I route different ticket types to different Jira projects?
Yes, you can set up multiple connections with conditional logic. Bug reports can automatically go to your development project, feature requests to product management, and infrastructure items to DevOps—all based on how tickets are categorized in Freshdesk.
Each connection can have its own field mappings and sync rules tailored to that specific workflow. For example, bug reports might sync more technical fields, while feature requests sync customer impact and business value fields.
How do status mappings work between Freshdesk and Jira?
You define status correspondence in your sync configuration. If Freshdesk uses “Open, Pending, Resolved” and Jira uses “To Do, In Progress, Done,” you map them according to your workflow.
You can apply conditional logic for sophisticated mapping. For example, map Freshdesk’s “Pending” to different Jira statuses depending on who’s assigned or what the ticket type is. “Pending” on a bug report might map to “In Progress” in Jira, while “Pending” on a feature request maps to “Under Consideration.”
Edge cases where statuses don’t align perfectly can be handled with default values or custom transformation logic. If Jira has 12 statuses and Freshdesk has 5, you create many-to-one mappings that make sense for your workflow.
Can I link multiple Freshdesk tickets to a single Jira work item?
Yes, this is particularly useful when multiple customers report the same problem or request the same feature. Linking related tickets to one work item avoids duplication and provides better visibility into issue impact.
When 20 customers report similar issues, linking all 20 Freshdesk tickets to a single Jira work item shows developers the true scope. Status updates on the single Jira work item propagate to all linked Freshdesk tickets automatically.
What happens to text formatting when syncing between Freshdesk and Jira?
Exalate preserves text formatting, including bold, italic, underlined text, lists, links, dividers, and text colors. Comments and descriptions maintain their structure, ensuring nothing gets lost during synchronization.
Formatted bug reports with numbered reproduction steps remain formatted. Links to documentation stay clickable. Color-coded priority indicators maintain their colors. This preservation ensures information is as useful in the destination system as it was in the source.
What platforms does Exalate support beyond Freshdesk and Jira?
Exalate supports integrations with Freshservice, Azure DevOps, Azure DevOps Server, Asana, ServiceNow, Salesforce, Zendesk, GitHub, and other platforms. You can connect multiple platforms simultaneously, enabling a comprehensive tool ecosystem integration.
Do I need coding knowledge to set up the integration?
For advanced customization requiring complex transformations or conditional logic, Groovy-based scripting is available. However, many sophisticated integrations can be built using Aida and pre-built templates without writing code. Organizations typically start with Aida and only move to custom scripting when they hit limitations.
Can I control which fields sync between systems?
Yes, you have complete control over field mapping. Choose which Freshdesk fields map to which Jira fields, apply transformations, and exclude fields that shouldn’t sync.
This granular control ensures sensitive data stays protected while necessary information flows freely. You might sync 15 standard fields but exclude 5 custom fields containing proprietary information. Or sync standard fields to everyone, but sync custom fields only to specific projects.
Can I test the integration before rolling it out company-wide?
Yes, you should start with a limited test scope. Create a test Freshdesk ticket, validate that it syncs correctly to Jira with proper field mappings, status transformations, and routing.
Verify bidirectional updates work as expected. Change the ticket status in Freshdesk and confirm it updates in Jira. Add a comment in Jira and verify it appears in Freshdesk. Test attachment sync, custom field mapping, and conditional routing.
Only after thorough testing should you expand to full production use. This approach prevents surprises and ensures the integration works as designed.
Have more questions? Book a call with our integration engineers to discuss your specific use case.


