Many organizations find themselves trapped between two worlds: their IT teams working in Freshservice to handle internal incidents and service requests, while customer support agents operate in Zendesk to manage external inquiries.
When these systems don’t communicate, critical information gets lost, response times suffer, and both teams end up playing an exhausting game of telephone. That’s exactly where Freshservice Zendesk integration comes in.
Modern service delivery demands seamless coordination between your technical operations and customer-facing support.
When customers report problems that require technical expertise, those tickets should flow instantly to IT with complete context. Likewise, when IT identifies infrastructure issues affecting customers, support teams need to know immediately.
This guide covers everything you need to know about connecting Freshservice and Zendesk, from core benefits and security considerations to practical use cases and best practices that ensure your integration delivers real value.
Key Takeaways
- Freshservice Zendesk integration connects your IT service desk with customer support, enabling automatic ticket synchronization, real-time status updates, and unified incident management across both platforms.
- Common use cases include multi-channel support consolidation, IT-to-customer escalations, MSP client management, and consolidated incident tracking where multiple Zendesk tickets map to a single Freshservice incident.
- When evaluating integration tools, prioritize field mapping flexibility, AI-assisted configuration, enterprise-grade security, and the ability to scale across multiple platforms.
- Exalate supports bidirectional sync between Freshservice, Zendesk, and other platforms.
- Start with a limited scope deployment, engage stakeholders from both IT and support teams, and monitor sync success rates and data processing latency before scaling.

What is Freshservice Zendesk Integration?
Freshservice to Zendesk integration connects your IT service desk with your customer support platform, creating an automated bridge that shares critical information between both systems in real-time.
Here’s how it works in practice: When your IT team identifies a server outage or infrastructure problem in Freshservice, the integration instantly creates related tickets in Zendesk so customer support agents can proactively reach out to affected users.
When customers report problems through Zendesk that require IT expertise, those tickets automatically convert into Freshservice incidents or service requests, complete with customer context and priority levels based on account importance.
Key data that flows between platforms includes:
- Incident and service request details, including ticket descriptions and summaries
- Real-time status changes and resolution updates
- File attachments and technical documentation
- Customer impact assessments and urgency levels
- Custom field data and workflow triggers
- Dashboard visibility and sync health metrics
- Private and internal notes (with proper access controls)
The integration creates a unified service environment where your IT specialists and customer success teams operate with shared visibility. This coordination proves invaluable when managing complex service delivery across multiple client accounts, business units, or geographic locations.
Why Integrate Freshservice With Zendesk?
Zendesk focuses on customer support operations and help desk management, delivering tools for handling customer communications, support requests, and external service workflows.
Freshservice functions as an IT service management solution within the Freshworks suite. It’s built for IT departments, technical teams, and operational staff to manage internal service delivery and infrastructure incidents.
Many organizations run both platforms simultaneously, which means they need to stay in sync to prevent information silos from forming around each system.
Core benefits of integrating Freshservice with Zendesk:
- Automatically coordinate tickets and optimize workflows across customer support and IT service management platforms.
- Eliminate manual data transfers between systems and partner organizations, avoiding redundant entries and minimizing human errors.
- Give teams unified visibility into service operations, system status, ticket workflows, and critical incident areas.
- Enhance response efficiency by linking Zendesk customer engagement with Freshservice technical management.
- Address customer problems more effectively, maintaining satisfaction scores and service delivery standards.
- Reduce costs associated with implementing additional systems or acquiring duplicate user licenses.
Beyond internal operations, businesses often need connectivity between their systems and external managed service providers, strategic partners, suppliers, and customer organizations.
This inter-organizational integration creates streamlined, cohesive service experiences without exposing internal systems.
What Should I Consider When Choosing a Freshservice to Zendesk Integration?
- Integration architecture: Decide between simple point-to-point connections or scalable platforms that handle future system additions without complete rebuilds. If you anticipate adding ServiceNow, Jira, or other tools later, choose a solution that supports multi-platform connectivity from the start.
- Field mapping capabilities: Ensure the solution handles custom fields, data transformations, and complex relationships like mapping multiple Zendesk tickets to a single Freshservice incident. The more granular your control over field mapping, the better your data quality.
- AI-assisted configuration: Look for tools like Aida that convert natural language requirements into integration configurations. Instead of writing scripts manually, you describe what you want and the AI generates the setup. This accelerates implementation and reduces the learning curve.
- Security standards: Verify encryption protocols, access controls, and compliance certifications meet your requirements. Look for ISO 27001 certification, JWT authentication, role-based permissions, and encryption of data both in transit and at rest.
- Customization depth: Choose solutions that offer full scripting capabilities for complex workflows and conditional logic. Template-based options work for straightforward field mapping, but advanced scenarios require more flexibility.
- Sync timing: Determine whether you need real-time synchronization for critical updates or if scheduled batch processing works for your operations. Most enterprise use cases require real-time sync.
- Multi-tenant support: For MSPs or multi-brand operations, ensure data isolation between clients while maintaining operational coordination. Each client environment should remain separate.
- Monitoring and troubleshooting: Look for performance tracking, failure alerts, and diagnostic capabilities to maintain reliable operations. You need visibility into sync health before problems affect users.
- Total cost analysis: Calculate licensing, implementation, maintenance, and training costs against potential savings from reduced manual work and eliminated duplicate processes.
- Scalability: Consider whether the solution handles increasing data volumes without performance degradation as your organization grows.

Calculate time and money savings from automated bidirectional sync.
Exalate provides an AI-powered bidirectional integration solution for Freshservice to Zendesk connectivity, alongside connections to Jira, ServiceNow, Salesforce, Azure DevOps, Freshdesk, Asana, GitHub, and more.
Why organizations choose Exalate for Freshservice-Zendesk integration:
- Multi-directional connections for linking multiple partners, vendors, MSPs, or suppliers without architectural limitations,
- Enterprise-grade security with ISO 27001 certification, JWT authentication, role-based access controls, and encryption of data in transit and at rest,
- Full operational control so each side maintains complete authority over its connection configuration and data,
- Groovy-based scripting for advanced integrations enhanced by Aida, the AI-assisted configuration assistant,
- Automated triggers to replicate tickets and actions across platforms based on your specific rules,
- Expert configuration through the IaaS offering that provides experienced engineers for complex mapping and setup.
What Are the Use Cases for Freshservice Zendesk Integration?
Here are practical implementations for Freshservice to Zendesk integration:
Case 1. Multi-Channel Customer Support
Challenge: Customers contact support through multiple channels. Some submit tickets via Zendesk’s web portal, others use Freshservice’s mobile app or email. Support agents waste time switching between platforms to piece together conversation histories, leading to slower responses and inconsistent experiences.
Solution: Bidirectional sync ensures all customer interactions appear in both systems automatically. Subject lines, descriptions, statuses, priorities, attachments, custom fields, assignees, and tags get to sync in real-time. Agents get complete context regardless of which platform they’re using.
Real-World Application: A SaaS company with customers across multiple time zones uses this setup for follow-the-sun support. When a US-based agent handles a ticket in Zendesk, their APAC colleagues see the full history in Freshservice the next morning.
Case 2. Internal IT and Customer Support Alignment
Challenge: When internal infrastructure problems start impacting customer-facing services, support teams often don’t find out until customers complain. IT teams lack visibility into how many customers are affected and can’t prioritize based on business impact.
Solution: When an internal incident is logged in Freshservice, the integration automatically creates corresponding tickets in Zendesk. Priority levels, affected services, and resolution updates sync in real-time. Support agents can proactively reach out to affected users while IT teams see actual customer impact data.
Real-World Application: An e-commerce platform experiences a payment gateway issue. IT logs the incident in Freshservice; within seconds, support sees a related ticket in Zendesk showing that some customers have reported checkout failures. IT immediately escalates based on revenue impact, and support begins proactive outreach before the complaint volume grows.
Case 3. Cross-Platform Escalation Workflows
Challenge: Complex technical problems often start as general customer inquiries in Zendesk but require internal IT expertise tracked in Freshservice. Manual escalation processes create delays and lose important context during handoffs.
Solution: The integration automatically converts Zendesk tickets into Freshservice incidents or service requests when IT involvement is needed. Descriptions, attachments, images, comments, and key fields transfer automatically. IT teams receive full context to prioritize based on customer impact.
Real-World Application: A healthcare software provider receives a support ticket about data sync errors. The support agent recognizes this requires database investigation, flags it for escalation, and the integration creates a Freshservice incident with all ticket history attached. The DBA sees the full customer context immediately.
Case 4. MSP Client Management
Challenge: Managed service providers handling IT infrastructure for multiple clients need to share relevant incident details with each client’s Zendesk environment without exposing data between clients or requiring shared administrative access.
Solution: Automatically sync relevant details to each client’s Zendesk tickets while maintaining strict data isolation. Each client environment remains separate, and no client can access another’s information. MSPs manage all connections from their Freshservice instance.
Real-World Application: An MSP manages IT for 15 mid-size companies. When their monitoring system detects a server issue affecting Client A, the integration creates a ticket in Client A’s Zendesk only. Client B never sees Client A’s incidents, but the MSP has unified visibility across all client environments.
Case 5. Consolidated Incident Management
Challenge: When multiple customers report the same underlying issue through separate Zendesk tickets, IT teams can’t easily see the full scope of impact. Related tickets remain disconnected, making root cause analysis difficult.
Solution: Map multiple related Zendesk customer tickets to a single Freshservice incident, consolidating connected issues for streamlined management. IT teams gain comprehensive visibility into failure patterns and customer sentiment data while maintaining individual Zendesk ticket tracking for customer communication.
Real-World Application: A software release introduces a bug affecting specific configurations. Thirty-two customers submit separate Zendesk tickets over two days. The integration links all tickets to one Freshservice incident. IT sees the full scope immediately, identifies the common configuration factor, and pushes a fix—then all 32 tickets update with resolution status automatically.
Case 6. Service Request Management and Routing
Challenge: Service requests flood in from internal staff and external customers through different channels. Manual triage creates bottlenecks and routing errors.
Solution: Establish automated routing that directs requests to appropriate teams based on impact level, urgency classification, and severity assessment. Standard requests route to IT for normal processing; critical issues escalate to engineering for priority handling.
Real-World Application: An employee submits a software access request through Freshservice; it routes to IT for standard 24-hour processing. A different request flagged as critical (new hire starting tomorrow) automatically escalates to the provisioning team with a 2-hour SLA.
Best Practices for Freshservice Zendesk Integration
Follow these practices to maximize value from your integration:
Establish Specific Integration Goals
Set concrete, measurable targets before building sync configurations. Rather than vague objectives like “improve teamwork,” define metrics such as “reduce average ticket resolution time from 6 hours to 90 minutes” or “eliminate 100% of manual ticket copying between platforms.” Clear targets provide success indicators and justify the investment.
Engage Key Team Members in Design
Bring together support representatives, technical staff, supervisors, and platform administrators during planning. They understand which data points and processes truly impact daily work. Prioritize syncing information that improves decision-making instead of connecting every available field.
Configure Security and Permissions First
Establish appropriate user access levels and security controls before deployment. Ensure only qualified personnel can adjust sync configurations or view sensitive customer information. Factor in data protection requirements and verify your integration meets internal security standards and regulatory compliance needs.
Create Comprehensive Documentation
Capture field connections, process flows, configuration rules, and include screenshots with explanations. Future administrators need to navigate and maintain your setup. Document your reasoning for specific choices: why certain fields sync one-way, why specific triggers exist.
Clean Your Data Before Sync
Address duplicate entries, normalize data formats, and consolidate conflicting records before activating synchronization. Dirty data in one system becomes dirty data in both systems, and cleaning up post-sync is significantly harder.
Begin with Limited Scope and Expand Methodically
Launch with a single team, division, or customer group instead of implementing across the entire organization immediately. Test thoroughly with actual use cases, collect user feedback, and optimize your setup before broader deployment.
Deliver Hands-On User Education
Develop practical training featuring actual scenarios rather than theoretical overviews. Create accessible reference materials so teams understand how their Freshservice activities influence Zendesk tickets and vice versa. Focus on routine tasks and the troubleshooting approaches users will encounter regularly.
Maintain Data Integrity Standards
Define data quality criteria before initiating sync and deploy monitoring to preserve them. Set up alerts for sync errors, unusual data patterns, or performance issues so you can address problems before they impact users.
Track Performance and Plan for Ongoing Support
Monitor your integration’s health through key metrics:
- Sync success rates and failure frequency
- Data processing speed and latency
- API usage and rate limit consumption
- Data accuracy and consistency scores
- User adoption and satisfaction
- Integration uptime and availability
Use this data to catch problems early and verify information remains intact during transfers.
How to Set Up Freshservice Zendesk Integration Using Exalate
This walkthrough shows you how to set up a Freshservice Zendesk integration using Exalate.
Get started with Exalate
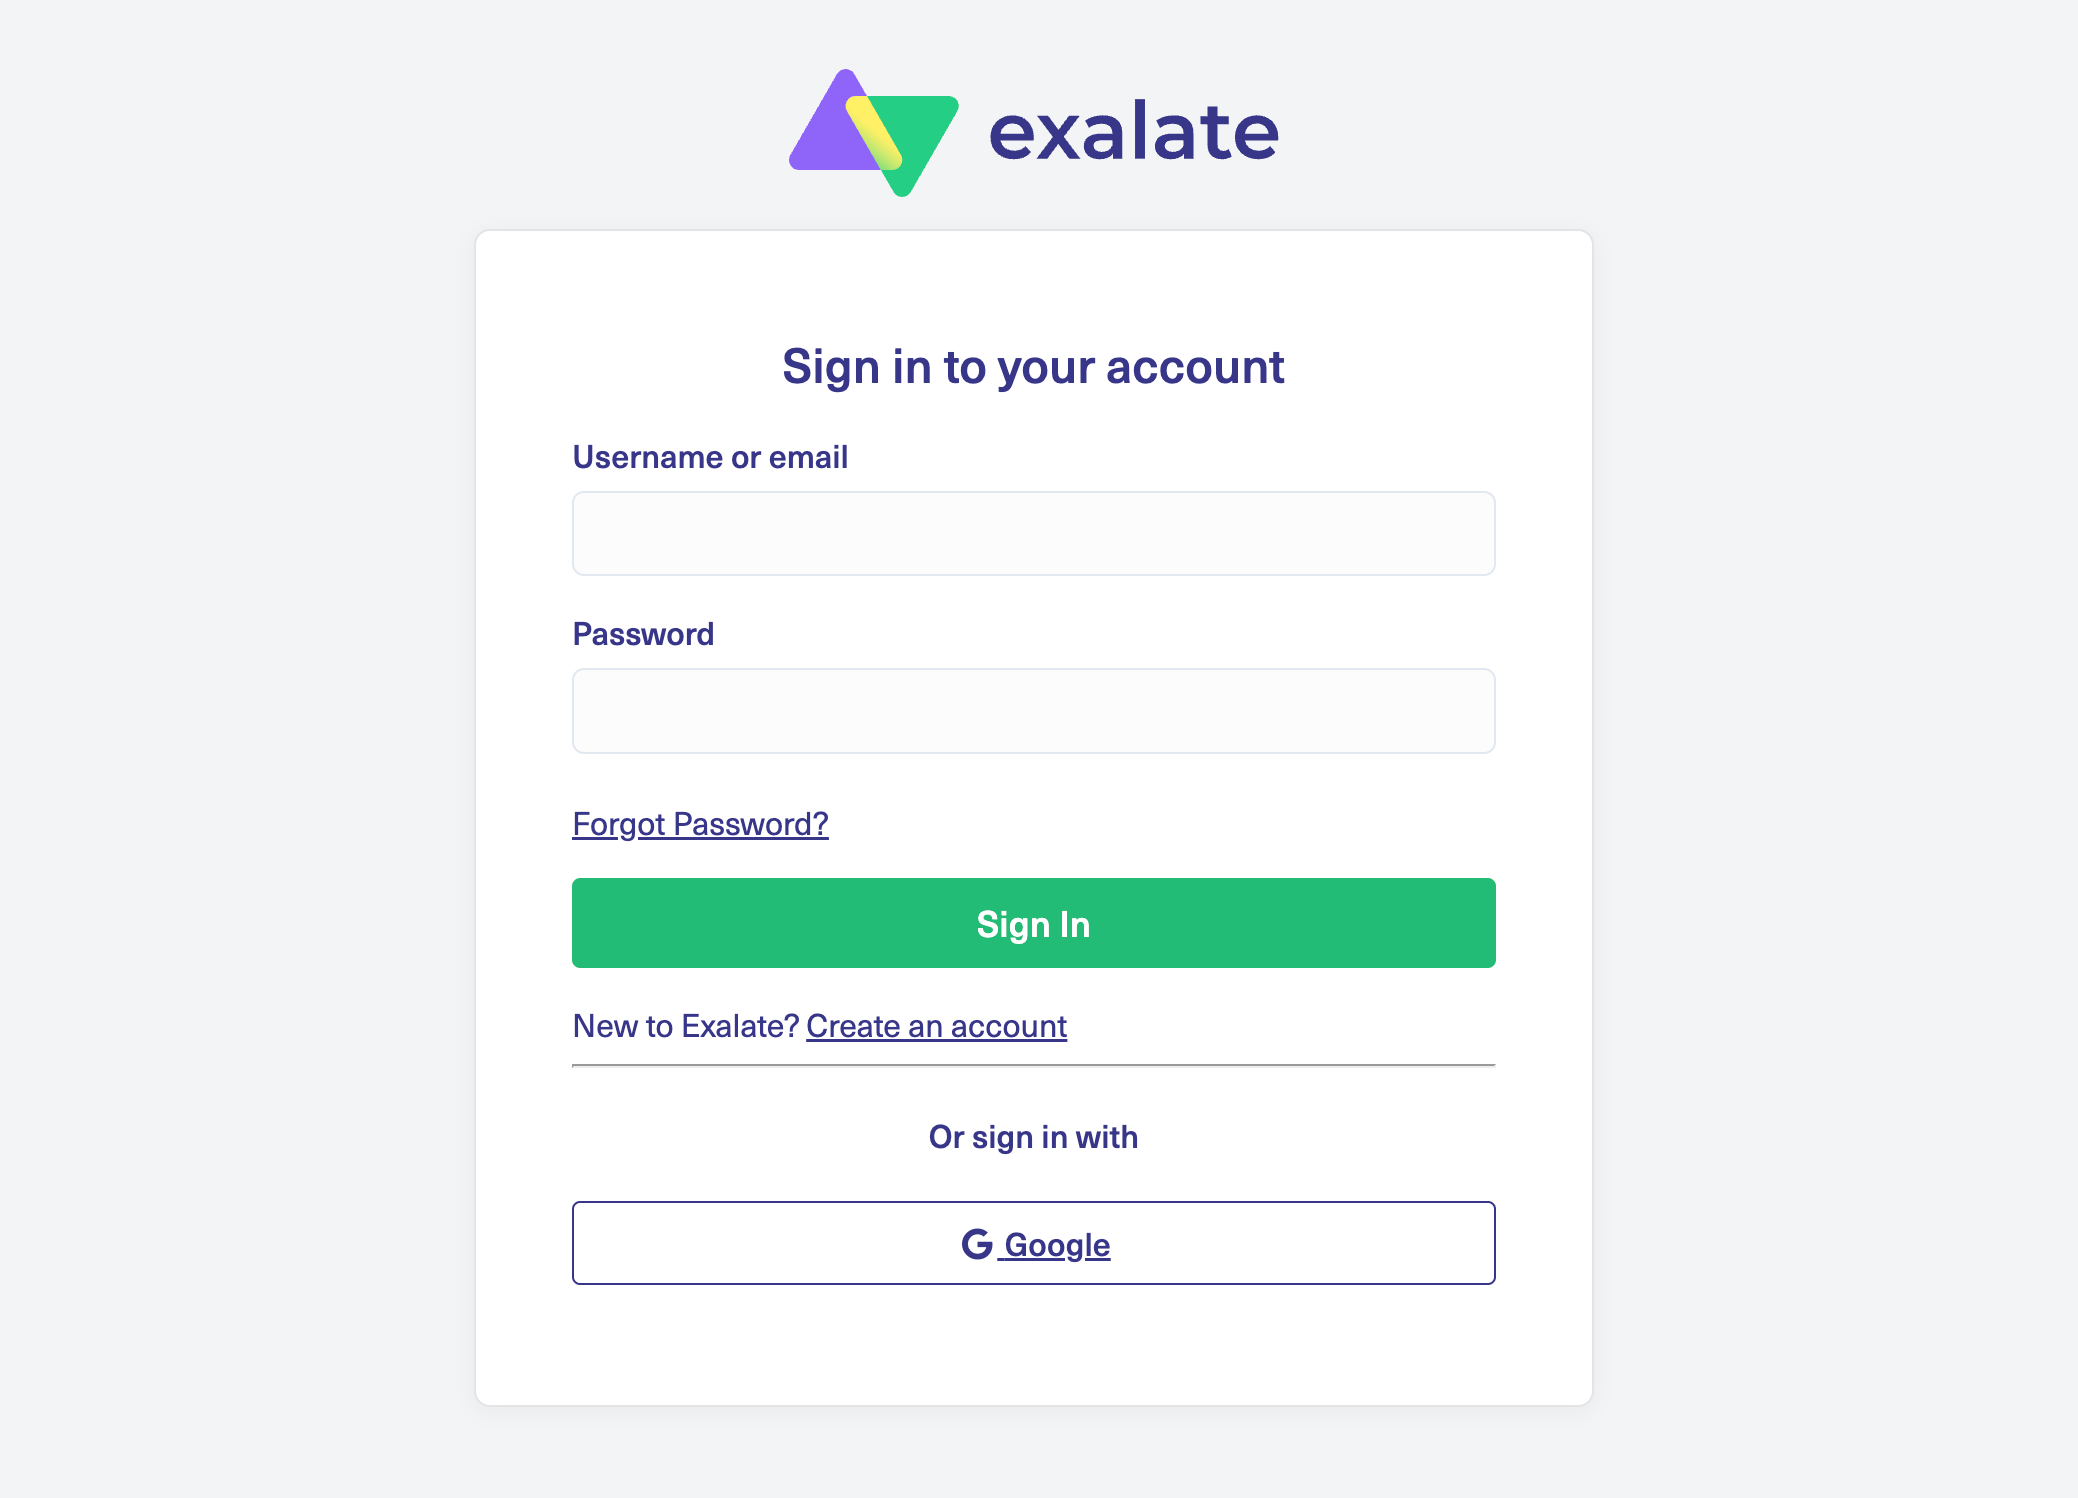
Head to the Exalate integrations page and create a new account. Already have one? Just log in.
You can sign up by entering your email and verifying it, or use Google for faster registration.
Set up a connection in your workspace
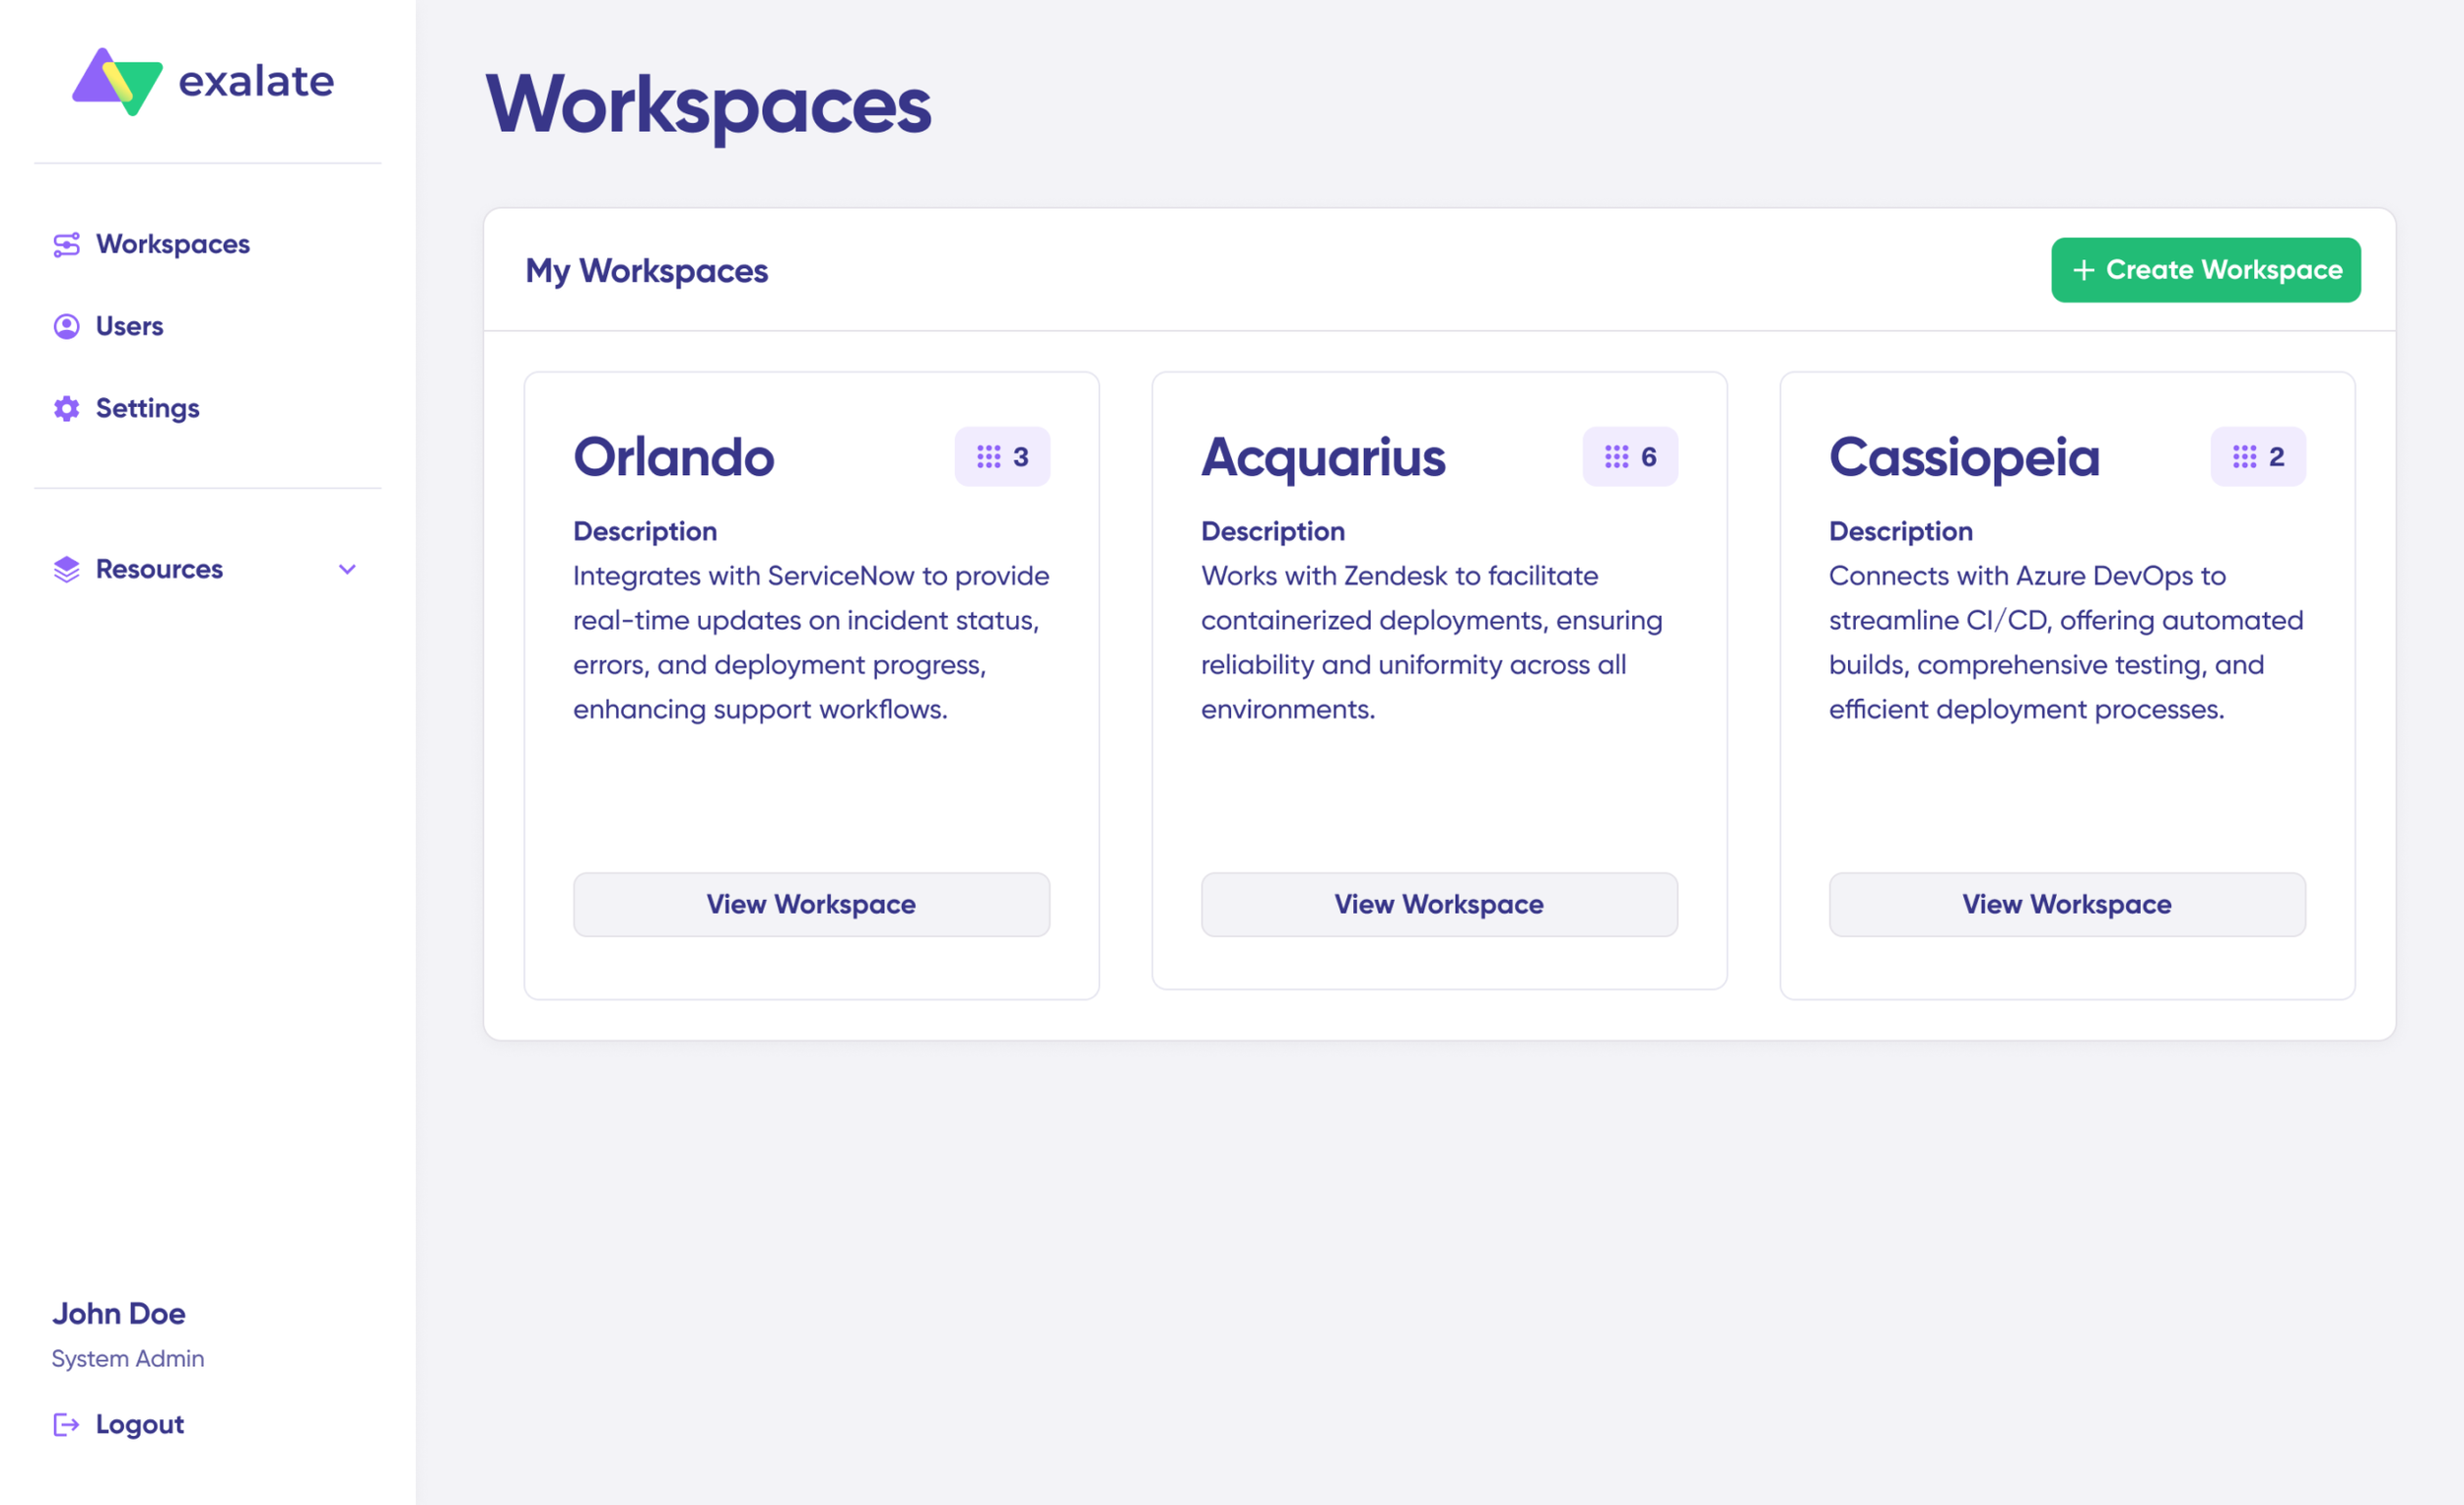
Workspaces let you organize your integrations and connections in one central location. Check the “Workspaces” tab to see any existing workspaces. Click “+ Create Workspace” to build your own.
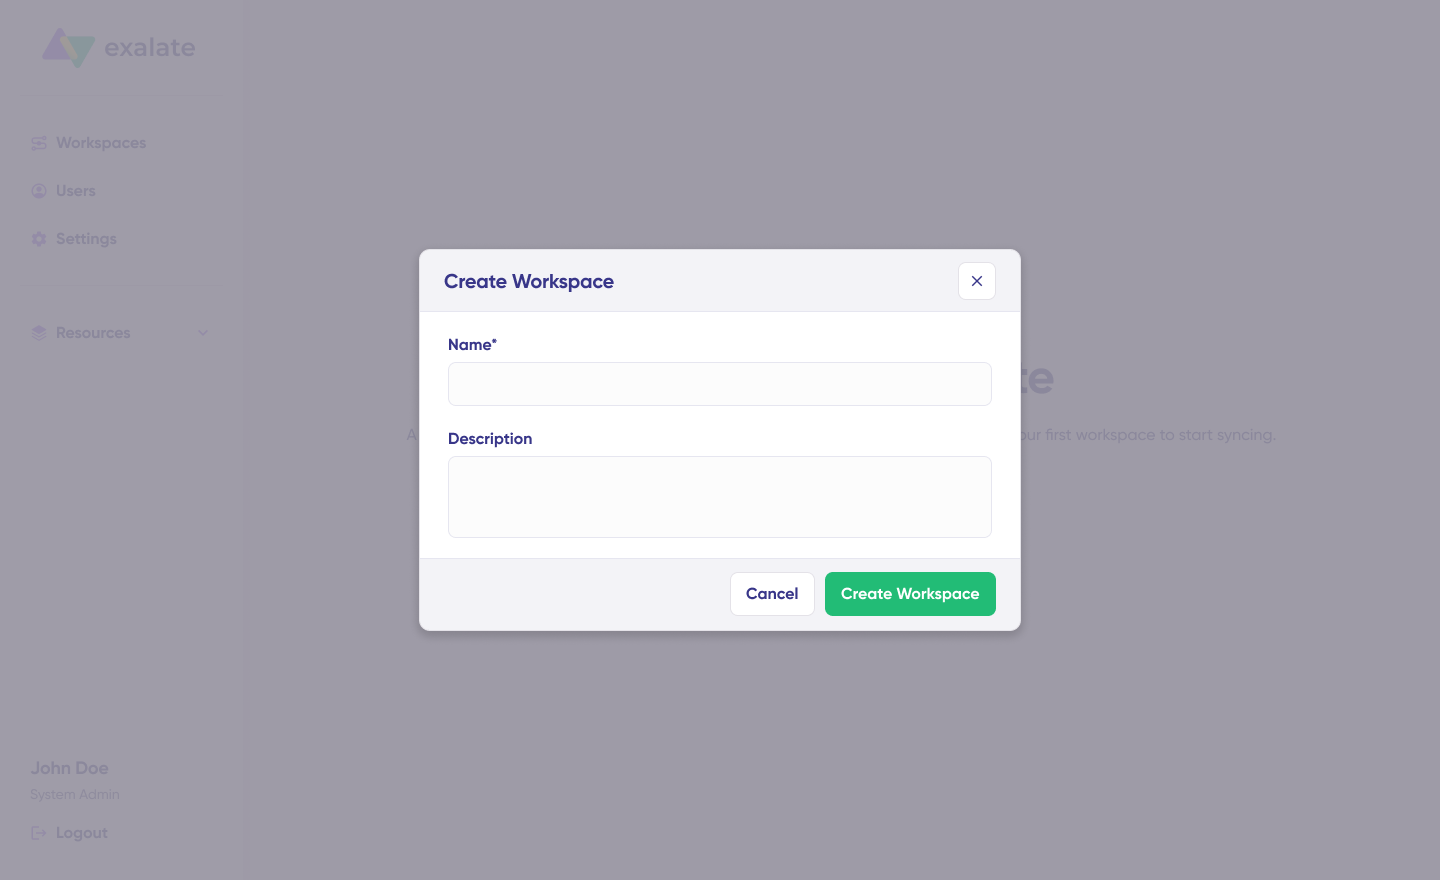
Enter a name and description, then click “Create workspace.”
If you’re working in an existing workspace, the “Connections” tab displays all your current connections. You can edit them or view connection details from there.
Note: Creating a connection requires an active Exalate account with at least one workspace, plus access credentials for both Freshservice and Zendesk.
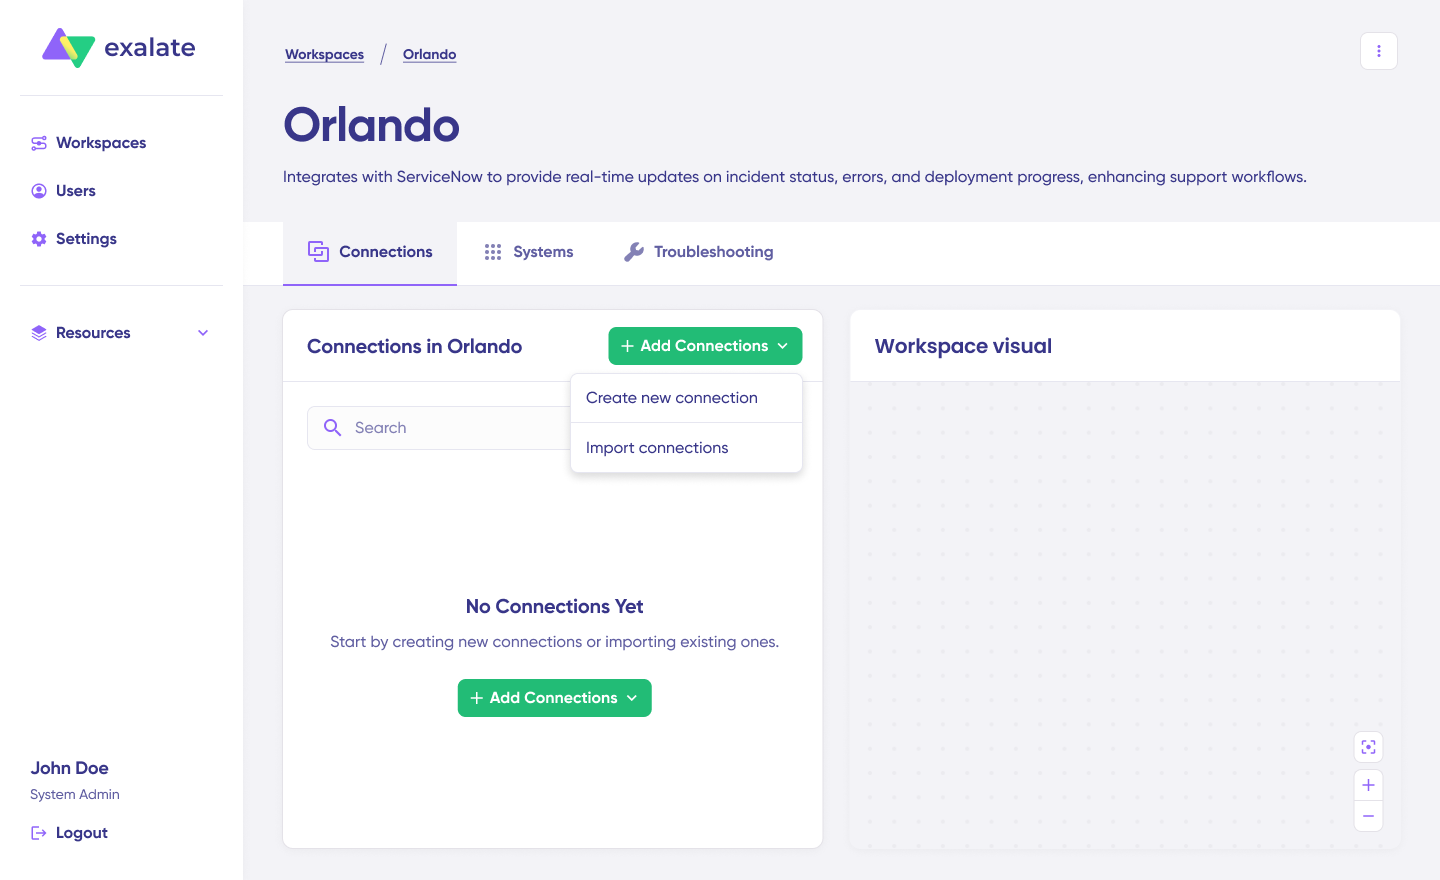
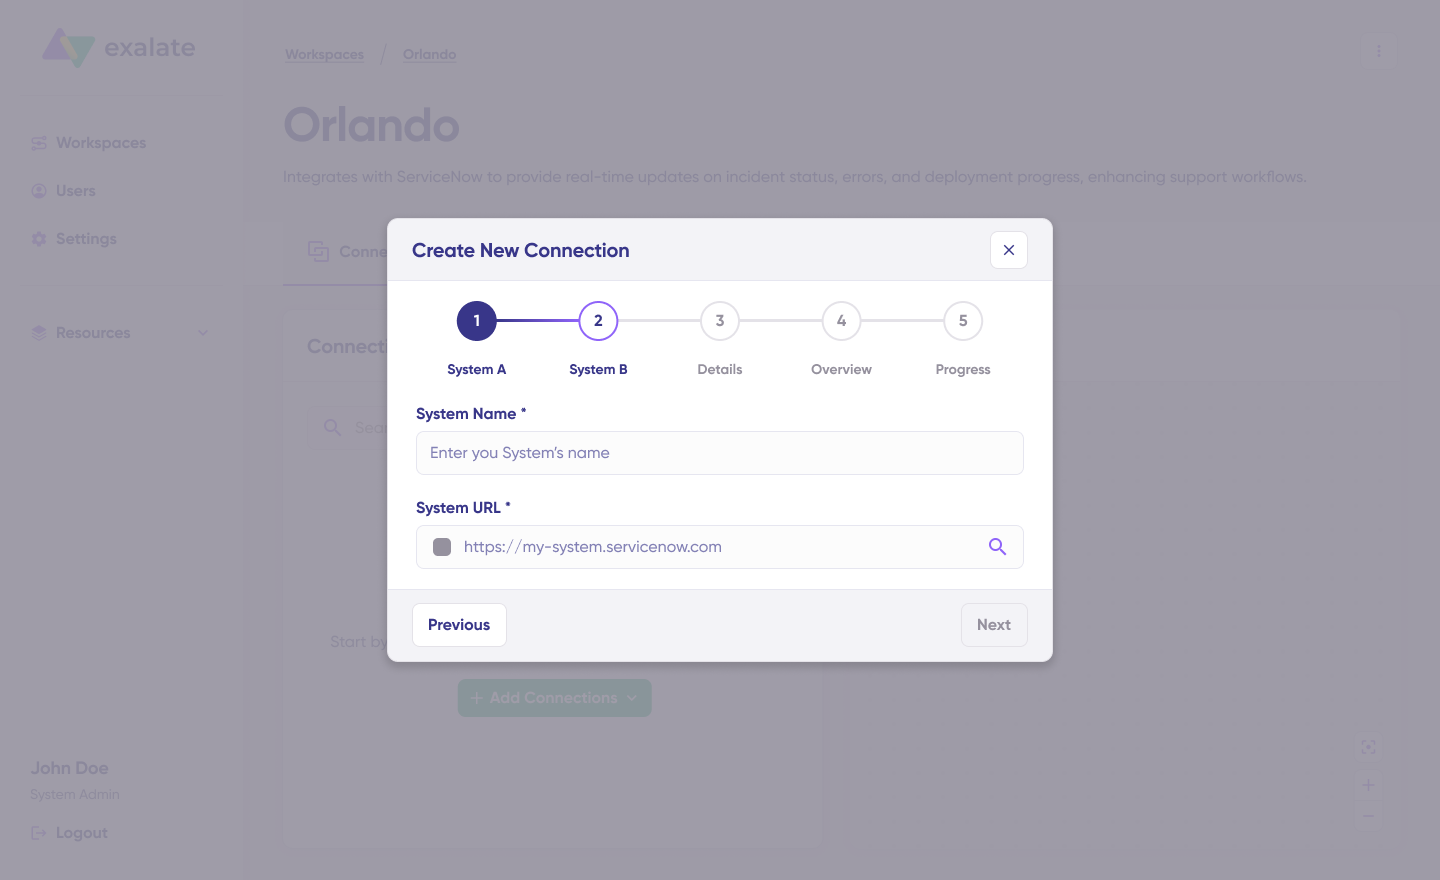
Click “+ Add connections” > “Create new connection.” Enter the name for your first system; either Freshservice or Zendesk can be System A. The order doesn’t affect functionality. Enter the URL of your chosen system.

Let’s say you start with Zendesk. Enter your Zendesk instance URL. A quick validation runs in the background.
If your system already belongs to this workspace, authentication happens automatically. If it’s part of a different workspace, the system gets registered to your current workspace.
For a new system, you’ll need to enter authentication details. Both Freshservice and Zendesk support Basic auth with username and API key/password.
Complete the same setup for Freshservice. The same authentication rules apply.
Provide a name and description for your connection. Click “Next.”
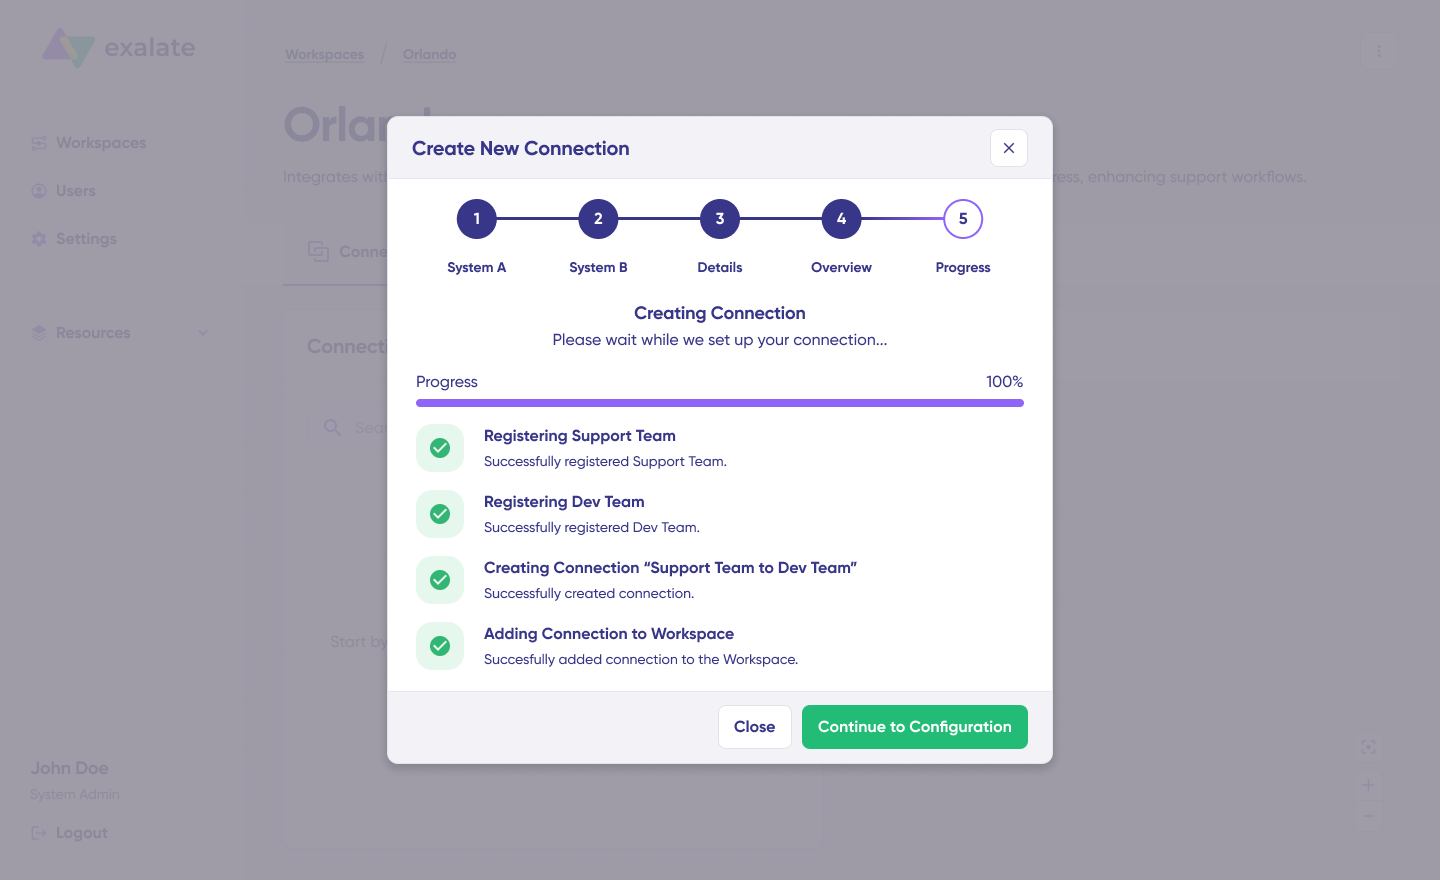
Review the details and click “Create connection.” Once the process completes, select “Continue to configuration” and choose the Freshservice department or Zendesk brand you want to use for synchronization. Click “Build & continue.”
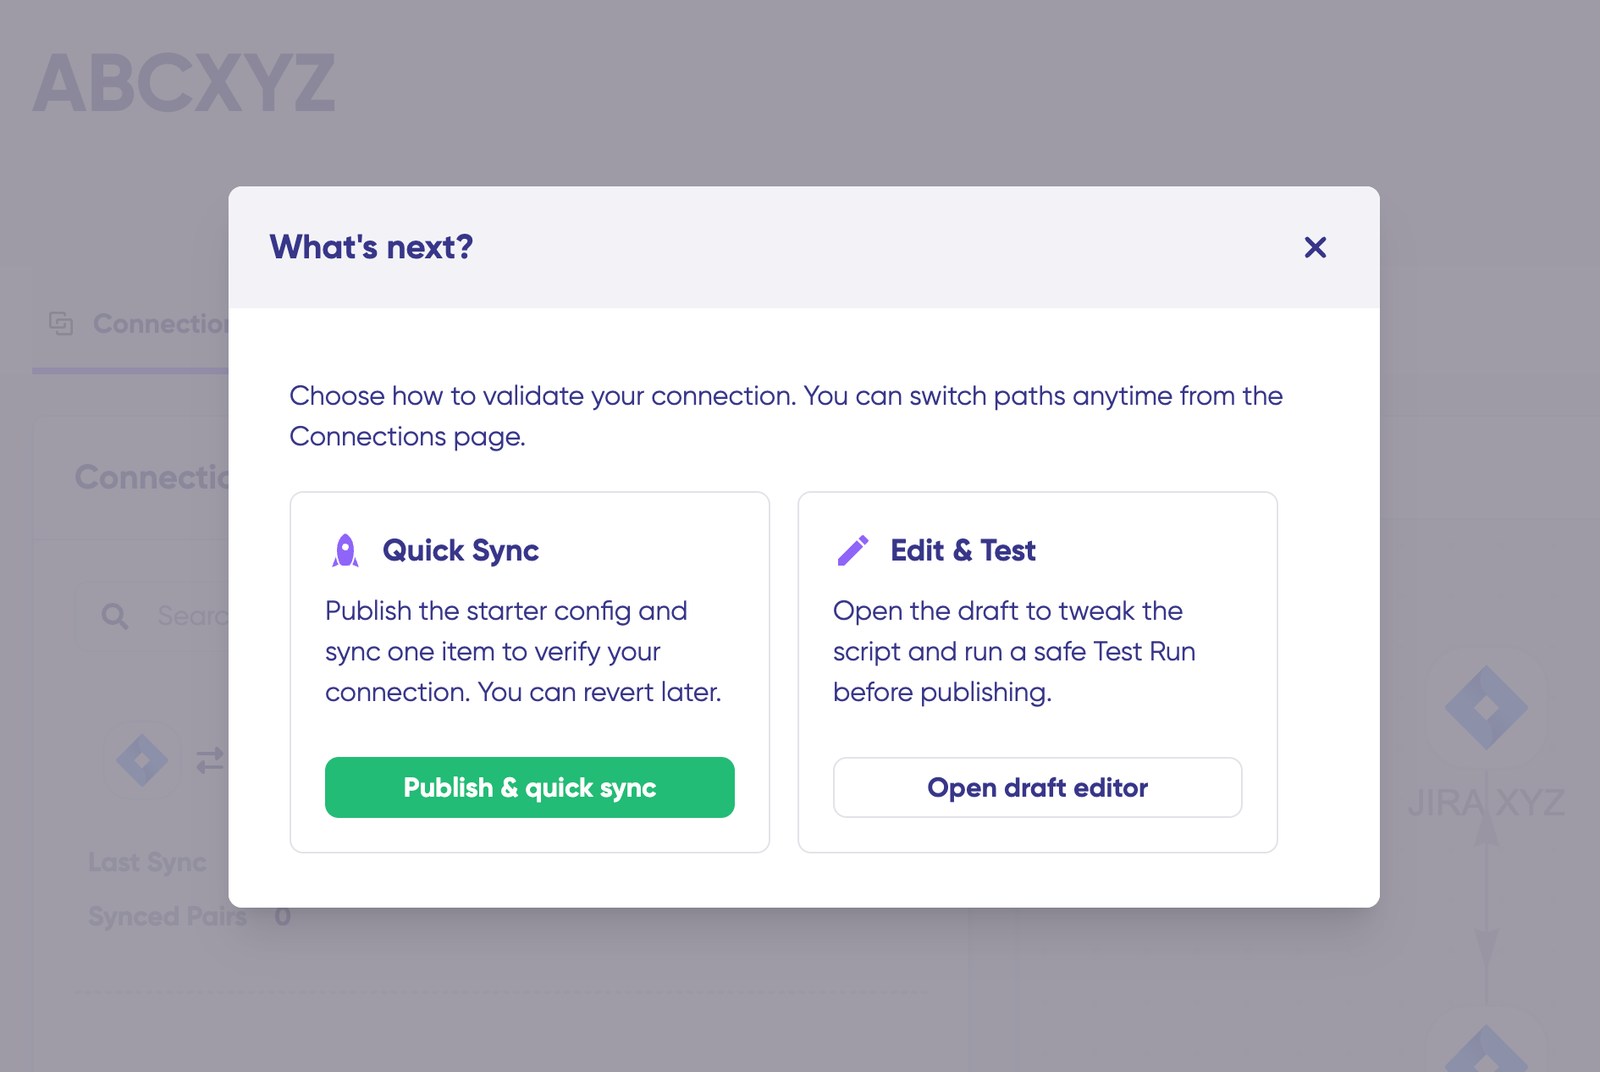
You now have two options: “Quick sync” and “Edit & Test.” Let’s walk through both.
Quick Sync: Validate your connection
This optional step lets you sync one item between Freshservice and Zendesk to confirm your connection works properly.
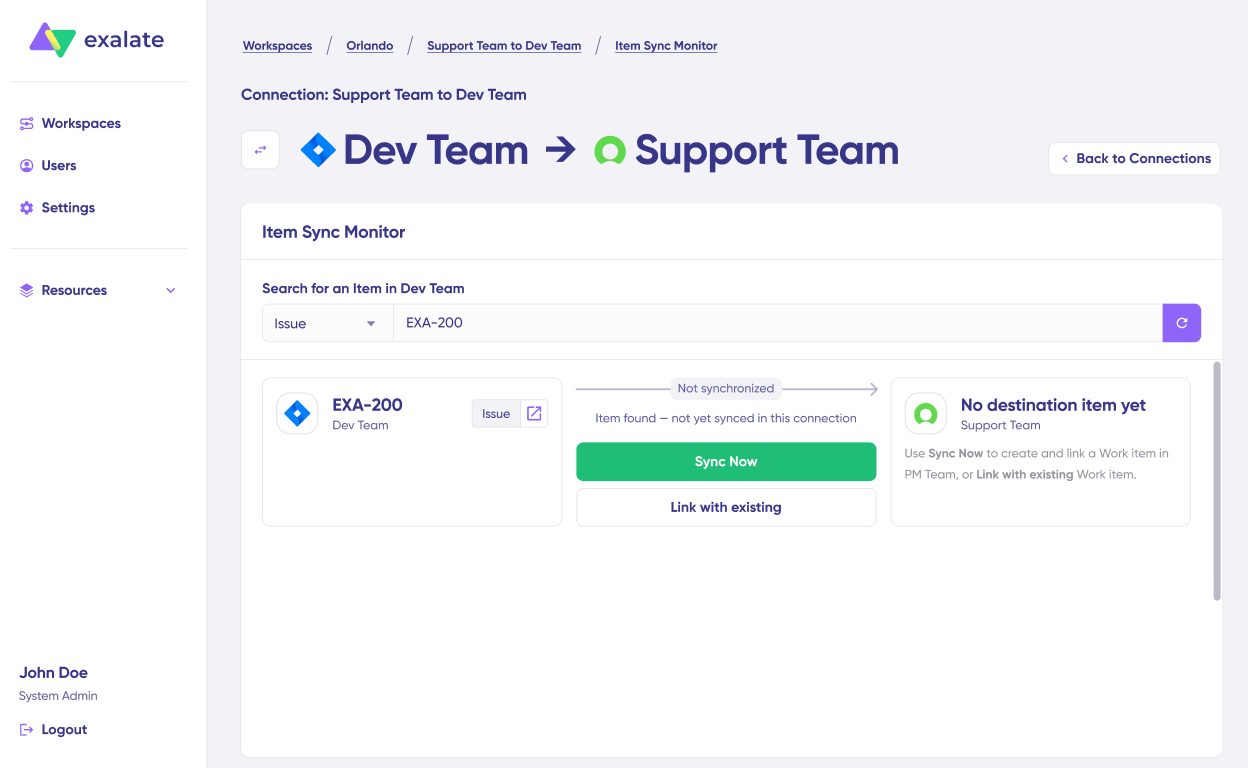
Under “Item sync monitor,” enter the Freshservice ticket number (incident or service request) or the Zendesk ticket ID. Click “Sync Now” to sync the first item. To connect two items that already exist in both systems, click “Link with existing.”

Status updates appear while the sync runs. Once complete, you can open both synced tickets in new windows to verify the results.
You can also compare how the synced items look and preview how changes will apply.
Edit & Test: Configure your sync rules
Click “Create a new version” or select “Open latest draft” to start making changes. This protects your existing configuration from accidental modifications. Draft changes save automatically.
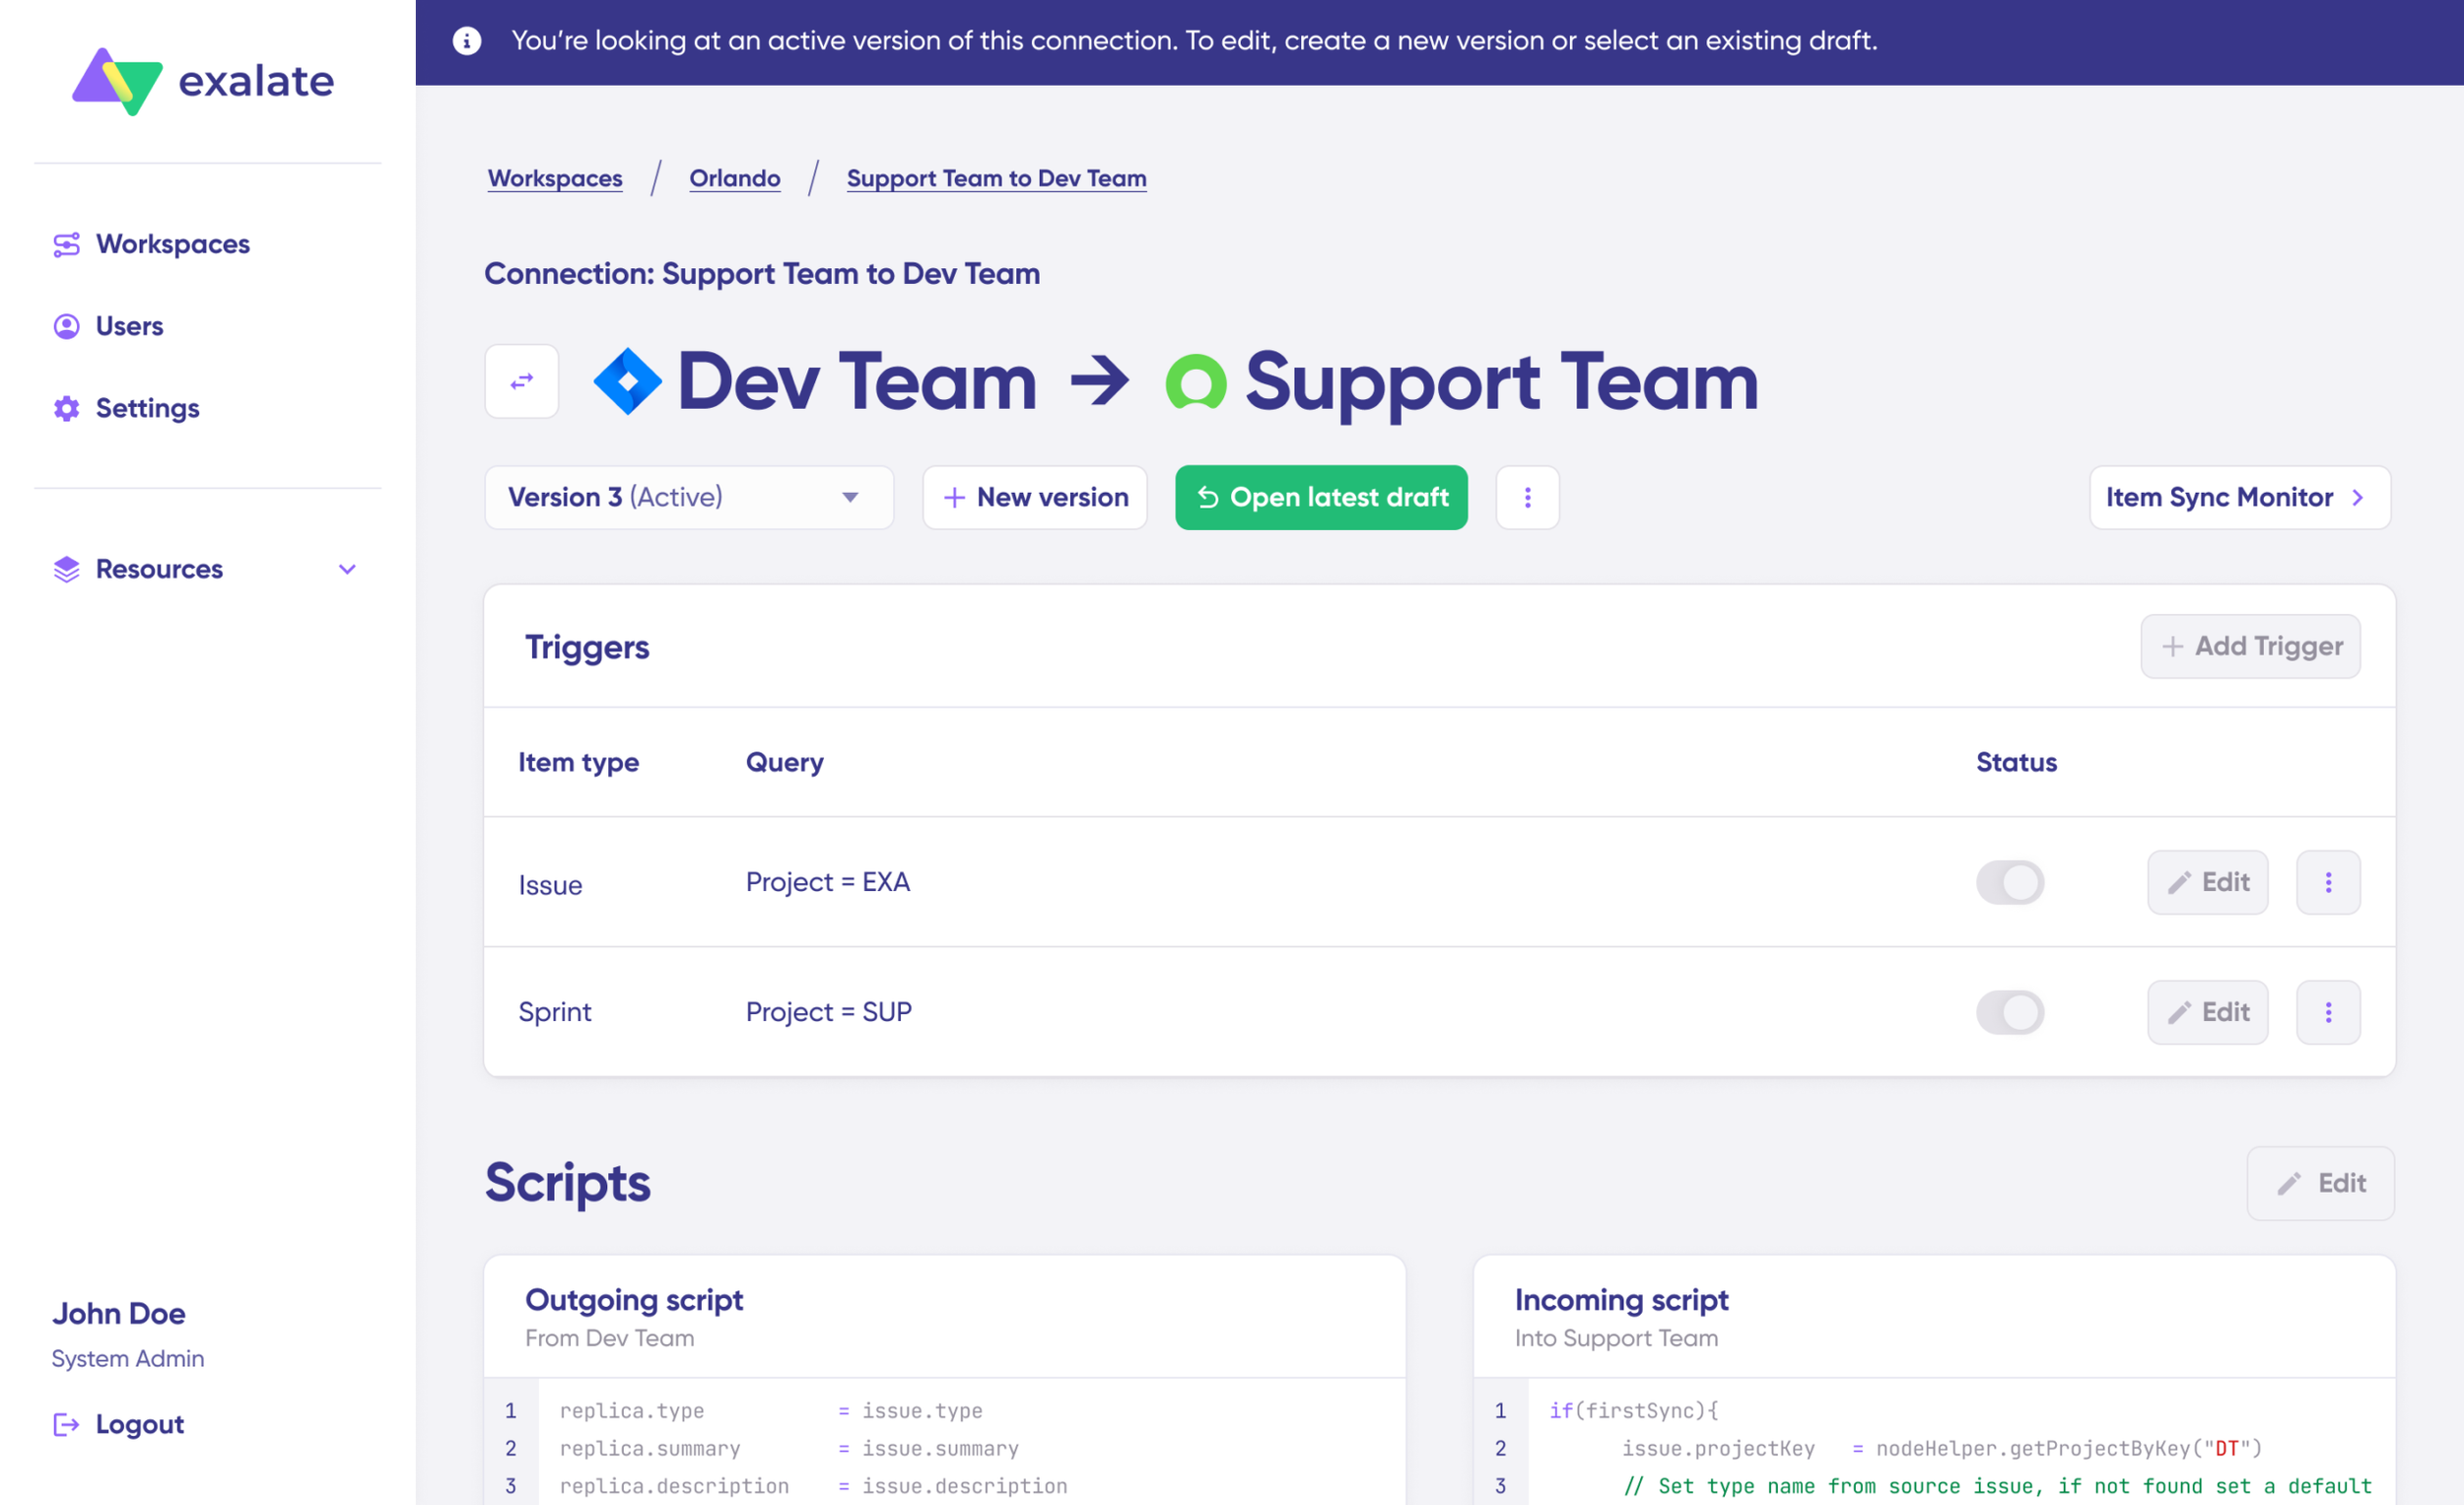
Click “Edit” to open the editor and modify your sync rules.
Sync rules use Groovy-based scripts. These scripts let you add custom data logic, field mapping, and conditional flows—adapting to complex workflows and advanced use cases.
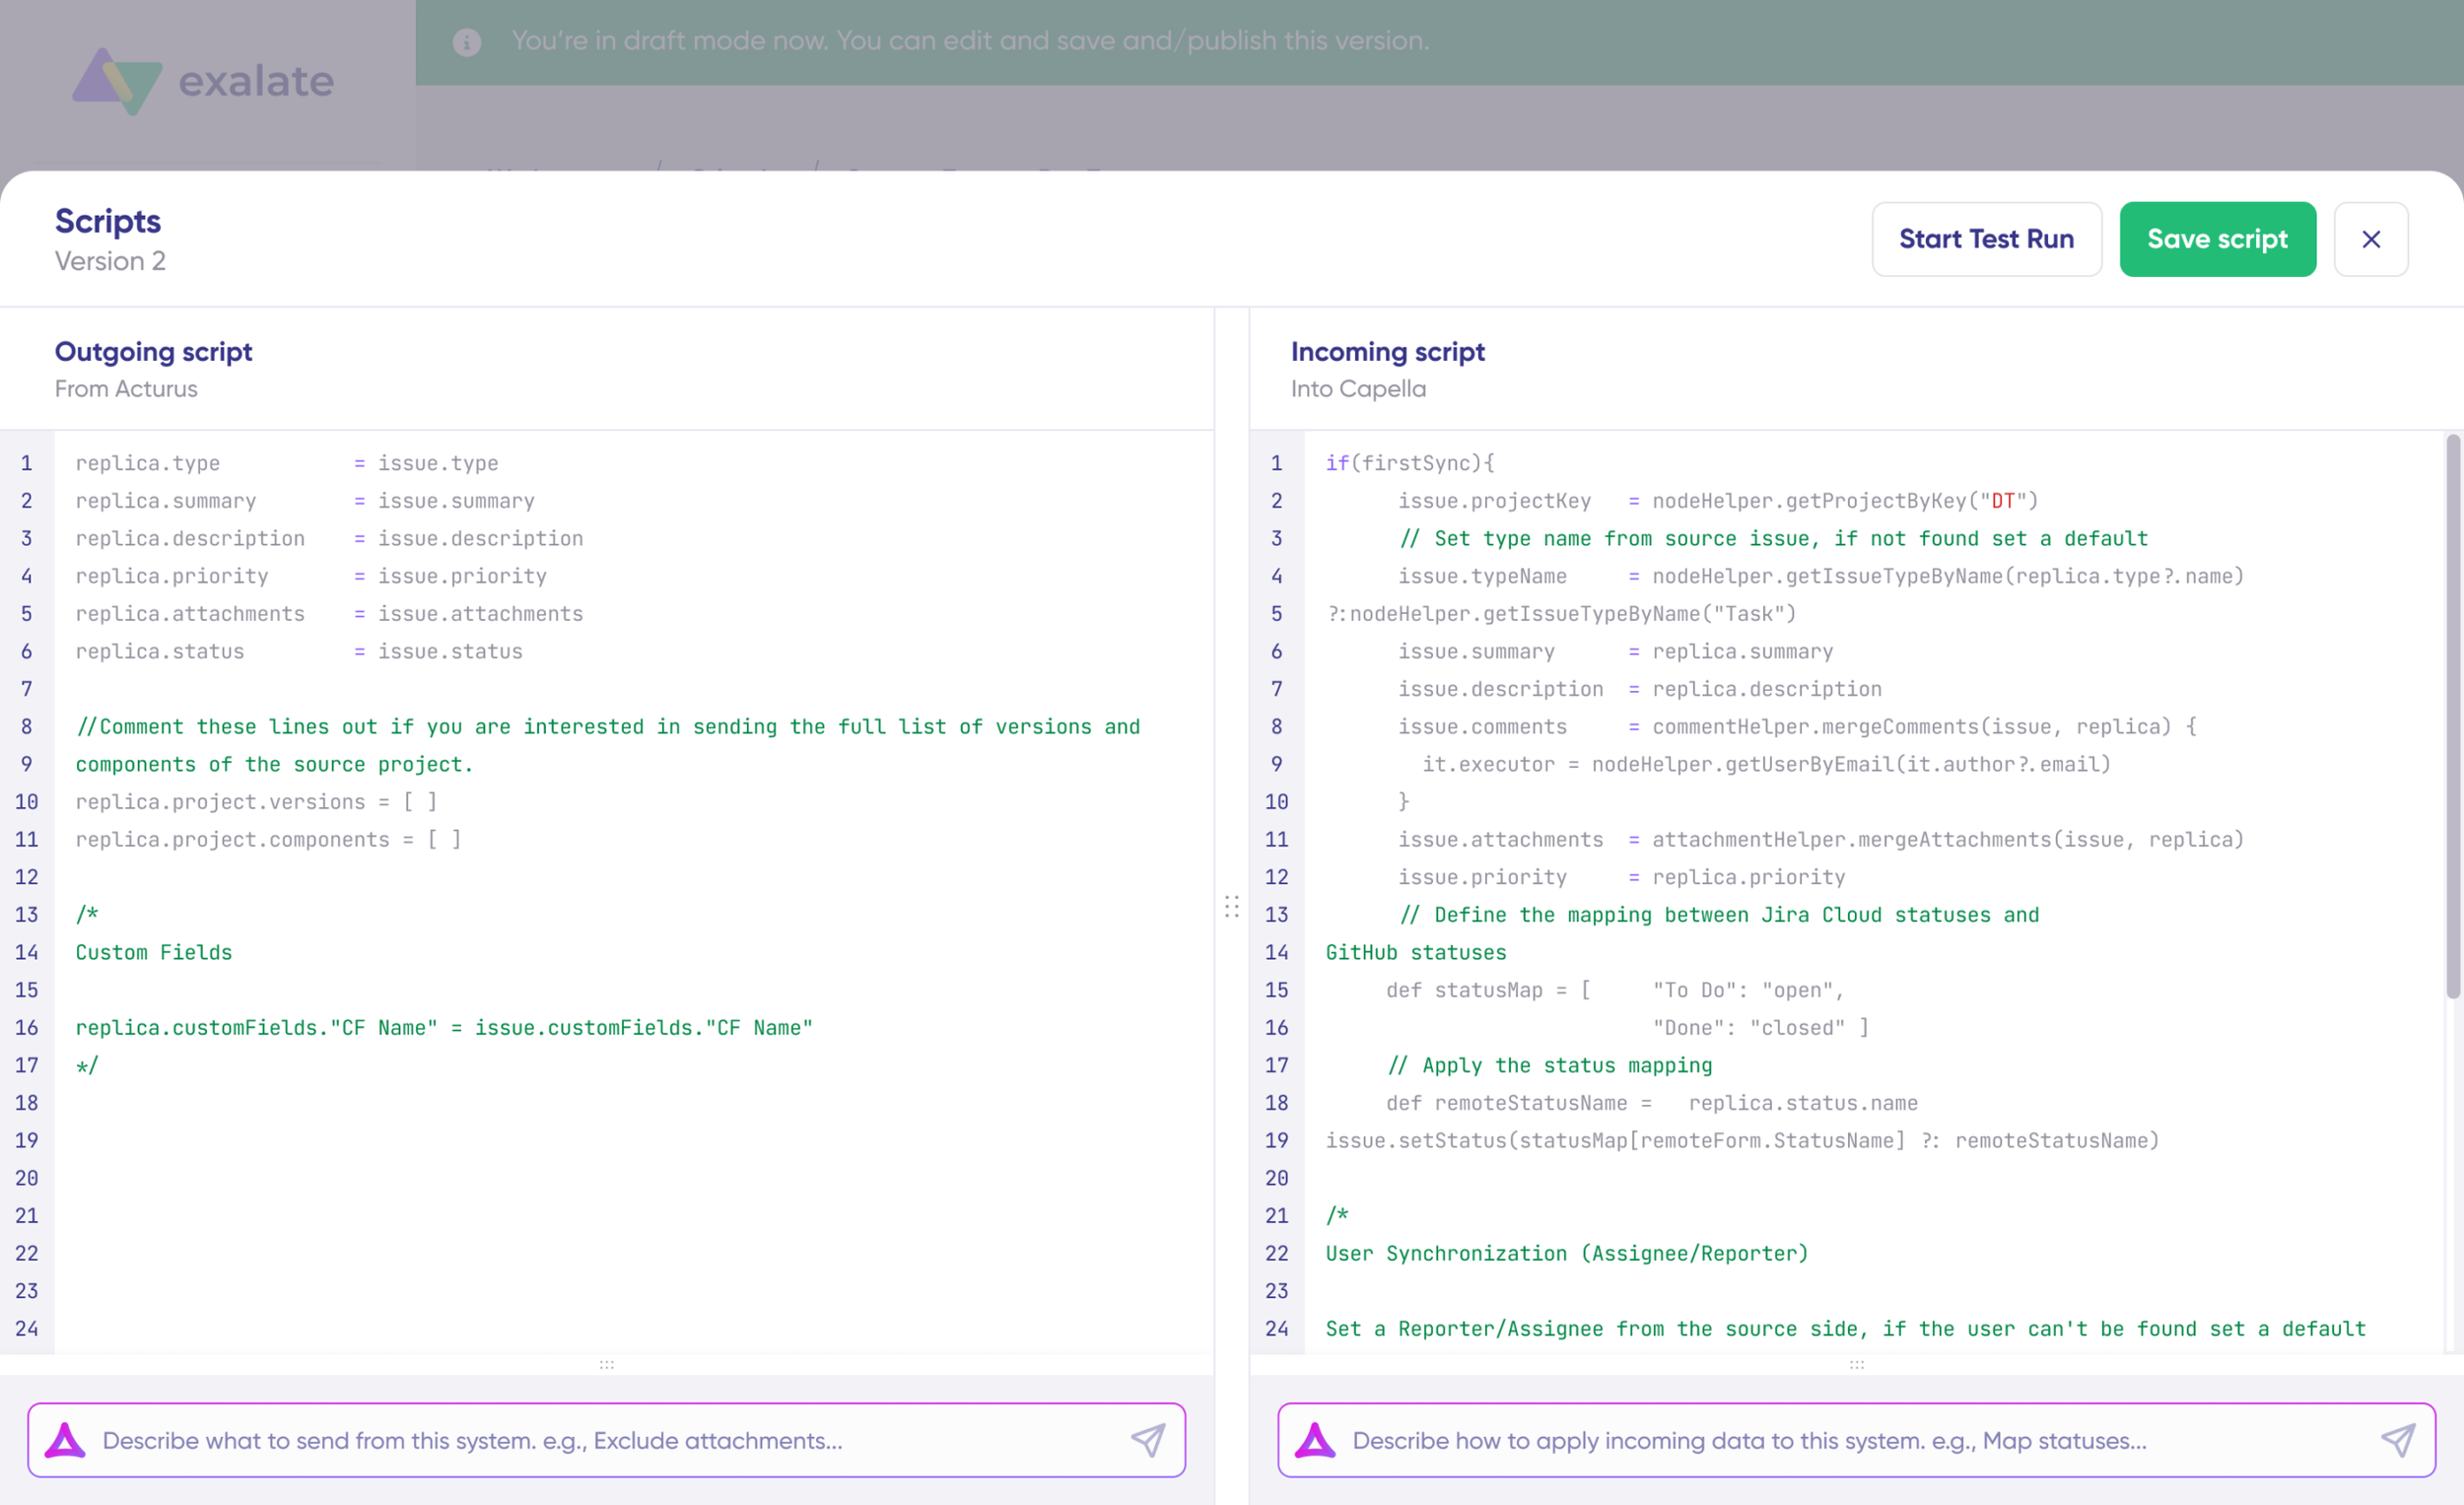
Change the sync direction by clicking the arrows next to the connection name. Scripts are divided into incoming and outgoing sections.
If syncing from Zendesk to Freshservice, the outgoing script defines what values leave Zendesk, and the incoming script determines how those values map into Freshservice tickets, incidents, or service requests. Reverse the direction, and the scripts flip accordingly.
The replica acts as a message payload holding the actual data passed between synced entities in JSON format.
To sync additional values, like ticket priority, status, tags, custom fields, or requester details, add the appropriate script lines. To stop something from syncing (for example, no attachments from Zendesk to Freshservice), remove that line from the outgoing Zendesk script.
Use Aida for AI-assisted configuration
Want to skip the scripting and save time? Use Exalate’s AI-assisted configuration feature, Aida, to generate your sync scripts. Aida appears in both incoming and outgoing script sections.
Aida helps in two ways:
For Outgoing scripts: Describe what data should leave your system. For example, “Only sync tickets with priority Urgent.”
For Incoming scripts: Describe how incoming data should apply to your system. For example, “Map Zendesk ticket statuses to Freshservice incident statuses”.
Based on Exalate’s scripting API and your existing configuration, Aida generates working Groovy scripts with proper field mappings for Freshservice tickets, incidents, service requests, and Zendesk ticket fields.
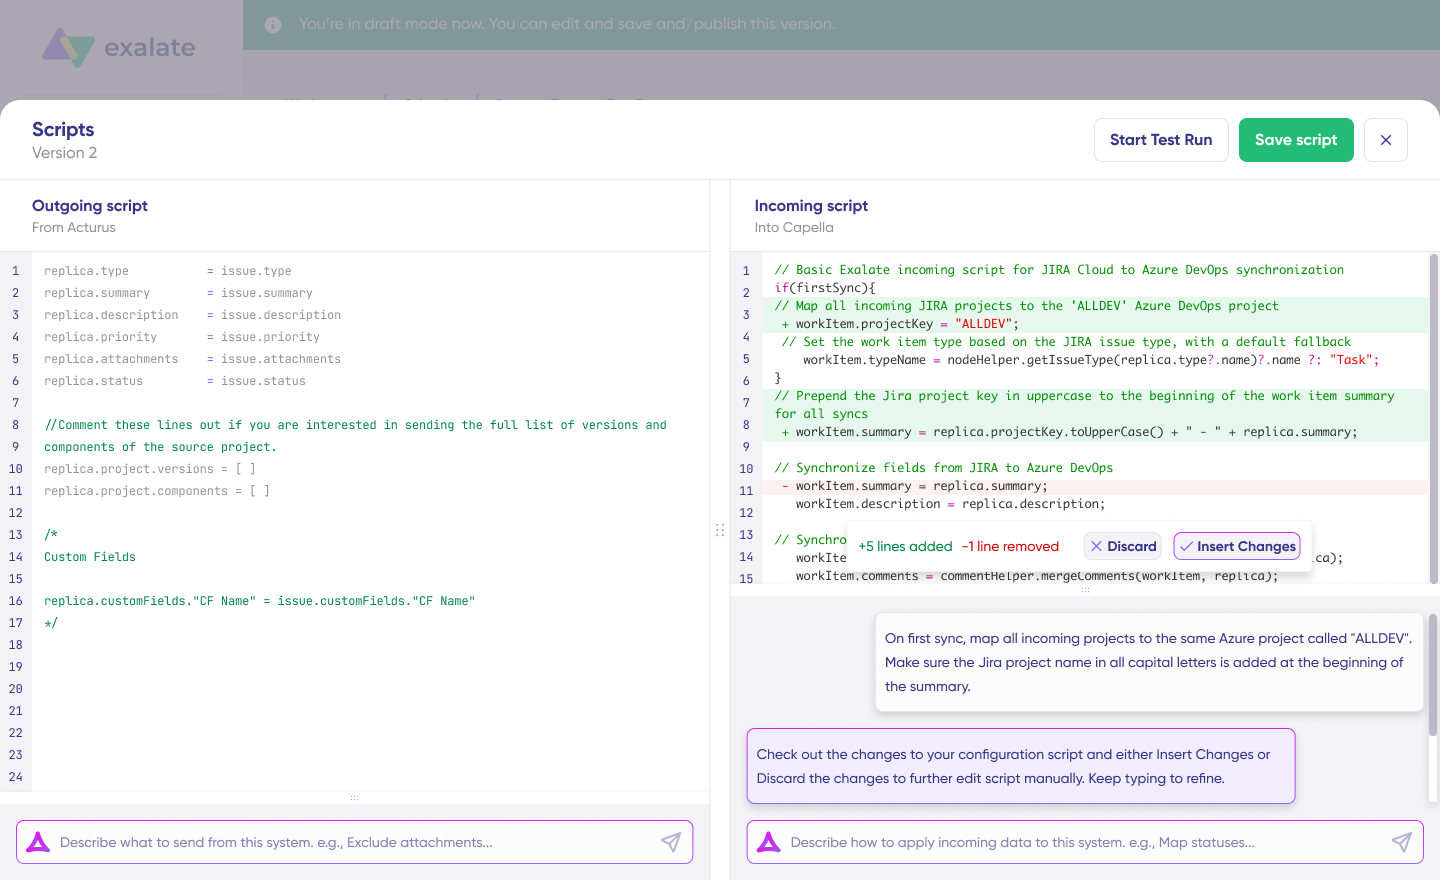
After Aida drafts your script, review the suggested changes. Green highlights new lines being added. Red highlights lines being removed. Choose “Insert” to accept or “Discard” to reject Aida’s suggestions.
Outgoing and incoming scripts work independently; Aida maintains a separate context for each, so keep your prompts direction-specific.
Note: Aida is helpful, but like any AI tool, review the generated code before applying it to production.
Test Run: Validate before going live
Once your sync scripts are ready, click “Save script” or run a dry test using “Start Test Run.”

Select the items you want to test: Freshservice incidents, service requests, or Zendesk tickets. You can select multiple items. Click “Start Test Run.”
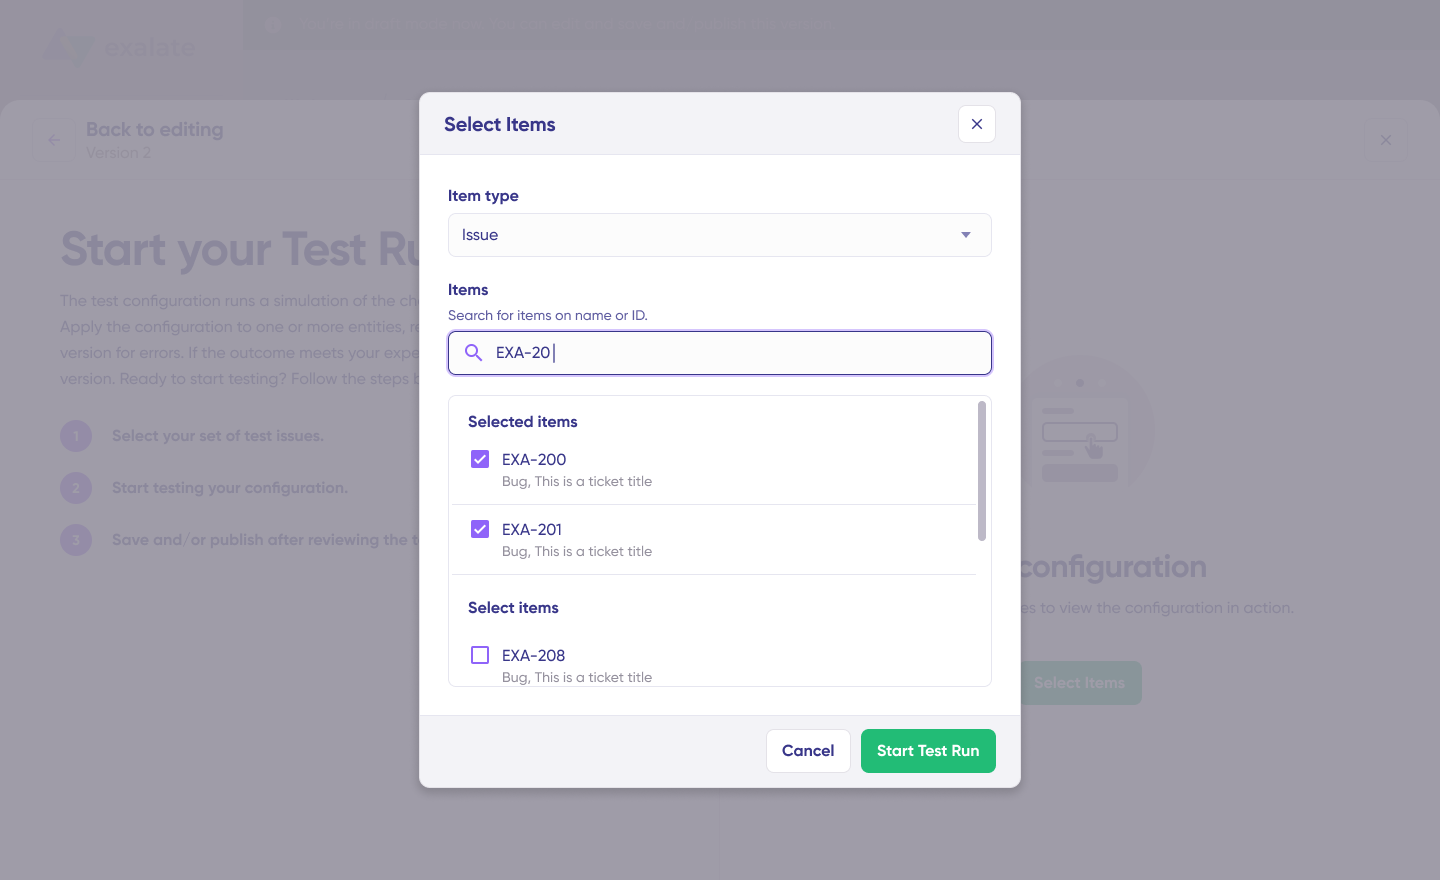
View incoming and outgoing replicas for each selected item in their respective tabs. Preview how your sync configuration will apply, check the replica data, and verify that field mappings look correct.
If something’s off, go back, adjust the scripts, and test again. Only deploy when you’re confident everything works. This safety net prevents errors from affecting live ticket data.

When everything matches your requirements, click “Publish Version” to apply the updated configuration to your live synchronization.
All versions for a connection appear in the “Version” dropdown. Versions can be “Active,” in “Draft” (editable), or “Archived.”
Set up triggers for automatic sync
Triggers are conditions or filters that determine which items sync automatically. For example: sync all Zendesk tickets with the tag “escalate_to_IT,” or sync all Freshservice incidents assigned to a specific agent group.
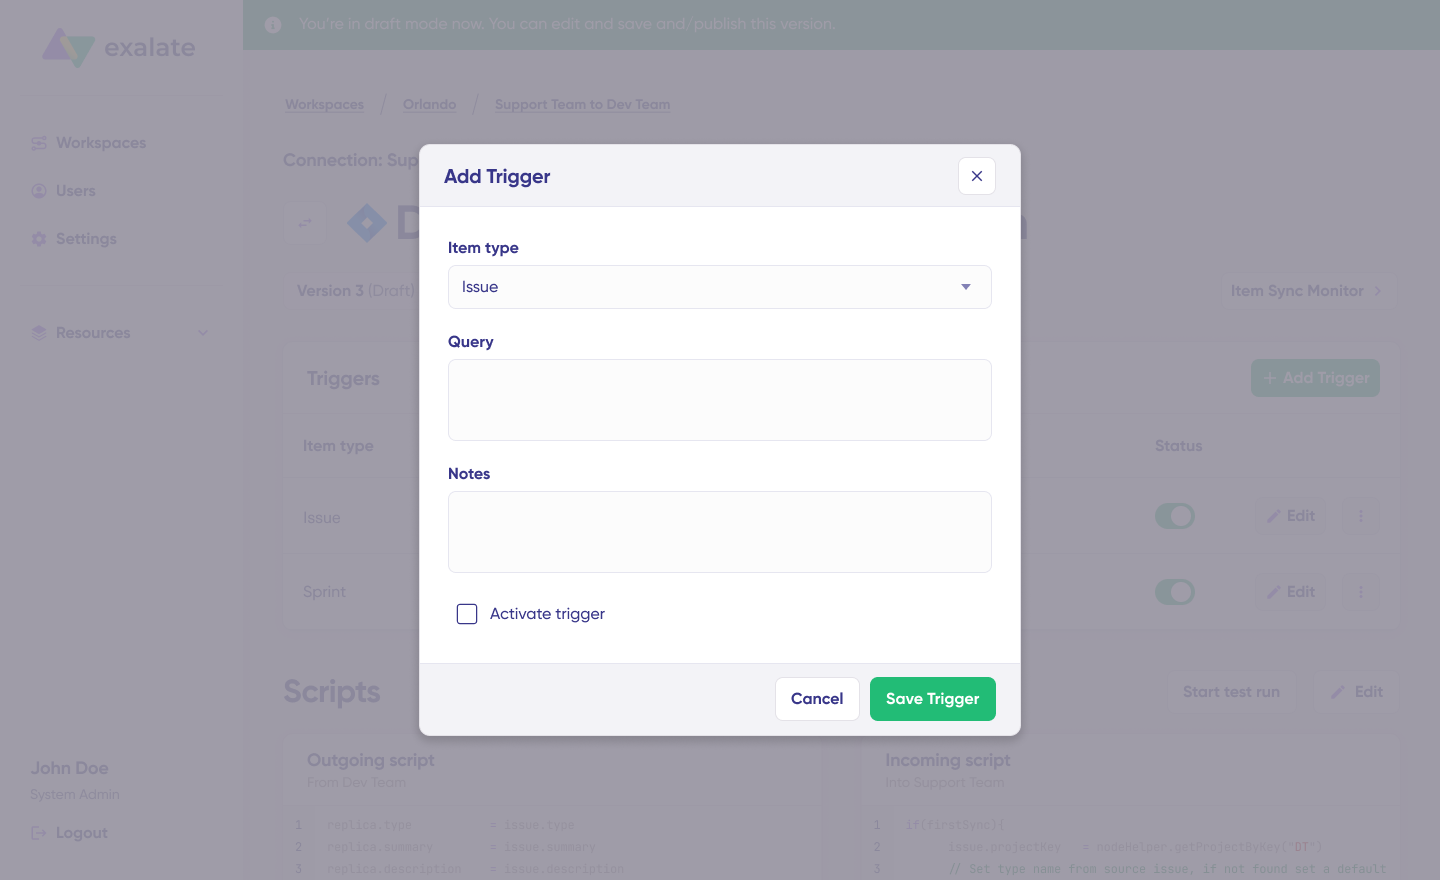
Click “+Add trigger” to create triggers. These are platform-specific:
For Zendesk: Use Zendesk search syntax to specify conditions for tickets based on status, priority, tags, assignee, brand, or custom fields.
For Freshservice: Use Freshservice query syntax to apply triggers to incidents, service requests, or tickets based on department, urgency, impact, category, or agent group.
Save your changes by publishing them.
That’s it. Your synchronization starts automatically based on the sync rules and triggers you’ve configured.
Troubleshooting with Aida
Aida helps you resolve sync errors faster with clear, context-aware suggestions right where you see them.

If an error occurs, go to the “Troubleshooting” tab in your workspace. Hover over the error you want to diagnose and click the Aida icon next to it.
A modal window displays the AI-generated suggestion, including a brief explanation of the error and a proposed solution.
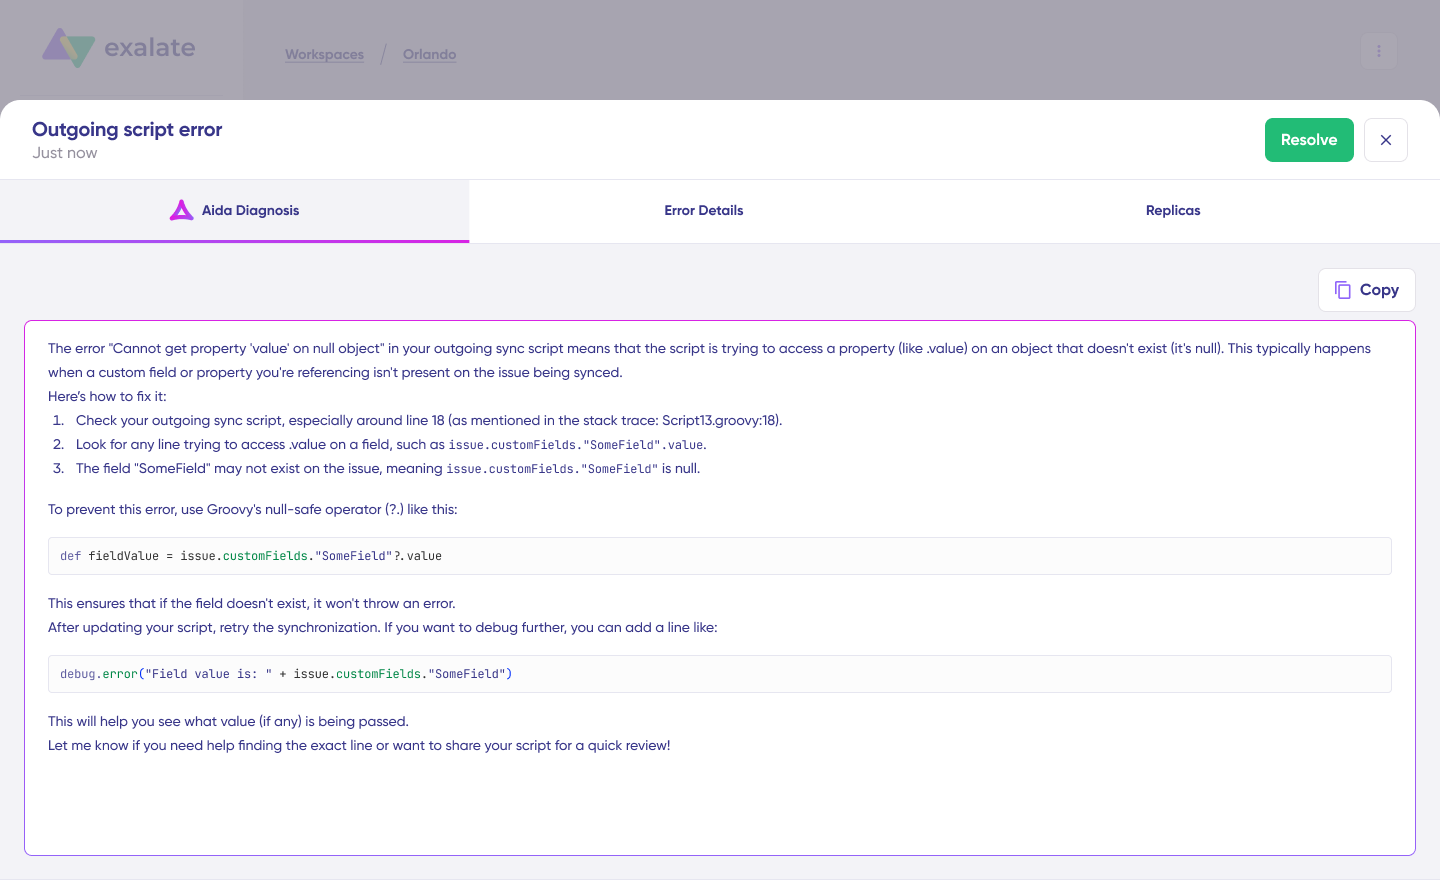
Click “View Full Analysis” for more context. You can also view “Error details” to copy the stack trace or “Replicas” to examine the JSON payload.
Choose “Resolve” and retry errors once you’ve applied the fix.
Your Freshservice Zendesk integration is now live. Tickets, incidents, and service requests will sync based on your configured rules, keeping your IT service desk and customer support teams aligned without manual data transfer.
Frequently Asked Questions
What types of data can be synchronized between Freshservice and Zendesk?
You can sync Freshservice tickets (incidents and service requests), including summary, description, status, priority, urgency, attachments, notes, custom fields, and tags. For Zendesk, all default and custom ticket fields are supported, plus any field accessible via REST APIs. The integration also supports bidirectional sync of private/internal notes, giving you complete control over what information flows between platforms.
How quickly do updates sync between the two platforms?
Exalate supports real-time synchronization. Updates typically occur within seconds of changes being made in either system. You can configure one-way, two-way, or multi-platform sync patterns based on your operational needs.
Can I map multiple Zendesk tickets to a single Freshservice incident?
Yes. This consolidation is especially valuable for MSP environments or post-release incident management. When multiple customers report the same issue through Zendesk, you can link all those tickets to one Freshservice incident. IT teams identify patterns and address root causes while maintaining individual ticket tracking for customer communication.
How does Exalate ensure data security during synchronization?
Exalate is ISO 27001:2022 certified and uses HTTPS with TLS 1.2/1.3 for data in transit. Data at rest is encrypted, and role-based access controls ensure only authorized personnel can configure or modify sync settings. JWT authentication secures API communications. For complete security documentation, visit the Exalate Trust Center.
Can I control which tickets trigger synchronization?
Yes. You can restrict sync using triggers based on brand, group, tags, requester details, ticket forms, or custom conditions using platform-native queries. This ensures sensitive information stays appropriately restricted while enabling visibility for relevant data.
How does Aida help with integration setup?
Aida is Exalate’s AI-assisted configuration tool. It converts natural language requirements into sync configurations. Describe what you want (“sync all high-priority Zendesk tickets to Freshservice incidents”), and Aida generates the configuration. You can refine the output further with Groovy scripting if needed.
Can Exalate integrate Freshservice and Zendesk with other platforms simultaneously?
Yes. Exalate supports connections to Jira, ServiceNow, Salesforce, Azure DevOps (Cloud and Server), Freshdesk, Asana, GitHub, Ivanti, and custom connectors. You can build a comprehensive integration ecosystem where data flows between all your service management tools from a single platform.
Recommended Reads
- How To Use Freshdesk Salesforce Integration For Better Sales
- Understanding Workflow Orchestration for Complex Business Processes
- ITSM Integration: Simplify Your IT Services
- Freshdesk ServiceNow Integration: Bring Your Support and IT Teams Together
- Freshdesk Jira Integration in the Age of Customer Satisfaction


