
Freshservice Azure DevOps integration connects your ITSM tool (Freshservice) with your development team’s workspace (Azure DevOps) so they can work together without the usual back-and-forth chaos.
Instead of support agents manually creating tickets for developers or constantly asking “What’s the status of that bug fix?”, everything happens automatically.
Without automatic coordination between your technical operations and devs, the level of support provided to customers will fall below par.
This comprehensive guide covers everything you need to know about integrating Freshservice and Azure DevOps, from core benefits and real-world use cases to security considerations and implementation best practices.
Key Takeaways
- Freshservice Azure DevOps integration automates data flow between ITSM and development platforms, eliminating manual ticket transfers and status update requests.
- Bidirectional sync keeps both teams informed in real-time. When developers update work items, support agents see changes reflected in Freshservice tickets automatically.
- Exalate offers AI-assisted configuration (Aida) for quick setup plus full scripting control for complex sync scenarios, including multi-tenant MSP environments.
- The integration supports complex workflows, including incident escalation, feature request pipelines, sprint integration, root cause analysis tracking, and multi-client MSP management.

How Does Freshservice Azure DevOps Integration Work?
When your support team gets a ticket in Freshservice that needs developer attention, the integration solution automatically creates a work item in Azure DevOps with all the details.
When your developers update their work item status from “In progress” to “Done”, those updates automatically show up back in Freshservice.
Your support team always knows what’s happening and can keep customers in the loop without interrupting the dev team every five minutes.
The integration follows this framework:
You set up rules for what triggers the sync, like “high priority incidents with ‘software bug’ category.”
Fields map between the systems, so Freshservice priority becomes Azure DevOps priority, and descriptions carry over. Status updates flow automatically in both directions. Everything stays linked, so you can trace from the original customer complaint all the way through to the deployed fix.
It’s like having a direct line between your customer-facing team and your developers that works 24/7 without anyone having to manage it.
When these systems don’t communicate, critical information gets lost, response times suffer, and both teams end up playing an exhausting game of telephone.
Why Integrate Freshservice With Azure DevOps?
- Eliminate manual data transfer. Instead of copying ticket details into emails or Slack messages that get lost, everything transfers automatically with full context intact.
- Real-time visibility across teams. Support agents can tell customers exactly where their issue stands without constantly pinging the dev team. Developers get customer impact data and business context right in their work items, so they can prioritize better during sprint planning.
- SLA protection. The integration keeps SLA timers running and alerts you if dev progress might cause a breach. You won’t miss SLA deadlines because development work is invisible to your service desk.
- Improved customer experience. Customers get proactive updates about their issues instead of radio silence. They see progress as the ticket moves through stages, which builds confidence even when fixes take time.
- End-to-end traceability. Track everything from initial customer complaint through code commit to deployment. This information proves essential for post-mortems, compliance reporting, and process improvement.
- Tool autonomy. Both teams stay in their preferred tools instead of jumping between platforms to get status updates or provide information.
Organizations also need to connect their internal systems with external partners: MSPs, vendors, suppliers, and customers. This cross-company integration keeps everything running smoothly and creates better service experiences for everyone involved.
What to Consider When Choosing a Freshservice to Azure DevOps Integration Tool
- Flexibility and Customization: Look for an integration that can handle complex business logic and conditional mappings without forcing you to change how you work. Your integration tool should adapt to your processes, not the other way around.
- Bidirectional Real-Time Sync: Make sure updates flow both ways in real-time. You don’t want developers updating Azure DevOps only to have support agents working with stale information in Freshservice.
- Security and Compliance: Check what data governance and security features are available, especially if you’re handling sensitive customer information or operating in regulated industries. Key security capabilities to look for include ISO 27001 certification, role-based access control, and encryption of data both in transit and at rest.
- Scalability and Performance: Consider how the integration handles high-volume sync scenarios. You don’t want your integration slowing down when ticket volumes spike during incidents.
- Implementation and Maintenance: Look at the learning curve and ongoing maintenance requirements. Some solutions need constant attention, while others run themselves once configured properly. Factor in implementation time, training costs, ongoing maintenance, and licensing fees.
- AI-Assisted Configuration: Modern integration platforms offer an AI-assisted setup that converts plain language descriptions into working configurations. This reduces time-to-value and makes complex integrations accessible to teams without deep scripting expertise.
- Scripting and Operational Control: For advanced scenarios, you need full script control over your sync side. This means complete autonomy over what data leaves your system, how it transforms, and what conditions trigger sync events.

Calculate time and money savings from automated bidirectional sync.
Exalate for Freshservice Azure DevOps Integration
Exalate supports Freshservice to Azure DevOps integration with AI-assisted configuration (Aida) that allows you to configure synchronization for any operational use case using natural language prompts or custom Groovy scripts.
Exalate also supports connections between Freshservice, Zendesk, Freshdesk, ServiceNow, Salesforce, Azure DevOps, Azure DevOps Server, Jira, GitHub, and Asana. Custom connectors extend integration capabilities to proprietary platforms via REST API. Check out the other supported integrations.
Key features:
- Multi-directional connections for connecting multiple partners, vendors, MSPs, or suppliers simultaneously
- Security controls, including JWT authentication, role-based access controls, and encryption protocols
- AI-assisted configuration that converts plain language prompts into working sync rules
- Groovy-based scripting for advanced integrations requiring custom logic and transformations
- Automated granular triggers to control ticket replication and actions across platforms
- Expert configuration through the Integration as a Service (IaaS) offering that provides experienced engineers for mapping and setup
How to Implement Freshservice Azure DevOps Integration Using Exalate
This walkthrough shows you how to connect Freshservice and Azure DevOps using Exalate’s workspace-based configuration.
Step 1: Create Your Exalate Account and Workspace
Head to the Exalate integrations page to get started.
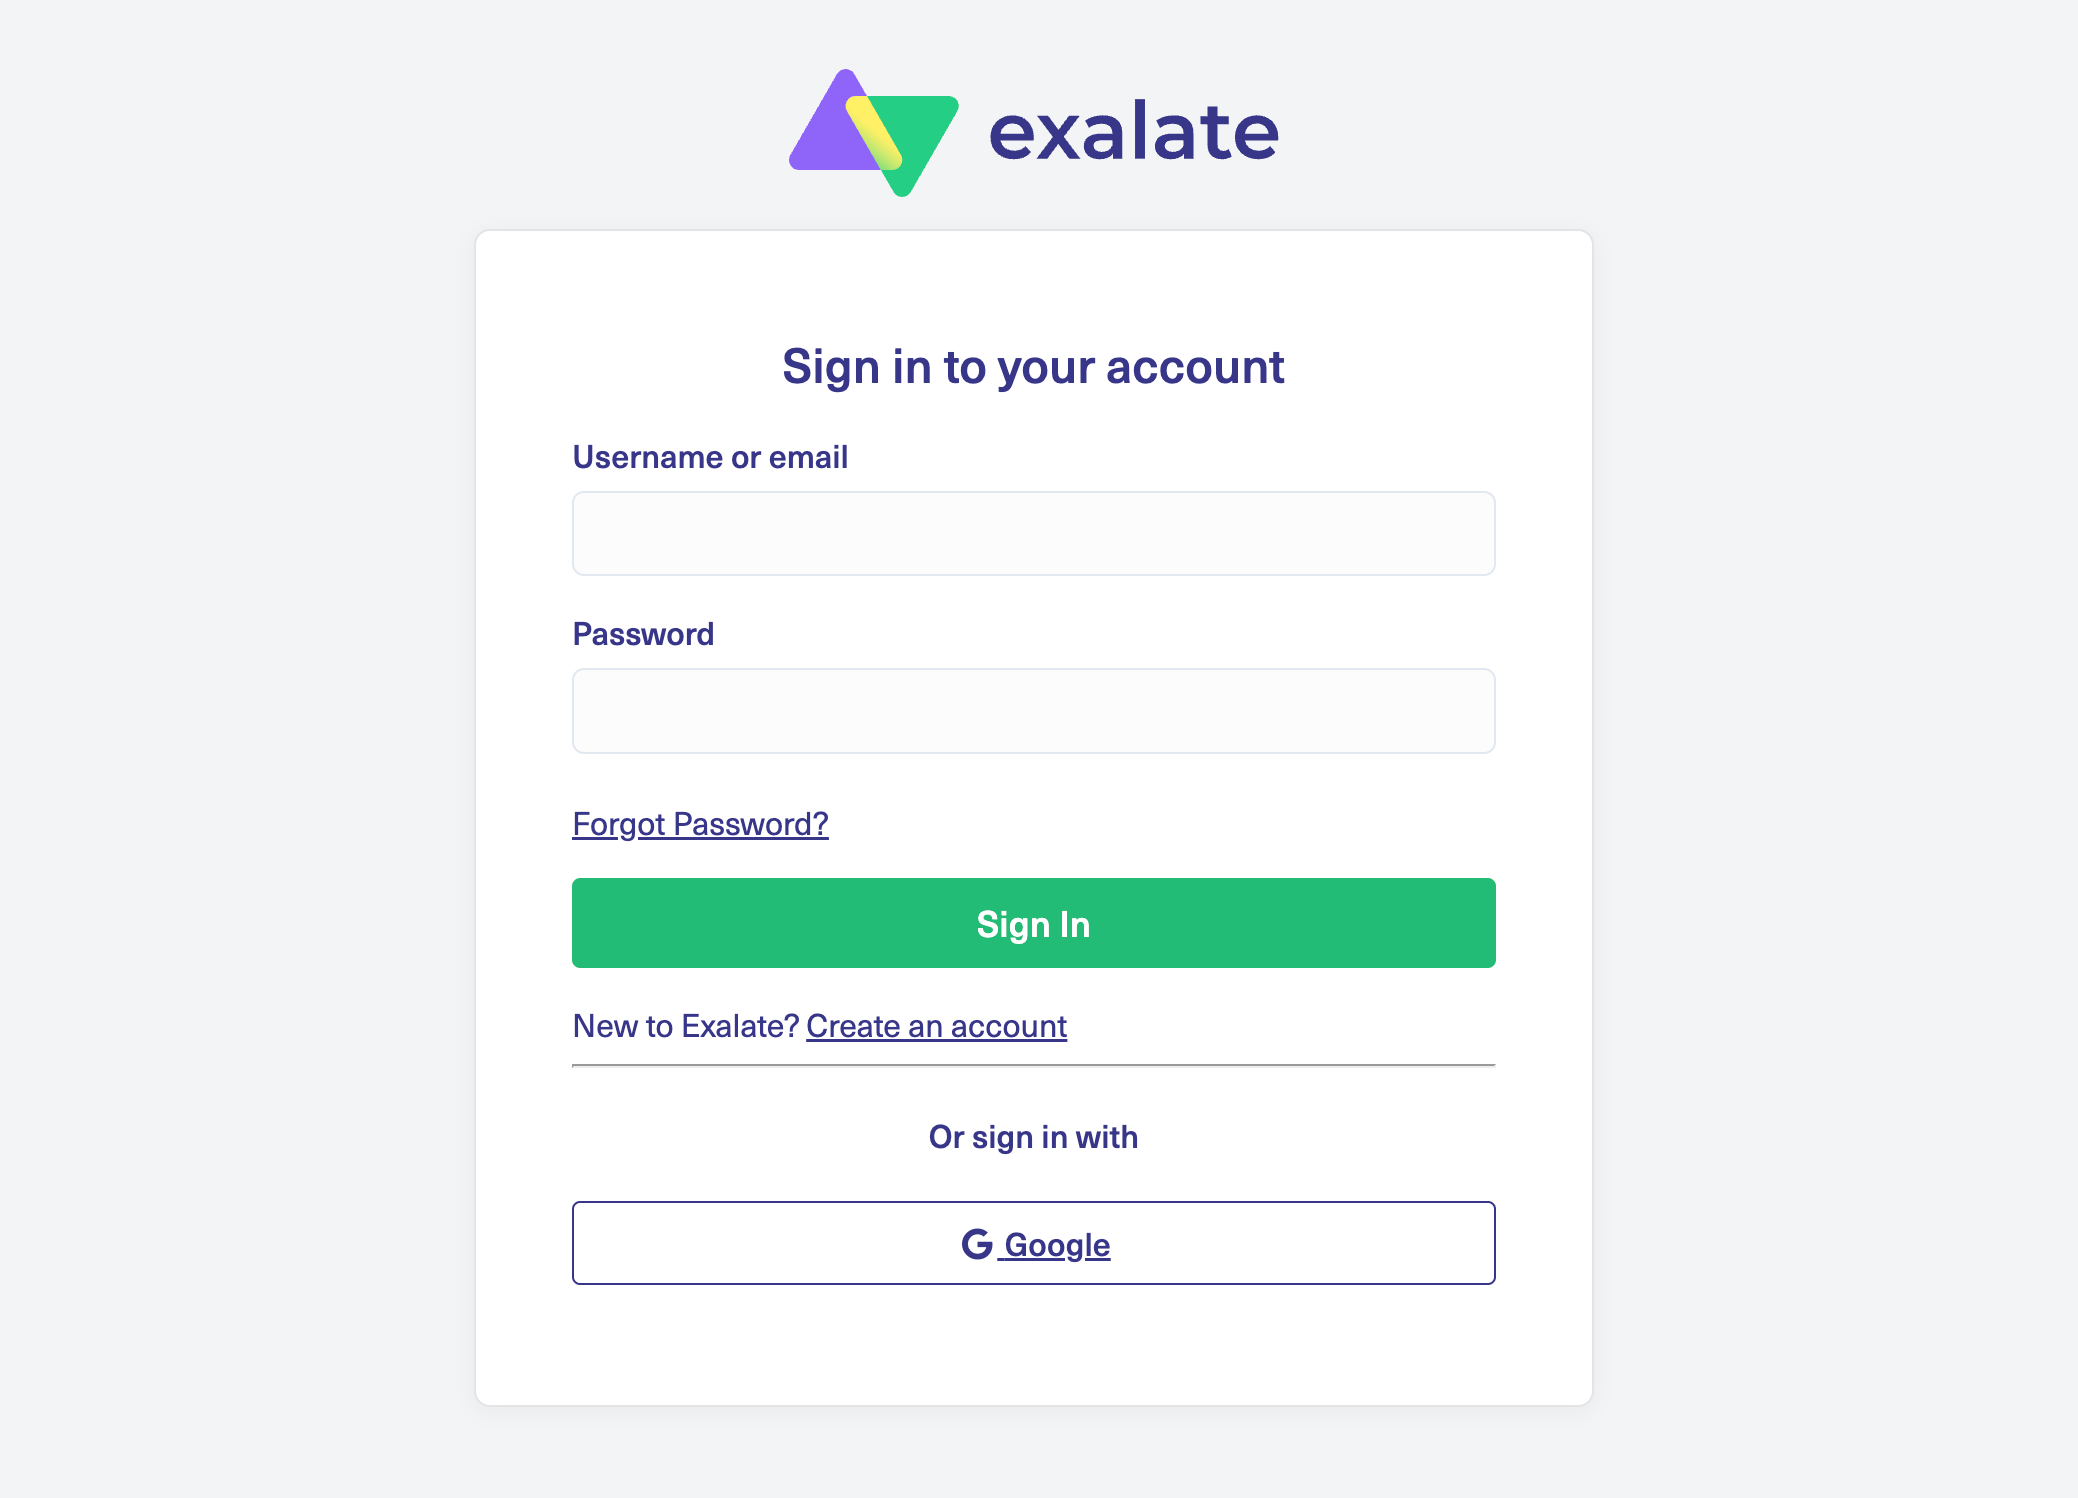
Create a new account by entering your email and verifying it, or sign up with Google. If you already have an account, log in directly.
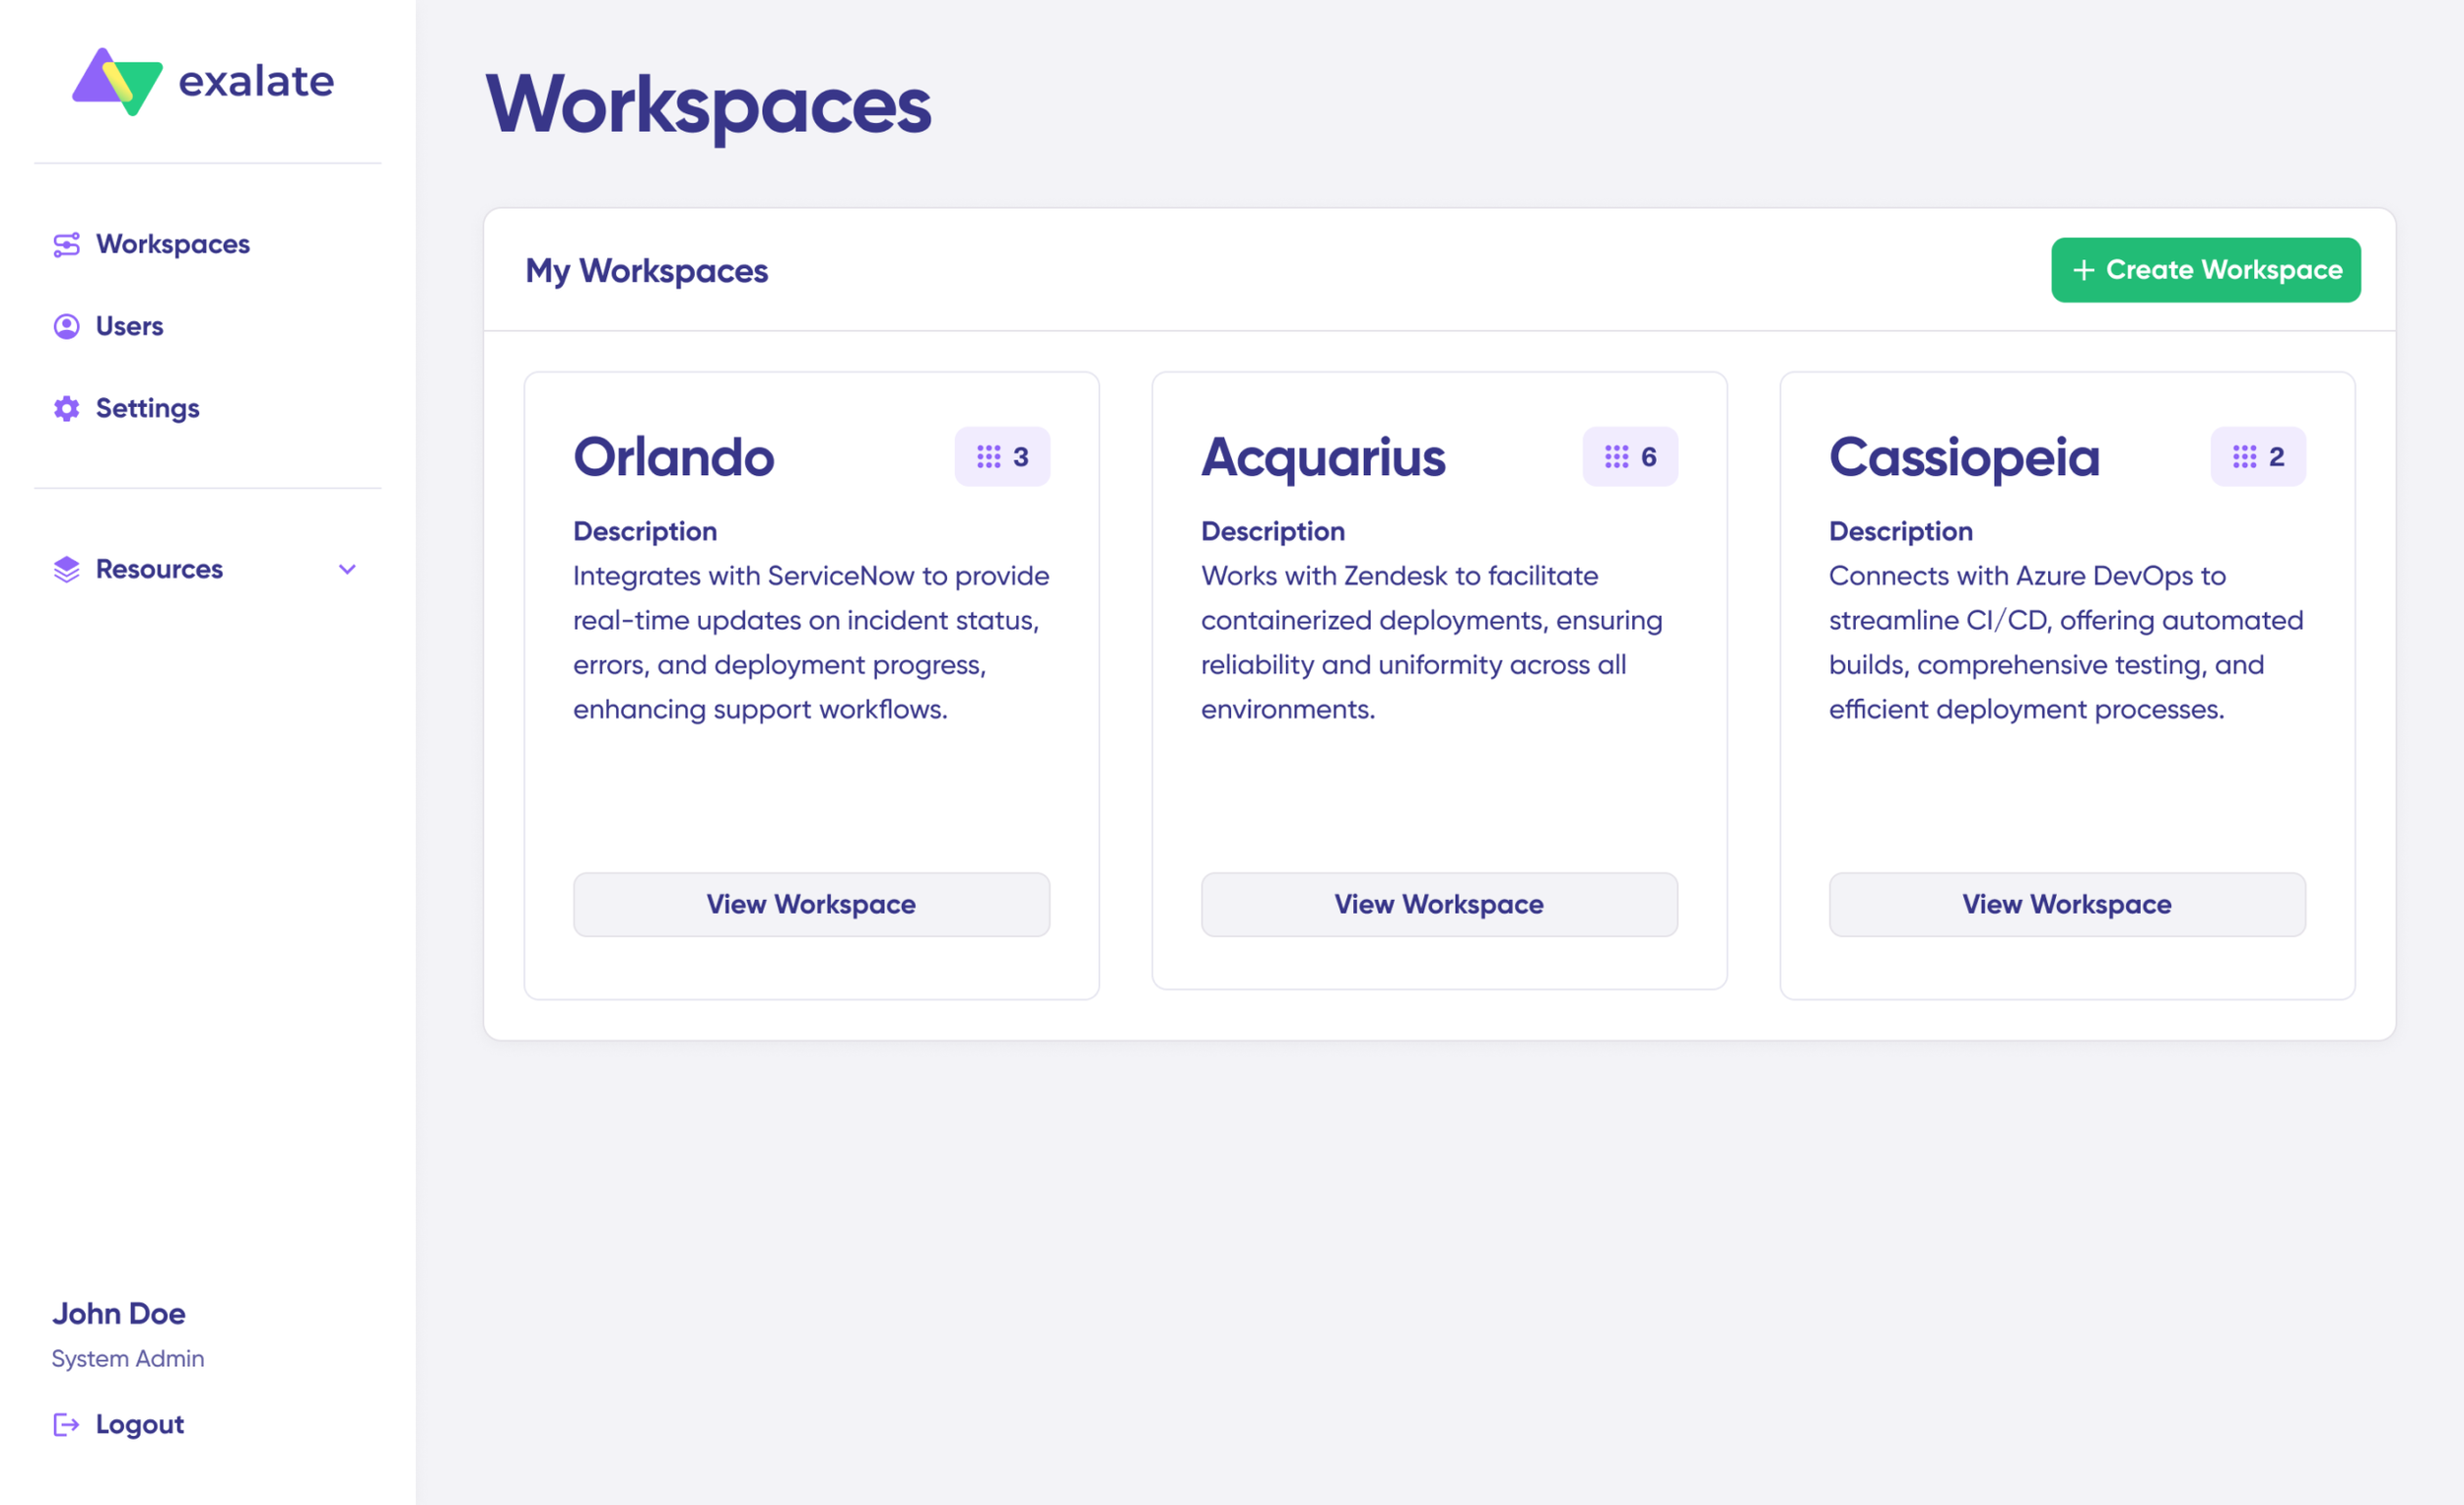
Workspaces let you organize and manage all your integrations from one place. Check the “Workspaces” tab to see any existing workspaces.
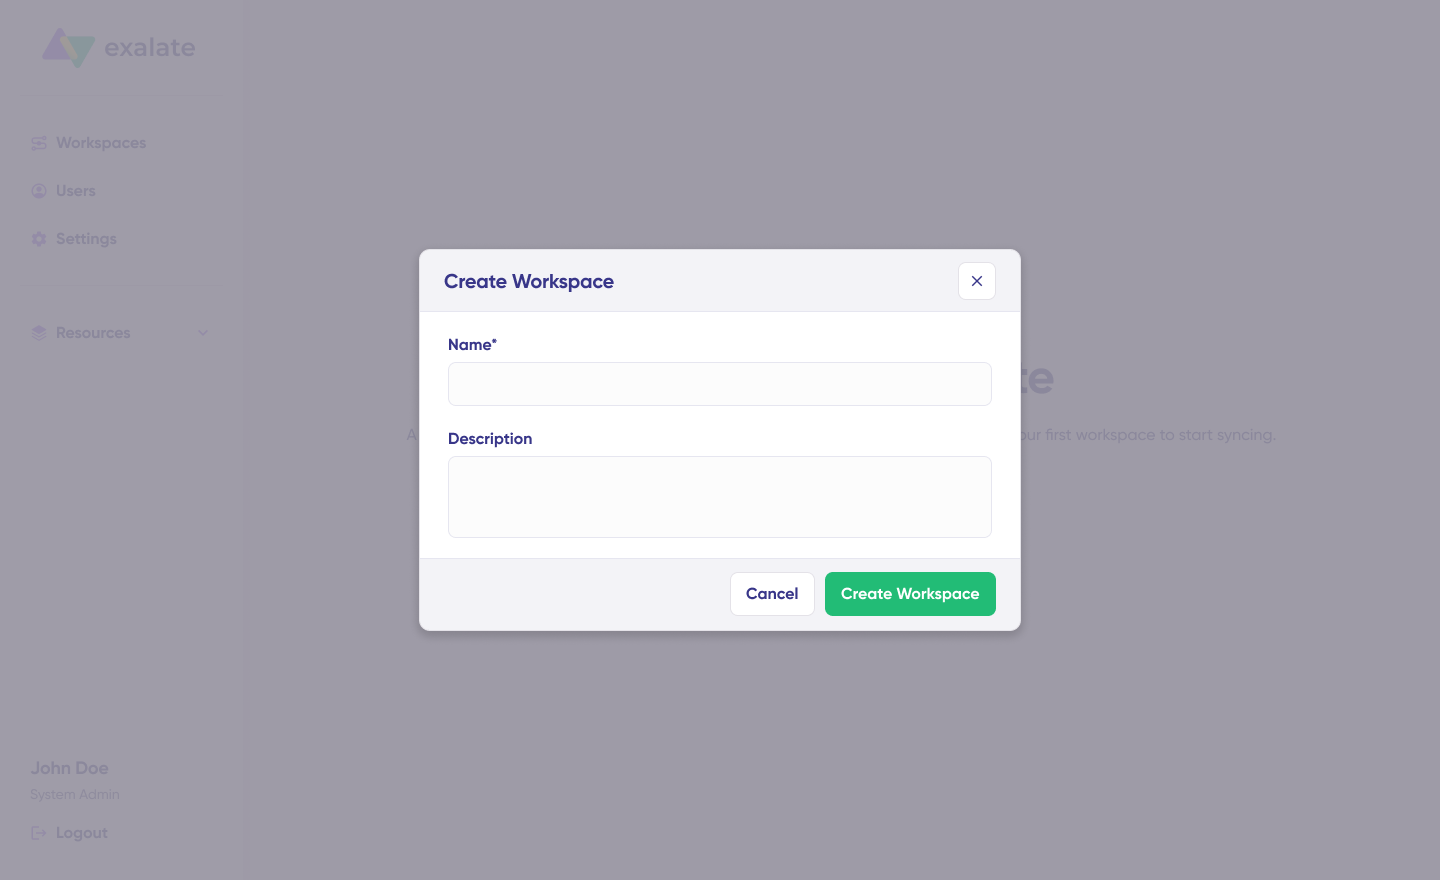
For a new workspace, click “+ Create Workspace”, give it a name and description, then click “Create workspace”.
Step 2: Set Up Your First Connection
With your workspace ready, you can start building the connection between Freshservice and Azure DevOps. View existing connections under the “Connections” tab, or create a new one.
Note: You’ll need an active Exalate account with at least one workspace and access credentials for both Freshservice and Azure DevOps.
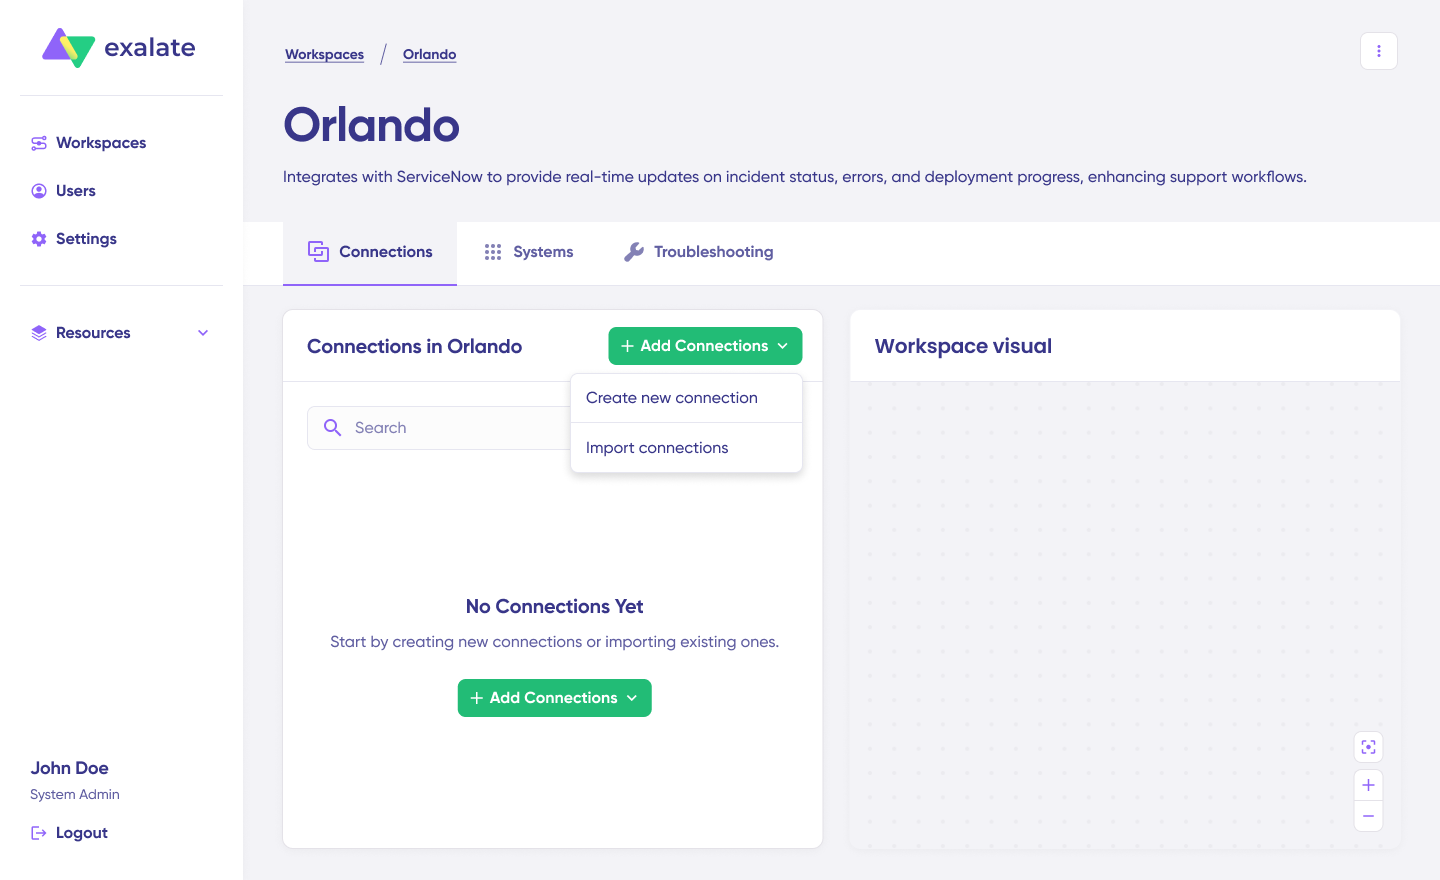
Click “+ Add connections” > “Create new connection”.
Configure System A (Freshservice):
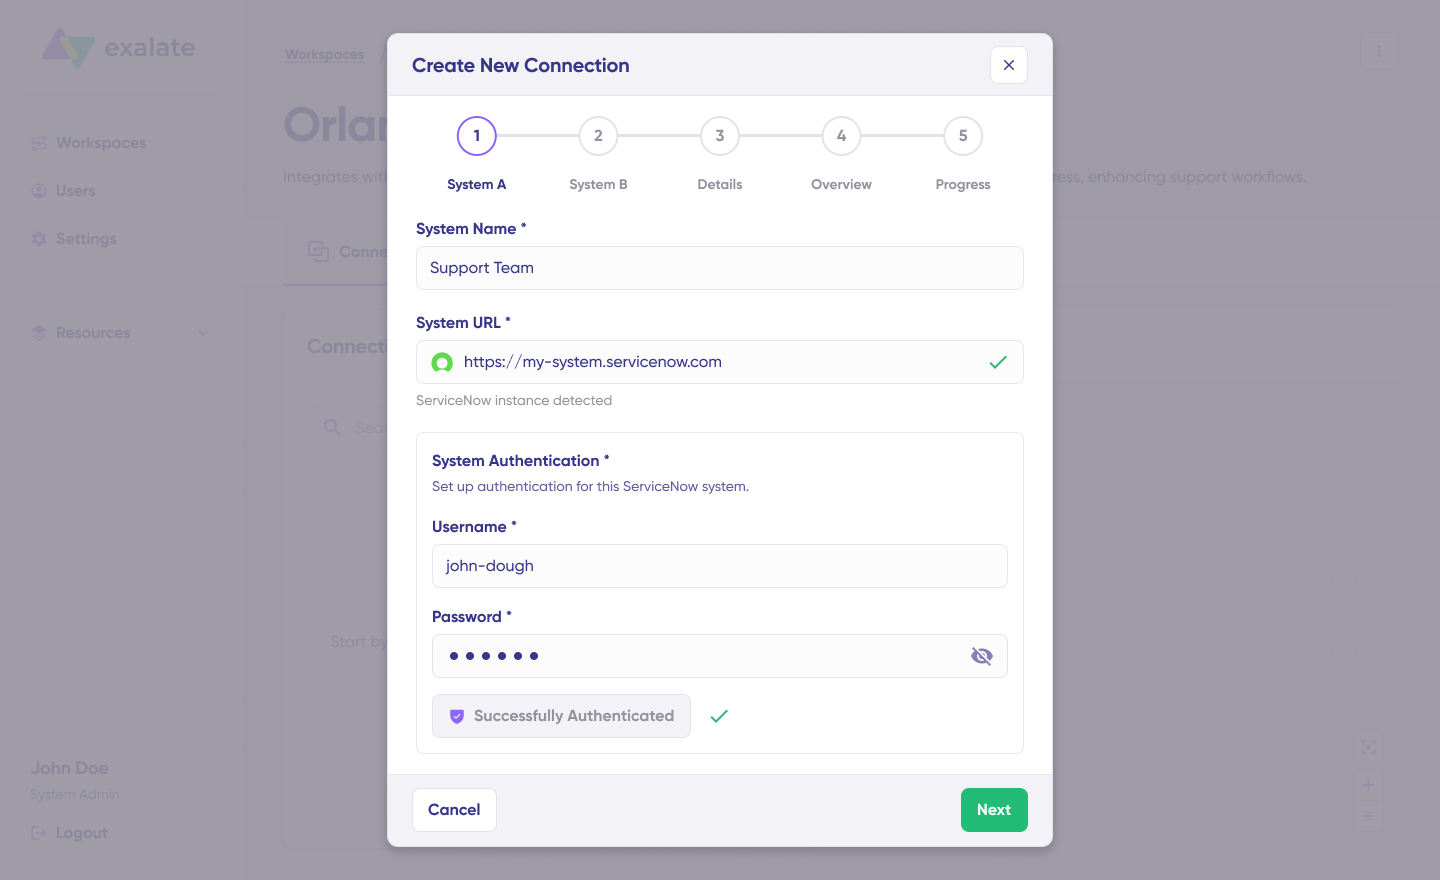
Enter your first system name and provide your Freshservice instance URL. Exalate runs a quick verification behind the scenes. If this system already belongs to your current workspace, authentication happens automatically. For a new system, enter your authentication details—Freshservice uses Basic auth with your API key.
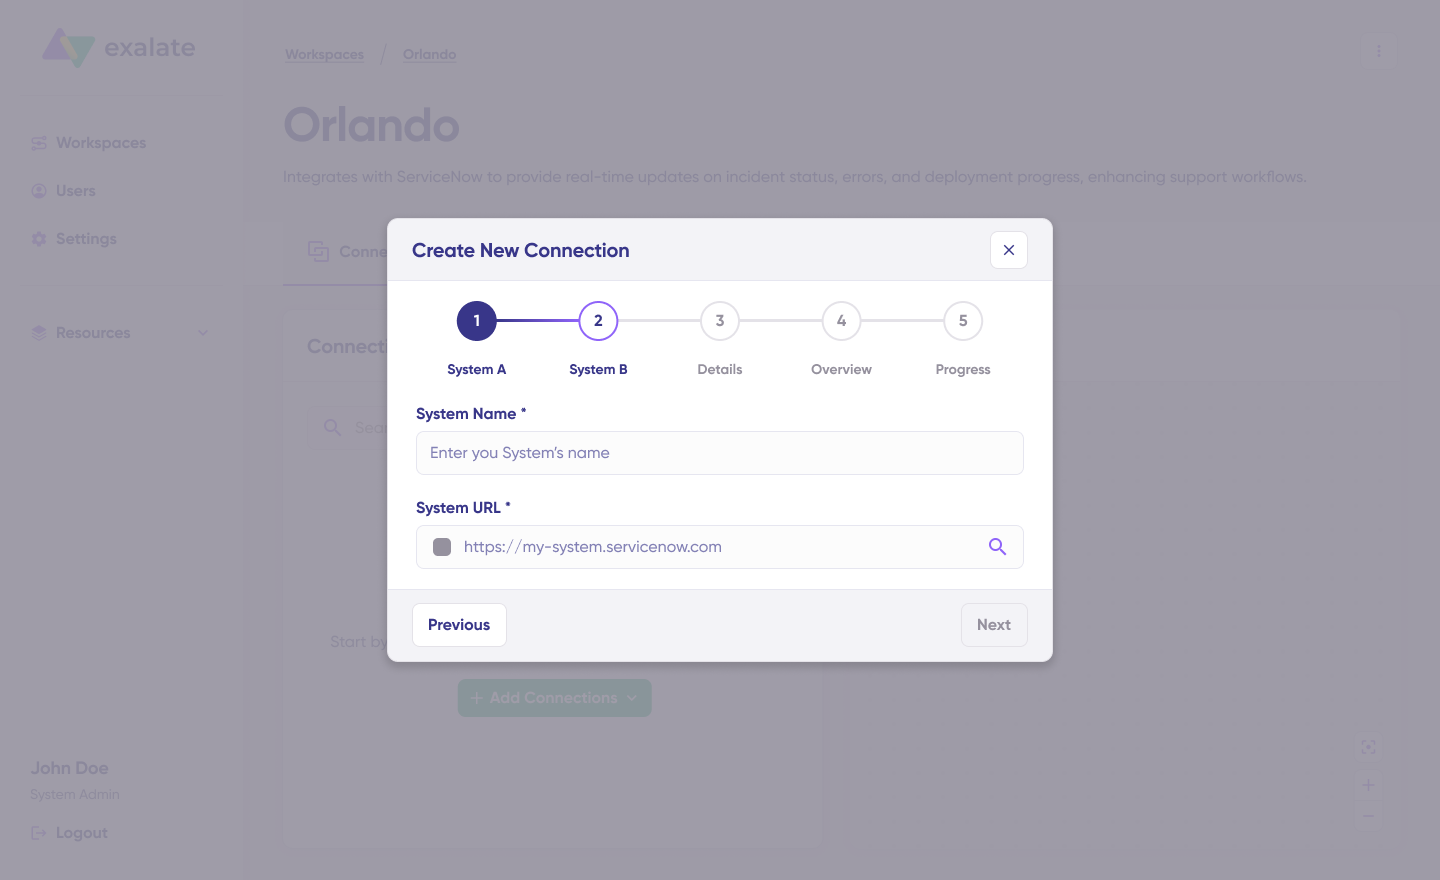
Configure System B (Azure DevOps): Enter your second system and provide your Azure DevOps organization URL. For authentication, you can use a Personal Access Token (PAT) with appropriate permissions for work item read/write access.
Give your connection a name and description, then click “Next”. Review the details and click “Create connection”.
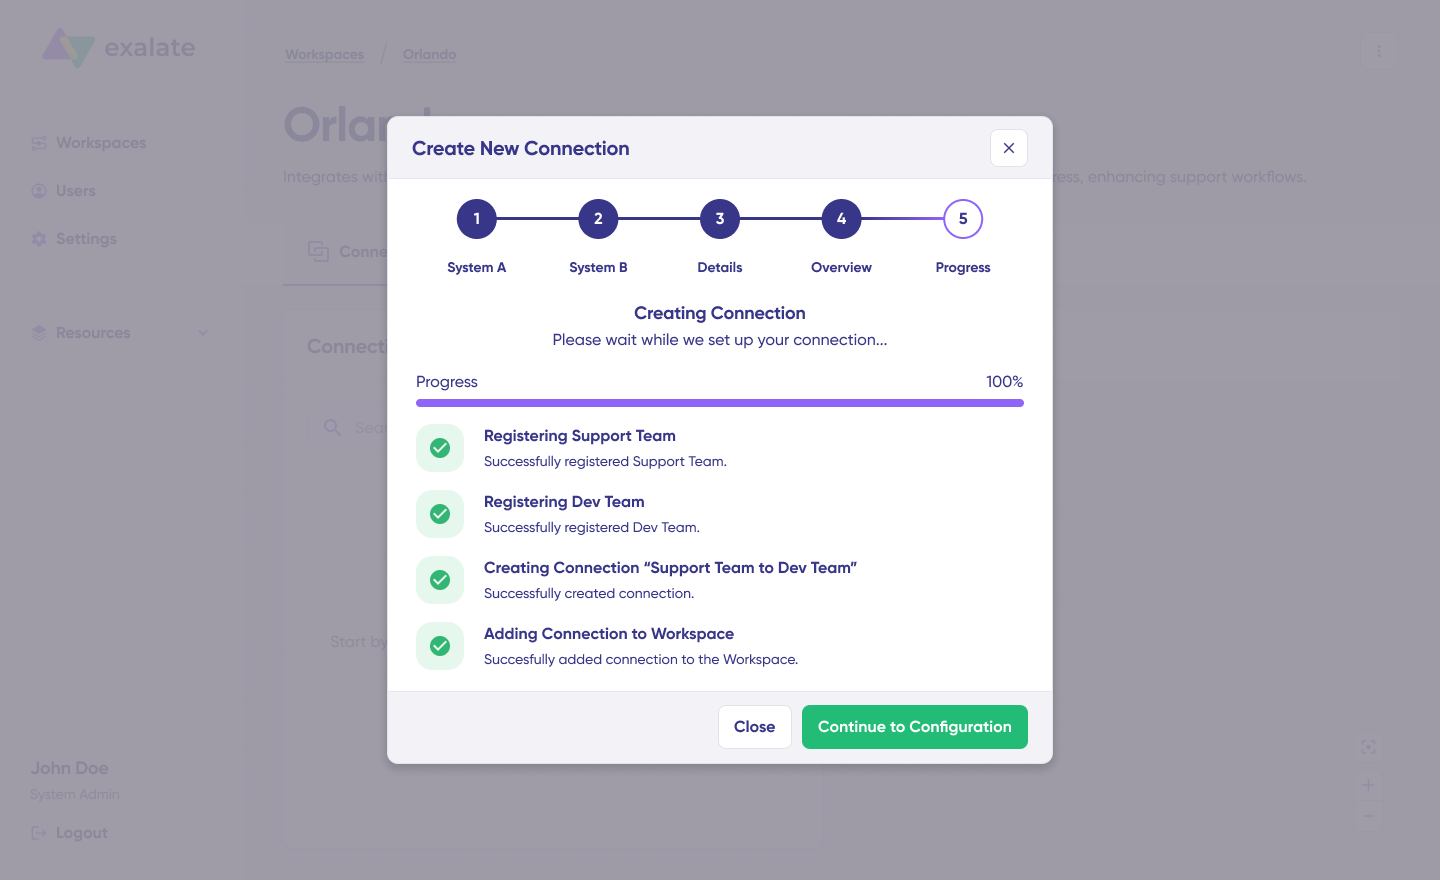
When the process completes, select “Continue to configuration” and choose the Freshservice workspace and Azure DevOps project you want to use for synchronization. Click “Build & continue”.
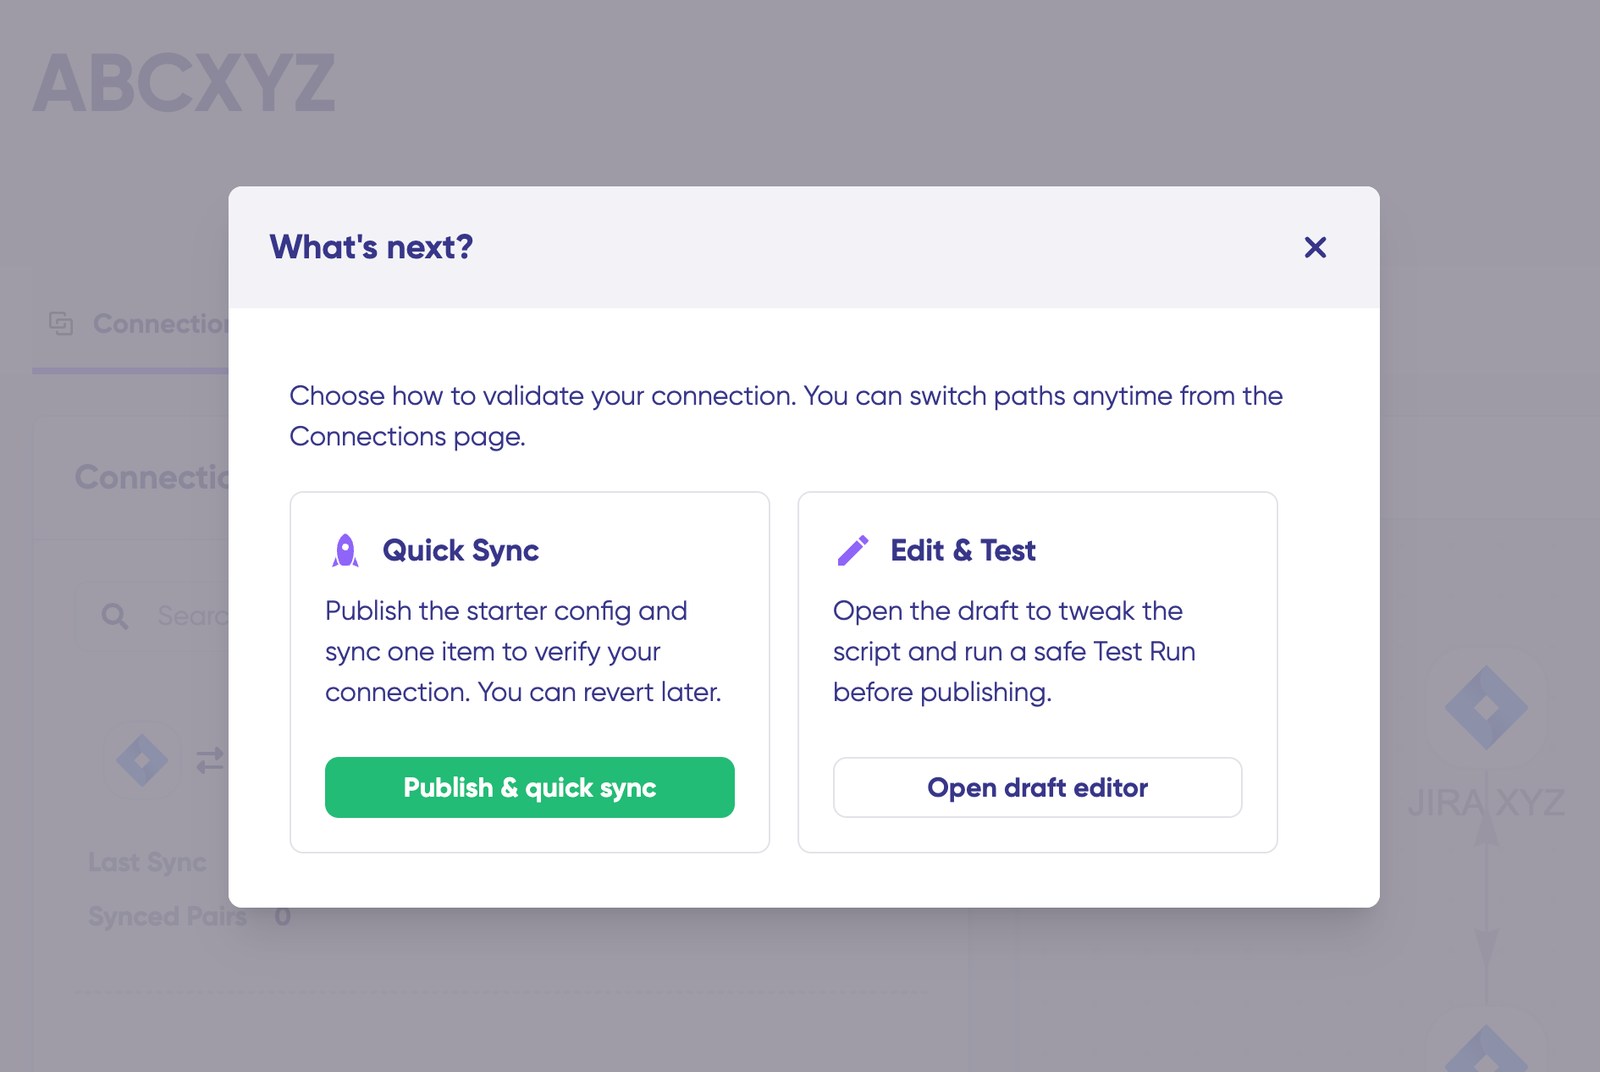
You now have two options: “Quick sync” and “Edit & Test”.
Step 3: Verify Your Connection with Quick Sync
This optional step lets you test the connection by syncing a single item between Freshservice and Azure DevOps.
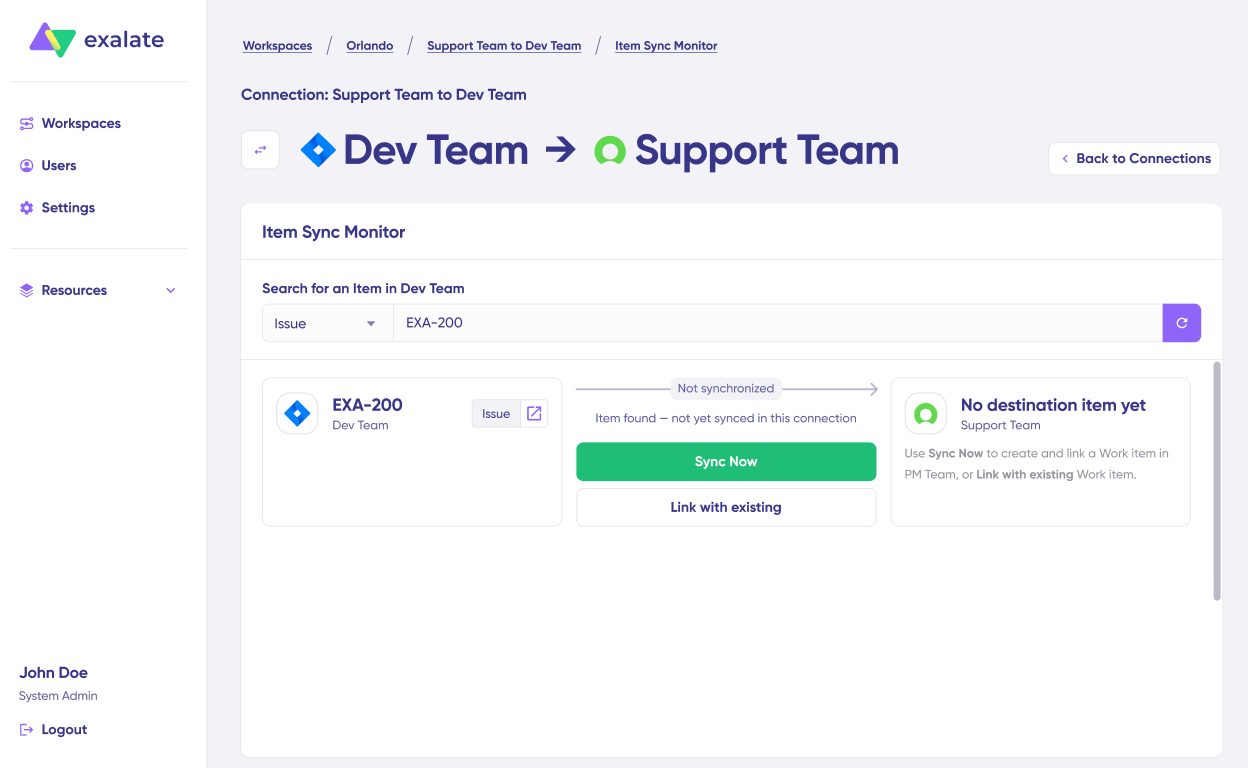
Under “Item sync monitor”, enter a Freshservice ticket number (incident or service request) or an Azure DevOps work item ID.
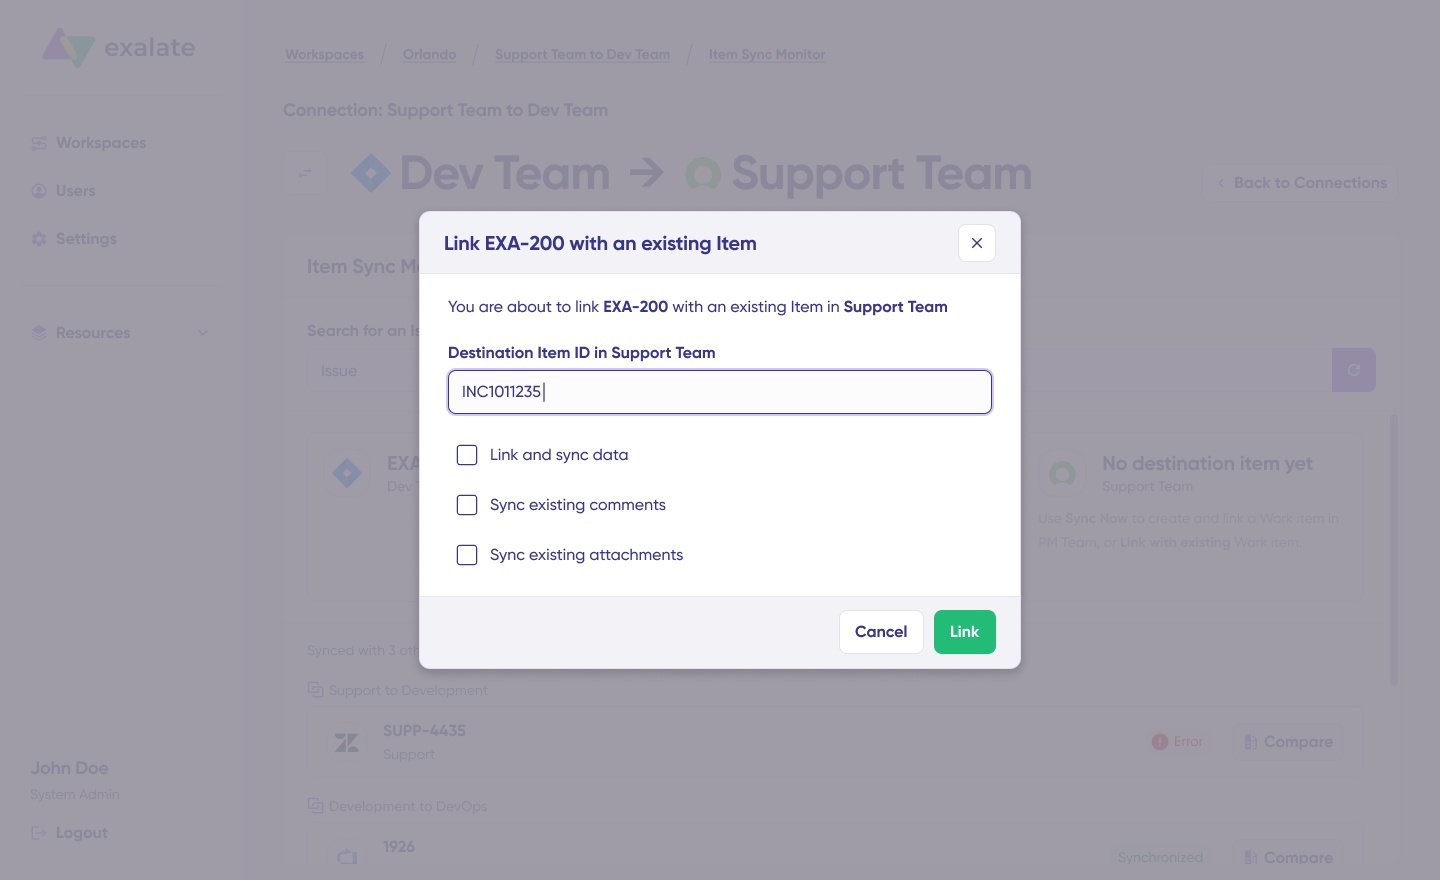
Click “Sync Now” to sync the item, or “Link with existing” to connect two items that already exist in both systems.
Watch the status updates as the sync progresses. Once complete, open both synced items in new windows to verify the data transferred correctly. You can also compare how synced items appear and how changes apply across both platforms.
Step 4: Configure Sync Rules in the Draft Editor
Click “Create a new version” or “Open latest draft” to start editing. Working in draft mode prevents accidental changes to your live configuration—all draft changes save automatically.
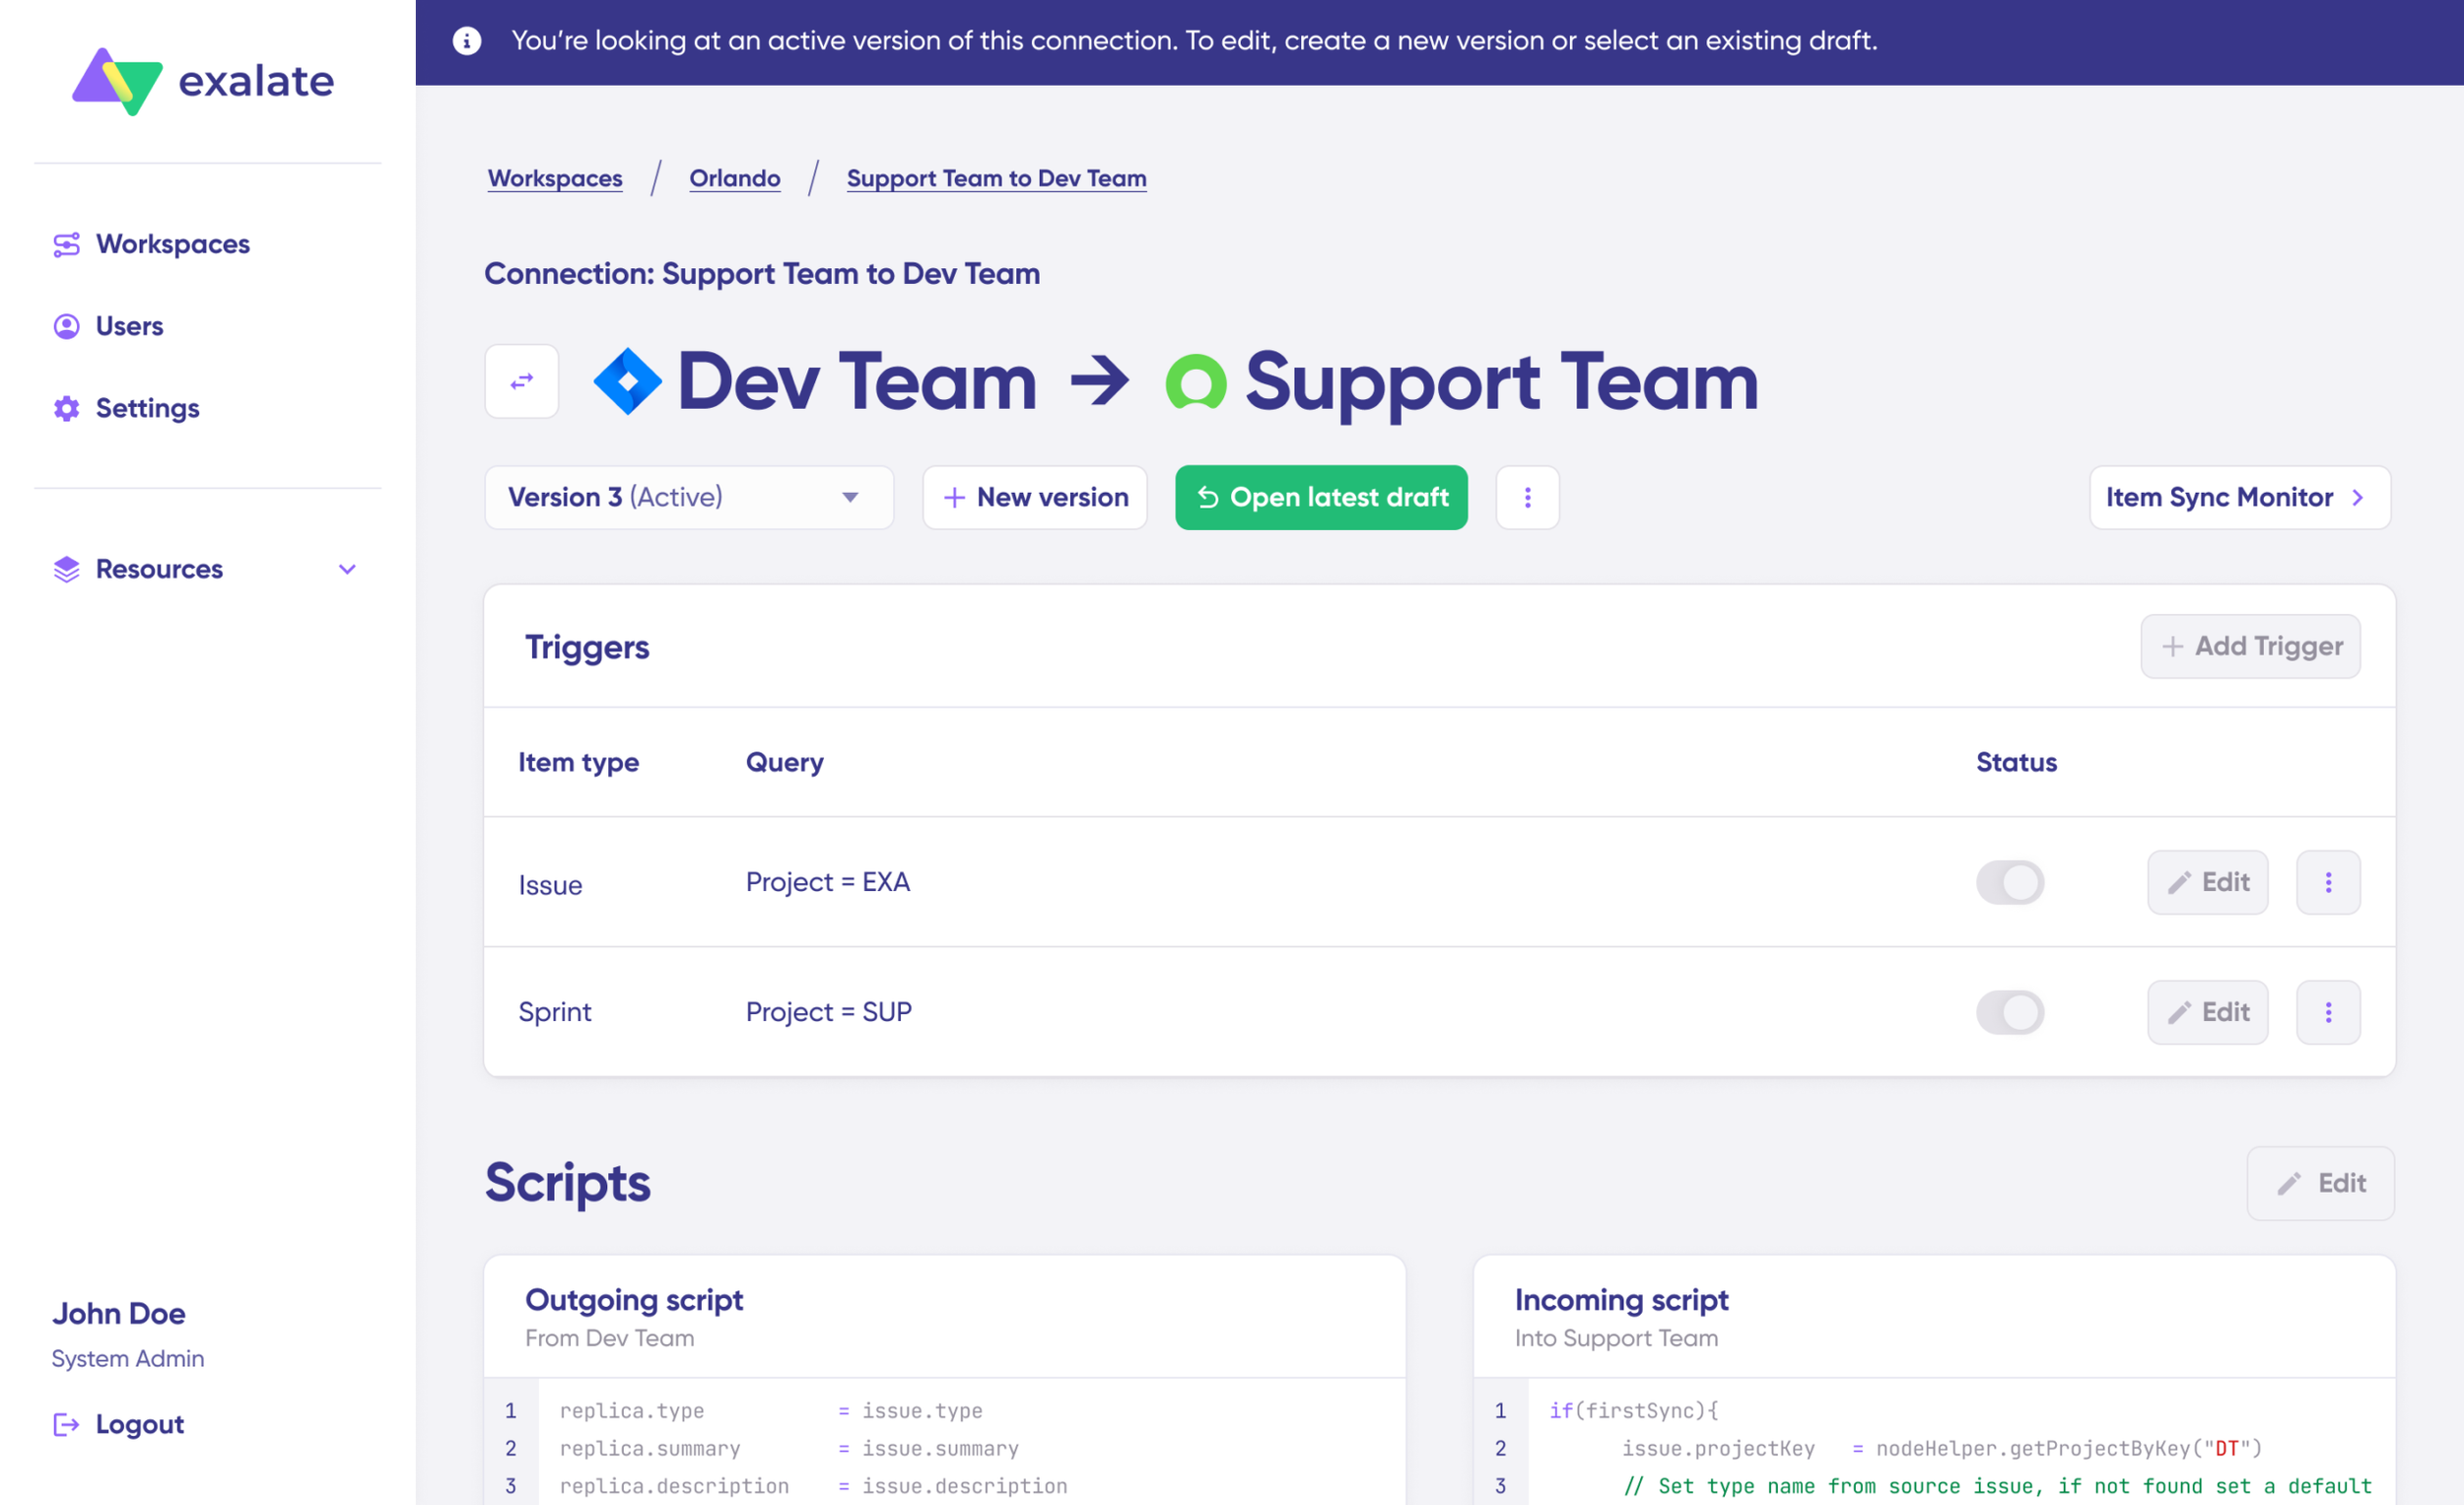
Click “Edit” to open the sync rules editor.
Sync rules use Groovy-based scripts that let you add custom data logic, field mapping, and conditional flows for any workflow complexity.
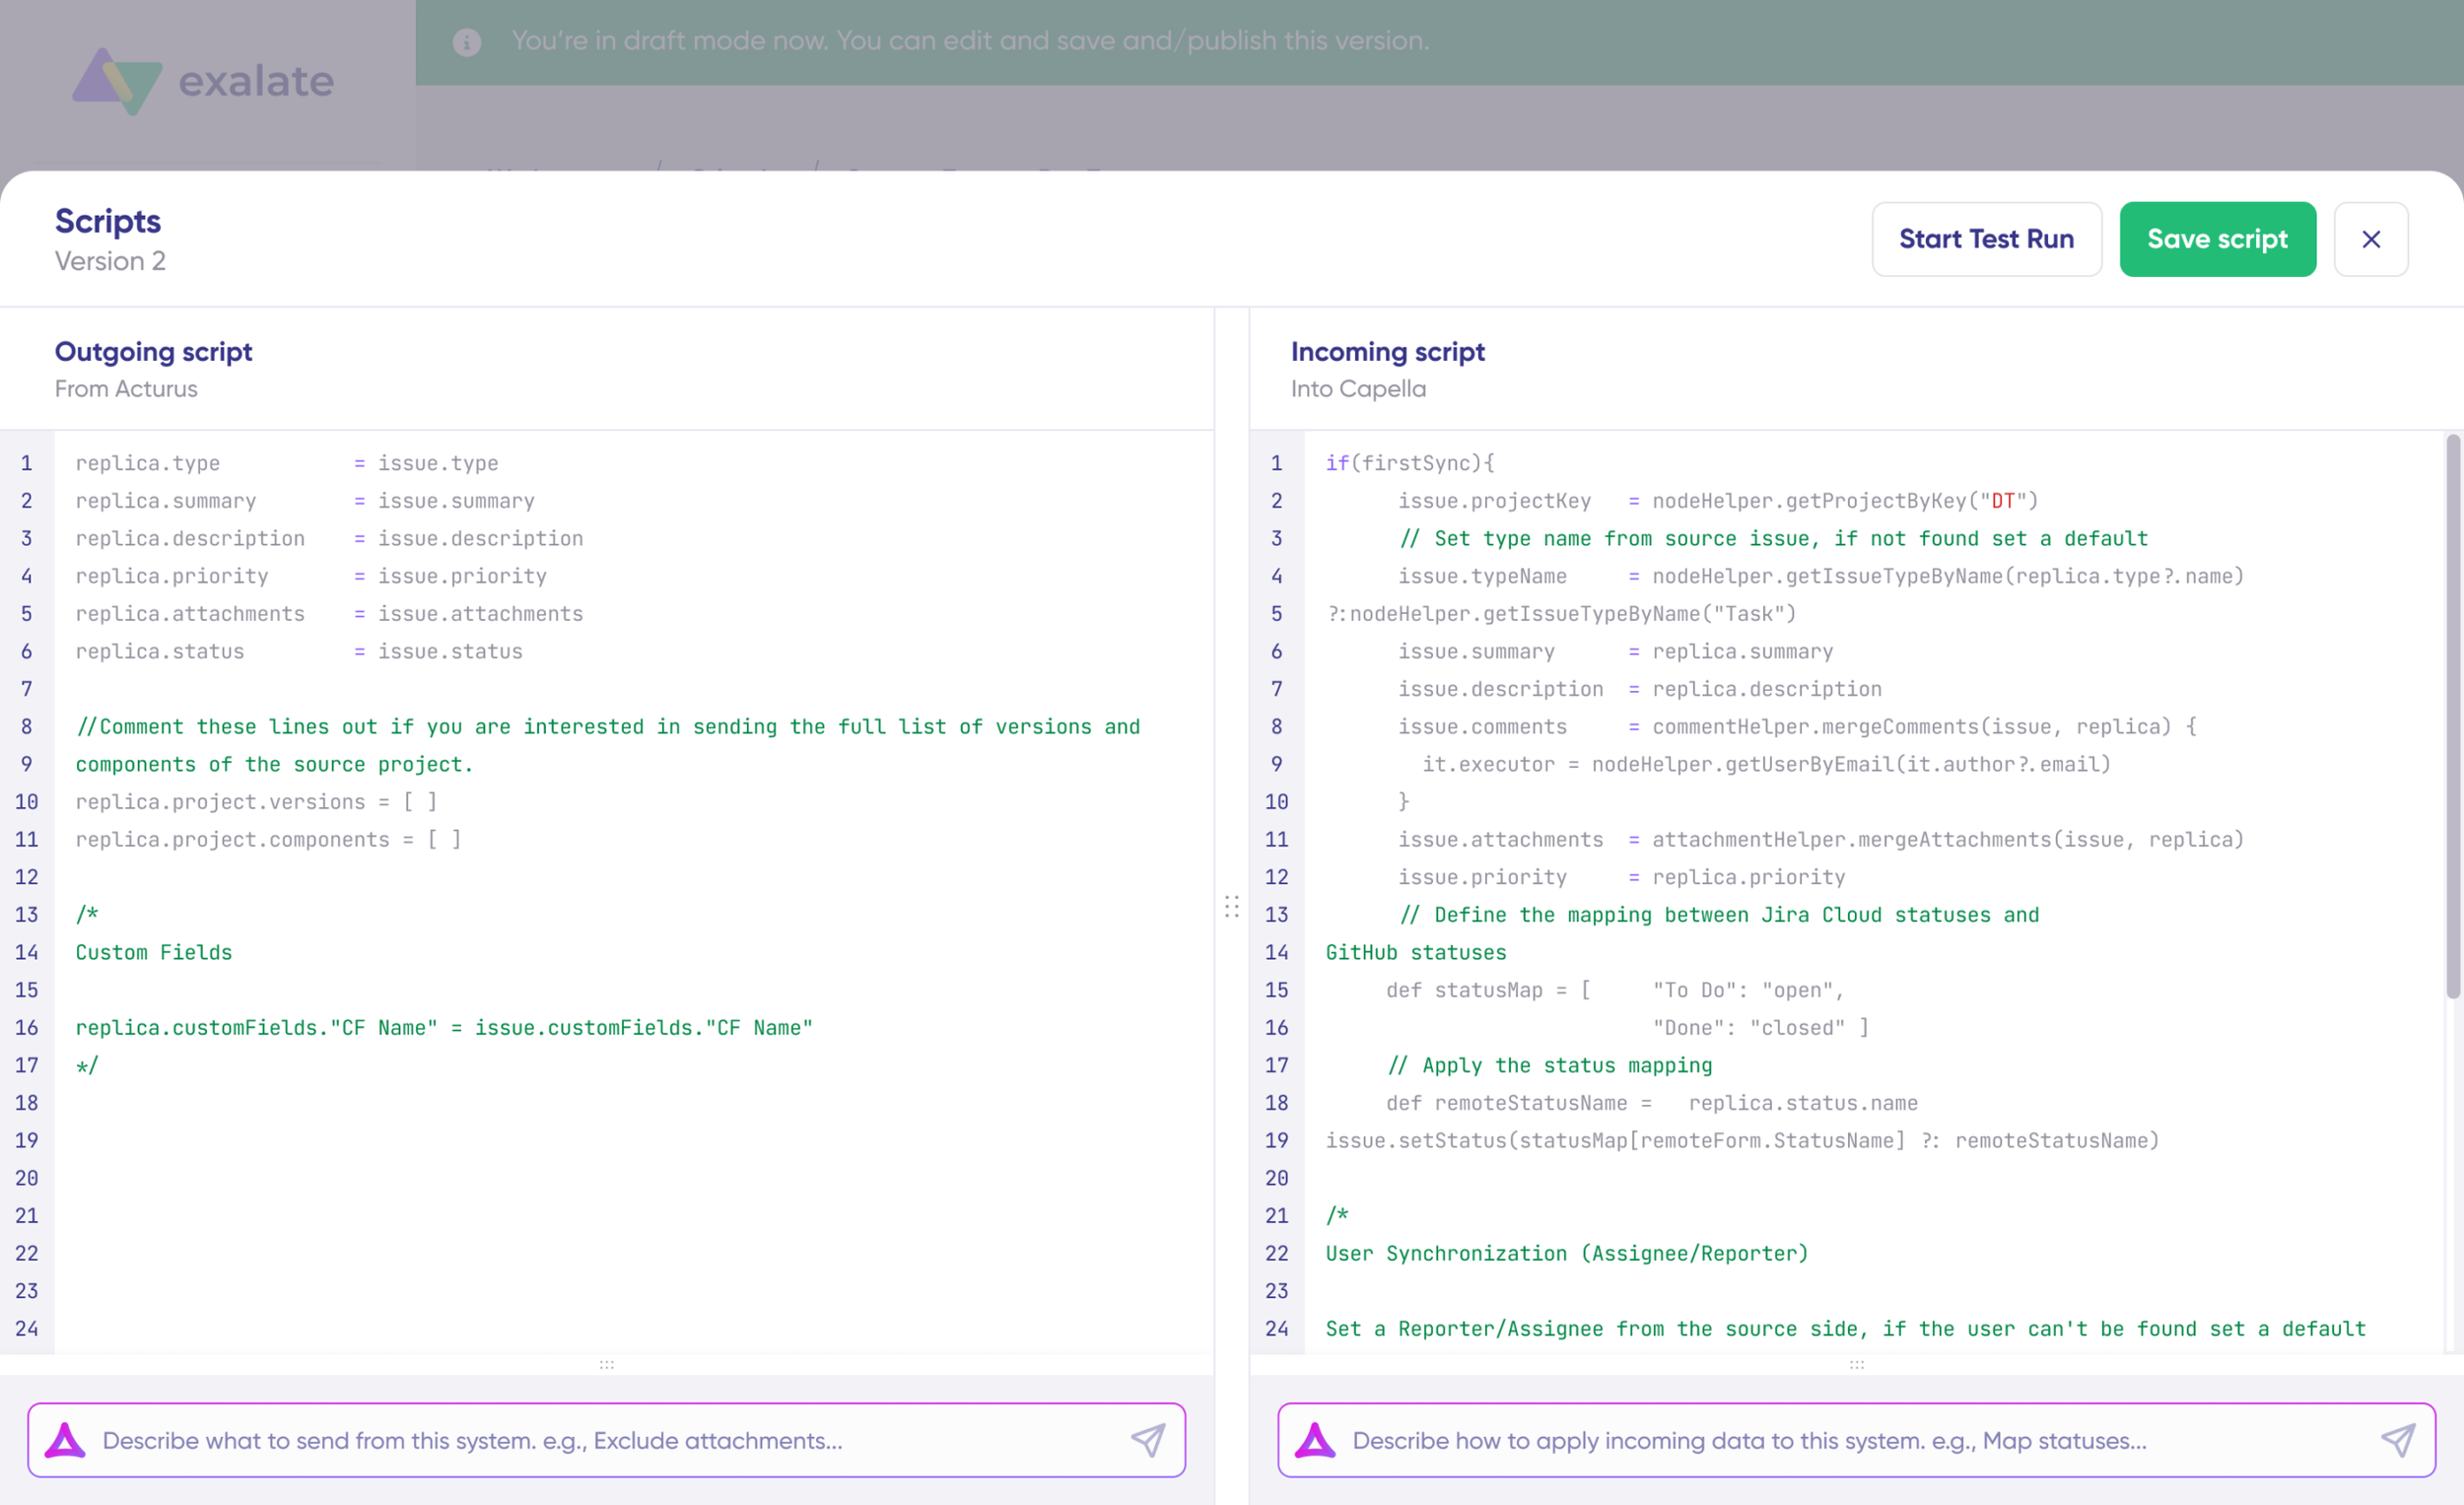
Change the sync direction by clicking the arrows next to the connection name. Scripts are divided into incoming and outgoing:
- Outgoing script (Freshservice side): Defines what ticket data—summary, description, status, priority, urgency, attachments, notes, custom fields—leaves Freshservice and travels to Azure DevOps.
- Incoming script (Azure DevOps side): Defines how incoming Freshservice data maps to Azure DevOps work item fields like Title, Description, State, Priority, Area Path, Iteration Path, and custom fields.
The replica acts as a message payload holding the actual data passed between synced entities in JSON format. To sync additional values, add the appropriate script lines. To exclude something—say, preventing attachments from syncing to Azure DevOps—remove that line from the outgoing Freshservice script.
Step 5: Generate Sync Rules with Aida
Save time on scripting by using Aida, Exalate’s AI-assisted configuration feature. Aida appears in both incoming and outgoing script sections.
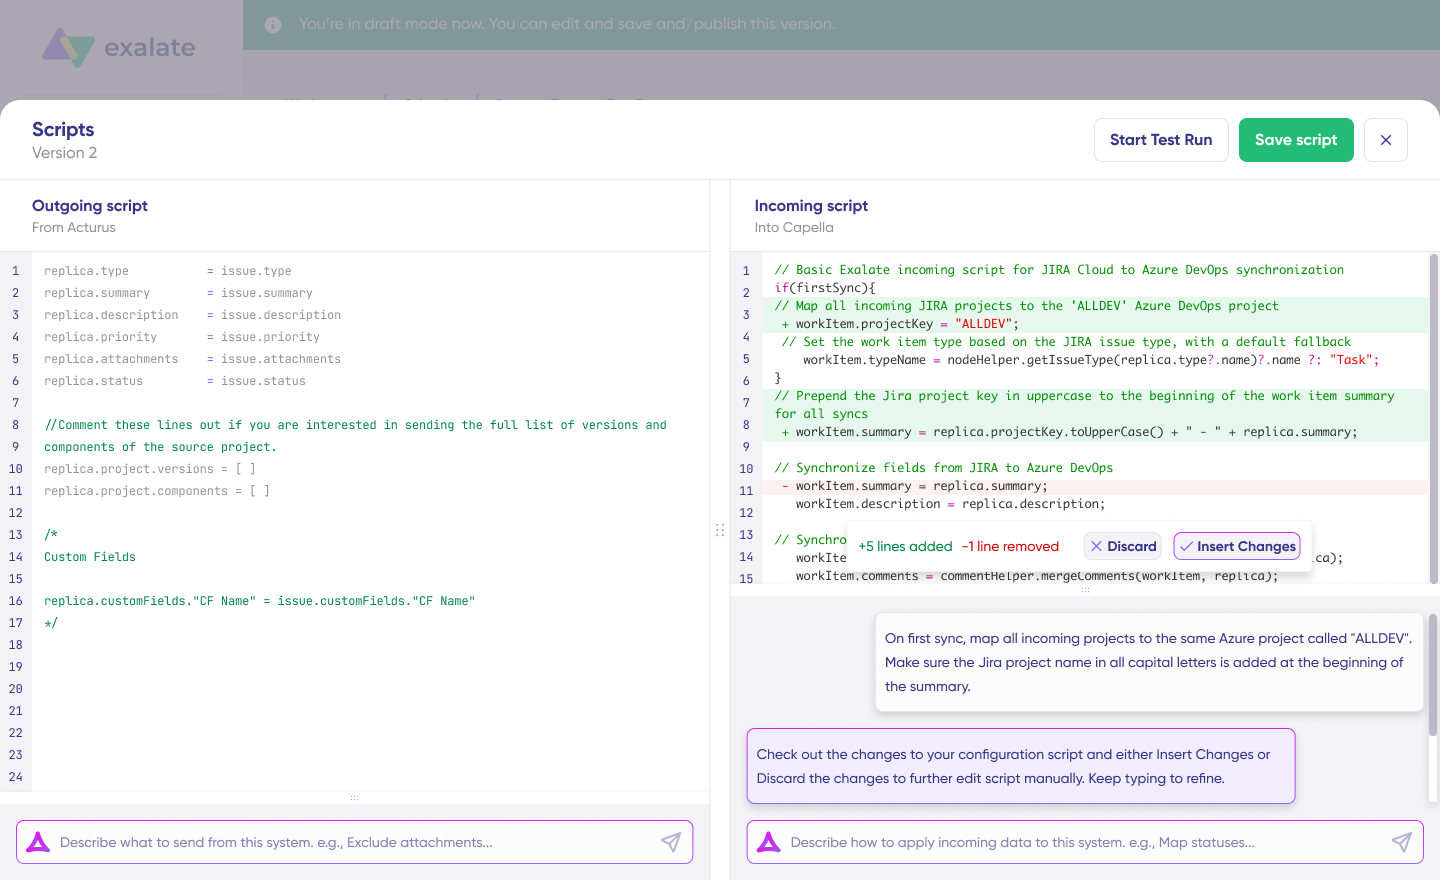
For Outgoing scripts: Describe what data should leave your system. Examples:
- “Sync ticket summary, description, priority, and status to Azure DevOps“
- “Only sync incidents with priority = Urgent or High“
For Incoming scripts: Describe how incoming data should apply to your system. Examples:
- “Map Freshservice priority to Azure DevOps Priority field“
- “Create bugs for incidents and user stories for service requests.“
Aida generates working Groovy scripts with proper field mappings based on Exalate’s scripting API and your existing configuration.
Review Aida’s suggestions before applying them. Green highlights show new lines being added. Red highlights show lines being removed. Choose “Insert” to accept or “Discard” to reject each suggestion.
Outgoing and incoming scripts work independently, and so does Aida.
Note: Aida is helpful, but like any AI tool, review the generated code before applying it to your sync.
Step 6: Validate Configuration with Test Run
Once your sync scripts are ready, click “Save script” or run a dry test using “Start Test Run”.
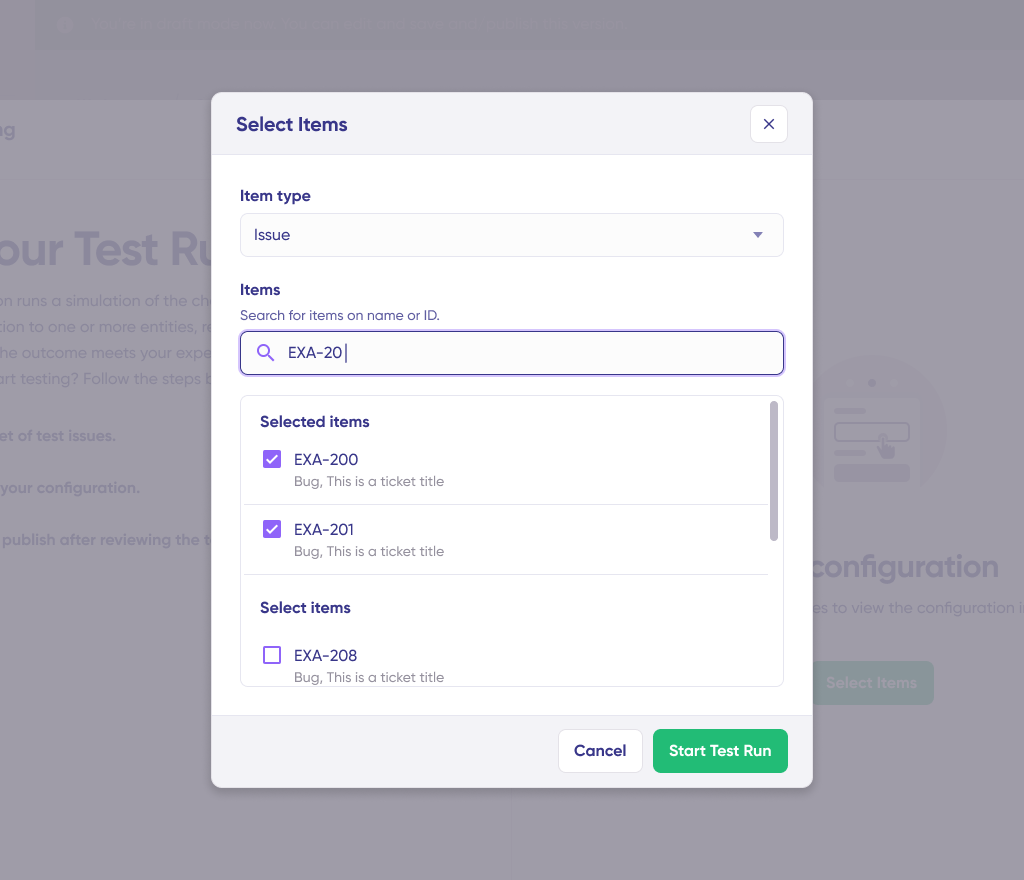
Select the items you want to test. You can choose multiple Freshservice tickets or Azure DevOps work items. Click “Start Test Run”.
View incoming and outgoing replicas for each selected item in their respective tabs. Preview how the sync configuration will apply, examine the replica data, and verify that field mappings look correct.

If something needs adjustment, go back, modify the scripts, and test again. Deploy only when you’re confident it works correctly.
This safety net prevents errors from affecting live data.

When everything matches your requirements, click “Publish Version” to apply the updated configuration to your live synchronization.
All versions for a connection appear in the “Version” dropdown. Versions can be “Active”, in “Draft” (editable), or “Archived”.
Step 7: Create Automatic Sync Triggers
Triggers are conditions that automatically start synchronization for specific items. Without triggers, you’d need to manually initiate each sync.
Click “+Add trigger” to create platform-specific triggers:
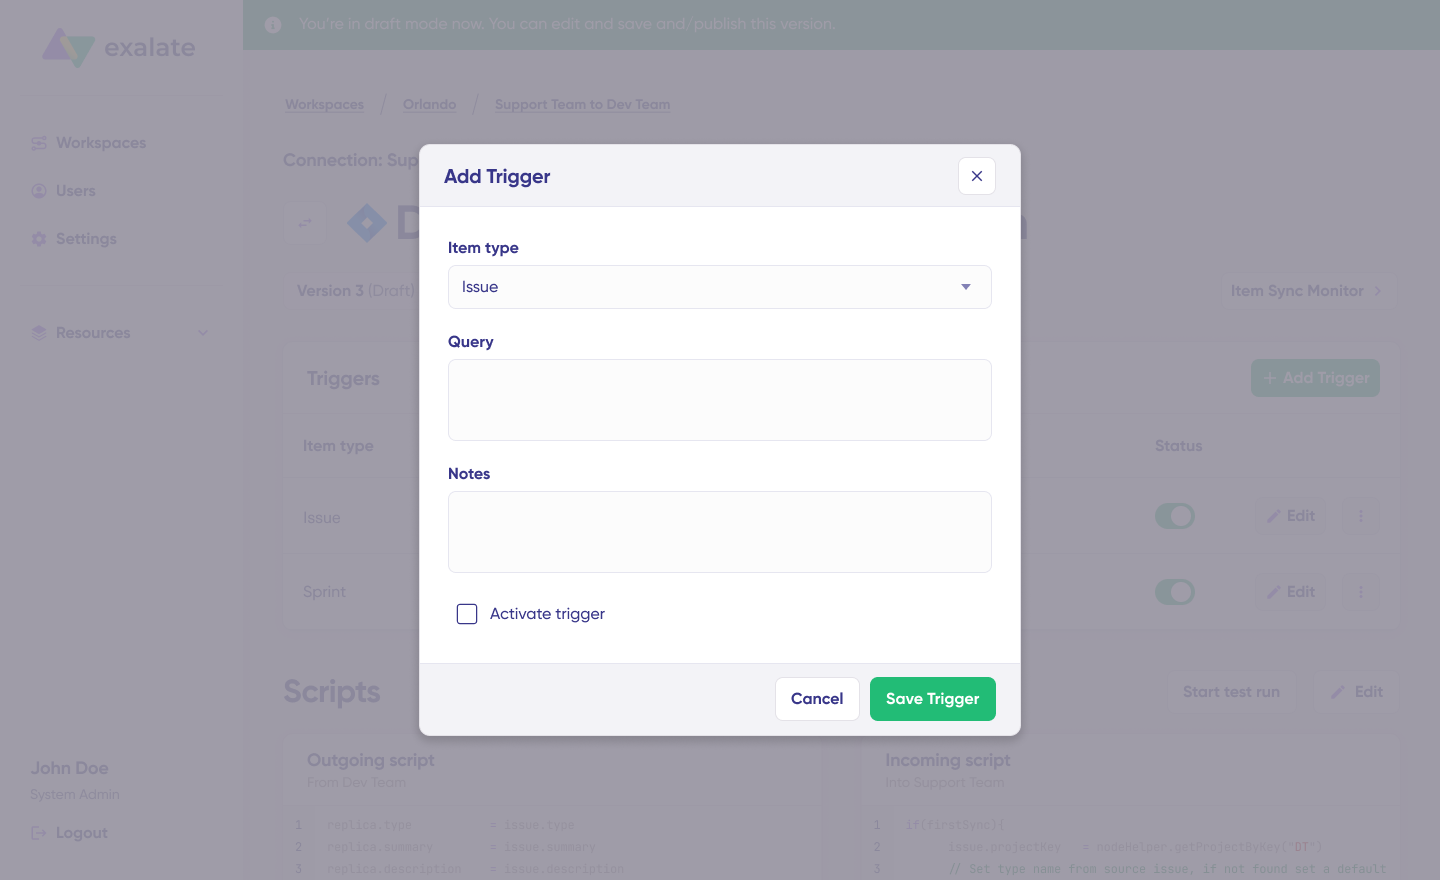
Freshservice triggers: Use Freshservice’s filter syntax to specify conditions for incidents, service requests, problems, or changes. Examples:
priority: 1 AND status: 2 OR urgency: 3
Azure DevOps triggers: Use Azure DevOps queries to apply triggers to bugs, user stories, tasks, epics, or other work item types. Examples:
[Work Item Type] = 'Task' AND System.TeamProject = 'ProjectO'
Save your trigger configuration by publishing the changes.
Step 8: Troubleshoot Errors with Aida
Aida helps diagnose and resolve sync errors with context-aware suggestions.
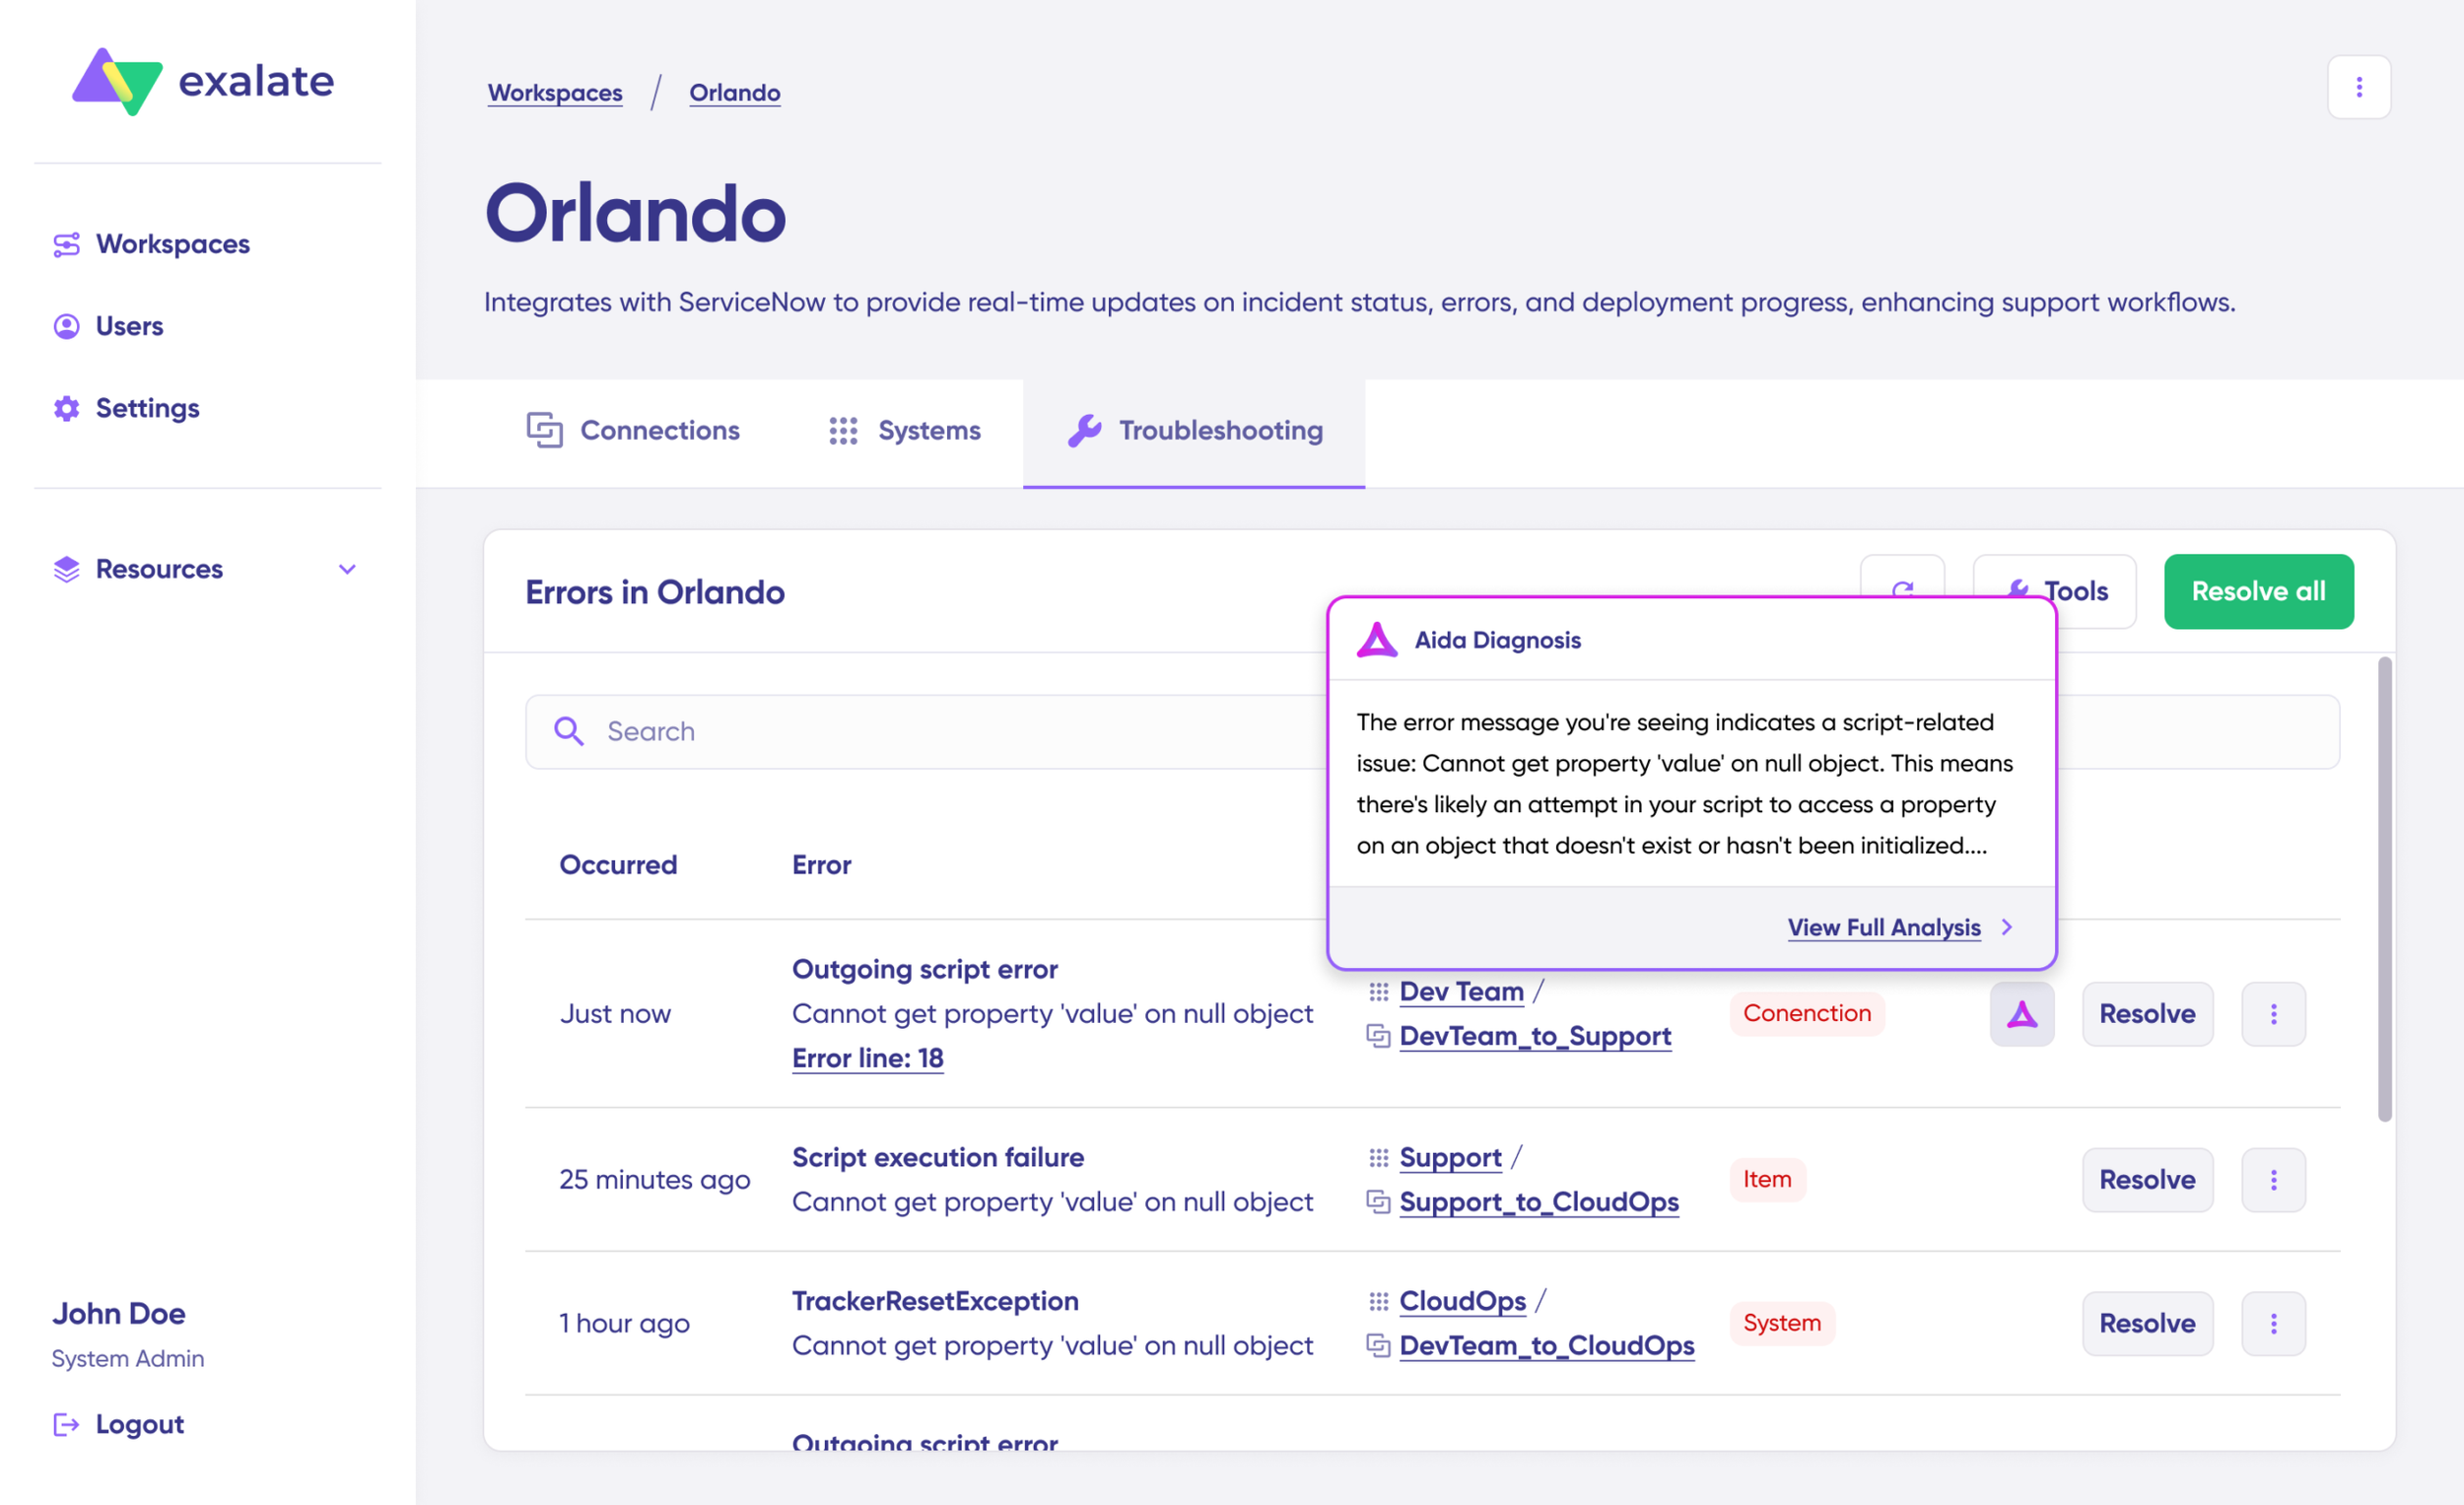
Navigate to the “Troubleshooting” tab in your workspace. Hover over any error and click the Aida icon that appears. The AI-generated suggestion includes a brief explanation and a proposed solution.
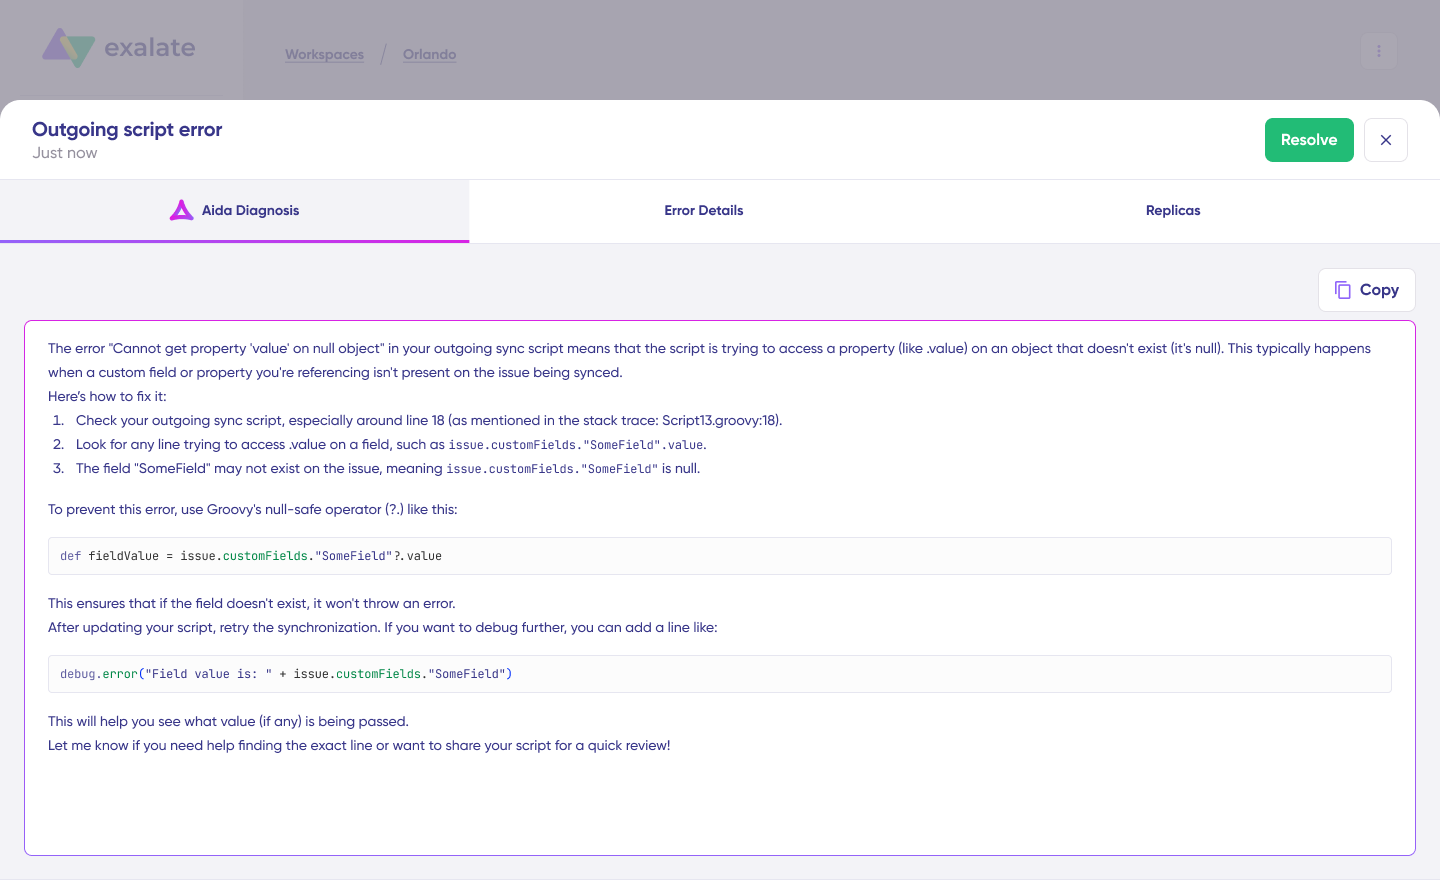
Click “View Full Analysis” for additional context. Access “Error details” to copy the stack trace or “Replicas” to examine the JSON data if needed.
Choose “Resolve” to apply the fix and retry failed syncs.
Use Cases for Freshservice Azure DevOps Integration
Case 1: Incident Escalation and Technical Issue Resolution
Challenge: High-priority incidents in Freshservice require developer attention, but manually transferring ticket details wastes time and loses context.
Solution: Automatically route high-priority incidents from Freshservice into Azure DevOps as bugs when deeper technical expertise is required. Context forwards to developers or stays with IT, depending on urgency and severity.
Real-World Application: A SaaS company receives a critical incident report about API failures. The ticket automatically creates an Azure DevOps bug with full customer impact details, reproduction steps, and error logs. Developers see the business context and customer count affected, enabling accurate prioritization.
Case 2: Bidirectional Status and Priority Sync
Challenge: Support and development teams work in separate tools, leading to outdated information and redundant status check communications.
Solution: When Freshservice tickets change status or priority, linked Azure DevOps work items automatically update to match. When developers update work items, Freshservice tickets reflect those changes immediately.
Real-World Application: A telecommunications company syncs priority changes bidirectionally. When a support manager escalates a ticket to “Urgent” in Freshservice, the linked Azure DevOps work item priority updates automatically. Developers see the change in their sprint board without anyone sending a message. When developers mark the fix “In Review”, the Freshservice ticket updates to “Pending Verification” automatically.
Case 3: Feature Request Pipeline
Challenge: Customer feature requests get lost between support and product teams. Business context and customer value justification disappear during handoffs.
Solution: Service requests for new features in Freshservice automatically become user stories or epics in Azure DevOps with full business context and approval status attached.
Real-World Application: An enterprise software company routes approved feature requests from Freshservice directly into the product backlog in Azure DevOps. Each user story includes the original customer request, business impact analysis, and any related customer conversations. Product managers see customer demand data directly in their planning tools.
Case 4: Agile Sprint Integration
Challenge: Critical production issues disrupt sprint planning when they’re not visible in development tools until someone manually reports them.
Solution: Critical incidents automatically appear as work items on Azure DevOps boards and move through sprint workflows. As items progress through board columns (backlog, active, done), status updates sync back to Freshservice in real-time.
Real-World Application: A fintech company integrates its sprint board with incident management. When a P1 incident hits Freshservice, it automatically appears in the current sprint’s “Interruption” swimlane in Azure DevOps. The development team sees it during standup and can address it within sprint capacity planning.
Case 5: Multi-Client MSP Management
Challenge: MSPs manage multiple clients with different Azure DevOps projects but need unified service delivery through a single Freshservice instance.
Solution: Route different clients’ issues to dedicated Azure DevOps projects while maintaining unified customer service in Freshservice. Each client keeps independent sync rules, field mappings, and data isolation.
Real-World Application: An MSP serves three enterprise clients—FinanceCorp, HealthTech, and RetailGiant. Each has a dedicated Azure DevOps project with different workflows and custom fields. When FinanceCorp submits a Freshservice ticket, it routes to their Azure DevOps project with their specific field mappings. HealthTech tickets are routed separately with different priority handling for compliance requirements. The MSP manages all clients from a single Freshservice instance with proper data separation, accurate per-client billing, and no risk of cross-contamination.
Case 6: Change Management and CI/CD Pipeline Integration
Challenge: DevOps deployments happen without corresponding change records in ITSM, creating compliance gaps and coordination failures.
Solution: Integrate Azure DevOps pipeline events with Freshservice change management. Pull request merges and deployment completions automatically create or update change records with proper documentation.
Real-World Application: An insurance company requires change documentation for all production deployments. When developers merge a pull request to the main branch, Freshservice automatically creates a change record with linked work items, deployment details, and rollback procedures. The CAB has visibility into upcoming changes without developers manually filing change requests.
Best Practices for Freshservice Azure DevOps Integration
- Define clear sync triggers. Decide exactly which Freshservice tickets should create Azure DevOps work items before you start. Focus on incidents and service requests that actually need development attention. Set up filters based on priority, category, or specific keywords to avoid cluttering your dev backlog with routine support requests.
- Map fields thoughtfully. Make sure all relevant information transfers over—customer details, reproduction steps, business impact, and attachments. Poor field mapping creates work items that lack the context developers need to act on them.
- Align status workflows. If Azure DevOps has five status options but Freshservice only has three, decide how those map and communicate the workflow to both teams so everyone knows what to expect.
- Configure appropriate access controls. Your support team doesn’t necessarily need access to Azure DevOps, but they should see development progress reflected in their Freshservice tickets.
- Test with real scenarios. Use actual scenarios from your backlog to make sure the integration handles your specific business logic, custom fields, and edge cases properly.
- Monitor adoption and performance. Keep an eye on sync performance and user adoption after launch. If tickets are bouncing back and forth or teams are bypassing the integration, there’s probably a workflow mismatch that needs fixing.
- Train both teams. Make sure support and development team members understand how the integration affects their daily work and what information flows where.
Key Performance Metrics for Freshservice to Azure DevOps Integration
Monitor these indicators to ensure optimal operation:
- Sync success rates and failure frequency: Track how often syncs complete successfully versus encounter errors.
- Data processing speed and latency: Measure time from trigger event to data appearing in the target system.
- Integration uptime and availability: Monitor for service interruptions affecting sync operations.
- API usage and rate limit consumption: Ensure you’re not approaching platform API limits.
- Data accuracy and consistency scores: Verify that synced data matches source data
- User adoption patterns: Track how teams use the integration and identify bypassing behaviors.
- Resolution time improvements: Compare ticket resolution times before and after integration.
Keep track of this data to ensure it remains intact during transfers and gives you a broader picture of how well teams are embracing the integrated workflow.
Frequently Asked Questions
What types of data can be synced between Freshservice and Azure DevOps?
You can sync Freshservice ticket fields, including summary, description, status, priority, urgency, attachments, notes, custom fields, and custom keys for incidents and service requests. For Azure DevOps, sync default and custom fields for bugs, user stories, epics, tasks, and other work item types, plus any field available via REST APIs. Custom field mapping handles platform-specific data structures.
How quickly do updates sync between the two platforms?
Exalate supports real-time synchronization between Freshservice and Azure DevOps. Updates typically occur within seconds of changes being made in either system. You can configure one-way, two-way, or multidirectional sync patterns based on your organizational needs.
Can I map multiple Freshservice incidents to a single Azure DevOps work item?
Yes. When several related incidents stem from the same root cause, consolidate them into one work item for developers to fix while maintaining separate ticket tracking for individual customer communication. Exalate supports linking multiple tickets to single work items with proper data separation in multi-client environments.
Does Exalate support parent/child relationships between tickets and work items?
Yes, you can set up hierarchies like one parent incident in Freshservice connecting to multiple child tasks in Azure DevOps, or create related links to maintain complex relationships across both systems.
Is Exalate suitable for MSP environments?
Exalate handles MSP environments with proper multi-tenant data isolation. Each client keeps independent control over their data mappings, sync rules, and privacy settings within their own space, with no risk of data mixing between clients.
Do both teams need access to both systems?
No, support and IT stay in Freshservice, while developers stay in Azure DevOps. Each team sees relevant updates from the other system reflected in their own workspace. The integration handles all data transfer without requiring cross-platform access.
Can I integrate Freshservice with platforms other than Azure DevOps?
Yes, Exalate supports integration with Jira, ServiceNow, Zendesk, Freshdesk, Salesforce, GitHub, Asana, Azure DevOps Server, and custom platforms via REST API connectors. You can connect Freshservice to multiple platforms simultaneously with different sync configurations for each.
How does Exalate handle complex field mapping between different system configurations?
AI-assisted configuration (Aida) suggests field mappings based on field names and types. For complex transformations—conditional logic, data reformatting, or custom field handling—use Groovy scripting to define exactly how data transforms between platforms.
Recommended Reads
- How to Set Up an Azure DevOps ServiceNow Integration: The Step-by-Step Guide
- How to Set up an Azure DevOps GitHub Integration: The Complete Guide
- How To Map and Sync Statuses and Correlation Details Between Azure DevOps and ServiceNow
- ITSM Integration: Simplify Your IT Services Like Never Before
- Integration Security: Safeguarding Your Data in Connected Systems


