Salesforce is perfect for teams working with customer data. Feature-rich and easy to use, it lets you control every aspect of the sales process without advanced technical know-how.
But there are ways to get more from it. The data you store can be shared with teams using other tools like Jira, Zendesk, ServiceNow, Azure DevOps, and more. That means your sales department can work with other departments more easily, with data filtered and shared automatically.
This guide explores why third-party integrations matter for Salesforce users, what features to look for in an integration solution, common use cases, and a comparison of tools that can help you connect Salesforce with your existing tech stack.
Key Takeaways
- Third-party integrations extend Salesforce beyond its native capabilities, enabling automated data exchange with platforms like Jira, ServiceNow, Zendesk, Azure DevOps, Freshservice, Freshdesk, and Asana.
- When choosing an integration solution, prioritize flexibility through scripting, reliability with automatic error recovery, and enterprise-grade security.
- Common use cases span customer escalation workflows, cross-functional collaboration between sales and development teams, multi-system case management, and partner ecosystem coordination.
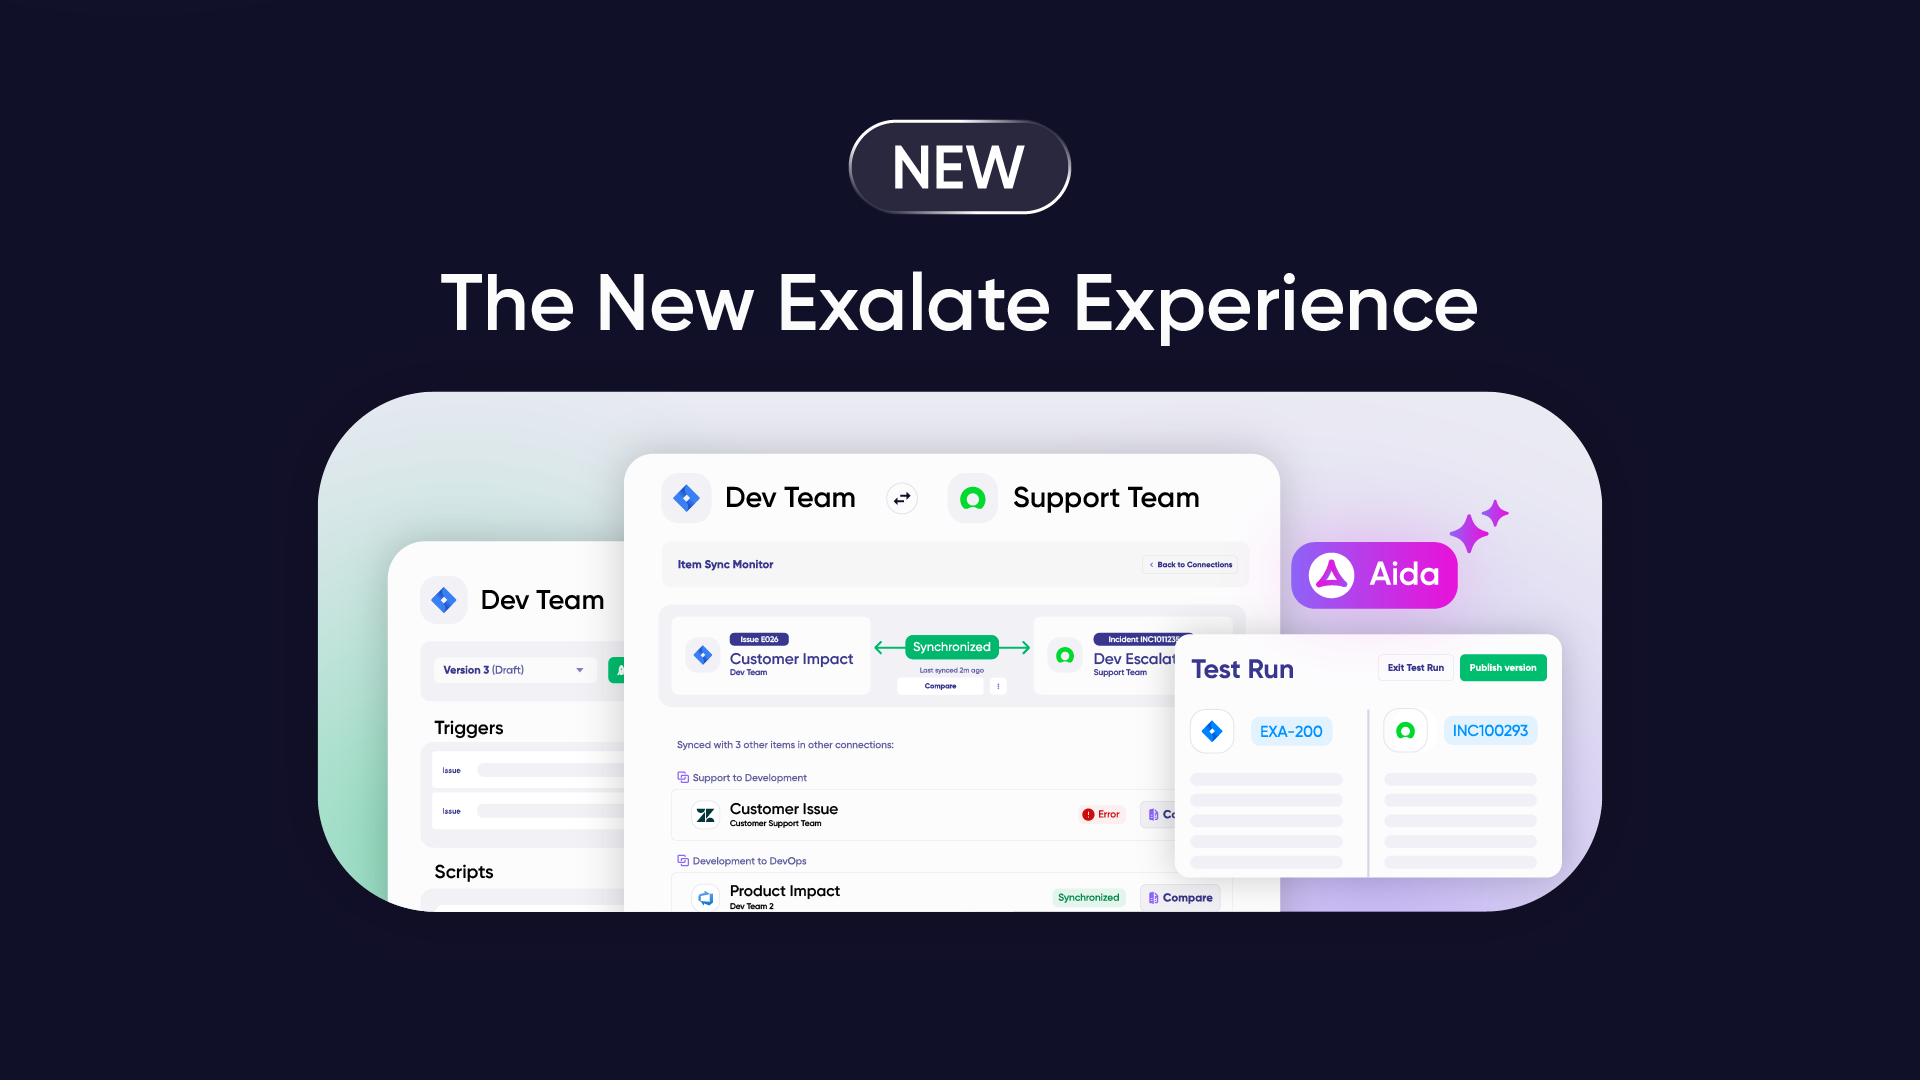
- AI-assisted configuration tools like Aida can generate sync scripts from natural language prompts, reducing implementation time without sacrificing customization capabilities.
- Two-way synchronization ensures both systems stay updated in real-time, eliminating manual data entry and reducing errors.

Features to Consider When Choosing a Salesforce Integration Solution
Not all integration tools are created equal. Here’s what to evaluate when selecting a solution for your Salesforce integration needs:
Flexibility and Customization
Basic integrations work for simple scenarios, but real-world requirements often get complex. Look for solutions that offer:
- Scripting capabilities: The ability to write custom logic for data transformations, conditional syncing, and complex field mappings. Groovy-based scripting engines provide flexibility for advanced scenarios.
- Granular field control: Choose exactly which fields sync and how they map between systems, not just predefined field pairs.
- Conditional triggers: Configure rules that determine when synchronization happens (e.g., only sync Cases with priority “High” or opportunities above a certain value).
Reliability and Error Handling
Integration failures shouldn’t require manual intervention. Evaluate:
- Automatic retry mechanisms: When connections drop, the system should queue changes and process them once connectivity returns.
- Transactional integrity: Changes should apply in the correct order, maintaining data consistency even after outages.
- Error visibility: You need clear logging and notifications when issues occur, not silent failures.
Security and Compliance
For enterprise deployments, security isn’t optional:
- ISO 27001 certification: Demonstrates commitment to information security management standards.
- Encryption: Data should be encrypted both in transit and at rest.
- Role-based access control: Limit who can configure integrations and what data they can access.
- Independent configuration: Each side of an integration should maintain its own configuration, preventing partners from accessing your sync logic or modifying your settings.
For detailed security information, visit the Exalate Trust Center.
AI-Assisted Configuration
Modern integration tools increasingly offer AI capabilities:
- Natural language prompts: Describe what you want to sync in plain English, and AI generates the configuration.
- Script generation: AI-assisted tools like Aida create working sync scripts from requirements, reducing time-to-value.
- Human oversight: AI-generated configurations should be reviewable and editable, automation assists, but you maintain control.
Platform Coverage
Ensure the solution supports your current stack and potential future additions:
- Work management: Jira, Azure DevOps, Azure DevOps Server, Asana
- IT service management: ServiceNow, Zendesk, Freshservice, Freshdesk
- CRM: Salesforce (obviously), plus the ability to connect multiple Salesforce orgs
- Development: GitHub
- Custom systems: REST API-based connectors for proprietary platforms
Salesforce Integration Tools: Native and Third-Party Options
Native Salesforce Integration Options
- Salesforce AppExchange: A marketplace with over 2,500 apps and integrations. Good for single-purpose integrations with popular tools like Slack, Mailchimp, or DocuSign. Limitations include reduced customization options and potential compatibility issues with complex use cases.
- Salesforce Connect: Displays external data within Salesforce without actually importing it. Useful for real-time access to external records but doesn’t truly synchronize data or support bidirectional updates for all scenarios.
- MuleSoft: Salesforce’s enterprise integration platform. Powerful for complex, multi-system architectures but requires significant implementation expertise and investment. Best suited for large organizations with dedicated integration teams.
- Salesforce APIs (REST, SOAP, Bulk, Streaming): Enable custom integrations for developers willing to build and maintain code. Flexible but resource-intensive, requiring ongoing development effort for changes and maintenance.
Third-Party Integration Platforms
- Zapier: No-code automation connecting Salesforce with 5,000+ apps. Excellent for simple, trigger-based workflows. Less suitable for complex bidirectional synchronization or scenarios requiring extensive data transformation.
- Workato: Enterprise automation platform with strong Salesforce connectivity. Offers more sophisticated logic than Zapier but still operates within a recipe-based paradigm that may not handle all advanced scenarios.
- Dell Boomi: Cloud-native integration platform for connecting Salesforce with enterprise applications. Scalable but requires technical expertise for implementation.
- Jitterbit: Integration platform with pre-built Salesforce connectors. Good for organizations needing quick deployment of standard integration patterns.
- Exalate: Purpose-built for cross-platform synchronization between work management, ITSM, and CRM tools. Offers Groovy-based scripting for complex scenarios, AI-assisted configuration through Aida, and independent configurations on each side of the integration. Supports Jira, ServiceNow, Azure DevOps, Zendesk, Salesforce, GitHub, Freshservice, Freshdesk, Asana, and custom connectors.
Benefits of Third-Party Integration
- Reduced Manual Work: Instead of copying data between systems or manually updating records, integrations automate the entire process. When a case updates in Salesforce, the connected system reflects that change automatically.
- Improved Data Accuracy: Manual data entry introduces errors. Automated synchronization ensures consistency across platforms, reducing discrepancies that lead to miscommunication.
- Faster Response Times: When customer information flows automatically between your CRM and other tools, teams can respond faster without waiting for data handoffs.
- Unified View of Customer Interactions: With data synchronized across platforms, every team sees the same customer context, regardless of which tool they work in.
Common Use Cases for Salesforce Third-Party Integration
Customer Escalation Workflows
Challenge: Support teams using Zendesk, Freshdesk, or ServiceNow need to escalate complex customer issues to engineering teams working in Jira or Azure DevOps. Without integration, this requires manual ticket creation, copy-pasting details, and constant status checks across systems.
Solution: A third-party integration automatically creates a work item in your development platform when a support ticket meets escalation criteria. Status updates, comments, and resolution details sync bidirectionally, keeping both teams informed without switching tools.
Real-World Application: A SaaS company escalates high-priority bugs from Zendesk to Jira. When engineering resolves the issue and updates the Jira work item, that resolution flows back to Zendesk, allowing support to close the ticket and notify the customer within minutes rather than hours.
Cross-Functional Collaboration Between Sales and Development
Challenge: Sales teams in Salesforce promise features or timelines without visibility into development workloads. Developers in Jira or Azure DevOps don’t see the customer context that could help prioritize work.
Solution: Integrate Salesforce opportunities with development platforms. When sales flags a deal dependent on a specific feature, that context appears in the development system. When engineering updates delivery timelines, sales sees the change in Salesforce.
Real-World Application: An enterprise software vendor connects Salesforce opportunities to Azure DevOps features. Account executives can check feature status directly in Salesforce while product teams see which prospects are waiting on specific capabilities, helping both sides make informed decisions.
Multi-System Case Management
Challenge: Organizations using multiple ITSM platforms (due to acquisitions, regional differences, or partner relationships) struggle to maintain consistent service delivery when cases span systems.
Solution: Connect ServiceNow, Freshservice, Zendesk, or other ITSM tools with Salesforce. Cases created in any system can sync relevant details to Salesforce for unified reporting, or escalations can flow between ITSM platforms automatically.
Real-World Application: A managed service provider uses Freshservice internally but needs to create tickets in clients’ ServiceNow instances for certain work. Integration enables automatic ticket creation with appropriate field mapping, plus bidirectional status and comment synchronization.
Partner Ecosystem Coordination
Challenge: Companies working with external partners, vendors, or contractors need to share selected information without granting direct access to internal systems or exposing sensitive data.
Solution: Integration solutions with independent configurations on each side allow you to control exactly what data is shared. Partners connect their systems to yours without seeing your internal configurations, and you can filter what information leaves your environment.
Real-World Application: A software company partners with implementation consultants who use their own project management tools. Rather than granting Salesforce access, the company integrates specific opportunity and project data, sharing only what partners need while maintaining control over customer information.
Automated Lead and Opportunity Sync
Challenge: Marketing and sales teams use different tools but need aligned data. Leads generated through marketing platforms need to flow into Salesforce, and opportunity data needs to inform marketing efforts.
Solution: Integrate marketing automation platforms, CRMs, and Salesforce to ensure leads, contacts, and opportunities stay synchronized across systems.
Real-World Application: A B2B company integrates HubSpot with Salesforce. Qualified leads automatically create Salesforce opportunities, and closed-won deals update HubSpot for accurate attribution reporting.
Product Development Feedback Loop
Challenge: Customer feature requests captured in Salesforce Cases don’t reach product teams. Development priorities disconnect from customer needs.
Solution: Sync Salesforce Cases or custom objects representing feature requests with Jira, Azure DevOps, or Asana. Product teams see customer demand signals alongside technical requirements.
Real-World Application: A product-led growth company integrates Salesforce feedback records with Asana. Product managers see aggregated customer requests linked to ARR impact, helping prioritize the roadmap based on business outcomes.
Choosing the Right Solution: Decision Framework
| Scenario | Recommended Approach |
| Simple, one-way automation (e.g., new lead → Slack notification) | Zapier or native AppExchange apps |
| Complex, bidirectional sync between Salesforce and work management tools | Exalate or similar specialized integration |
| Enterprise-wide integration architecture | MuleSoft (with significant investment) |
| Custom internal system integration | API-based development or custom connectors |
| Cross-company integration with external partners | Solutions offering independent configuration (e.g., Exalate) |

Calculate time and money savings from automated bidirectional sync.
How to Set up a Salesforce to Salesforce Integration With Exalate
This tutorial demonstrates how to set up a Salesforce-to-Salesforce integration using Exalate.
- Get Started with Exalate
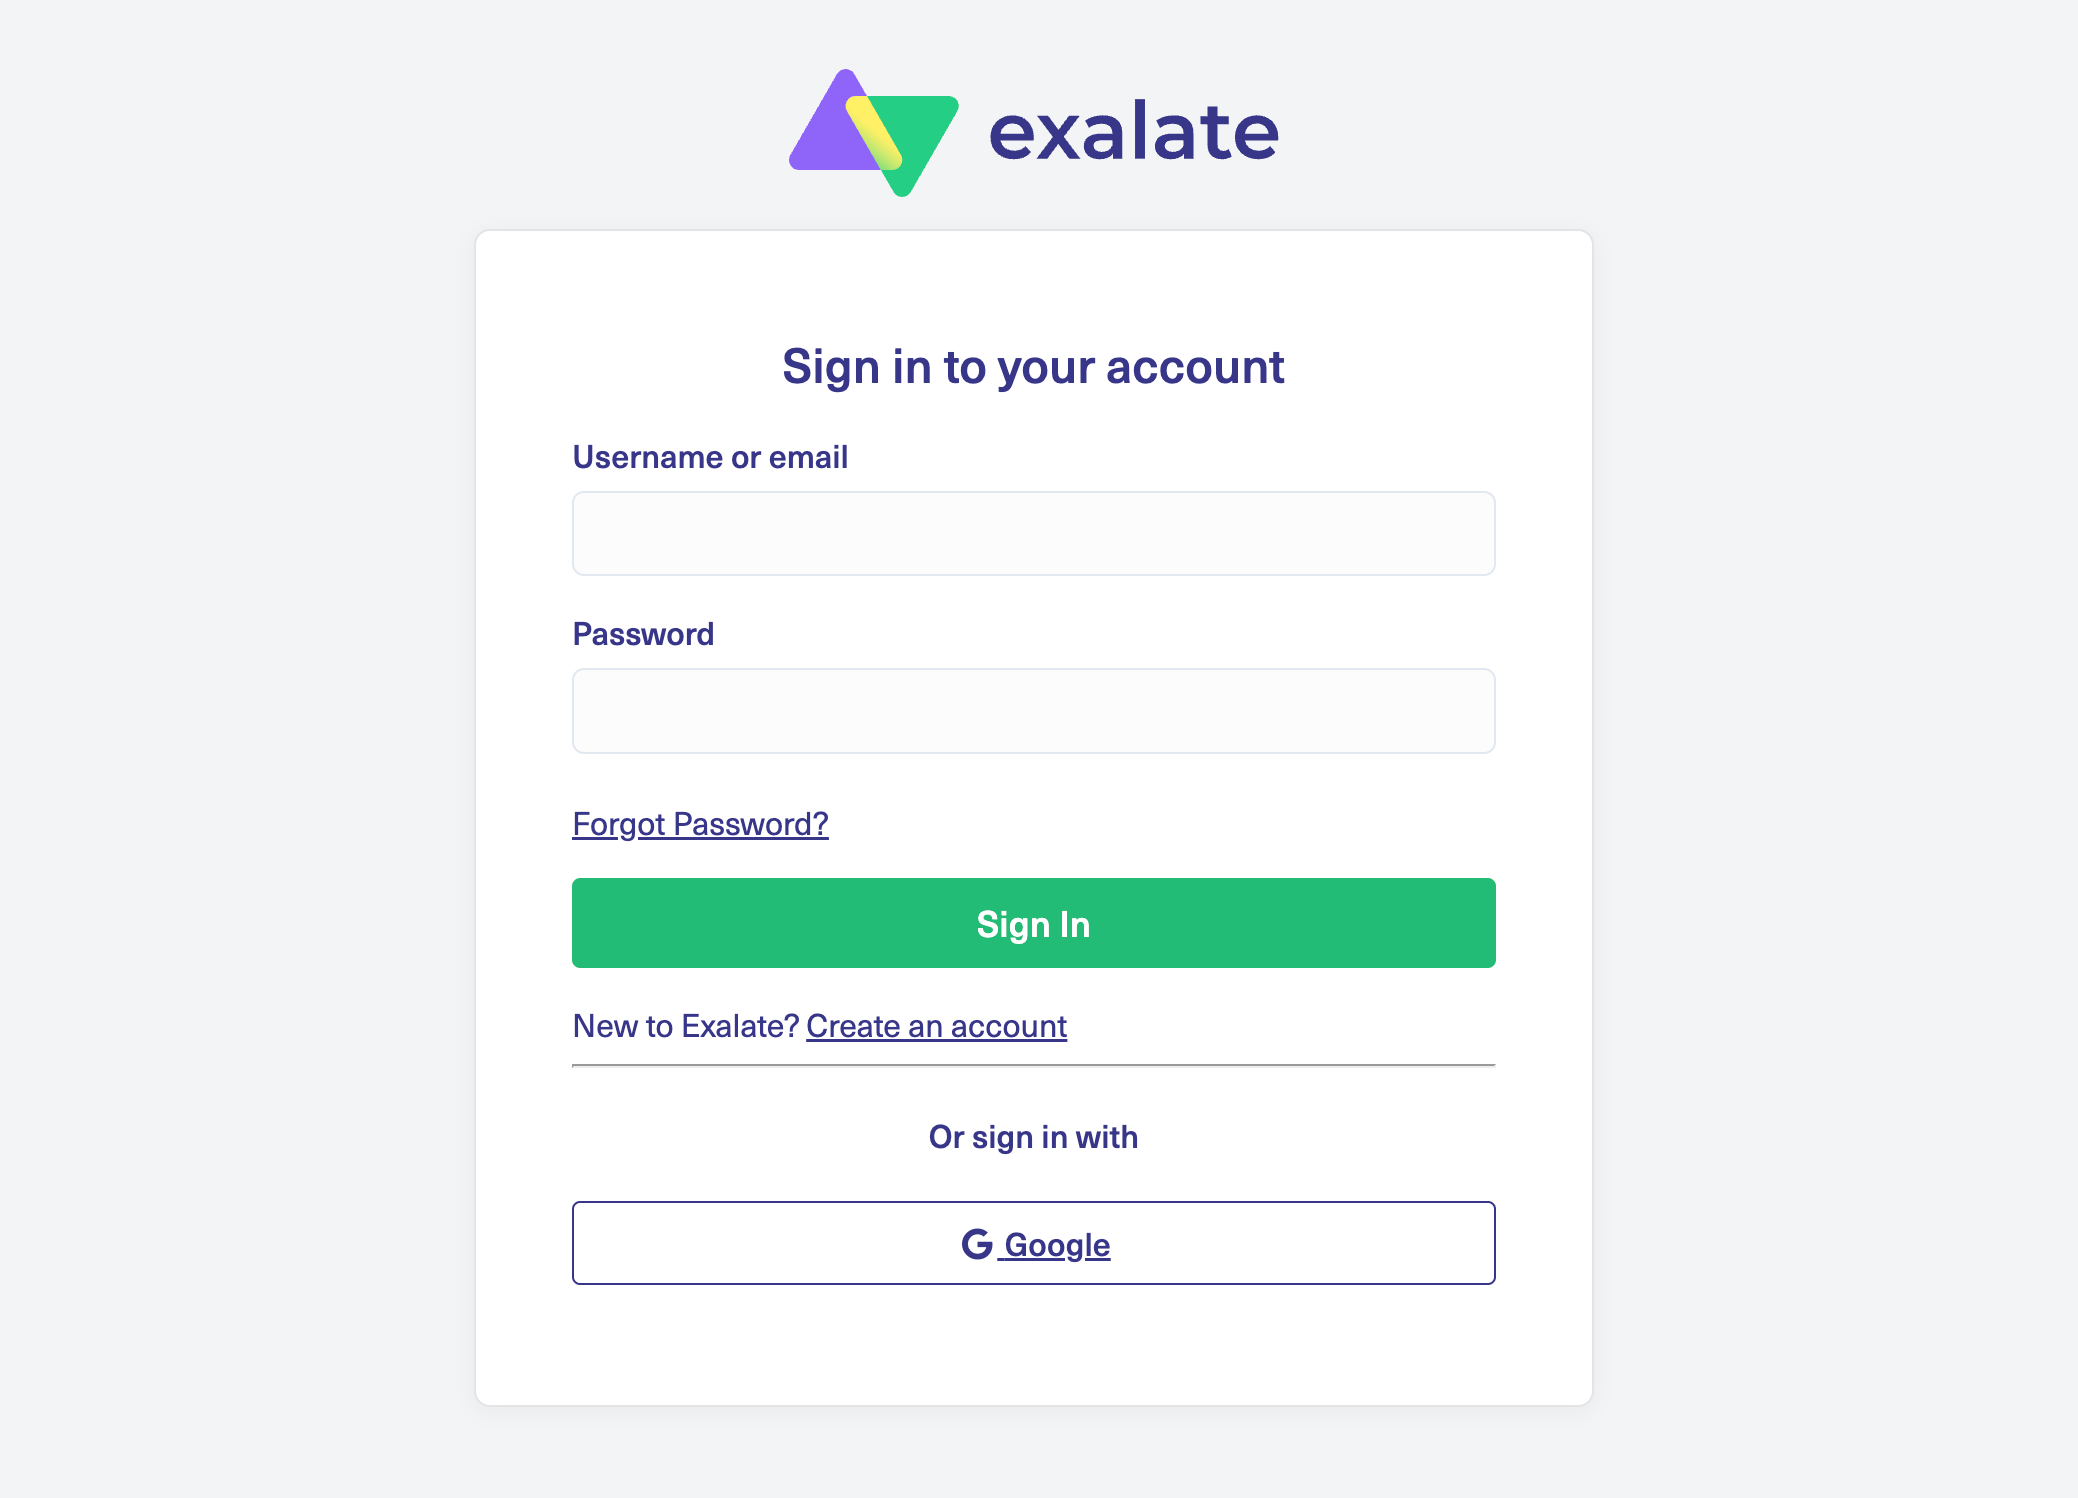
Navigate to the Exalate integrations page and create your account. If you’re a returning user, simply log in. You can register manually with email verification or use Google sign-in for faster access.
- Set Up Your Workspace
Workspaces serve as central hubs for organizing and managing all your integrations and connections. Access your existing workspaces through the “Workspaces” tab.
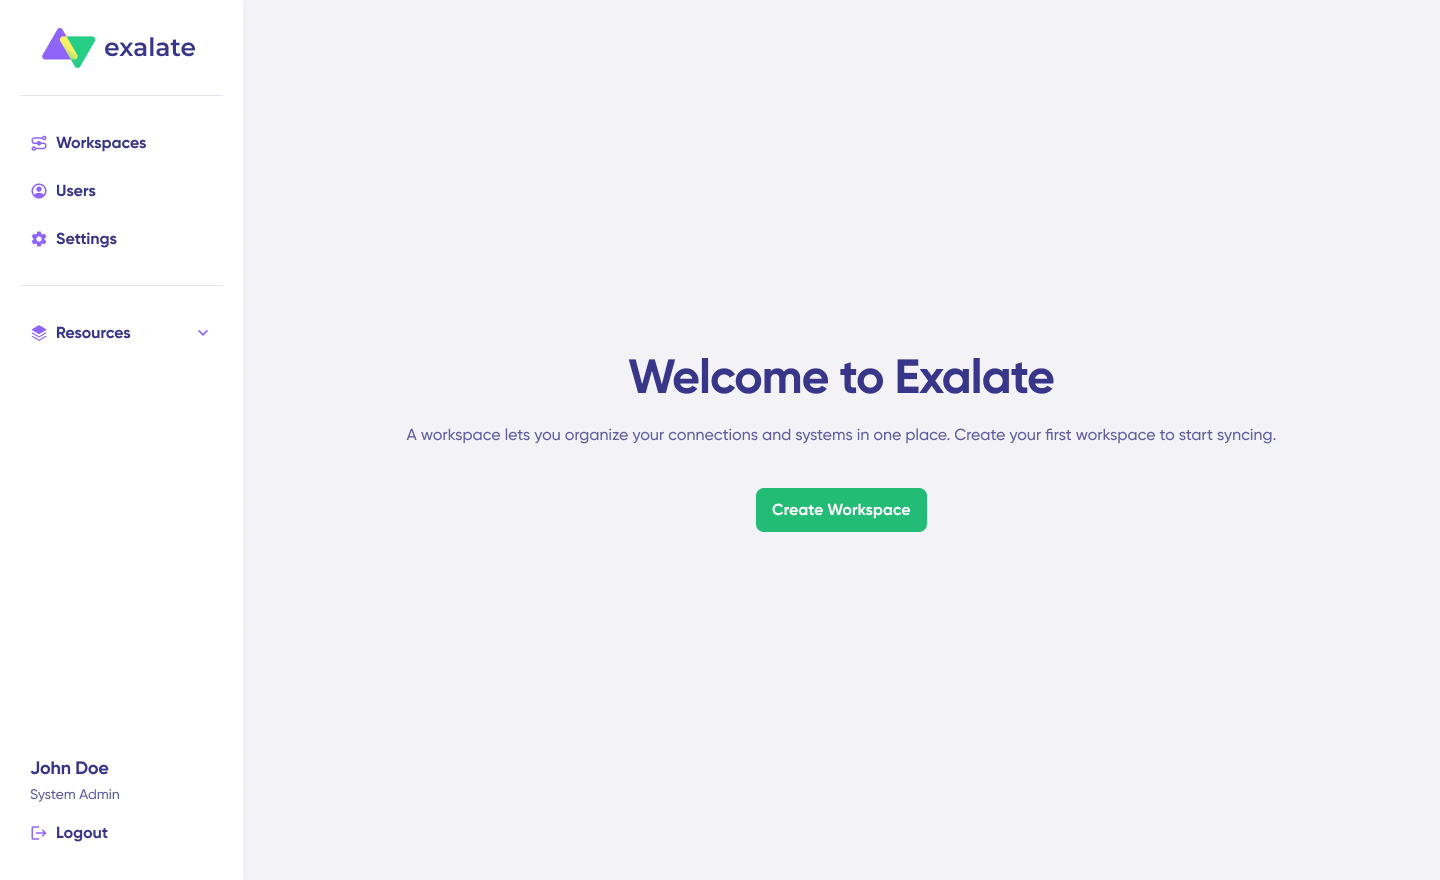
For first-time users, click the “+ Create Workspace” button. Provide a name and description for your workspace, then click “Create workspace” to proceed.
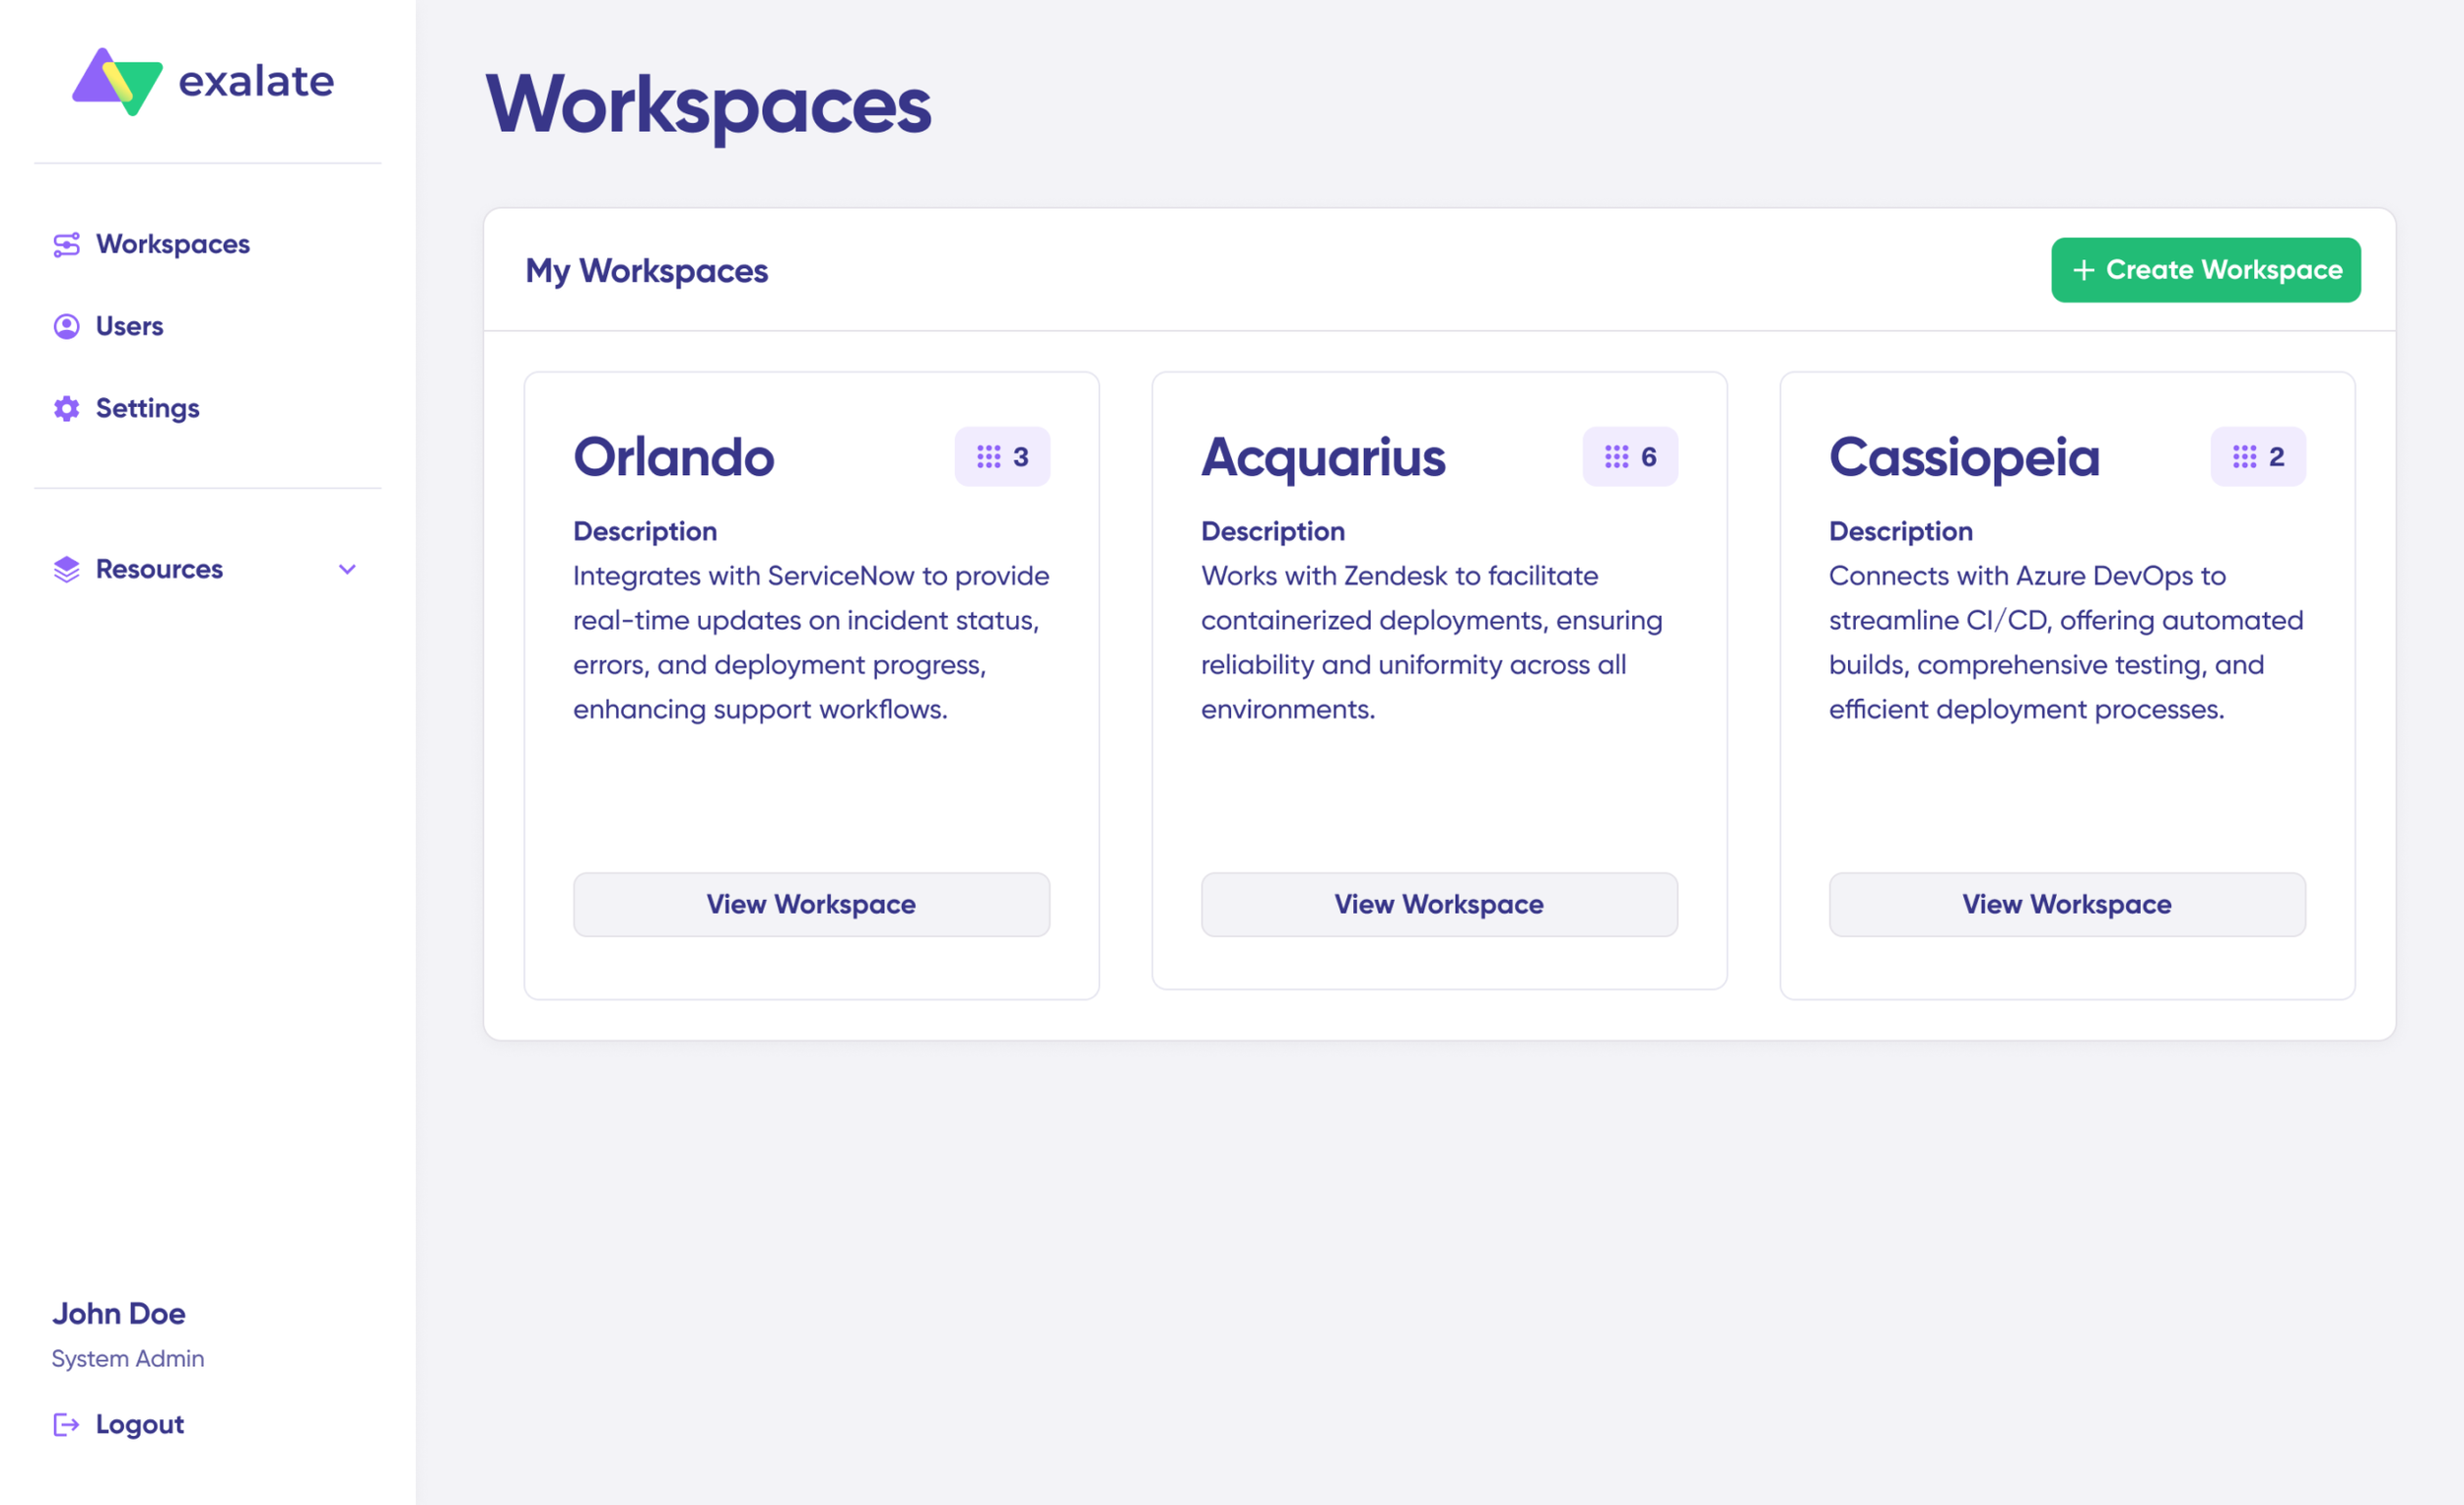
- Initiate Your Salesforce-to-Salesforce Connection
If you’re working with an existing workspace, navigate to the “Connections” tab to view all your connections. From here, you can edit connections and access detailed connection information.
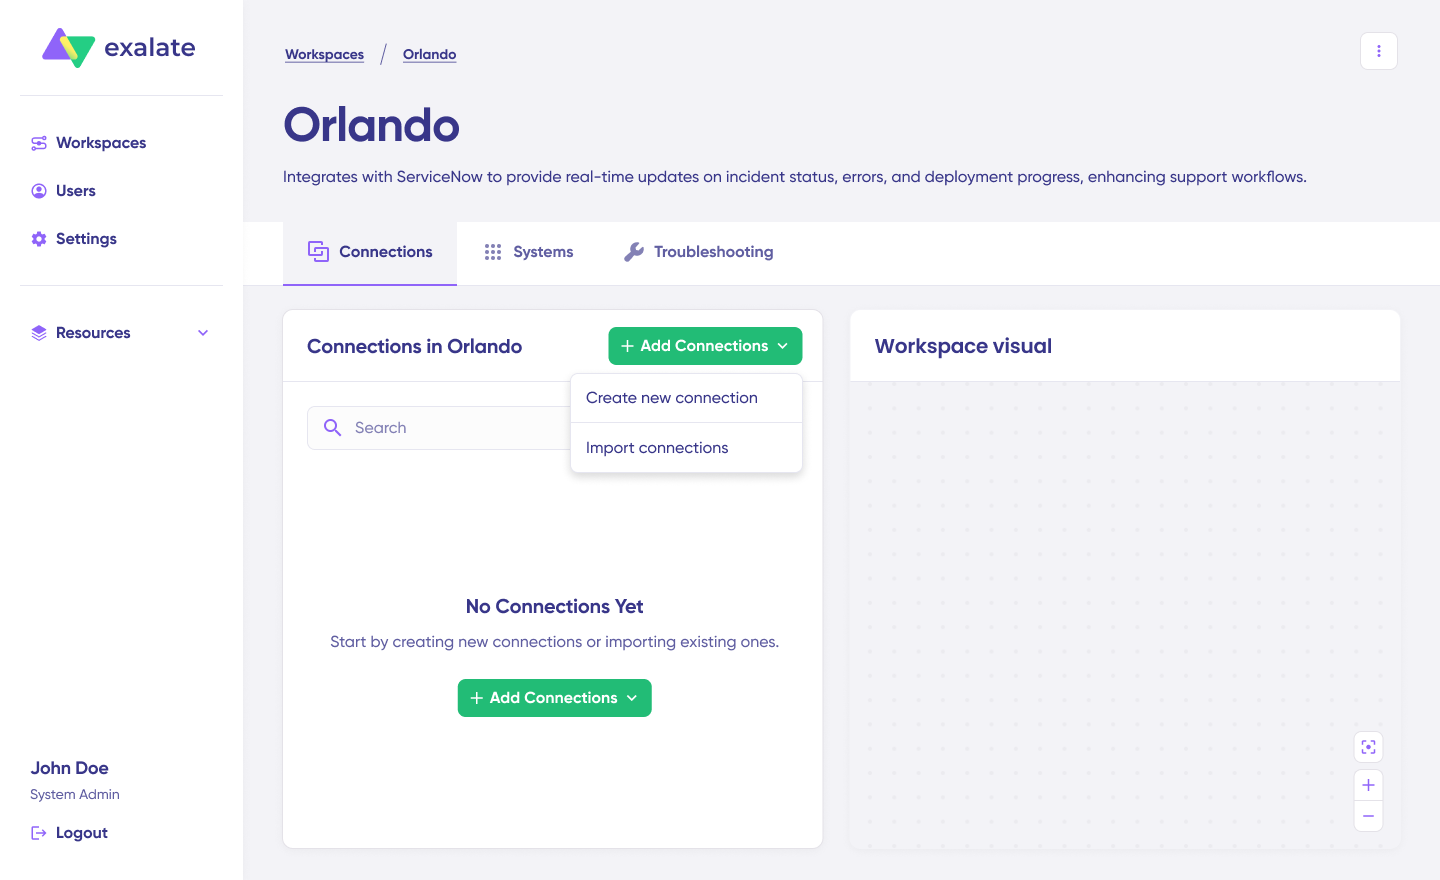
Click “+ Add connections” → “Create new connection“. Enter the name for your first Salesforce instance as System A. Then Provide the URL of your first Salesforce org.
Note: Creating a connection requires an active Exalate account with at least one Workspace and authentication credentials for both Salesforce instances you want to connect.
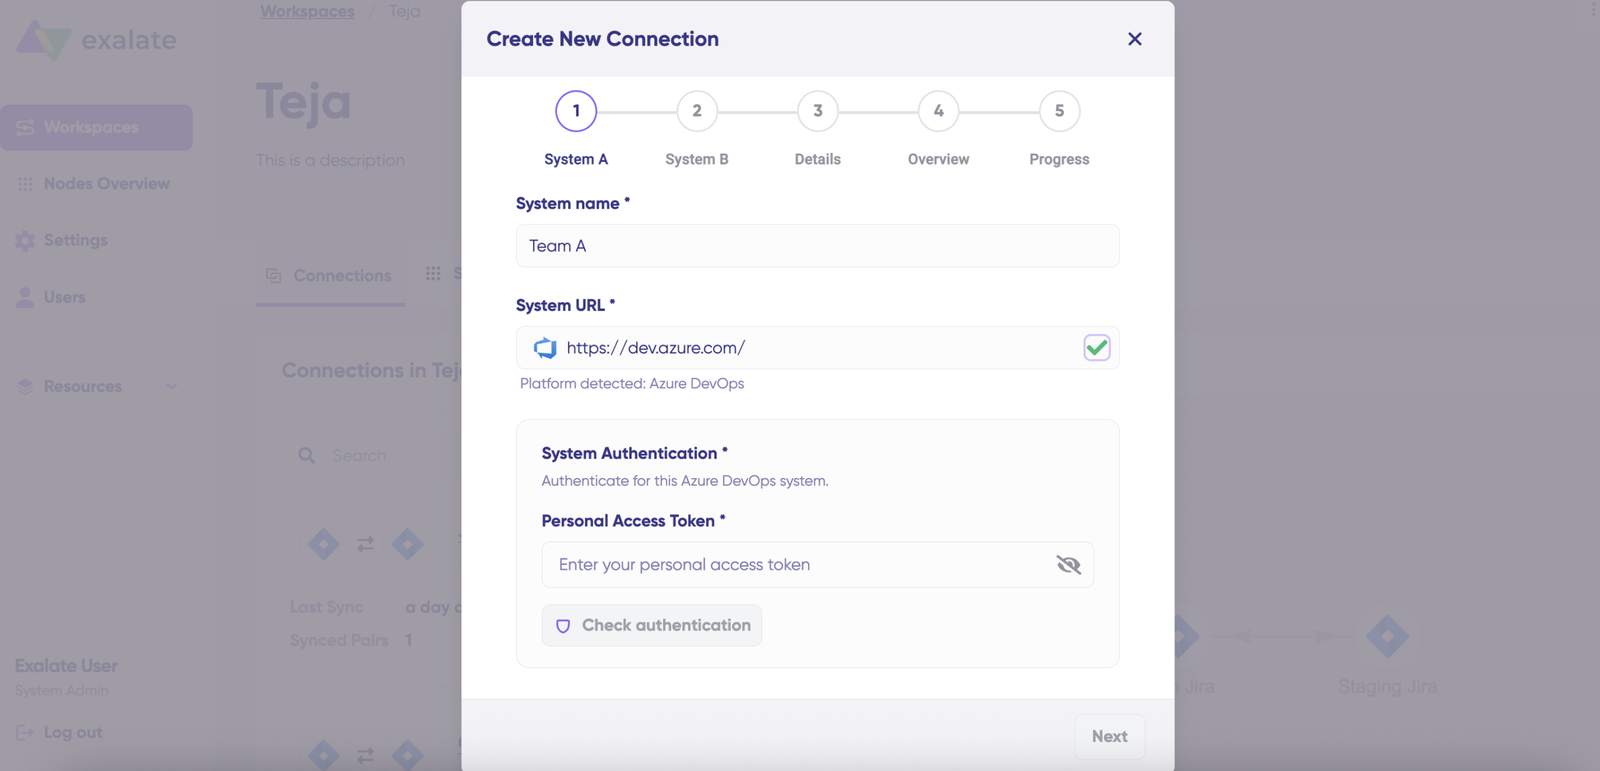
Once you enter the URL, Exalate performs a validation check. If your Salesforce org is already registered in the current workspace, authentication happens automatically. If the org belongs to a different workspace, it will be newly registered for your current workspace.
For a new Salesforce instance, you’ll need to enter your authentication credentials using Basic Auth with username and password.
Complete the same setup process for your second Salesforce instance (System B). The authentication rules remain identical since both systems are the same.
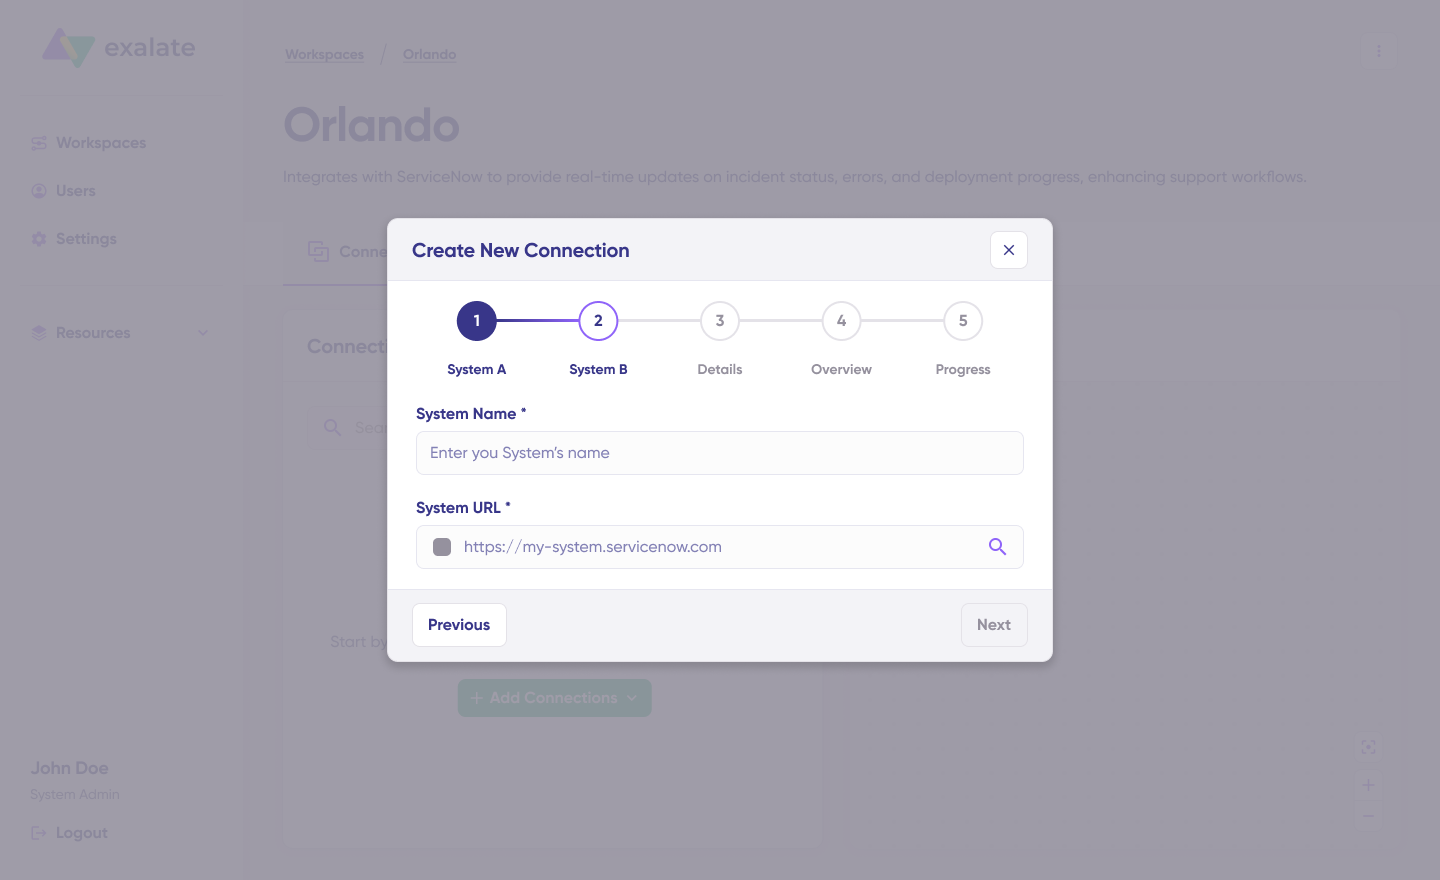
Assign a name and description for your connection, then click “Next“. Review the configuration details for accuracy and click “Create connection“.
When the process completes, select “Continue to configuration” and choose the Salesforce objects you want to synchronize (such as Accounts, Opportunities, Cases, or Leads).
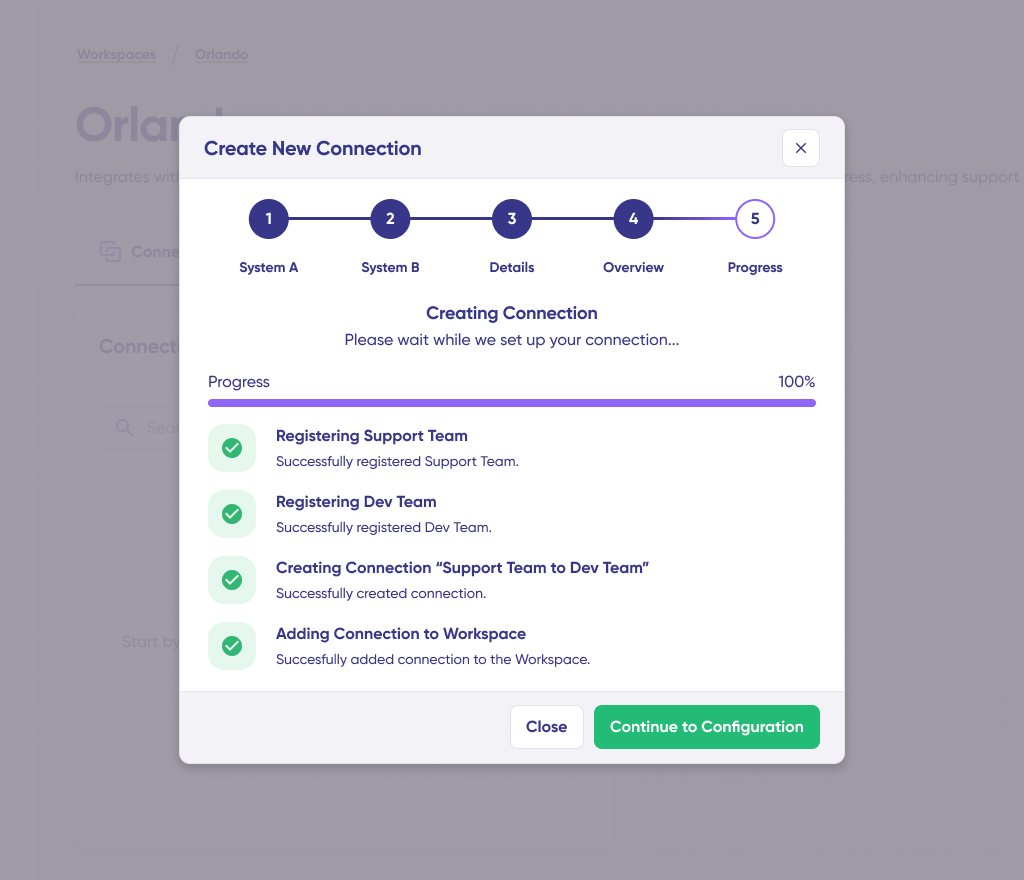
Then click “Build & continue“. You’ll now see two configuration options: “Quick sync” and “Edit & Test“. Let’s explore both approaches.
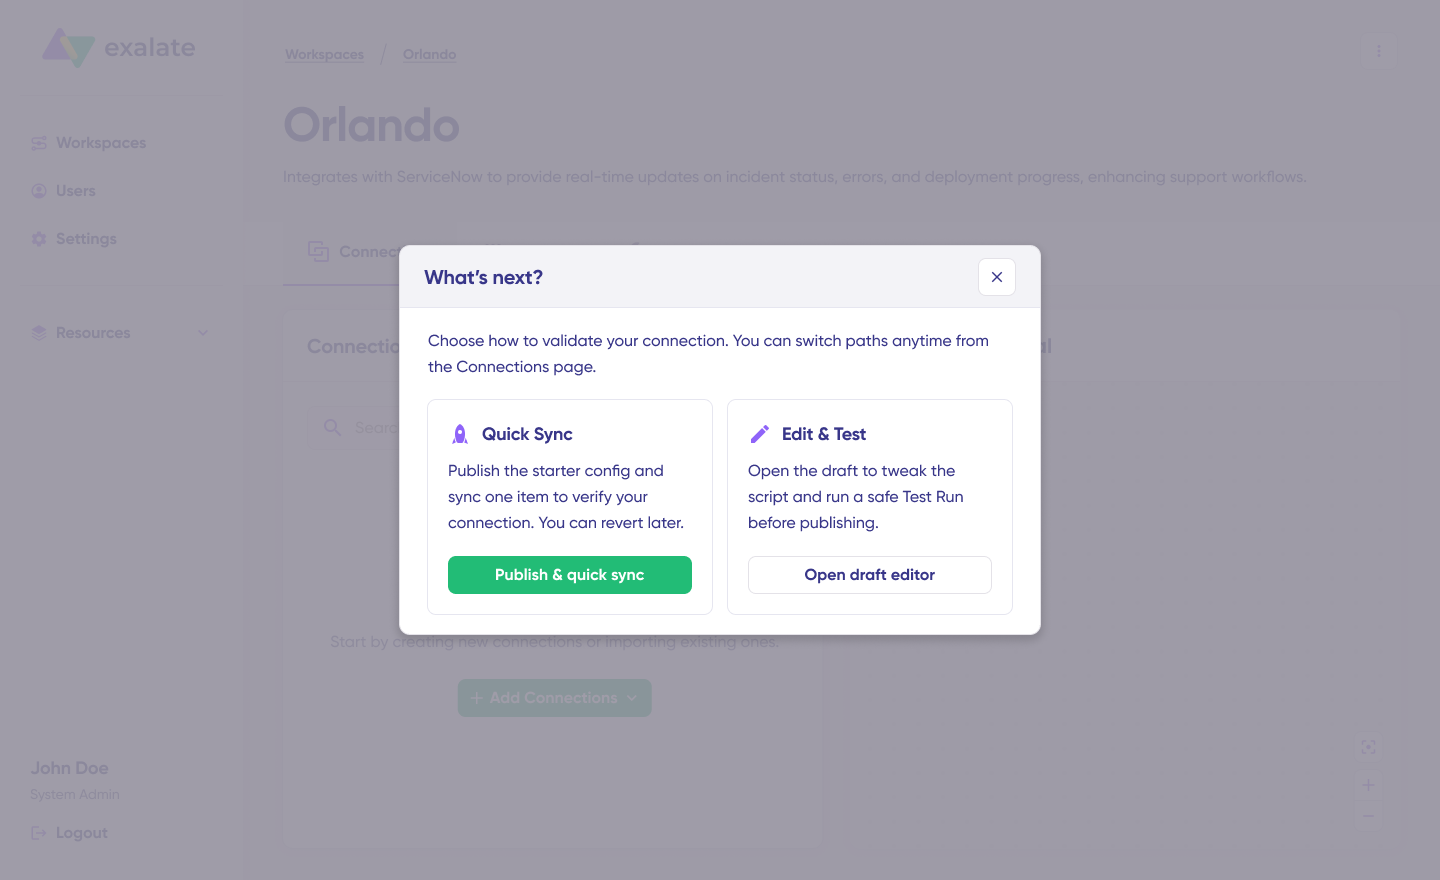
- Quick Sync: Test Your Connection Immediately
This option allows you to synchronize one record between your Salesforce instances to verify that the connection works correctly. This is an optional but recommended step.
Under the “Item sync monitor,” enter the Salesforce record ID from either instance—such as an Account ID, Opportunity ID, or Case Number.
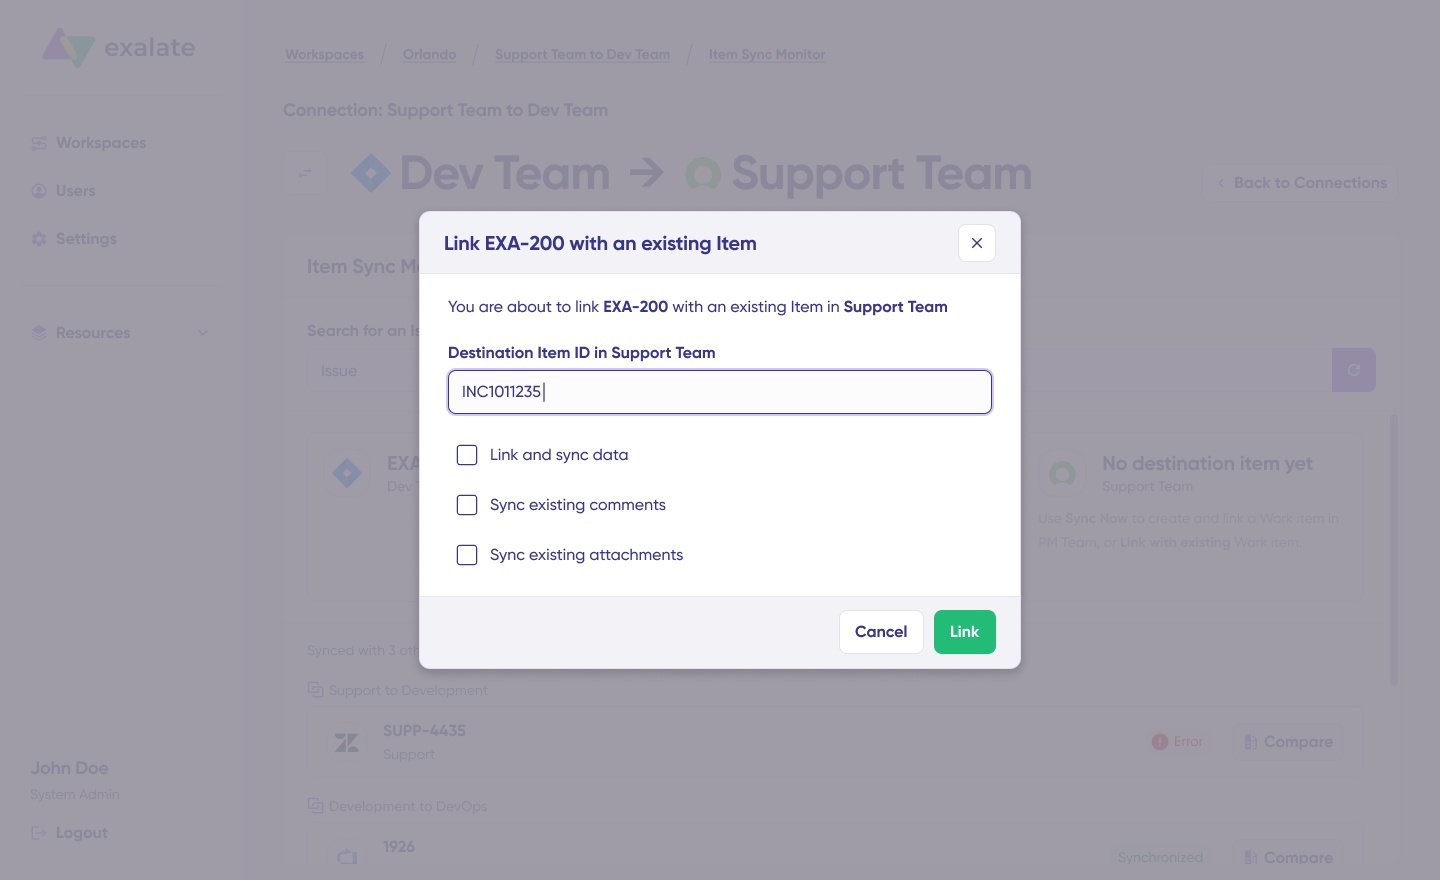
To synchronize the first record, click “Sync Now“. To link two existing records from both instances, select “Link with existing“. You’ll receive real-time status updates during synchronization.
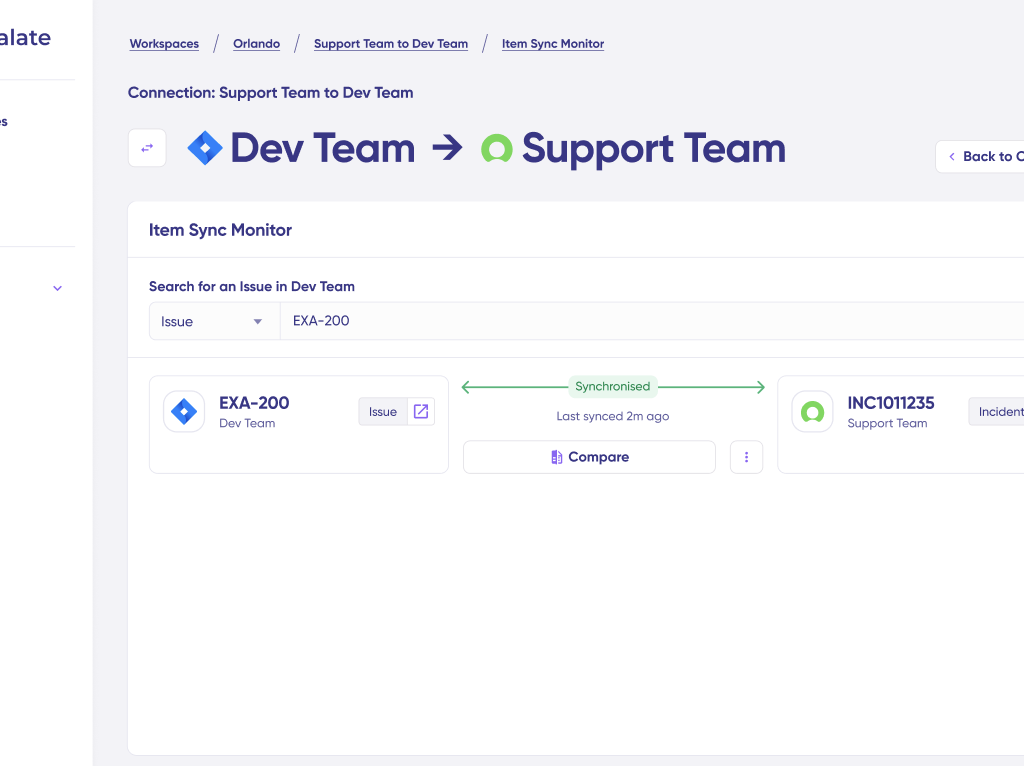
Once complete, view both synchronized records by opening them in separate windows. You can also compare how the synchronized records appear and preview how changes will be applied across both instances.
- Edit & Test: Configure Custom Sync Rules
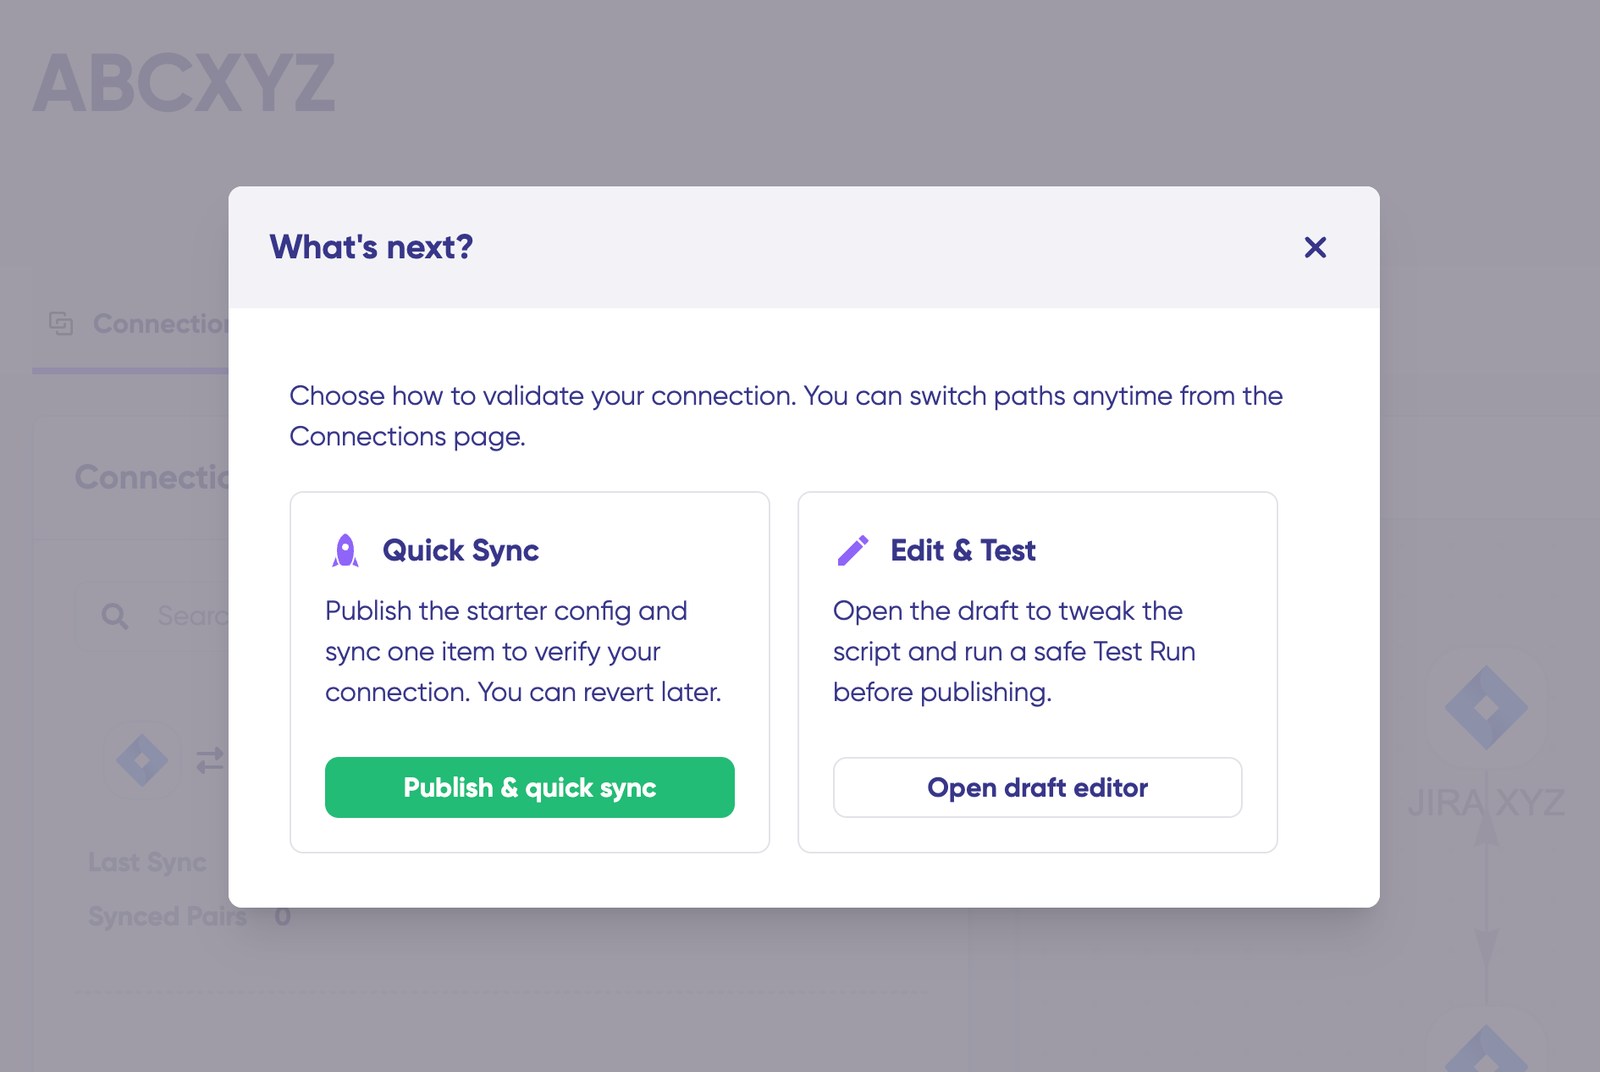
To customize your synchronization behavior, click “Create a new version” or select “Open latest draft“. This prevents accidental modifications to your active configuration. All changes in draft mode are saved automatically.
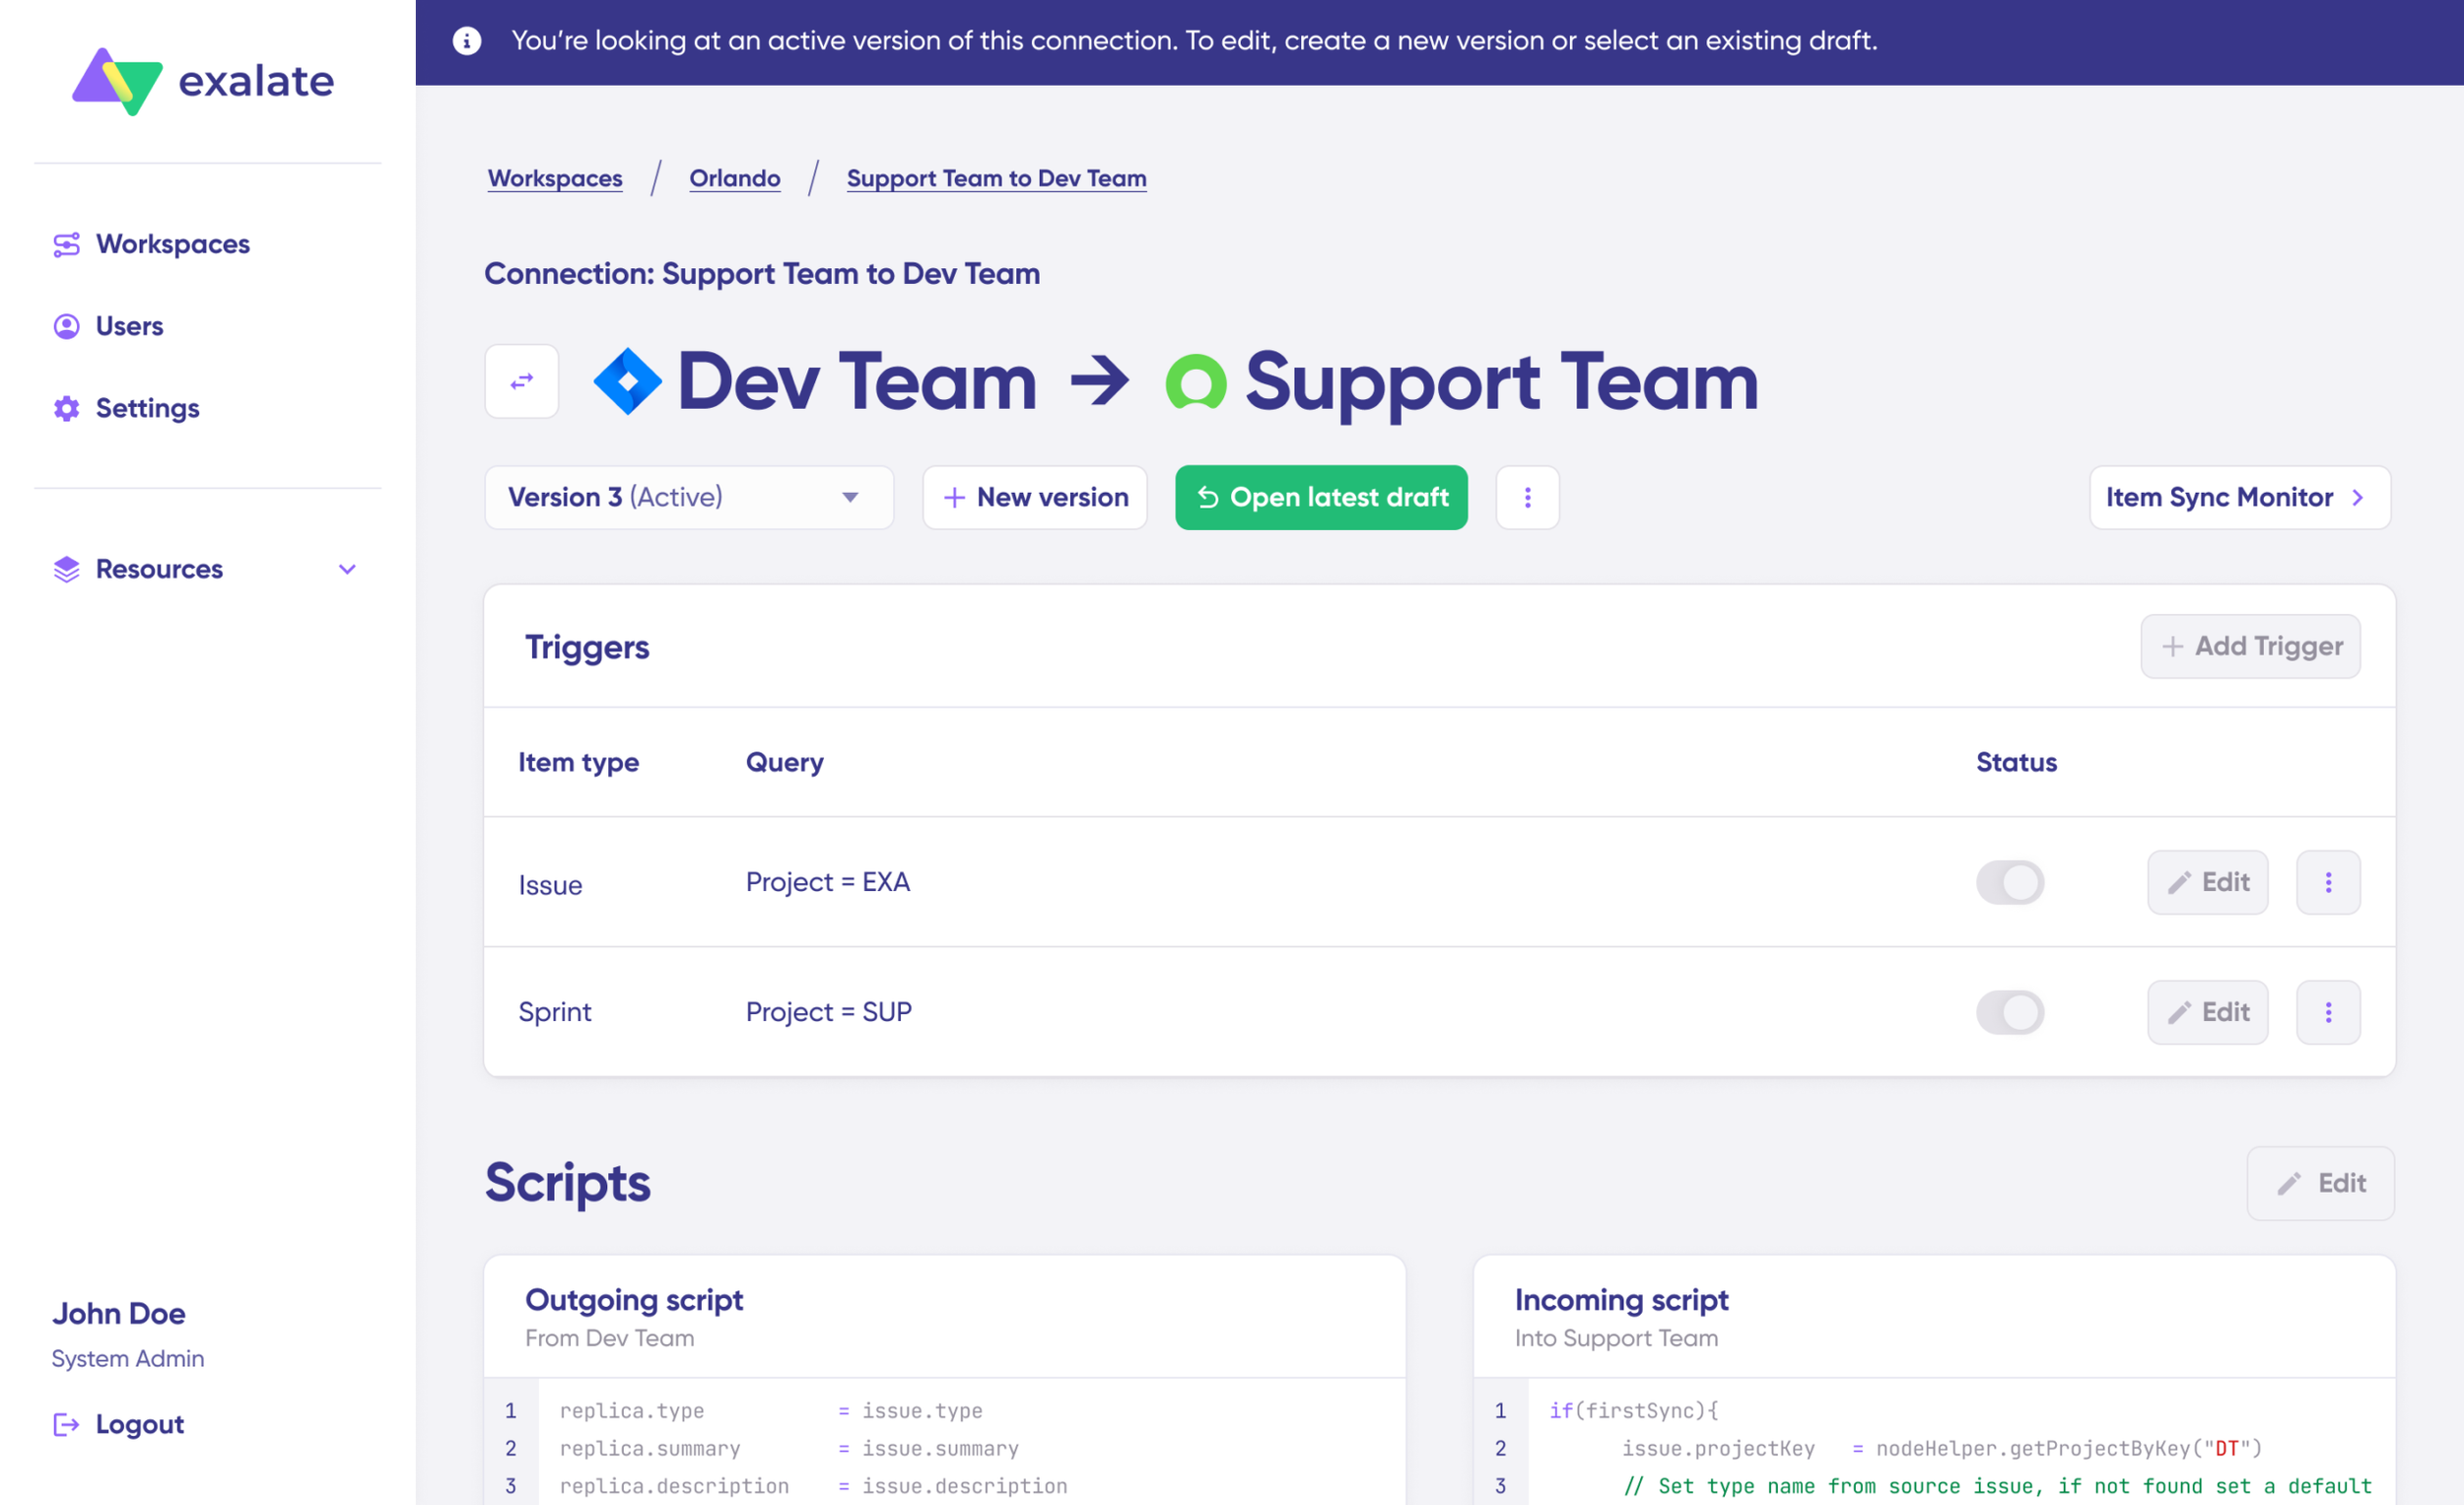
Click the “Edit” button to access the configuration editor and modify sync rules. Sync rules use Groovy-based scripting. These scripts enable custom data logic, field mapping, and conditional workflows, allowing you to handle complex business requirements and unique integration scenarios.
Change the synchronization direction by clicking the bidirectional arrows next to the connection name.
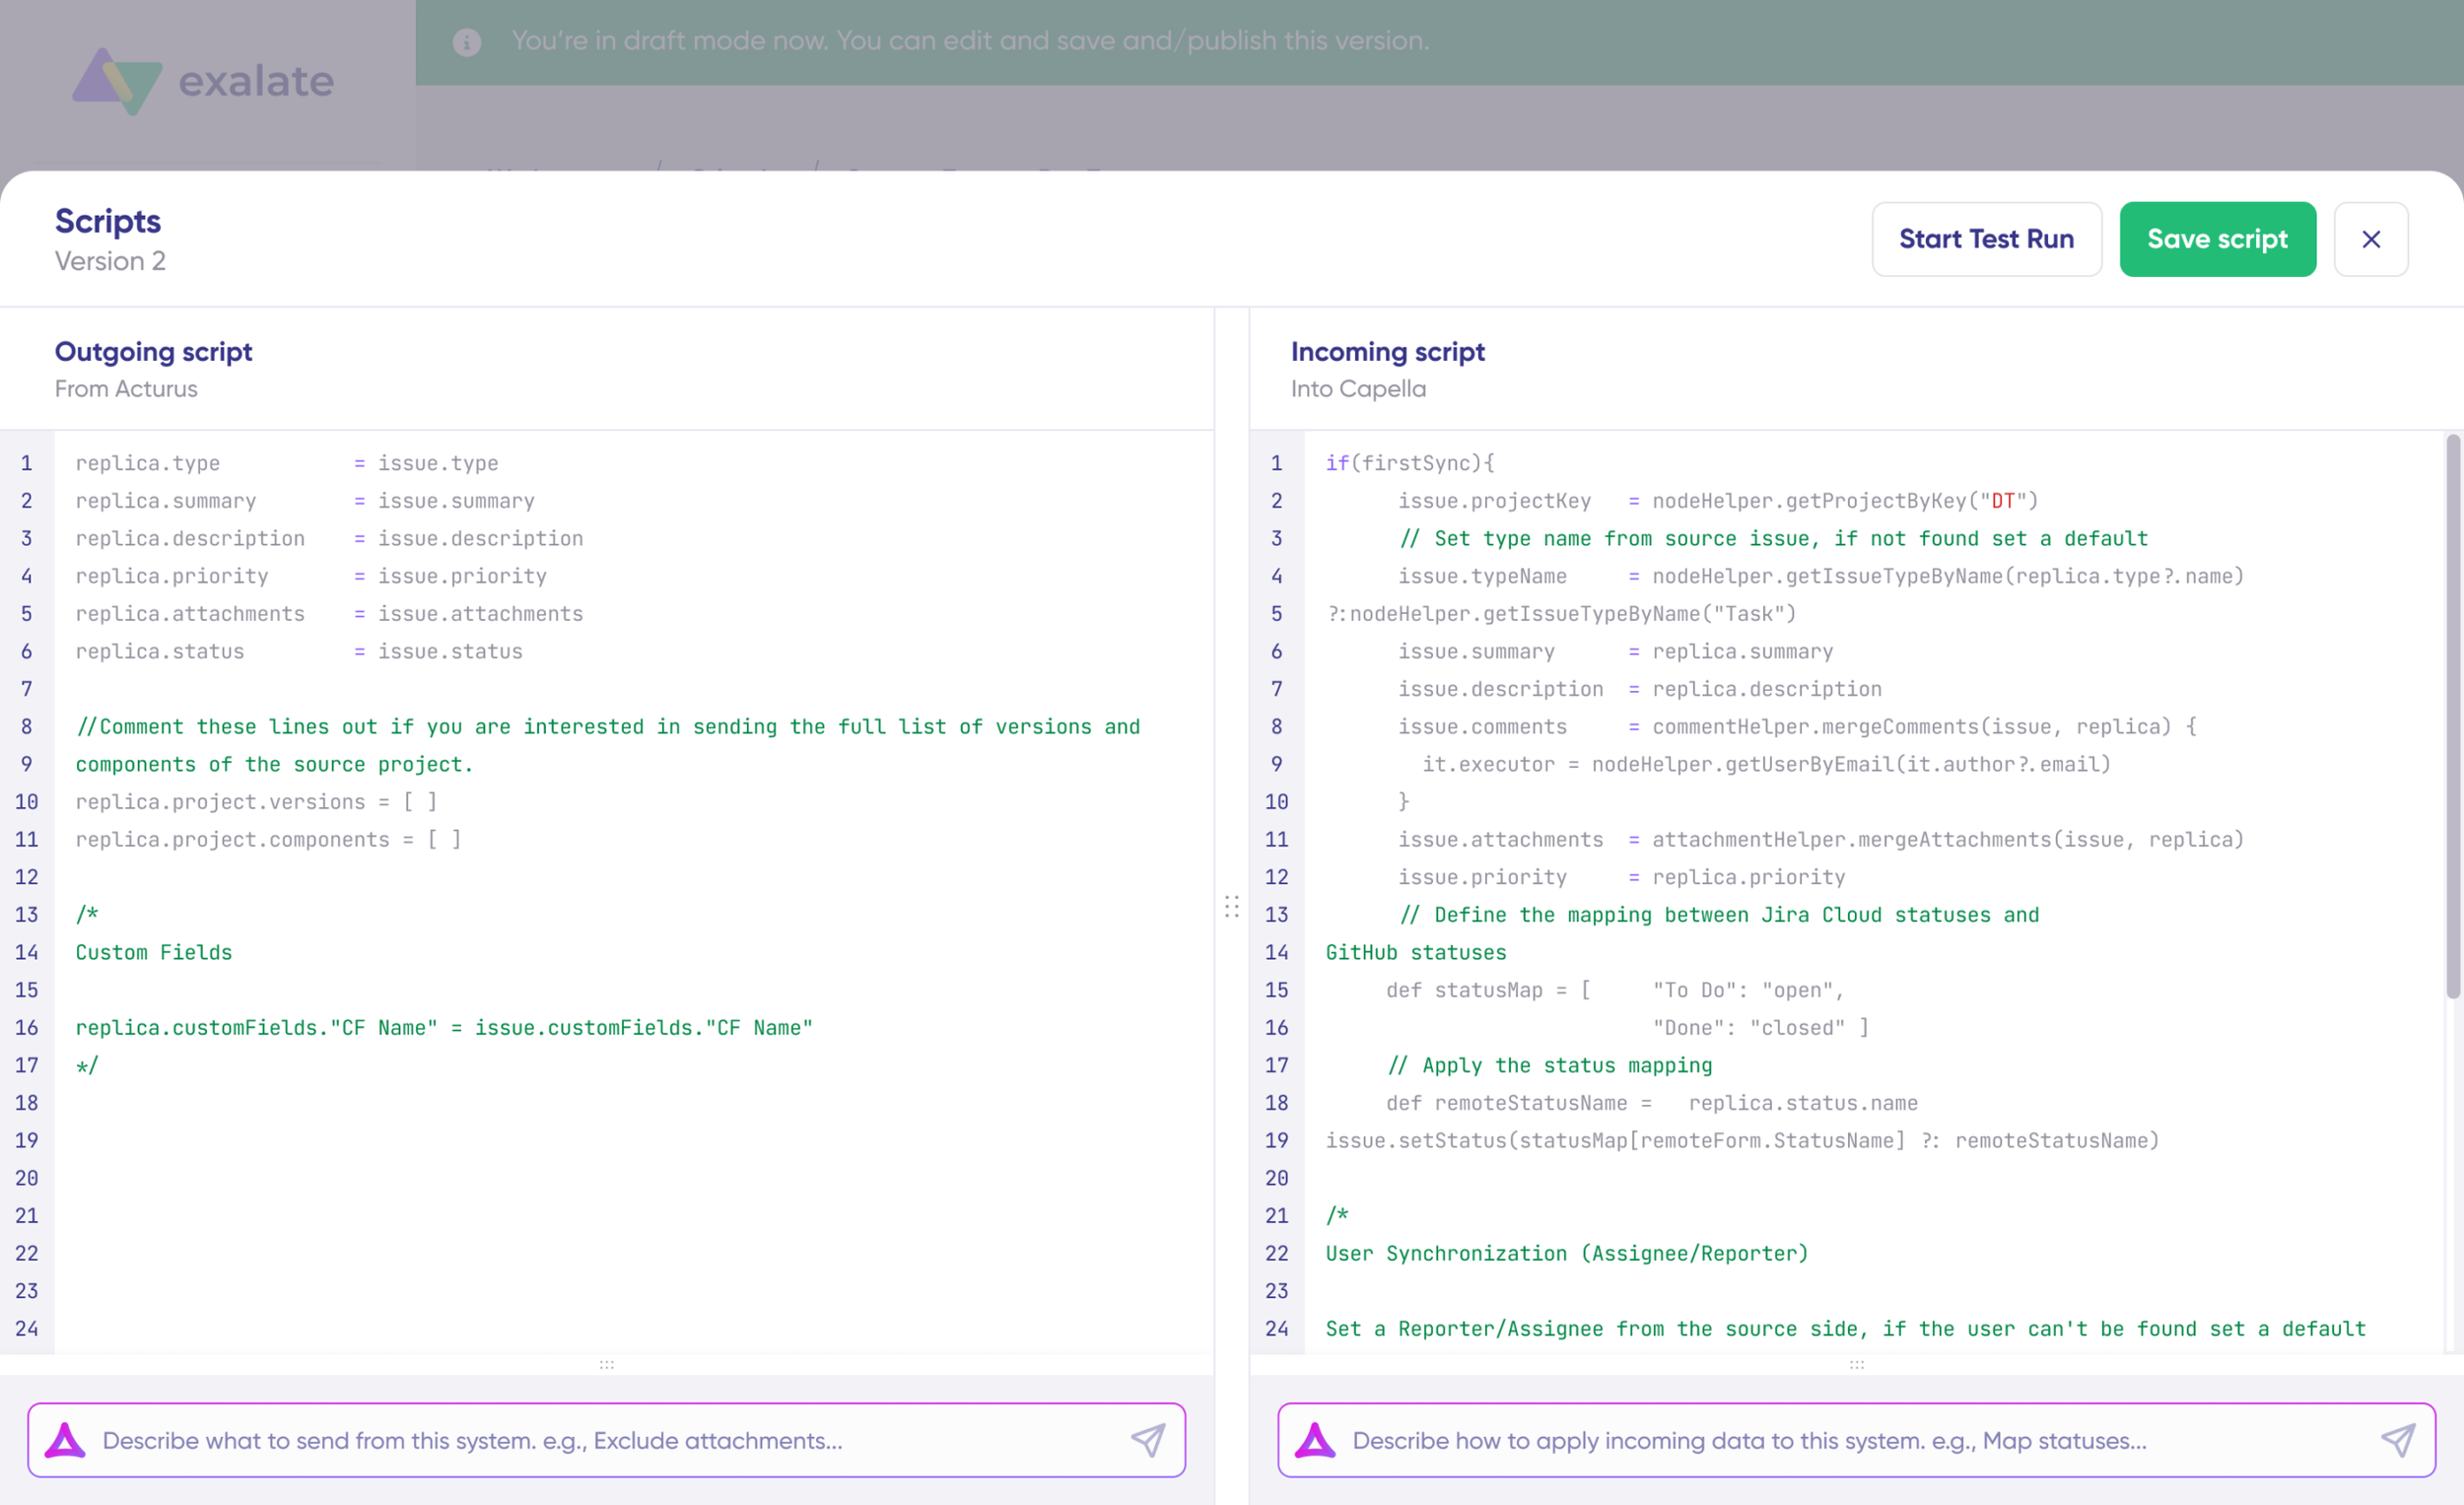
Scripts are organized into incoming and outgoing sections. If the sync direction flows from Salesforce A to Salesforce B, the outgoing script defines which values are sent from Org A to Org B, while the incoming script determines how those values are mapped in Org B. These scripts reverse when you change direction.
To synchronize new fields, add them to the sync script directly (if you’re comfortable with scripting). To prevent specific data from syncing, remove that script line from the outgoing script.
- Use Aida for AI-Assisted Configuration
If you want to save time and avoid scripting complexities (especially useful for business users), leverage Exalate’s AI-assisted configuration feature called Aida to generate your sync scripts.
Aida is available in both incoming and outgoing script sections, so select the appropriate side based on your needs. Outgoing and incoming scripts operate independently, as does Aida, so maintain separate context and direction for each prompt.
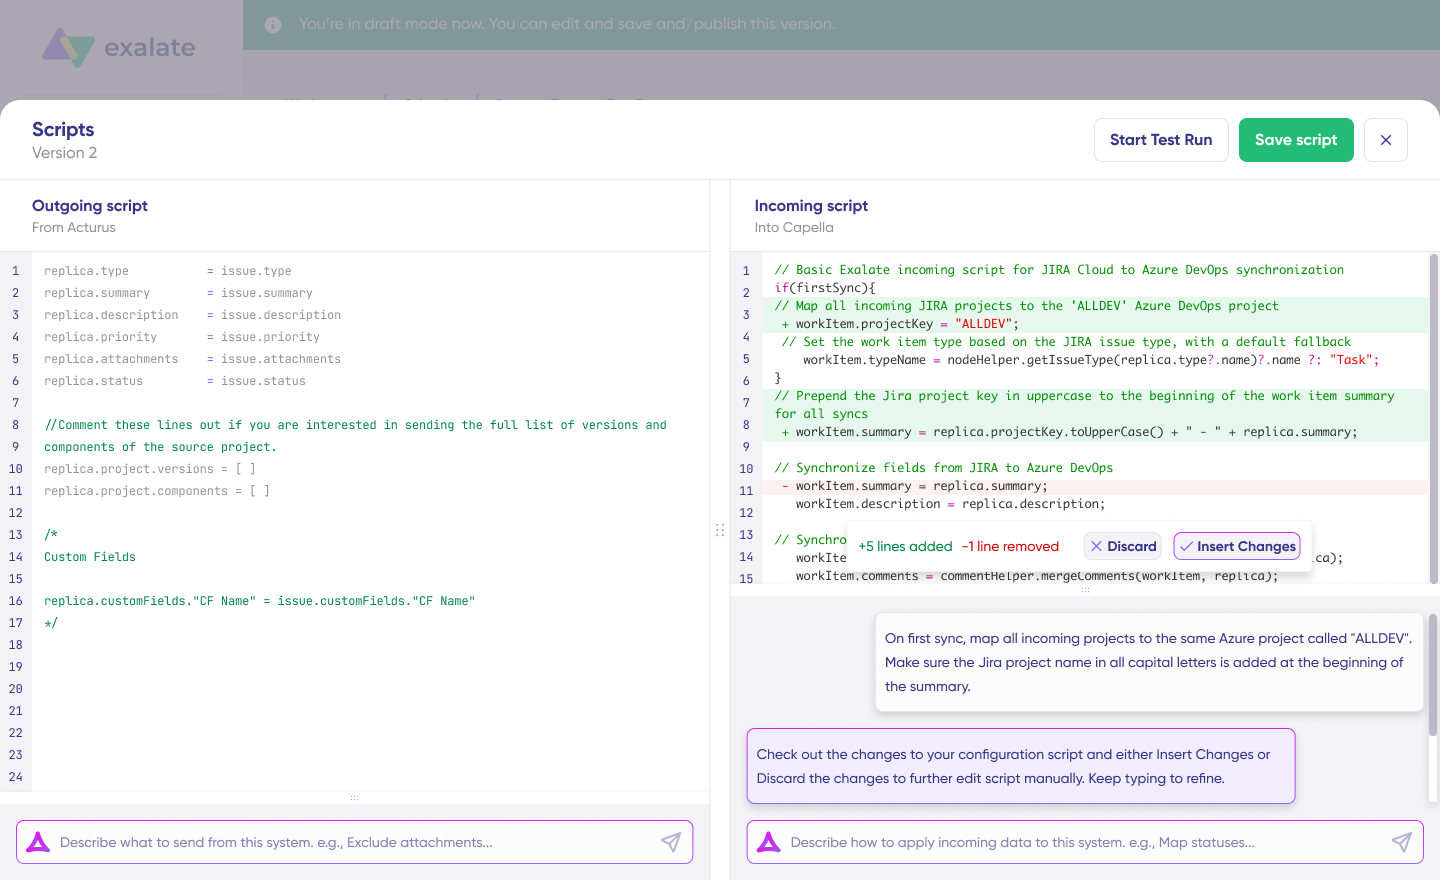
Aida assists you in two ways:
For Outgoing scripts: Describe what data should leave your Salesforce instance. For example, “Only sync Opportunities with Amount greater than $10,000.”
For Incoming scripts: Describe how incoming data should be applied to your Salesforce instance. For example, “Map Account Owner to the Contact Owner” or “Set a default Lead Status if the status doesn’t exist.“
Based on Exalate’s scripting API and your existing configuration, Aida generates functional Groovy scripts with proper field mappings.
Once Aida completes your script, review the suggested changes. Green highlights indicate new lines to be added. Red highlights show lines to be removed. You can choose to “Insert” or “Discard” Aida’s suggestions.
Note: Aida is a powerful tool, but like any AI assistant, always review the generated code before applying it to production.
- TestRun: Validate Before Going Live
Once your sync scripts are ready, you can either “Save script” or validate them using the “Start Test Run” option.
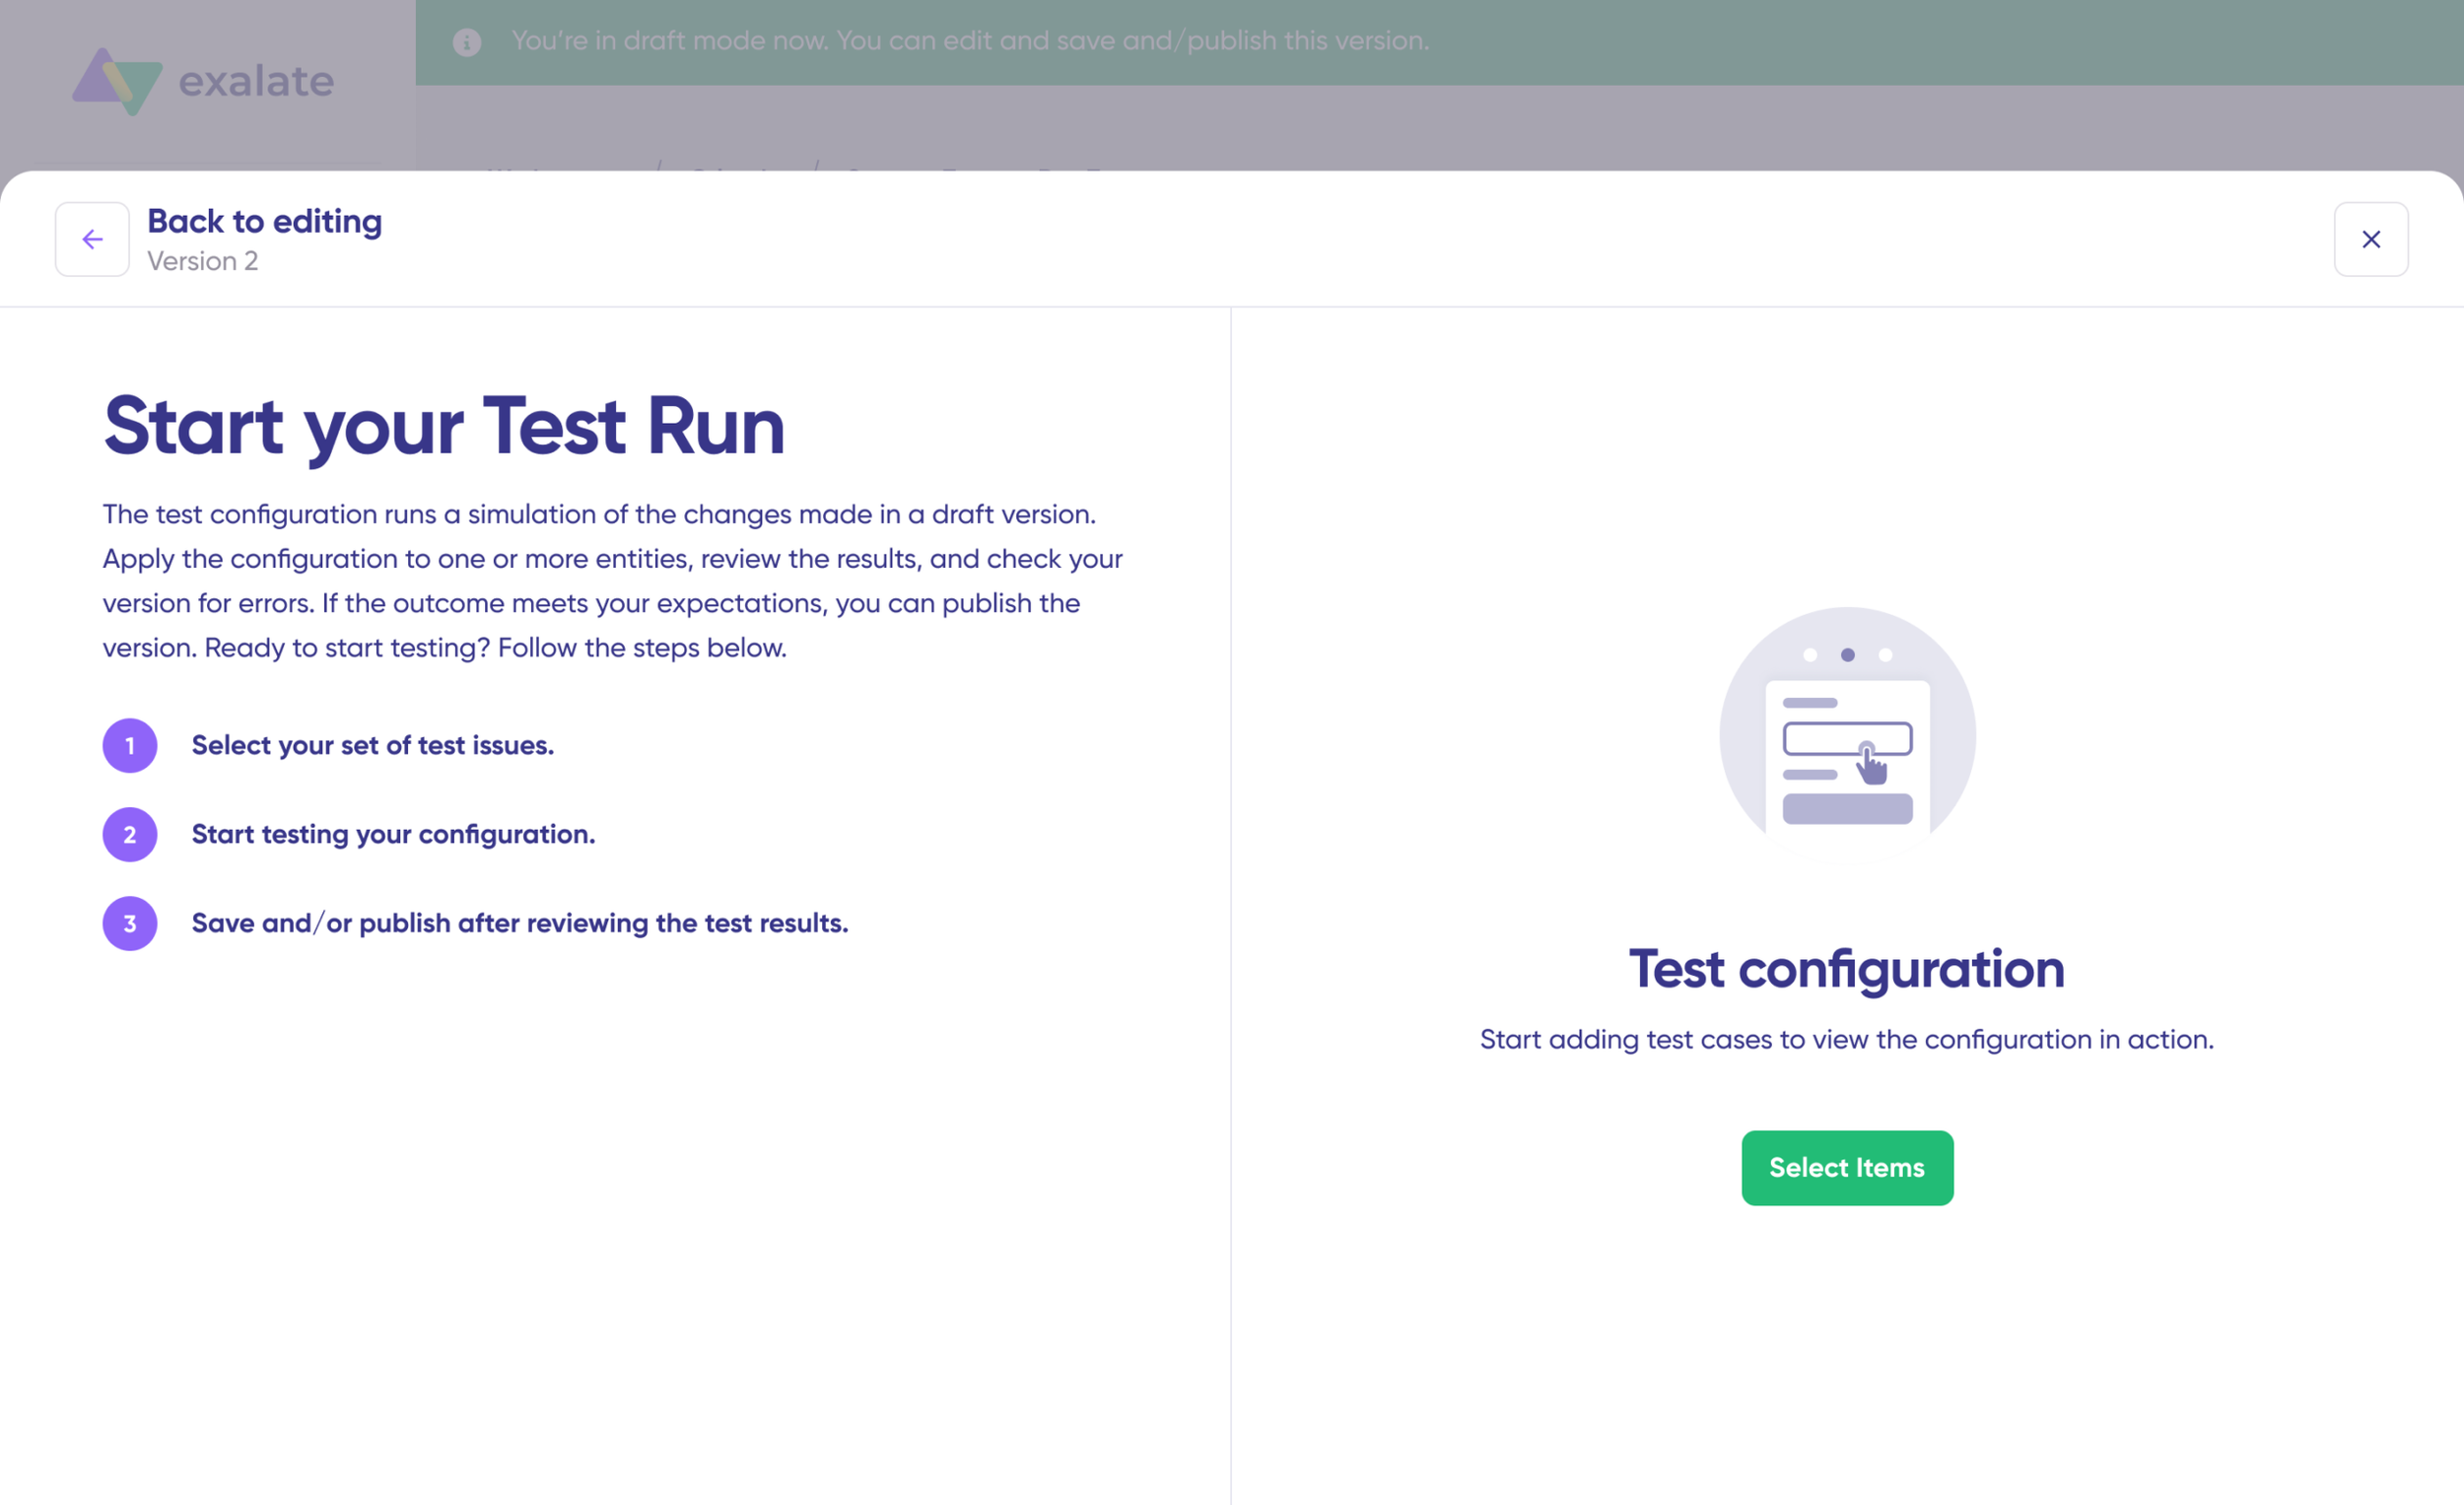
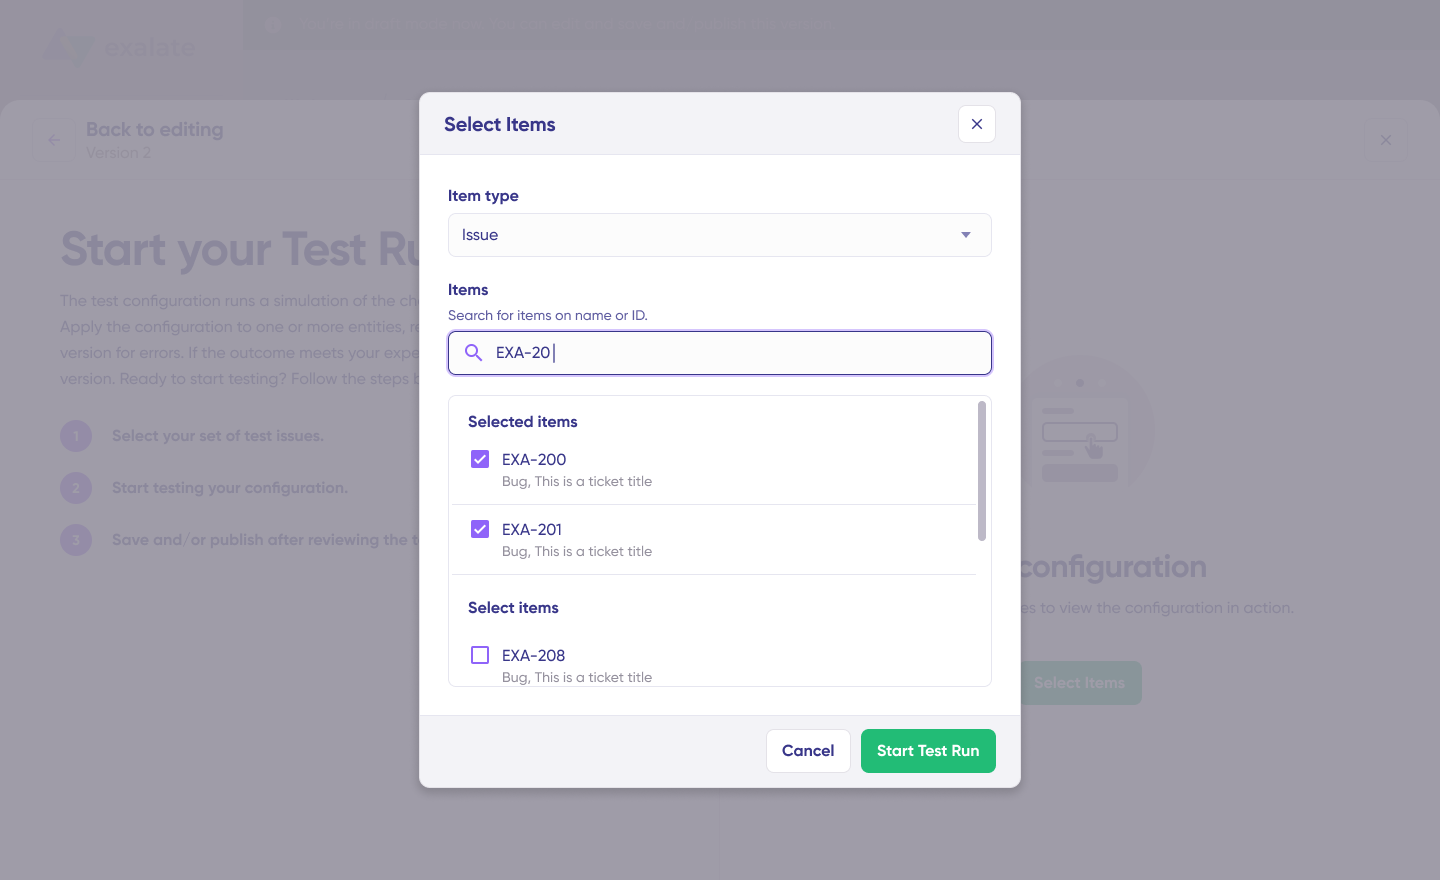
To test your configuration, “Select Items” you want to apply synchronization to. You can select multiple Salesforce records. After selection, click “Start Test Run”.
You’ll now see all incoming and outgoing replicas for each selected record. Review them in their respective tabs. Preview how the sync configuration will be applied to your records, examine the replica structure, and verify that field mappings appear correct.
If adjustments are needed, return to the editor, modify the scripts, and test again. Deploy only when you’re confident the configuration performs as expected. This validation step prevents errors from impacting production data.
- Publish Your Configuration
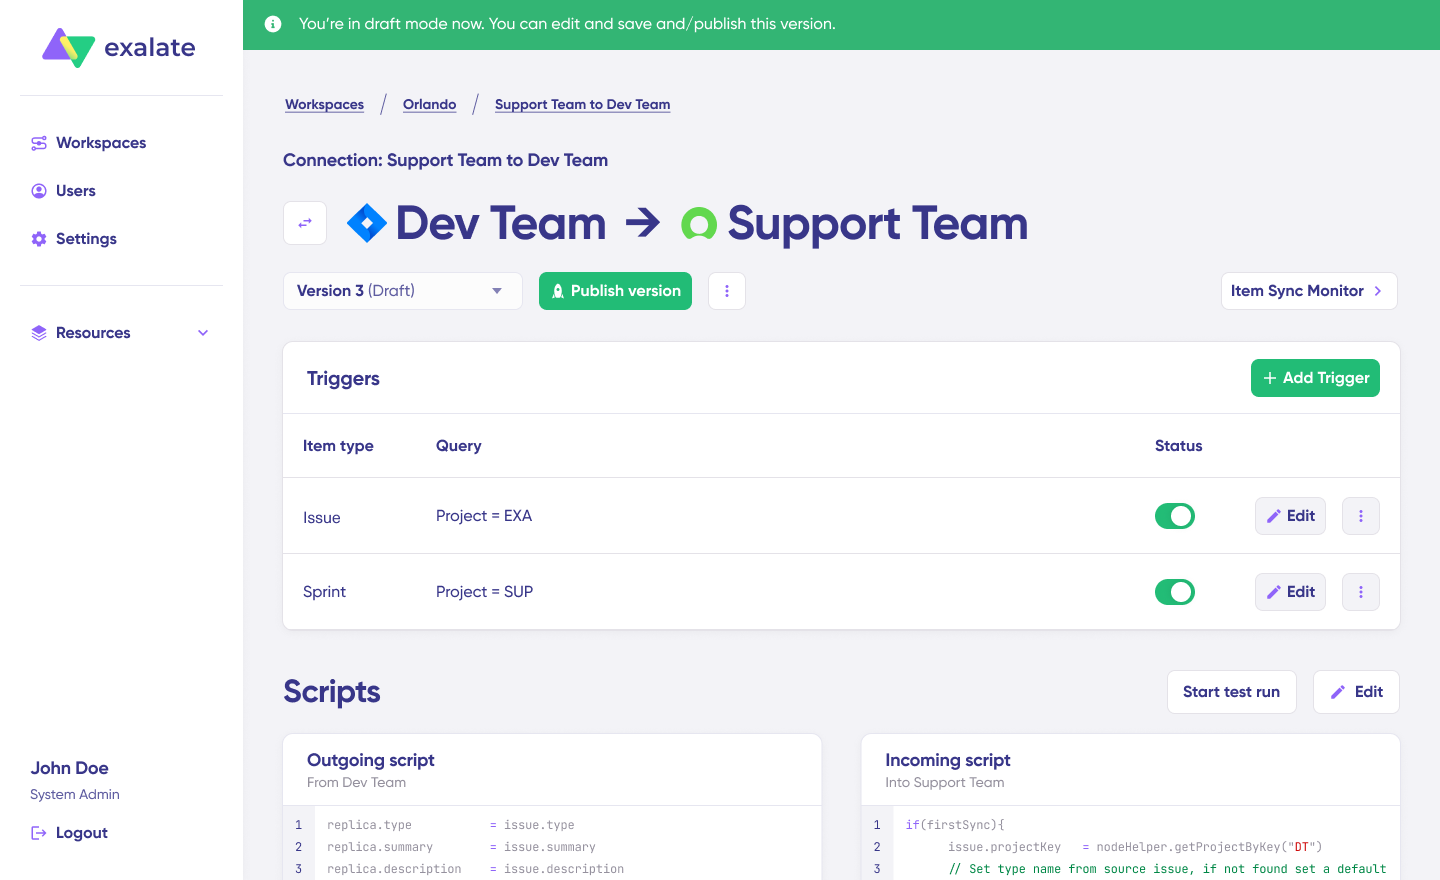
When everything meets your requirements, click “Publish Version” to apply your updated configuration to live synchronization. All versions for a connection are accessible in the “Version” dropdown.
- Configure Automatic Triggers
To enable automatic synchronization, configure “Triggers“—conditions or filters applied to specific records.
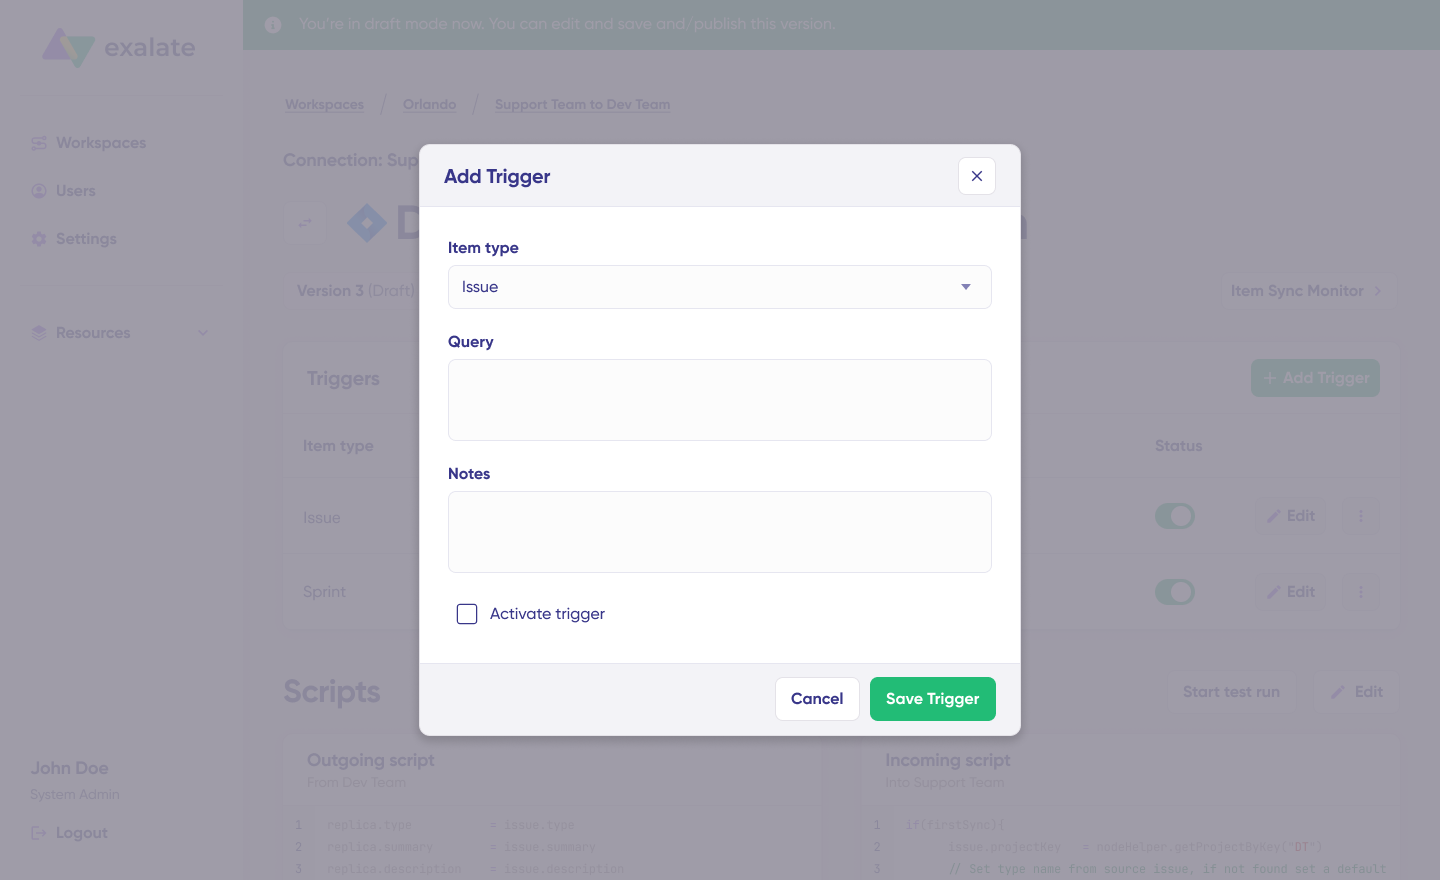
Click the “+Add trigger” button to create triggers. Exalate triggers are platform-specific. For Salesforce, you can use SOQL-style filters to specify conditions for Accounts, Opportunities, Cases, Leads, or custom objects.
StageName= 'Proposal'
This trigger will sync only Opportunities that have reached the proposal stage with your organization.
Save your changes by clicking on “Save Trigger“.
- Troubleshooting with Aida
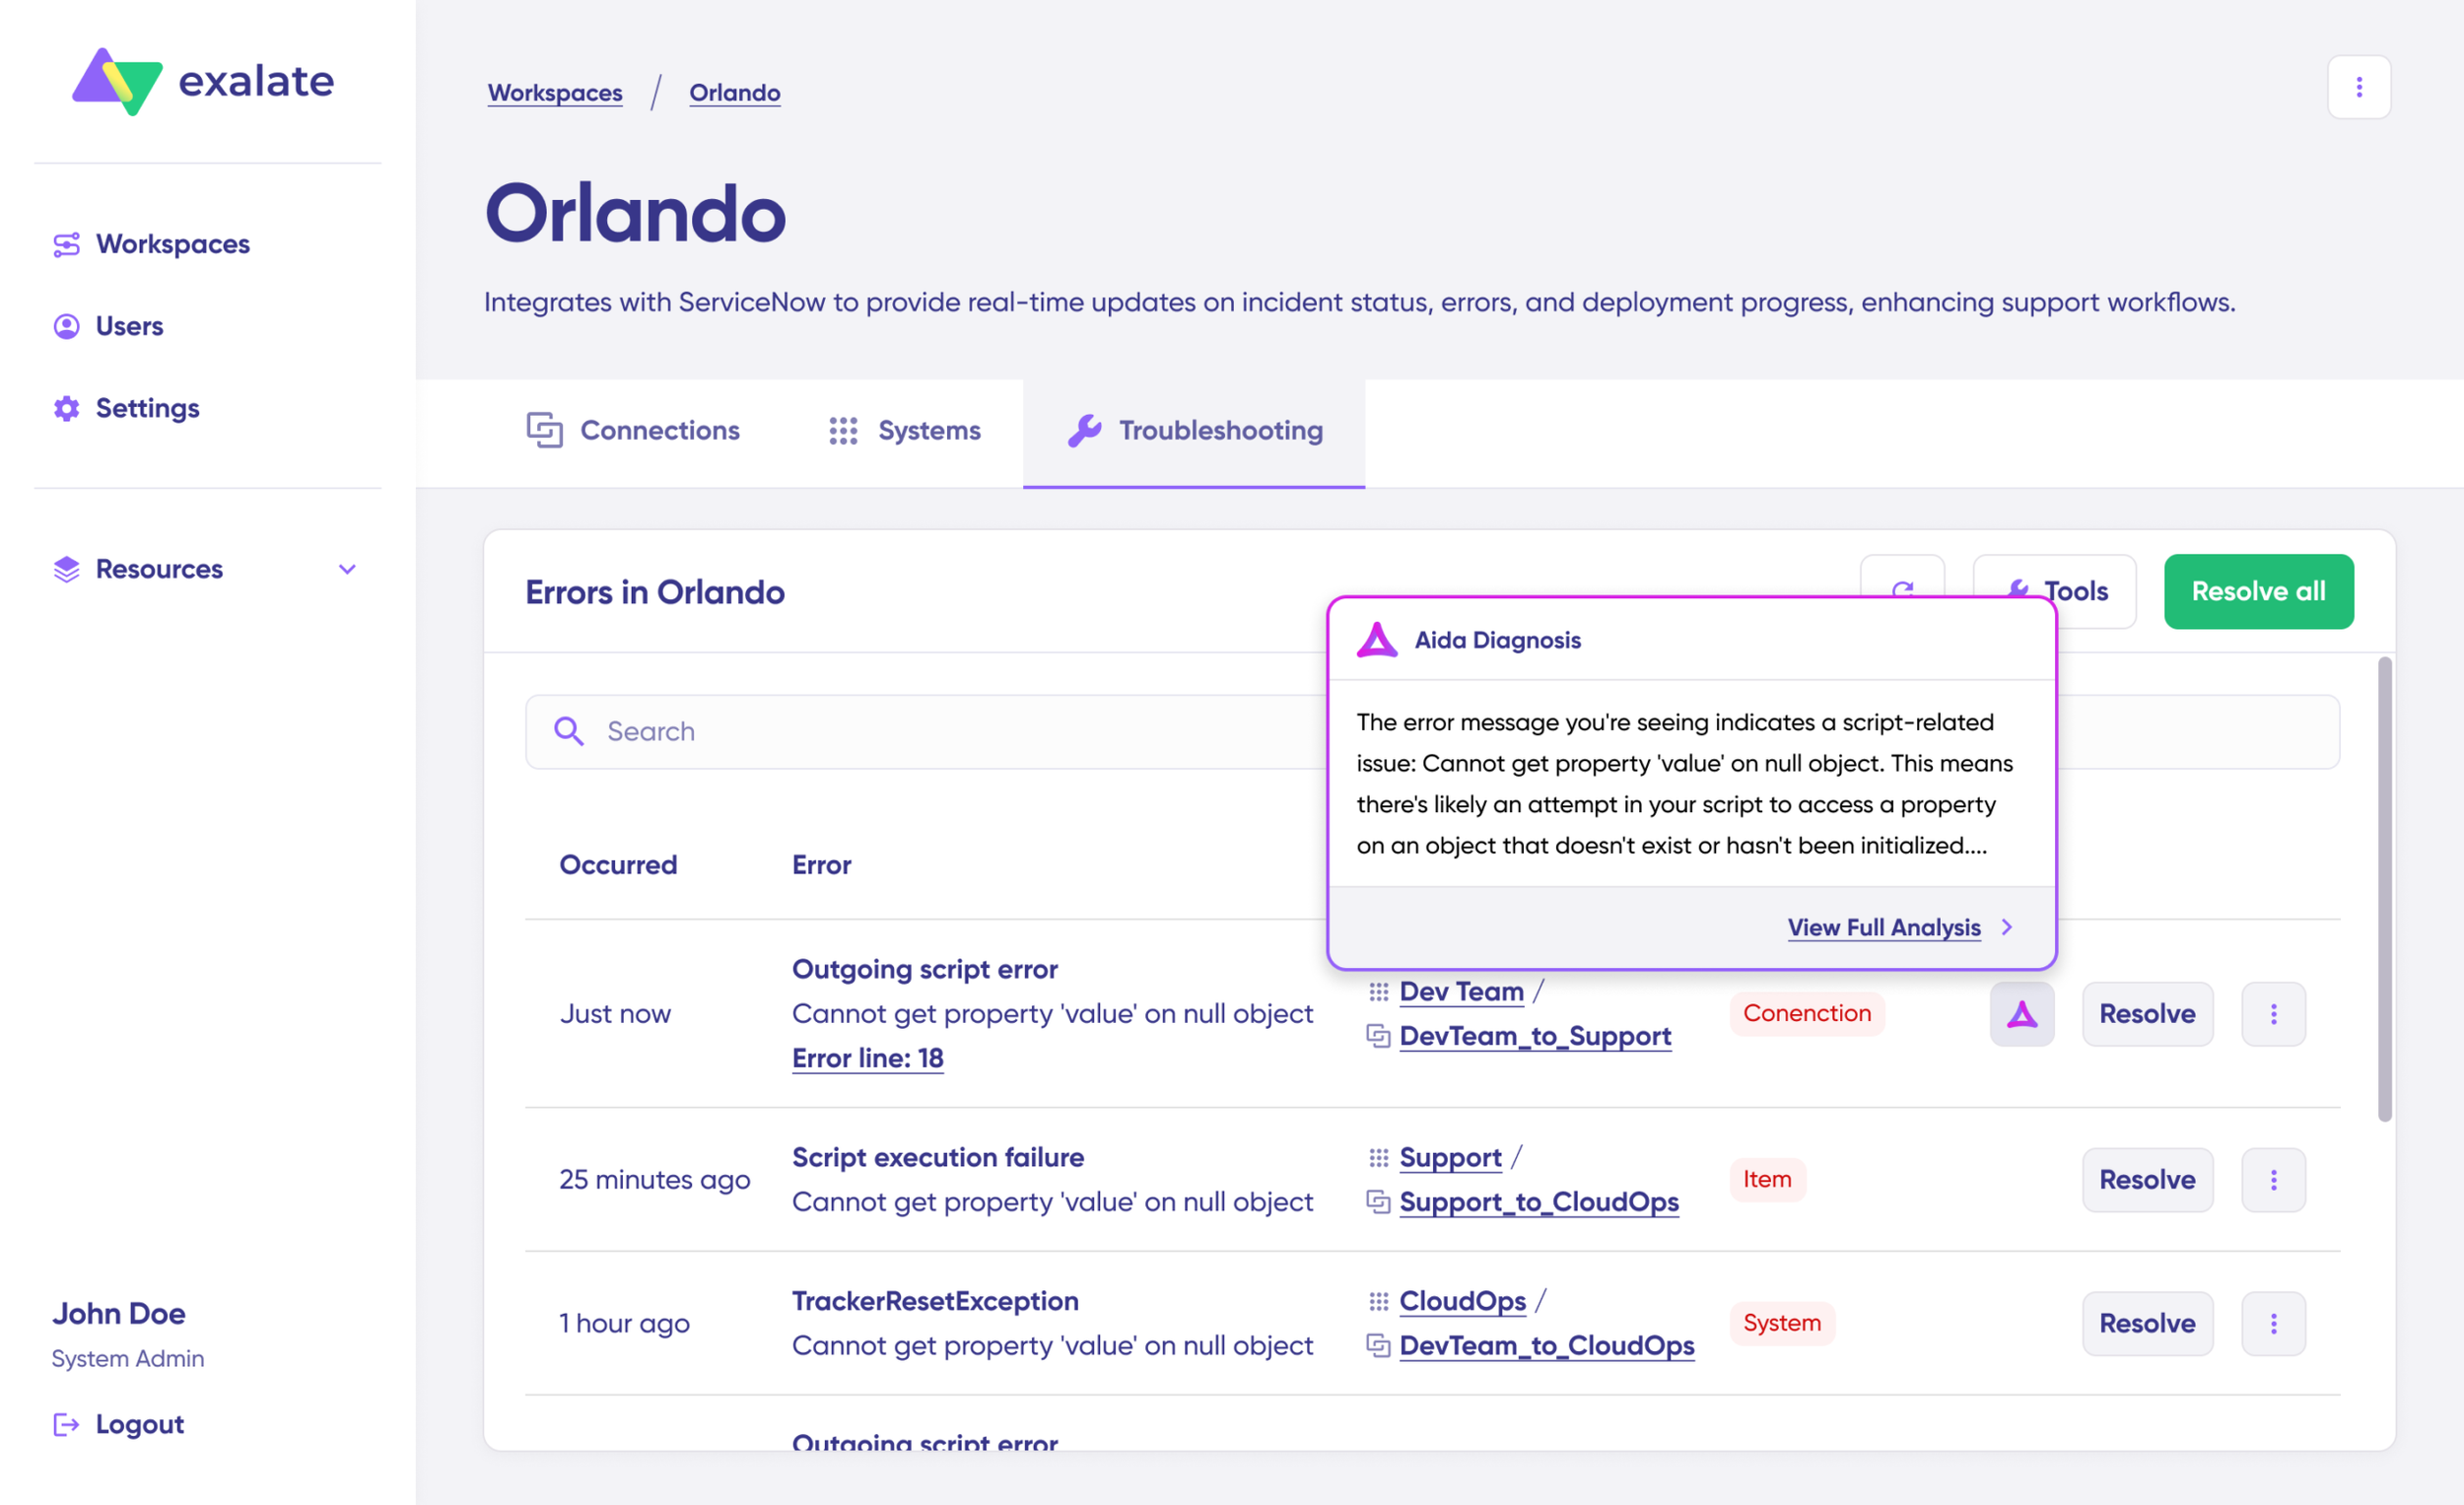
Aida provides intelligent troubleshooting assistance to resolve errors faster. It offers clear, context-aware suggestions directly where errors appear.
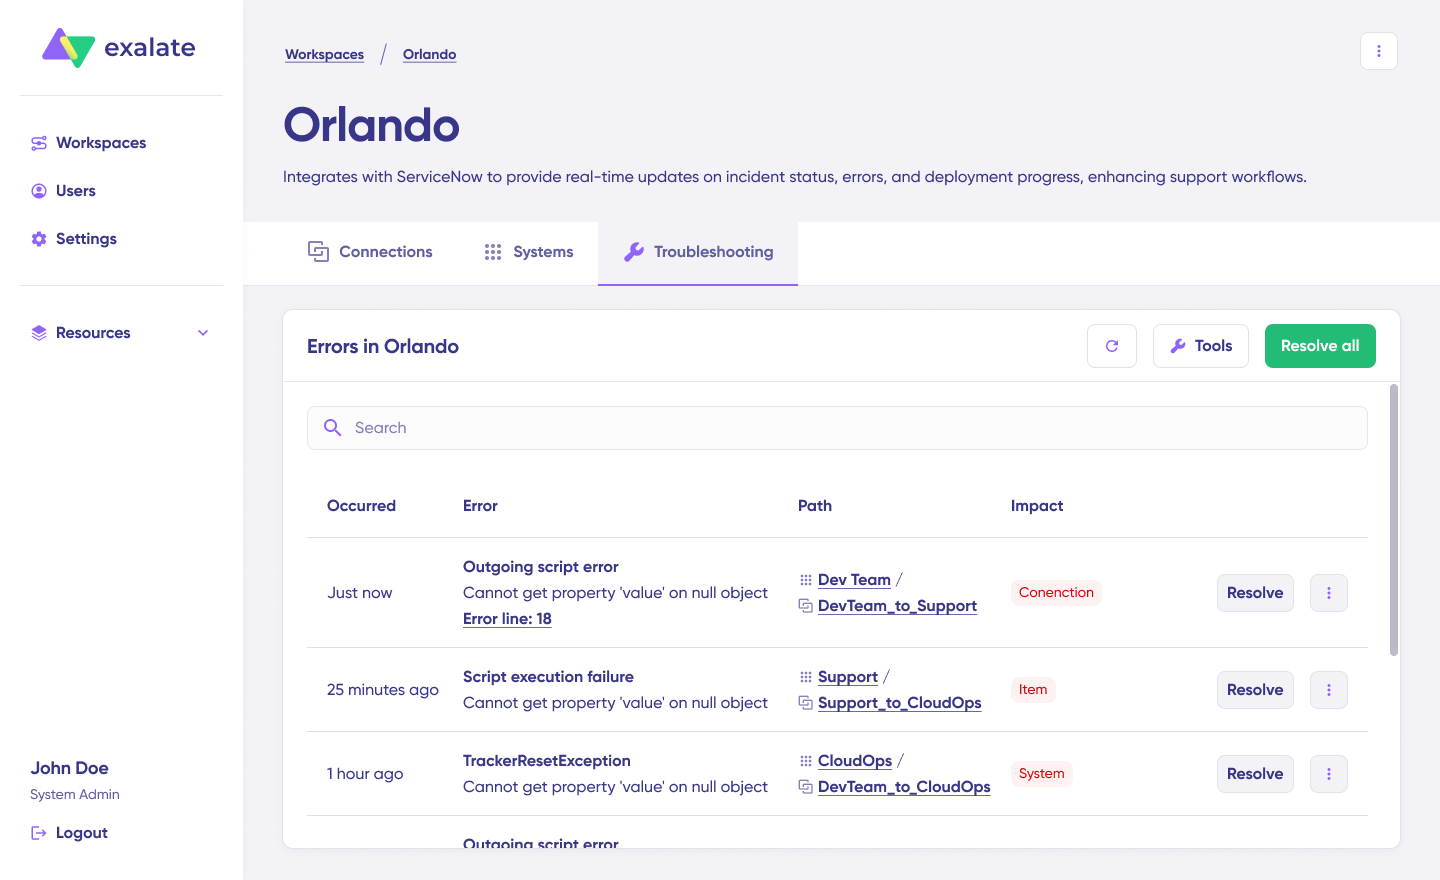
When errors occur, navigate to the “Troubleshooting” tab in your workspace. Hover over the error you want to diagnose and click the Aida icon that appears. An AI-generated suggestion will display in a modal window, including a concise explanation of the error and a proposed resolution.
Select “View Full Analysis” for additional context. You can also access “Error details” to copy the stack trace and view “Replicas” in JSON format if needed.
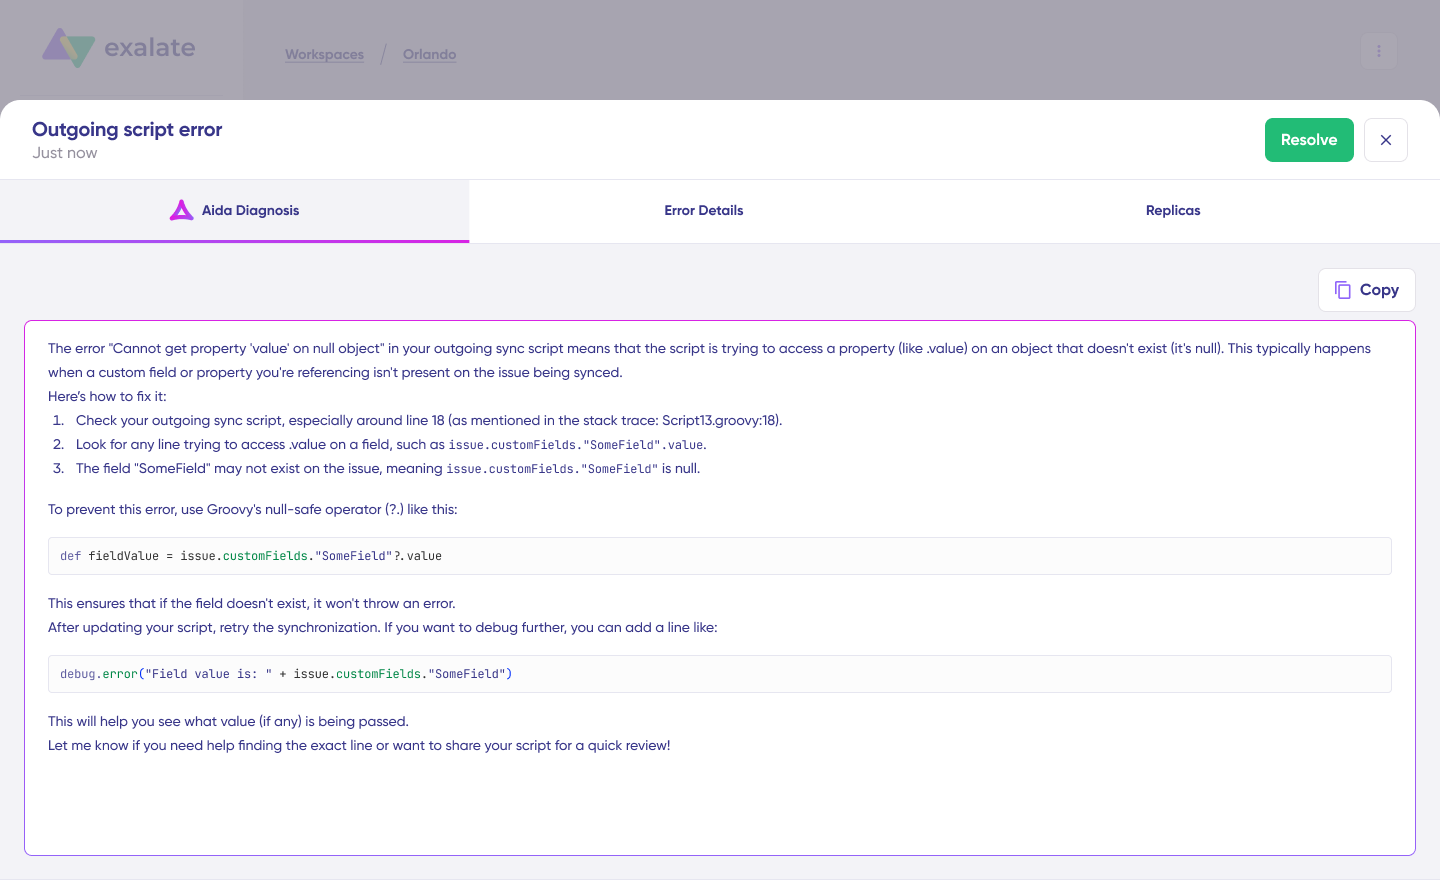
Choose to “Resolve” and retry failed synchronizations.

Getting Started with Salesforce Third-Party Integration
When you want to share data between platforms, your choice of solution is key. Get it right and your teams benefit from automated workflows, consistent data, and reduced manual effort.
Exalate, as a Salesforce third-party integration solution, is designed to deliver reliability and flexibility. It lets you integrate multiple platforms easily without leaving the tools you’re familiar with.
You can choose exactly how and when data is shared. Once configured, your integration handles the synchronization automatically, leaving your teams free to focus on what they do best.
Want to quantify the impact?

Calculate time and money savings from automated bidirectional sync.
Frequently Asked Questions
What is a Salesforce third-party integration?
A Salesforce third-party integration connects Salesforce CRM with external applications using tools outside of Salesforce’s native ecosystem. These integrations enable automated data synchronization, workflow automation, and cross-platform collaboration without requiring custom API development.
How is a third-party integration different from native Salesforce integrations?
Native integrations use Salesforce’s built-in tools (AppExchange, Salesforce Connect, APIs) and operate within Salesforce’s technical constraints. Third-party integrations often offer more flexibility, customization options, and specialized features for complex synchronization scenarios, particularly bidirectional sync with work management or ITSM platforms.
What platforms can Exalate integrate with Salesforce?
Exalate connects Salesforce with Jira, ServiceNow, Azure DevOps, Azure DevOps Server, Zendesk, GitHub, Freshservice, Freshdesk, Asana, and other platforms through custom connectors. Multiple Salesforce orgs can also be connected to each other.
Is coding required to set up a Salesforce integration with Exalate?
Not necessarily. Aida, Exalate’s AI-assisted configuration tool, generates sync configurations from natural language descriptions. For common scenarios—syncing cases, opportunities, or accounts with corresponding records in other systems—AI-assisted setup handles the configuration. For advanced requirements involving complex conditional logic or custom field transformations, Groovy scripting provides full control.
How does Exalate handle security for cross-company integrations?
Exalate enables secure external collaboration without compromising data protection. Key security features include ISO 27001 certification, encryption of data in transit and at rest, role-based access control, and independent configurations on each side of the integration. Partners cannot see your sync scripts, and configuration changes on your side don’t require partner approval. For complete security documentation, visit the Exalate Trust Center.
What happens if the connection drops during synchronization?
Exalate maintains transactional queues on both sides of the integration. Changes are tracked in sequence, so when connectivity is restored, updates apply in the correct order. The built-in retry system resumes automatically without requiring manual intervention.
Can I filter which Salesforce records sync to other systems?
Yes. Exalate allows granular filtering based on record type, field values, ownership, or any other criteria available in Salesforce. You can configure rules to sync only specific Cases, Opportunities, or custom objects while excluding sensitive or irrelevant data.
How does Exalate compare to Zapier for Salesforce integrations?
Zapier excels at simple, trigger-based automation across thousands of apps. Exalate specializes in complex, bidirectional synchronization between work management, ITSM, and CRM platforms. If you need to create a Slack message when a Salesforce record updates, Zapier works well. If you need full bidirectional sync between Salesforce Cases and Jira work items—with comments, attachments, custom fields, and status mapping—Exalate is purpose-built for that scenario.
What’s the pricing model for Exalate?
Exalate uses subscription-based pricing calculated by the number of connections and usage volume. A free trial provides full feature access for evaluation. For detailed pricing specific to your deployment, visit the Exalate pricing page or contact the sales team.
Can Exalate connect multiple Salesforce instances?
Yes. Exalate supports Salesforce-to-Salesforce connections, enabling synchronization between separate Salesforce orgs. This is useful for organizations managing multiple Salesforce environments, post-merger integrations, or franchises with independent CRM instances.
Recommended Reads:
- Jira Salesforce Integration: How to Set up a Two-Way Sync between Different Teams
- Salesforce to Salesforce Integration: Sync Multiple Salesforce Instances Bidirectionally
- How to Set up an Azure DevOps Salesforce Integration
- GitHub Salesforce Integration: How to Set up a Sync in 6 Steps
- How to Set up a Salesforce ServiceNow Integration
- Salesforce Zendesk Integration
