Syncing data between Jira and Azure DevOps allows organizations to keep both platforms aligned without context-switching or manual copy-paste. Since neither platform can share data natively, you need a third-party integration solution to bridge the gap and handle data transformation across systems.
This post walks you through how to sync Jira work item priority with an Azure DevOps picklist custom field using Exalate, a bidirectional integration solution.
Priority and Custom Field Sync: Jira to Azure DevOps Use Case
When you change the priority of a Jira work item, the value appears in a picklist custom field on the corresponding Azure DevOps work item (task).
Why is this useful?
- It provides more context about the work item for both Jira and Azure DevOps users.
- You can share Jira priority data with teams monitoring tasks on Azure DevOps.
- Customer service teams can orchestrate internal workflows by integrating data from both platforms.
- Developers and QA specialists can keep priority levels consistent across projects.
For this illustration, the goal is to fetch data from the Jira priority dropdown and make it appear on a designated custom field in Azure DevOps.
Here are the requirements:
- Fetching the right API name from fields on both sides.
- Mapping the correct priority values from Jira.
- Establishing sync rules for the incoming and outgoing data.
- Setting triggers to update the fields automatically.

How to Sync Priority in Jira to a Custom Field in Azure DevOps
Exalate is a script-based bidirectional integration solution that works with Jira, Jira Service Management, Azure DevOps Cloud, Azure DevOps Server, ServiceNow, Salesforce, Zendesk, Freshservice, Freshdesk, Asana, GitHub, and more.
Why Exalate?
- It supports trigger-based integration and bulk operations.
- It provides a unified management console for all your connections.
- It supports the synchronization of Jira and Azure DevOps custom fields.
- You can use its Groovy scripting engine for complex use cases.
- Aida, Exalate’s AI-assisted configuration, helps generate and troubleshoot sync scripts.
- Test Run lets you validate sync scripts before production deployment.
How to Configure Exalate for Custom Field Sync
To get started, go to the Exalate app and log in. New users can create an account by entering their email and verifying it, or by signing up with Google.
Creating a Workspace
Workspaces help you organize and manage your integrations and connections in a single place.
- Click the “+ Create Workspace” button.
- Enter a name and description for your workspace.
- Click “Create workspace” to confirm.
Creating a Connection Between Jira and Azure DevOps
Once you have a workspace, you can create a connection between Jira and Azure DevOps.
- Click “+ Add connections” > “Create new connection”.
- Enter the name for your first system (System A). You can name either Jira or Azure DevOps as System A.
- Enter the URL of your system. For example, if you start with Azure DevOps, enter your Azure DevOps instance URL.
- Once you enter the URL, a validation check occurs. If your system is already part of the existing workspace, authentication happens automatically. If the system is part of a different workspace, it will be imported into your current workspace.
- For new systems, you’ll need to enter your authentication details. Jira uses OAuth, and Azure DevOps uses an API token.
- Complete the same setup process for the second system.
- Give your connection a name and description.
- Click “Next”.
- Review the details to ensure they are correct, then click “Create connection”.
When the process is complete, select “Continue to configuration”.
Configuring the Sync Rules
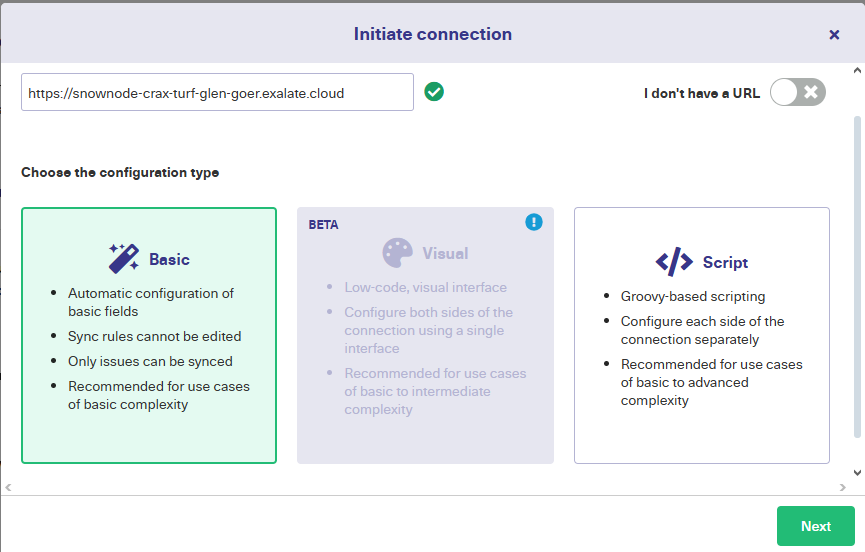
After creating your connection, you have two configuration options: “Quick Sync” and “Edit & Test”.
For custom field mapping like this use case, select “Edit & Test”. Click “Create a new version” or select “Open latest draft” to start editing. This ensures you don’t accidentally modify the existing configuration. Changes in the draft are saved automatically.
Click the “Edit” button to open the editor and modify the sync rules.
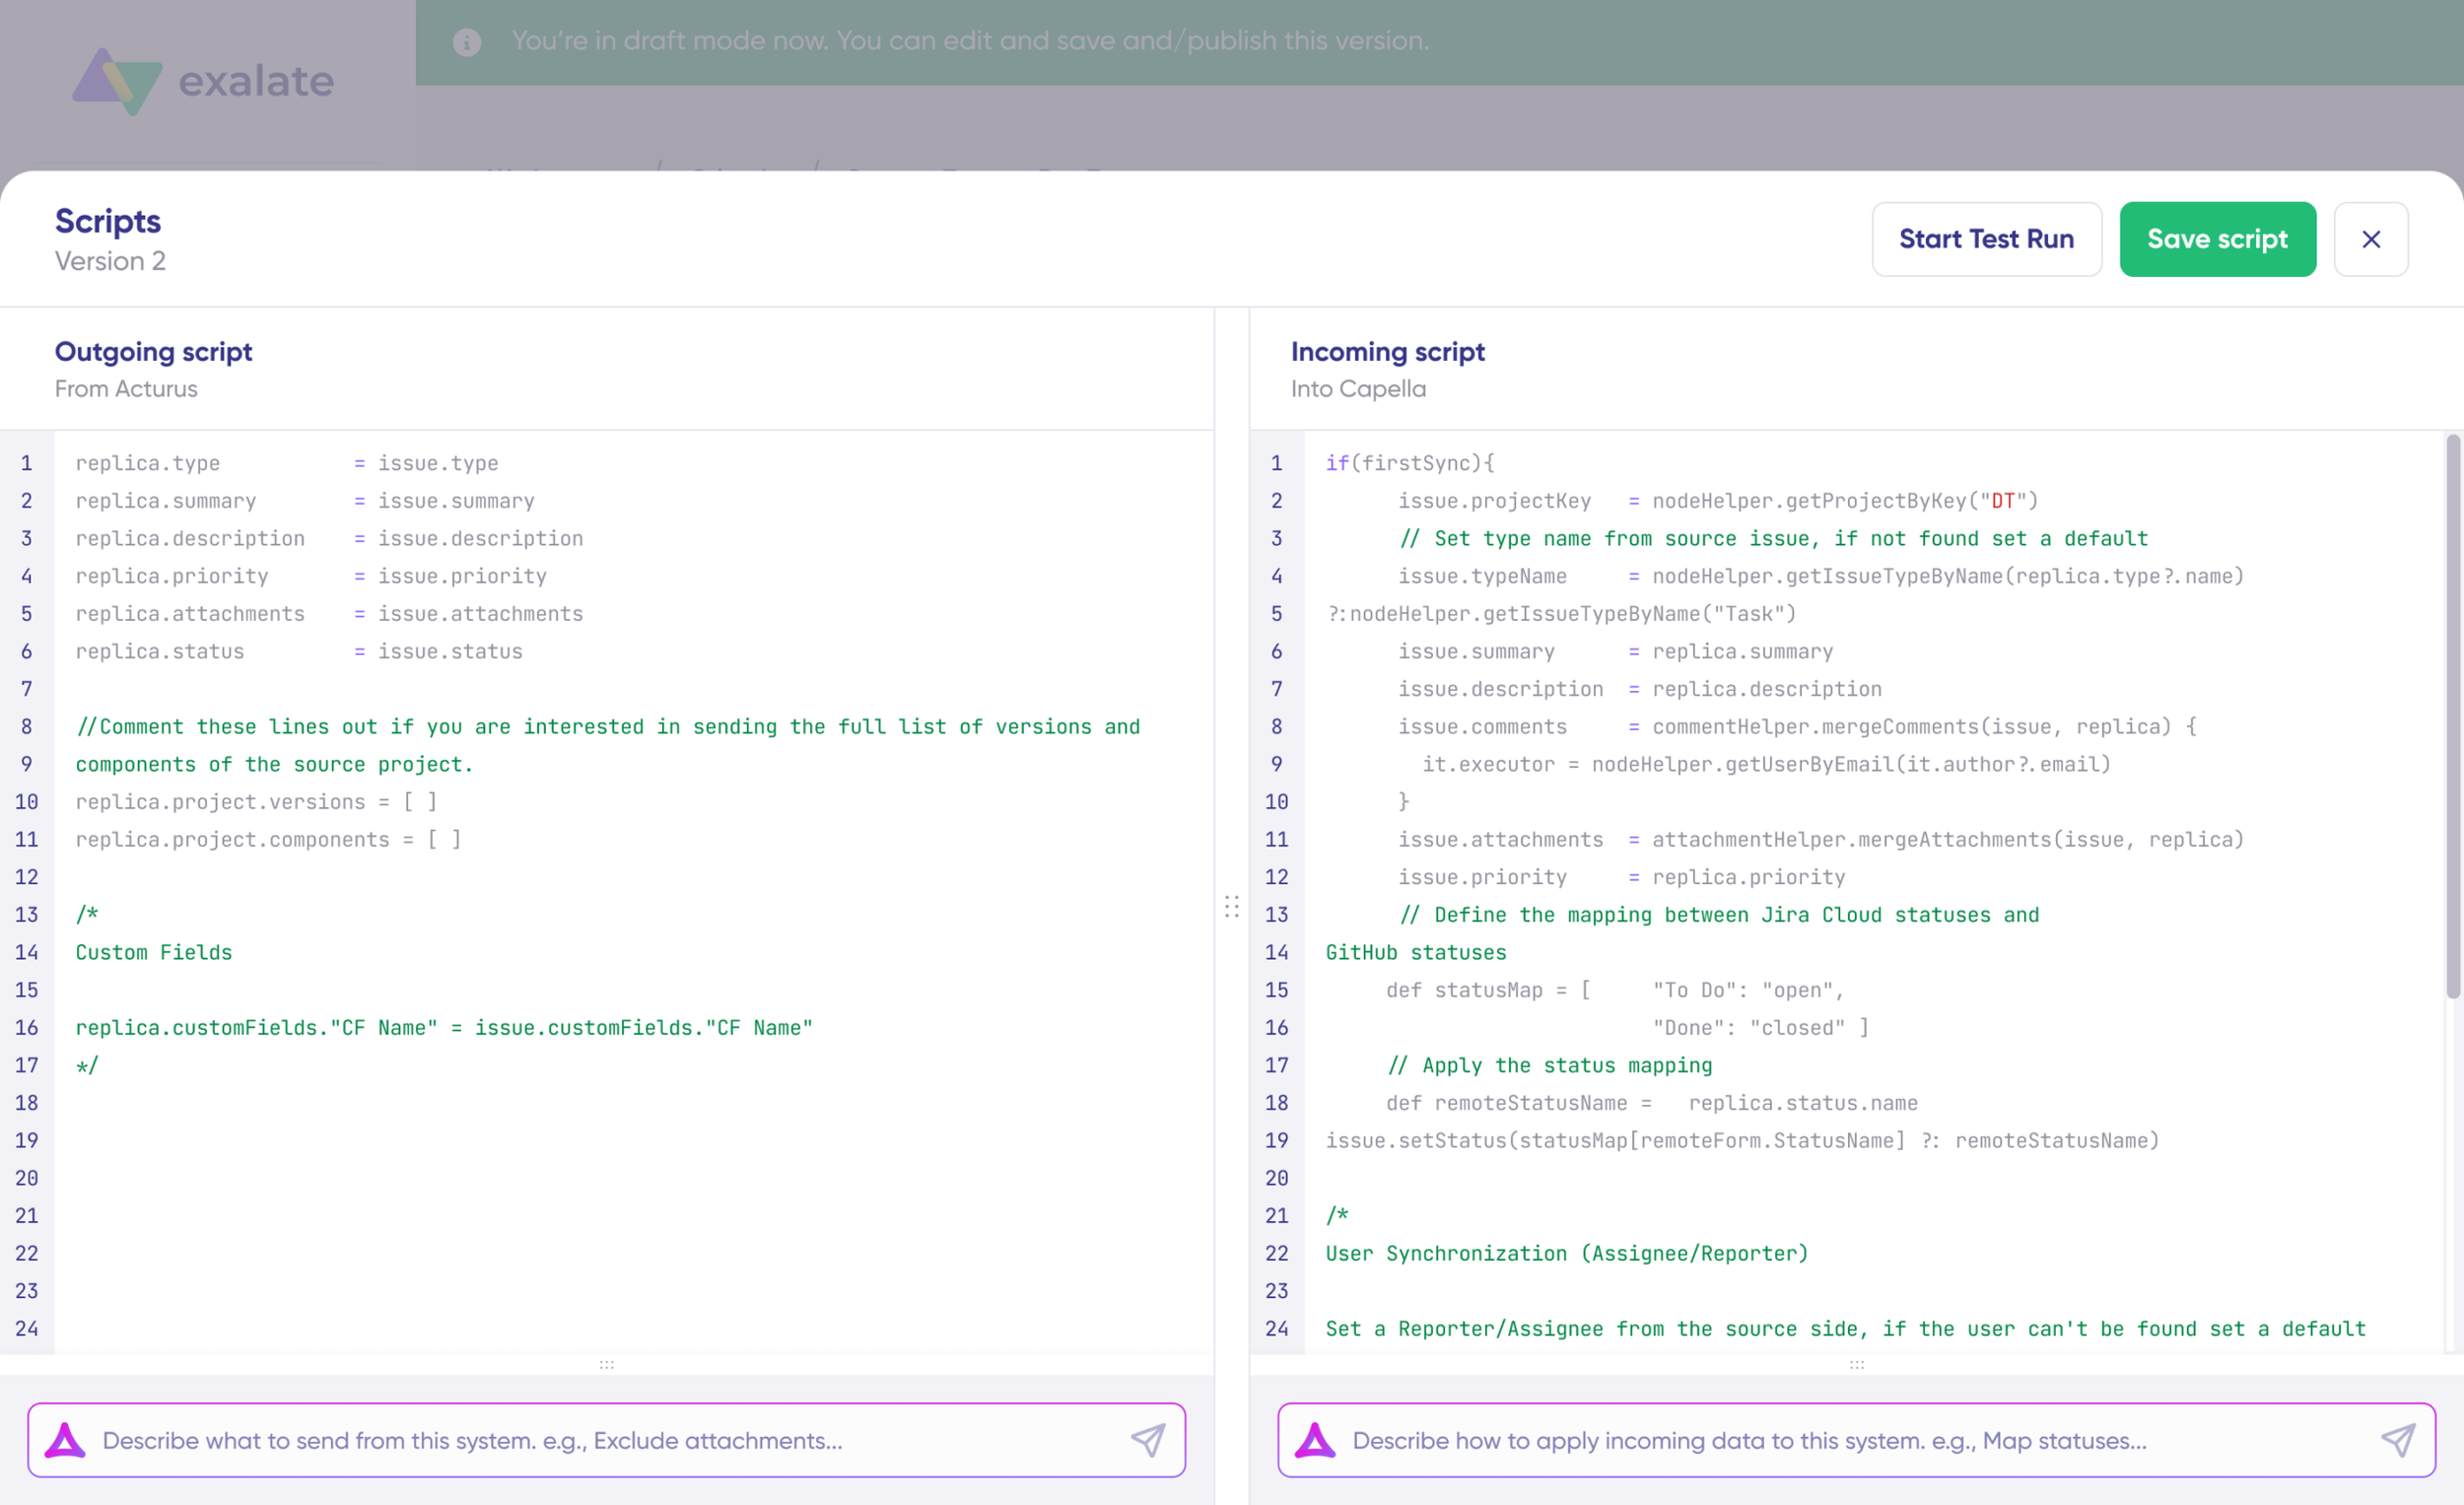
Sync rules are based on Groovy scripts. The scripts are divided into incoming and outgoing scripts:
- Outgoing script (on the Jira side): Defines the data to be sent from Jira to Azure DevOps.
- Incoming script (on the Azure DevOps side): Defines how the data from Jira is mapped in Azure DevOps.
Under the incoming sync script on the Azure DevOps side, enter the following code snippet:
def priorityMapping = [

    "Highest" : "Angry",
    "High"    : "Not OK",
    "Medium"  : "OK",
    "Low"     : "Happy",
    "Lowest"  : "Delighted"
]

def remotePriority = replica.priority.name
priorityName = priorityMapping[remotePriority] ?: remotePriority
workItem."MindState" = priorityNameCode language: JavaScript (javascript)
The priorityMapping is a hash map that maps the default Jira work item priorities to the picklist options in the Azure DevOps task.
You can also use Aida, Exalate’s AI-assisted configuration feature, to generate sync scripts. Describe what you want in plain language (for example, “Map Jira priority to the MindState custom field in Azure DevOps”), and Aida will generate working Groovy scripts with proper field mappings.
Once your scripts are ready, use Test Run to validate them before going live. Select the work items you want to test against, click “Start Test Run”, and review the incoming and outgoing replicas. Deploy only when you’re confident everything works correctly.
When satisfied, click “Publish Version” to apply the configuration to your live synchronization.
Adding Triggers
To automate the sync, add triggers using JQL (Jira Query Language) on the Jira side or WIQL (Work Item Query Language) on the Azure DevOps side.
Go to the connection details page and click “+ Add Trigger”. Select the entity type, enter the query conditions, and activate the trigger.
For example, this JQL trigger syncs all work items in the “FIR” project with the label “badday”:
project = FIR AND labels = badday
Once a Jira work item is created in the “FIR” project with the label “badday”, the priority will be reflected on the MindState custom field in Azure DevOps.
You have now set up rules and triggers to sync Azure DevOps custom fields with Jira work item priority. Monitor the Activity Dashboard to track sync status and adjust the rules as your project needs evolve.
If you have questions or want to see how Exalate fits your specific use case, book a call with one of our integration experts.
Recommended Reads
- Jira Azure DevOps Integration: The Complete Step-by-Step Guide
- Advanced Integration Use Cases
- How to Set up an Azure DevOps Salesforce Integration: The Comprehensive Guide
- How to Sync Text, Date, and Picklist Custom Fields Between Jira and Azure DevOps
- How to Sync Tempo Worklogs Between Two Jira Cloud Instances