
Jira Service Management integration with Salesforce is the best way to keep the sales team in sync with the company’s service desk.
For teams looking to streamline collaborations between the support team and salespeople, connecting Jira Service Management data with Salesforce helps improve productivity and make information readily available.
The right third-party solution, like Exalate, helps you connect the entities, fields, and projects needed to make the collaboration successful.
This guide explores how to use Exalate to integrate Salesforce and Jira Service Management using AI-assisted configuration and Groovy scripting.
Note: Jira now refers to issues as “work items.” Throughout this guide, we use Jira’s current terminology. A single issue is a “work item,” multiple issues are “work,” and an “issue type” is a “work item type.”
Key Takeaways
- Jira Service Management to Salesforce integration connects both platforms bidirectionally, enabling real-time data exchange between sales and support teams without manual transfers.
- Organizations with integrated service desks and sales data make decisions faster because they have access to synchronized information.
- Exalate provides AI-assisted configuration (Aida) for quick setup, plus full Groovy scripting control for complex sync scenarios, including multi-tenant MSP environments.
- Use cases range from syncing comment threads with user mentions to filtering incoming cases by work item type and creating opportunities from Jira insights.

What is Jira Service Management to Salesforce Integration?
Jira Service Management to Salesforce integration connects both platforms unidirectionally or bidirectionally, so they interact in real-time or based on triggers.
Think of it as connecting two systems with middleware: a Salesforce to Jira connector. The goal is to fetch and send data from either side based on your configurations.
Data exchange between Jira and Salesforce follows the ETL (extract-transform-load) or ELT (extract-load-transform) model. Salesforce uses HTML internally to represent comments, and Jira uses Wiki Markup, so the transformation happens automatically.
The transformation stage is handled by the middleware solution by converting data between platform-native formats before it reaches the individual systems.
Why Integrate Salesforce with Jira Service Management?
Integrating these platforms delivers measurable benefits across teams:
- Faster information access: Service teams stay in close contact with sales teams. Support agents can see customer account value, deal stage, and history without leaving Jira Service Management. Sales reps can track technical work item resolution without switching to JSM.
- Real-time decision making: Organizations with integrated service desks and sales data make decisions faster because they have access to synchronized information. When a high-value customer reports a critical bug, everyone sees the urgency immediately.
- Reduced context switching: Teams stay in their own systems without migrating to different platforms just to access information. This saves licensing costs and prevents the productivity loss that comes from constant tool-switching.
- Better customer experience: Customers receive better service delivery when JSM is integrated with Salesforce because teams on both ends have all the information they need. Support agents know the customer’s account tier; sales knows about open technical work items.
Use Cases for Jira Service Management to Salesforce Integration
Here are practical applications where teams can implement JSM to Salesforce integration using Exalate.
Use Case 1: Sync Comment Threads and User Mentions Between Platforms
Challenge: Teams need threaded conversations to sync between platforms while preserving user mentions. Native Jira threaded comments have limitations, and cross-platform user tagging typically breaks.
Solution: Exalate fetches comments from the Salesforce Chatter feed and makes them appear in Jira. User mentions in Jira tag the correct corresponding user in Salesforce (if the user exists on both systems). Comments from Jira also appear in Salesforce.
Real-World Application: A support agent in Salesforce @mentions their manager about a complex case. That mention syncs to JSM, where the engineering team sees it. When the engineer @mentions the QA lead in Jira, that mention appears correctly in the Salesforce case thread.
Use Case 2: Sync Multiple Salesforce Objects to a Single JSM Ticket
Challenge: Sales teams need all related Salesforce objects (account, contact, opportunity) consolidated into a single Jira Service Management ticket for complete context.
Solution: Exalate syncs multiple related objects from a Salesforce case to a single JSM ticket.
Real-World Application: When a customer reports an issue, the JSM ticket automatically includes the account tier (Enterprise), primary contact details, related opportunity stage (Renewal pending), and contract value. The support engineer has full context without asking sales for information.
Use Case 3: Escalate Priority with Contextual Comments
Challenge: High-priority Salesforce cases need additional emphasis in JSM beyond just setting a priority field.
Solution: When a Salesforce case has the highest priority, the JSM ticket receives a comment specifying the level of urgency in plain words.
Real-World Application: A case marked “Highest” priority creates a JSM ticket with an automated comment: “CRITICAL: Enterprise customer revenue at risk. Account value: $2M ARR. Executive sponsor escalation in progress.” The service team understands the gravity immediately.
Use Case 4: MSP Multi-Tenant Isolation
Challenge: Managed Service Providers need to sync multiple client Salesforce orgs with corresponding JSM projects without data mixing.
Solution: Exalate’s workspace-based architecture allows independent connections for each client. Each connection operates with its own field mappings, status transformations, and sync rules.
Real-World Application: An MSP manages 15 clients. Client A’s Salesforce cases sync to Client A’s JSM project with custom priority mappings. Client B has different mappings and workflows. Data never crosses between clients, and configuration changes for one don’t affect others.
Use Case 5: Create JSM Tasks for Every Contract Proposal
Challenge: When opportunities reach the proposal stage, service teams need to prepare technical requirements without sales manually requesting action.
Solution: Conditional triggers generate JSM tasks automatically when Salesforce opportunities reach the proposal stage.
Real-World Application: A $500K enterprise deal moves to the “Proposal” stage. JSM automatically creates a technical requirements task assigned to the solutions architect. The task includes account details, deal value, and decision timeline. Sales tracks progress without chasing engineering.
Features to Consider When Choosing a JSM-Salesforce Integration
When evaluating integration solutions, consider these capabilities:
- Bidirectional vs. unidirectional sync: Can you configure one-way data flow (source → destination only) or two-way synchronization where changes flow in both directions? One-way suits reporting scenarios; bidirectional enables true collaboration.
- Field-level control: Do you choose which specific fields synchronize, or is it all-or-nothing? Granular control matters for security and compliance. You might share summaries and status, but exclude financial fields or internal comments.
- Custom field support: Can you sync Jira’s specialized field types—select lists, cascading fields, checkboxes, multi-user pickers? What about Salesforce custom objects and formula fields?
- Trigger-based sync: Can you define conditions for when syncs execute? JQL queries in Jira and SOQL in Salesforce enable precise control over which records sync and when.
- Data protection: Encryption of data in transit (TLS) and at rest protects sensitive information. ISO 27001 certification demonstrates security commitment.
How Exalate Handles Salesforce to Jira Service Management Integration
Exalate provides bidirectional sync between JSM and Salesforce with complete customization control. Unlike template-based integrations limited to dropdown menus and checkboxes, Exalate uses Groovy scripting, so you define exactly how data moves between systems.
What You Can Sync
- Standard fields: Case subject to work item summary, case description to work item description, priority levels, status mapping, assignee, reporter, and timestamps.
- Custom fields: Any custom field in either platform (select lists, cascading selects, checkboxes, date pickers, text fields, formula fields, and lookup relationships).
- Collaboration data: Comments with user mention preservation, attachments with embedded images, and internal notes.
- Related records: Accounts, contacts, opportunities, and any related Salesforce objects consolidated into JSM tickets.
AI-Assisted Configuration with Aida
Aida provides an AI-assisted configuration where you describe sync needs in plain language.
“Sync all high-priority Salesforce cases to the Customer Support project, mapping case subject to work item summary, case description to description, and priority levels 1:1” generates an appropriate configuration automatically.
Aida handles common scenarios without requiring scripting knowledge:
- Field mapping between standard fields
- Basic filtering by record type or priority
- Status mapping between different workflows
- Comment synchronization.
For complex requirements, such as conditional logic based on custom fields, data transformations, or integration with external systems via API, technical teams can customize the generated scripts using Groovy.
Groovy Scripting for Advanced Control
Exalate’s scripting engine provides complete programmatic control:
- Outgoing sync rules: Define what data leaves your instance and how it’s formatted for the remote system.
- Incoming sync rules: Define how incoming data maps to your local fields, with transformations and conditional logic.
- Triggers: Use JQL (Jira) or custom conditions to determine which records sync and when.
Sample conditional logic:
if (entity.priority?.name == "Highest" && entity.customFields["Account Tier"]?.value == "Enterprise") {

    replica.priority = "Critical"

    replica.labels = ["enterprise-escalation"]

}Code language: JavaScript (javascript)
Integration Security Features
When integrating customer data across platforms, security is paramount.
- ISO 27001 certification: Exalate maintains ISO 27001 certification, demonstrating commitment to information security management.
- Role-based access control: Configure who can create connections, edit sync rules, and view synchronization logs. Administrators control access granularly.
- Encryption: Data is encrypted both in transit (TLS 1.2+) and at rest. No data is stored in plain text.
- Script control: Full scripting control means you determine exactly what data syncs from your side. You can exclude sensitive fields, mask data, or transform values before they leave your instance.
- No credential sharing: Each side authenticates independently. You never share admin credentials with the remote instance.
For complete security documentation, compliance certifications, and architecture details, visit the Exalate Trust Center.
For detailed pricing specific to your deployment size and use case, visit the Exalate pricing page or contact the sales team for a personalized quote.

Calculate time and money savings from automated bidirectional sync.
How To Integrate Jira Service Management and Salesforce with Exalate
This walkthrough shows you how to connect Jira Service Management with Salesforce using Exalate’s workspace-based architecture and AI-assisted configuration.
Step 1: Create Your Exalate Account and Workspace
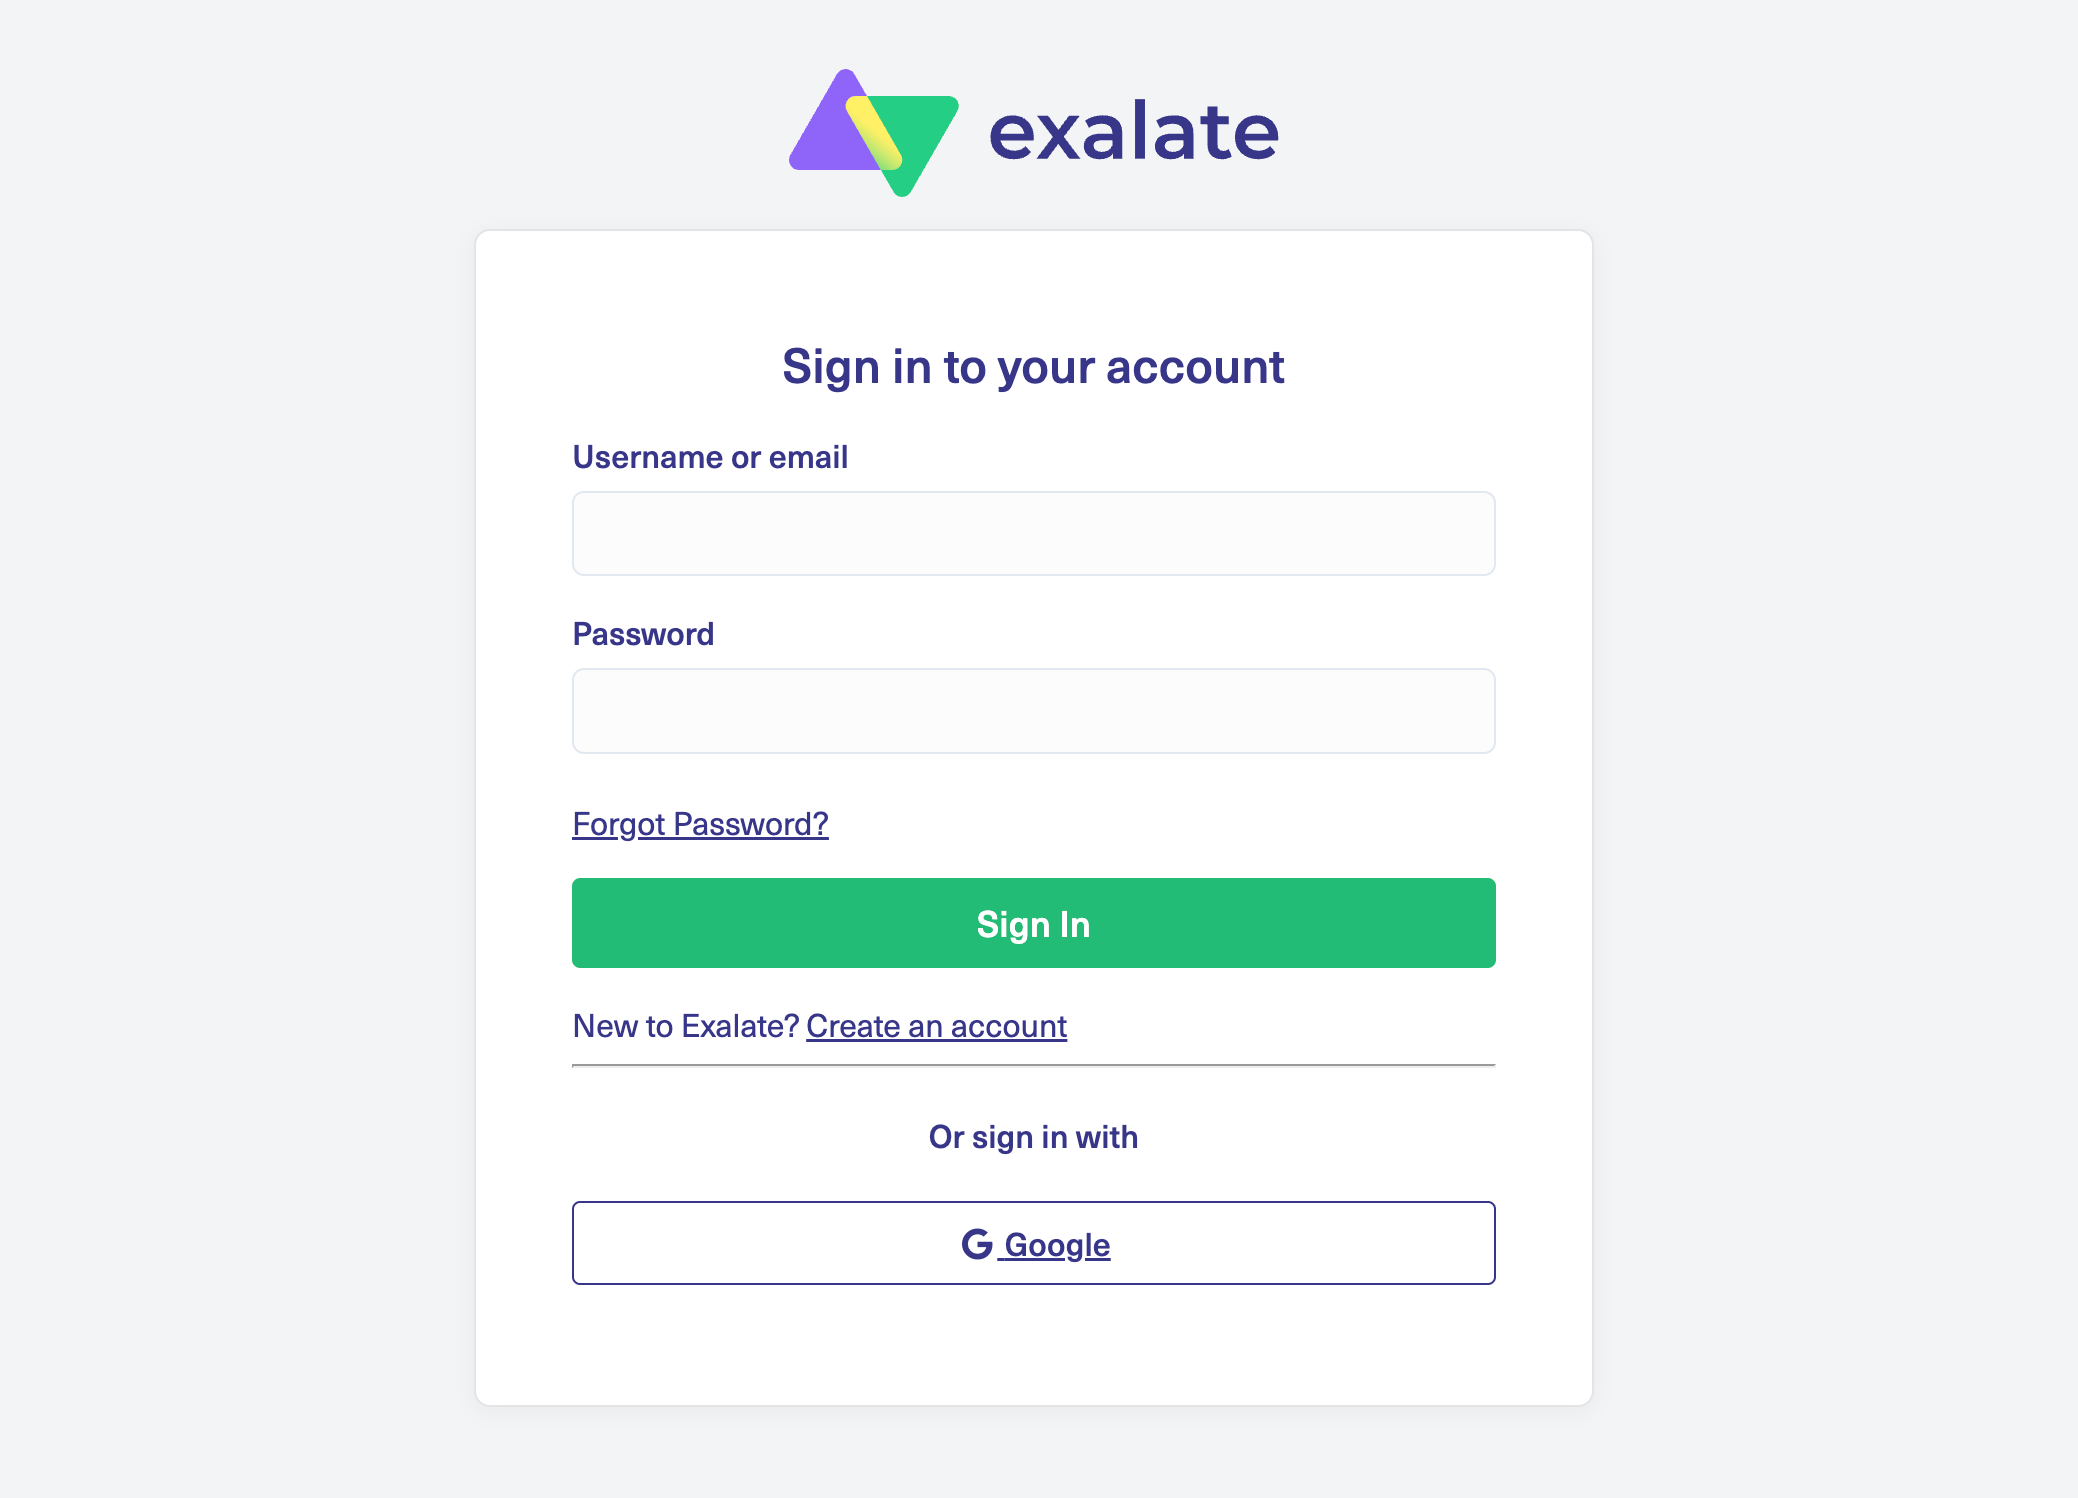
Head over to the Exalate integrations page to get started. You can register a new account or log in to an existing one. Registration works with your email address (requires verification) or through Google sign-in.
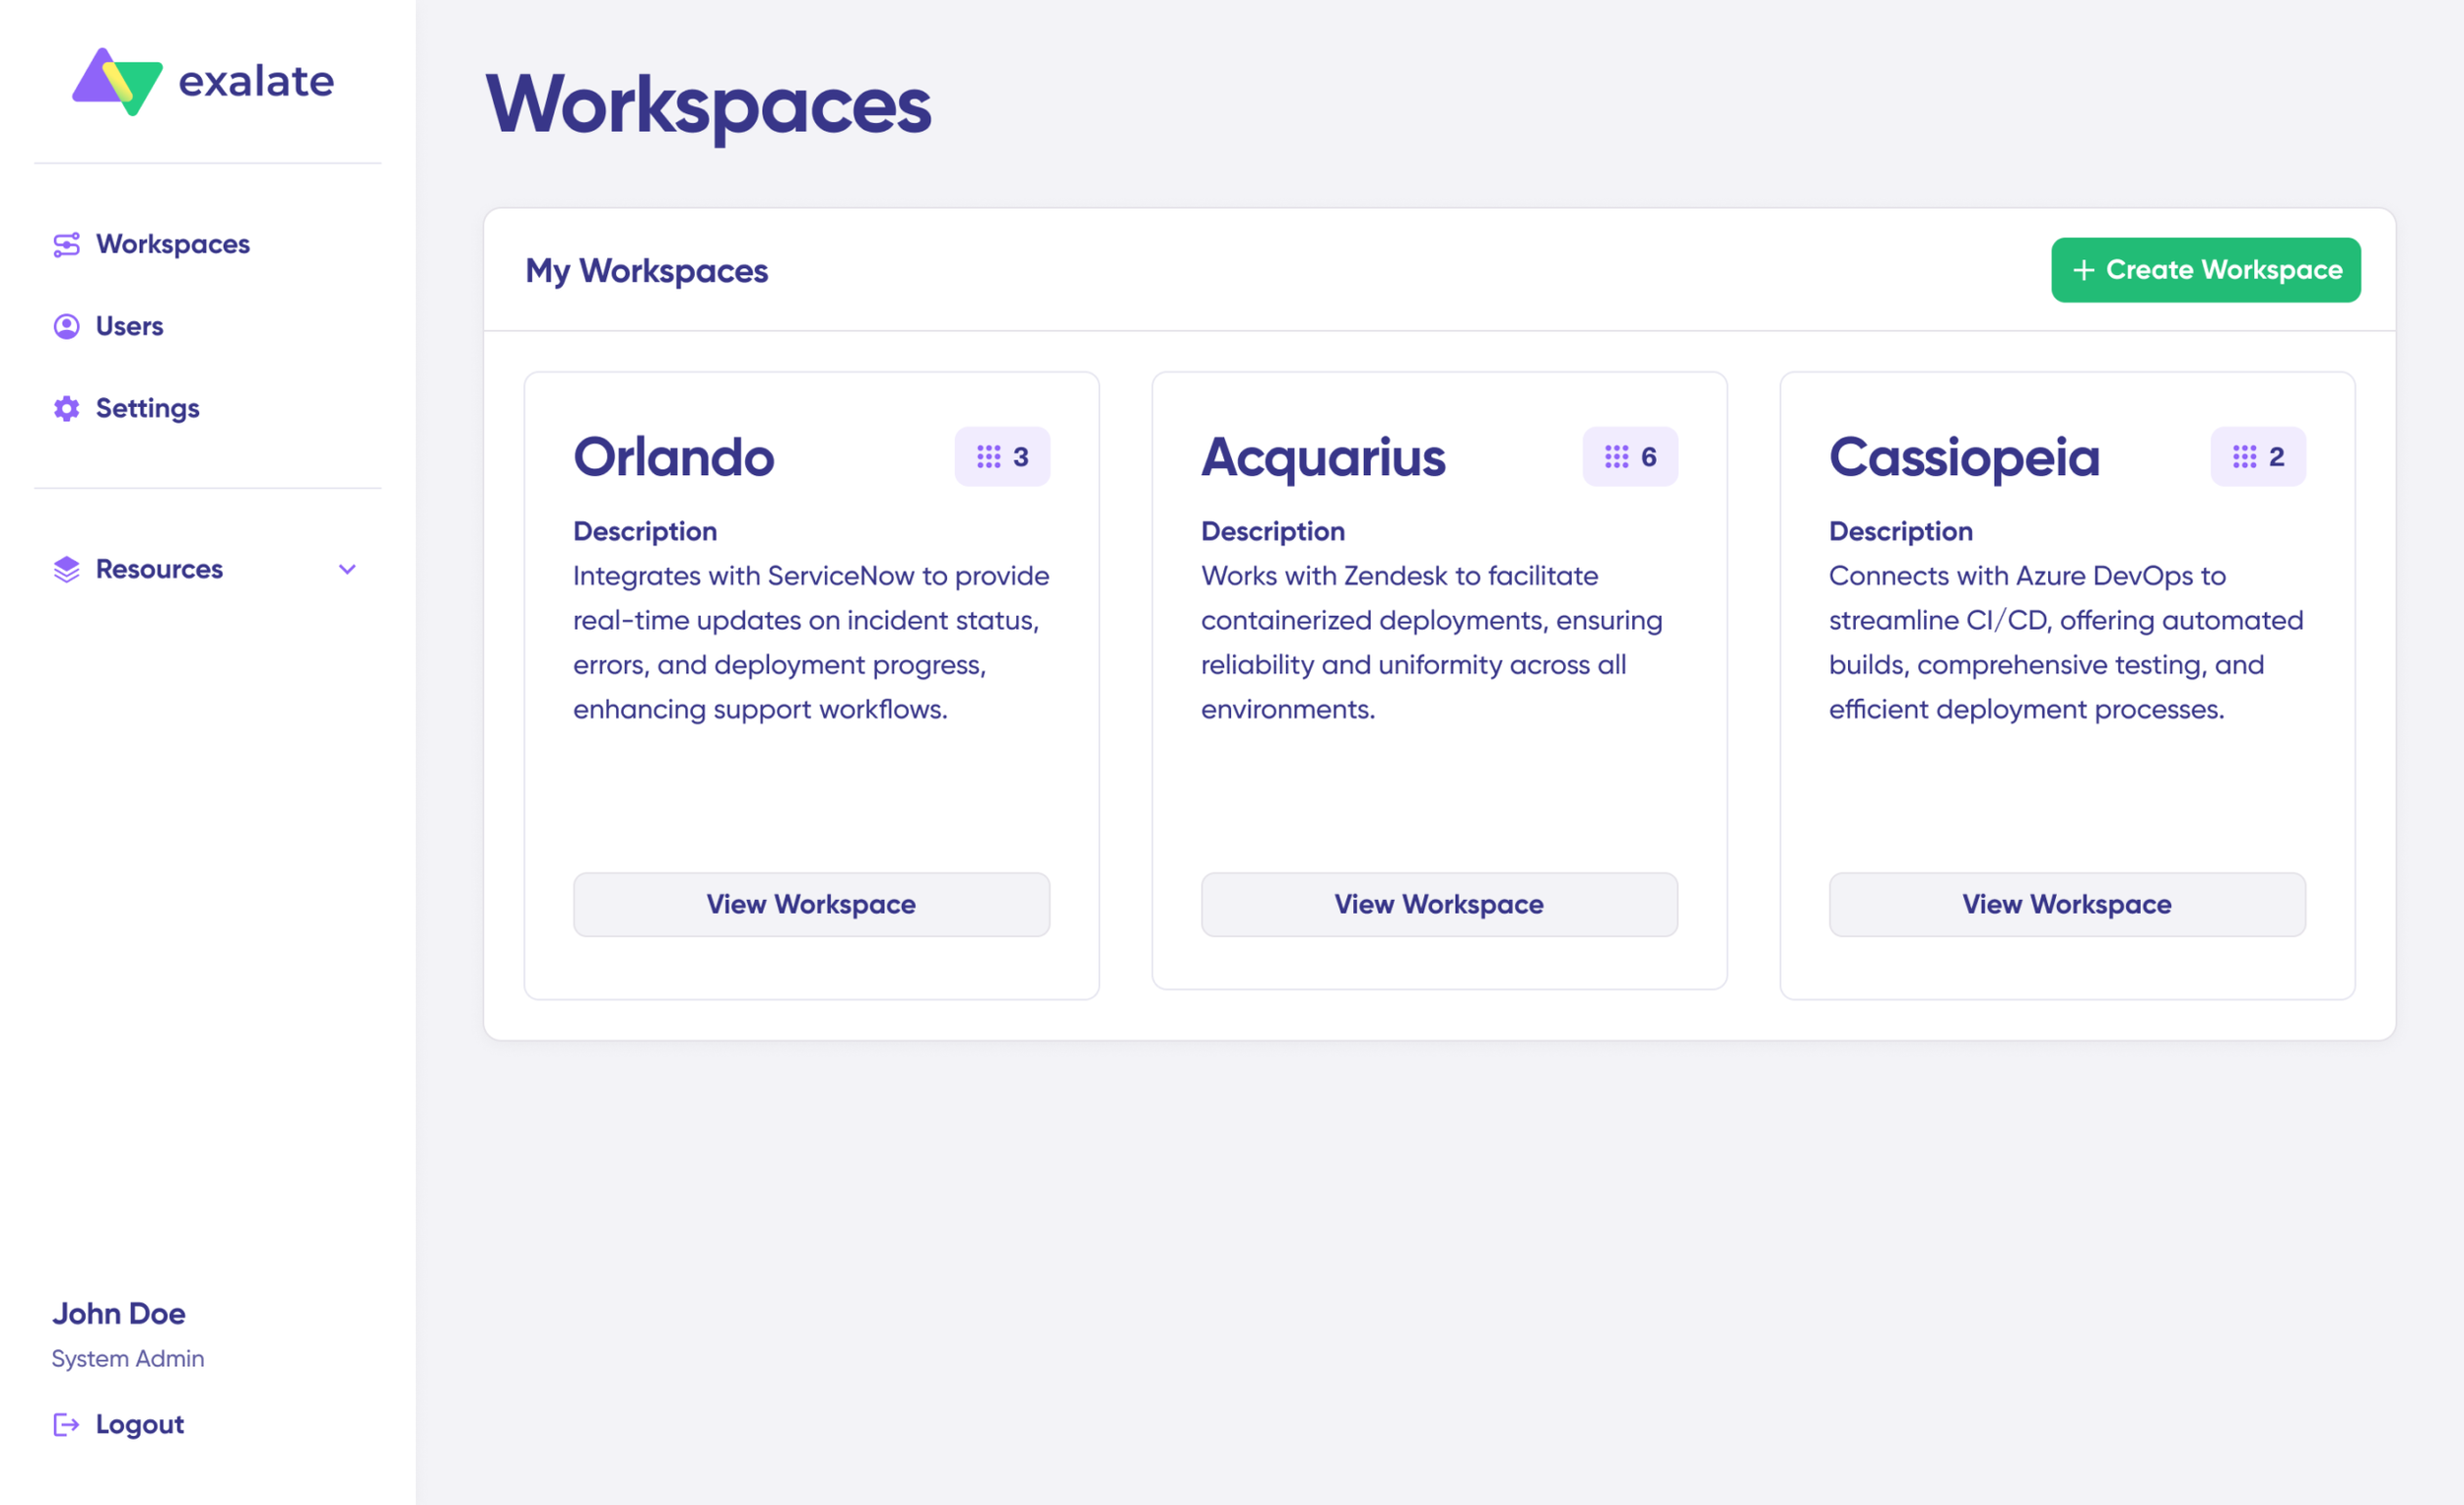
Workspaces serve as containers for organizing your integrations and managing multiple connections from a single location. Access existing workspaces through the “Workspaces” tab. First-time users should click “+ Create Workspace” to set one up.
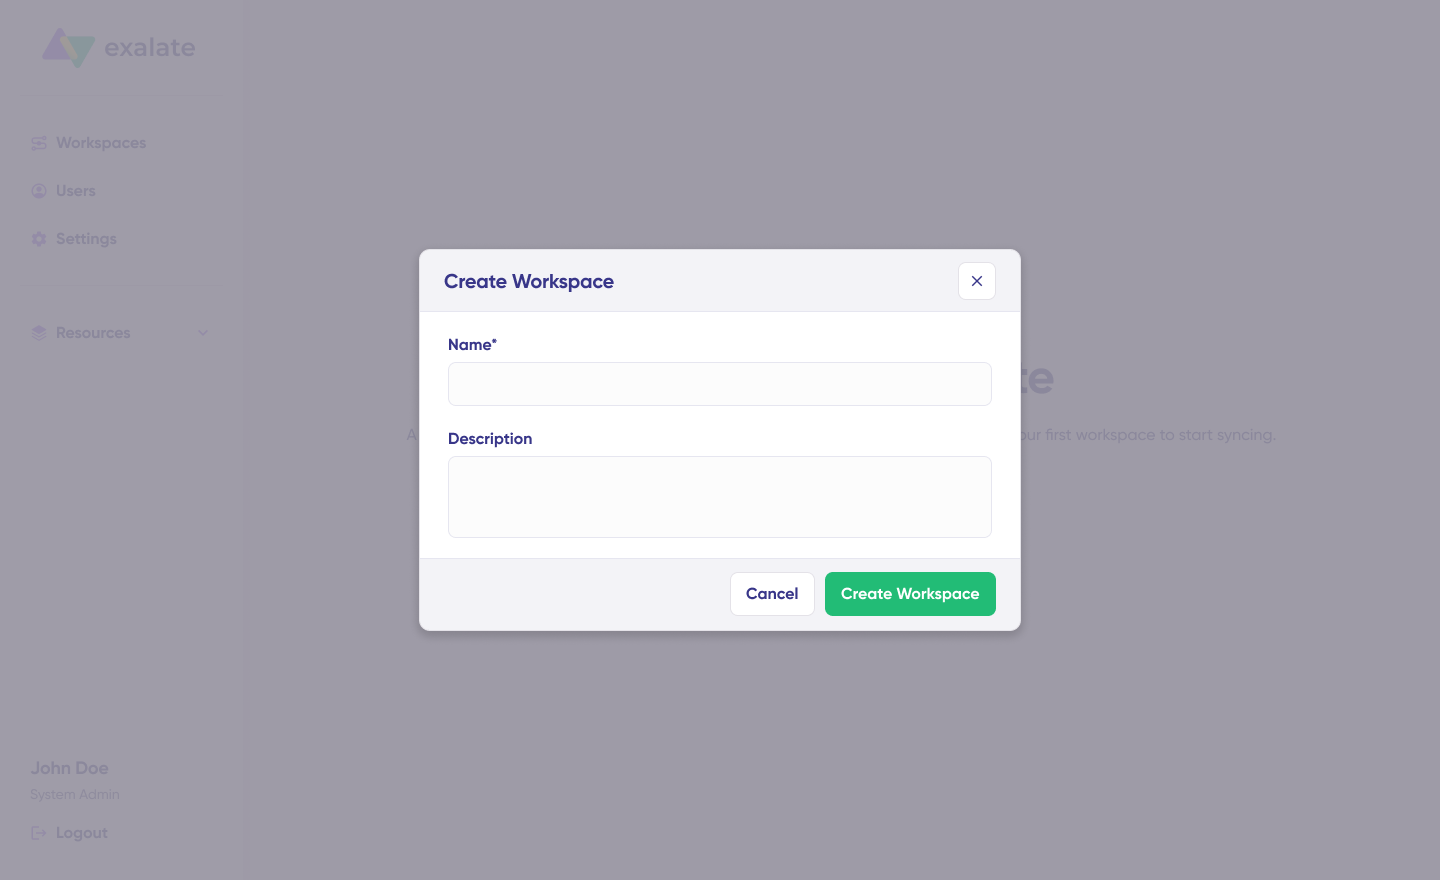
Provide a name and description for your workspace, then hit “Create workspace” to proceed.
Step 2: Establish the JSM-Salesforce Connection
With your workspace ready, you can begin linking Jira Service Management to Salesforce. The “Connections” tab displays all your existing integrations and allows you to modify connection settings or review sync details.
Note: Creating a connection requires an active Exalate account, at least one workspace, and authentication credentials for both Jira Service Management and Salesforce.
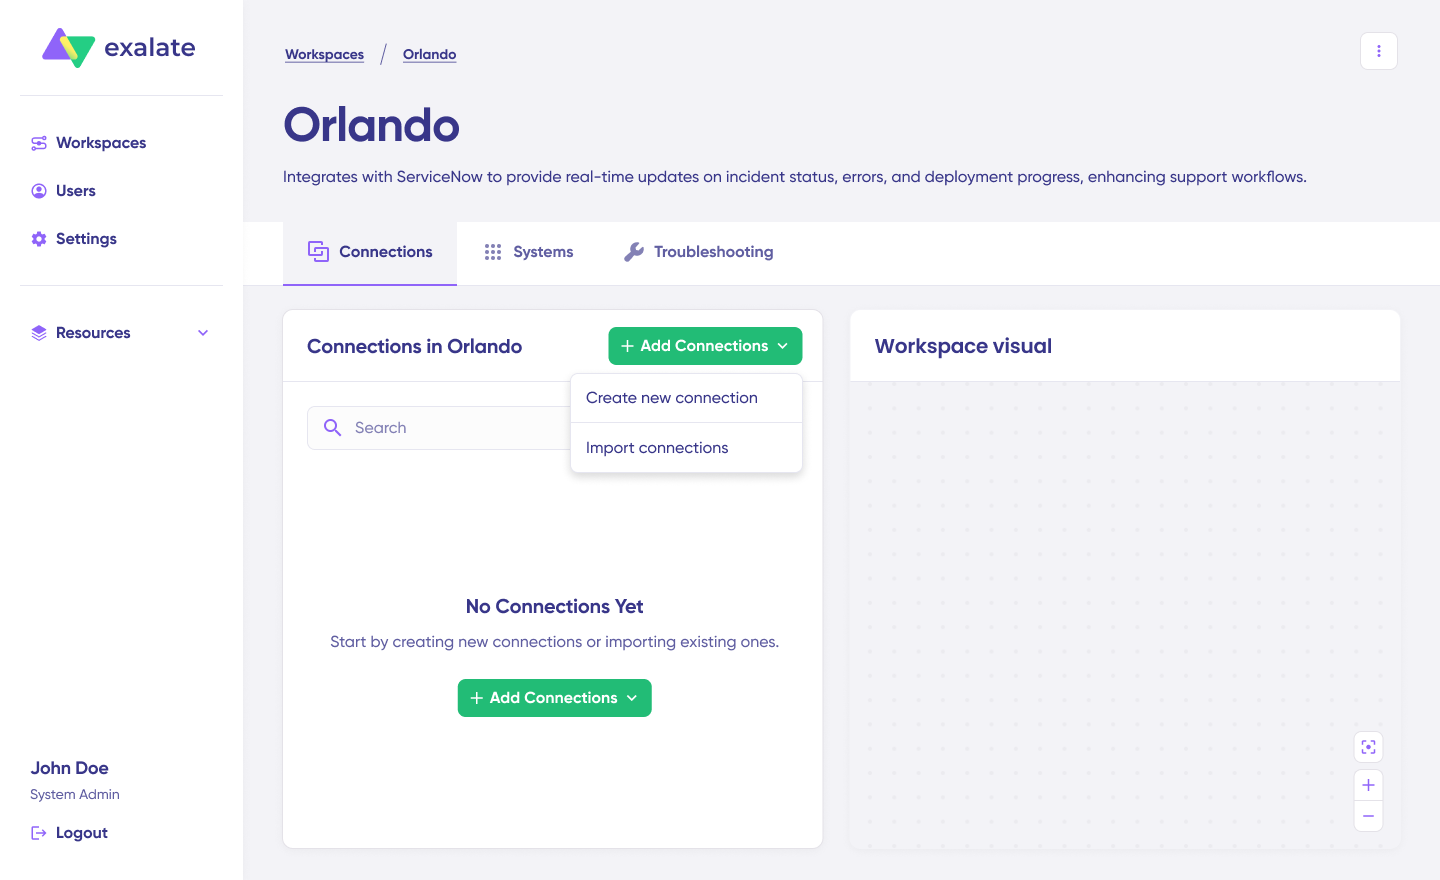
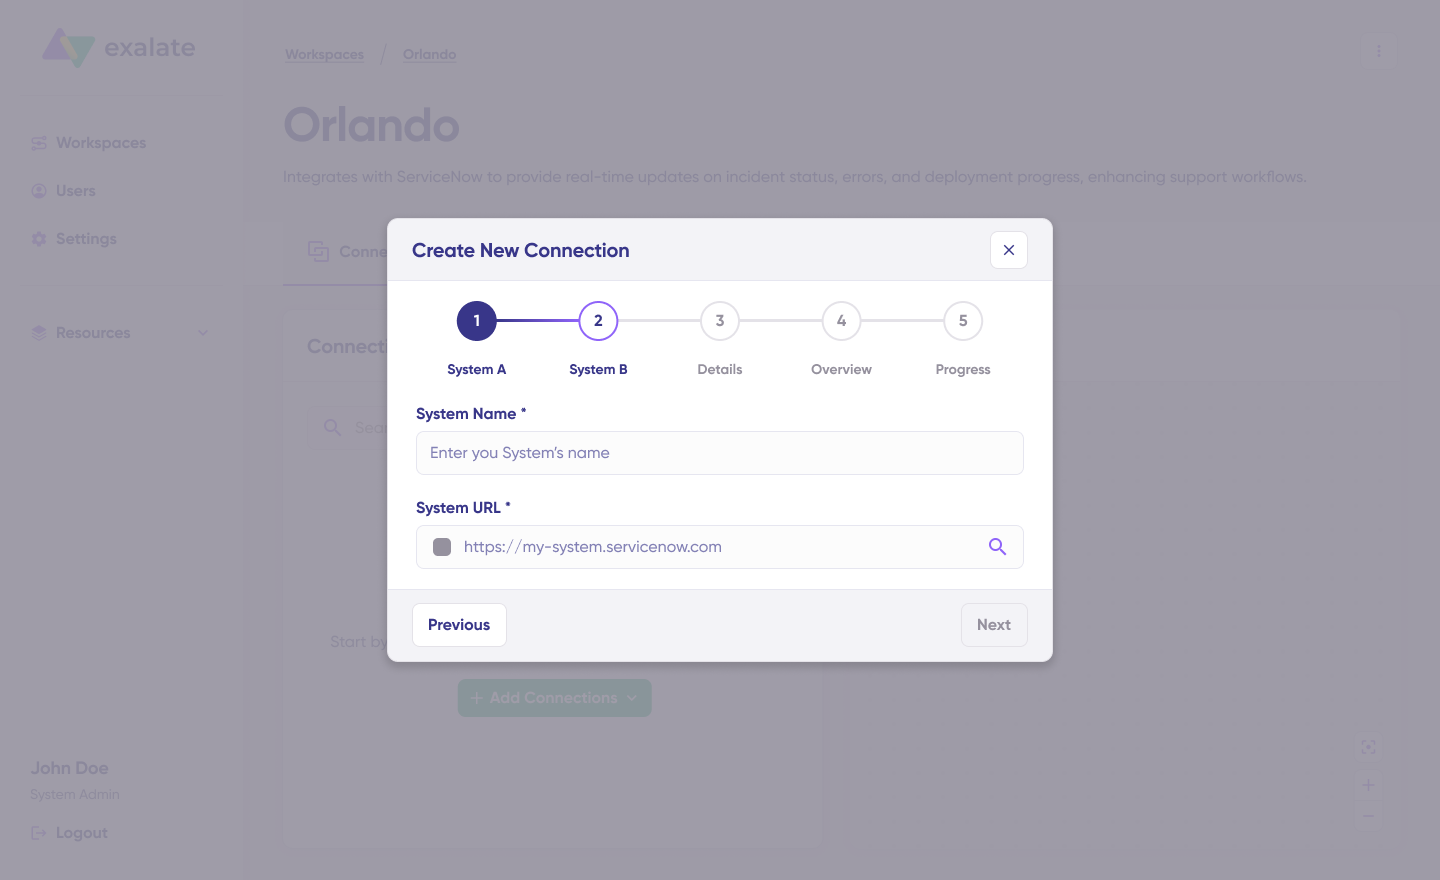
Navigate to “+ Add connections” and select “Create new connection.”
Name your first system—either Jira Service Management or Salesforce can go first; the order doesn’t matter. Enter the instance URL for whichever platform you’re starting with.

When you provide the URL, Exalate runs a quick validation. If your system already belongs to the current workspace, authentication happens seamlessly.
If it’s registered under a different workspace, the system gets newly registered for your current workspace. New systems require authentication credentials—both Jira Service Management and Salesforce support Basic authentication with username and password.
Repeat this process for the second platform. The same authentication rules apply.
Assign a name and description to your connection, then click “Next.”
Verify the connection details and click “Create connection.”
Once complete, select “Continue to configuration” and choose the Jira Service Management project you want to synchronize. Click “Build & continue” to proceed.
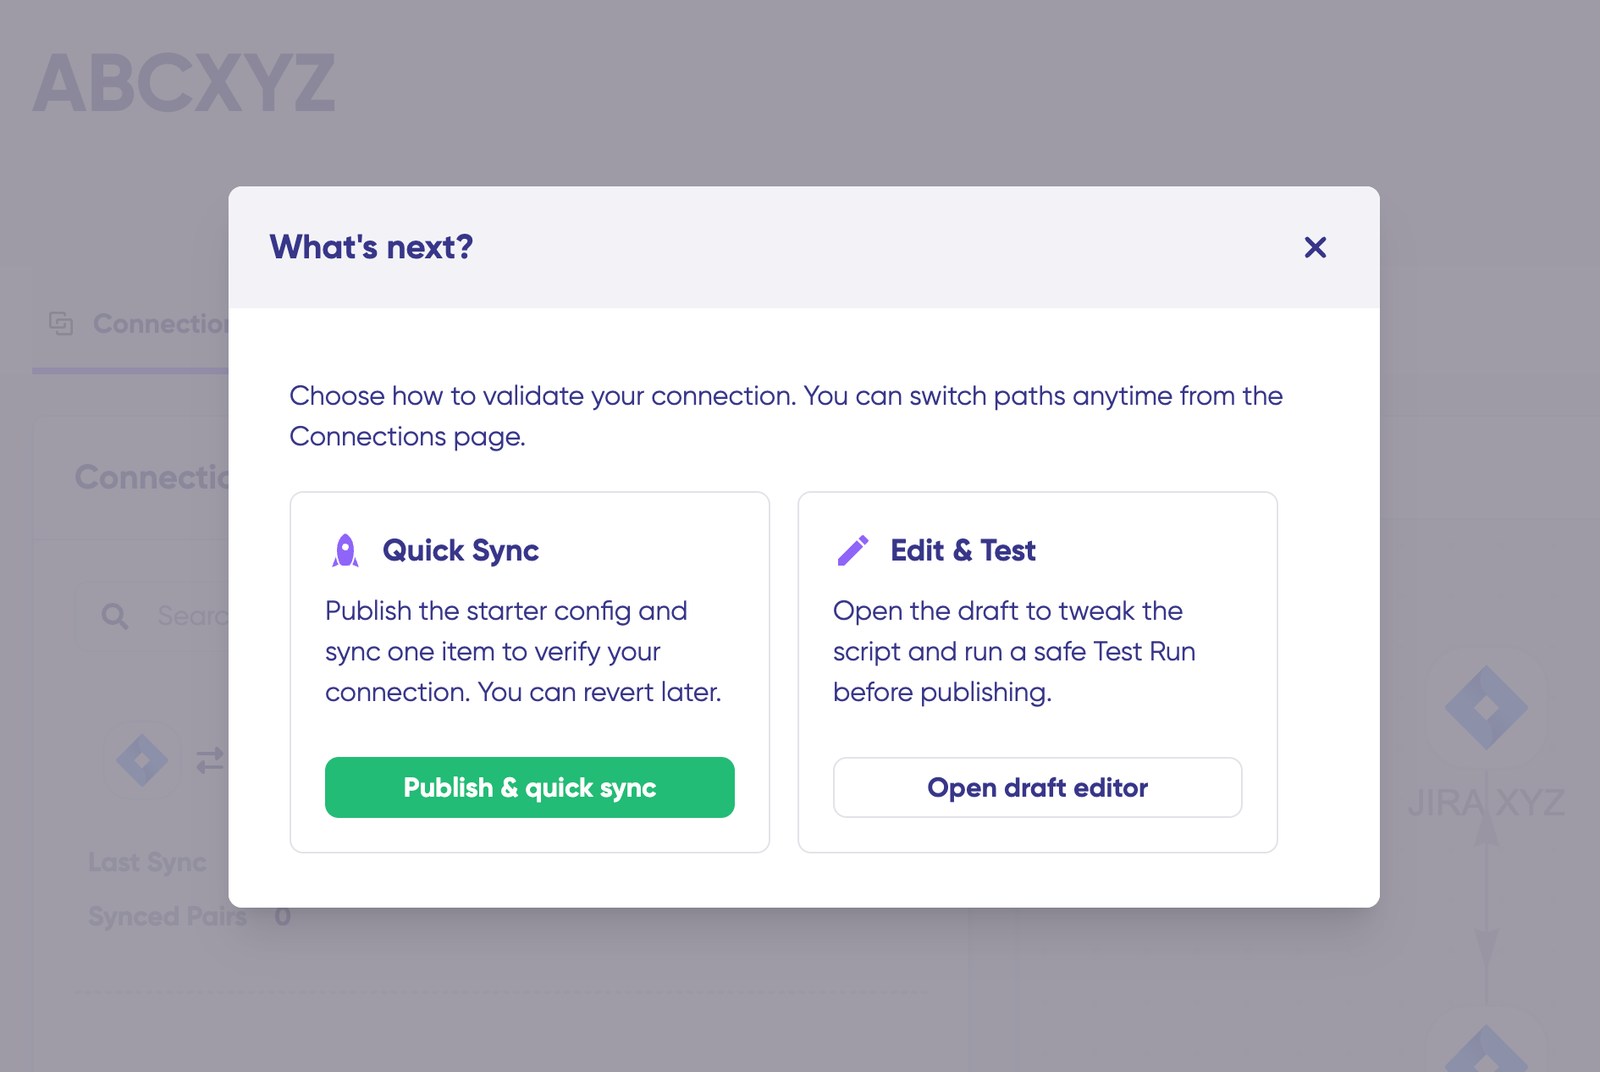
Two paths open up: “Quick sync” and “Edit & Test.” Let’s explore both.
Step 3: Validate Your Connection with Quick Sync
Quick Sync lets you test the connection by syncing a single item between platforms. This step is optional but recommended.
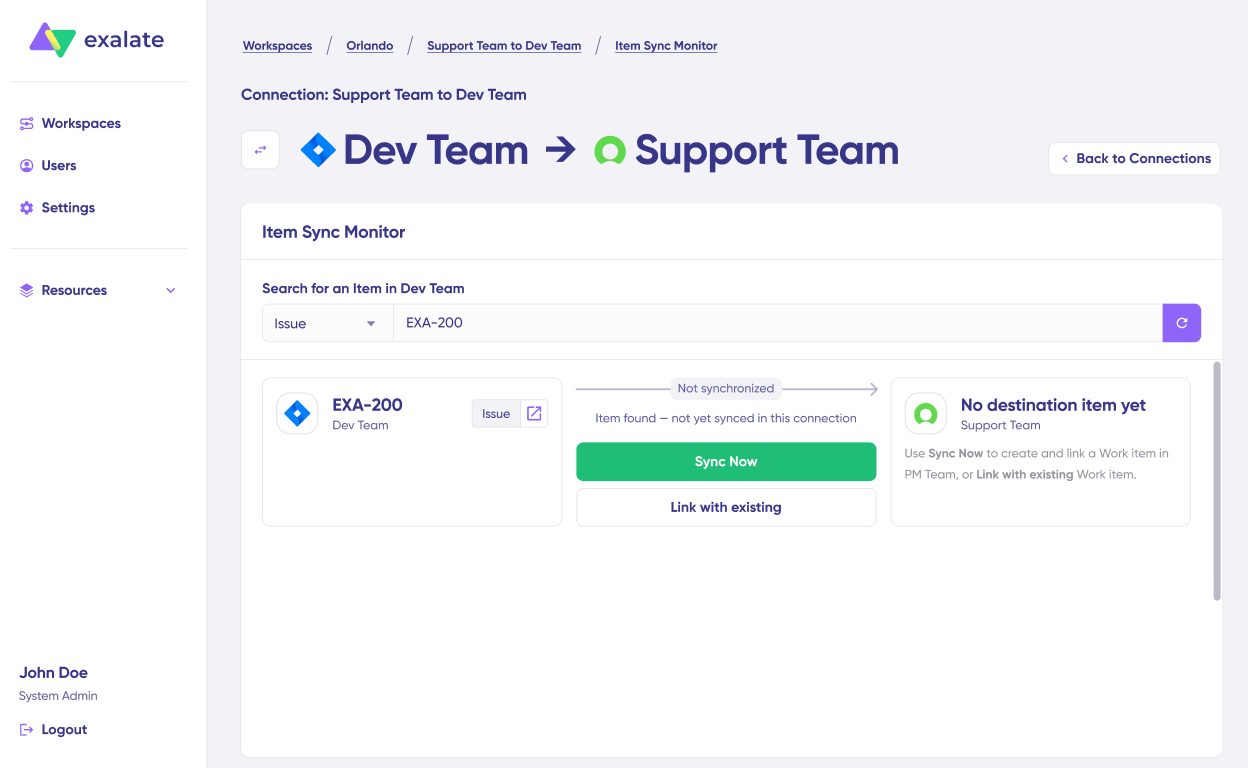
In the “Item sync monitor,” enter a work item key from Jira Service Management (like a service request or incident number) or a Case number from Salesforce.
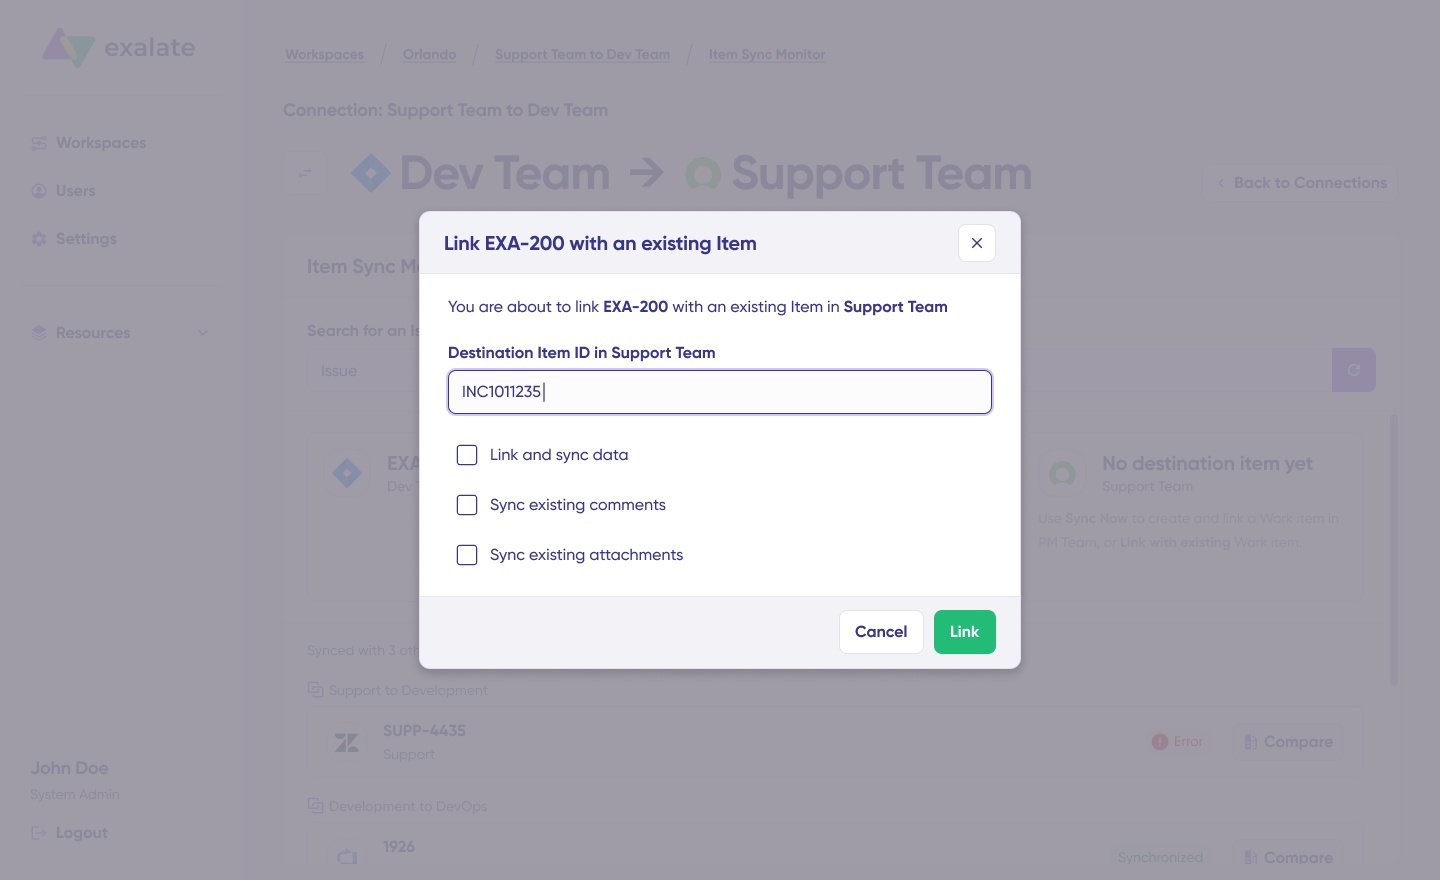
Click “Sync Now” to push the item through. To connect two items that already exist on both sides, use “Link with existing” instead.
Status updates appear as the sync progresses. When it finishes, you can open both synced items in new windows to compare them.
The comparison view shows exactly how field mappings apply and what changes flow between systems.
Step 4: Configure Sync Rules in the Draft Editor
Click “Create a new version” or “Open latest draft” to access the editor. Working in draft mode protects your live configuration from accidental changes. All edits save automatically.
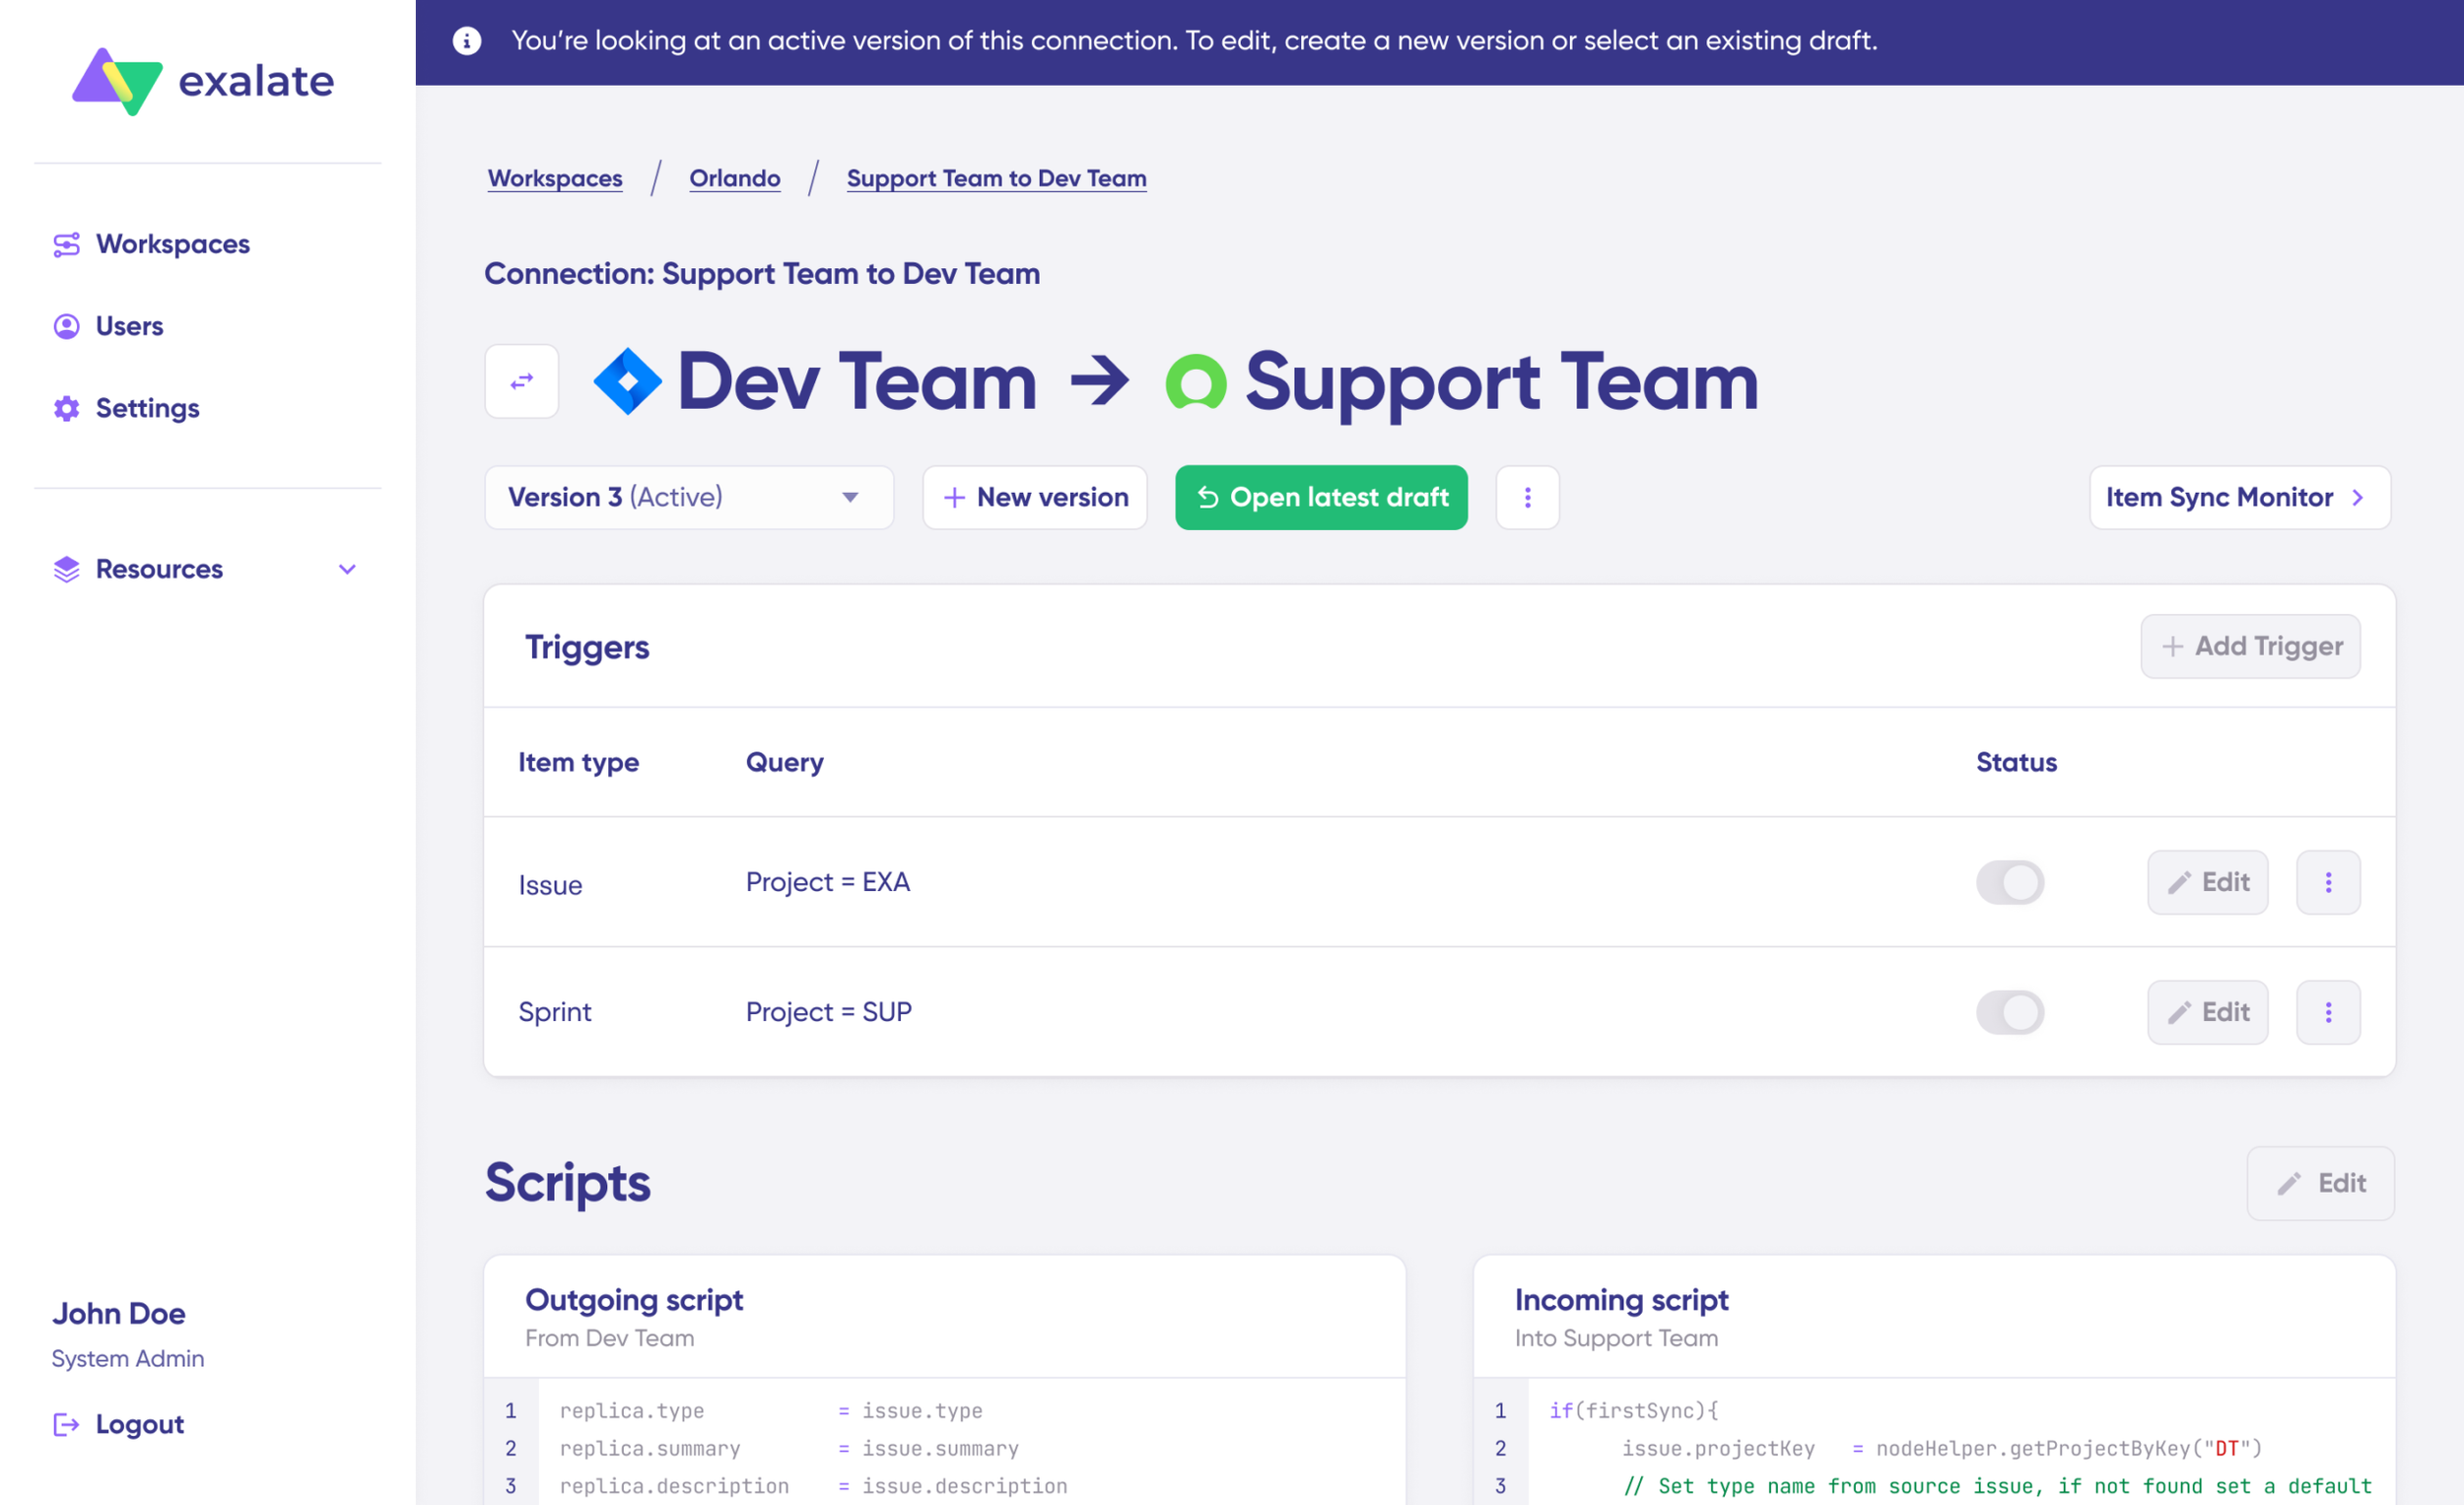
Hit the “Edit” button to open the sync rules editor.
Sync rules use Groovy-based scripts. These scripts let you define custom data logic, field mappings, and conditional flows—essentially adapting the integration for any workflow complexity you need.
Toggle the sync direction using the arrows next to the connection name. Scripts are split into incoming and outgoing sections.
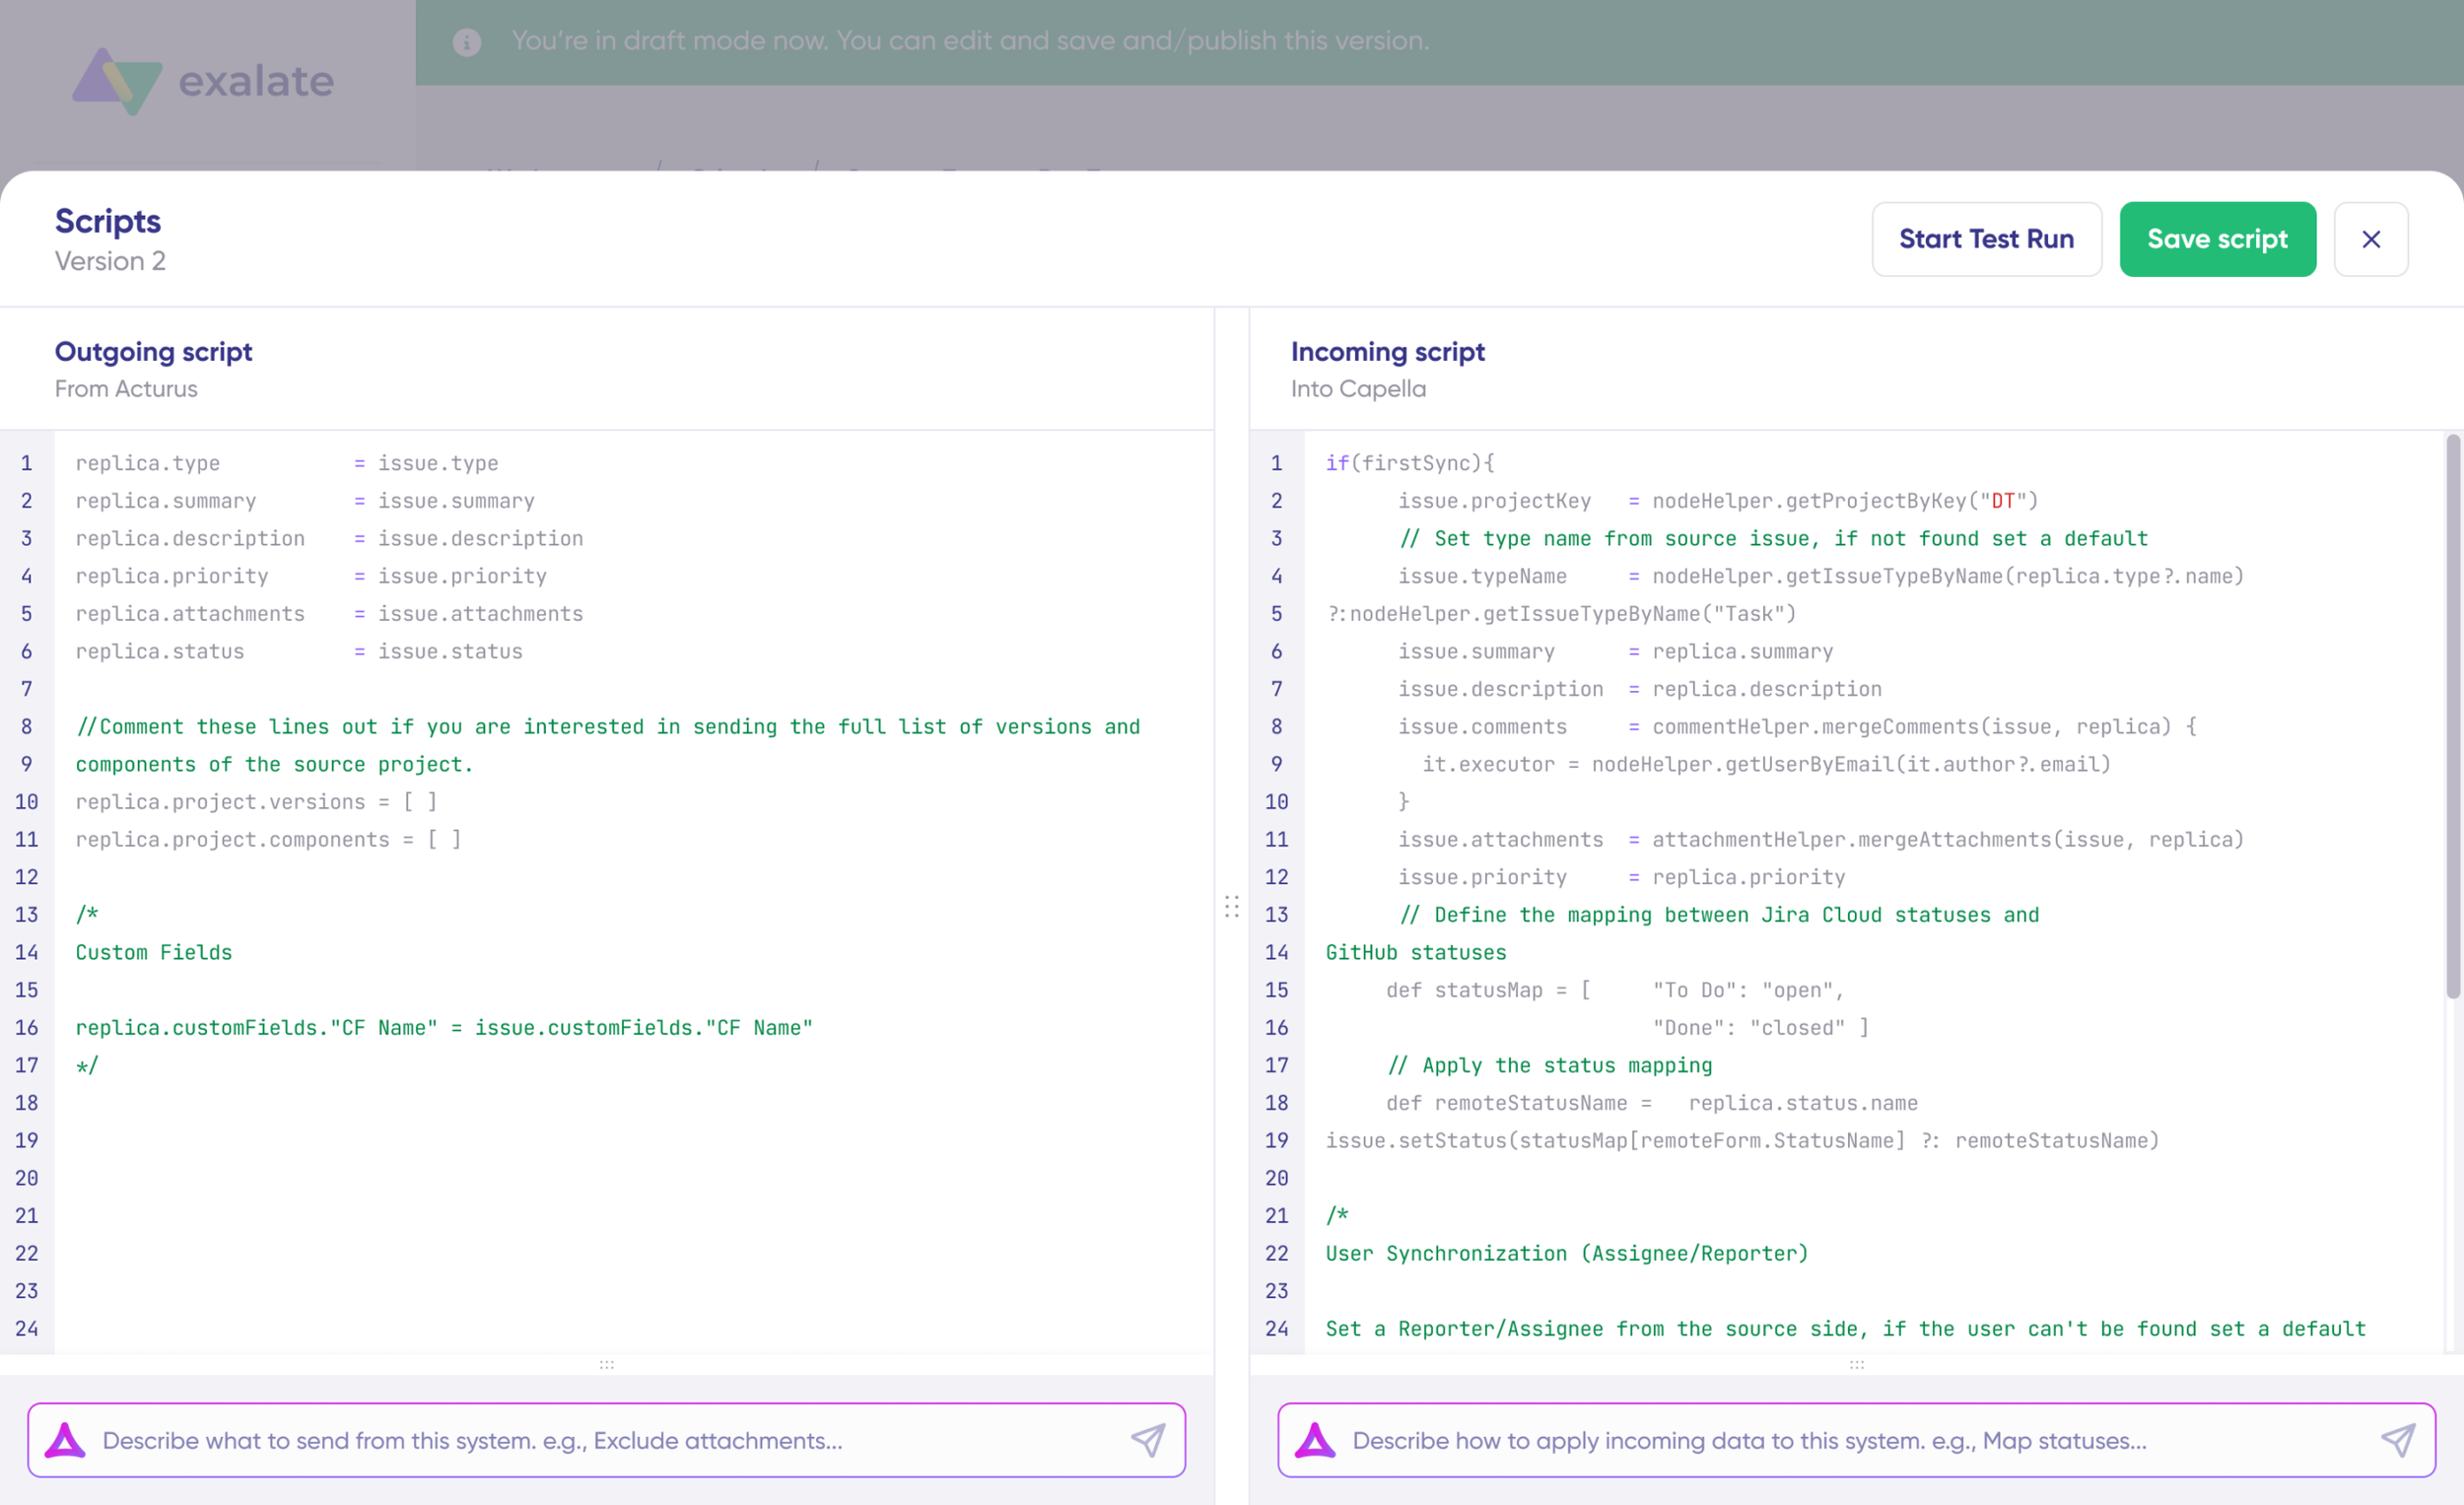
When syncing from JSM to Salesforce, the outgoing script controls what leaves Jira Service Management, and the incoming script defines how that data maps into Salesforce objects like Cases, Opportunities, or Accounts.
The replica functions as a message payload carrying actual data between synced entities in JSON format.
For JSM entities like Incidents, Service Requests, Problems, and Changes, common fields you can sync include:
- Summary, description, priority, status
- Assignee, reporter, comments, attachments
- Customer request type, organizations, SLA information
- Custom fields specific to your service desk
For Salesforce objects, typical syncable fields include:
- Cases: Subject, Description, Status, Priority, Origin, ContactId, AccountId
- Opportunities: Name, StageName, Amount, CloseDate, AccountId
- Accounts: Name, Industry, Type, BillingAddress
- Contacts: FirstName, LastName, Email, Phone, AccountId
To sync new values, add the appropriate script lines (straightforward if you’re comfortable with code). To exclude data—say, preventing attachments from flowing to Salesforce—remove that line from the outgoing JSM script.
Step 5: Generate Scripts with AI-Assisted Configuration (Aida)
For those who prefer skipping manual scripting, Exalate’s AI-assisted configuration feature, called Aida, generates sync scripts automatically. Aida appears in both incoming and outgoing script sections.
Aida works in two directions:
For Outgoing scripts: Describe what data should leave your system. Examples:
- “Only sync high-priority incidents“
- “Include Account and Contact information with the Case.”
For Incoming scripts: Describe how data should map to your system. Examples:
- “Map JSM status to Salesforce Case status“
- “Create a Case when receiving a Service Request, create an Opportunity when receiving a Change.”
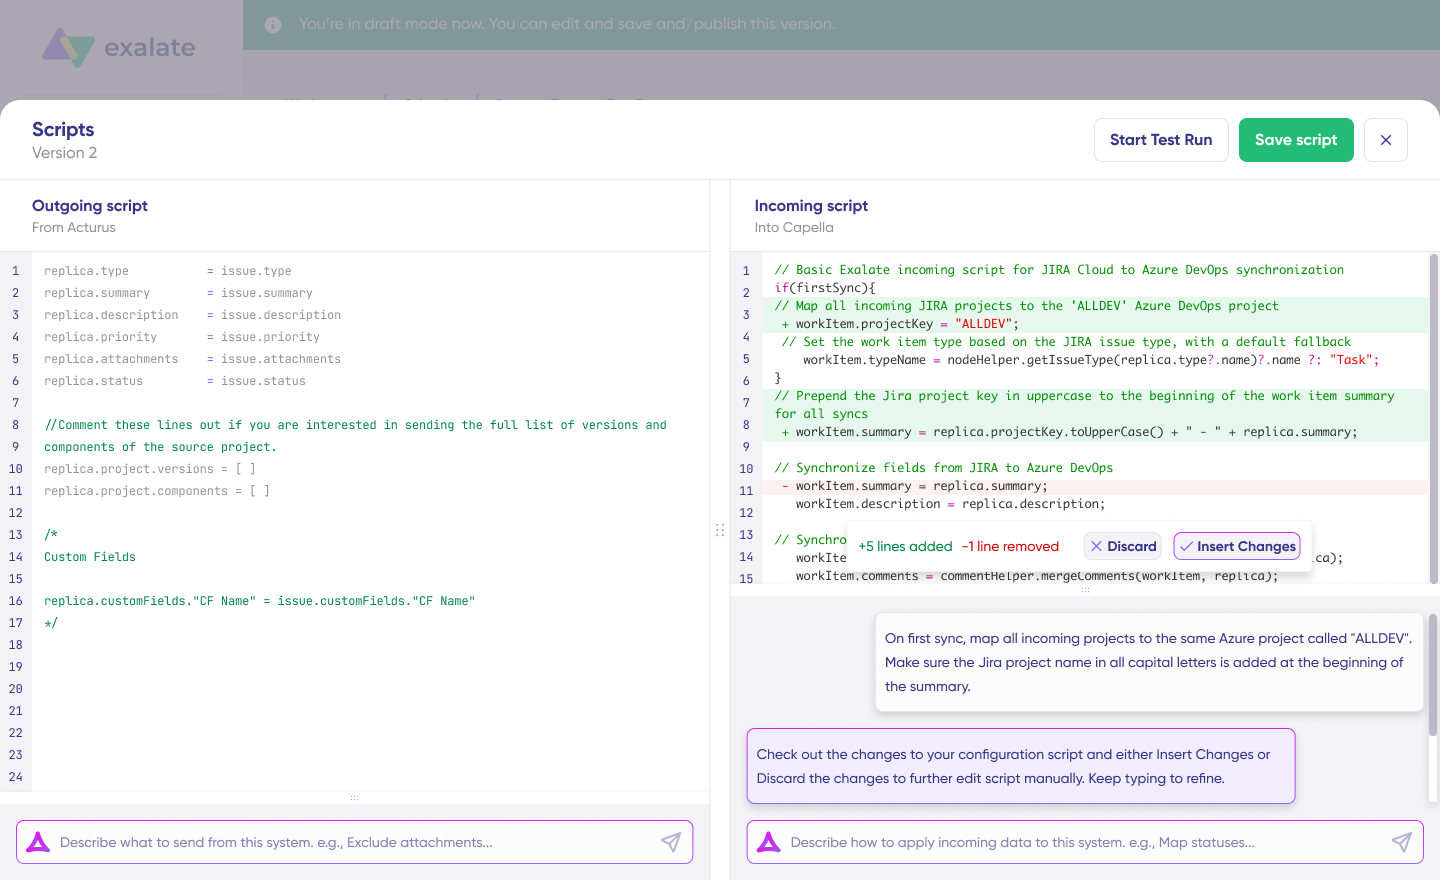
Aida analyzes Exalate’s scripting API alongside your existing configuration to produce working Groovy scripts with proper field mappings.
Review the suggested changes once Aida finishes. Green highlighting shows new lines being added; red highlighting shows lines being removed. Choose “Insert” to accept or “Discard” to reject each suggestion.
Since incoming and outgoing scripts operate independently, Aida maintains a separate context for each. Keep your prompts focused on the relevant direction.
Important: Like any AI tool, Aida benefits from human review. Always verify generated scripts before publishing.
Step 6: Test Before Going Live

With your sync rules configured, you can either “Save script” or validate everything using “Start Test Run.”
Select the items you want to test under “Select Items”—you can choose multiple work items or Salesforce records. Click “Start Test Run” to execute.
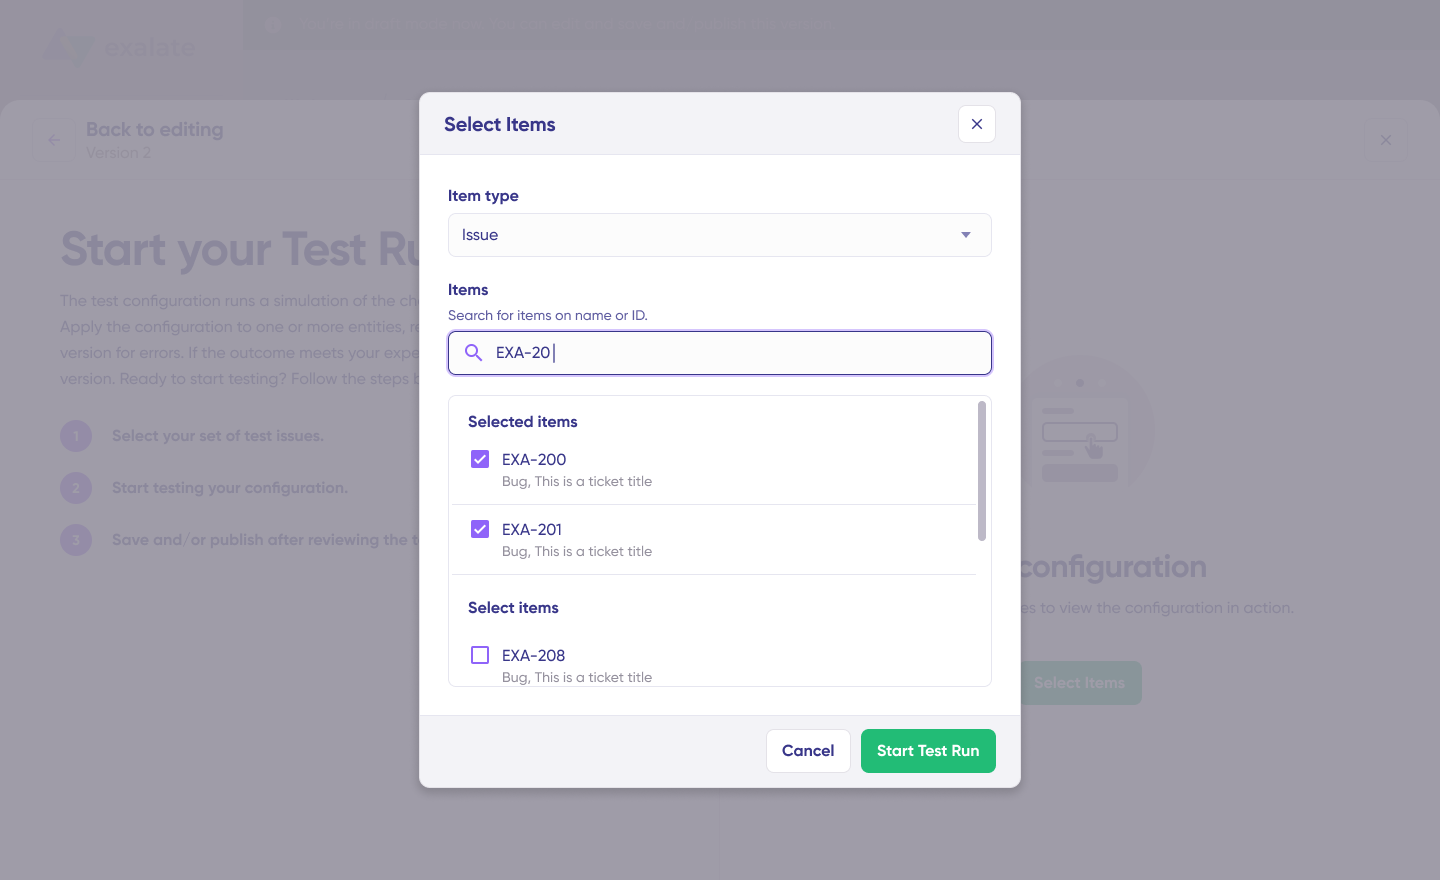
The test displays all incoming and outgoing replicas for each selected item across separate tabs. Review how the sync configuration applies, examine the replica structure, and confirm that field mappings look correct.
If something’s off, return to the editor, adjust the scripts, and test again.

Only deploy when you’re confident everything works as expected. This dry-run approach prevents errors from touching live data.
Once your configuration meets requirements, click “Publish Version” to apply the updated sync rules to your production integration.

Access all versions through the “Version” dropdown. Versions can be “Active” (running), “Draft” (editable), or “Archived” (historical reference).
Step 7: Set Up Triggers for Automatic Synchronization
Triggers define conditions that automatically initiate synchronization for specific items. Click “+Add trigger” to start creating one.
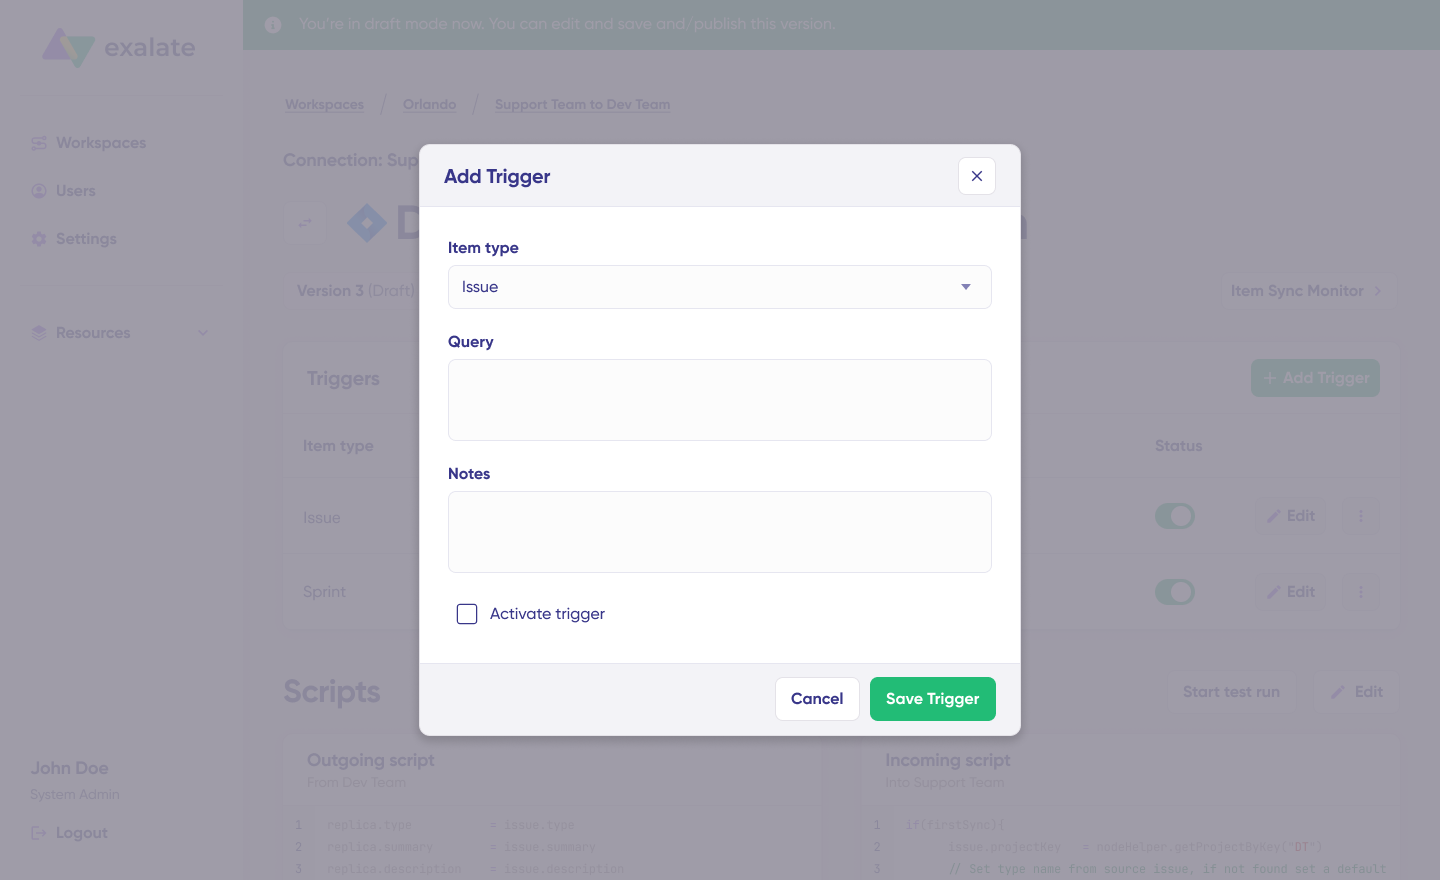
Triggers are platform-specific:
For Jira Service Management: Use Jira Query Language (JQL) to specify conditions. Examples:
project = "Customer Support" AND issuetype = "Service Request"— syncs all service requests from a specific projectpriority = High AND status != Closed— syncs high-priority open itemslabels = "salesforce-sync"— syncs items with a specific label
For Salesforce: Use SOQL-based queries or advanced search syntax. Examples:
- Sync all Cases where
Status = 'Escalated' - Sync Opportunities in a specific StageName
- Sync Cases belonging to a particular AccountId
Save your triggers by publishing them.
Step 8: Monitor and Troubleshoot
Your synchronization now runs automatically based on the rules and triggers you’ve established.
Script-based tools offer tremendous flexibility but can sometimes encounter errors, especially with complex workflows.
Troubleshooting with Aida:
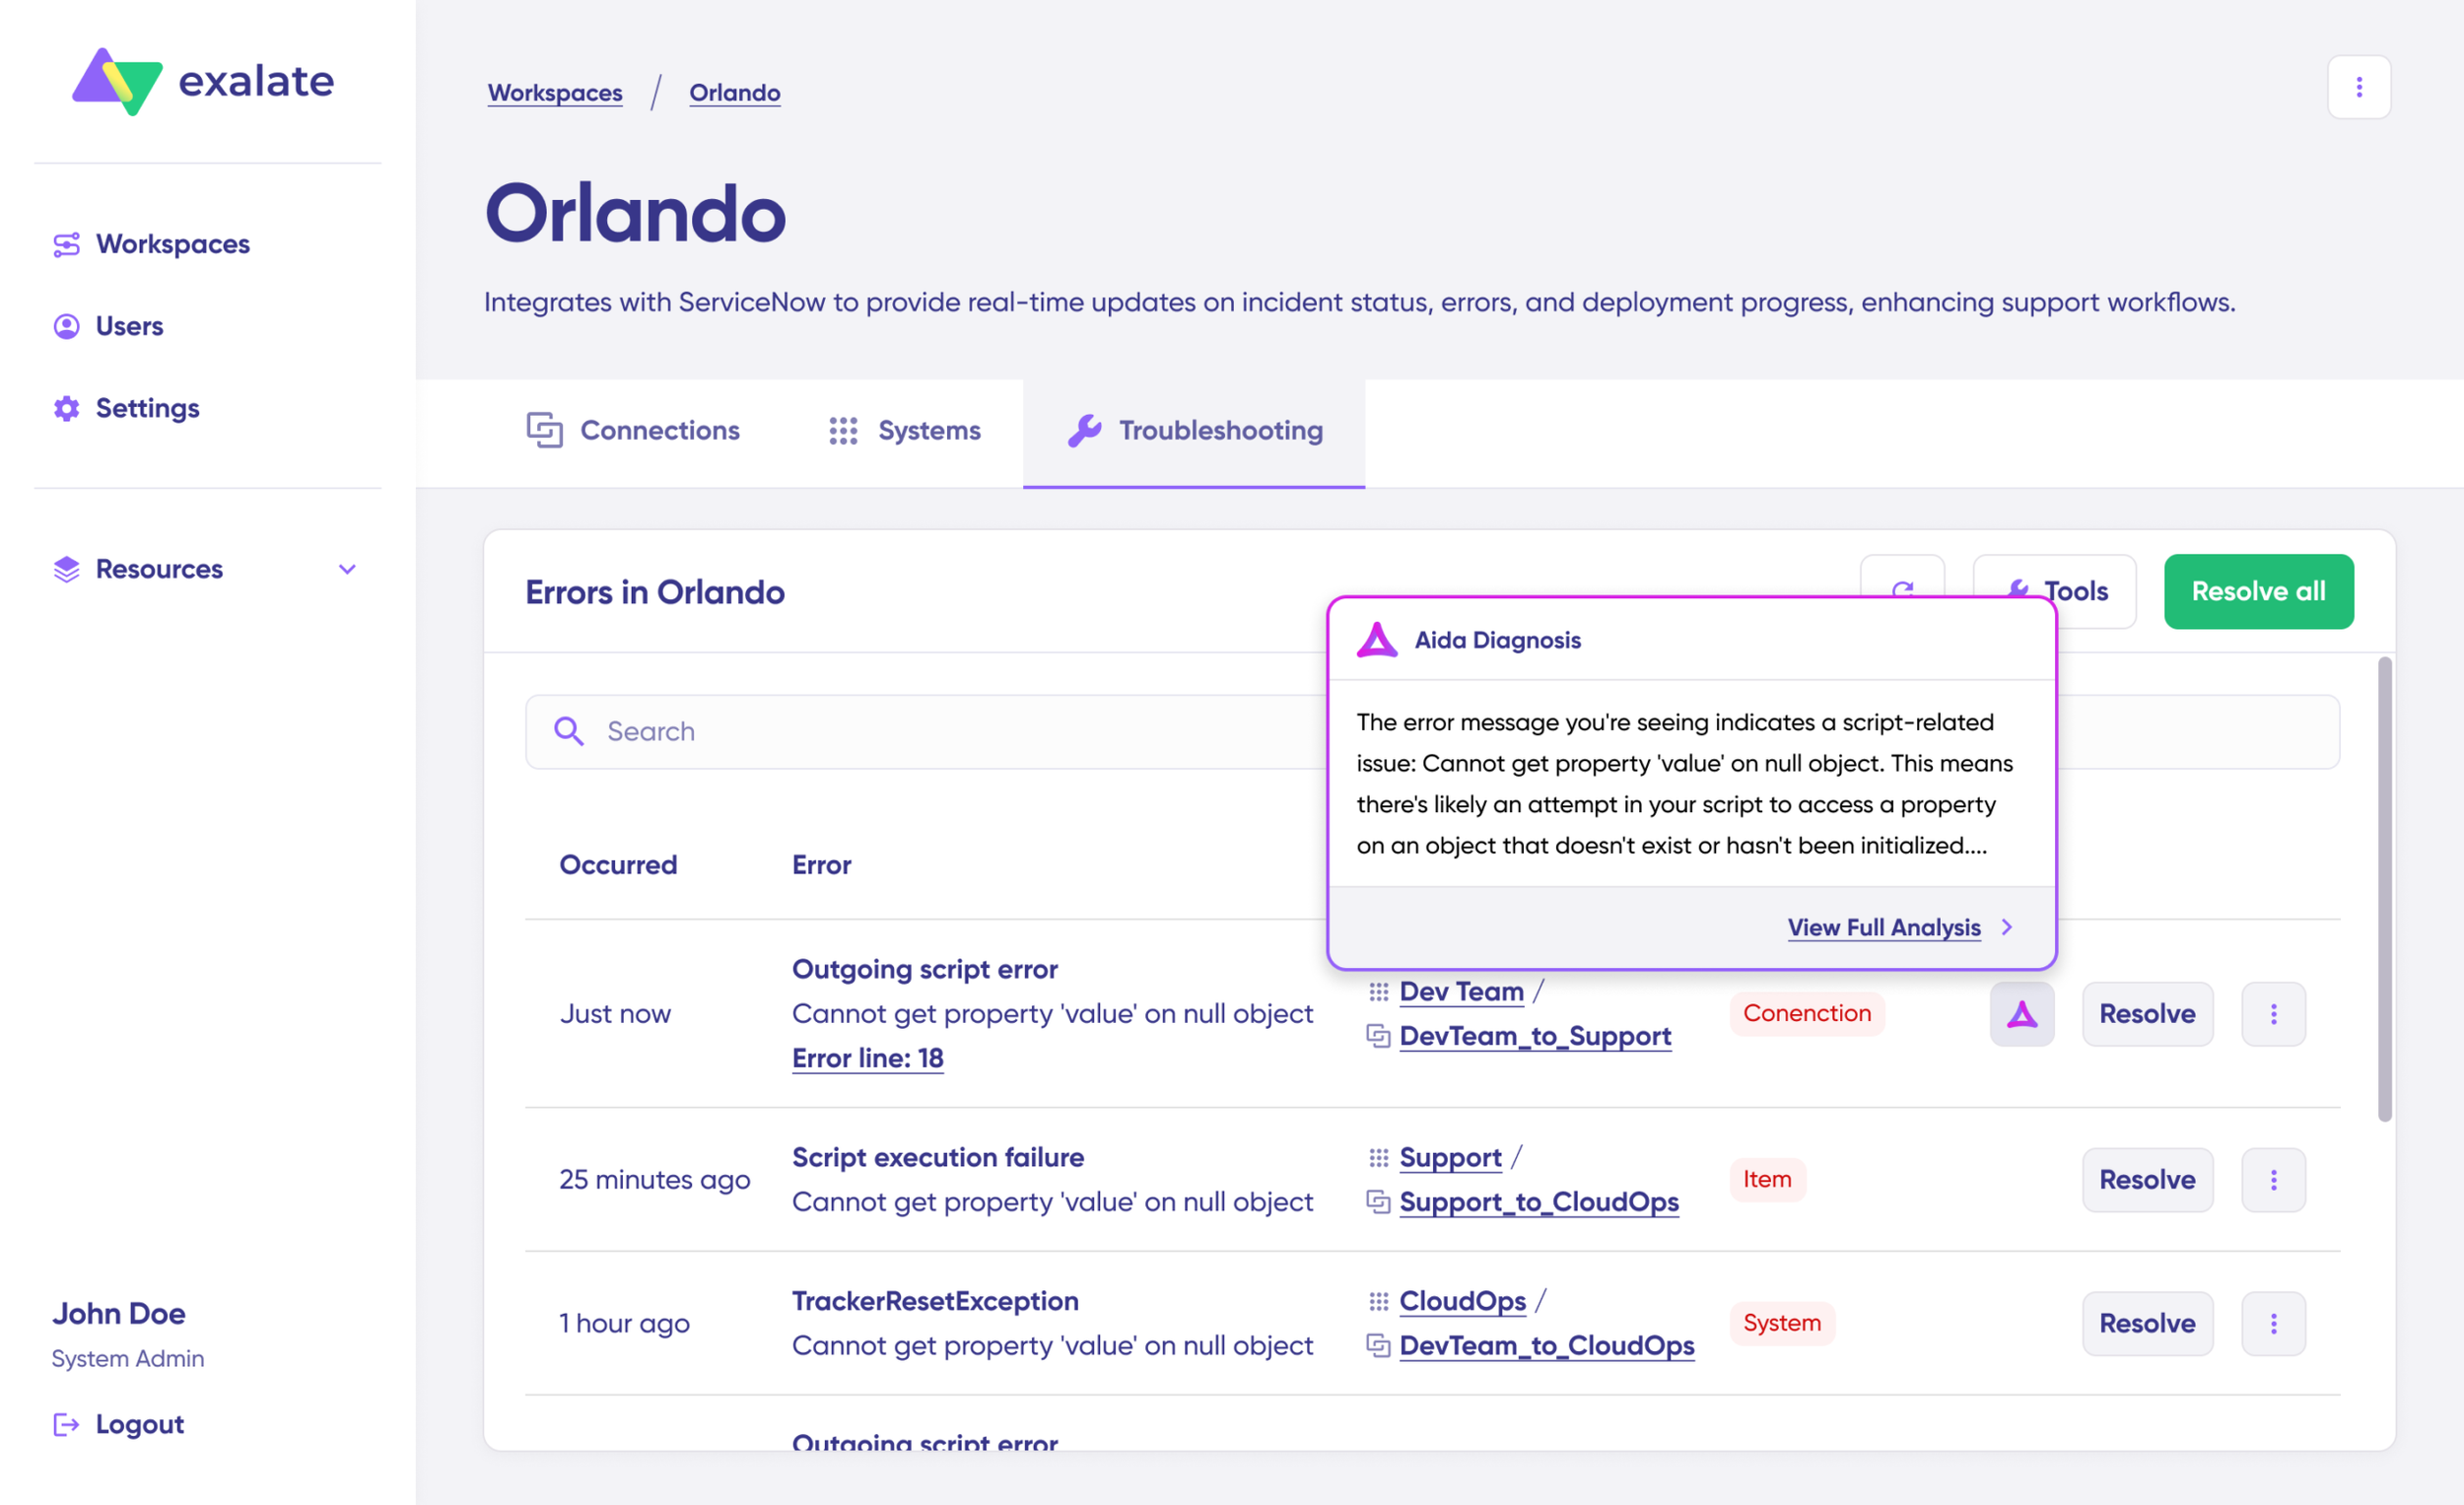
Aida accelerates error resolution with context-aware suggestions delivered exactly where you need them.
When an error occurs, navigate to the “Troubleshooting” tab in your workspace. Hover over the problematic entry and click the Aida icon that appears.
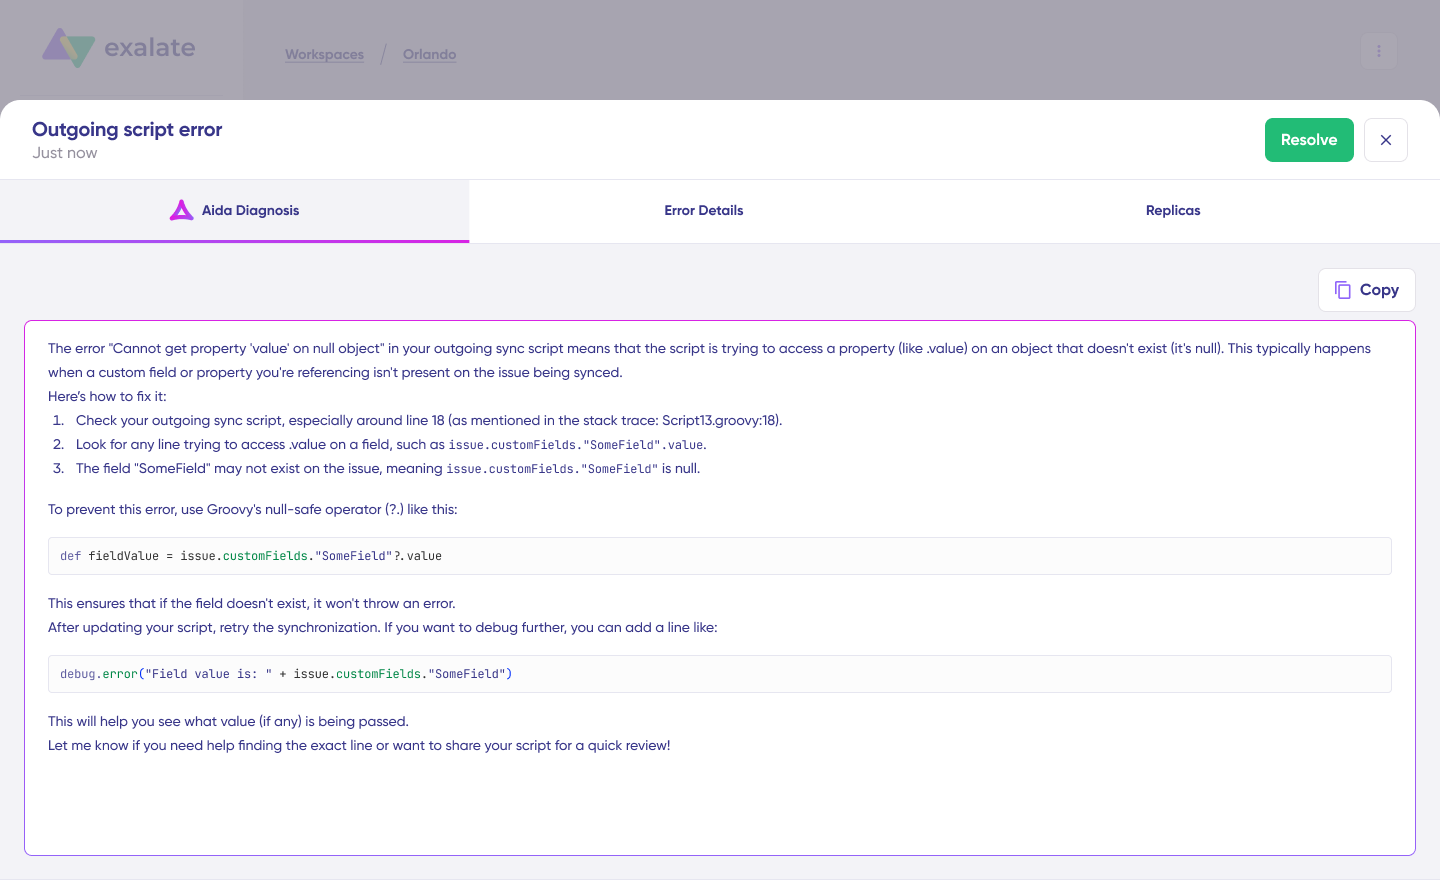
A modal window displays the AI-generated diagnosis, including an explanation of what went wrong and a proposed fix. Select “View Full Analysis” for deeper context.
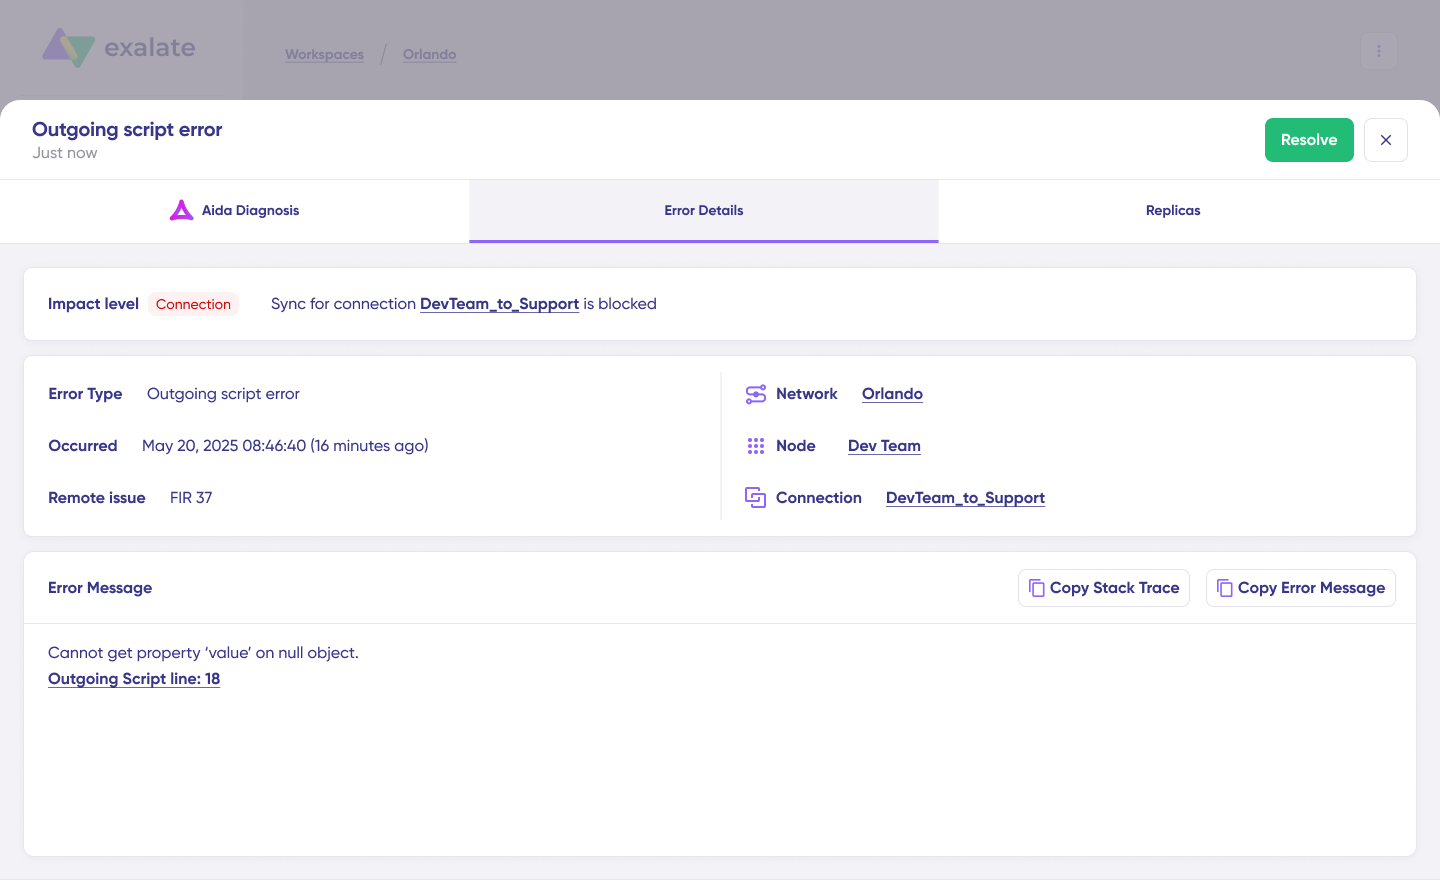
Access “Error details” to copy the stack trace for further investigation. The “Replicas” view shows the JSON data involved in the failed sync.
Choose “Resolve” to apply fixes and retry the synchronization.
Frequently Asked Questions
What is a Jira Service Management Salesforce integration?
A Jira Service Management to Salesforce integration syncs data between both platforms in real-time. When someone creates a case in Salesforce, the integration automatically creates a corresponding ticket in JSM with all details like description, priority, customer info, and attachments. Status updates in one system reflect in the other immediately.
Why integrate JSM with Salesforce using Exalate?
Exalate eliminates manual handoffs between your customer-facing teams in Salesforce and technical teams in JSM. Without integration, someone copies information between systems, wasting time and introducing errors. With Exalate, a customer reports a bug through Salesforce, JSM gets the full ticket with customer context, your team fixes it, and the status updates back to Salesforce automatically.
What can Exalate sync between JSM and Salesforce?
Everything available through the REST APIs: standard fields, custom fields, attachments, comments with user mentions, status transitions, assignees, labels, priorities, and related records. Common mappings include case subject to work item summary, case description to work item description, priority levels, and account/contact information. See available fields and entities for the complete list.
Can I sync multiple Salesforce orgs with multiple JSM instances?
Yes, Exalate’s architecture allows direct connections between each system pair. If you’re an MSP managing 10 clients, each with their own Salesforce org and JSM instance, you set up 10 independent connections. Client A’s Salesforce talks directly to Client A’s JSM with its own sync rules. No data mixing, no bottlenecks, and each client’s integration is completely isolated.
How do I sync custom fields?
Reference custom fields in your Groovy scripts using their API names. Exalate maps any custom field to any other field, with transformations if data types or values don’t match. If you have a Salesforce custom field “Customer_Tier__c” storing “Enterprise,” “Professional,” or “Basic,” you can map it to a JSM custom field that uses numeric values by writing logic that converts Enterprise to 1, Professional to 2, and Basic to 3.
Can I use AI to write sync scripts?
Yes, Aida helps you write Groovy scripts without deep coding knowledge. Describe what you want in plain English, and Aida generates the script. Review it, test it, and refine it as needed. This makes scripting accessible even if you’re not a developer.
How secure is Exalate?
Exalate uses encrypted TLS connections and OAuth authentication for secure access to both systems. Role-based access control governs who can configure integrations. Data is encrypted in transit and at rest. Each connection uses its own authentication credentials, so you can revoke access to specific integrations without affecting others. Exalate is ISO 27001 certified. Find complete security documentation at the Trust Center.
Can I pause or disable sync temporarily?
Yes, you can disable specific connections in the Exalate admin interface for maintenance or troubleshooting. You can also use scripts to conditionally stop syncing based on time windows or field values. Temporarily disabling sync doesn’t lose queued changes; they process once you re-enable it.
What other platforms does Exalate integrate with?
Beyond JSM and Salesforce, Exalate connects with ServiceNow, Azure DevOps, Azure DevOps Server, Zendesk, Freshdesk, Freshservice, Asana, GitHub, and more. Custom connectors are available for proprietary systems. This enables comprehensive integration strategies across your entire toolchain.
Do I need technical skills to set up Exalate?
For basic syncs, Aida’s AI-assisted configuration lets you describe your needs in plain language and generates the configuration. For complex scenarios involving conditional logic, data transformations, or multi-system integrations, Groovy scripting knowledge helps. Exalate’s documentation and support team assist with advanced configurations.
Recommended Reads:
- Jira Salesforce Integration: How to Set up a Two-Way Sync between Different Teams
- Salesforce Integrations: Integrate Salesforce and other Tools
- Salesforce Third-Party Integration: Set up a Bidirectional Sync between Salesforce and Other Tools
- Jira Integrations: Integrate Jira and Other Systems Bidirectionally
- How to Set Up a Bidirectional Jira Service Management Integration with Jira Software


