As software teams grow and diversify, it’s getting more common to have them manage their work on different platforms. These organizational systems are definitely a great help to your productivity.
However, achieving an Azure DevOps and GitHub integration to keep everything in sync isn’t always that straightforward. If you can solve the potential syncing issues, you can give your business a real boost.
Focusing on two particular platforms, we’ll look at how to set up an Azure DevOps to GitHub Integration in order to help your teams work in harmony.
We’ll discuss the potential problems when teams use different software and show how the right integration solution can address them. With these platforms integrated correctly, your teams can work in tandem to achieve your business goals faster.
Note: In this tutorial, we will be using a software integration tool called Exalate to set up the integration. You will learn more about this throughout this guide.
What’s covered in this blog post:
- Why Integrate Azure DevOps and GitHub
- How to Choose the Right Solution for Setting Up Your Integration
- How To Set Up an Azure DevOps GitHub Integration (a Step-by-Step Process)
- Common Pitfalls to Keep in Mind when Completing the Azure DevOps GitHub Integration
- Architecture, Security, and Deployment for an Azure DevOps GitHub Integration
- Frequently Asked Questions
Why Integrate Azure DevOps and GitHub
Azure DevOps
Azure DevOps is a platform that has multiple features for development teams that require project management, version control, reporting, and requirements management.
Since it is a Microsoft product, you can use your Microsoft account to log in. Azure DevOps integrates well with several other tools but is particularly suitable for teams using Visual Studio or Eclipse. Its project management capabilities make it a compatible tool for agile and waterfall teams.
You can run it on your own server or use the cloud version, which is handy when it comes to scalability. It also has a range of extensions available on its marketplace.
GitHub
GitHub is a great way to keep code in one place. It handles versioning and source management, as well as issue tracking and project milestones. It is also among the best choices for distributed teams, who can use it to share code with team members anywhere in the world.
GitHub is one of the most popular coding tools around, especially with teams working on open-source projects. Although GitHub was originally an independent platform, Microsoft has acquired it.
Why Integrate Azure DevOps and GitHub
Azure DevOps and GitHub are both great tools, but when choosing a platform for your team to use, you’ll want to pick the right one for the job. Since they offer different things, teams within your organization may want to use one or the other.
That means they can take advantage of their best features. But it can also mean that the teams might lose track of what the others are doing. This can lead to a silo effect, where they handle the same issues separately or don’t share information that can be useful for those outside their group.
GitHub enables you to make your code visible to everybody, which is especially good for open-source projects. Often though, there’ll be parts of your business that you want to keep private. You may want to limit what you share or filter the information people add to it.
Azure DevOps, on the other hand, is great for handling backend code, or for working in the development environments it supports.
So if you want to manage the relationship between these two platforms, you’ll need a tool that can handle them both and can sync data when needed.

How to Choose the Right Solution for Setting up Your Azure DevOps GitHub Integration
When looking for the right solution for our integration, we need to make sure it fits our needs first. To help us do that, let’s look at the problems we’re aiming to solve. There are three particular features we should take into account:
1. Decentralized Integration
Helping our teams work together without introducing unnecessary constraints is one of the most important features to consider. Information exchange should let our teams work together in the comfort of their own environment, meaning that they shouldn’t become dependent on one another.
Both sides should be able to define what, when, and with whom they want to share the information. And they should also have the freedom to make changes without causing problems for others.
2. Reliability
The integration needs to exchange information without getting in our way. We don’t want to have to fix problems every time we transfer information. Our system should be able to cope with occasional issues, such as outages on either side. It should be robust enough to resume as normal when both sides come online again.
A reliable system should do what we need without distracting us from other tasks. We should be able to set it up and forget about it until we want to make changes.
3. Flexibility
As systems evolve and teams expand, changes become inevitable. So the more flexible an integration solution is, the better it can adapt itself to the changes and updates.

Moreover, teams might need to integrate data with other teams working on different platforms, so a solution that can support a variety of connections seems like the most convenient one in the long run.
We’ve used a tool called Exalate which was designed specifically to meet these requirements. It lets us connect our platforms while avoiding these pitfalls.
Next, we’ll look at how to use it. We’ll see how to set it up on Azure DevOps, then on GitHub, and then see how we can configure what is shared and set the conditions for data exchange to take place.
How to Set up an Azure DevOps GitHub Integration (a Step-by-Step Process)
There are five steps to take to set up our integration. First, we’ll install Exalate on both platforms. Next, we’ll see how to connect the two. We’ll then configure the connection we’ve set up so that it does what we want. And finally, we’ll look at automated synchronization triggers to control when the information is exchanged.
Step 1: Install Exalate on Azure DevOps
Firstly, we need to install Exalate on Azure DevOps. For more information on this step, check out our Azure DevOps Exalate Documentation.
As well as having your own Azure DevOps instance, you’ll need to request an Exalate instance, and you’ll need to work in both of them to have them set up correctly.
Visit this page to request an Exalate instance. Choose the Azure DevOps option, and you will be redirected to the Azure DevOps marketplace.
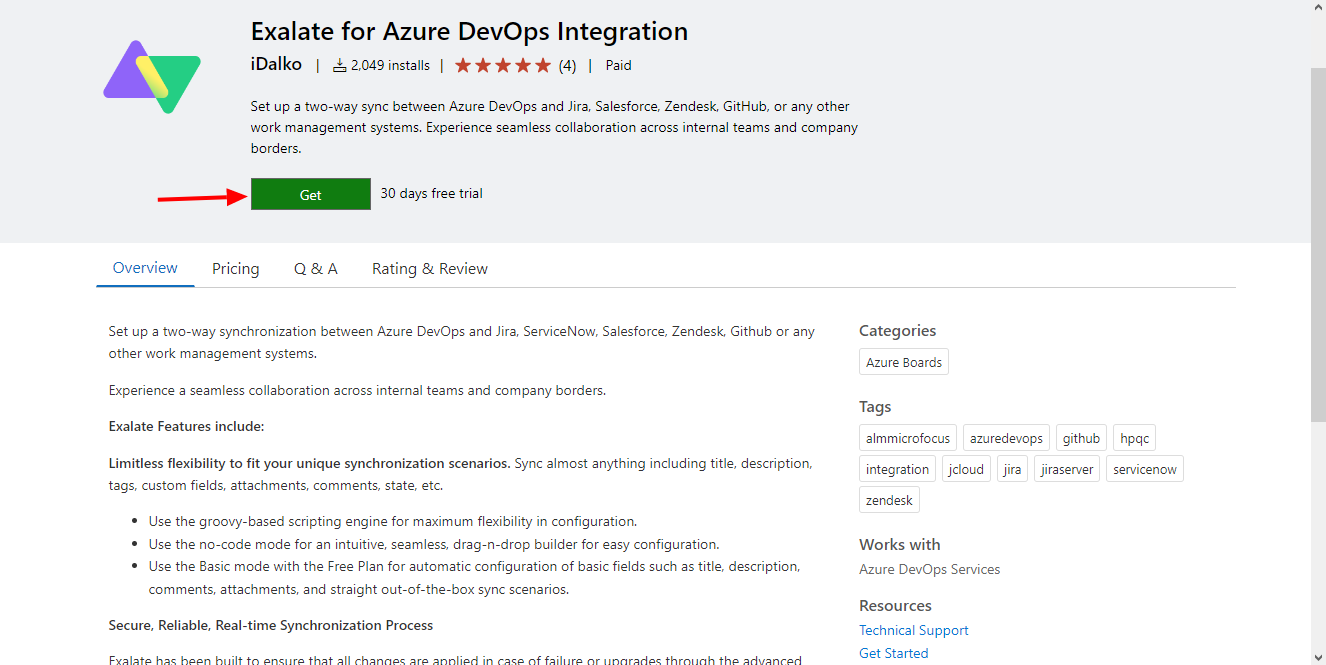
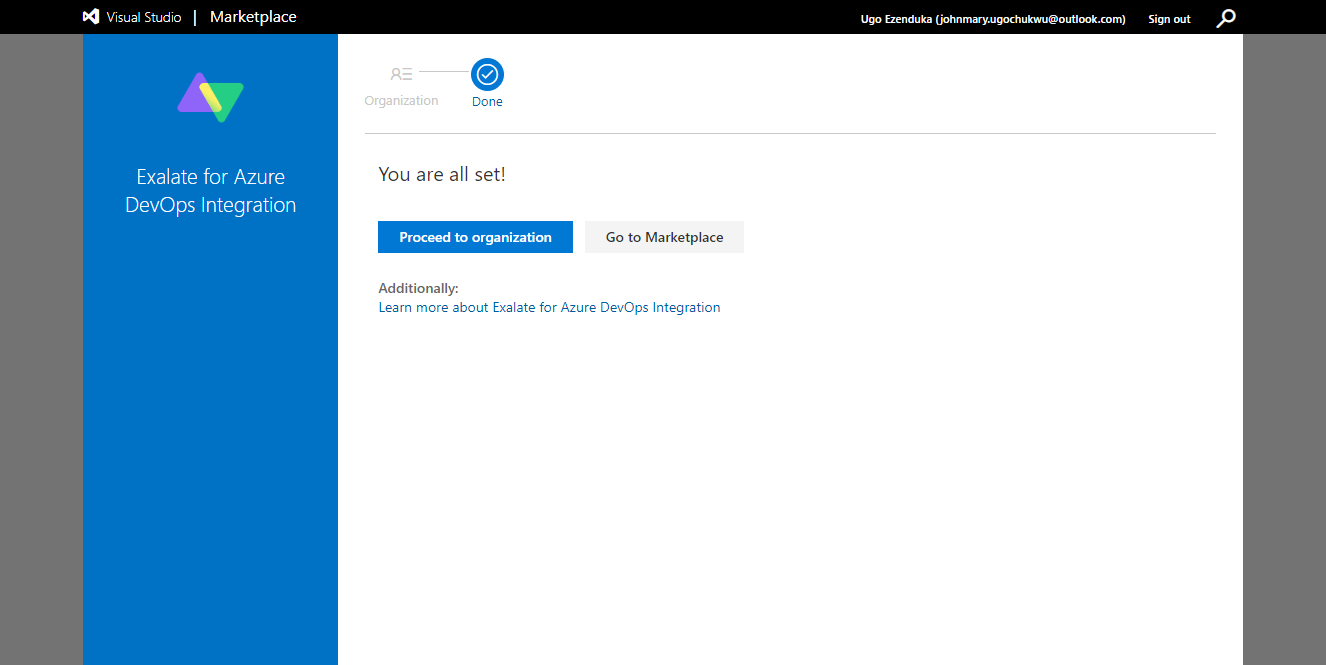
Click on the “Get” button, and you will be required to select the organization. Once done, click “Install”. Now you need to create a personal access token.
Open the settings menu at the top right of the screen and click “Profile”. Now look at the left-hand menu and click on “Personal Access Tokens” in the “Security” section. You can read this guide to understand this step in depth.
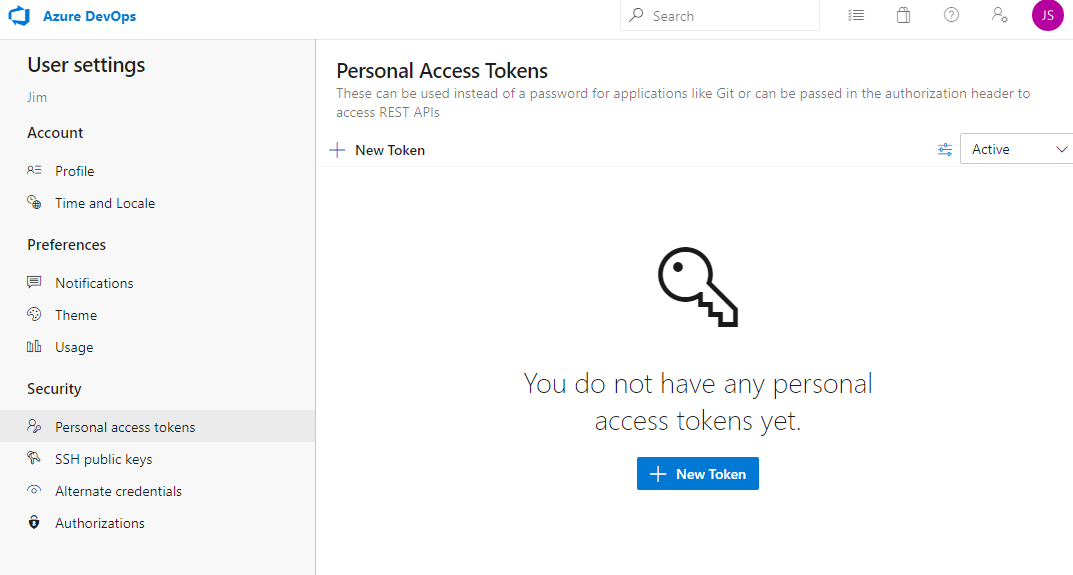
Here you can see the tokens you already have and can edit or revoke them if needed. If you haven’t done this before, it will likely be empty. Start by clicking on “New Token”.
A form will appear where you enter details for your new token. You can give it a name and organization, as well as choose when it expires. A longer lifespan means you won’t have to extend it as soon, but a shorter expiry date can be a better choice for security reasons.
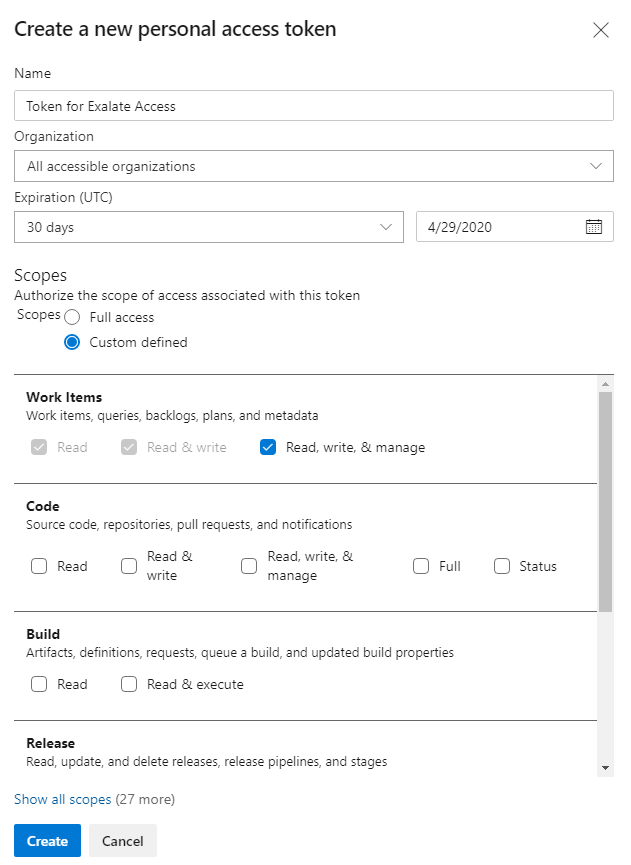
You also need to choose what the token grants access to in the scopes section. You can provide access to everything by selecting full access, or you can pick and choose what you want.
For our installation, we need access to read, write, and manage work items. Select those, and then click “Create” to generate the token.
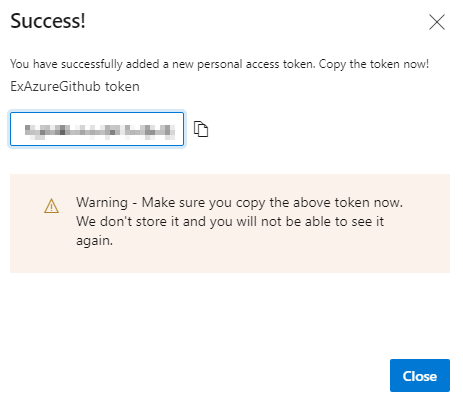
A new window will appear containing your token, which is simply a string of text. Select this, making sure to get all of it, and copy it to a safe location. There’s an icon next to it that copies it straight to the clipboard which makes it easier. You only get one chance to do this, or else you’ll need to start over and create a new token.
Next, look in your email and find the response to your Exalate app node request. Follow the link that was sent to you and you’ll be taken to your new node.
Accept the license to continue.
Now you can put your details in. Add your organization name and paste it into the personal access token you just generated. There’s also a space to enter your DevOps URL. If yours doesn’t work, try using dev.azure.com instead.
Once you’ve set those details up, you’ll need to log in. Again, this uses your personal access token. Enter it and click the “Login” button. After that, you’ll see the settings page. We’ll come back here after installing GitHub.

Step 2: Install Exalate on GitHub
Now that Exalate is ready on Azure DevOps, we’ll move over to GitHub.
Open GitHub, go to the marketplace, and search for Exalate. You can follow this link to save some time if you prefer.
Note: Exalate is also available for GitHub Enterprise. For installing Exalate on GitHub Enterprise Cloud, check this article.
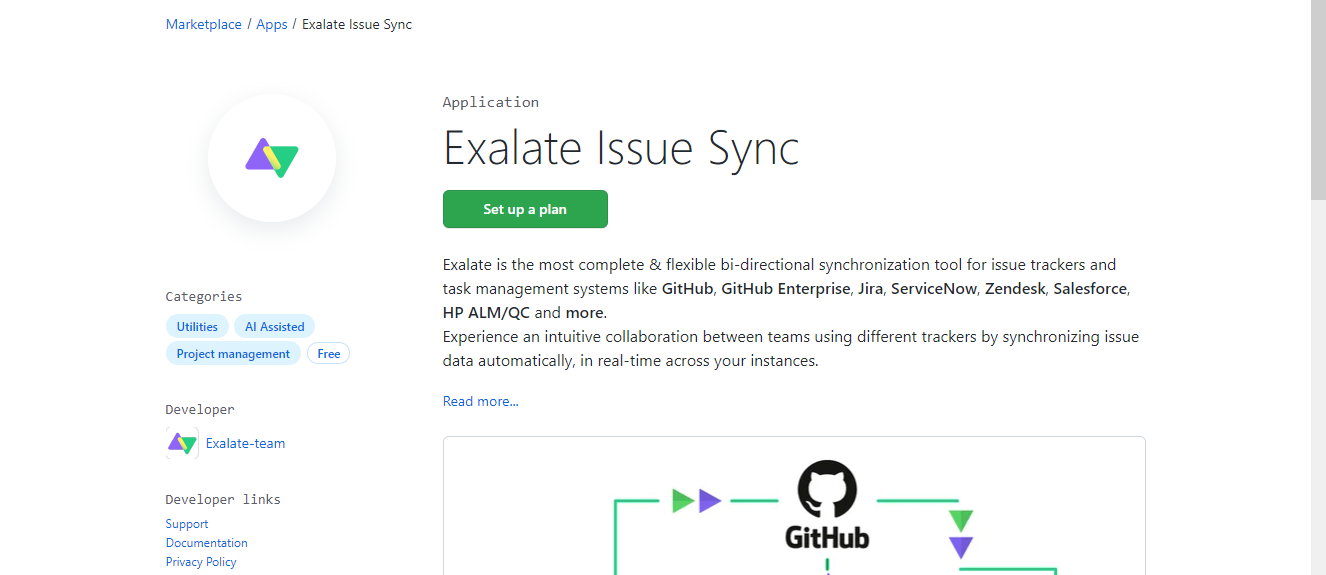
Click the green “Set up a plan” button first. Fortunately, Exalate for GitHub has a free trial, so you can try it out for free. Click the “Install it for free” box to take advantage of it.
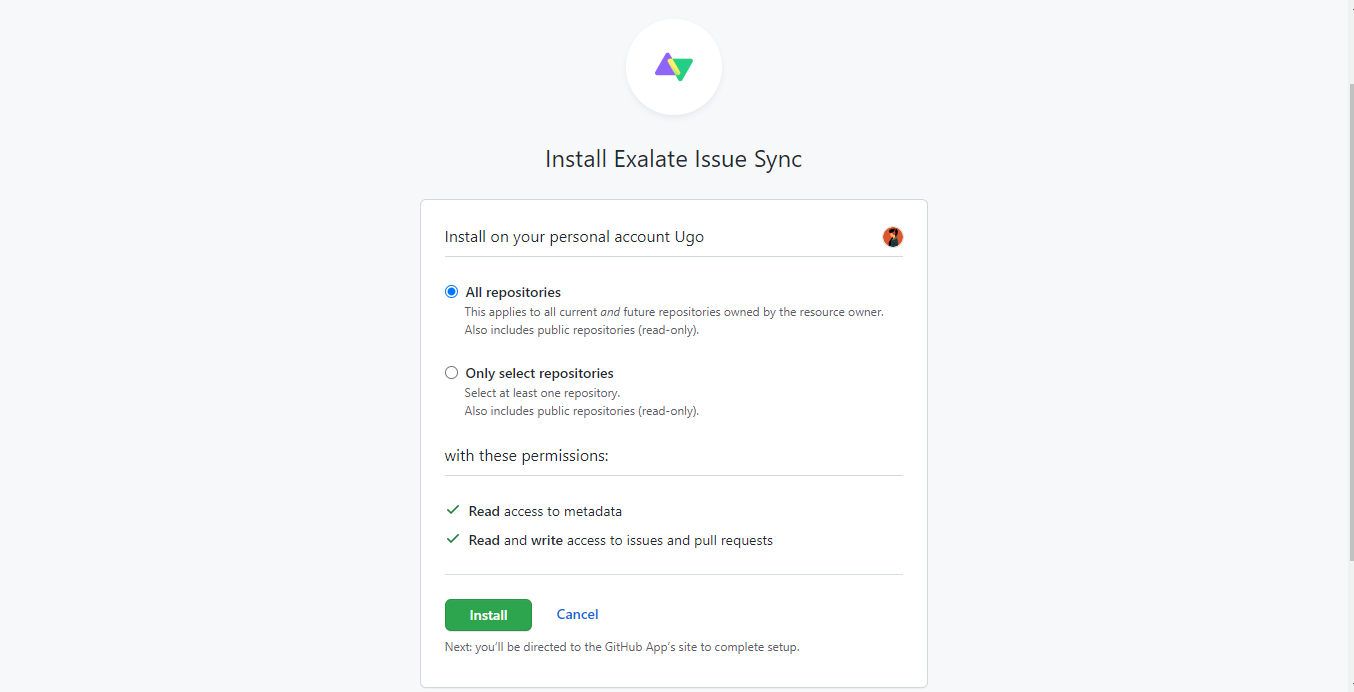
On the install screen, Exalate will allow you to select which repositories should be granted access to. You can pick all of them or a preferred selection. Exalate doesn’t need to access the code itself, as it just works with the metadata, the issues, and the pull requests.
Once you’re happy with your settings, click the “Install” button to continue. You’ll then head over to the official Exalate website to accept the user agreement.
Next, you can choose one of the two methods for accessing GitHub from Exalate. Giving it your username and password is the easiest, but that might be removed in the future. Creating an “OAuth token” is the other option.
Once you’ve set up the access, you’ll need to request an evaluation license for GitHub.

Note: If you don’t request an evaluation license, you won’t be able to synchronize issues later.
Step 3: Connect Azure DevOps and Github
After setting up Exalate on both platforms, we can now get to connect them. We need to initiate a connection on one platform, and then accept it on the other. We can generate the invitation from either side, but for this tutorial, we’ll go back to Azure DevOps and start there.
Go to the Azure DevOps node and log in with your access token. Once you’re in, check the menu on the left-hand side and click on “Connections”. On the connections screen, click the green “Initiate connection” button.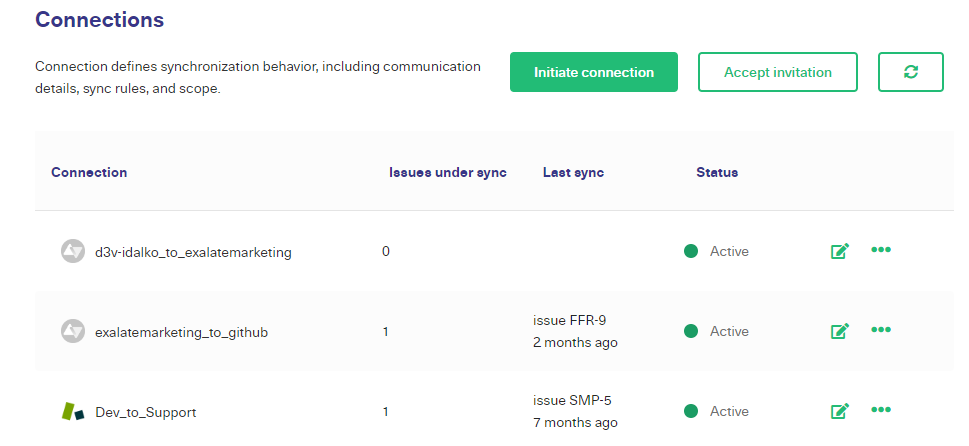
Next, enter the URL of your GitHub node. If you’re not sure what that is, access your GitHub account and look for the Exalate app in the marketplace. From there, click on “Configure access”. There’s a link next to “Looking for your Exalate Console URL” that will take you to a screen where you can enter your username and find your GitHub node.
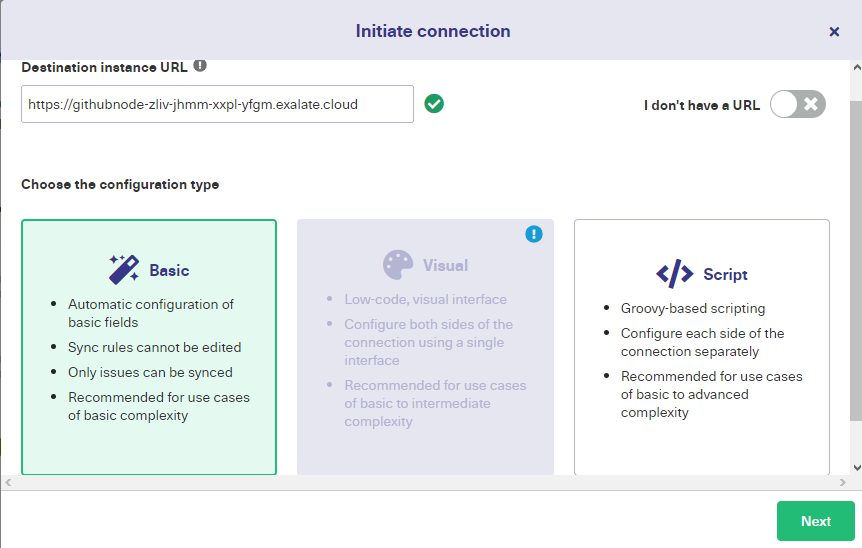
Here, a verification takes place to see if Exalate exists on the GitHub instance. After a successful verification, the above screen prompts the user to select the configuration type.
Exalate comes with 2 modes: the Basic Mode and the Script Mode. The Basic mode is suitable for use cases of basic complexity. The modification of the sync rules and other advanced configurations is not possible with this mode. It also comes with a Free Plan that allows up to 1,000 free syncs per month.
With the Script Mode, you can expect advanced configuration features for complex and unique business cases. With this mode, you can edit the sync rules and use “Groovy scripting” to pass almost any kind of information between the two instances.
For now, we will have a look at the Basic Mode, and then we will learn about the Script Mode.
Continue with the Basic Mode
After clicking “Next” on the screen above, you will need to select the project on the Azure DevOps side. This can be done by selecting one from a drop-down list.
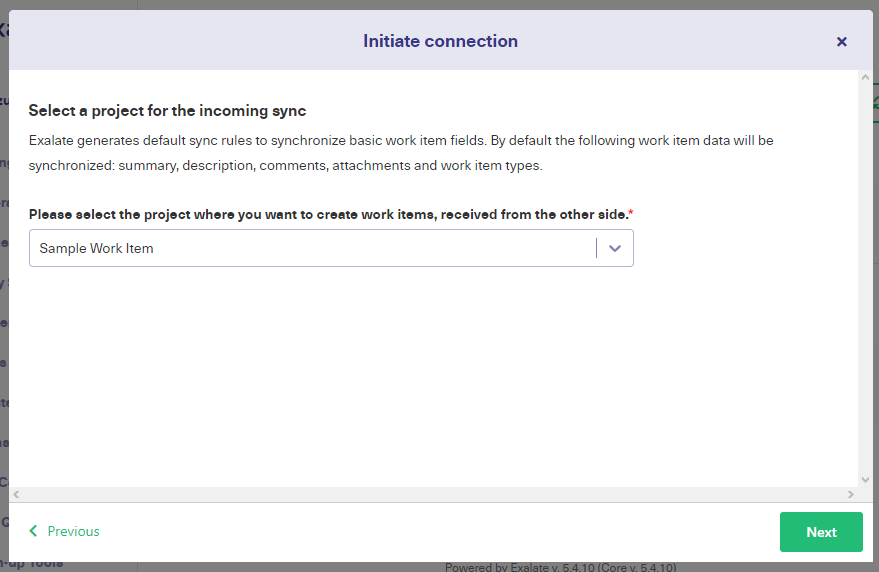
Hit “Next” after you select the project.
Now you need to verify if you have admin access to the GitHub instance or not. Don’t worry if you don’t have access; click on “No, I don’t have admin access” and you will be asked to copy and paste an invitation code on the GitHub side. We will be covering this in the Script Mode part.
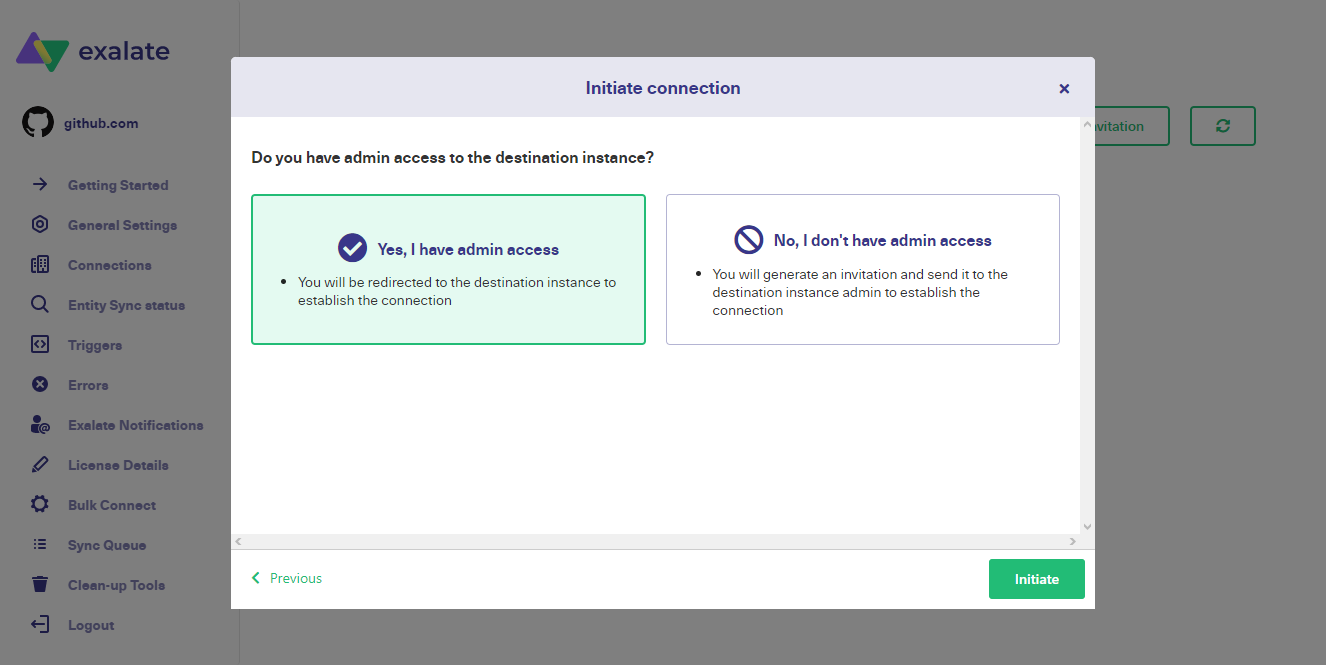
For now, click on the “Yes, I have admin access” button, “Initiate” and verify the access.
Upon successful verification, you will now be taken to the GitHub side for further steps.
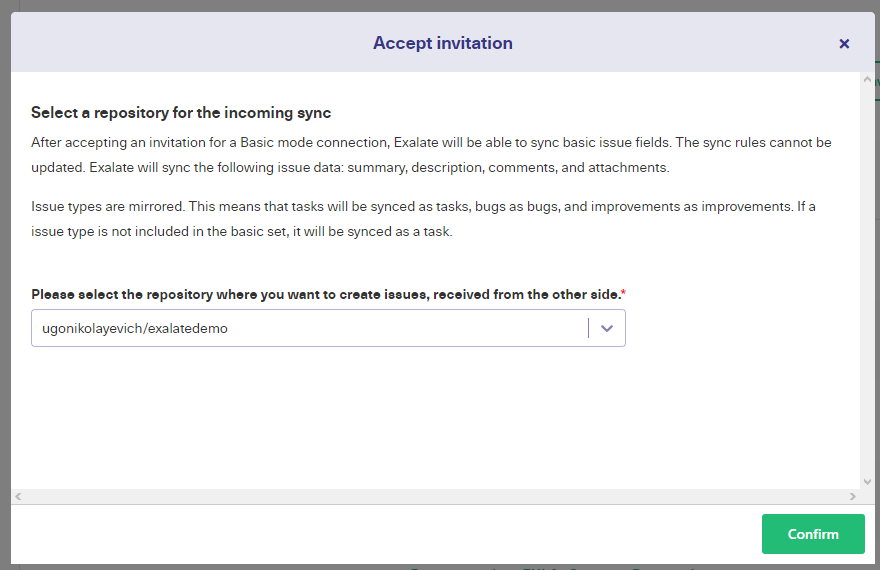
Here, as done for Azure DevOps you need to select the repository for the Github side as well.
Click “Confirm” and you will be asked to enter the issue key. This means a new work item will be created on the Azure DevOps side, where the details of the synced issue will appear. The same screen on the Azure DevOps side will prompt you to enter the work item number.
Either way, wait for some time for the synchronization to take place.
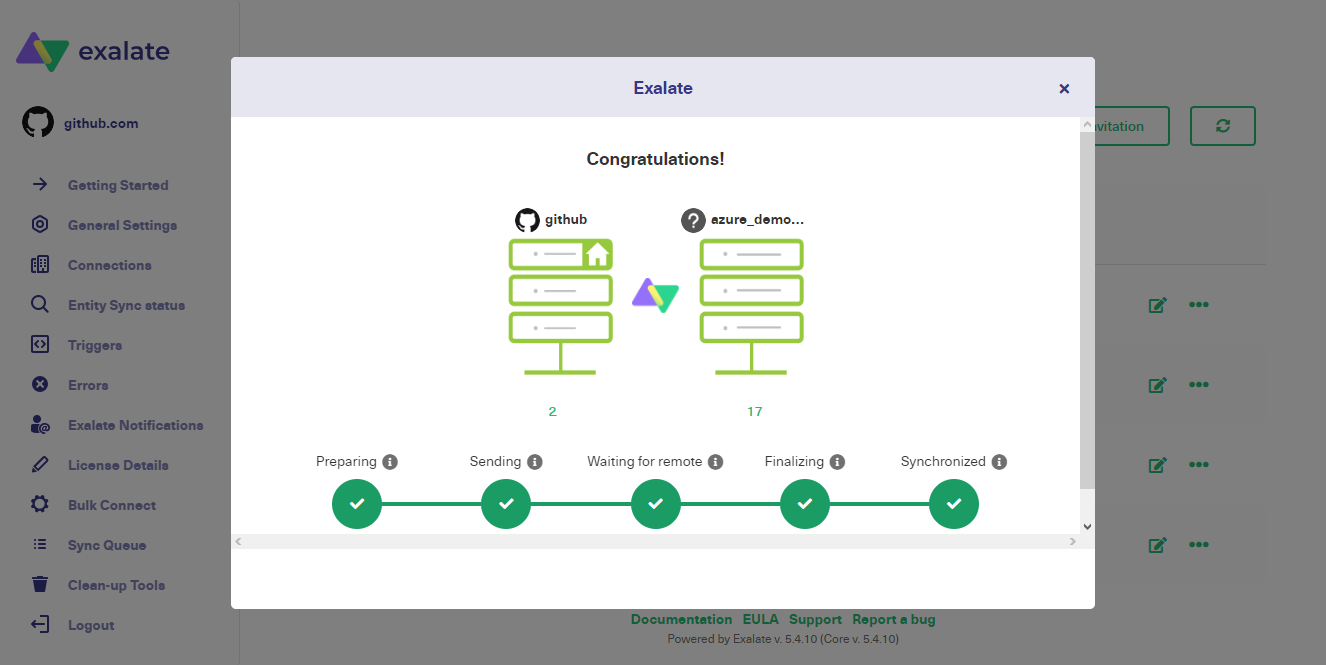
This is an easy way to sync issues or work items using the Basic Mode. You can even connect the issues for synchronizing or creating triggers (we will see them in a bit) or even “Bulk Exalate” issues to sync them all at once.
Continue with the Script Mode
The steps for the Script Mode are slightly different. Once you choose the “Script” Mode, you click “Next”.
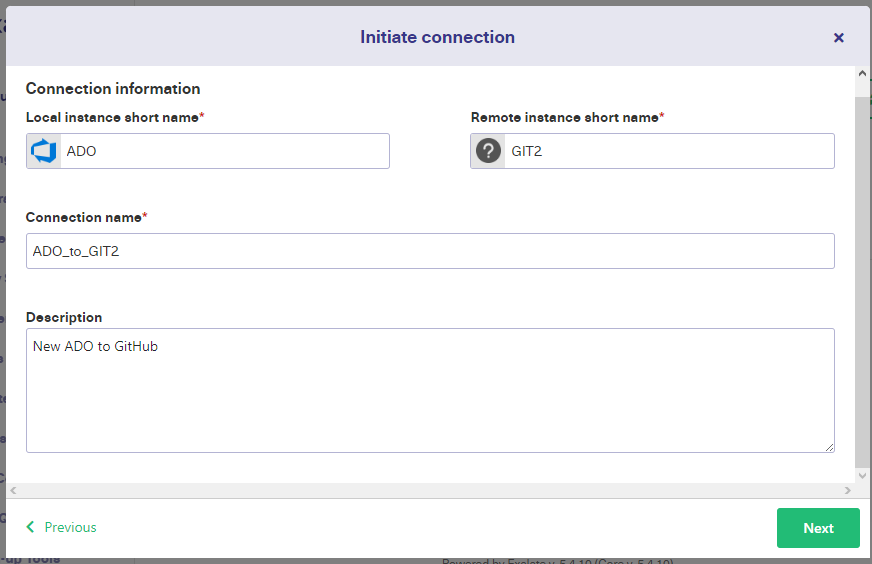
You must now enter the name for the local instance (Azure DevOps) and the remote instance (Github). Give meaningful names so that you will remember what the connection is for. The system will generate a name by combining both the local instance short name and the remote instance short name. You can choose to keep it as it is or change it if you want. Enter a description to identify what the connection has been established for and click “Next”.
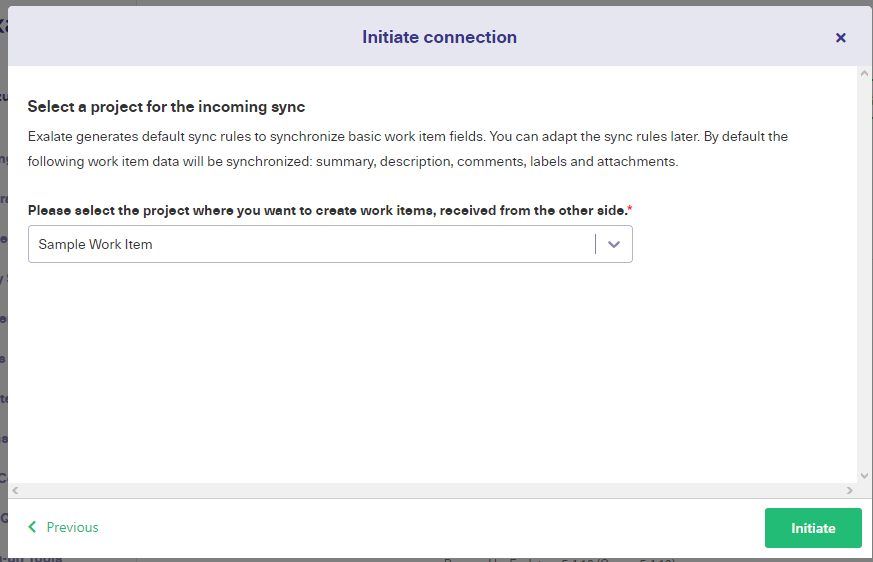
Select the project just as you had for the Basic mode and click “Initiate”.
After a brief pause, our connection is created and an invitation code is generated. We need to copy that and paste it somewhere safe. We’ll use it to accept the connection on our GitHub node.
We’re done with Azure DevOps for the time being, so click the “Done” button and then we’ll head back to GitHub.
In our Exalate GitHub node, click on the “Connections” text. This time, we’ll click on the “Accept invitation” button.
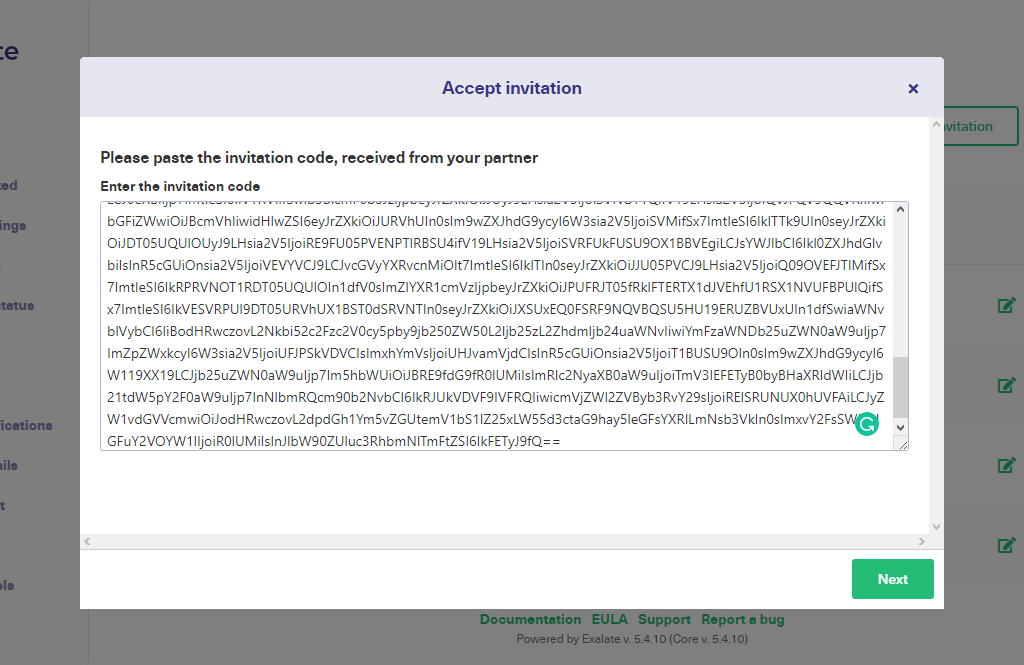
There is a big text field that allows you to paste the invitation code. Paste and click “Next”.
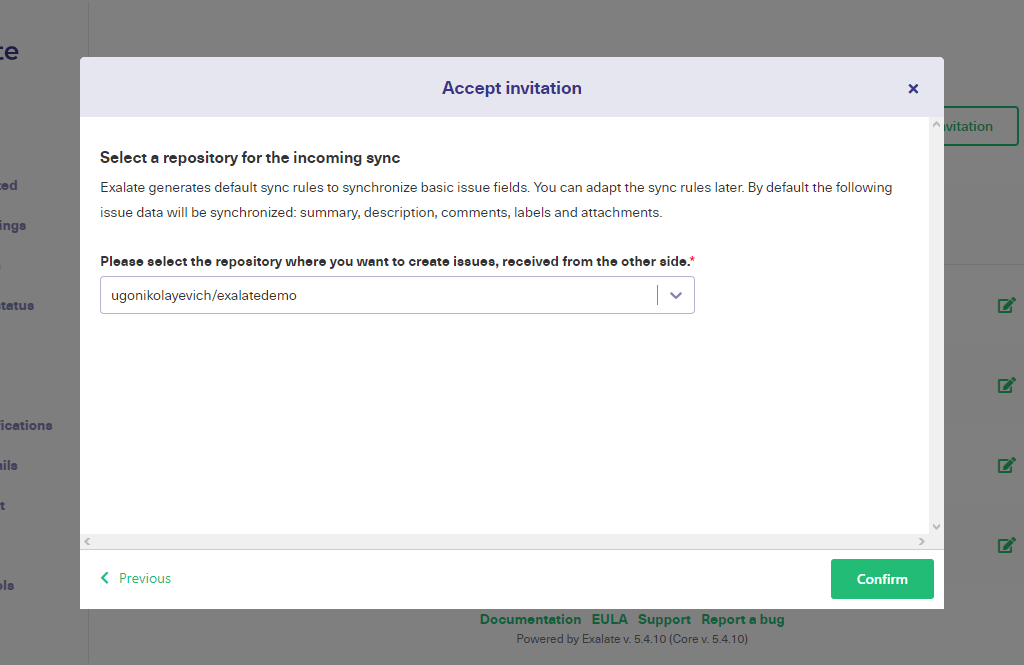
Select the repository now and click on “Confirm”.
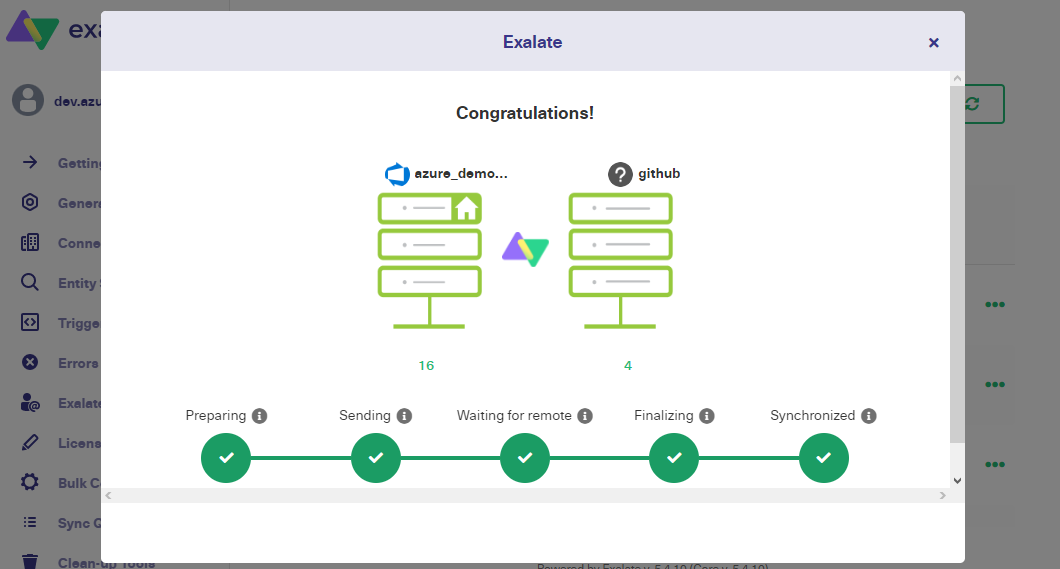
You have successfully set up a connection between GitHub and Azure DevOps. For configuring the connection you can either click the “Configure Sync” button or simply configure it by editing the connection later.
We will see this configuration in the next 2 steps.
Step 4: Configure your Connection to Determine What Information Gets Shared

Let’s make sure our connection shares what we want. In GitHub, click the “Edit Connection” icon next to your connection name.
Note: We are choosing to edit the connection for configuring it, but you can press the “Configure Sync” button shown in the step above as well.

You’ll see a screen with 4 tabs: “Rules”, “Sync”, “Statistics,” and “Info”. We are interested in the “Rules” tab for this step.
Here we can see a list of the synchronization rules. These show which fields on each platform are matched to those on the other. For example, in the outgoing sync, we can see most fields are matched to identically named fields on the other platform. There are some fields like that on the incoming sync rules and a few that use more complex rules to get the correct data.
We can edit these rules to give us more control over the data exchange. We can remove any we don’t want to share, add the ones we do, and edit fields with different names to swap data if that’s what we want. Be careful here as any mistakes will cause an error, so be sure to test what you do and make sure it works as intended.
For more information, read our script helpers guide.
Step 5: Set up Automated Synchronization Triggers
Now, our platforms are exchanging the information we want, but we also need to choose when the information is shared and what will trigger the exchange.
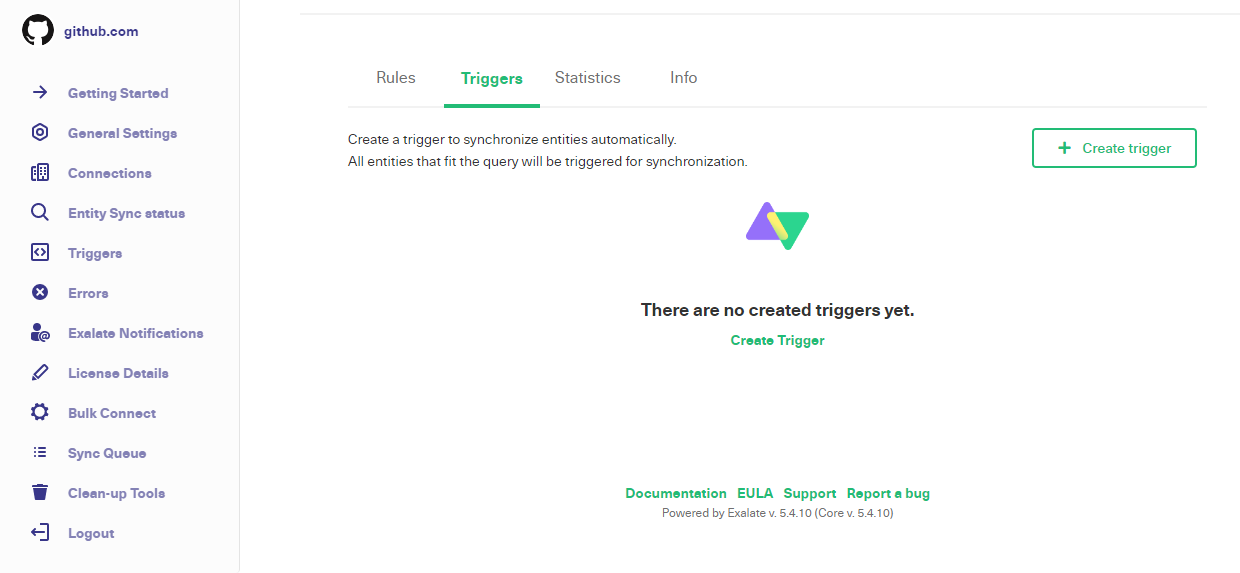
In your GitHub node, select “Triggers” from the left-hand menu. Then click the “Create Trigger” button.
Note: You can also create a trigger, by clicking on the “Triggers” tab in the edit connection section.

On this screen, you can set trigger conditions using GitHub’s advanced search syntax. If you hover over the “i” next to “if”, there’s a link to help you with that. You can choose the connection your trigger applies to, and add a note to help you track what your triggers do. There’s also an “Active” switch to turn the trigger on and off. When you’re ready, click “Create”.
To read more about this and other advanced configurations, check this link.
Common Pitfalls to Keep in Mind when Completing the Azure DevOps GitHub Integration
To make sure our integration goes smoothly, we’ll look at some of the issues that can happen when setting it up. Keeping these potential problems in mind will help us avoid them and ensure we get the best out of our software integration.
Role Clarification
The right software integration can help our teams work together more effectively and prevent siloing. Beware of the opposite problem though. It’s a good point that the teams know about each other’s issues, but we don’t want them working on the same things.
When storing information in the same place, it’s important to keep track of who’s doing what, so teams don’t get distracted. Making sure everyone is fully aware of what they are responsible for is critical. As well as tracking who is assigned to each issue, it might be worth flagging which team is handling it, too.
Message Overload
We need to keep track of what our software is doing and most platforms help us with this by sending messages when anything of note happens. When platforms are integrated, the flow of information increases, and this can result in more messages.
We don’t want this to become overwhelming. Getting too many notifications can decrease engagement and productivity. So, you may want to tune your notification settings to make sure you don’t see more than you want to when it comes to integrating platforms.
Architecture, Security, and Deployment for an Azure DevOps GitHub Integration
Now we’ll discuss Exalate technology in more detail. If you’re using it, you may be curious about its architecture and security features it has.
Architectural Autonomy
Here’s a diagram that shows Exalate’s architecture:

The blue end represents Azure DevOps and the red end represents GitHub. Exalate agents for each platform sit in between these two services and handle the exchange of information between them.
- The letters A-F show how information flows between platforms. Both services use Exalate as an intermediary, which maintains the autonomy of each one.
- The Exalate agents control the sending and matching of information from one platform to the other.
- As well as Azure DevOps and GitHub, there are Exalate agents available for Jira Cloud, ServiceNow, Jira On-Premise, HP ALM/QC, and Zendesk. More services are coming soon, so check back later if the one you need isn’t ready yet. You can also request an integration here.
Security
Security is a key consideration when exchanging information between platforms. Exalate is designed with security in mind so you can trust it to synchronize information securely.
It uses the secure HTTPs protocol for most data exchange and nodes use a reverse proxy for data termination. It also uses JWT to ensure data requests come from trusted sources.
Exalate protects your data by taking daily backups, which remain in storage for two days. It also conducts monthly penetration tests to help find and eliminate potential security issues.
To learn more about how Exalate keeps data safe, read this free, “Exalate Security and Architecture Whitepaper”
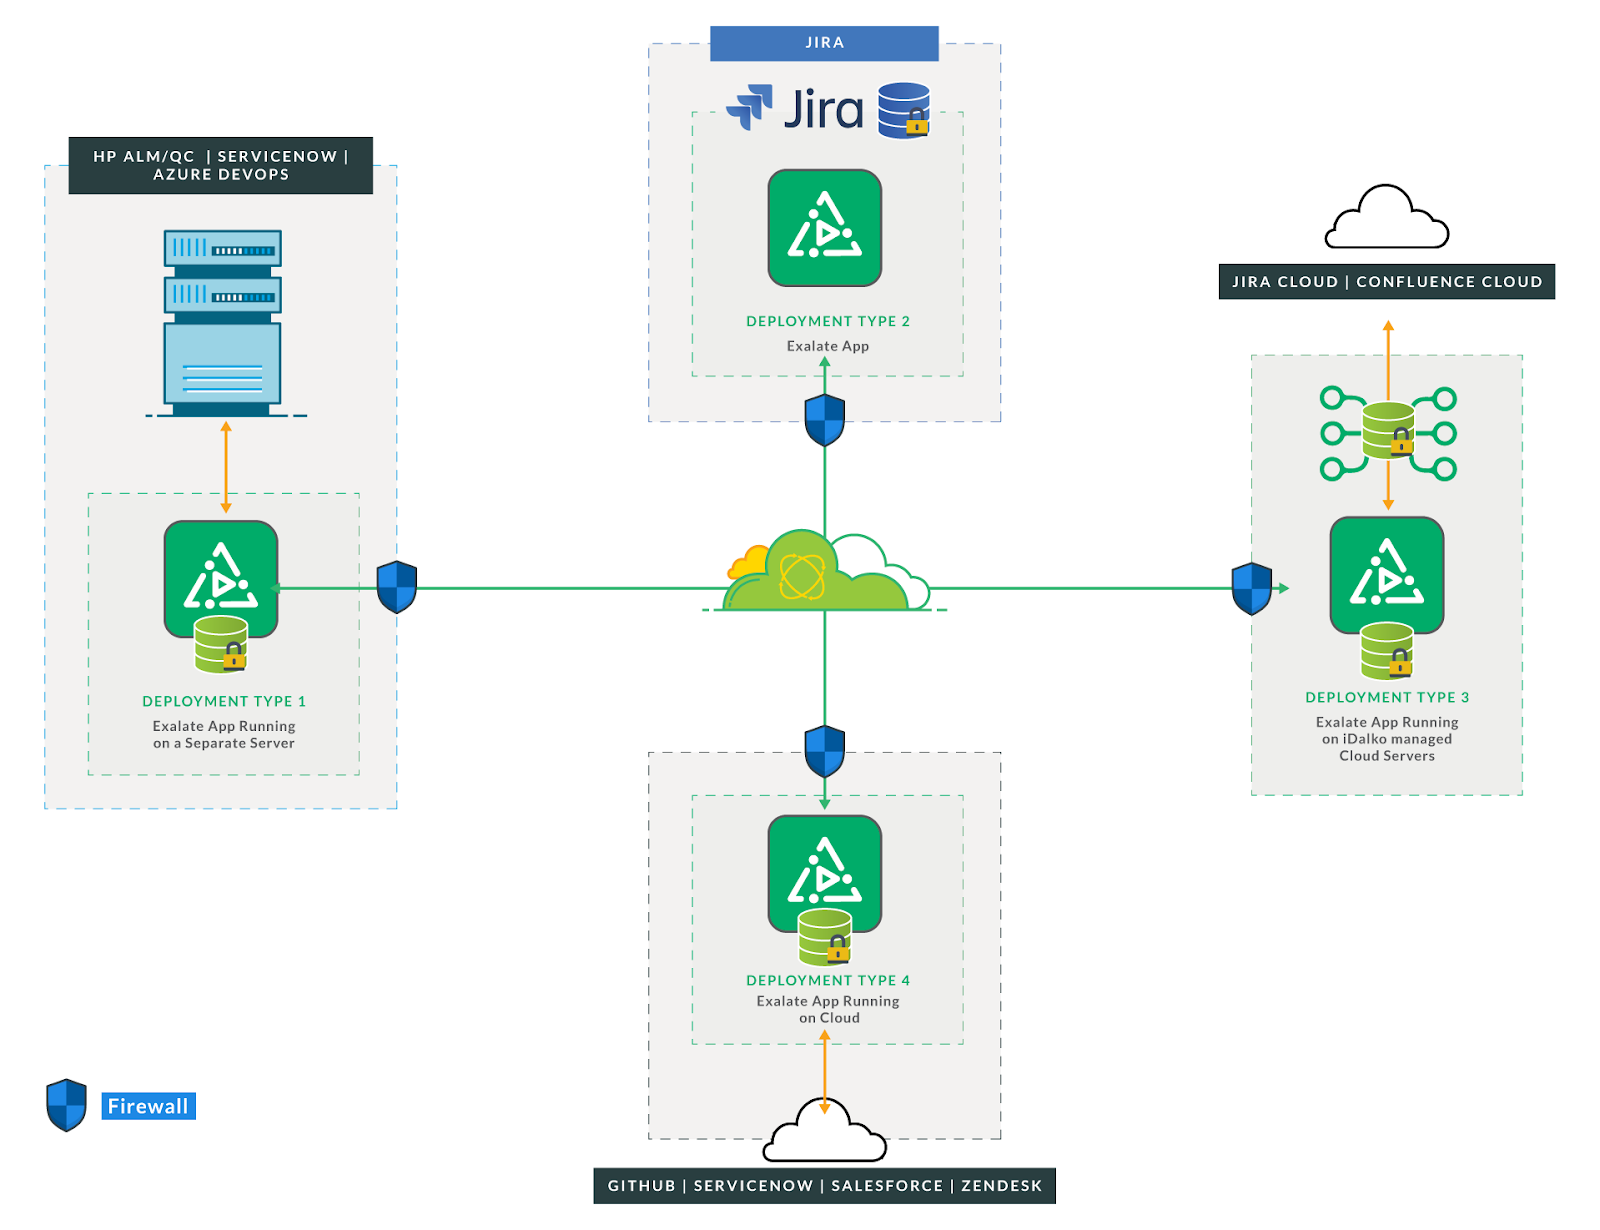
This image shows the relationship between Exalate and the services it supports.
Conclusion
If your teams are working on different platforms then it’s important to make sure they stay connected. There are many ways to do that, but getting the right balance between automation and customization can give an edge to your team’s performance.
Azure DevOps and GitHub both cater to different kinds of teams. Sometimes you want them kept apart. But when you don’t, you need a way to bridge the gap. We’ve done that with Exalate.
We’ve gone from having two different platforms with information tracked separately to an integrated system where data flows between the two automatically. The left hand now knows what the right hand is doing.
Frequently Asked Questions
Why should I integrate Azure DevOps and Github?
You can combine these powerful tools, Azure DevOps for its robust build, test, and deploy capabilities and GitHub for its feature-rich code hosting and version control abilities. Integrating these platforms can enable an automated end-to-end development process. You can also promote better code quality, facilitate cross-team collaboration, and simplify the management of work items and issues, delivering high-quality software faster.
Can I connect GitHub Enterprise with Azure DevOps?
Yes, you can connect GitHub Enterprise and GitHub Cloud with Azure DevOps. You can create a standard GitHub Enterprise Server service connection to a GitHub repository.
You can also integrate GitHub Enterprise with Azure DevOps to support advanced synchronization cases using third-party tools like Exalate.
Does Azure DevOps have a Git repository?
Yes, Azure DevOps has a built-in Git repository, which allows users to store and manage their code base. Apart from the regular Git repository, Azure DevOps also gives your team access to Team Foundation Version Control (TFVC).
How does GitHub integrate with Azure DevOps?
One way to connect GitHub and Azure DevOps is through GitHub Actions, which allows you to define custom workflows within your GitHub repository.
Azure DevOps pipelines can fetch source code directly from GitHub repositories and execute build and release processes.
Azure Boards, a project management tool in Azure DevOps, can integrate with GitHub issues.
You can also use third-party tools like Exalate that support a variety of different synchronization use cases to integrate GitHub and Azure DevOps.
How do I integrate Azure pipelines with GitHub?
With an Azure DevOps and GitHub account, you can integrate Azure pipelines with GitHub. Then, you can create a new service connection to authorize GitHub access to your Azure pipelines.
How do I move code from GitHub to Azure DevOps?
Both Azure DevOps and GitHub have Git repositories that support version control. To move code between them, you need to clone the GitHub repository before adding the Azure DevOps repository as a remote. Then use Git commands in your terminal to push the code to the Azure DevOps repository.
Can I integrate Azure DevOps and GitHub for free?
Yes, you can integrate some entities like Azure boards or pipelines for free between Azure DevOps and GitHub. There are also third-party plugins like Exalate that come with a Free plan to sync 1000 entities per month. The plan can be used for basic synchronization use cases. You also perform advanced integrations using simple code with Exalate.
Should I use GitHub or Azure DevOps?
GitHub and Azure DevOps both offer features for software development and project collaboration. If you are more interested in version control, GitHub is the go-to platform for you. If you want a comprehensive software development platform, Azure DevOps is the perfect choice.
Recommended Reads:
- Jira Azure DevOps Integration: The Complete Step-by-Step Guide
- GitHub Salesforce Integration: How to Set up a Sync in 6 Steps
- How to Set up a Jira GitHub Integration
- How to Set up an Azure DevOps Salesforce Integration
- How to Set up a ServiceNow GitHub Integration
- How to Set Up an Azure DevOps ServiceNow Integration
- How to Set up a Zendesk GitHub Integration
- How to Set up a Zendesk Azure DevOps Integration