Migrating Jira requires careful planning to avoid data loss and team disruption. This guide shows you how to migrate Jira safely using three approaches: Big Bang (fast but risky), Project-by-Project (gradual but complex), and Live Migration (recommended for zero downtime).
You’ll learn the exact steps, tools needed, and how to avoid common mistakes that cause migration failures.
Most important: With Atlassian ending Data Center support in March 2029, planning your migration now prevents last-minute scrambling.
Best way to migrate Jira: Use a live migration approach with real-time synchronization tools. This lets teams work during the transition, reduces risk, and avoids downtime. Budget 2-6 weeks for complete migration, depending on data volume.
Estimated reading time: 12 minutes
A side note: We want to be as clear as possible on how to migrate Jira to another application like Azure DevOps or a Jira data center instance. That is why this article can get a little technical towards the end. So, the end of the article might be mostly useful for your administrator. However, if you’re just using Jira as a user (but not as an admin), this article will still be valuable. If you’re the Jira admin, great! Otherwise, I’d recommend you share this with your admin as well. He (or she) will definitely thank you for it!
Now, let’s get into the nitty-gritty of the challenge that is: implementing a clean Jira migration.

What are the Different Ways to Migrate Jira?
There are several types of Jira migrations, each of which comes with its own pros and cons.
1. The Big Bang Approach of Migrating Jira
Following a Big Bang approach means you’ll be migrating Jira to a new Jira instance in one go.
You will achieve the migration in a single step.
Going forward, all access to your old system is redirected. So there can be no confusion as to where updates should be logged.
Because of these factors, a Big Bang migration can look superficially attractive.
However, it will mean downtime for users, and several other major drawbacks that we’ll discuss in a minute. So keep reading…
2. A Project-By-Project Approach to Migrating Jira
This approach means migrating projects, as required.
This is typically done when a project has been maintained on one Jira instance but then needs to be moved to another.
This might be due to reasons relating to infrastructure, security, or practicality.
When the migration is launched, access to the project is stopped, and all data (including configuration information) is sent over to the new instance in one go.
Users can then be informed that the project is available on the new instance.
This approach can be used to migrate a complete configuration to a new environment gradually. And while it is a more measured approach, it nevertheless comes with many of the same problems as a Big Bang migration…
3. A Work-by-Work Approach or a Live Jira Migration
Following this approach, work items (Old name: issues) are migrated from one instance to another as required.
So, work items are simultaneously available on both platforms.
Team members can then work on either platform and gradually switch over from one to the other.
Many consider this the most flexible and foolproof approach.
Migration Approach Comparison
| Feature | Big Bang | Project-by-Project | Live Migration |
|---|---|---|---|
| Downtime | Yes (hours to days) | Yes (per project) | No |
| Risk Level | High | Medium | Low |
| Rollback Option | No | Limited | Yes |
| Team Impact | High disruption | Medium disruption | Minimal disruption |
| Best For | Small teams (<50 users) | Medium teams | Enterprise teams |
| Timeline | 1-2 days | 2-8 weeks | 2-6 weeks |
The Dangers of Migrating Jira
A Big Bang migration sounds simple, but it can come with some major issues.
These include:
1. Losing valuable time when preparing for the migration process
A great deal of preparation is needed to ensure that the new system meets all operational requirements of the users and teams who depend on the system.
You can not underestimate this!
In many cases, people need to dedicate significant amounts of time to confirming that the new system is fully customized to their needs.
And, all too often, they’ll still miss crucial details.
2. Missing crucial details when migrating Jira to a new instance
During the transition period, you will have to factor in downtime during which neither Jira instance is operational.
You will likely want to schedule this for a low-traffic period, such as a weekend, with an advance announcement of the planned downtime.
However, if the migration fails, then everything needs to be rescheduled and repeated.
Trust me, that’s not fun!
You will have to follow up with further testing with repairs to the migration process. You’ll then need to do this again and again until you get it right.
This is the kind of big-bang migration that you really don’t want.
3. Losing crucial data after Jira has been migrated
When the moment of truth arrives, and staff begin really using the new environment, then no rollback is possible.
At this point, you’ll conclusively find out whether you’ve done enough preparation.
If one team finds a blocking issue while other teams are happily using the new system, then the administrator hits a wall.
The dissatisfied staff will have to either wait for the functionality to be built or for a workaround to be devised for their issue.
But failing that, they’ll have to make do without it.
As with the real Big Bang, you can’t do a re-run…
Why is live migration better than Big Bang?
2 words.
Less friction.
Running a Live Migration removes nearly all of the problems and friction that might occur when migrating Jira to a new server.
With a Big Bang migration, some degree of dissatisfaction is almost inevitable.
Staff want their environment to continue to work as they know it. And introducing significant changes will always have an impact on operations, however big or small.
Given limits to spec’ing and testing, there is a very good chance that at least some features and functionality will be missing, altered, or broken.
What’s worse, this will often only be revealed once your users pick things up on the other side of a Big Bang migration.
Our view is that bringing about change in an organization is best done by making incremental improvements to the environment without causing disruption.
A Live Migration achieves just this, allowing for projects and work items to be gradually transferred from one system to another. This makes the process simple and painless.
Synchronization of data (using tools like Exalate) ensures that users will find what they need, as they need it, on both platforms.
Small changes can then be applied to the new system to make it just perfect.
All the while, your staff can keep using both systems in their day-to-day operations.
If something doesn’t work to their needs, then they can continue to use the original system while the configuration is adapted to the new environment.
Once the new configuration is perfected, the whole team can make the switch. Only when the staff is completely satisfied can the old configuration be dismissed.
By building this flexibility into the transition, the migration is ultimately made far easier and safer.
Before we discuss the actual implementation, I want to share a couple of common Jira migration use cases that companies usually look for.
When should you migrate Jira?
Simply transferring your data from one Jira to another is not migration. It’s about ensuring your workflows, configurations, and teams can continue to operate without a hitch post-migration.
Let’s look at a few Jira migration use cases to help you prepare for what’s coming next.
1. Consolidating Multiple Jira Instances
Large organizations often end up dealing with multiple Jira instances after mergers, acquisitions, or other department-level purchases. Consolidating these instances will simplify the administrative work and provide a unified view of projects and work items across teams.
2. Migrating from Jira Server to Jira Cloud
With Atlassian phasing out the use of Jira Server and encouraging the move to Jira Cloud, organizations are slowly opting for this. It will ensure you have access to all the latest Jira features, lower maintenance overload, and better resource scalability.
3. Migrating from Jira Cloud to Jira Data Center
Enterprises that have strict security and compliance requirements or large-scale operations often prefer moving to Jira Data Center, which offers high availability and robust performance. I have seen this happen a lot in the banking or healthcare sector, where control over data is critical.
4. Splitting a Jira Instance into Multiple Instances
This use case is the opposite of the first one we discussed. Sometimes, organizations decide to split a Jira instance when teams need more autonomy or when sensitive data needs to be isolated due to regulatory requirements.
Jira migrations aren’t limited to moving between Jira setups.
Often, organizations look to switch platforms entirely, such as moving from Jira to Azure DevOps (or vice versa), or from ServiceNow to Jira Service Management (JSM).
These migrations are driven by business needs, team preferences, or platform-specific advantages.
Important: Atlassian Data Center End of Life Announcement
Atlassian officially announced that Jira Data Center and other Data Center products will reach end of life on March 28, 2029. This affects organizations currently running Jira and other Atlassian products in Data Center environments.
Key Dates You Need to Know:
- March 30, 2026: No new Data Center license sales for new customers
- March 30, 2028: Existing customers can no longer purchase licenses or expansions
- March 28, 2029: All Data Center licenses expire and become read-only
What This Means for Your Organization
After March 28, 2029, Data Center instances will become read-only, with no further technical support or security updates. Organizations running Data Center need to plan their migration strategy now rather than waiting until the deadline.
How Exalate Helps with Data Center Migration
Exalate offers a reliable migration path from Jira Data Center to:
- Jira Cloud
- Another Jira Data Center instance (as an interim step)
- Cross-platform migrations to Azure DevOps or ServiceNow
Our live migration approach means you can move gradually without the risk of a Big Bang cutover. Your teams continue working while data synchronizes in real-time between environments.
Ready to plan your Data Center migration? Start with Exalate’s 30-day free trial to test your migration strategy with zero risk. Learn more about Atlassian’s Data Center EOL.
What Does a Jira Migration Cost?
Tool Costs
- Exalate: Request custom migration pricing
- Atlassian Cloud Migration Assistant: Free (basic migrations only)
Time Costs
- Small instance (<1,000 issues): 1-2 weeks
- Medium instance (1,000-10,000 issues): 2-4 weeks
- Large instance (>10,000 issues): 4-8 weeks
Hidden Costs to Consider
- Staff training on new system: 2-5 days per team
- Custom workflow recreation: 1-3 days per workflow
- Testing and validation: 1-2 weeks
- Potential productivity dip during transition: 10-20% for 2-4 weeks

How to Implement a Jira to Jira Live Migration
At this point, you know about the types of migrations and the dangers they come along with.
Now it’s time to show you exactly how to migrate your Jira safely to a new data center (or cloud).
A heads up, this part is a bit technical. So if you’re not a Jira administrator, be warned.
For the reasons we explained above, we will be doing a live migration.
In this case, we’ll be taking an example of migrating Jira to another Jira. We’ll be migrating all agile information within the projects. This includes sprints, epics, all work data, including work key, change history, work links, sub-tasks, typical work custom fields, etc.
To implement the live migration, we use Exalate.
Exalate is an add-on for Jira that allows you to synchronize issue data in real-time.
You can try Exalate for free for 30 days. That should be more than enough time to complete the migration.
So let’s get to it!
Pre-Migration Checklist
Before starting your Jira migration, verify:
- You have admin access to both Jira instances
- You’ve backed up all data from the source Jira instance
- Custom fields and workflows are documented
- Team members are notified about the migration timeline
- You’ve identified which projects need migration
- Third-party apps and plugins are compatible
- Testing environment is ready for validation
Step 1: Install the Exalate Migration Tool
The Professional plan for Exalate’s Jira app starts at $6 per month for each system. To find out about the cost of the Enterprise plan, read more about Exalate pricing on our website.
First, you’ll have to download Exalate.
To do this, head over to the Exalate page on the Atlassian Marketplace.
Once there, click “Try it free”.

Then just follow the step-by-step wizard. If you need more details on setting up Exalate, you can have a look at the following documentation page for Jira on-premise or the following documentation page for Jira Cloud.
Step 2: Install the Exalate Synchronization Tool on the Other Instance
To implement the migration, you will need to have Exalate installed on both the initiating instance as well as the destination instance.
So, repeat step 1 for your other instance as well. You can choose the destination instance on the Exalate integrations page and proceed further.
Note that if more than 2 instances will be involved in the migration, just set up Exalate for any of the other instances as well.
Step 3: Connect the Jira Instances
Now we’ll configure a connection between the instances using Exalate.
Exalate connects instances based on invitations. This means you’ll have to initiate your connection on one side, after which you will receive an invitation code on the other side.
Don’t worry, this is easier than it sounds. I’ll walk you through it.
Navigate to “Connections” in the left pane and click “Initiate connection”.

Now you’ll be asked to enter the URL of the destination instance.
Add the URL of the other Jira instance and click “Next”.
You’ll have to select your “Configuration type”. Exalate supports three configuration modes: the Basic mode, the Visual mode (BETA), and the Script mode.

For migration, we’ll consider the Script mode only.
Now you will have to add a “Connection name” and click “Next”.
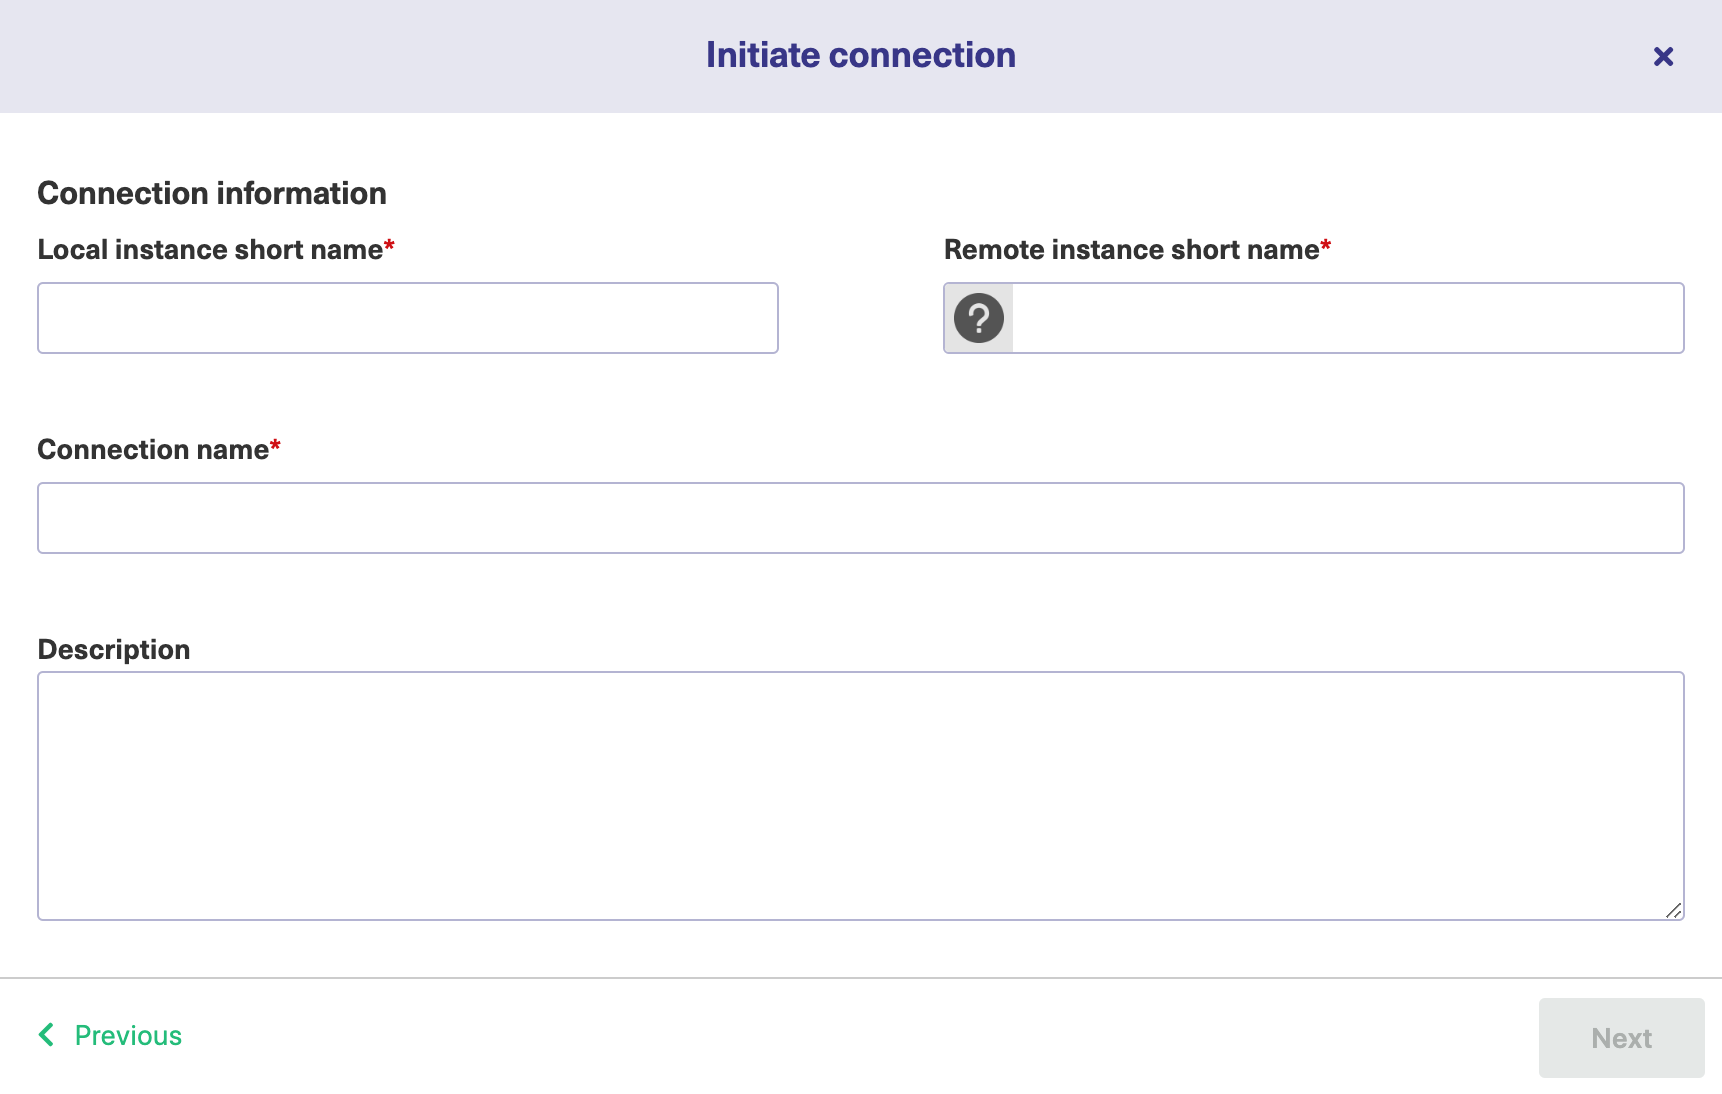
Select the Jira project you’ll use for migration.

Now, an invitation code will be generated to accept the invitation on the destination instance. Once that is accepted on the other side, you will be able to start the live migration of the Jira work.
So copy the script to your clipboard and move on to the other instance (or send it over to whoever has access to the new instance).
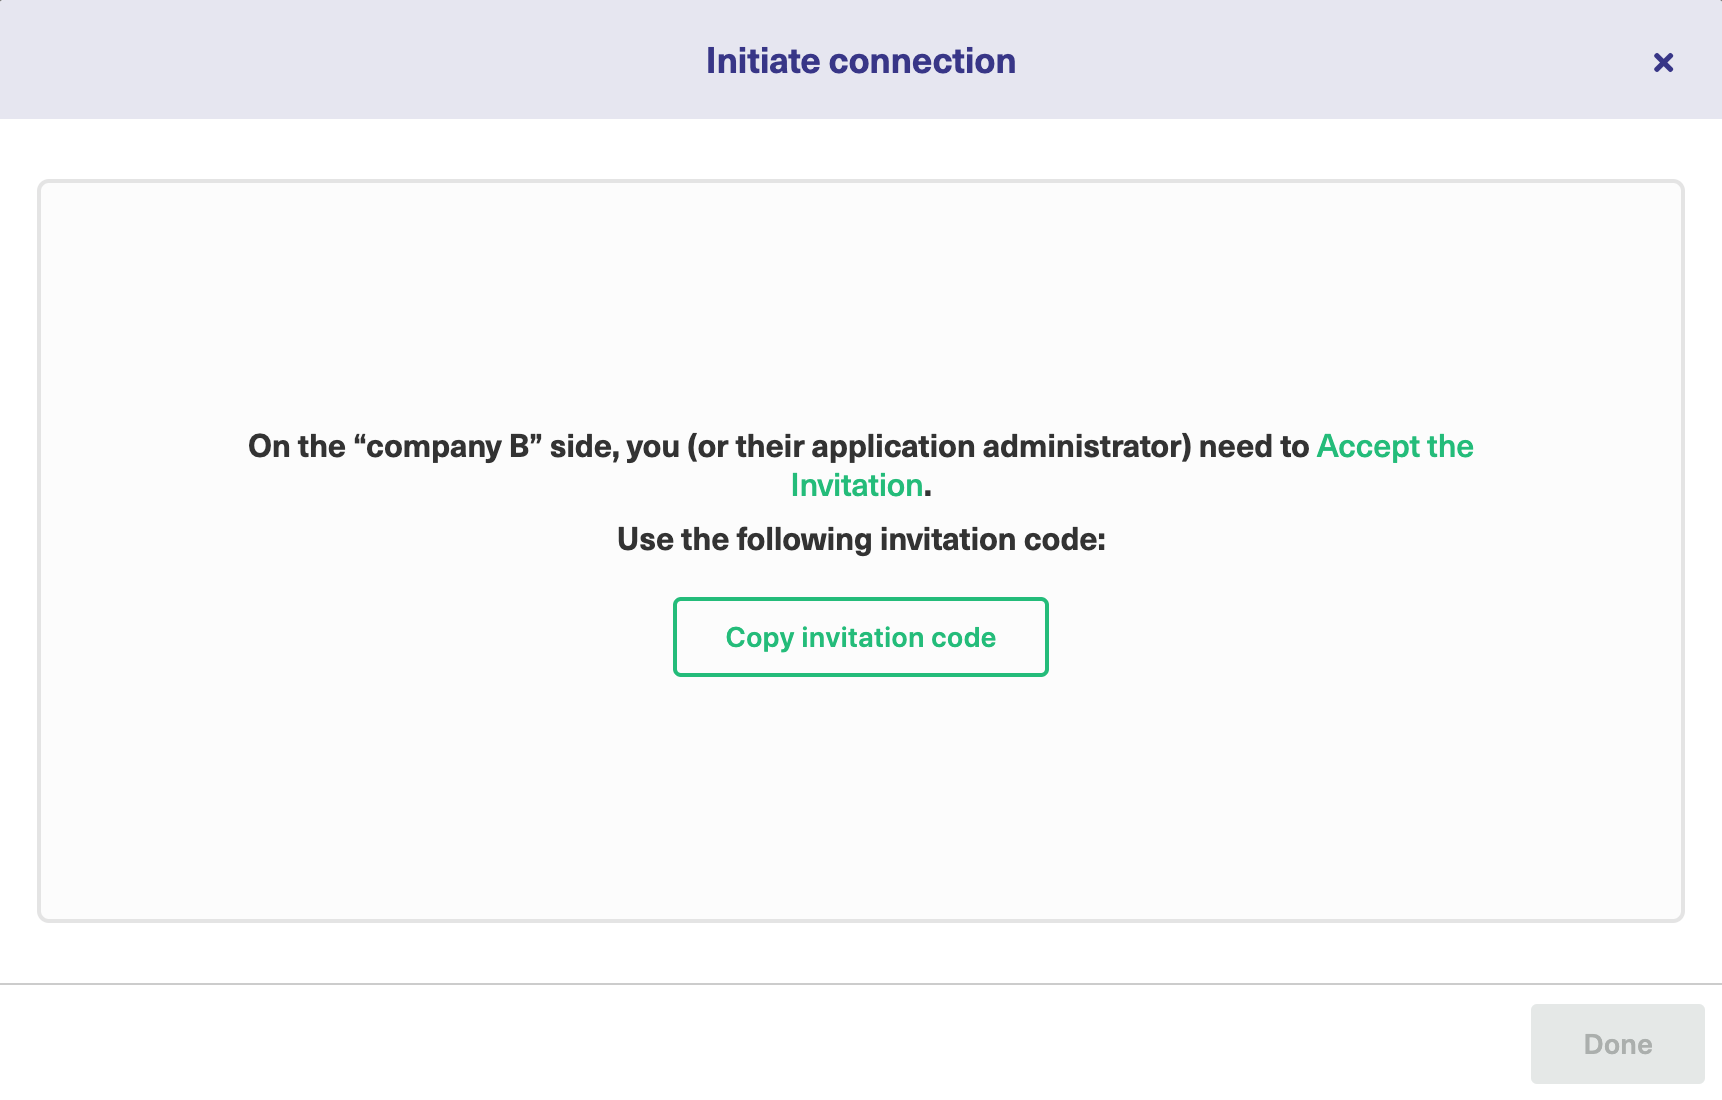
On the other hand, this time, click the “Accept invitation” button.
Paste the invitation code you just generated.
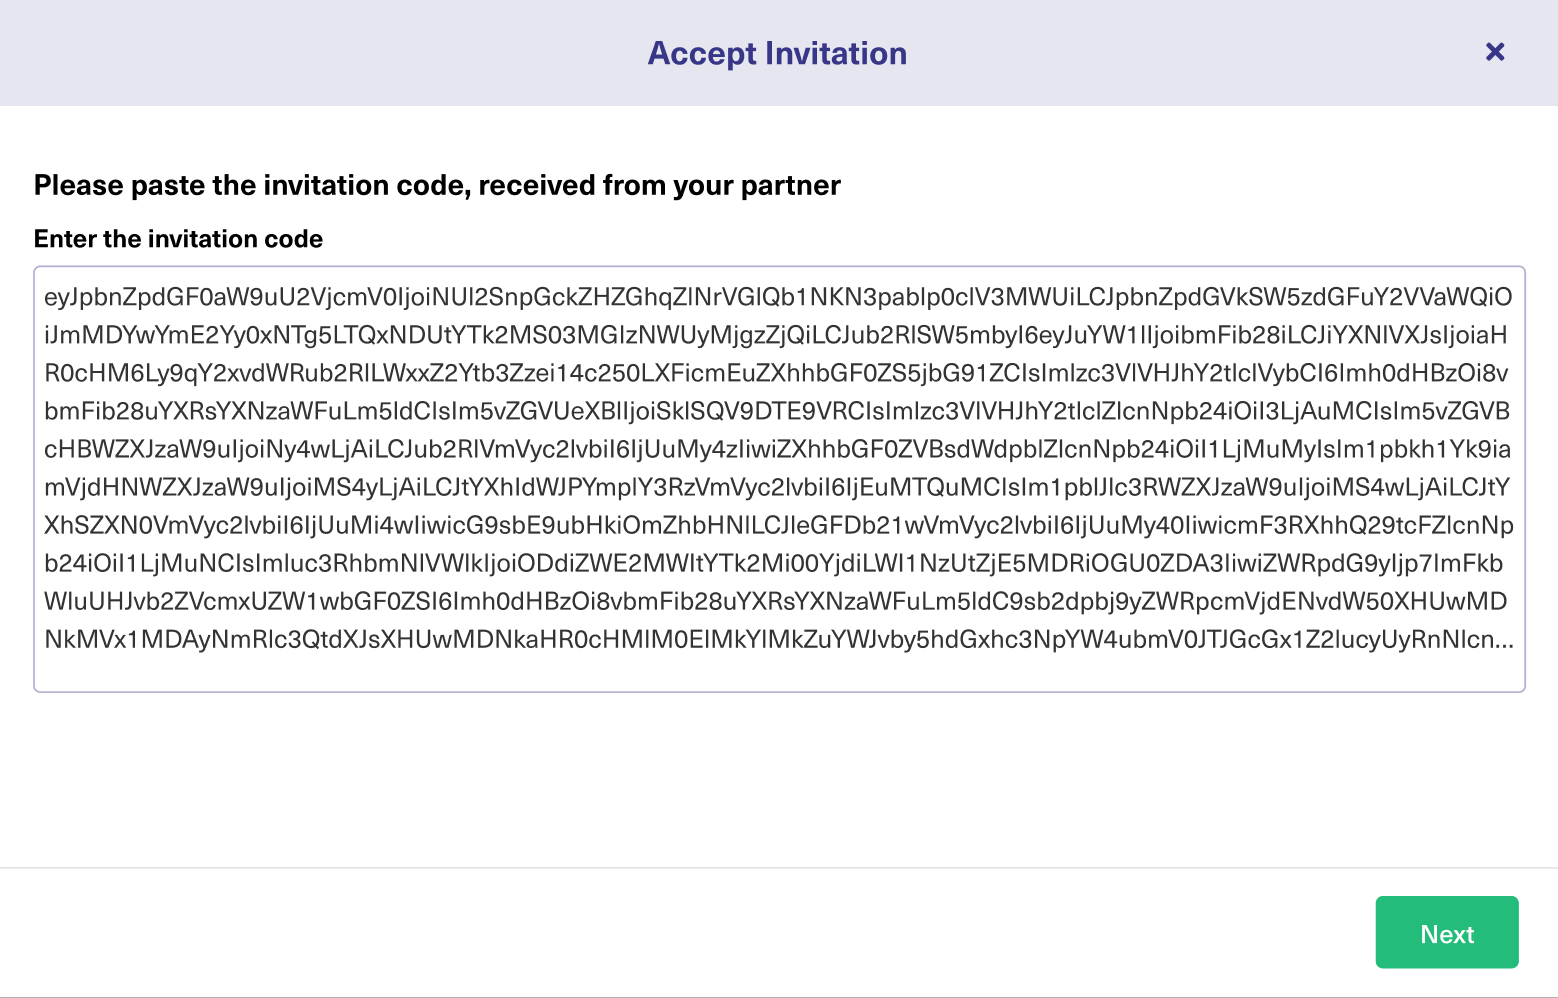
It will be automatically validated.
Click “Next” to proceed.
Select the project name again where you’d like to migrate the work items to.
Awesome, now the 2 instances are connected!
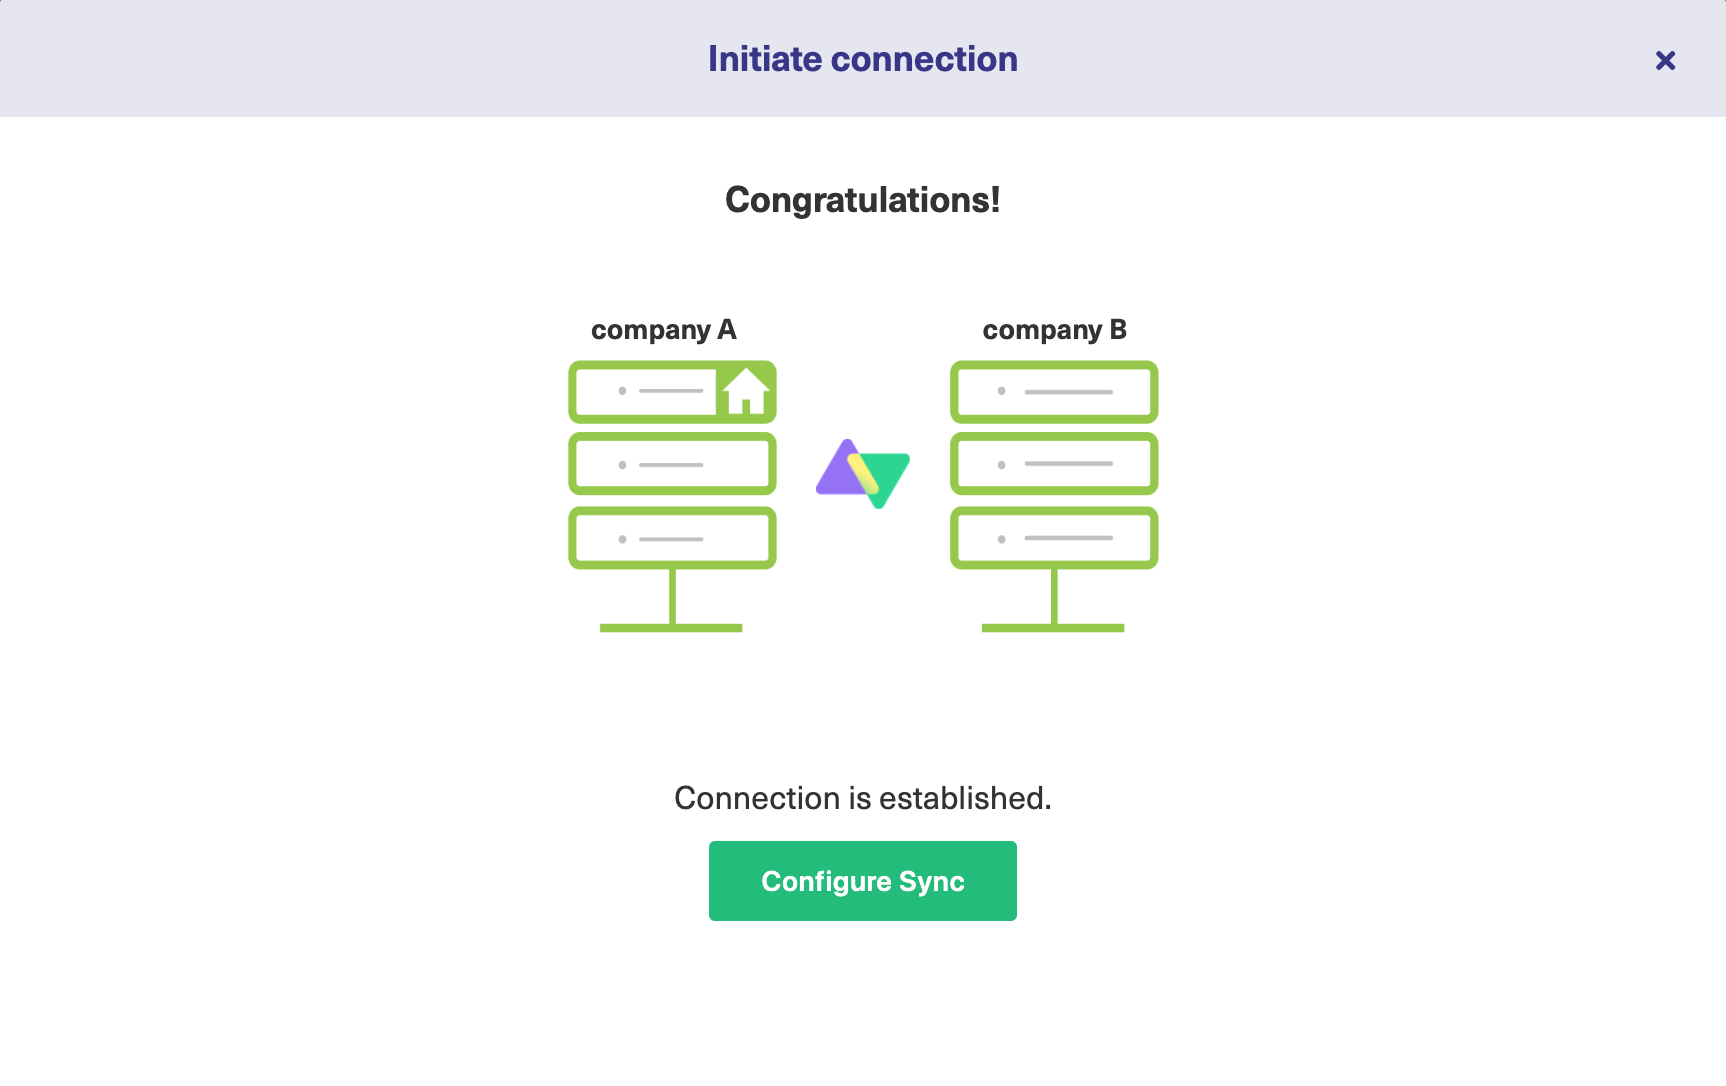
Once the connection has been set up, you can proceed with the migration.
Step 4: Configure the Connection for Migration
After the connection is set, you’ll still need to do some minor configuration to the synchronization rules. This way, we’ll make sure the connection is correct for your specific migration use case.
With the default sync rules, you can migrate the summary, description, type, assignee, reporter, comments, attachments, and labels.
However, if your migration requires more advanced configuration, you need to edit them in this step.
To access the configuration, click on the “Configure sync” button shown in the image above or head over to “Connections” (from the left menu).
On the “Connections” screen, click on “…” next to the connection you would like to configure and click “Edit”.
After that, go to “Sync rules”.
This is where you should end up:

Now this part might be a little tricky, so stay with me.
Here you will have access to the scripts of:
- Outgoing sync script – information leaving your Jira instance
- Incoming sync script – information coming into your Jira instance
The same scripts exist on the other side as well, with their functionalities reversed.
You will have to copy/paste new scripts into each one of these based on your needs. If you don’t wish to migrate some data, simply delete or comment those lines.
The scripts will differ based on whether you’re migrating from cloud to on-premise, or from on-premise to cloud, and so on.
Step 5: Create the Migration Trigger
Now we’ll need to create a “Trigger”.
This will be super easy.
The “Trigger” will determine when issues will be migrated/synchronized to the other side. As well as choose when not to migrate issues. Of course, the second choice is completely optional.
To create the trigger, navigate to the “Triggers” tab in the configuration screen. Click the “Create trigger” button.
Here, you’ll want to choose to sync certain projects. Just add that project to the trigger.

Again, in this example, I decided to call the project “FIR”, but yours will have a different name.
Tip: You can also set advanced triggers in JQL like, choose to not migrate issues with the label “nosync” or empty labels.
If you’re satisfied with the trigger rules, activate it and click “Add”.
Step 6: Start Migrating the Jira Work
After you’ve managed to successfully create the trigger, you’ll be able to start migrating work items.
To achieve this, click on the “…” button in the Action column next to the correct trigger.
There you’ll be able to select “Bulk Exalate”.

That’s it!
Now the work in the project you’ve selected will be automatically synchronized to the other side.
You can check the “Sync queue” to see if any errors are occurring. Everything should be in order.

Start tracking all your nodes, connections, and errors. Exalate has a dedicated monitoring dashboard where you can keep an eye on all the active and inactive connections on your node over a specific period (monthly or annually).
Step 7: Transfer the Whole Team by Providing Training
After migration has been completed, it’s possible your team will require some time to adjust to the new system.
In order to streamline the efficiency of using the system, I’d recommend dedicating some resources to training staff.
This will save you valuable time, human errors, and overall confusion in the end.
Step 8: Stop Migrating Work
When all of your data has been transferred and teams are familiar with the new system, you can stop the synchronization.
Step 9: Dismiss the Old System
Is everything running smoothly now? Is the staff getting adjusted to the new Jira?
If so, it’s time to pull the plug on the old system!
Congratulations, you’ve completed a smooth transition from your staff to your new environment.
Hope it was a smooth ride. Kudos!
Common Jira Migration Problems (And How to Fix Them)
Problem: Custom fields not migrating
Check that field types match on both instances. Map custom fields in your sync rules before starting migration.
Problem: Attachments missing after migration
Verify file size limits on the destination instance. Large attachments may need a separate transfer.
Problem: User accounts not matching
Create a user mapping file before migration. Ensure email addresses match between systems.
Problem: Migration running too slowly
Reduce batch size in your sync settings. Migrate during off-peak hours for better performance.
Problem: Work links breaking
Use migration tools that preserve work link relationships. Test with a small project first.
Conclusion
Performing a migration from one system to another is never easy.
Fundamentally, though, the challenges in the transition are not just about technology. It’s about the people using it and the way they work.
That’s why it’s crucial to ensure the new configuration completely meets their needs.
The problem here is that getting user feedback is always difficult. Users will rarely have enough time to explain their requirements in the necessary detail or validate new software to the degree that is required.
Because of this, a Big Bang migration may well be followed by a ‘WTF’ moment. This usually only happens when staff have to put the new instance to use.
And at this point, you might be left without having the option to roll things back.
The gradual transition made possible by a Live Migration, on the other hand, allows for an iterative and controlled evolution of the environment. That’s why we recommended this approach in some way for most use cases.
How about you? Did you find this article useful? Did you have any migration stories people could learn from? Share your thoughts in the comments below!
Frequently Asked Questions
What types of Jira migrations can Exalate handle?
Exalate handles any Jira migration scenario—Cloud to Cloud, Server/Data Center to Cloud, between Server instances, or cross-instance migrations within the same organization. It works for simple moves and complex consolidations where you’re merging multiple instances. You can do complete instance migrations, selective project moves, or merge acquired companies’ Jira data. For example, suppose your company acquires another business and both use separate Jira Cloud instances. In that case, Exalate can migrate all their projects, issues, and custom fields into your main instance without losing data.
How is Exalate different from Jira’s native migration tools?
Jira’s Cloud Migration Assistant handles straightforward lift-and-shift migrations where you move everything as-is. Exalate gives you much more control by allowing you to selectively migrate specific projects or issues using JQL filters, transform data during migration with Groovy scripts, and keep both instances running while you test. It lets you migrate incrementally, customize field mappings, handle different configurations, and maintain bidirectional sync during transition periods so teams can keep working.
Can I test my migration before going live?
Yes, you can set up a complete test migration to a sandbox environment, validate that everything migrates correctly, and identify issues before touching production. You can also do phased migrations—move pilot projects first, get feedback, make adjustments, then migrate remaining projects.
What do I need to set up before starting?
You need Exalate installed on both instances with admin access. Do the following:
- Document everything: custom fields and their types, workflows and statuses, issue types and schemes, and any special configurations you need to preserve.
- Create matching custom fields and issue types on your destination instance since Exalate syncs data into existing configurations.
- Set up a test project on the destination to validate settings before production.
- Identify which users need accounts on the destination to preserve assignments.
How do I map fields between different Jira configurations?
Field mapping happens through Groovy scripts in Exalate’s sync rules. You define which source fields map to which destination fields, and transform data if names or types don’t match. You access source data from the replica object and write to the destination issue object. You can also handle complex transformations like converting field types, splitting text into multiple fields, or applying conditional logic.
Can I migrate issues without their history?
Yes. By default, Exalate migrates the full history, including comments, status changes, and attachments. But you can configure sync rules to exclude history and only transfer current field values. This creates a clean slate where issues appear with current data, but without years of accumulated history. It’s useful when you want to archive old data separately, speed up migration, or when historical context isn’t needed. You can also be selective—maybe include the last 6 months of comments, but skip everything older.
Can I migrate custom fields and custom issue types?
Yes, you can migrate custom fields and custom issue types, but you must create matching custom field definitions and issue types on the destination first. Exalate syncs data between existing configurations rather than creating new fields automatically. This gives you control over how fields are configured on the destination. Once you create matching fields on both sides (they don’t need identical names, just compatible types), your sync rules map values during migration.
How long does a typical migration take?
It depends on volume and complexity. A small project with a few hundred issues might finish in under an hour. Thousands of issues with extensive histories and large attachments could take hours or days. Exalate processes in batches, so it’s about the total volume. Most organizations do incremental migrations over weeks rather than one massive push.
What happens to issue links and attachments during migration?
Both migrate with your issues. Exalate preserves issue links—if Issue A links to Issue B on the source, that relationship recreates on the destination (assuming both issues migrate). This includes all link types: blocks, relates to, duplicates, and custom types. Attachments transfer too, though large files can slow migration. Some organizations migrate issues without attachments initially for speed, then sync attachments separately. Others filter out very old attachments or unnecessary file types based on storage requirements.
What if the migration fails partway through?
Each issue migrates independently, so failures only affect specific issues while others continue processing. Check Exalate’s sync queue to see which issues failed and why—usually it’s a required field missing, field type mismatch, or invalid value. Fix the underlying problem (update sync rules, create missing field values, or adjust configuration) and retry just those failed issues without reprocessing everything. You might find 50 issues failed out of 10,000 due to one field mapping issue—fix that mapping and reprocess just those 50.
How long does a Jira migration take?
A typical Jira migration takes 2-6 weeks, depending on your data size and complexity. Live migrations with tools like Exalate can run continuously, allowing teams to work during the transition without downtime.
How much does Jira migration cost?
The Professional plan for Exalate’s Jira app starts at $6 per month for each system. To find out about the cost of the Enterprise plan, read more about Exalate pricing on our website.
Can I migrate from Jira Data Center to Jira Cloud?
Yes, as Jira Data Center approaches end-of-life, it is important to know that Exalate supports migration from Data Center to Cloud while maintaining data synchronization. Exalate works on both Jira Data Center and Jira Cloud, so you can migrate your integrations. Install Exalate on your Jira Cloud instance, reconfigure your connections to point to the new Cloud setup, and migrate your sync rules. Exalate’s support team will help you transfer your configurations to maintain continuity during the migration.
Recommended Reads:
- A guide to Jira workflow best practices (with examples)
- Jira to Jira Integration: The Comprehensive Guide to Jira Sync
- Jira Azure DevOps Integration: The Complete Step-by-Step Guide
- Jira Salesforce Integration: How to Set up a Two-Way Sync between Different Teams
- Jira ServiceNow Integration: How to Connect Jira and ServiceNow in 5 Steps
- Freshdesk Jira Integration in the Age of Customer Satisfaction
- How to Set up an End-to-End ServiceDesk Plus Jira Integration
