Connecting Jira Service Management (JSM) with Jira Software can help your organization combine IT service management with DevOps, quality assurance, and other processes.
Internal teams can use this integration scenario to stay up to date about product changes and customer feedback.
At the same time, you can link your Jira Software site with an MSP’s JSM instance in order to create a collaborative environment.
To get this right, you need to find a way — an integration or custom script — to get the API endpoints on both Jira instances to interact and share data seamlessly.
In this article, I’ll show you how to sync your JSM and Jira Software sites.
How Does Jira Software Differ from Jira Service Management?
Although both are Atlassian Jira products, Jira Service Management and Software differ in terms of functionality and application for every organization.
Jira Service Management provides you with templates and functionality for general and HR service management. You can also use it to manage equipment and facilities.

With Jira Service Management, your organization can report and resolve all ITSM incidents faster, using automated tracking and approval workflows.
It also helps admins monitor the impact of the changes downstream as well as stay in constant contact with partners and internal stakeholders.
Jira Software caters to all activities in the development pipeline, from mapping work items to tracking releases and dependencies.

Some features available on Jira Software include Agile boards (Scrum and Kanban), which are backed by timelines, as well as critical reports and insights.
Developers can also use Jira Software to view DevOps progress, track the development status, and work on code repositories.
Why Integrate Jira Service Management and Jira Software?
After clearly explaining how both products differ, I’ll now go deeper to describe why you need them.
Here is a sample scenario.
The development team is using Jira Software for a feature update, while the IT team is using JSM to monitor incidents related to the release. This is an example of a classic customer support development use case.
For both teams to share information and stay updated about changes and incidents in real time, they must find a way to integrate both platforms.
This exact scenario can be extended to cross-company collaborations with MSPs, vendors, outsourcing partners, and clients. The only difference is that the cultures of both organizations have to be factored in, as well as the access levels and roles of admins and stakeholders.
Other common use cases for Jira Software to Service Management integration include:
- Software development teams connecting the ITSM team to address incidents,
- Marketers sharing user feedback with IT staff to reduce the resolution time,
- IT teams managing internal and customer-generated maintenance requests.
- Managers cloning Jira Software to Jira Service Management.
Another way JSM to Jira integration can benefit your organization is by breaking down the formation of information silos between teams. All involved team members and stakeholders will be privy to project-relevant data when required.
But that’s not all.
Integrating JSM with Jira Software allows different teams to communicate about changes across multiple channels. This builds a collaborative environment rooted in trust and transparency.
And the cherry on top is customer satisfaction. Since connecting both systems leads to faster incident resolution, customers will get a better overall experience when using the product.
How To Choose the Right Integration Tool
Before selecting an integration tool for Jira Service Management and Jira Software, understand what your organization wants to achieve with this integration.
For inter-company syncs, you need to hop on a discovery call to flesh out expectations, timelines, milestones, and other issues.
Some native solutions, such as Jira Cloud Migration Assistant (JCMA) and Copy Product Data, can help you move data back and forth between instances.
However, these two solutions are limited in the functionality and customization capabilities they offer. So you need a third-party integration solution to extend the possibilities of the sync.
Here are things to consider when choosing a third-party Jira to Jira integration solution:
- The solution’s ease of use
- The presence of airtight security features like ISO 27001:2002 certification, data encryption, etc
- The affordability of the integration solution
- The ability to scale and maintain flexibility
- The availability of reliable support services
- The possibility to enforce role-based access.
- The reliability to deliver optimum performance
- The customizability to adapt connections to advanced use cases
Exalate is a third-party solution that meets all the listed criteria. It supports bidirectional integration between Jira Cloud instances as well as Data Centers.
Users can also configure Exalate’s Groovy-based scripting engine to sync standard entities and fields, as well as custom fields.
How to Sync Customer Request Type Field Between Jira Service Management and Jira Software
Step 1: Install Exalate on Jira
Search for Exalate Jira Issue Sync & more in the Atlassian Marketplace. Click “Try it free” on the next page.

A pop-up asking you to “Add to Jira” will appear. Then click “Start free trial”.
You’ll be redirected back to Jira, where you’ll see a pop-up telling you that the app has been added. Click the “Get started” button.
That’s all! Your installation is complete.
Next, you need to repeat the same process on your JSM instance.
If your JSM instance is on Jira Cloud, follow the steps in this guide. Otherwise, follow the Jira Server or Data Center installation process.
Step 2: Connect your Jira Instances
Click the “Initiate connection” button. Then enter the destination URL and select the Script Mode.
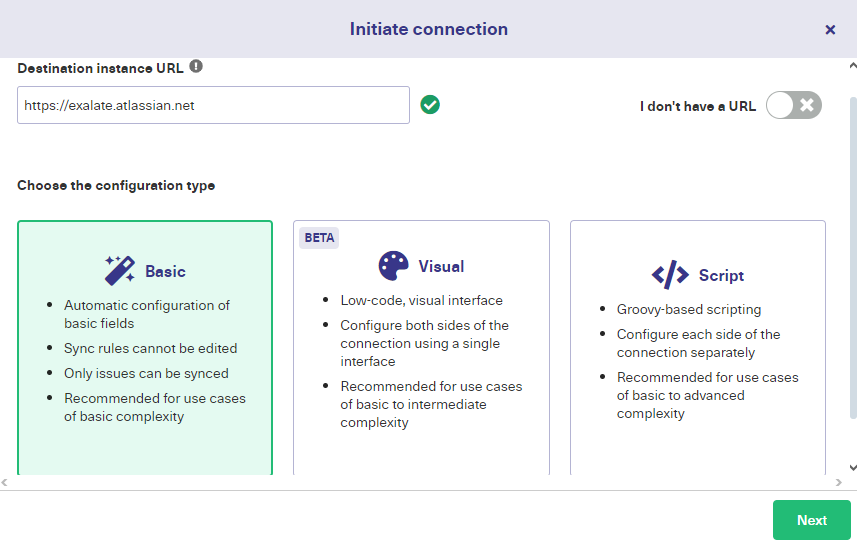
After selecting “Script Mode”, you will see a screen where you can enter the details of the connection.
Follow the steps in the documentation in order to set up the Script Mode connection.
Step 3: Configure Your Customer Support Software Development Integration
Find the connection you just created and click the “Edit connection” icon that appears. Then go to the “Rules” tab in the connection screen.

The rules use the Groovy programming language, so if you already have some experience working with it, setting up syncs should be easy.
To sync customer request types, you need to enter sync rules to control how the integration works.
On the source side (local replica [JSM]), enter the following code snippet in the “Outgoing Sync” text box:
replica.customFields."Request Type" = issue.customFields."Request Type" |
Note: This code snippet copies the request type from the JSM instance and sends it to the Jira Software instance.
Go over to the destination side (remote replica [Jira Software) and enter the following code snippet in the “Incoming Sync” text box:
issue.customFields."Request Type".value = replica.customFields."Request Type"?.value |
Note: This code snippet retrieves the value of the incoming request type and sends it to the designated custom field on Jira Software.
When you’re done, click the green “Publish” button to save your changes. You can read more about the sync rules here to guide your configurations.
Step 4: Set Up Automated Synchronization Triggers
Triggers are automated conditions and commands that determine if specific items are synchronized or not.
You can also find a summary of all of your active triggers by clicking “Triggers” in the left-hand menu.
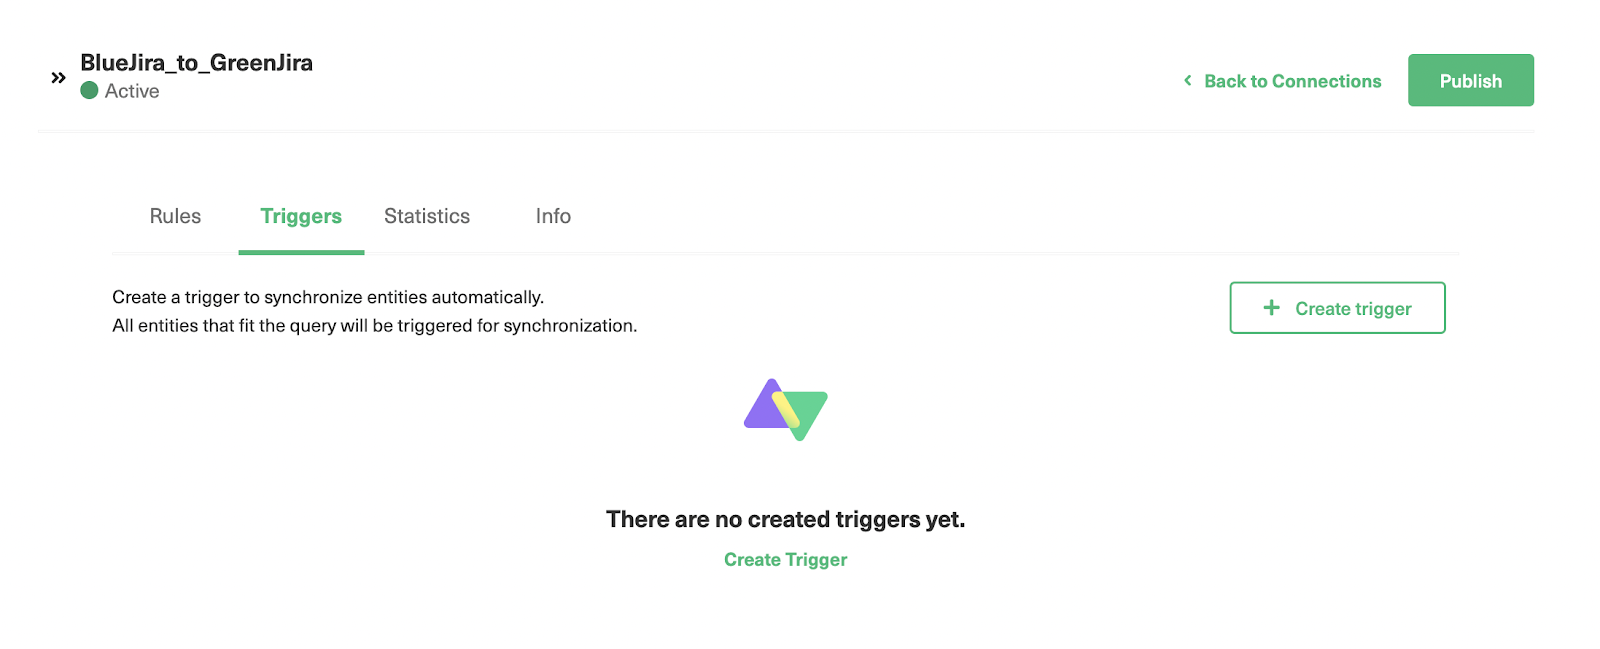
To create a new trigger, click the “Create trigger” button at the top right. Jira uses its own query language, JQL, to control the sync.
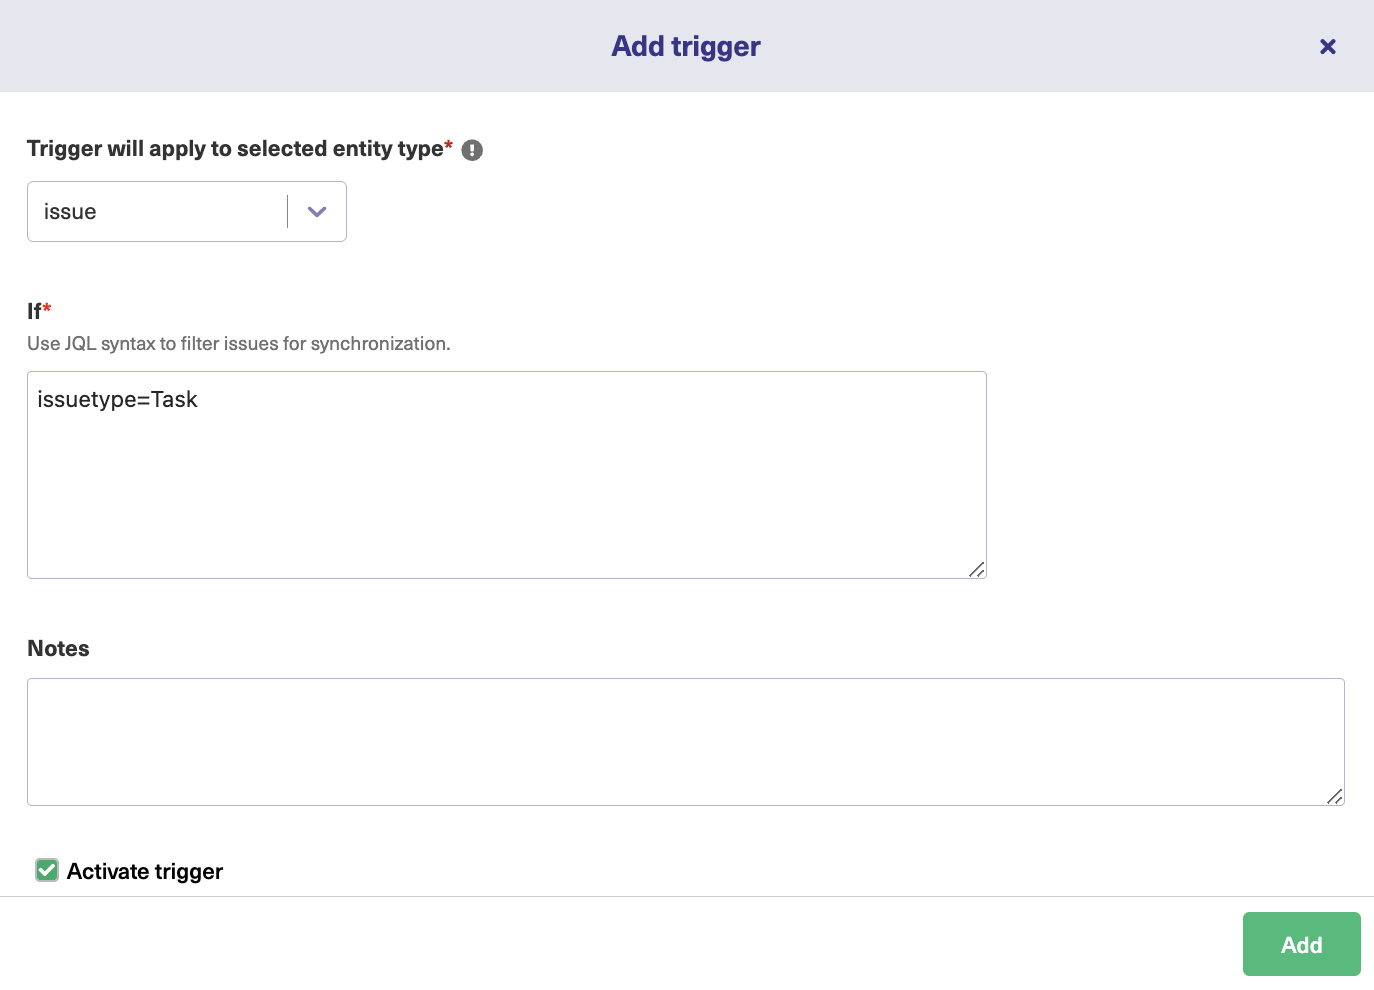
On the “Add trigger” screen, select the entity. I’ve selected “issue” in this case. In the next box, enter your query.
Here, I’ve chosen to sync issues where the type is “Task”. I’ve also added a note describing what the trigger does and set the trigger to “Active”. Finally, click the “Add” button at the bottom.
Check out some JQL triggers:
(status=resolved AND project=SysAdmin) OR assignee=bobsmith |
*Finds all resolved issues in the ‘SysAdmin’ project, as well as all issues currently assigned to the an admin named “bobsmith”.
project = "TEST" AND assignee = currentuser() |
*Finds all issues in the “TEST” project where the assignee is the currently logged in user.
You can edit or delete these triggers by clicking the respective icons in the list under the “Action” heading. If you click the three dots, you also get the option to “Bulk Exalate” and “Unbulk Exalate”.
Step 5: Start Synchronizing Tasks
Exalate checks for new tasks every few minutes, so please wait for a few seconds if you don’t see them transferred immediately.
On your open issue, go to the side panel and click “Open Exalate”.
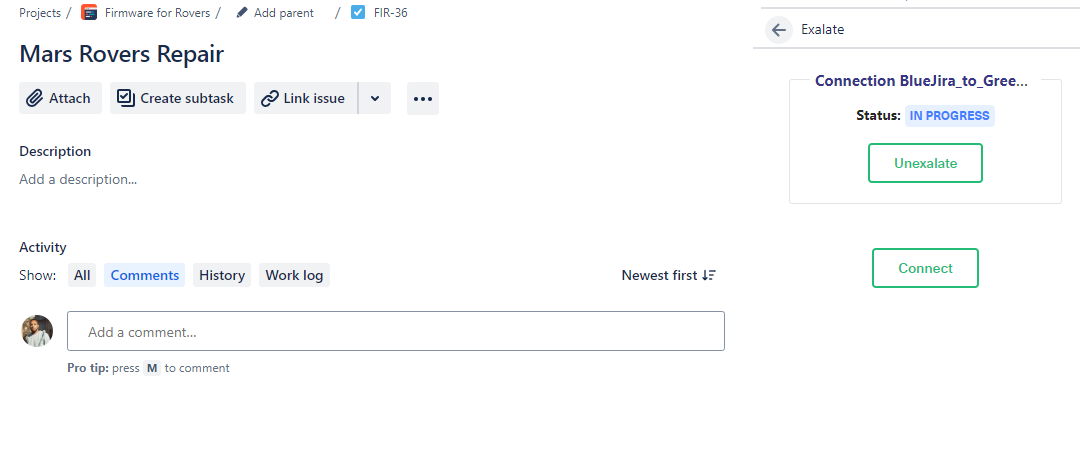
Then click “Exalate”. Select the connection and wait for the sync to complete. Once done, you can make changes to the entity and have them reflected on the other side.
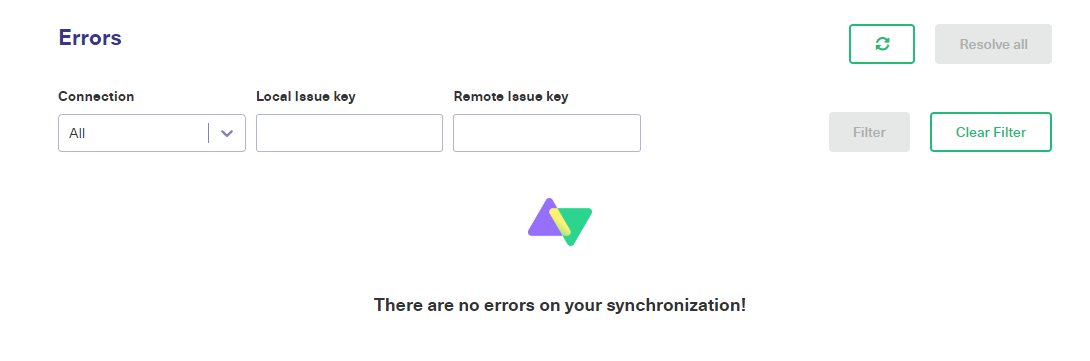
If you don’t see anything after a while, take a look at the rules and make sure they exactly match the items and fields you want to exchange. You will probably see the source of the blocker in the “Error” panel for proper troubleshooting.
Jira Service Management Integration Use Cases
Other tasks and operations you can perform after syncing JSM and Jira Software include:
- Convert remote status changes to local comments
- Populate a required remote field from a specific field
- Sync user mentions in comments
- Sync organization fields across two instances.
Final Words
Syncing Jira Service Management and Jira Software requires mapping out requirements, writing scripting rules, and implementing robust security protocols.
To ensure that your sync can exchange data in real time between standard, default, and custom fields, you need to choose a solution that meets your sync requirements and is also affordable.
If you want to use Exalate to sync Jira Software and JSM instances, book a demo with our engineers.
Recommended Reads:
- Multiple Jira Instances: How to Connect For Efficient Collaboration
- Jira to Jira Sync: How to Synchronize Multiple Jira Instances in 9 Steps – Idalko
- Jira to Jira integration The Comprehensive Guide [2024]
- Jira Integrations: The 2024 Guide to Integrating Jira & Other Systems
- How to Implement Jira Issue Sync For Cross-Team Collaboration
- Jira Salesforce Integration: Sync Teams Bidirectionally [2024]