
This article was originally published on the Atlassian Community.
In today’s interconnected business environments, teams are distributed across different departments or organizations. Maintaining accurate and synchronized work logs is essential for transparency, resource allocation, and effective decision-making.
This guide walks through the process of syncing Tempo Worklogs between two Jira Cloud instances. By setting up this synchronization, teams can bridge the gap between separate Jira instances, keep work data consistent, and get the most out of their collaborative efforts.
The Use Case
To set the context, let’s look at a situation involving two Jira Cloud instances: Instance A (JCA) and Instance B (JCB). When a ticket is escalated from JCA to JCB, it appears in the second instance, and users can start working on it.
Here’s where worklog consistency becomes critical. When a user logs time against that ticket in JCB, that time entry needs to show up in JCA as well. Otherwise, reporting and billing data is off.
The same applies in reverse. If a user modifies a worklog in JCA, that change should be reflected in JCB. This way, everyone involved has up-to-date information across both instances.
This kind of bidirectional worklog sync is an advanced use case. You need an integration solution that can handle Tempo’s external API, manage worklog payloads, and keep everything in sync without manual intervention.
Exalate is a customizable integration solution built for exactly these kinds of scenarios, from basic field mapping to advanced scripting use cases.

Exalate: An Integration Solution
Exalate connects your everyday tools and sets up a flexible, bidirectional sync. It supports Jira, Jira Service Management, ServiceNow, Azure DevOps Cloud, Azure DevOps Server, Salesforce, Zendesk, Freshservice, Freshdesk, Asana, GitHub, and custom connectors.
Beyond a drag-and-drop interface for simple use cases, Exalate gives you full control over advanced sync scenarios.
Exalate uses Groovy-based scripts on both integration sides. The outgoing script controls what information leaves the platform, and the incoming script controls how incoming data is interpreted. You can manage these scripts independently on each side, giving you full operational control over what gets synced and how.
Here’s what Exalate brings to the table for this use case:
- AI-assisted configuration: Aida helps generate and troubleshoot sync scripts
- Test Run: Test your sync scripts against real data before deploying to production
- Script versioning: Full audit trail with rollback, draft mode, and version history
- Real-time sync: Complete queue visibility and work item history
- Security: ISO 27001 certified, RBAC, encryption at rest and in transit. Visit the Exalate Trust Center
- Outcome-based pricing: You pay for active sync pairs (work items currently in sync), not user seats or per-transaction fees
Start a free trial | Get Exalate on the Atlassian Marketplace
Before we jump into the implementation, let’s quickly cover how Exalate interacts with Tempo worklogs.
How Exalate Interacts with Tempo
If you have installed Tempo already, you can access it under “Apps” in your Jira Cloud instance.
Exalate uses the Tempo Cloud REST API to access Tempo worklogs. This allows Exalate to retrieve worklogs from the source instance and push them to the target instance. It also keeps worklog updates in sync on an ongoing basis, so any modification in one instance is accurately reflected in the other.
Grant Exalate Access to Tempo
Exalate needs access to Tempo, and you grant that through a user access token. This token is tied to the permissions of the Jira Cloud user who generates it.
You can generate the Access Token under the “Tempo settings > API integration” tab.
The required permissions for the user who generates the token are:
Jira Permissions:
- Create worklogs
- View all worklogs
- Log work for others
- Work on work items
Tempo Permissions:
- View team worklogs
- Manage team worklogs
With this groundwork done, it’s time to set up the synchronization.
How to Sync Tempo Worklogs Between Two Jira Cloud Instances
This section walks you through connecting two Jira Cloud instances using Exalate and configuring the Tempo worklog sync.
Step 1: Log in to Exalate
Go to exalate.app. If you already have an account, log in directly. New users can create an account by entering their email and verifying it, or by signing up with Google.
Step 2: Create a Workspace
Workspaces help you organize and manage your integrations and connections in one place. You can find all your existing workspaces under the “Workspaces” tab.
To create a workspace:
- Click the “+ Create Workspace” button.
- Enter a name and description for your workspace.
- Click “Create workspace” to confirm.
Step 3: Create a Connection Between the Two Jira Instances
Once you have a workspace, you can create a connection between your two Jira Cloud instances.

- Click “+ Add connections” > “Create new connection”.
- Enter the name for your first system (System A). You can name either JCA or JCB as System A; it doesn’t matter which goes first.
- Enter the URL of your Jira Cloud instance.
- Once you enter the URL, a validation check runs. If the system is already part of the workspace, authentication happens automatically. For new systems, you’ll need to enter authentication details. Jira uses OAuth.
- Complete the same process for the second Jira Cloud instance.
- Give your connection a name and description.
- Click “Next”.
- Review the details, then click “Create connection”.
When the process completes, select “Continue to configuration” and choose a Jira project for synchronization.
Then click “Build & continue”.
Step 4: Configure the Sync
After creating your connection, you have two configuration options: “Quick Sync” and “Edit & Test”.
For Tempo worklog sync, you’ll use Edit & Test since this requires custom scripting.
Open the Draft Editor
Click “Create a new version” or select “Open latest draft”. This ensures you don’t accidentally modify the existing live configuration. Changes in the draft are saved automatically.
Click the “Edit” button to open the editor and modify the sync rules. Sync rules are based on Groovy scripts. With these scripts, you can add custom data logic and mapping, along with conditional flows.
Since we want a bidirectional Tempo worklogs sync between the Jira instances, we need to modify both the outgoing and incoming scripts on both sides.
Outgoing Sync
The incoming and outgoing sync scripts will remain the same on JCA and JCB. Only the token must be replaced with the actual token you generated.
Outgoing script:
TempoWorkLogSync.send(
   "92mXBTLkvf7pQWHns4yJGz1Cr6d8Ao-eu",  // replace the "token" with the previously generated access token
   replica,
   issue,
   httpClient,
   nodeHelper
)Code language: JavaScript (javascript)
Incoming Sync
For the incoming sync, ensure the following:
- Add the imports at the beginning of the code.
- Add the functions at the end of the code.
Incoming script:
TempoWorkLogSync.receive(
"7a9KJZPwtV5gQMLxr3dTYq8Ns1w6Co-us", // replace the "token" with the previously generated access token
replica,
issue,
httpClient,
traces,
nodeHelper
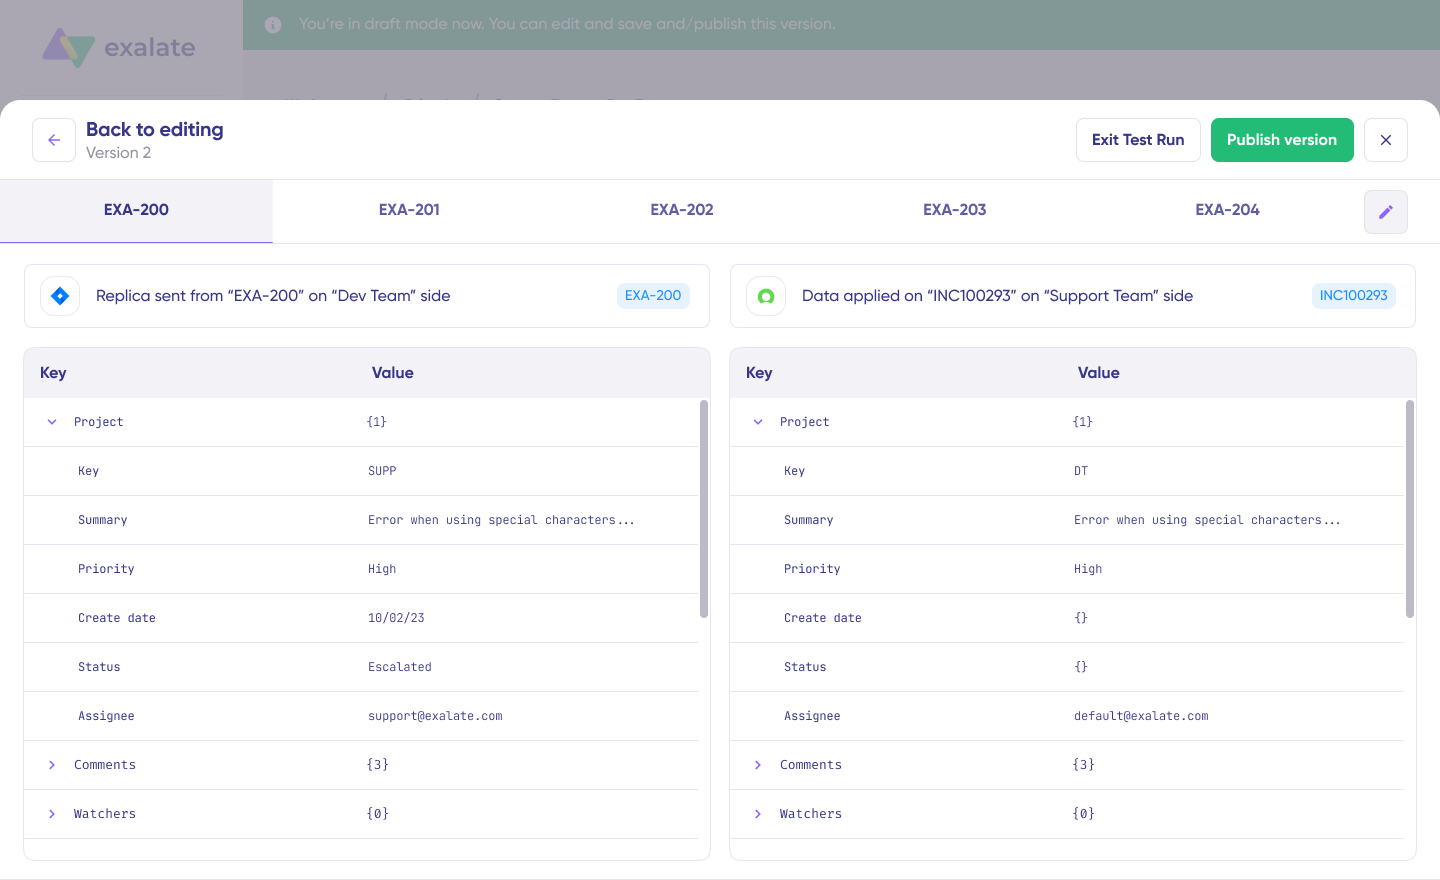
)Code language: JavaScript (javascript)Step 5: Test with Test Run
Once your sync scripts are ready, you can use the Test Run feature to validate before going live.
- Click “Start Test Run”.
- Select the work items you want to test the sync against. You can select multiple items.
- Review the incoming and outgoing replicas for each item in their respective tabs.
- Verify that the field mappings and worklog data look correct.
- If something is off, go back, adjust the scripts, and test again.
Deploy only when you’re confident everything works as expected. This safety net prevents errors from affecting live data.
Once everything looks good, click “Publish Version” to apply the configuration to your live synchronization.
Step 6: Add Triggers
To automate the sync, add triggers. Triggers are conditions or filters you apply to specific work items. For instance, you can sync all Jira work items in a particular project, or those matching a specific JQL query.
Common Pitfalls to Watch For
A few things to keep in mind when setting up Tempo worklog sync:
- Token permissions: Make sure the Tempo access token has the correct permissions listed above. Missing permissions will cause silent failures.
- Token expiry: Tempo tokens can expire. If your sync suddenly stops working, check if the token needs to be regenerated.
- Worklog author mapping: By default, worklogs may be attributed to the integration user rather than the original author. You may need custom script logic to preserve the original author.
- Time zone differences: If your teams are in different time zones, verify that worklog timestamps are handled correctly across instances.
Conclusion
By synchronizing Tempo worklogs between two Jira Cloud instances using Exalate, organizations can maintain real-time worklog updates across distributed teams. This bidirectional synchronization ensures consistency and accuracy of worklog data, enables cleaner billing and reporting, and promotes transparency across teams.
The scripting approach gives you full control over what gets synced, how it’s mapped, and when it happens, making it suitable even for complex multi-instance environments.
Start a free trial | Get Exalate on the Atlassian Marketplace
Recommended Reading:
- How to Synchronize User Mentions in Comments Between Jira Cloud and Jira On-premise
- How to Sync Comment Threads and User Mentions in Comments between Jira and Salesforce
- How to Sync Multiple Related Salesforce Objects (Contact & Account Linked to a Case) to Jira
- How to Synchronize a ServiceNow Customer Case to a Jira Epic
- How to Sync Custom List Fields Bi-Directionally Between Jira and Zendesk


