This article was originally published on both the Zendesk community and the Atlassian Community.
An interesting use case often requires elaboration. And I thought this use case was interesting enough to be detailed out for others who have similar requirements.
So here it is!
The Use Case
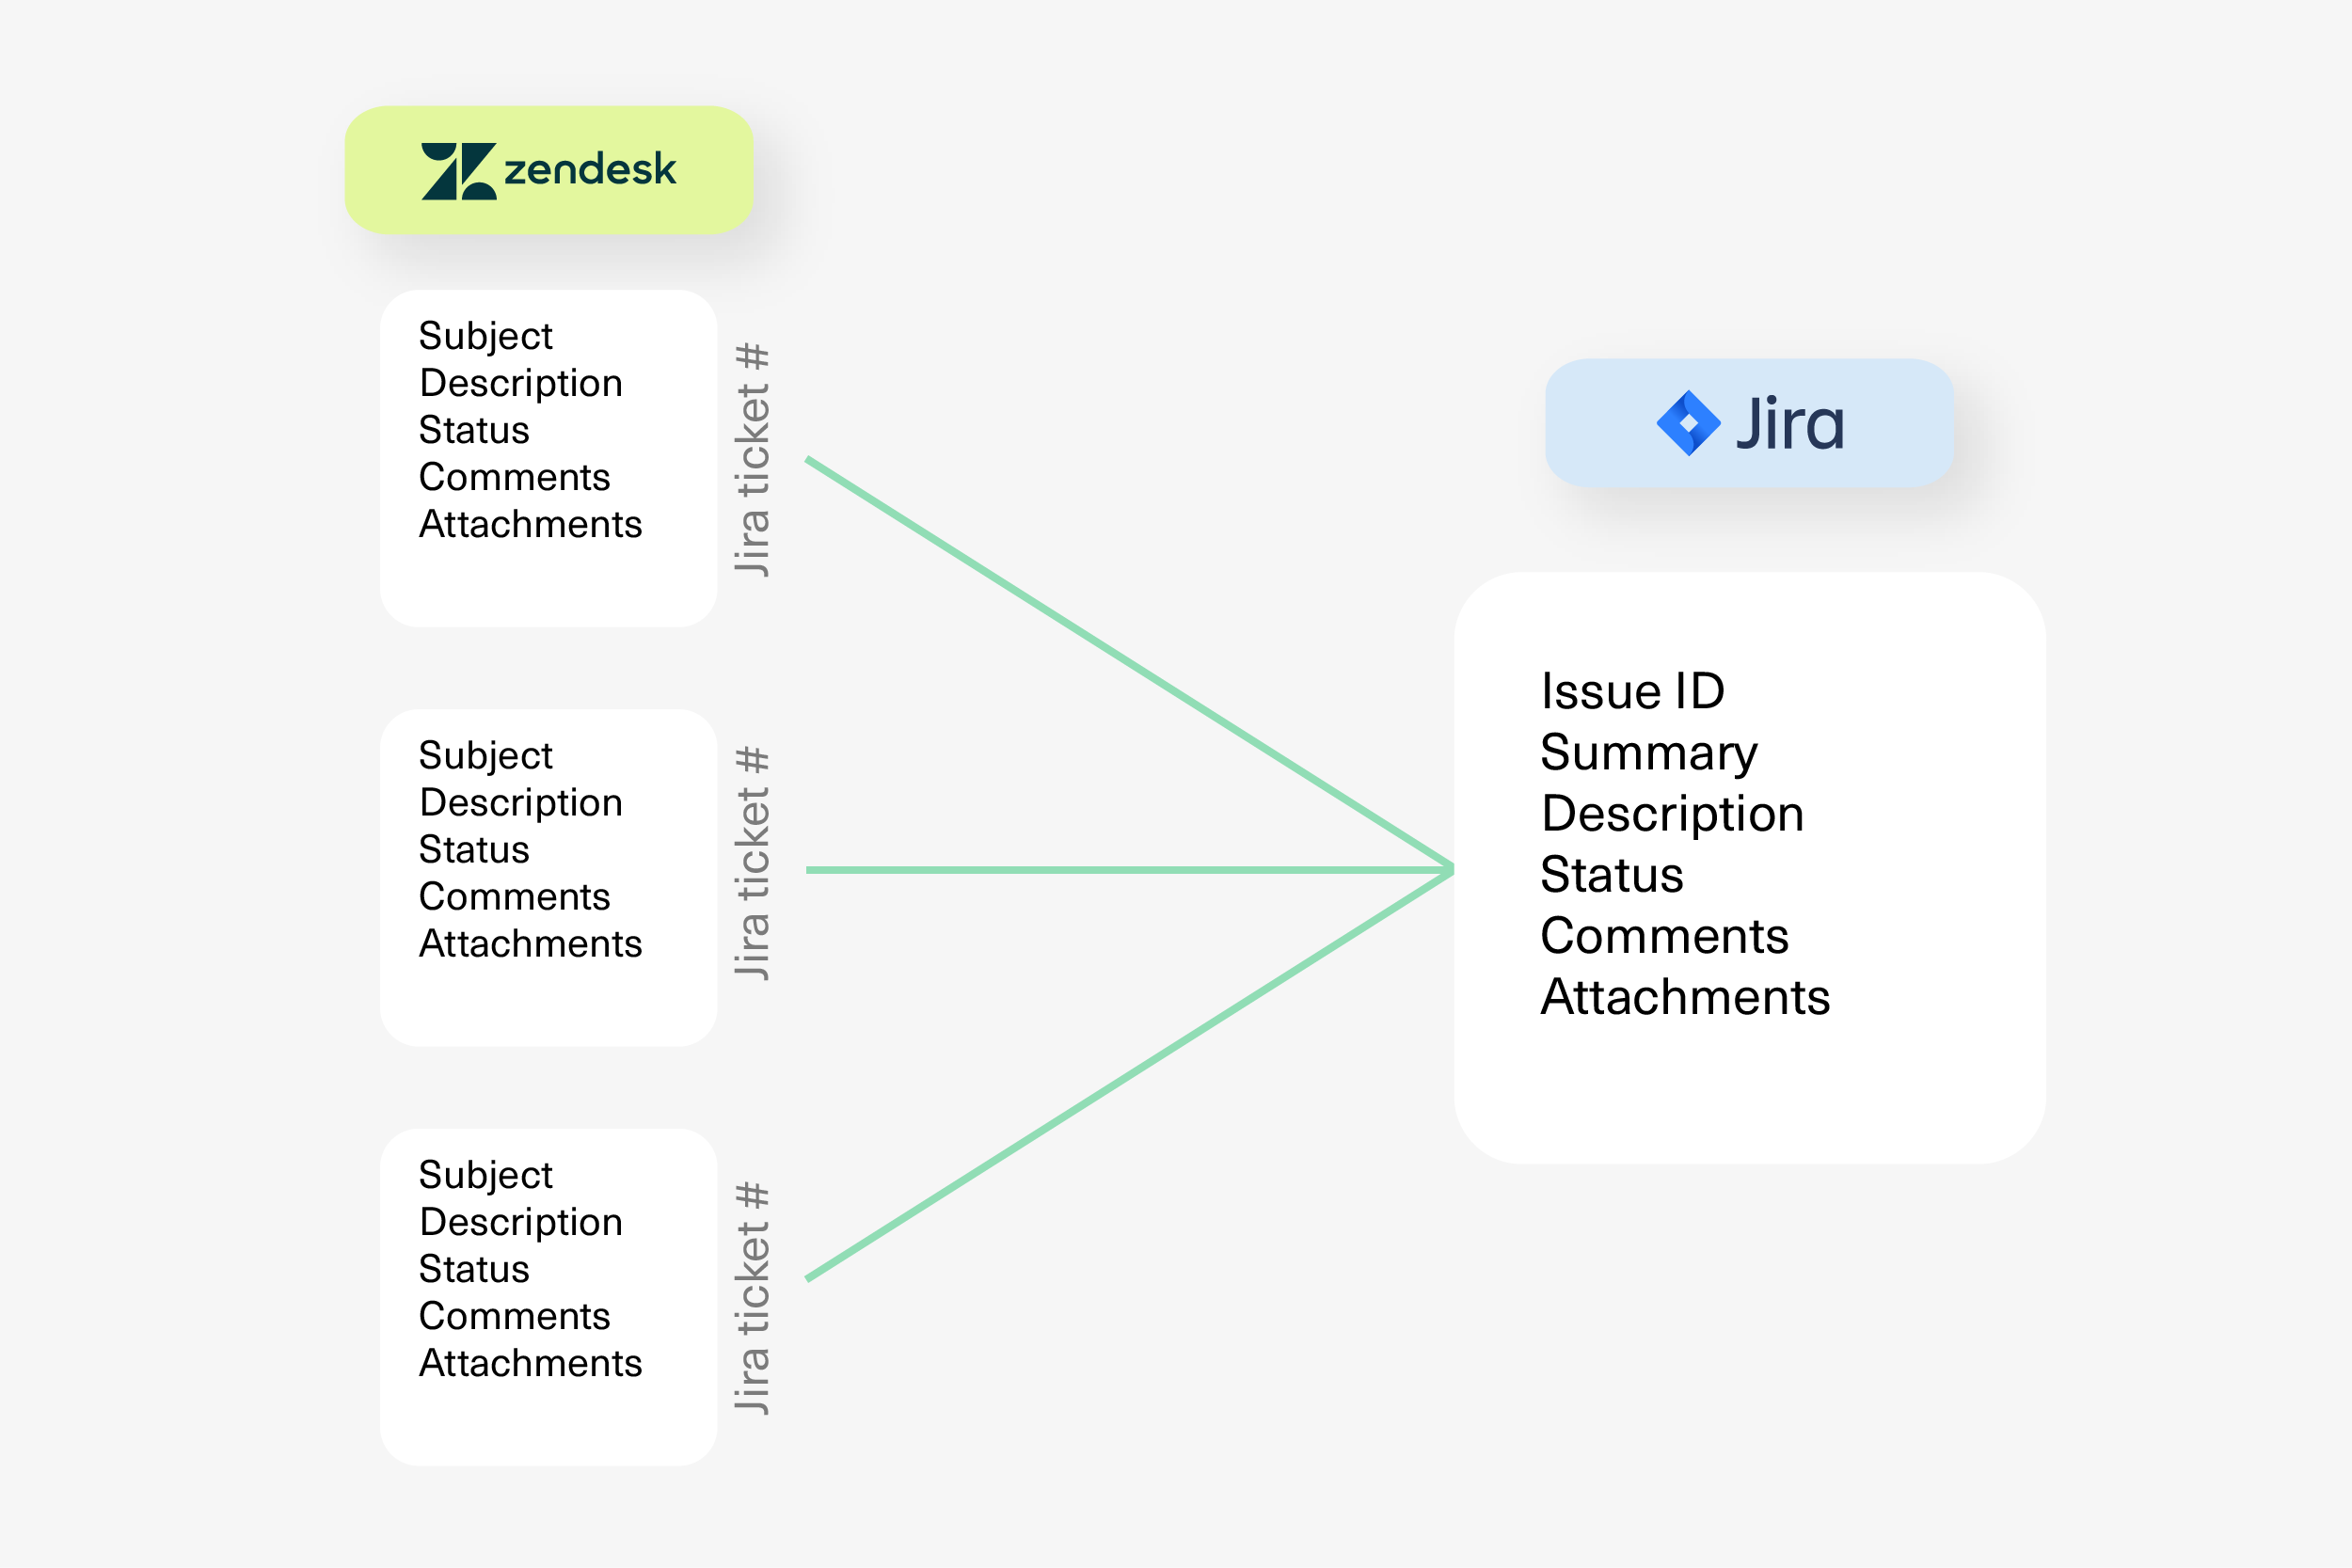
A customer wanted to sync multiple Zendesk tickets (raised by their customers) to be reflected in a single Jira Cloud work item to be taken up by the Dev team.
Also, once the status on the Jira work item has been marked as “Done” from “In Progress”, the corresponding status on the Zendesk side would be changed to “Open” from “New”.
A custom field called “Jira ticket #” is used as an identifier for the work item on the Jira side.
Summary/Subject, description, labels/tags, attachments, and comments need to be synced bidirectionally between the two systems.
This is a common pattern for support teams handling duplicate customer reports. Instead of creating separate Jira work items for each ticket about the same bug or feature request, all related Zendesk tickets funnel into one work item, keeping the dev team focused while support tracks individual customer communications.
The Challenges
- Finding the correct Jira work item ID so that the tickets are mapped correctly to it
- Mapping statuses so that the customer support team using Zendesk gets the correct status updates
- Keeping comments and attachments flowing bidirectionally without duplication

The Integration Solution: Exalate
Exalate is a bidirectional synchronization solution that integrates different platforms like Jira, Jira Service Management, Zendesk, ServiceNow, Azure DevOps Cloud, Azure DevOps Server, Salesforce, Freshservice, Freshdesk, Asana, GitHub, and more. The above use case can be implemented using the Exalate API. With a built-in Groovy scripting engine, you have the capabilities to implement virtually any use case.
As an Exalate administrator, you can configure both the incoming and outgoing sync scripts from a unified console. These scripts on both the Jira and Zendesk sides filter what information must be sent and received. You also get features like script versioning (with rollback capability), TestRun to validate changes before production, and Aida, an AI-assisted configuration tool that helps generate and troubleshoot sync scripts.
Get Exalate on the Atlassian Marketplace
How to Set Up a Jira Zendesk Connection with Exalate
To get started, go to the Exalate app and log in or create a new account. New users can sign up using their email or Google account.
Step 1: Create a Workspace
Workspaces help you organize and manage your integrations. Click “+ Create Workspace”, enter a name and description, and confirm.
Step 2: Create a Connection
Inside your workspace, click “+ Add connections” > “Create new connection”. Enter a name for your first system (either Jira or Zendesk) and provide its URL. Exalate auto-detects the platform and prompts for authentication. Jira uses OAuth while Zendesk uses API tokens.
Repeat for the second system. Give your connection a name and description, review the details, then click “Create connection”.
Step 3: Choose Your Configuration Path
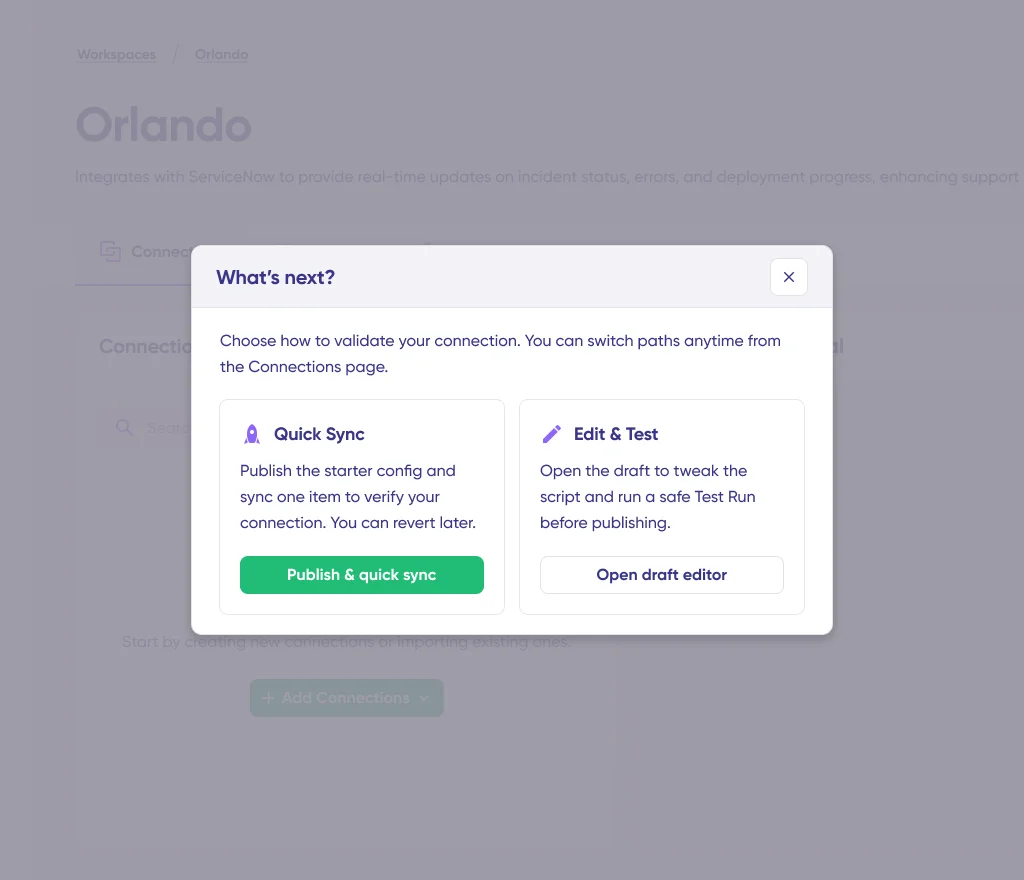
After creating the connection, you have two options:
- Quick Sync: Publish the default configuration and sync one item to verify your connection works. Enter a Jira work item key or Zendesk ticket number and click “Sync Now”.
- Edit & Test: Open the draft editor to customize your sync rules before going live. This is recommended for this use case since we need advanced scripting.
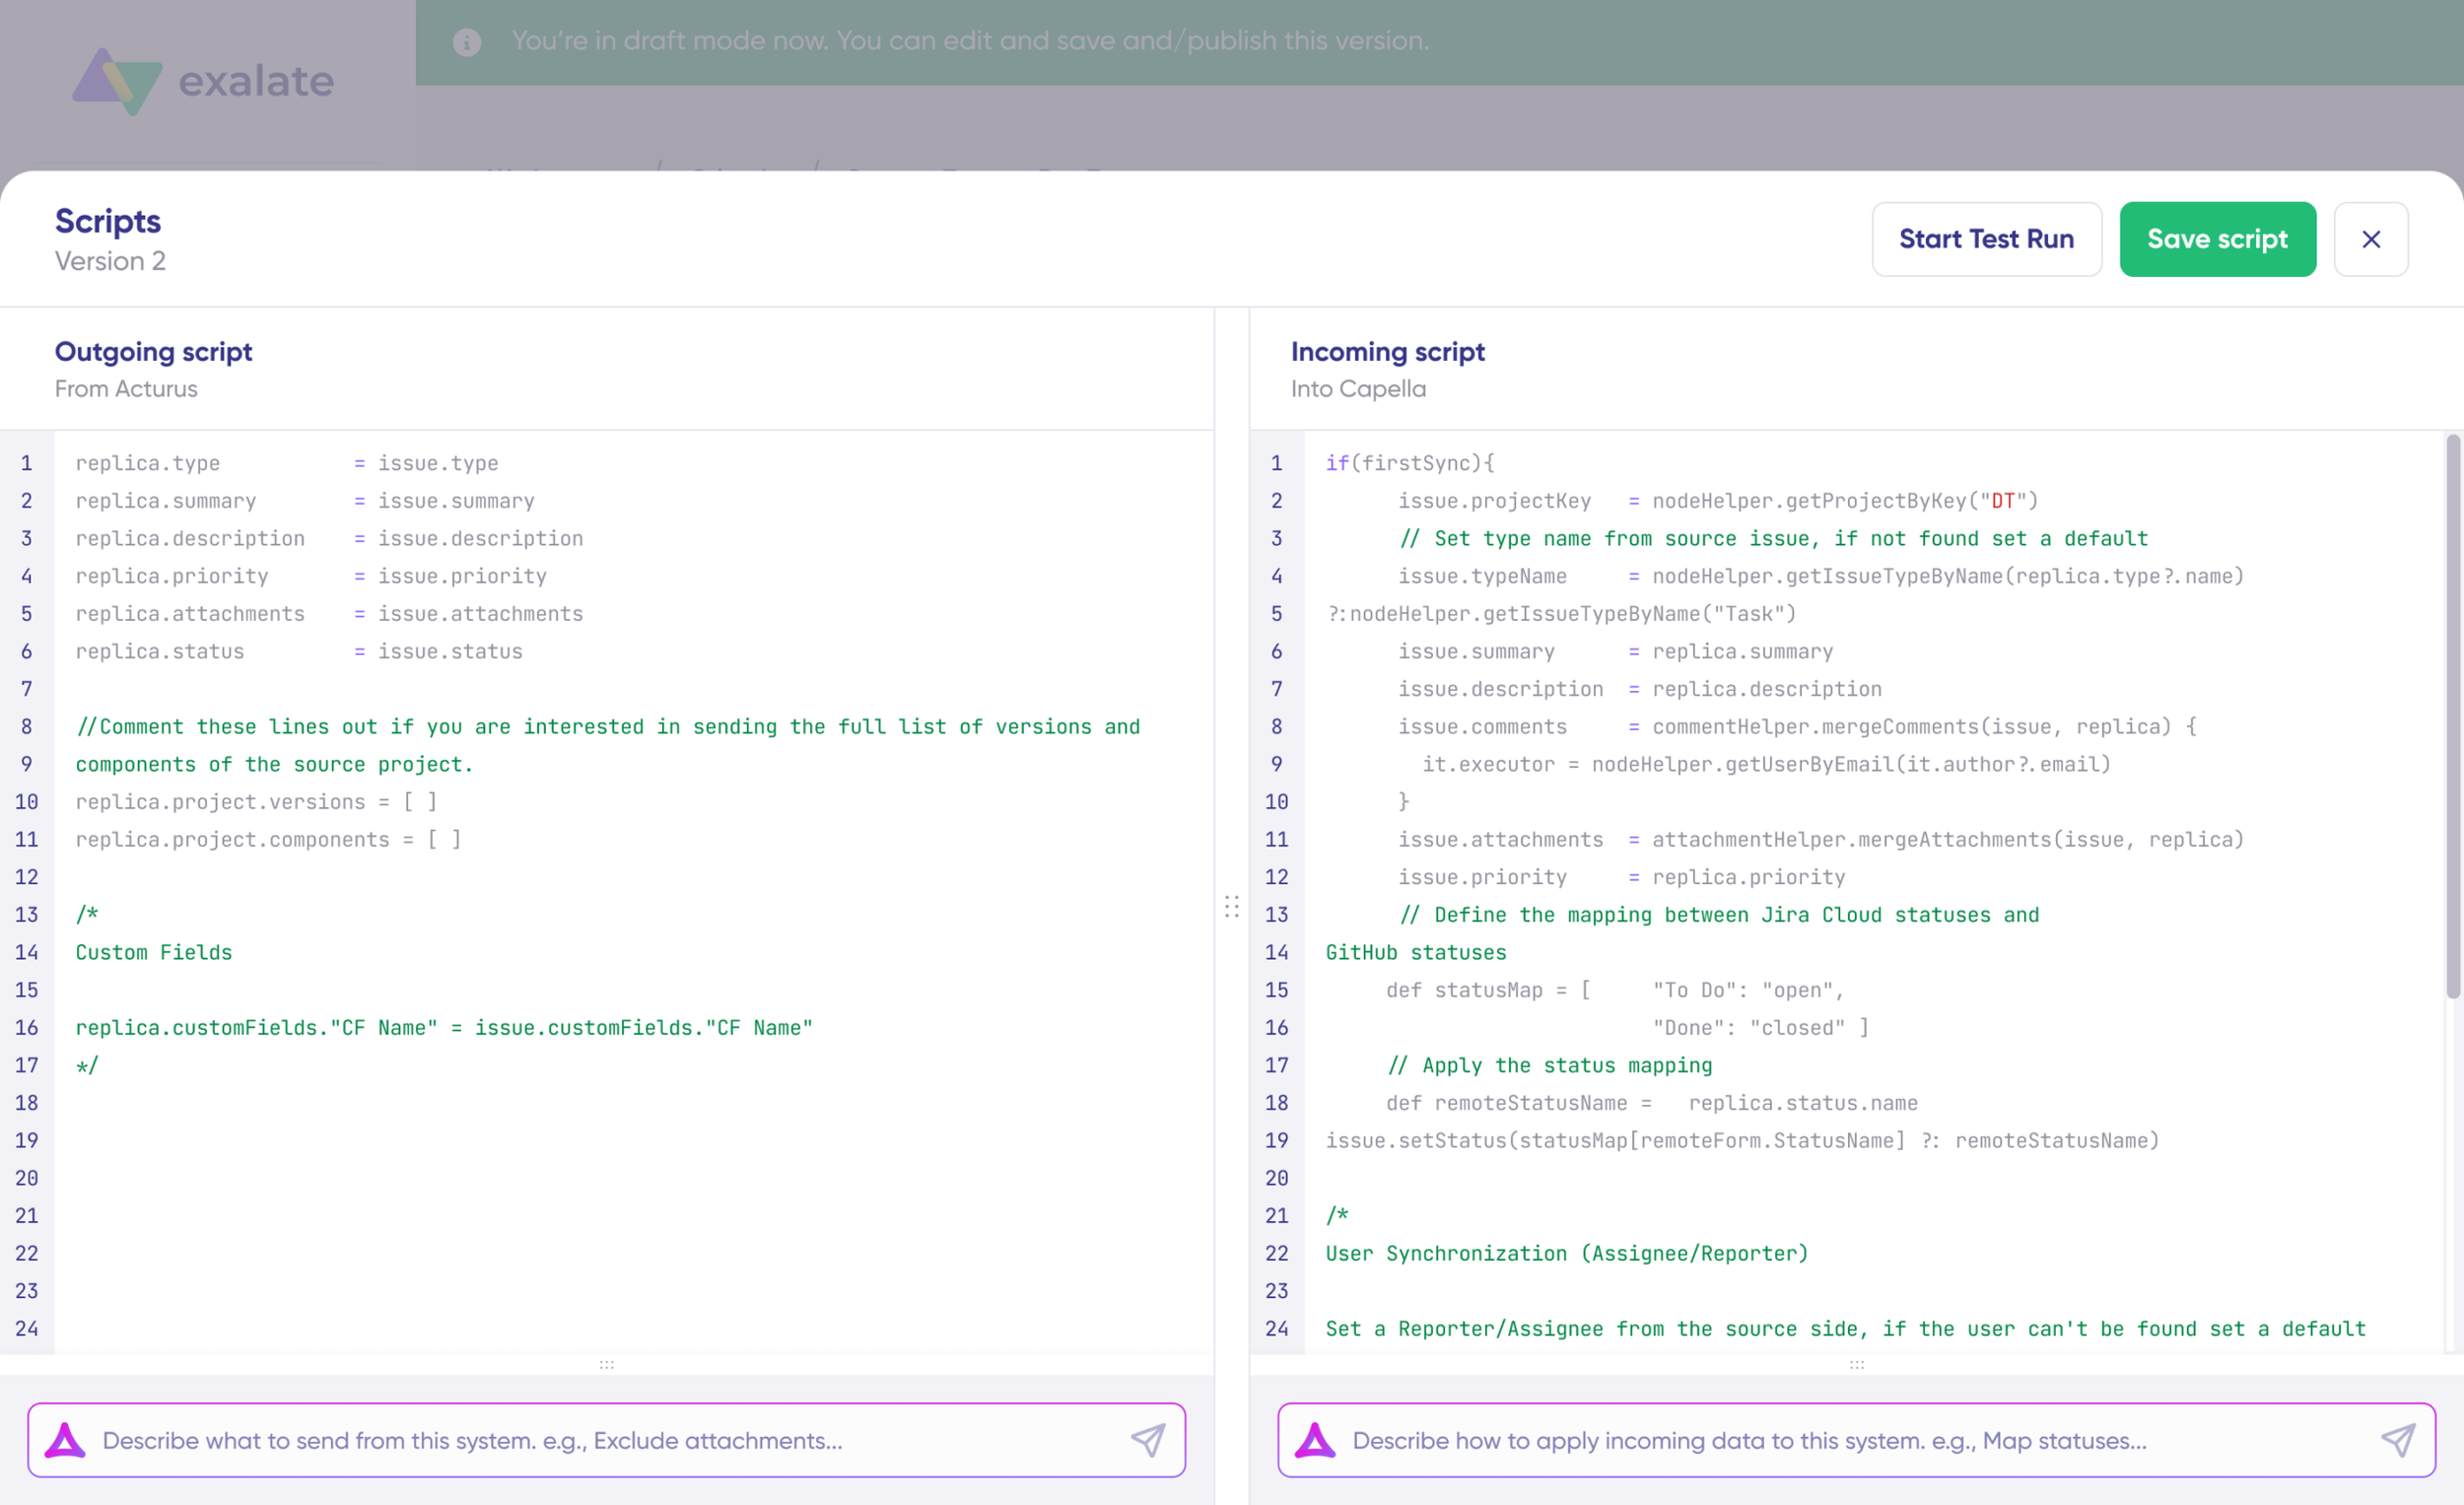
Step 4: Configure Sync Rules
The sync rules are based on Groovy scripts, split into outgoing (what data leaves a system) and incoming (how data is applied to the destination system) scripts.
You can write the scripts manually if you are familiar with Groovy, or use Aida to generate them. Describe what you need in plain language (e.g., “Only sync tickets with a specific custom field value”), and Aida generates the working code for you. Review the suggested changes, then choose to insert or discard them.
Step 5: Test with Test Run
Before publishing, use the TestRun feature to validate your configuration against real data without affecting production. Select one or more items, start the test, and review how the replica will be applied. Adjust scripts and re-test as needed.
Step 6: Add Triggers
To automate the sync, add triggers using platform-native query languages. For Jira, use JQL (e.g., project = DEV AND type = Bug). For Zendesk, use Zendesk Search Syntax.
Step 7: Publish and Monitor
Publish your configuration to go live. Monitor sync activity through the Activity Dashboard in Exalate, and use Aida for troubleshooting if any sync errors appear.
Configuration of the Sync Rules for This Use Case
Considering the advanced configuration required, we use the script-based configuration in Exalate.
Zendesk: Outgoing Configuration
The ticket information from Zendesk, like summary, description, labels, etc., to be sent to Jira are present in the “Outgoing Sync” by default.
To this, I add only the information from the custom field “Jira Ticket #” to be sent over to Jira.
replica.key = issue.key

replica.assignee = issue.assignee

replica.reporter = issue.reporter

//if(issue.customFields."Jira Ticket #"=="")

replica.summary = issue.summary

replica.description = issue.description

replica.type = issue.type

replica.labels = issue.labels

replica.attachments = issue.attachments

replica.comments = issue.comments

replica.status = issue.status

replica.customFields."Jira Ticket #" = issue.customFields."Jira Ticket #"

//Send a Custom Field value

//replica.customFields."CF Name" = issue.customFields."CF Name"Code language: JavaScript (javascript)
Zendesk: Incoming Configuration
Since I need to map the statuses between Jira and Zendesk, the mapping code needs to be added in the “Incoming sync” on Zendesk. Remote and local statuses are mapped one-on-one.
Also, once the work item has been marked “Done” in Jira, a comment is added on the Zendesk ticket stating “Fix has been released by the Dev team.”. This is done using the commentHelper class of Exalate.
if (firstSync)

    issue.summary      = replica.summary

issue.labels = replica.labels

issue.description = replica.description ?: "No description"

issue.attachments = attachmentHelper.mergeAttachments(issue, replica)

issue.comments    += replica.addedComments

//Receive a Custom Field value

//issue.customFields."CF Name".value = replica.customFields."CF Name".value

def statusMapping = ["Done":"open", "To Do":"open"]

def remoteStatusName = replica.status.name

issue.setStatus(statusMapping[remoteStatusName] ?: "open")

if (remoteStatusName == "Done")

    issue.comments += commentHelper.addComment("Fix has been released by Dev team", issue.comments)Code language: JavaScript (javascript)
Jira: Outgoing Configuration
Nothing specific needs to be added to the “Outgoing sync” of Jira, so the default configuration remains.
Jira: Incoming Configuration
For this, when the ticket is synced over for the first time, it needs to create a work item in the specific project. In our case, “AAA” is the project that is selected.
Then, depending on the remote ticket, a work item type is set. The default is Task if no type is found. The Jira work item ID from the Zendesk custom field “Jira Ticket #” is saved in the remoteIssueUrn variable. Simply fetch the Jira work item details using the httpClient.get() method in the localIssue variable. If the Jira work item is not found, then an “Issue not found” exception is raised. However, if the Jira work item exists, then simply set the Jira work item ID to the localIssue ID. Summary, description, comments, attachments, and labels are synced as-is.
if(firstSync){

    issue.projectKey   = "AAA"

    // Set type name from source issue, if not found set a default

    issue.typeName     = nodeHelper.getIssueType(replica.type?.name, issue.projectKey)?.name ?: "Task"

    def remoteIssueUrn = replica.customFields."Jira Ticket #"?.value

    if(remoteIssueUrn){

        def localIssue = httpClient.get("/rest/api/2/issue/"+remoteIssueUrn)

        if(localIssue == null) throw new com.exalate.api.exception.IssueTrackerException("Issue with key "+remoteIssueUrn+" was not found")

        issue.id = localIssue?.id

        issue.key = localIssue?.key

        return;

    }

    issue.summary      = replica.summary

    issue.description = replica.description

}

issue.comments     = commentHelper.mergeComments(issue, replica)

issue.attachments  = attachmentHelper.mergeAttachments(issue, replica)

issue.labels       = replica.labelsCode language: PHP (php)
After this, you can create triggers to start syncing information automatically. On the Jira side, you can use Jira Query Language (JQL), and on the Zendesk side, use Zendesk Search Syntax to create them.
Output
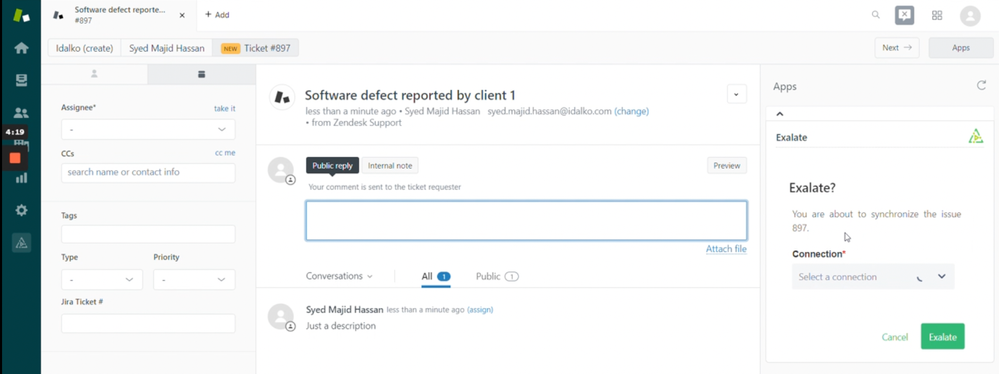
We create a ticket on the Zendesk side and sync it manually to the Jira side. Though this can also be done automatically with the help of triggers.
The work item on the Jira side has the ID: AAA-830.
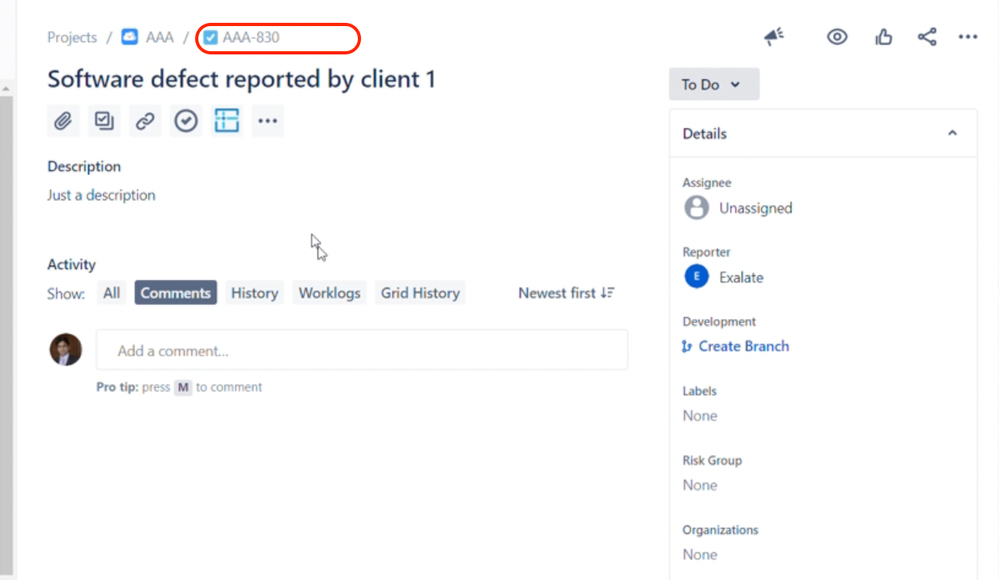
Remember, this is the ID that needs to be entered on the Zendesk side. So when a new ticket is created, the same ID is entered in the custom field “Jira ticket #”.
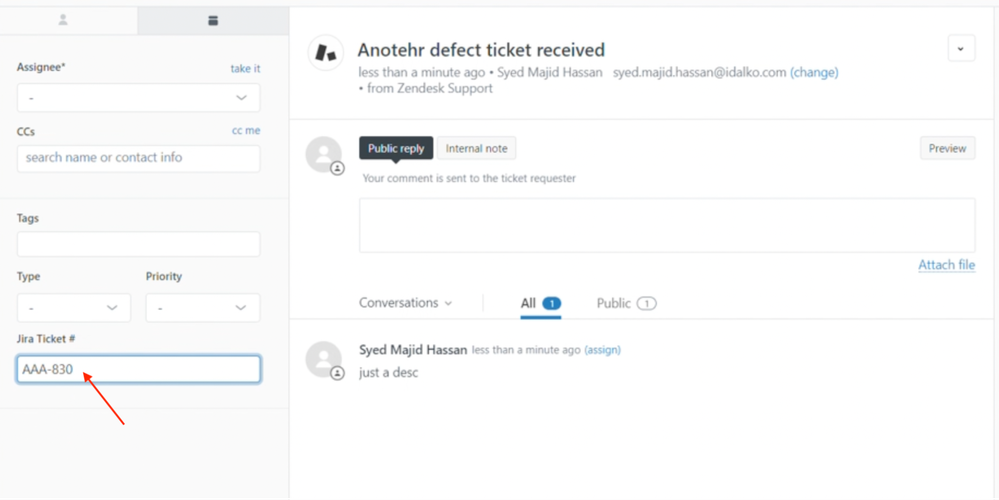
And when it is synchronized, it gets synced to the same Jira work item we have entered.
That’s all that is needed to achieve this use case with Exalate. If you are a visual person, this video will help you get started, or check out this Jira Zendesk integration article.
Conclusion
There are native integrations that can connect Jira and Zendesk, but they have limitations. Zendesk’s native integration does not support syncing multiple tickets to a single Jira work item, and it offers limited field mapping and customization.
Exalate, on the other hand, has a Groovy scripting engine that makes it flexible enough to handle even the most advanced integration requirements. Combined with features like the unified management console, AI-assisted configuration (Aida), Test Run for safe testing, and script versioning with rollback, it provides a complete solution for complex Jira Zendesk workflows.
If you are interested in knowing more about it, book a demo with an expert, and we can walk you through its functionality.
Recommended Reading:


