
Keeping track of the huge quantities of information circulating your business can be a headache, but it also presents an opportunity to sync data and collaborate effectively with other teams.
Let’s say you’re working in Azure DevOps and you need to integrate with another team in ServiceNow. An Azure DevOps ServiceNow integration can make things run way more smoothly.
So in this blog post, I’ll walk you through a step-by-step process for Azure DevOps integration with ServiceNow with the least fuss possible.
Azure DevOps ServiceNow Sync Guide
Learn how to achieve a seamless integration between Azure DevOps and ServiceNow instances, step-by-step.
Why Integrate Azure DevOps and ServiceNow?
Azure DevOps is an excellent tool for a range of purposes, including managing servers and websites, as well as product development.
It is stacked with features for versioning, project and requirements management, build automation, and software development lifecycle management.
Technical teams can use Azure DevOps on the cloud or host it on their local servers.
Azure has a marketplace where you can get features and integrate them with other platforms. It can also be extended directly via its SDK.
ServiceNow mainly supports service management features, like incident management, change management, release management, etc.
Using ServiceNow is a great way to handle customer requests and organize the way your customer support team interacts with clients. It lets you keep track of incidents and problems and allows your team to stay on top of all the information generated by customers.
Benefits of a ServiceNow Azure DevOps Integration
Teams often need to share information, and the specifics of what they need to know will differ.
Keeping them on the same page without duplicating or losing information is quite a challenge. So a tool that can take care of it automatically will be a huge asset.
Here is a common scenario.
The customer service team working in ServiceNow usually becomes aware of problems or incidents that the engineers working in Azure DevOps need to know about. The engineers will fix these problems, and the customer service team can then pass the result on to the clients.
This data can be exchanged manually, but there are several problems with doing that.
- It takes time and effort.
- Some entities don’t get transferred.
- The transferred data is in the wrong format.
- The data quality is too low or practically unusable.
With an automated system, you can ensure smooth data transfer between both platforms. You can set conditions and filters for the exchange.
ServiceNow integration with Azure DevOps can help teams automate and streamline their processes.
Let’s see what a ServiceNow Azure DevOps integration looks like in practice.
ServiceNow Azure DevOps Integration Use Cases
An integration between Azure DevOps and ServiceNow can be beneficial for various teams.
Development and Customer Support Teams
Customer incidents or problems come in through ServiceNow. Sometimes, they need the development teams’ attention, working in Azure DevOps.
An integration between these two applications will ensure both teams have the same information at a given point in time.
Say all incidents of urgency = 1 and belonging to a specific assignment group are synced to Azure DevOps as bugs or issues.
The development team starts working on it and changes the status. This status automatically reflects in ServiceNow. Any additional information appears in comments, work notes, or attachments.
By doing so, the customer support team has complete visibility on the dev issue until it gets resolved. Everyone stays on the same page, and the customers are always up-to-date on their ticket status.
Development and QA teams
The dev team working in ServiceNow always sends bugs, issues, problems, or change requests to the QA team working in Azure DevOps.
An Azure DevOps to ServiceNow integration streamlines the software development work cycle.
By automatically exchanging issues, updating statuses, and sending the required data back and forth between Azure DevOps and ServiceNow, teams can ensure everything runs smoothly without any hiccups.
This will help the organization reduce release cycle times, address customer concerns faster, and fix bugs promptly.
What Data Can be Synchronized Between ServiceNow and Azure DevOps?
Let’s take a quick look at what you can sync within each system.
- All the work items in Azure DevOps, like bugs, issues, tasks, and test cases.
- ServiceNow entities, including incidents, problems, change requests, RITM, catalog, and tasks.
You can map the entity fields in any way you require. For instance, Work Items (Bugs) in Azure DevOps to Incidents in ServiceNow. Another option is to map statuses, e.g., “Waiting for Support” mapped to “In Progress”.
Other practical applications include maintaining the parent-child hierarchy between Azure DevOps work items and ServiceNow entities. This involves syncing incidents, sync statuses, and correlation details.
By letting an integration tool take control of the Azure DevOps and ServiceNow integration, you can save yourself work and ensure data is exchanged consistently under the conditions you specify.

How to Choose the Right Technology for Setting up an Azure DevOps ServiceNow Integration
When picking an integration solution, it is important to clarify the problems you need to solve.
There are three particular criteria to bear in mind when choosing a solution for ServiceNow and Azure DevOps integration.
Security
Considering that teams would be sharing sensitive information with other teams or companies, integration security should be paramount when choosing a solution.
The system should also allow teams to maintain privacy so they only share the information they want to.
To that effect, you need to look for solutions with advanced encryption and safety protocols, such as tokenization, role-based authentication, and pseudonymization.

Reliability
The integration solution must be able to cope with downtime or problems on either side of the connection and recover when things are back up.
Outages happen when working online, and the system should be capable of rescheduling data exchange without anything getting lost and without engineers needing to become involved.
Flexibility (Scalability)
The teams on either side of a ServiceNow to Azure DevOps integration may want to expand the range of data shared as the teams grow and requirements change.
In that case, the integration must be able to handle these changes and adapt to the needs of users on each end of the connection.
For our integration, we’ve chosen Exalate, a solution built to solve these three particular challenges. It is robust and flexible and allows your teams to operate independently.
Now let’s look at how to set up our ServiceNow Azure DevOps integration.
How to Set up an Azure DevOps ServiceNow Integration (a Step-by-Step Process)
First, you need to install Exalate on both sides.
Note: You can watch the step-by-step Azure DevOps ServiceNow integration tutorial.
Step 1: Install Exalate on Azure DevOps
You can install Exalate via the Microsoft Azure marketplace, which will deploy the node onto the Exalate cloud. Alternatively, you can also install Exalate via Docker.
For this guide, I’ll install directly from the marketplace.
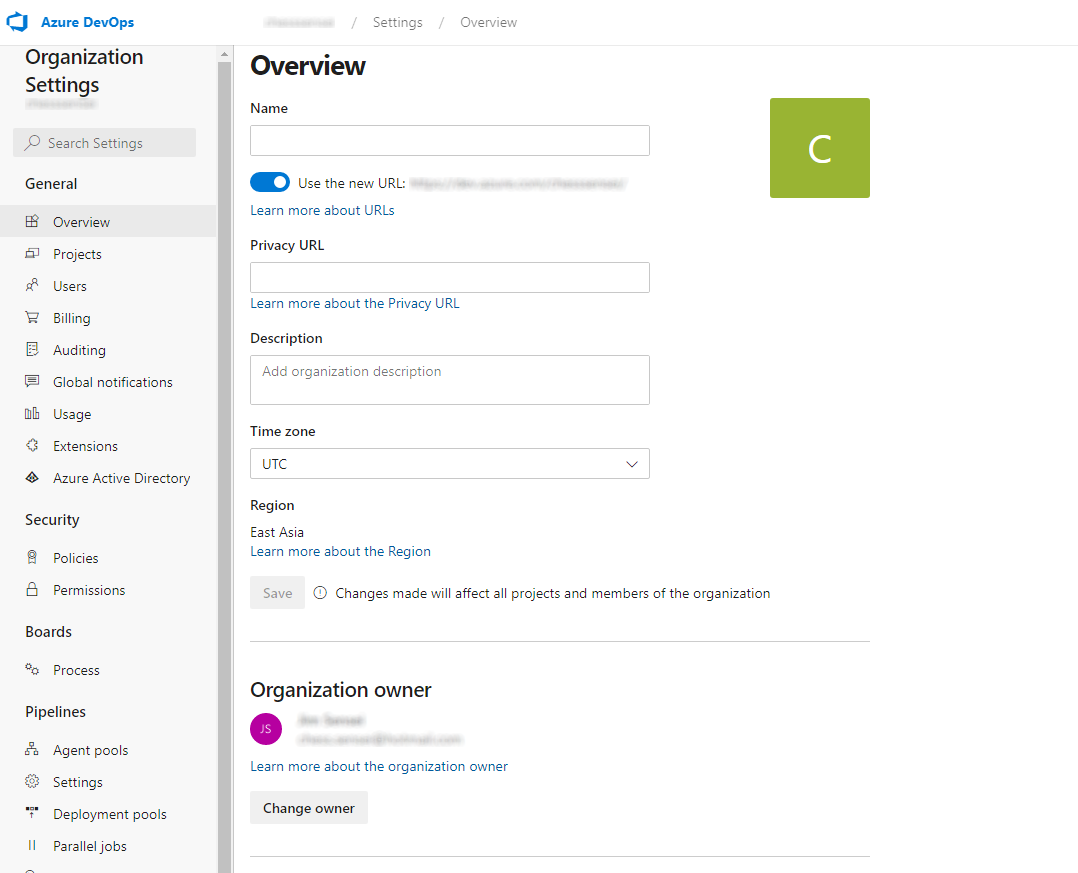
Make sure you are logged in as an admin. Scroll down to the bottom left of the screen and click on ‘Organization Settings’. On the screen that follows, click “Extensions” in the left-hand menu.
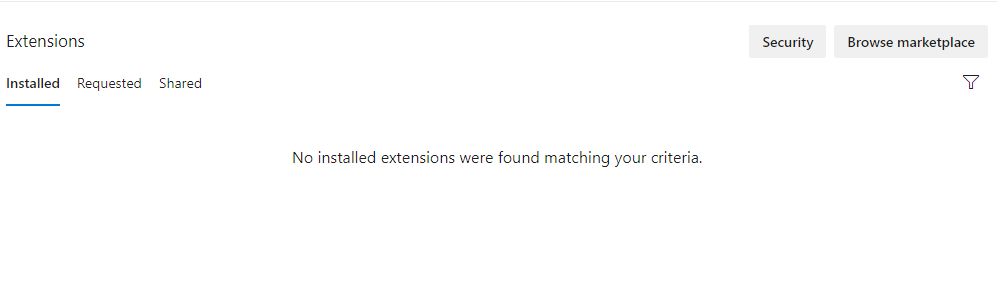
On the extensions screen, click the ‘Browse marketplace’ in the top right.
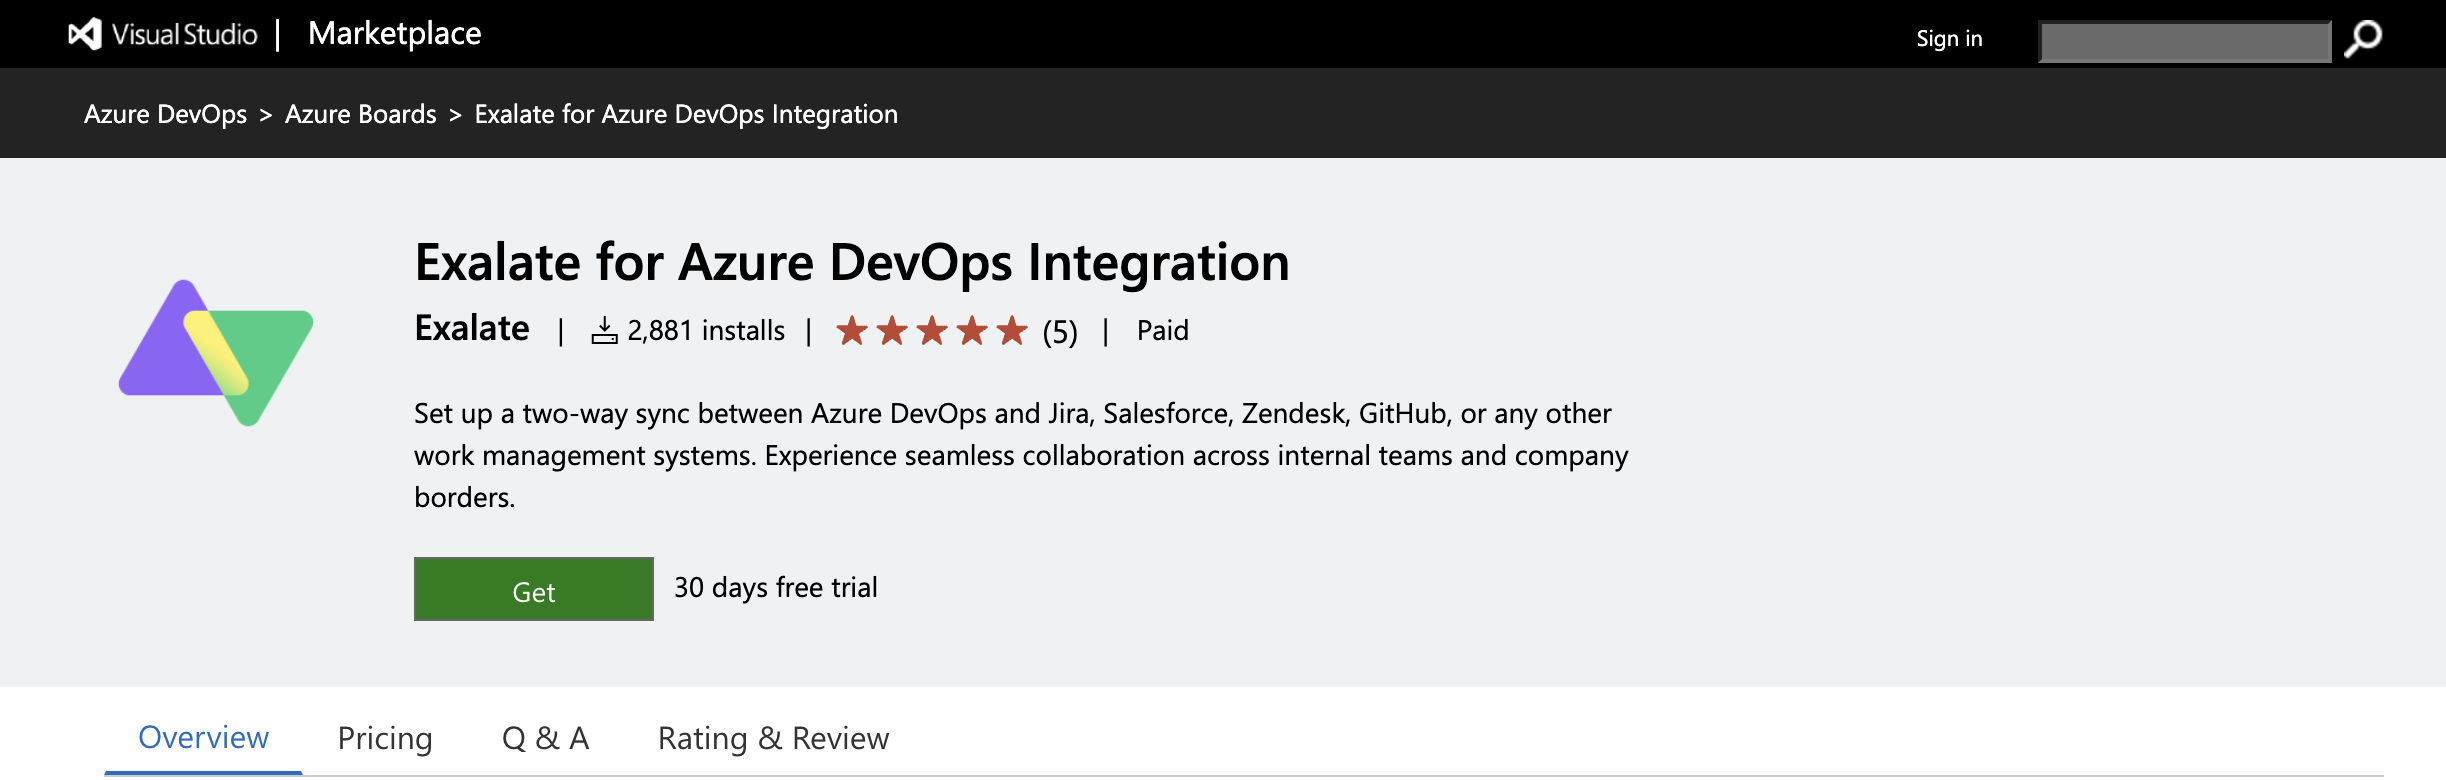
In the marketplace search field, look for Exalate for Azure DevOps.
Click it and you’ll be taken to its marketplace page. Click the green ‘Get’ button to install it.
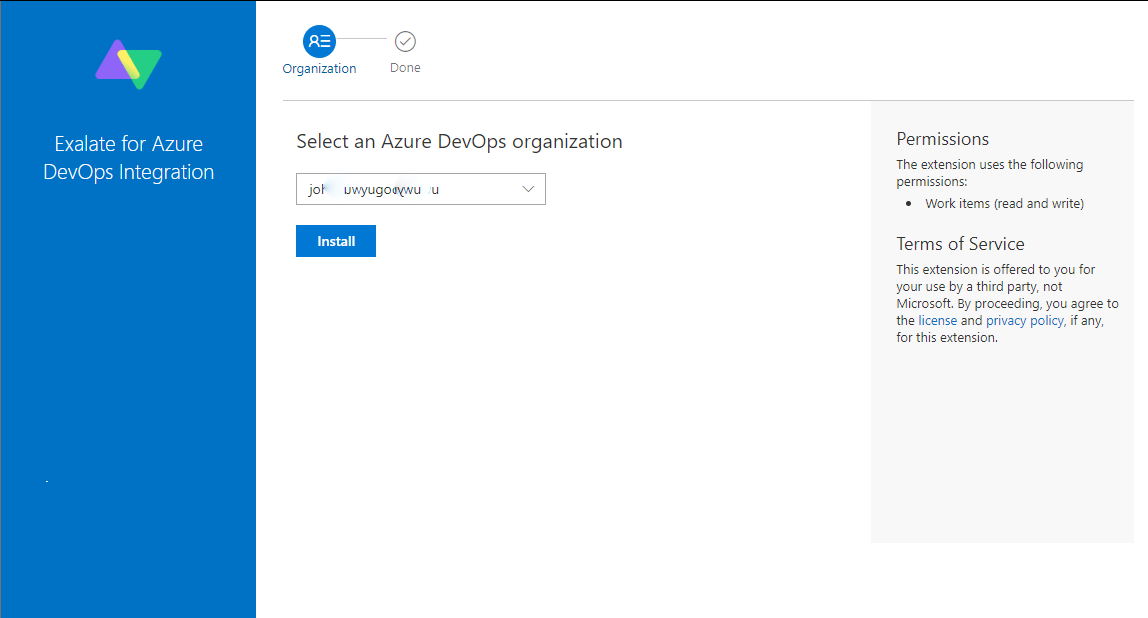
Next, you have to pick an organization to attach your installation to. Choose one from the drop-down list and click the blue “Install” button.
You’ll also need to request an evaluation license to use Exalate. You can do that by clicking “Exalate” in the left-hand Azure DevOps menu. Then click “License details”.
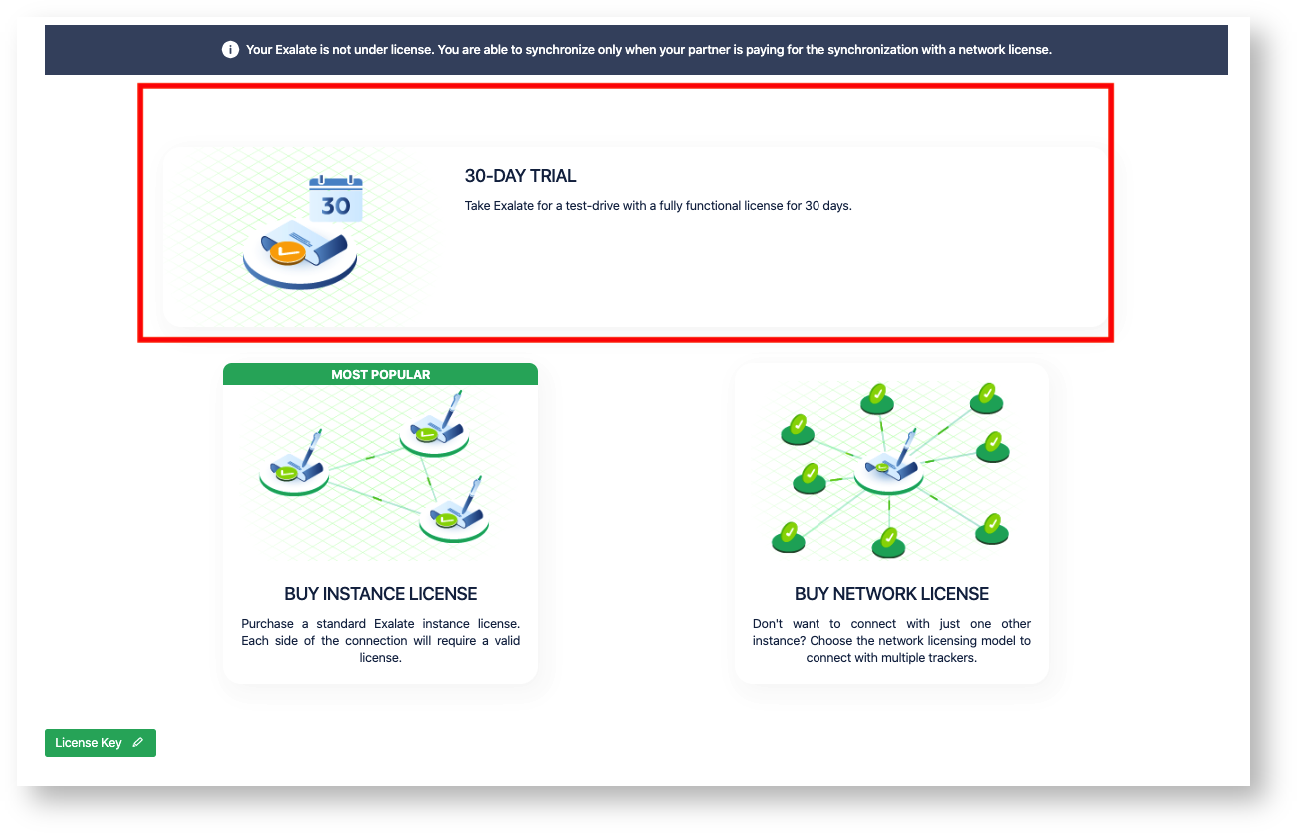
Click on the 30-day trial image and then enter your email into the popup that appears. You’ll get an email with an evaluation code, which you should copy.
Back in Exalate, in the license details area, click the green “License Key” button at the bottom left.
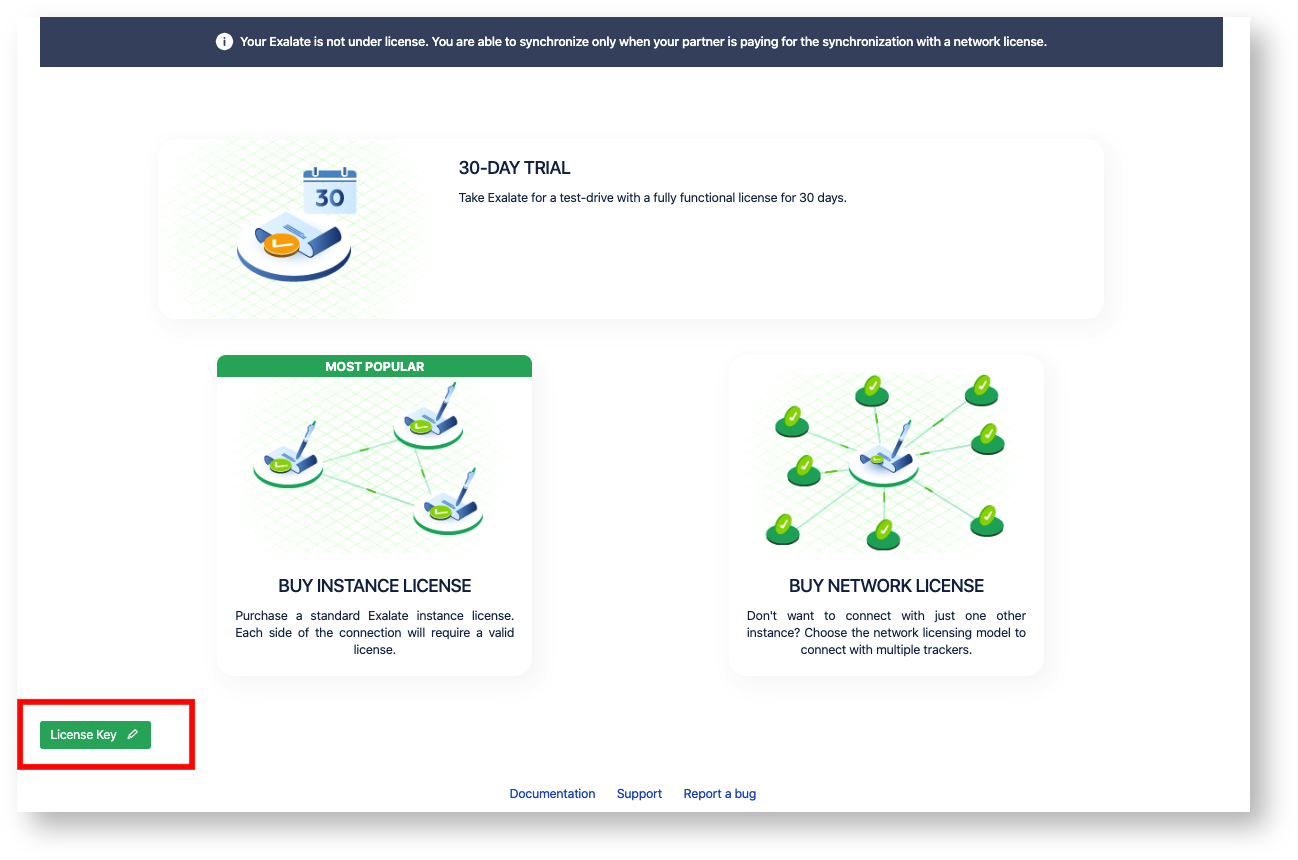
Paste your key in and click “Update” to register your license.

You’re now all set on Azure DevOps. When we get to step 3, come back here to configure your connection.
Step 2: Install Exalate on ServiceNow
Now, we’ll install Exalate on our ServiceNow instance.
Firstly, request an Exalate node by going to Exalate’s integrations page. Find ServiceNow and fill in your details on the form that pops up. You’ll get an email soon afterward, containing the URL of your node.
Next, download an XML “update set” from Exalate. The information in this file tells ServiceNow how to work with Exalate. Download it here.
Once you’ve stored the XML file somewhere safe, log in to your ServiceNow account. In the left-side menu, click the “All applications” icon, if it isn’t already selected.
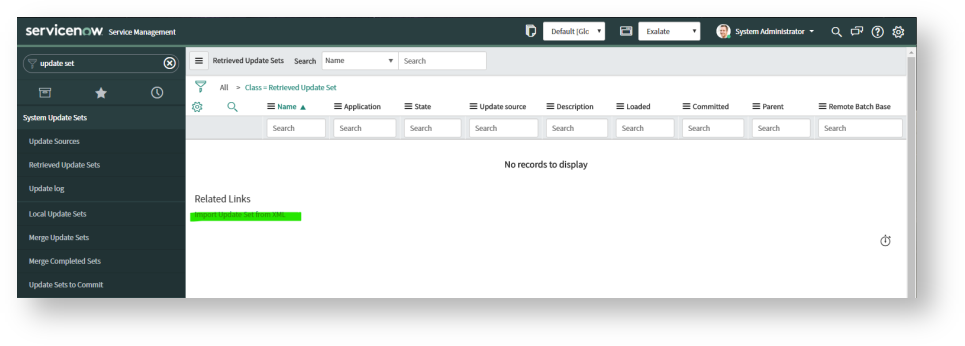
Look for the “System Update Sets” entry and click to open it. This menu can get very crowded, so use the search field to locate it if you have trouble finding it. Then click “Retrieved Update Sets”.

Under the “Related Links” heading, click the text that says “Import Update Set from XML”. Next, click the “Choose File” button and select the XML file downloaded earlier. Click the “Upload” button to complete the process.
The Exalate XML file will be uploaded and listed. You should be able to see it. Click the file and then click the “Preview Update Set”. If it asks you to update your setup, click the “Accept remote update” button to do so.
Once that’s done, click the “Commit Update Set” button. Exalate is now installed on ServiceNow.

Note: For more details, read this documentation. There are a few different ways to do it, this guide will take you through one of them.
Step 3: Set up a connection between Azure DevOps and ServiceNow
To create a connection between Azure DevOps and ServiceNow, we log into one platform and create an invitation, which we then paste into the other.
This step and most of what follows is essentially the same for these and other platforms, so Exalate allows you to connect multiple platforms very easily once you are familiar with it.
For this example, we’ll start in Azure DevOps. Find Exalate in the “Organization Settings” under “Extensions”.
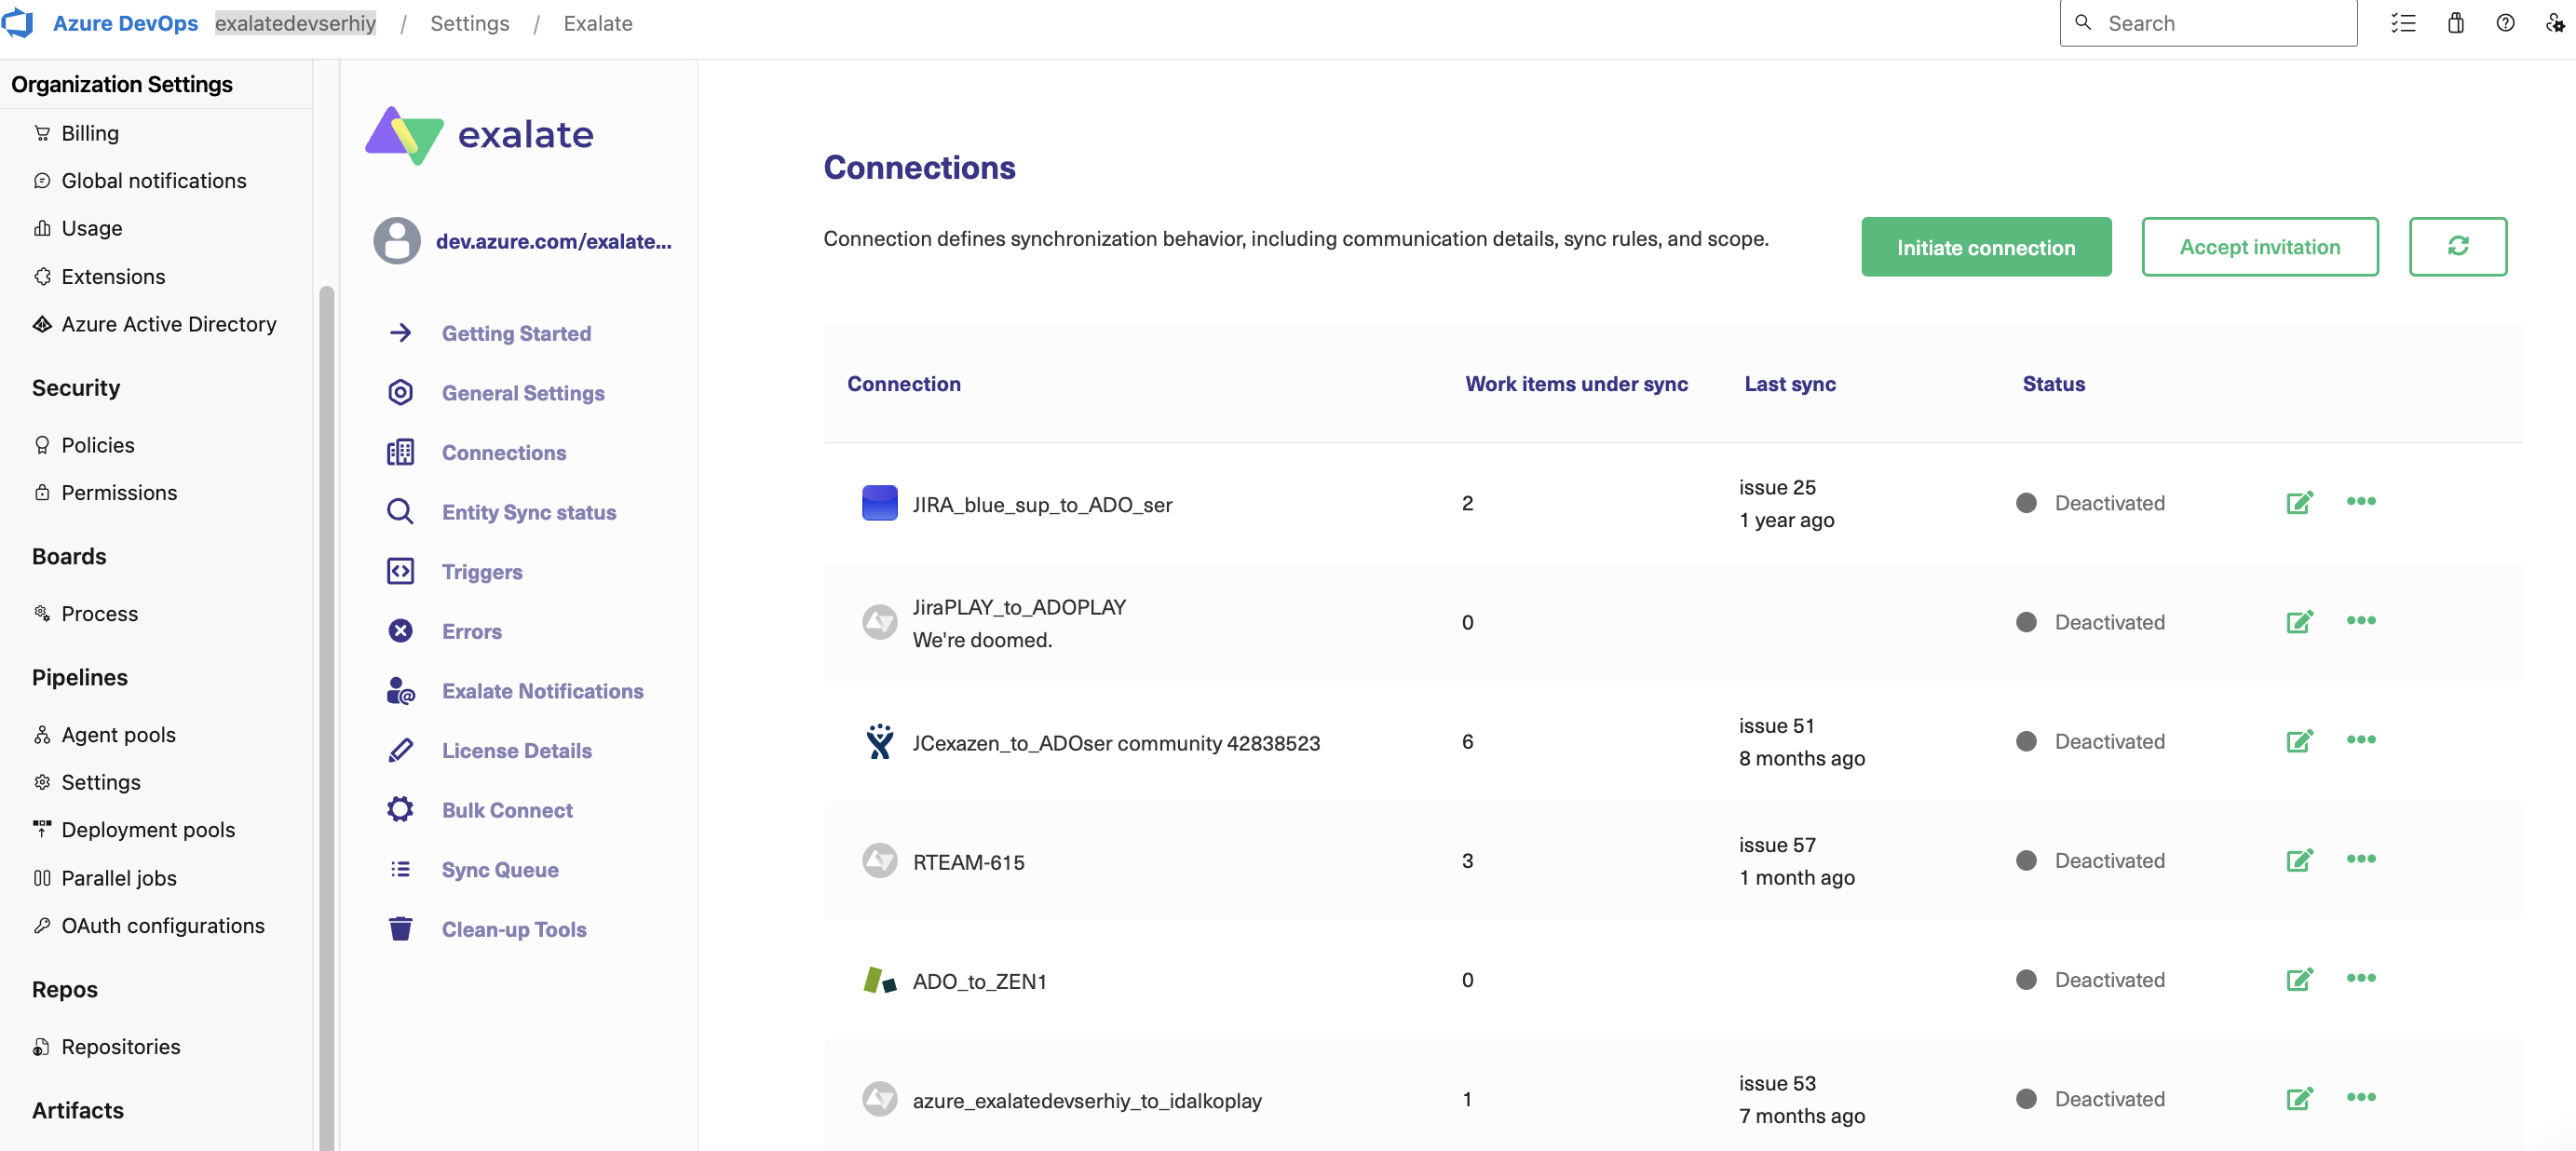
If you aren’t already there, click “Connections” in Exalate’s left-side menu. You should see either a list of existing connections or a message saying you don’t have any. Either way, click the green “Initiate connection” button to get started.
On the next screen, enter the URL of your destination instance. Again, that will be our Exalate ServiceNow node. After you enter the URL, a few more fields will appear.
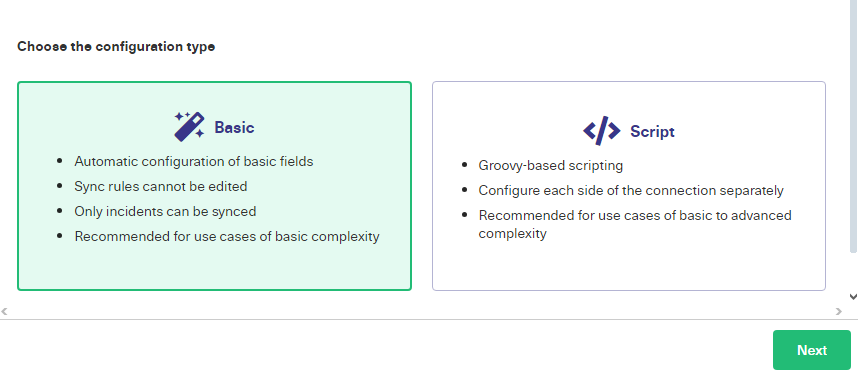
You will be required to select the configuration type of your connection. Exalate offers two modes: Basic and Script.
The Basic mode has predefined mappings and sync rules that cannot be modified. It is suitable for use cases of basic complexity.
Exalate offers a Free Plan that comes with the Basic mode connection, offering up to 1,000 free syncs per month. It is a great way to see how Exalate works firsthand.
The Script mode allows you to configure each side of advanced integration cases separately using Groovy-based scripting.
With the Script mode, you can generate your own rules and share almost any kind of information with the other side.
You can even upgrade your Basic connection to Script mode anytime you want!
Let us have a look at both these modes one by one.
Connections with the Basic mode
Click “Next” when you select “Basic” on the screen above.
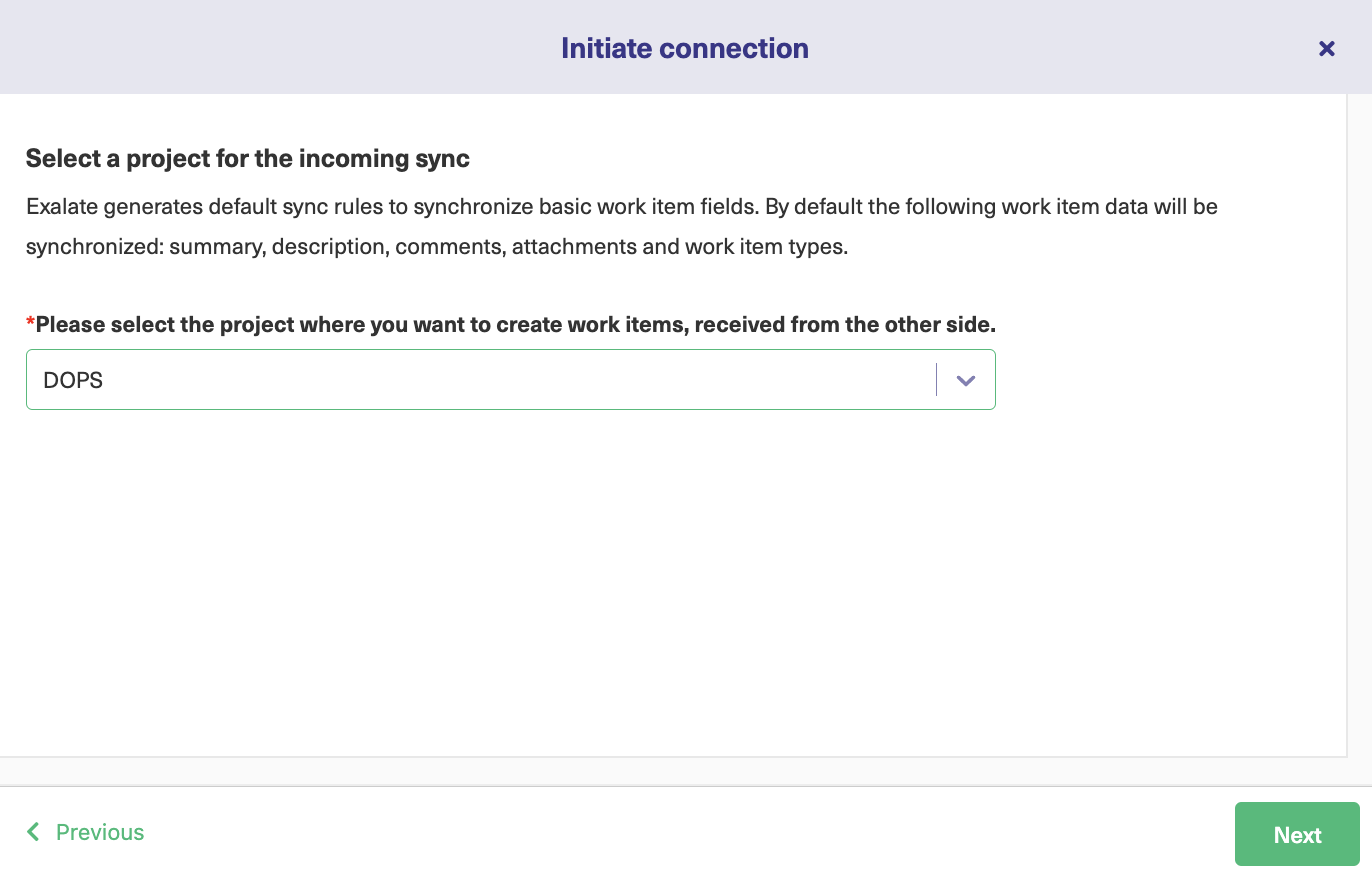
Select the project on the Azure DevOps side. This will be the project you want the ServiceNow entities to sync into. Choose the one you want from the dropdown list and hit ‘Next’.
Exalate will then ask you to verify if you have admin access to the other side. In our case, it is ServiceNow. Click “Yes, I have admin access” if you have access.
In case you don’t have admin access, an invitation code will be generated for you. Copy this invitation code and paste it manually on the ServiceNow side.
We will see how to do this in the Script mode.
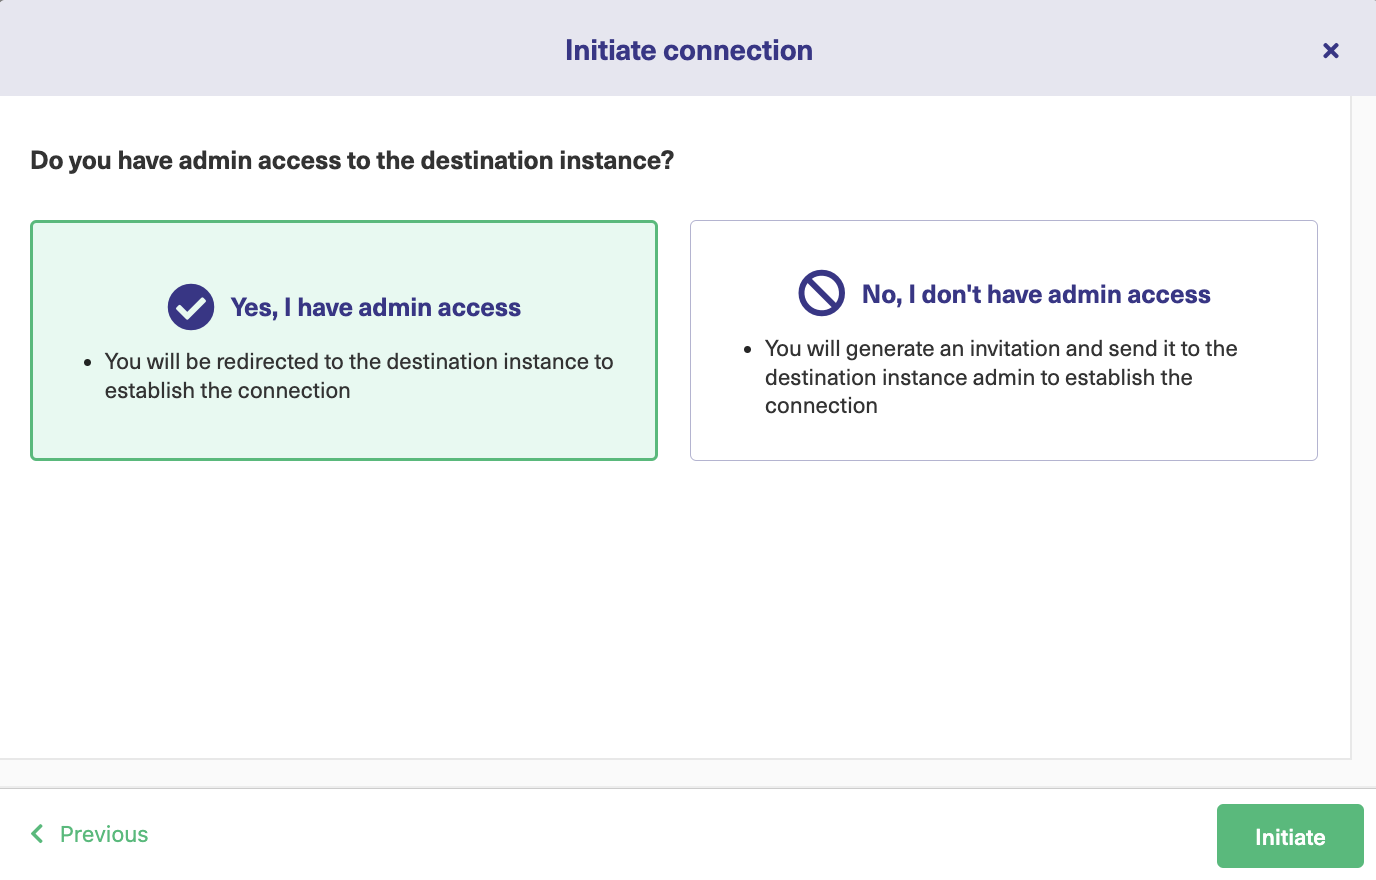
Click ‘Initiate’ after confirming admin access.
After a quick verification is done on the ServiceNow side, your Basic mode connection between Azure DevOps and ServiceNow is established. You can now move on and sync your first Incident or Work Item.
Here, we have entered a work item number to start the synchronization from Azure DevOps.
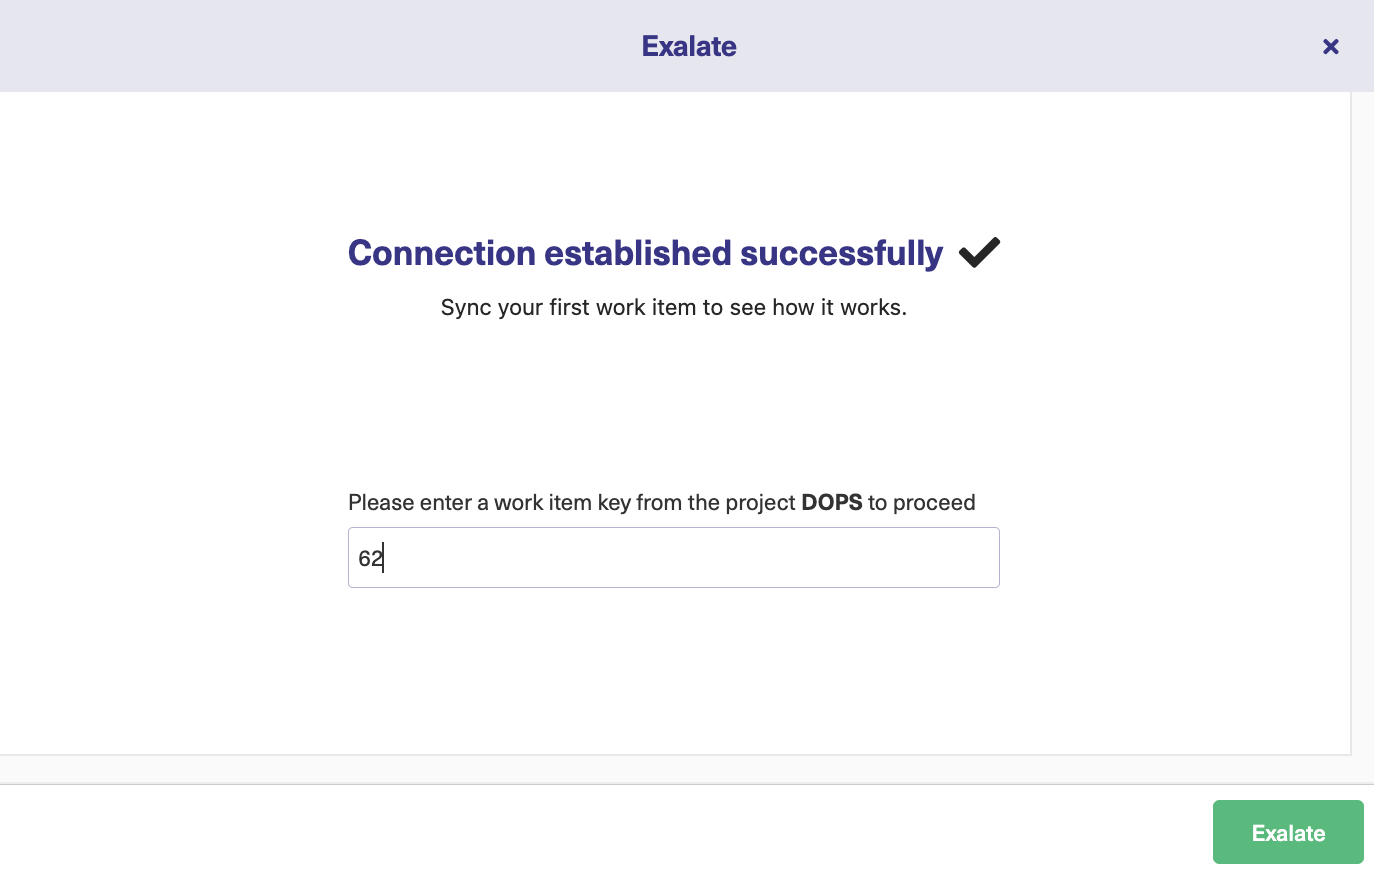
If you navigate to the ServiceNow side right now you will come across the same screen asking you to enter the Incident key to sync.
In either case, click “Exalate”.
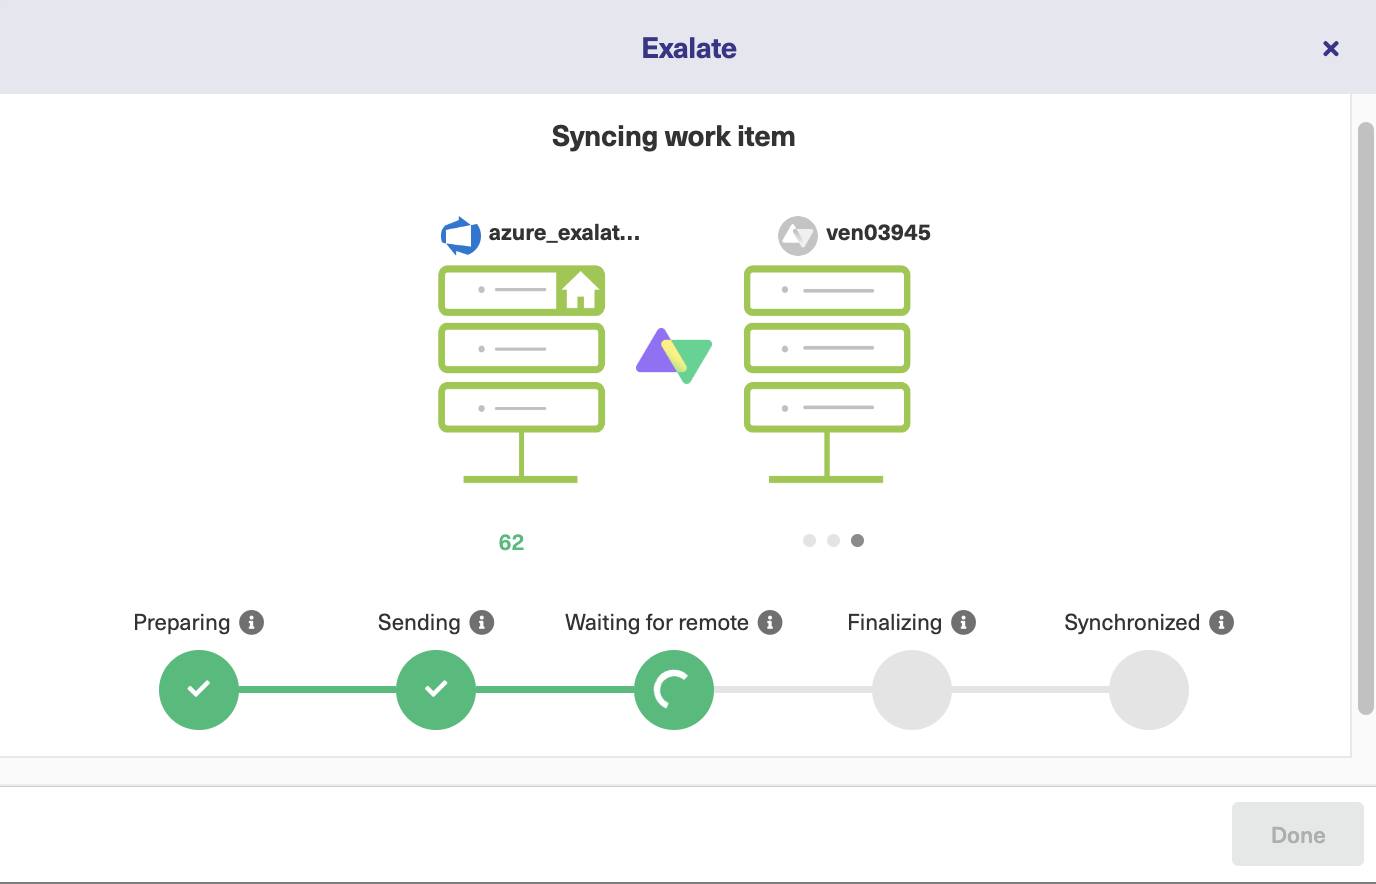
Wait for some time for the synchronization to happen. You’ll receive proper sync status updates.

The Work Item you have synchronized creates an Incident in ServiceNow, which allows the syncing of statuses and any other vital updates bidirectionally.
You can also follow the Work Item or Incident by clicking the remote link generated on the Azure DevOps and the ServiceNow sides.
Using the Basic mode, you can synchronize Work Items or Incidents. To sync existing Azure DevOps and ServiceNow entities, you can create triggers or use the “Bulk Connect” option.
We will cover triggers in detail in a bit.
Connections with the Script Mode
To continue with this mode, select “Script” on the screen to choose the configuration type and click “Next”.
You can give each side of the connection a name and an optional description. This will help other people who may need to work with these connections later.
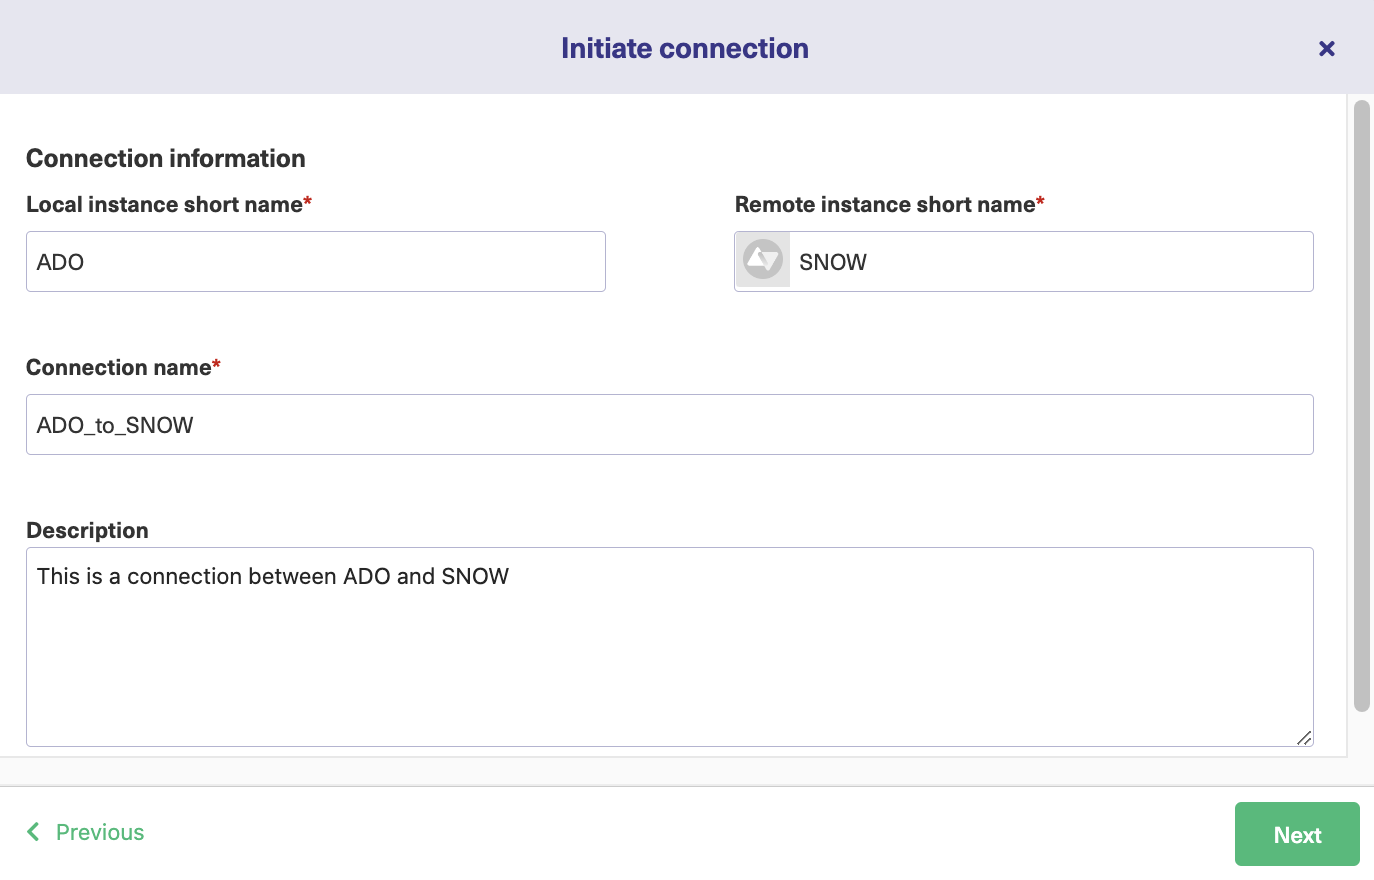
After entering the details, click the green “Next” button.
You need to pick the project that is going to be synchronized via the connection. Use the drop-down box to choose from the available projects and then click the green “Initiate” button.
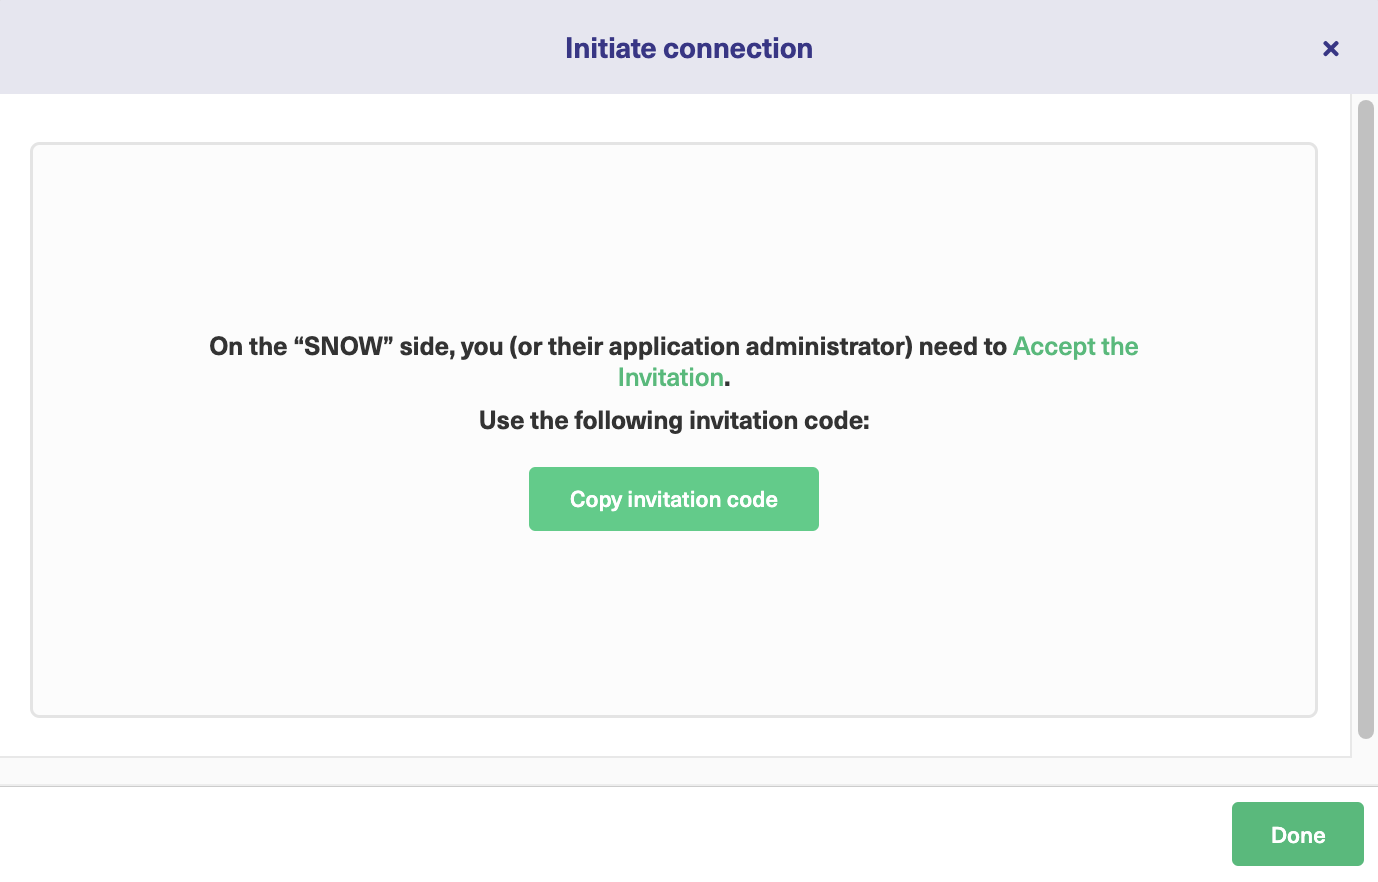
Exalate will generate an invitation code. Copy this and paste it somewhere safe. Head over to ServiceNow for the next.
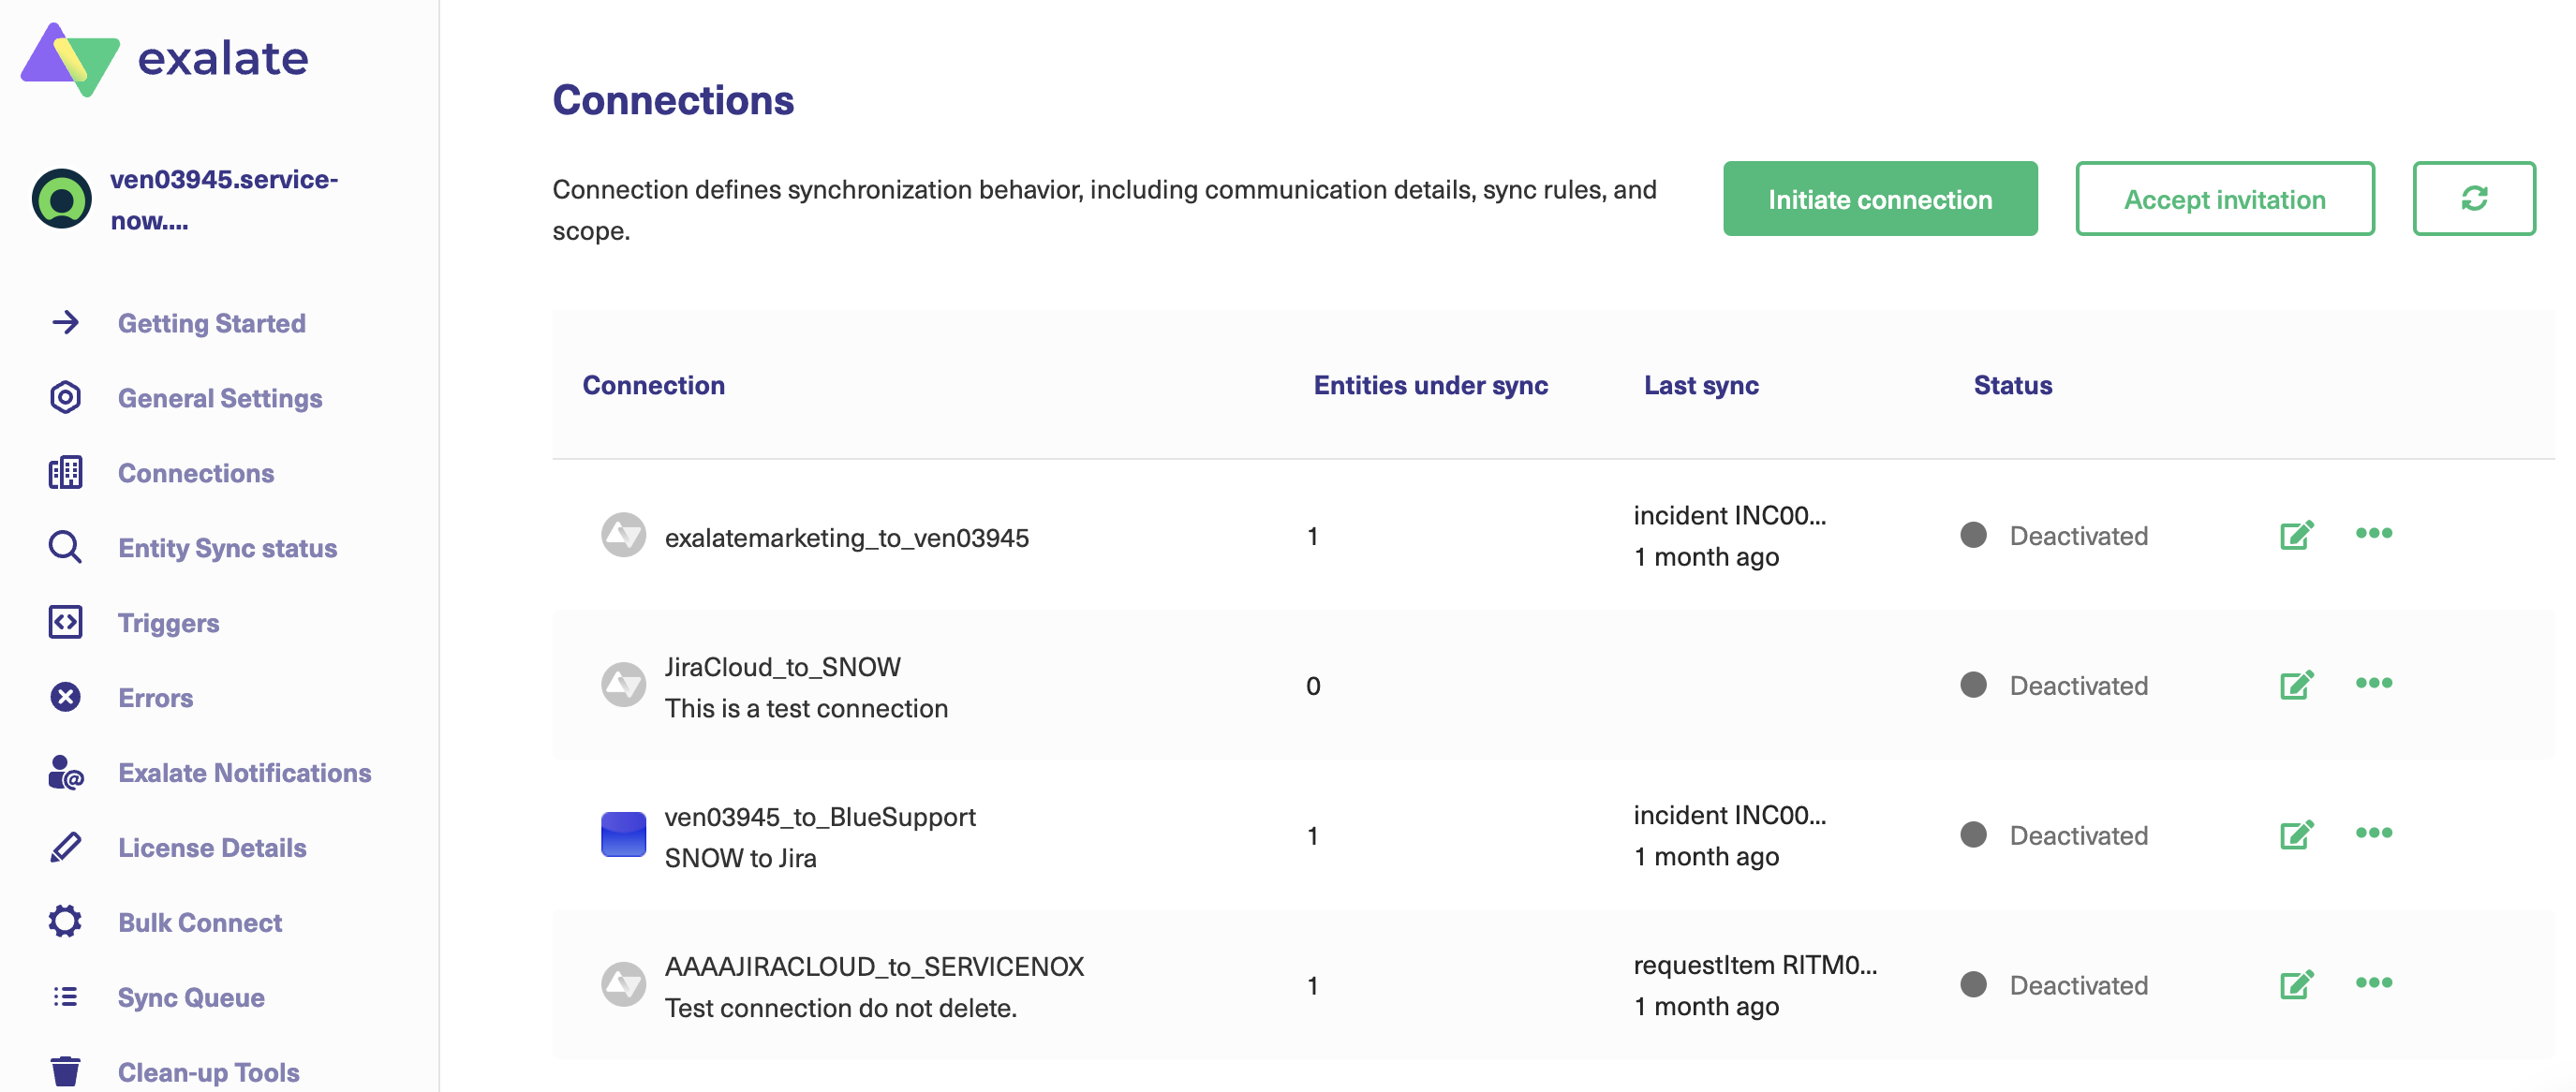
Click “Connections” in the left-hand sidebar. Again, you’ll see a list of existing connections if you have any.
Click the “Accept invitation” button in the top right.
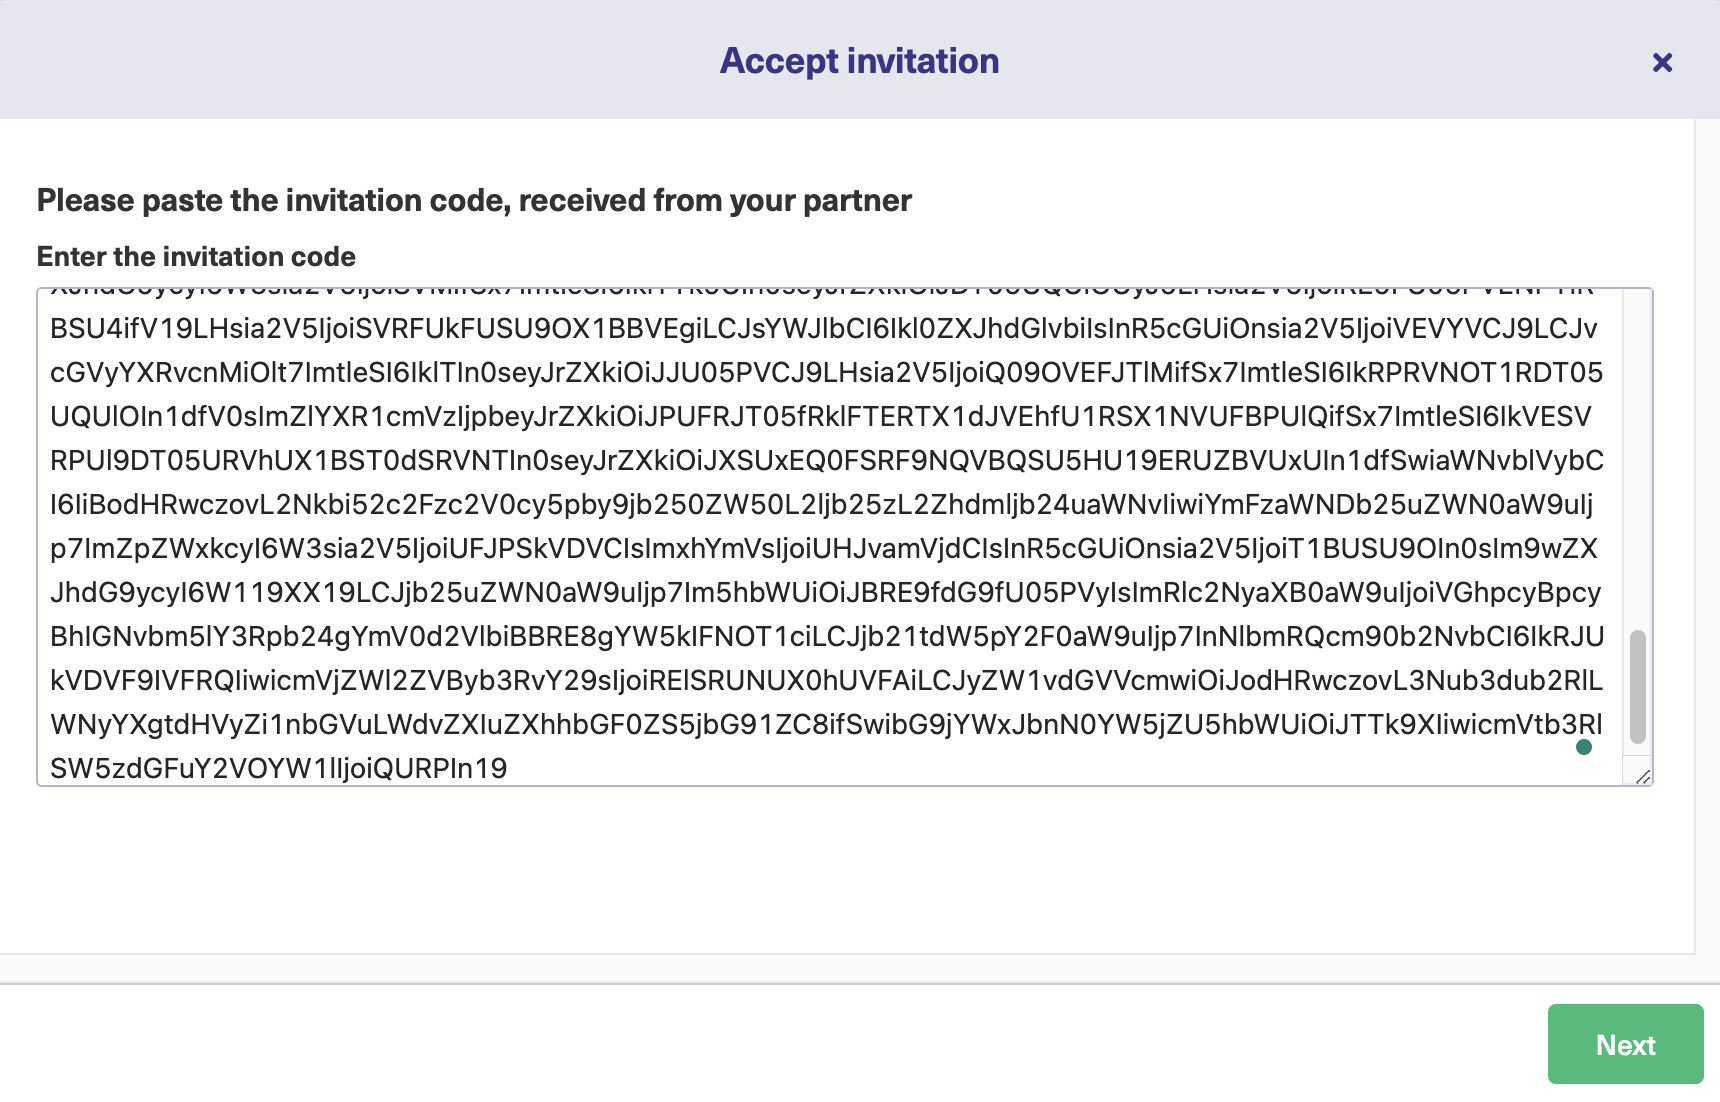
On the next screen, you’ll see a text field. Paste in the invitation code generated in Azure DevOps. Then click the green “Next” button.
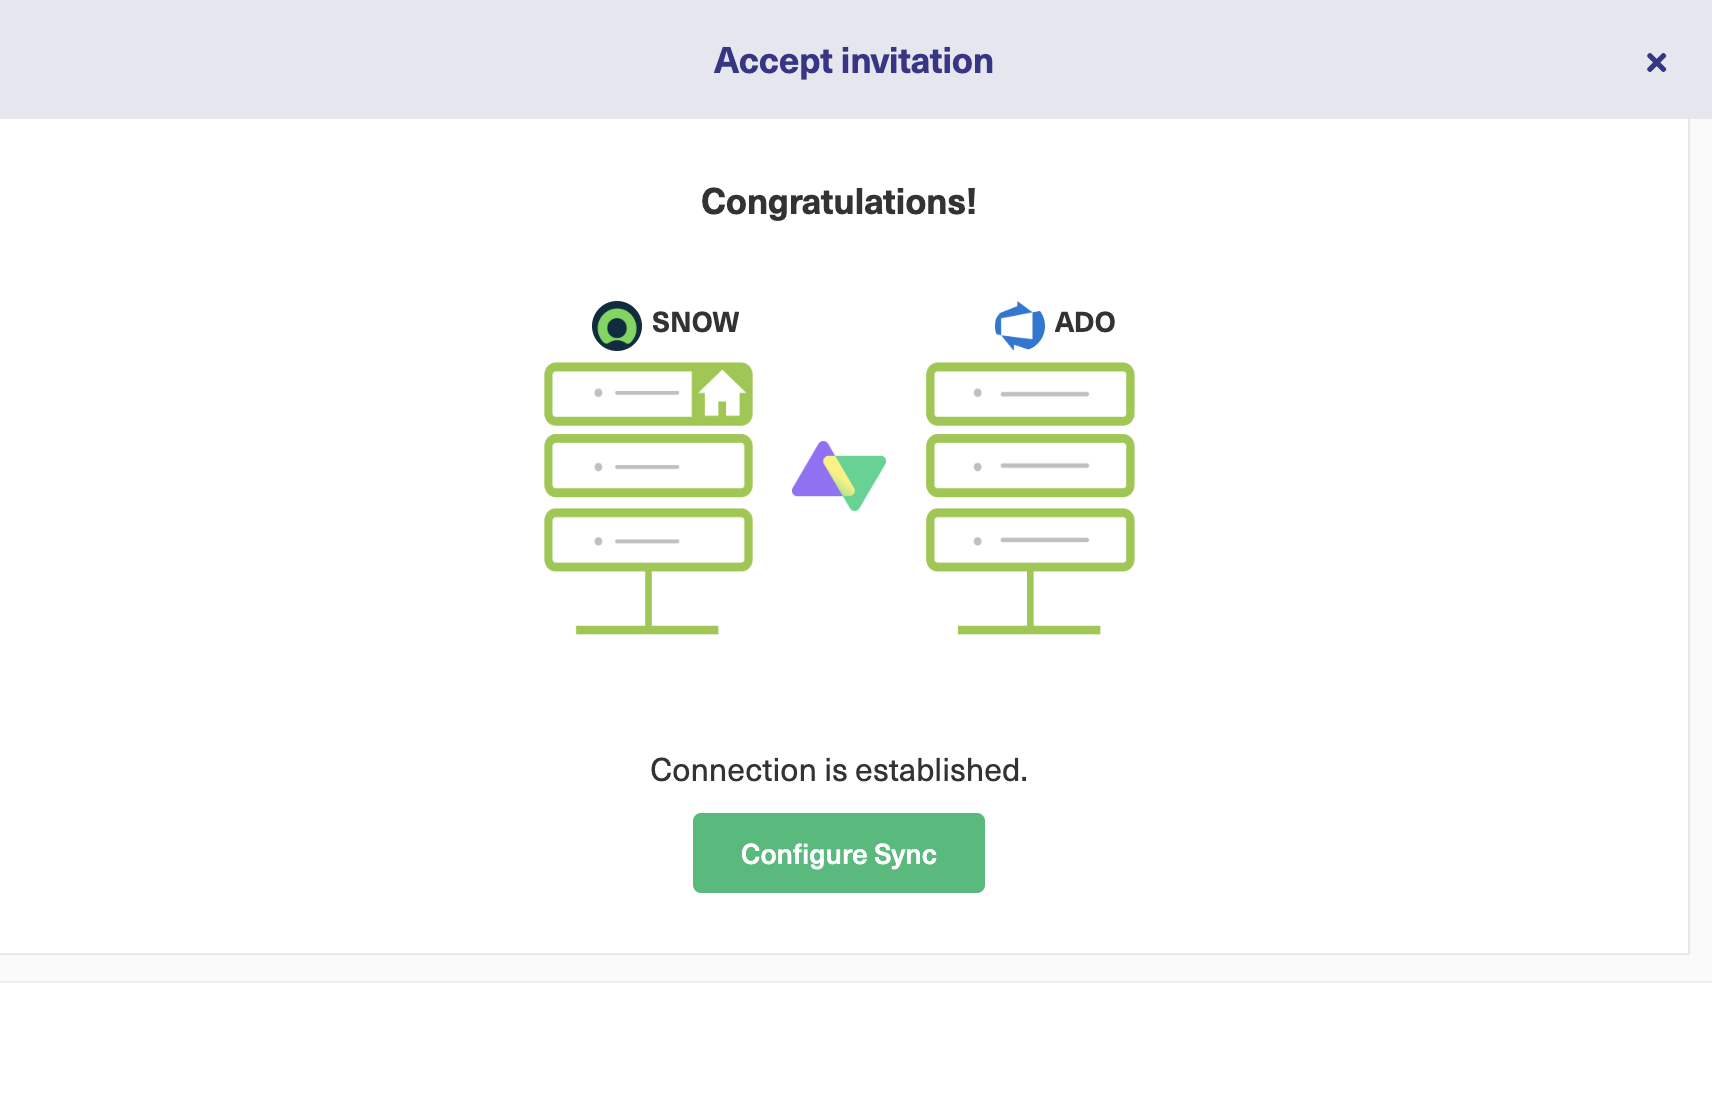
The connection between Azure DevOps and ServiceNow is successful. You can start configuring it as shown in step 4 or by clicking the “Configure Sync” button.
Note: Back in the connection list, we can see our connection is there, with the details we selected earlier. Now, we will edit the connection and control what it does, and when it does it.
Step 4: Configure Your Connection to Determine What Information to Share
In the Azure DevOps connections list, hover the mouse over the connection we just created.
Click the edit icon that appears in front of its name.
From here, you can edit triggers, write sync rules, and view statistics to know how many issues are under sync.
For now, click the “Rules” tab.

We can see a list of outgoing sync rules and incoming sync rules. Since we are in Azure DevOps, the outgoing sync rules refer to items sent from Azure DevOps to ServiceNow. The incoming rules refer to items sent from ServiceNow to AzureDevOps.
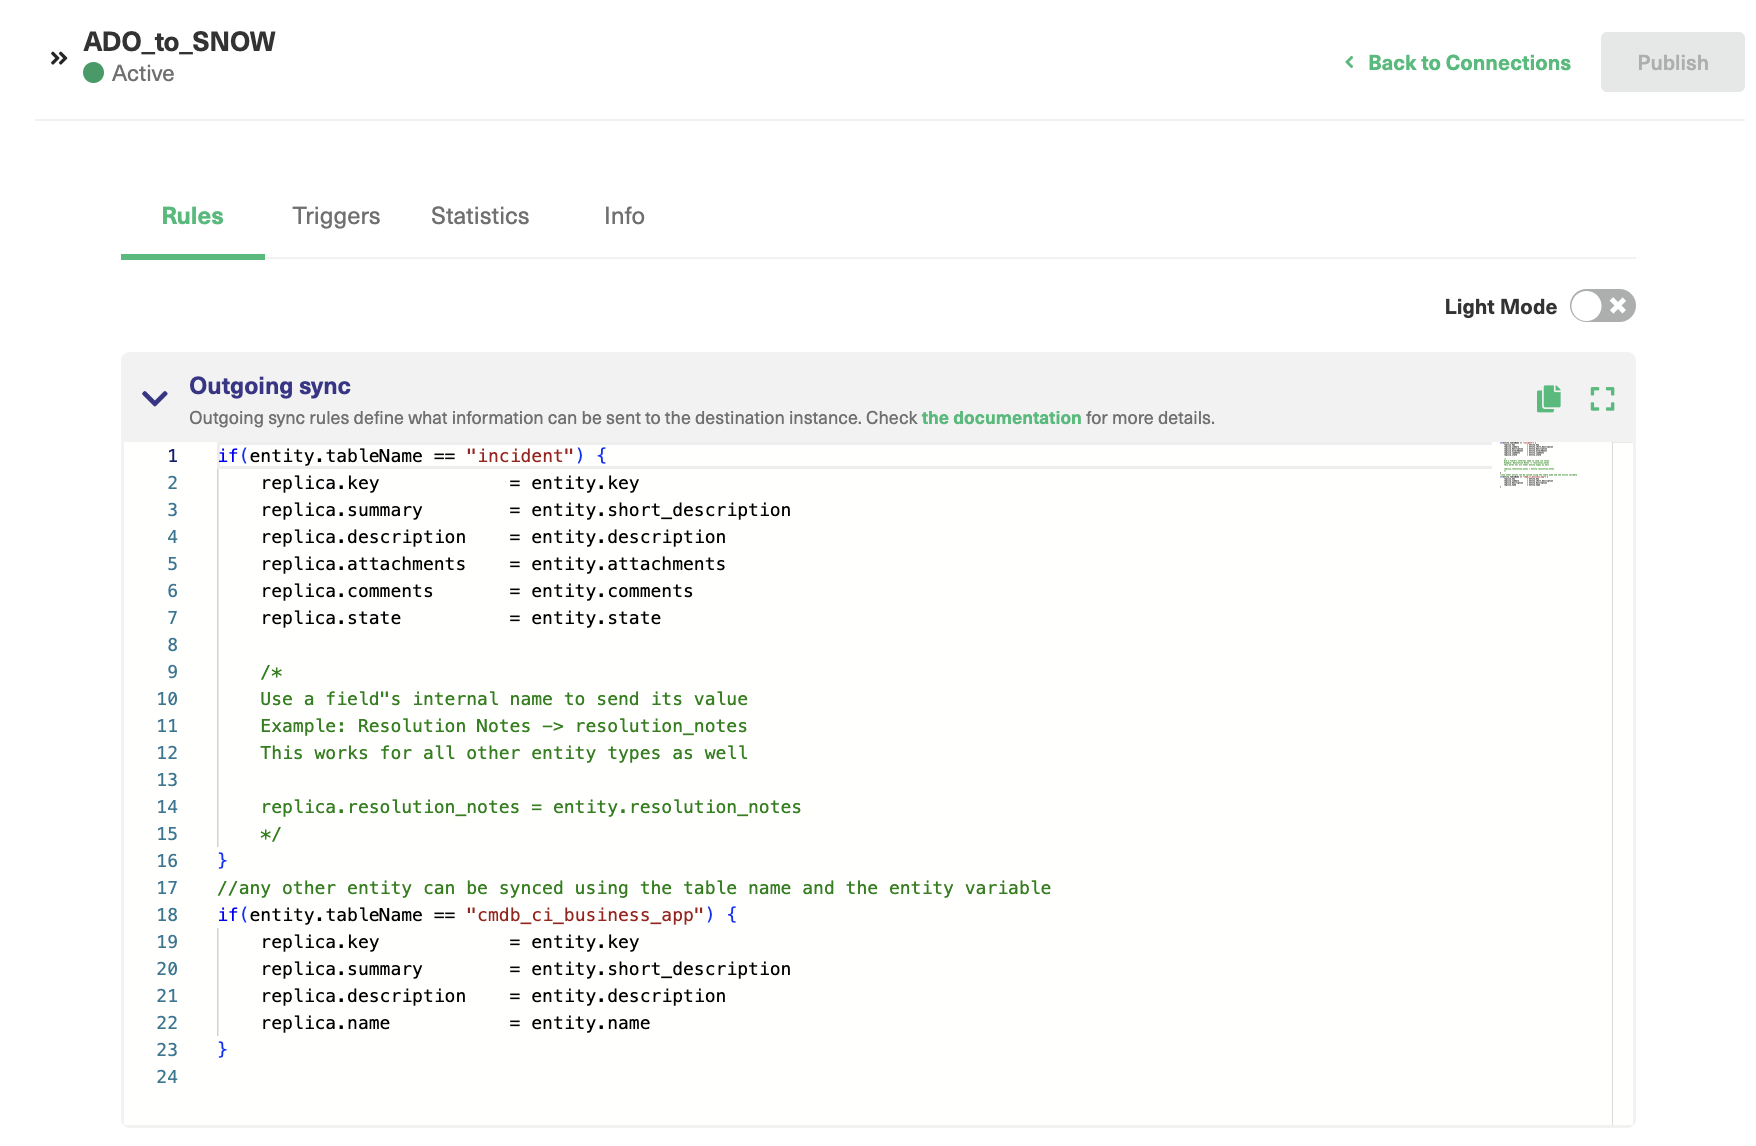
If we view the same screen in ServiceNow, we will see a similar screen, but with these relationships in reverse.
Let’s look more closely at the incoming rules in Azure DevOps.
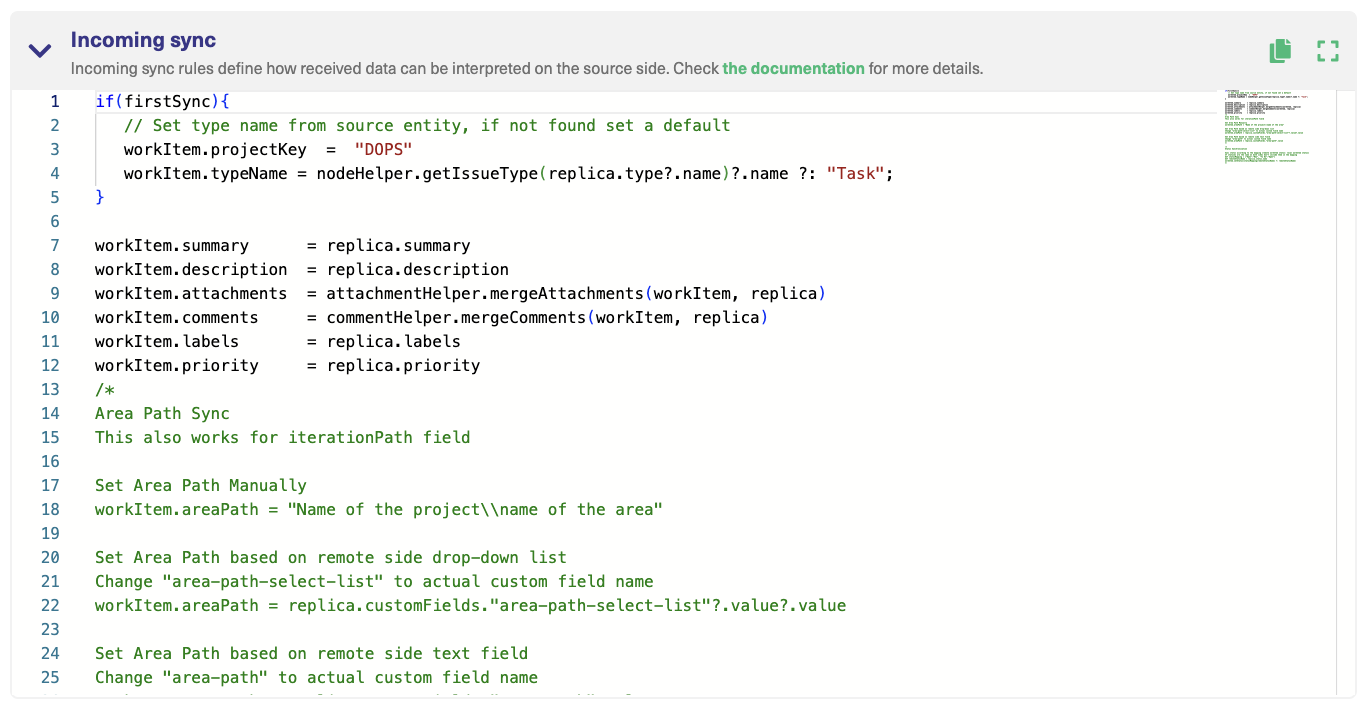
There are several lines, such as workItem.summary = replica.summary that control how data is mapped from one platform to the other. ‘Replica’ here refers to the payload exchanged between our Exalate nodes. It contains the details of the item from ServiceNow that is in sync with the ‘Work Item’ in Azure DevOps.
In this case, several fields are mapped directly onto each other. The summary, description, priority, and label fields will all be copied directly when the fields are synced.
If you don’t want a field mapped, delete the relevant line. If you want fields to map differently, change them. You could map them to a different field, for example, by writing workItem.labels = replica.priority.
You could also add specific text of your own, for example, workItem.description = ‘synced from ServiceNow’.
The attachments and comments fields use functions that automatically handle these items. These are a little more complicated, but you can investigate them and change them if you need to.
Again, you can easily delete them in case you don’t want those fields mapped. The commented areas, that start with /* and end with */, give you information about what you can do with the edit rules. To learn more, read our script helpers guide.
Step 5: Set Up Automated Synchronization Triggers
Now we’ve looked at what we’re sending, we’ll look at how to configure automated synchronization triggers. These set the conditions for sending items from one platform to the other.
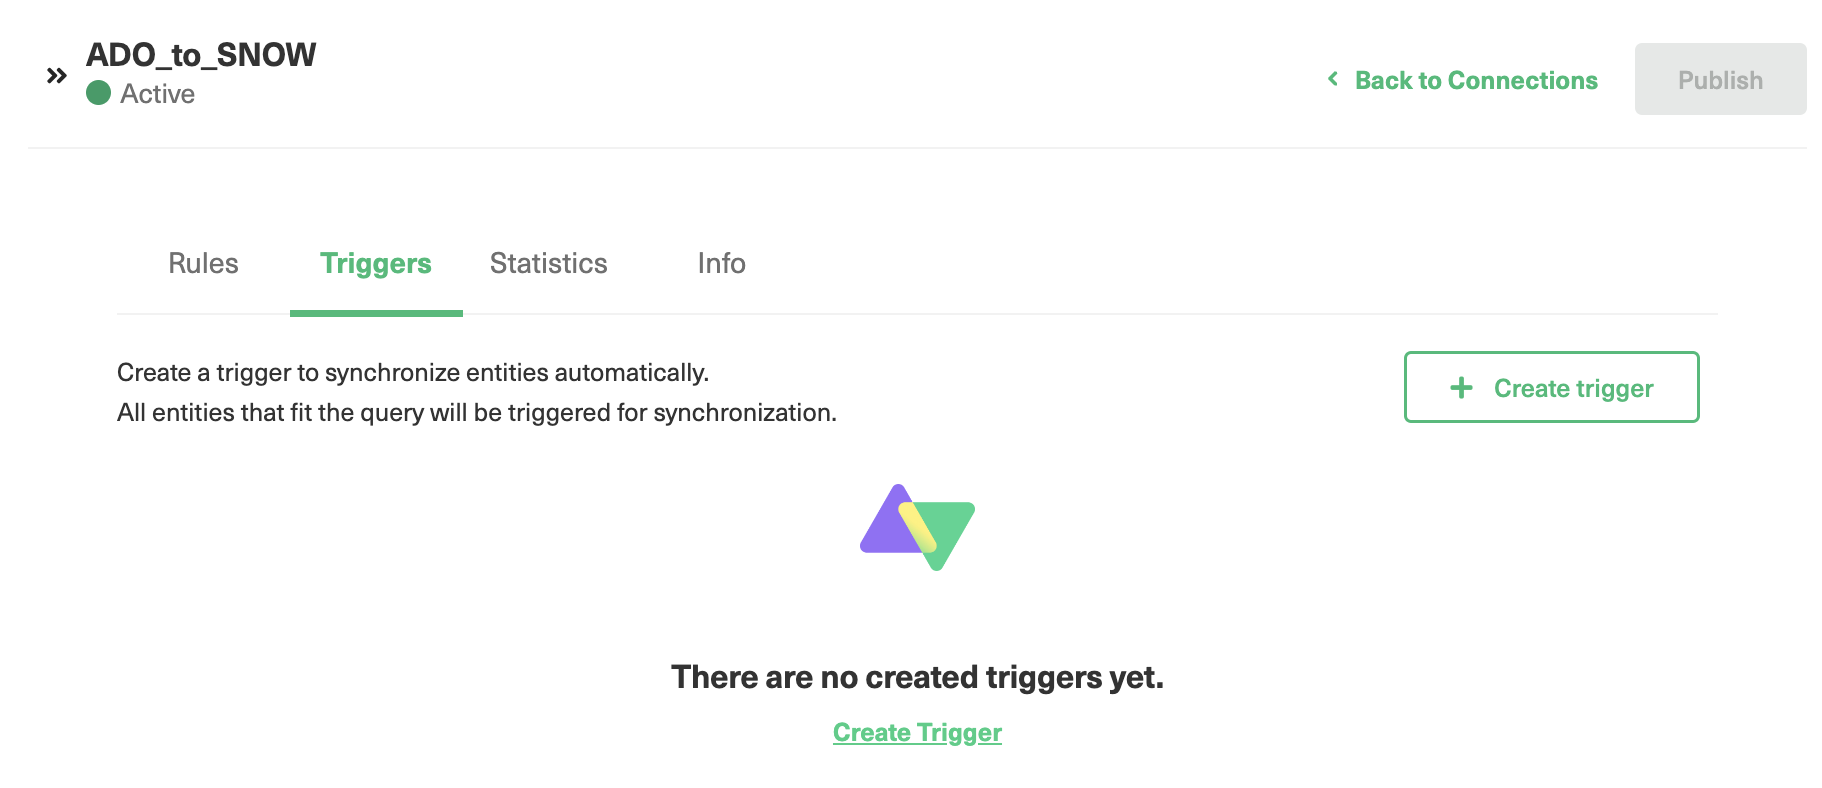
Go to the ‘Triggers’ section. Now, click the “Create trigger” button.
The “Add trigger” dialog box will appear. You can choose the entity type to work with from the drop-down box.
In this case, we only have one option, ‘Work item’. On other platforms, you may have other options available to select from. For instance, in ServiceNow, the drop-down will have many ServiceNow entities like Incidents, Problems, Change Requests, Catalog Tasks, etc.
In the ‘If’ text field, we can enter a search query to select matching items. You can use this query to exchange all items of a particular type or from a particular user.
You could send urgent queries or queries that have comments. Additionally, you can set up multiple triggers to send items that match different conditions.
The search query uses Work Item Query Language (WIQL) for short.
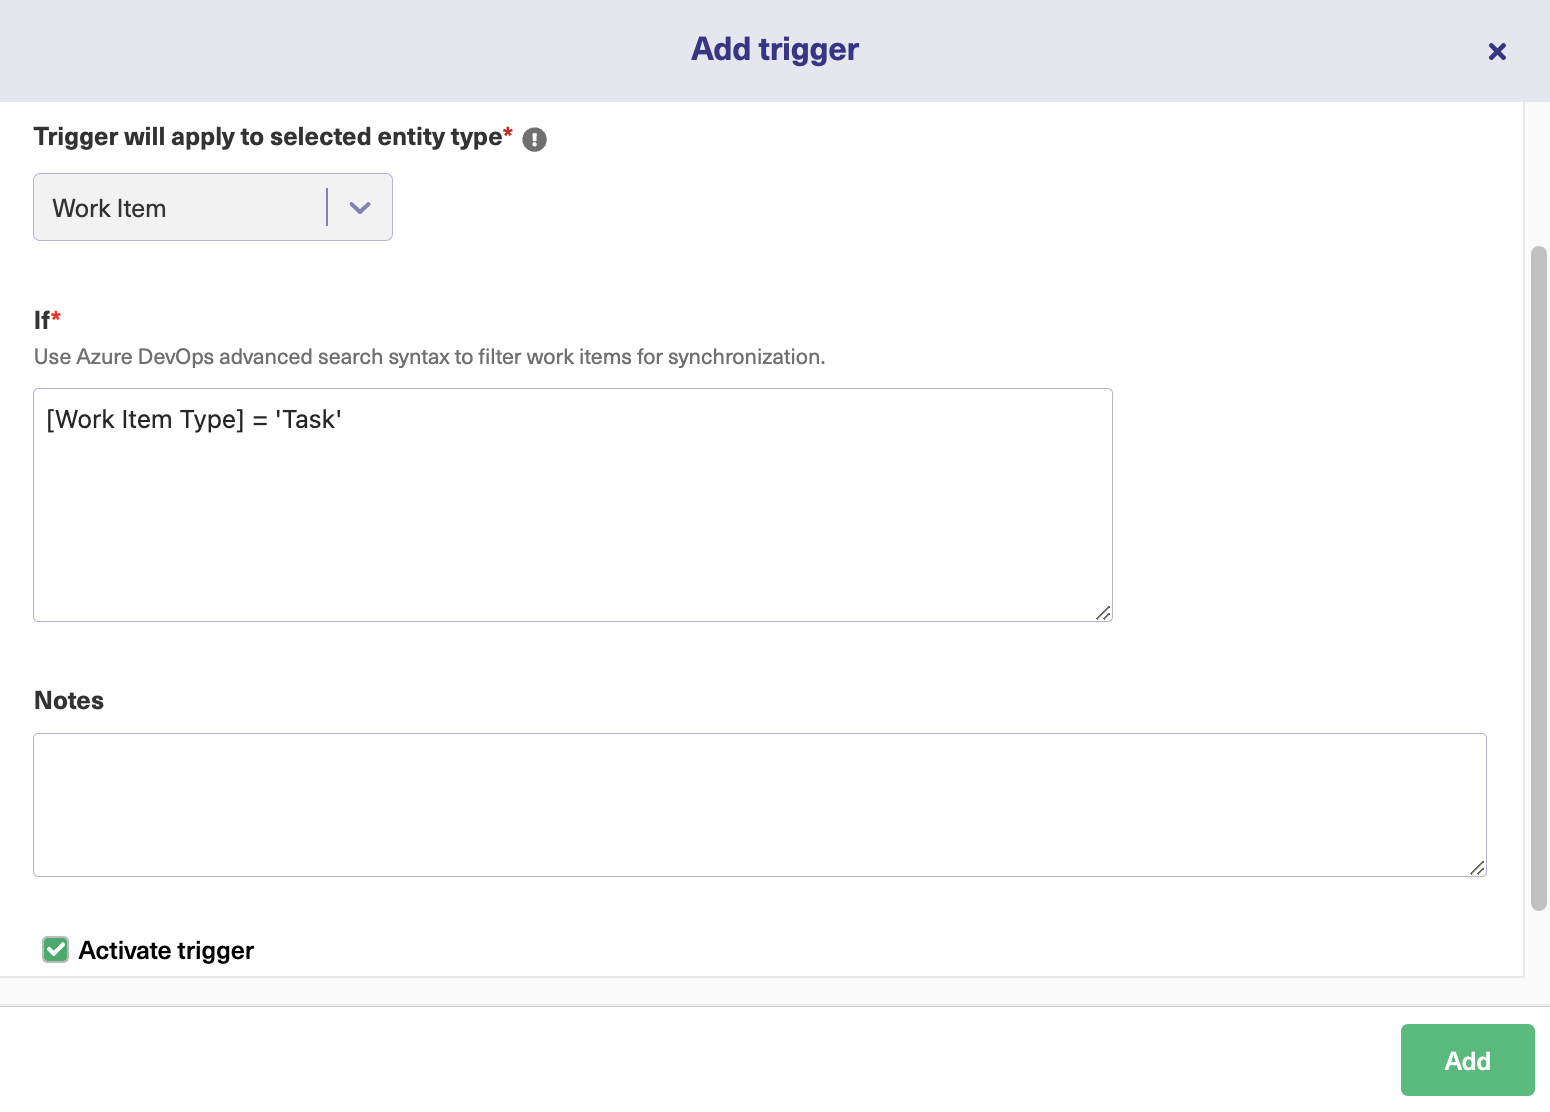
For this example, let’s create a query that syncs items of the “Task” type. To do that, we type the code into the ‘if’ field. This trigger will apply to any item where “Task” is set as the type. You can substitute ‘Task’ for any other type.
You can also add a description. It is best to add as much information about what you are doing and why you are doing it. That makes it easier to work with if you come back to it later, and also enables others to understand what is going on.
There’s also a checkbox to activate the trigger. You need to click this, or the trigger won’t do anything. Later you can use this to quickly switch existing triggers on or off.
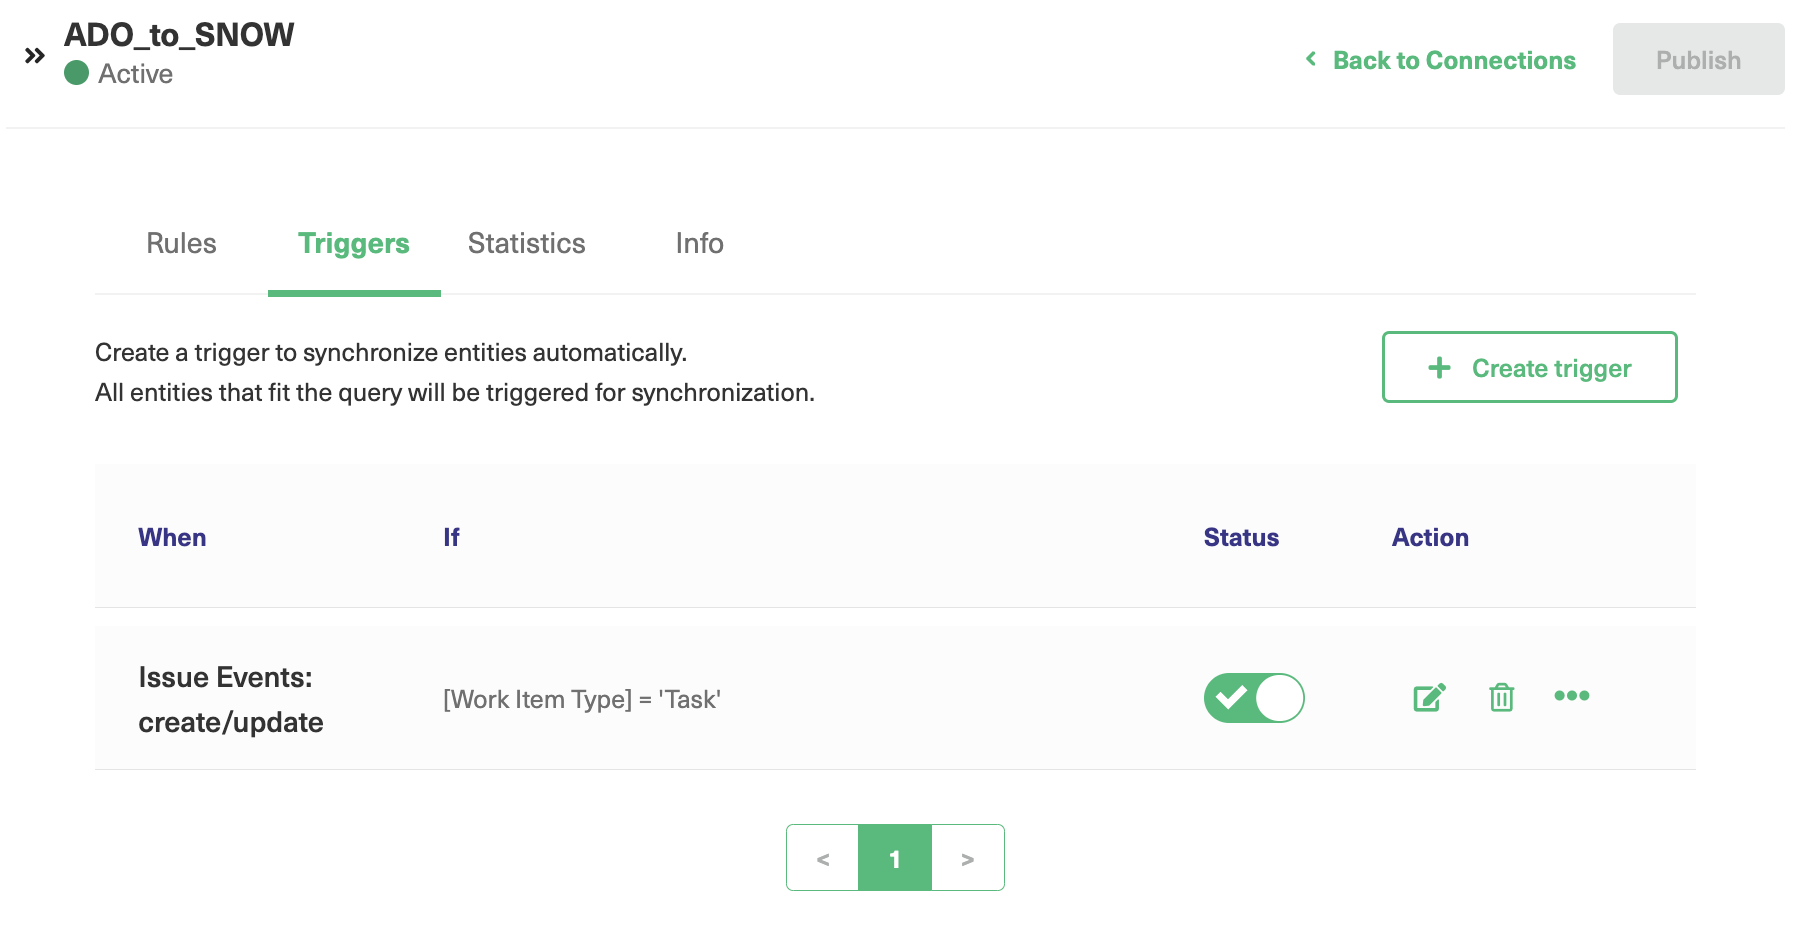
Click the green “Add” button and you’ll see your trigger listed, and active. Items that meet these criteria will now be synchronized automatically.
Common Pitfalls to Avoid after Setting up the Azure DevOps ServiceNow Integration
There are a few things to be aware of when setting up an Azure DevOps ServiceNow integration that will help you ensure things go as smoothly as possible.
Role Clarification
While it is highly beneficial to exchange information, you don’t need to share everything.
Support teams don’t need to know the technical details, and developers don’t need to know the full history of interactions with customers.
So, when choosing what fields to sync, be careful to make sure teams get the information they need and nothing more. You can create a dedicated field where the support team summarizes each issue rather than pass on all the customer comments.
Similarly, developer comments may not be useful to the customer support team, but they are likely to want to know when an issue has been resolved and what the solution is. Try to set your sync rules up to reflect each team’s needs.
Too Many Messages
Teams may get notifications when new tickets are created or comments are added. When synchronizing platforms, make sure notifications don’t buzz people into frustration. That increases engagement and makes synchronization more useful to team members.
Conclusion
Azure DevOps ServiceNow integration helps teams work more smoothly and efficiently. It also consolidates data and prevents the creation of siloes between teams and partners.
There are many things to consider when connecting teams, and taking careful account of the issues raised here will help your organization get the best value possible from their integration.
With care, you can ensure you craft a process that delivers exactly what you need, making the best use of the information your teams gather while minimizing the need for maintenance and avoiding problems with duplication and wasted effort.
We’ve seen how Exalate can bridge the gap between different groups and help them share information while giving them enough flexibility to evolve. It does so reliably, allowing everyone to focus on what they do best.
Frequently Asked Questions
Why integrate Azure DevOps with ServiceNow?
By integrating Azure DevOps with ServiceNow, you can connect the development and IT service management activities. The integration provides a unified view for teams working in these environments. It saves duplication of work, avoids shared access, saves time, and reduces errors. You can achieve smooth collaboration between development and operations teams, ensuring faster issue resolution.
Which is better Azure DevOps or ServiceNow?
It is impossible to say whether Azure DevOps or ServiceNow is better because both serve different purposes. When it comes to software management Azure DevOps is the better option, but when it comes to IT service management, ServiceNow takes the cake.
How do I connect Azure DevOps with ServiceNow?
You can connect Azure DevOps and ServiceNow by using various integration methods:
- Building a solution in-house. But it’s not always feasible, scalable, and maintainable.
- The native integration method ServiceNow provides is called IntegrationHub. But it doesn’t offer advanced mappings or handle complex use cases inherently.
- Third-party integration solutions are available on the Azure DevOps marketplace and ServiceNow store. One such solution is Exalate, which offers pre-built integration templates for basic use cases in addition to tailored custom scripts for advanced synchronizations.
What can I sync between Azure DevOps and ServiceNow?
In Azure DevOps, you can sync work items such as tasks, user stories, bugs, issues, test cases, and any other user-defined ones.
In ServiceNow, you can sync incidents, problems, change requests, RITMs, tasks, or any other ServiceNow entity.
You can
- Update and reflect status, priority, or assignment in ServiceNow and vice versa,
- Sync attachments to ServiceNow associated with work items, allowing easy access to relevant files,
- Sync discussions, comments, and work notes in either system for better visibility and communication history.
Can I integrate Azure DevOps and ServiceNow for free?
No, you cannot integrate Azure DevOps and ServiceNow for free.
You need a subscription to use the native ServiceNow integration functionality called IntegrationHub. You can also install third-party apps for integrating Azure DevOps and ServiceNow. Exalate is a third-party app that offers tailor-made integrations between various platforms. It has a free plan for syncing 1,000 entities per month. It also has a Groovy-based script mode for implementing advanced use cases.
Explore the various options based on your use case, implement a POC, understand the pricing, and make an informed decision.
Recommended Reads:
- ServiceNow to ServiceNow Integration: Set up a Two-Way Sync
- Jira ServiceNow Integration: How to Set up an Integration in 6 Steps
- Jira Azure DevOps Integration: The Complete Step-by-Step Guide
- How to Set up a Salesforce ServiceNow Integration
- How to Set up an Azure DevOps Salesforce Integration
- Zendesk ServiceNow Integration: The Complete Guide
- How to Set up a Zendesk Azure DevOps Integration
- ServiceNow Integrations: Integrate ServiceNow and Other Systems Bidirectionally